Articles
How To Store Homemade Syrup
Modified: December 7, 2023
Learn the best methods for storing homemade syrup with our informative articles. Find out how to keep your syrup fresh and delicious for longer.
(Many of the links in this article redirect to a specific reviewed product. Your purchase of these products through affiliate links helps to generate commission for Storables.com, at no extra cost. Learn more)
Introduction
Homemade syrups are a delicious addition to various culinary creations. Whether you’re making flavored syrups for pancakes, cocktails, or coffee, it’s important to know how to properly store them to ensure their freshness and flavor are preserved. Proper storage techniques can significantly extend the shelf life of your homemade syrups, keeping them enjoyable for longer periods.
Storing homemade syrup correctly not only maintains its taste but also prevents bacterial growth and preserves its consistency. By following some simple guidelines, you can keep your syrups fresh and delicious for extended periods, allowing you to enjoy their flavors whenever you desire.
In this article, we will discuss different types of homemade syrups, factors to consider before storing them, and general guidelines for storing syrup. We will also explore specific techniques for storing syrups in glass and plastic containers, as well as refrigeration and room temperature storage methods. Lastly, we will provide tips on checking syrup quality and determining shelf life.
So, whether you’ve just made a batch of aromatic lavender syrup or a classic maple syrup, let’s dive into the art of storing homemade syrup to ensure it remains delectable over time.
Key Takeaways:
- Proper storage of homemade syrups is crucial for preserving freshness, flavor, and safety. Consider ingredients, container quality, and temperature to extend shelf life and enjoy delectable syrups for longer.
- Whether in glass or plastic containers, refrigerated or at room temperature, storing homemade syrups requires attention to detail. Check for contamination, label containers, and monitor quality to ensure delightful flavors in every use.
Read more: How To Store Simple Syrup
Why is Proper Storage Important?
Proper storage of homemade syrup is essential to maintain its quality, flavor, and safety. Here are a few reasons why it is important to store syrups correctly:
- Prolonged Freshness: Homemade syrups are made with natural ingredients and lack the preservatives found in store-bought syrups. As a result, they have a shorter shelf life. By storing them properly, you can extend their freshness and prevent spoilage.
- Preservation of Flavor: Syrups are known for their distinct flavors, whether it’s the rich caramel notes of butterscotch or the delightful citrus zest of orange syrup. Proper storage methods help preserve these flavors by preventing oxidation and avoiding exposure to light and air.
- Food Safety: Syrups are susceptible to bacterial growth and contamination if not stored correctly. Proper storage prevents the growth of harmful bacteria, ensuring that your homemade syrups are safe to consume.
- Cost-Effectiveness: By storing your homemade syrups properly, you can avoid waste and save money. Instead of throwing away spoiled syrups, you can enjoy their full shelf life without compromising taste or quality.
Whether you’ve spent hours perfecting your homemade caramel syrup or experimenting with unique flavor combinations, proper storage ensures that your efforts aren’t in vain. A few extra steps can make a significant difference in preserving the freshness, flavor, and safety of your syrups.
Types of Homemade Syrups
Homemade syrups come in a wide variety of flavors, allowing you to customize your culinary creations. Here are some popular types of homemade syrups:
- Maple Syrup: Made from the sap of maple trees, maple syrup is a classic and versatile syrup. Its rich, sweet flavor is perfect for pancakes, waffles, and other breakfast treats.
- Fruit Syrups: These syrups are made by simmering fruits, such as berries, peaches, or citrus, with sugar and water. They add a burst of fruity sweetness to pancakes, ice creams, and desserts.
- Herbal and Floral Syrups: Syrups infused with herbs like mint or rosemary, and floral ingredients like lavender or hibiscus, add unique and refreshing flavors to cocktails, teas, and mocktails.
- Spiced Syrups: Syrups infused with spices like cinnamon, ginger, or cloves are perfect for adding warmth and depth to beverages like coffee and hot chocolate.
- Nutty Syrups: Nut-based syrups, such as almond or hazelnut, are popular additions to specialty coffees and baking recipes, adding a rich and nutty flavor.
- Flavored Coffee Syrups: These syrups, available in a wide range of flavors like vanilla, caramel, and mocha, are specifically designed to enhance your coffee experience. They can also be used to add a touch of flavor to cocktails, milkshakes, or desserts.
These are just a few examples of the countless homemade syrup options available. The beauty of making syrups at home is that you can combine flavors and create your own unique concoctions. Whether you prefer a simple fruit syrup or an adventurous blend, homemade syrups allow you to personalize your culinary creations and elevate your dishes with incredible flavors.
Factors to Consider Before Storing Syrups
Before you store your homemade syrups, there are a few important factors to consider. These factors can influence the shelf life and quality of your syrups. Here are some key considerations:
- Ingredients: Take note of the ingredients used in your syrup recipe. Certain ingredients, like fresh fruits or dairy products, may reduce the shelf life of the syrup. It’s important to be aware of the perishability of these ingredients and adjust your storage method accordingly.
- Sugar Content: The sugar content of a syrup can impact its shelf life. Syrups with high sugar concentrations tend to have a longer shelf life due to the preservative properties of sugar. However, it’s still essential to store them properly to maintain quality.
- Acidity: The acidity level of a syrup can affect its preservation. Syrups with higher acidity, such as citrus or berry syrups, may have a shorter shelf life. Acidic syrups are more prone to bacterial growth and spoilage, so it’s crucial to store them correctly and monitor their freshness.
- Consistency: Some syrups may thicken or crystallize over time, especially those made with natural ingredients. Consider the consistency of your syrup and choose a storage method that helps prevent or mitigate these changes. Stirring or gently heating the syrup before storing can help maintain its desired consistency.
- Container Quality: The container you choose for storage plays a crucial role in maintaining syrup freshness. Opt for containers that are airtight, leak-proof, and made of food-safe materials. Glass or high-quality plastic containers are ideal choices for storing syrups.
- Temperature and Light Exposure: Temperature and light can impact the flavor and quality of homemade syrups. Avoid storing syrups in places that are exposed to direct sunlight or extreme temperatures. Opt for cool, dark storage areas to preserve the syrups’ taste and prevent rapid spoilage.
By considering these factors and making appropriate adjustments, you can ensure that your homemade syrups stay fresh, flavorful, and enjoyable for as long as possible. It’s essential to be mindful of the unique characteristics of each syrup and tailor your storage approach accordingly.
General Guidelines for Storing Homemade Syrup
When it comes to storing homemade syrup, there are some general guidelines that can help maintain its freshness and flavor. Follow these tips to ensure your syrups stay delicious and enjoyable:
- Allow Syrup to Cool: Before transferring your syrup to a storage container, allow it to cool completely. Hot syrup can create condensation, which can lead to bacterial growth and spoilage.
- Clean and Dry Containers: Ensure that your storage containers are clean, dry, and free from any residual odors. Any lingering odors can transfer to the syrup and alter its flavor.
- Use Airtight Containers: Choose containers with airtight seals to prevent air exposure, which can lead to oxidation and flavor loss. Airtight containers also help maintain the syrup’s consistency and prevent leaks.
- Label and Date Containers: It’s a good practice to label your syrup containers with the type of syrup and date of preparation. This will help you keep track of the freshness and ensure you use the oldest batch first.
- Store in Cool, Dark Places: For maximum preservation, store your syrups in cool, dark places, away from direct sunlight and heat sources. Excessive heat and light can degrade the syrup’s quality and flavor.
- Avoid Refrigerating Certain Syrups: Not all syrups require refrigeration. Those with high sugar content, like simple sugar syrups, can be stored at room temperature. However, refrigerating syrups made with fresh fruits or dairy products is recommended to maintain their freshness.
- Keep Away from Strong Odors: Syrups can easily absorb strong odors from their surroundings. Store them away from pungent spices, cleaning agents, or other strong-smelling substances that could alter the flavor of the syrup.
- Check for Contamination: Before using or storing your syrup, check for any signs of contamination, such as mold growth or off-putting odors. If you notice any signs of spoilage, discard the syrup immediately.
These general guidelines should be followed for most homemade syrups. However, keep in mind that specific syrups may have unique storage requirements, so it’s essential to consider the individual characteristics of each syrup before determining the ideal storage method.
By following these guidelines, you can ensure that your homemade syrups maintain their quality, taste, and freshness, allowing you to enjoy their delightful flavors in various culinary creations.
Read more: How To Store Agave Syrup
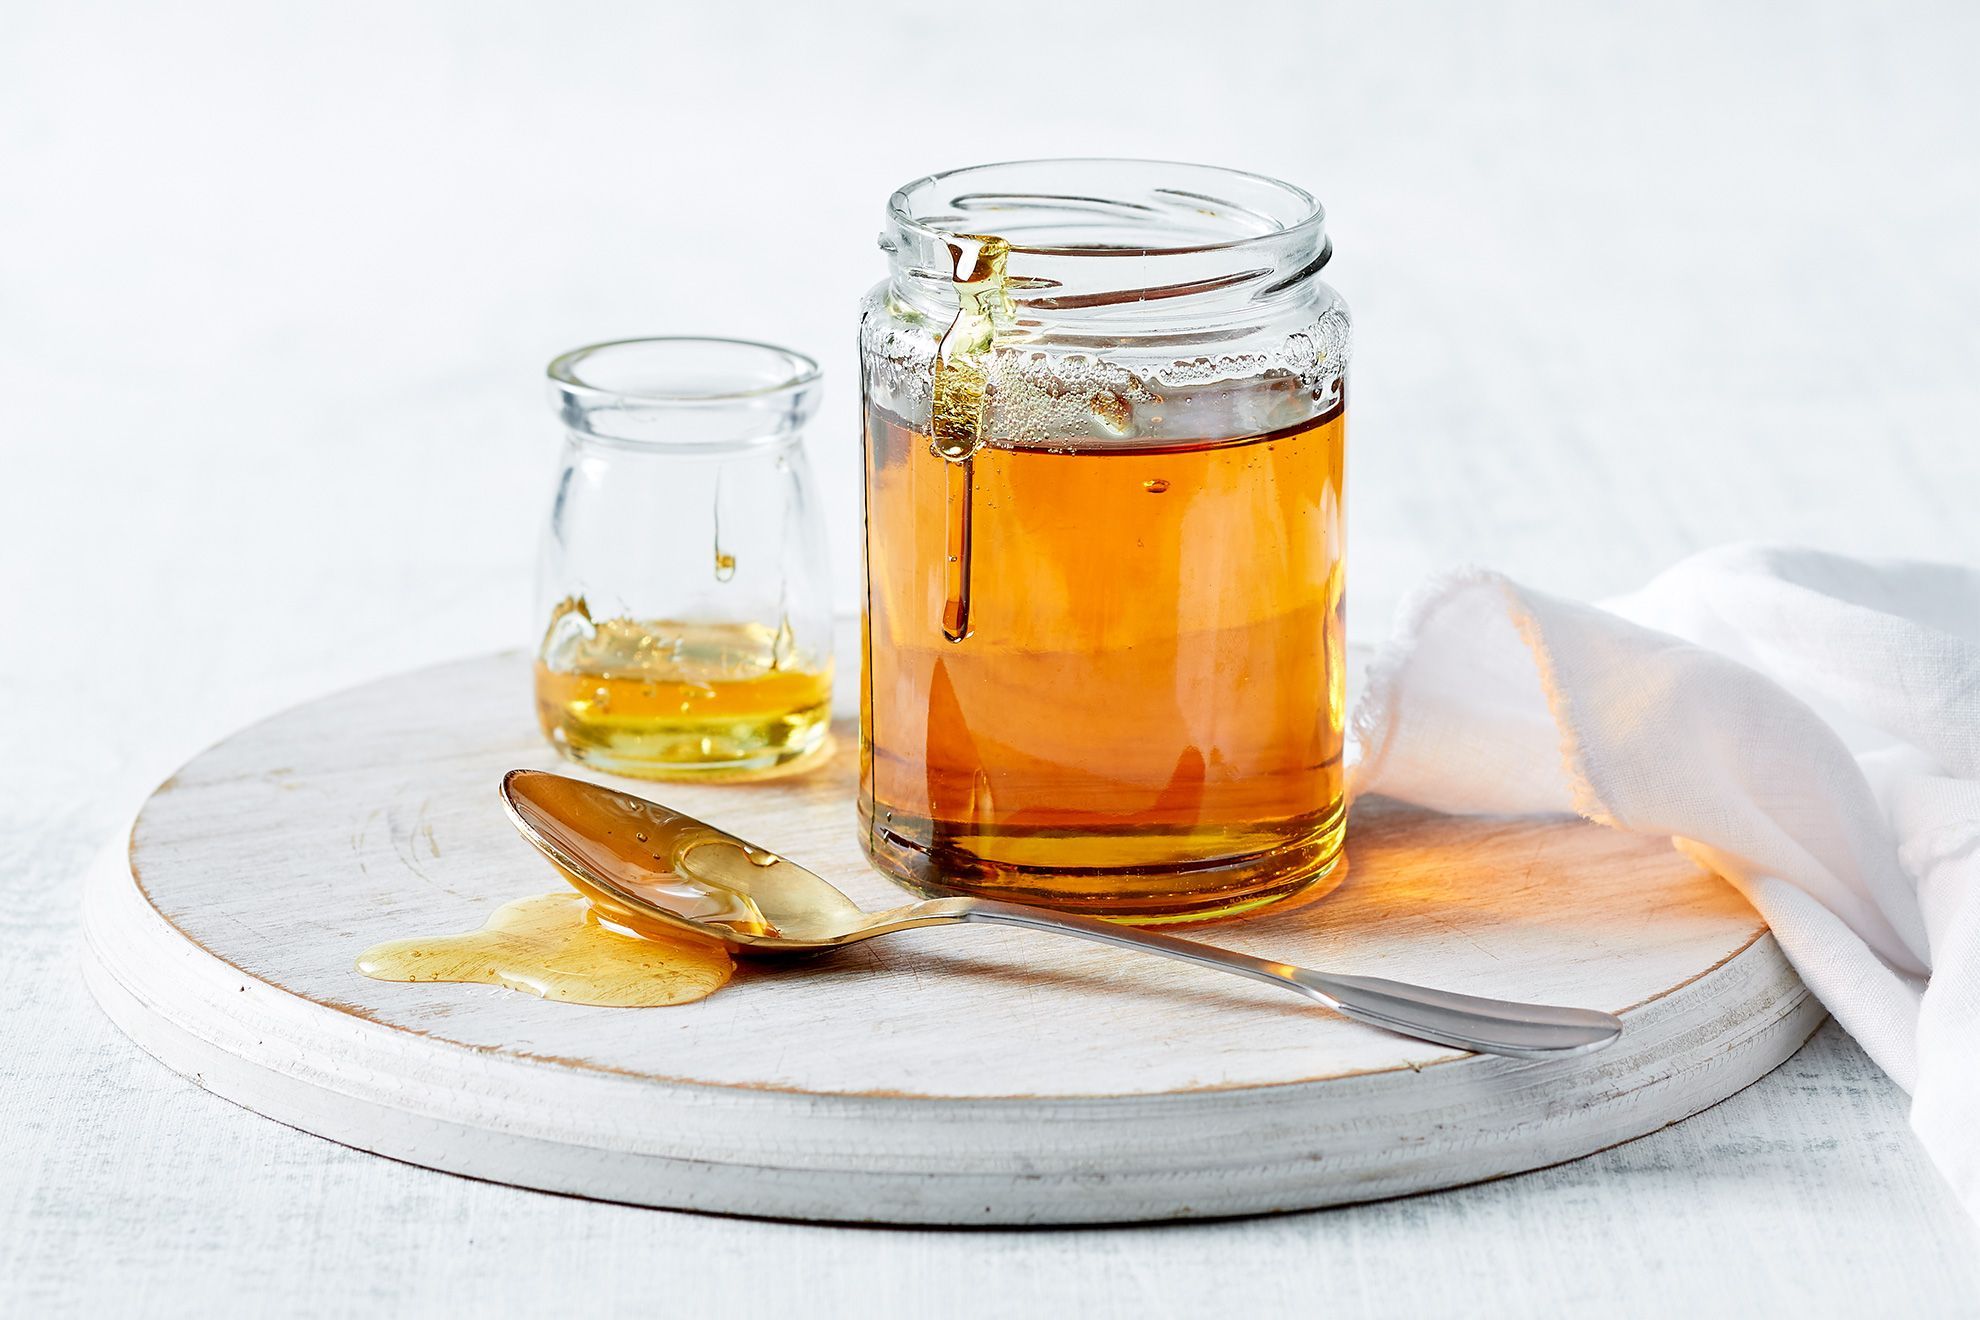
Storing Syrups in Glass Containers
Glass containers are an excellent choice for storing homemade syrups. They are non-reactive, non-porous, and provide airtight seals, ensuring optimal freshness and preventing any unwanted flavors or odors from seeping into the syrup. Here are some tips for storing syrups in glass containers:
- Choose High-Quality Glass Containers: Select glass containers specifically designed for food storage. Look for containers with secure lids or closures that create a tight seal to prevent air exposure and maintain syrup freshness.
- Ensure the Containers are Clean and Dry: Before transferring your syrup to glass containers, make sure they are thoroughly cleaned and dried. Any residual moisture or contaminants can affect the quality and shelf life of the syrup.
- Fill Glass Containers Properly: Fill the glass containers with syrup, leaving some headspace at the top. This empty space allows for expansion if the syrup freezes (in case you choose to store it in the freezer) and helps prevent leakage.
- Seal the Containers Tightly: Ensure the lids or closures of the glass containers are tightly sealed to prevent air from entering. Airtight seals are crucial for maintaining the syrup’s flavor, consistency, and freshness.
- Label and Date the Containers: Label each glass container with the type of syrup and the date of preparation to easily track its freshness. This helps you know which syrup to use first, especially if you have multiple varieties stored.
- Store in a Cool, Dark Place: Place the glass containers in a cool, dark storage area to protect the syrup from heat and light. Avoid exposing the containers to direct sunlight, as it can affect the flavor and quality of the syrup.
- Avoid Extreme Temperature Changes: Glass containers can be sensitive to sudden temperature changes. To prevent breakage, avoid placing hot syrup-filled containers directly into the fridge or freezer. Allow them to cool to room temperature before refrigerating or freezing.
- Check for Contamination: Before using the syrup, inspect the glass container for any signs of contamination, such as mold growth or unusual odors. If you notice any of these signs, discard the syrup immediately.
Storing syrups in glass containers helps preserve their quality, flavor, and consistency. With proper storage techniques, you can enjoy the deliciousness of your homemade syrups for an extended period. Remember to follow the specific guidelines for each type of syrup and adjust storage methods accordingly.
Store homemade syrup in a clean, airtight glass container to prevent contamination and maintain freshness. Keep it in the refrigerator to prolong its shelf life.
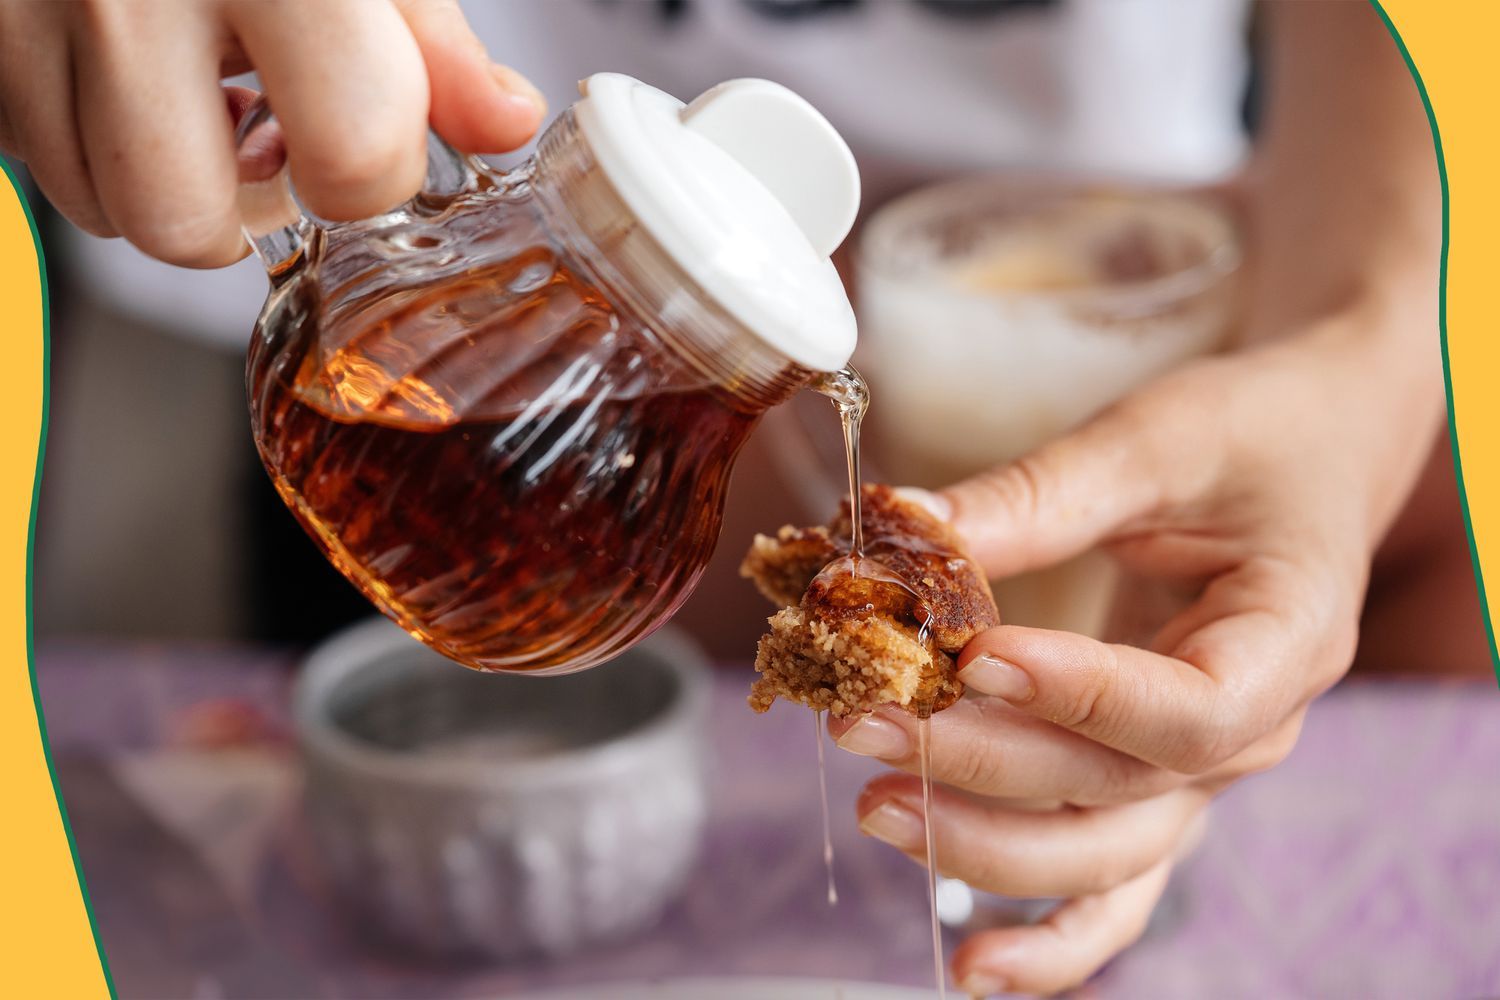
Storing Syrups in Plastic Containers
While glass containers are often preferred for storing homemade syrups, plastic containers can also be a viable option. Plastic containers are lightweight, portable, and available in various sizes and shapes. Here are some tips for storing syrups in plastic containers:
- Choose Food-Grade Plastic Containers: Select plastic containers that are specifically labeled as food-grade and safe for storing liquids. Look for containers made from high-quality, BPA-free plastics to ensure they do not leach any harmful chemicals into the syrup.
- Ensure the Containers are Clean and Dry: Like with glass containers, it’s crucial to clean and dry plastic containers thoroughly before transferring syrup to them. Any residual moisture or contaminants can affect the taste and quality of the syrup.
- Check for Airtight Seals: Ensure that the plastic containers have secure, airtight seals to prevent any air exposure that can lead to oxidation and flavor loss. A tight seal helps maintain the freshness and viscosity of the syrup.
- Fill Plastic Containers Properly: Fill the plastic containers with syrup, leaving some headspace at the top. This empty space allows for expansion if the syrup freezes (if storing it in the freezer) and avoids leakage in case the syrup expands due to temperature changes.
- Label and Date the Containers: It’s important to label each plastic container with the type of syrup and the date of preparation. This helps you keep track of the freshness and easily identify the syrup you want to use, especially if you have multiple varieties stored.
- Store in a Cool, Dark Place: Similar to glass containers, store plastic containers in a cool, dark area where they are protected from direct sunlight. Exposure to heat and light can degrade the quality and flavor of the syrup.
- Avoid Extreme Temperatures: Plastic containers are more flexible than glass containers, making them more prone to deform or warp under extreme temperatures. Avoid placing hot plastic containers directly into the fridge or freezer. Let the syrup cool to room temperature before refrigeration or freezing.
- Check for Contamination: Before using the syrup, inspect the plastic container for any signs of contamination, such as mold growth or unusual odors. If you notice any signs, discard the syrup immediately.
While plastic containers can be used to store homemade syrups, it’s important to note that they may not offer the same level of insulation and protection as glass containers. Plastic containers are more susceptible to odor absorption and can be less durable in the long run. However, if handled properly and stored under suitable conditions, plastic containers can effectively keep your syrups fresh and enjoyable.
Remember to adapt the storage method based on the specific requirements of each syrup. By following these tips, you can safely store homemade syrups in plastic containers and continue delighting in their flavors.
Storing Syrups in the Refrigerator
Refrigeration is an ideal storage method for many homemade syrups, especially those made with perishable ingredients like fruits or dairy. Proper refrigeration helps maintain freshness and prolong the shelf life of syrups. Here are some guidelines for storing syrups in the refrigerator:
- Cool the Syrup: Allow the syrup to cool to room temperature before placing it in the refrigerator. Hot syrup can raise the temperature inside the fridge and promote bacterial growth.
- Choose Suitable Containers: Transfer the syrup to clean, airtight containers that are specifically designed for food storage. Glass or high-quality plastic containers with tight-sealing lids are excellent choices for refrigeration.
- Leave Headroom: It’s essential to leave some headroom in the container to allow for expansion. Syrup can slightly expand when frozen, so leaving enough space prevents containers from cracking or leaking.
- Label and Date Containers: Clearly label each container with the type of syrup and the date of preparation to keep track of freshness. This way, you can use the oldest syrup first to avoid wastage.
- Place in the Coolest Area: Position the syrup containers in the coolest part of the refrigerator, such as the back or bottom shelf. Avoid placing them near the door or in areas with temperature fluctuations.
- Protect from Contamination: To prevent cross-contamination and odors, store syrups away from strong-smelling foods like onions or garlic. Place the syrup containers in sealed bags or cover them with aluminum foil for added protection.
- Monitor Shelf Life: Regularly check the syrup for any signs of spoilage, such as mold growth or off-putting odors. Discard any syrup that shows signs of contamination or has exceeded its recommended shelf life.
Refrigeration helps slow down the natural degradation process of homemade syrups, extending their shelf life. However, it’s important to note that certain syrups with high sugar content, such as simple sugar syrups, do not necessarily require refrigeration. Refer to the specific syrup recipe or consult guidelines to determine the most suitable storage method.
By following these guidelines and maintaining proper refrigeration, you can enjoy your homemade syrups for a longer period, preserving their flavor and quality.
Storing Syrups at Room Temperature
While refrigeration is commonly recommended for storing homemade syrups, certain syrups with high sugar content and low perishability can be stored at room temperature. When stored correctly, these syrups can maintain their quality and flavor without the need for refrigeration. Here are some guidelines for storing syrups at room temperature:
- Determine the Suitable Syrups: Syrups with high sugar concentrations, such as simple sugar syrups or flavored coffee syrups, can be safely stored at room temperature. These syrups act as natural preservatives, extending the shelf life and preventing bacterial growth.
- Choose Airtight Containers: Transfer the syrup to clean, airtight containers made of glass or high-quality plastic. The containers should have tight-sealing lids to prevent air exposure and maintain the syrup’s freshness and flavor.
- Cool the Syrup: Allow the syrup to cool completely before sealing the containers. Hot syrup can create condensation, leading to mold growth or spoilage.
- Store in a Cool, Dark Place: Place the sealed containers in a cool, dark area, away from direct sunlight and heat sources. A pantry or cupboard can be an ideal spot for storing syrups at room temperature.
- Protect from Contamination: Keep the syrup containers away from strong-smelling substances or potential sources of contamination. Store them separately from spices or cleaning agents that can alter the flavor of the syrup.
- Label and Date Containers: Clearly label each container with the type of syrup and the date of preparation. This way, you can easily identify the syrup and use the oldest batch first to ensure freshness.
- Monitor Shelf Life: Regularly check the syrup for any signs of spoilage, such as mold growth, color changes, or strange odors. Discard any syrup that appears contaminated or past its recommended shelf life.
It’s important to note that syrups stored at room temperature may have a shorter shelf life compared to refrigerated syrups. Factors such as humidity and temperature fluctuations in the storage area can affect the longevity of syrups stored without refrigeration. Always consider the specific syrup recipe or guidelines to determine the most suitable storage method.
By following these guidelines and storing syrups properly at room temperature, you can enjoy the convenience of readily accessible syrups with preserved flavor and quality.
Read more: How To Store Corn Syrup After Opening
Checking Syrup Quality and Shelf Life
Checking the quality and shelf life of your homemade syrups is crucial to ensure their safety and optimal taste. While homemade syrups can have varying shelf lives depending on their ingredients and storage methods, here are some general tips for evaluating syrup quality:
- Appearance: Examine the syrup’s appearance for any signs of mold, discoloration, or cloudiness. A fresh syrup should have a clear and consistent color.
- Texture: Assess the texture of the syrup. It should be smooth and free from any lumps, crystals, or separation. Some syrups may naturally crystallize over time, but you can gently warm them to restore the desired consistency.
- Odor: Smell the syrup to ensure it has a pleasant aroma. If you detect any off-putting or sour odors, it may indicate spoilage or fermentation.
- Taste: Finally, taste a small amount of the syrup to check for any unusual or off flavors. A fresh syrup should have a characteristic taste that aligns with its ingredients and flavor profile.
- Shelf Life: The shelf life of homemade syrup can vary depending on the specific syrup and how it was stored. Simple sugar syrups, which have a high sugar concentration, can last for several months when properly stored. Syrups with perishable ingredients like fruits or dairy may have a shorter shelf life and typically need refrigeration.
- Expiration Date: Consider the date of preparation and any recommended expiration date provided by the syrup recipe. As a general rule, it’s advisable to consume homemade syrups within 6 to 12 months for optimal quality. However, always trust your senses and evaluate each syrup individually.
If your syrup exhibits any signs of spoilage, such as mold growth, an unpleasant odor, or an off taste, it is crucial to discard it immediately to prevent any potential health risks. It’s better to err on the side of caution and prioritize your safety when consuming homemade syrups.
Remember that proper storage techniques, such as using airtight containers, refrigeration (if necessary), and monitoring for any changes in appearance, odor, or taste, are key to prolonging the shelf life of homemade syrups and ensuring their freshness.
By regularly checking the quality and shelf life of your homemade syrups, you can enjoy them at peak flavor and have confidence in their safety for consumption.
Conclusion
Making homemade syrups can be a delightful and rewarding experience. Whether you’re crafting fruity syrups for breakfast, herb-infused syrups for cocktails, or indulgent flavored syrups for your favorite beverages, knowing how to store them properly is essential. Proper storage not only maintains the freshness and flavor of homemade syrups but also ensures their safety for consumption.
Throughout this article, we have explored various aspects of storing homemade syrups. We discussed the importance of proper storage techniques, factors to consider before storing syrups, and general guidelines for storing syrups. We also delved into specific methods for storing syrups in glass or plastic containers, as well as refrigeration and room temperature storage.
Glass containers are an excellent choice for storing syrups, as they are non-reactive, non-porous, and provide airtight seals. On the other hand, plastic containers can be a convenient option, especially for syrups with high sugar content. Refrigeration is recommended for syrups made with perishable ingredients, while room temperature storage can be suitable for syrups with high sugar concentrations.
It’s important to check the quality and shelf life of homemade syrups regularly by assessing their appearance, texture, odor, and taste. By being mindful of these factors, you can ensure that your syrups remain delicious, safe to consume, and enjoyable for as long as possible.
Remember, each syrup may have different storage requirements, so always refer to the specific recipe or guidelines provided. Following proper storage techniques, using suitable containers, and paying attention to the shelf life of your syrups will help you prolong their freshness and preserve their flavors for months to come.
So, whether you’re topping your pancakes with maple syrup, adding a burst of fruitiness to your drinks with homemade fruit syrups, or experimenting with unique flavor combinations, applying the right storage methods will ensure that your homemade syrups always taste their best.
Frequently Asked Questions about How To Store Homemade Syrup
Was this page helpful?
At Storables.com, we guarantee accurate and reliable information. Our content, validated by Expert Board Contributors, is crafted following stringent Editorial Policies. We're committed to providing you with well-researched, expert-backed insights for all your informational needs.


0 thoughts on “How To Store Homemade Syrup”