Articles
How To Store House Paint
Modified: January 23, 2024
Learn the best practices for storing house paint in this informative articles. Keep your paint fresh and ready for your next home improvement project.
(Many of the links in this article redirect to a specific reviewed product. Your purchase of these products through affiliate links helps to generate commission for Storables.com, at no extra cost. Learn more)
Introduction
Proper storage of house paint is essential to maintain its quality and extend its lifespan. Whether you’re a DIY enthusiast or a professional painter, knowing how to store house paint correctly can save you time, money, and frustration in the long run. In this article, we will explore the factors to consider when storing house paint and provide you with practical tips to ensure your paint remains usable for future touch-ups and projects.
Improper storage of house paint can lead to multiple issues such as premature drying, color separation, and a decrease in overall effectiveness. Factors like temperature, humidity, and exposure to light can significantly impact the quality and longevity of your paint. By following simple guidelines and implementing proper storage techniques, you can preserve the integrity of your paint and have it ready for future use.
Before we delve into the specifics of storing house paint, it’s important to note that different types of paint may have unique storage requirements. Acrylic, oil-based, and water-based paints all have different characteristics and may require slightly different storage techniques. Always refer to the manufacturer’s recommendations for storing specific types of paint. With that said, let’s explore some general factors to consider when storing house paint.
Key Takeaways:
- Properly storing house paint in a temperature-controlled environment, using airtight containers, and labeling paint containers ensures longevity and usability for future projects.
- Organizing paint storage by categorizing colors, creating an inventory, and keeping supplies handy saves time and ensures efficient management of paint supplies.
Read more: How To Paint The Eaves Of A House
Factors to Consider When Storing House Paint
When it comes to storing house paint, there are several important factors to keep in mind, including:
- Temperature: Extreme temperatures can damage the paint, causing it to thicken or separate. It’s crucial to store paint in a temperature-controlled environment to prevent these issues. Avoid exposing paint cans to freezing temperatures or extreme heat.
- Humidity: Excessive humidity can affect the consistency and quality of paint. High humidity can lead to mold or mildew growth, rendering the paint unusable. Find a storage location with low humidity levels to preserve the paint’s effectiveness.
- Light: Exposure to direct sunlight can cause paint to fade or discolor over time. It’s recommended to store paint in a dark or dimly lit area to protect it from UV rays. This can help maintain the paint’s true color and prevent any unwanted changes.
- Airtight Containers: Properly sealing paint cans or using airtight containers is crucial for preserving the paint’s freshness and preventing air and moisture from entering. This will help maintain the paint’s consistency and prevent it from drying out or becoming unusable.
- Location: Store paint in a cool, dry, and well-ventilated space to ensure the best conditions for its longevity. Avoid storing it near sources of heat, fluctuations in temperature, or areas prone to moisture, such as basements or bathrooms.
By considering these factors and taking the necessary precautions, you can significantly extend the shelf life of your house paint. However, proper storage doesn’t stop at temperature and humidity control. The choice of storage containers also plays a vital role in maintaining paint quality.
Storing Paint in a Temperature-Controlled Environment
One of the most critical factors to consider when storing house paint is maintaining a temperature-controlled environment. Extreme temperatures can negatively impact the quality and consistency of paint, making it unusable for future projects. Here are some tips to help you store paint in a temperature-controlled environment:
- Choose a Suitable Storage Location: Select a storage area that maintains a relatively stable temperature throughout the year. Avoid areas that are exposed to extreme heat or cold, such as attics or garages with no climate control. A cool, dry, and well-ventilated space, like a basement or utility room, is ideal. If storing paint indoors isn’t an option, consider using an insulated shed or climate-controlled storage unit.
- Protect from Freezing Temperatures: Cold temperatures can cause paint to freeze, leading to irreversible damage. If you live in a region with freezing winters, make sure to protect the paint from extreme cold. Avoid storing paint in unheated areas or near windows. If necessary, insulate the containers or use a space heater to keep the storage area above freezing temperatures.
- Avoid Excessive Heat: Extreme heat can cause paint to deteriorate and lose its effectiveness. Avoid storing paint in areas prone to high temperatures, such as a hot attic or near heating appliances. Heat can also cause paint cans to expand and potentially leak. Keep the temperature below 90°F (32°C) to prevent any adverse effects on the paint’s quality.
- Monitor Temperature Fluctuations: Rapid fluctuations in temperature can damage paint. Avoid storing paint in areas where temperatures vary significantly throughout the day, such as garages or sheds. If the storage location experiences occasional temperature fluctuations, try to minimize them by insulating the paint containers or using temperature-regulating solutions like climate control devices.
- Regularly Check the Storage Environment: Periodically check the temperature of the storage area to ensure it remains within the recommended range. Use a thermometer to monitor the temperature and make any necessary adjustments. Maintaining a consistent temperature will help preserve the integrity of the paint for an extended period.
By storing paint in a temperature-controlled environment, you can prevent issues like drying out, thickening, or color separation, ensuring that your paint remains in usable condition when you need it next. But proper storage doesn’t end with temperature control; choosing the right storage containers is equally important.
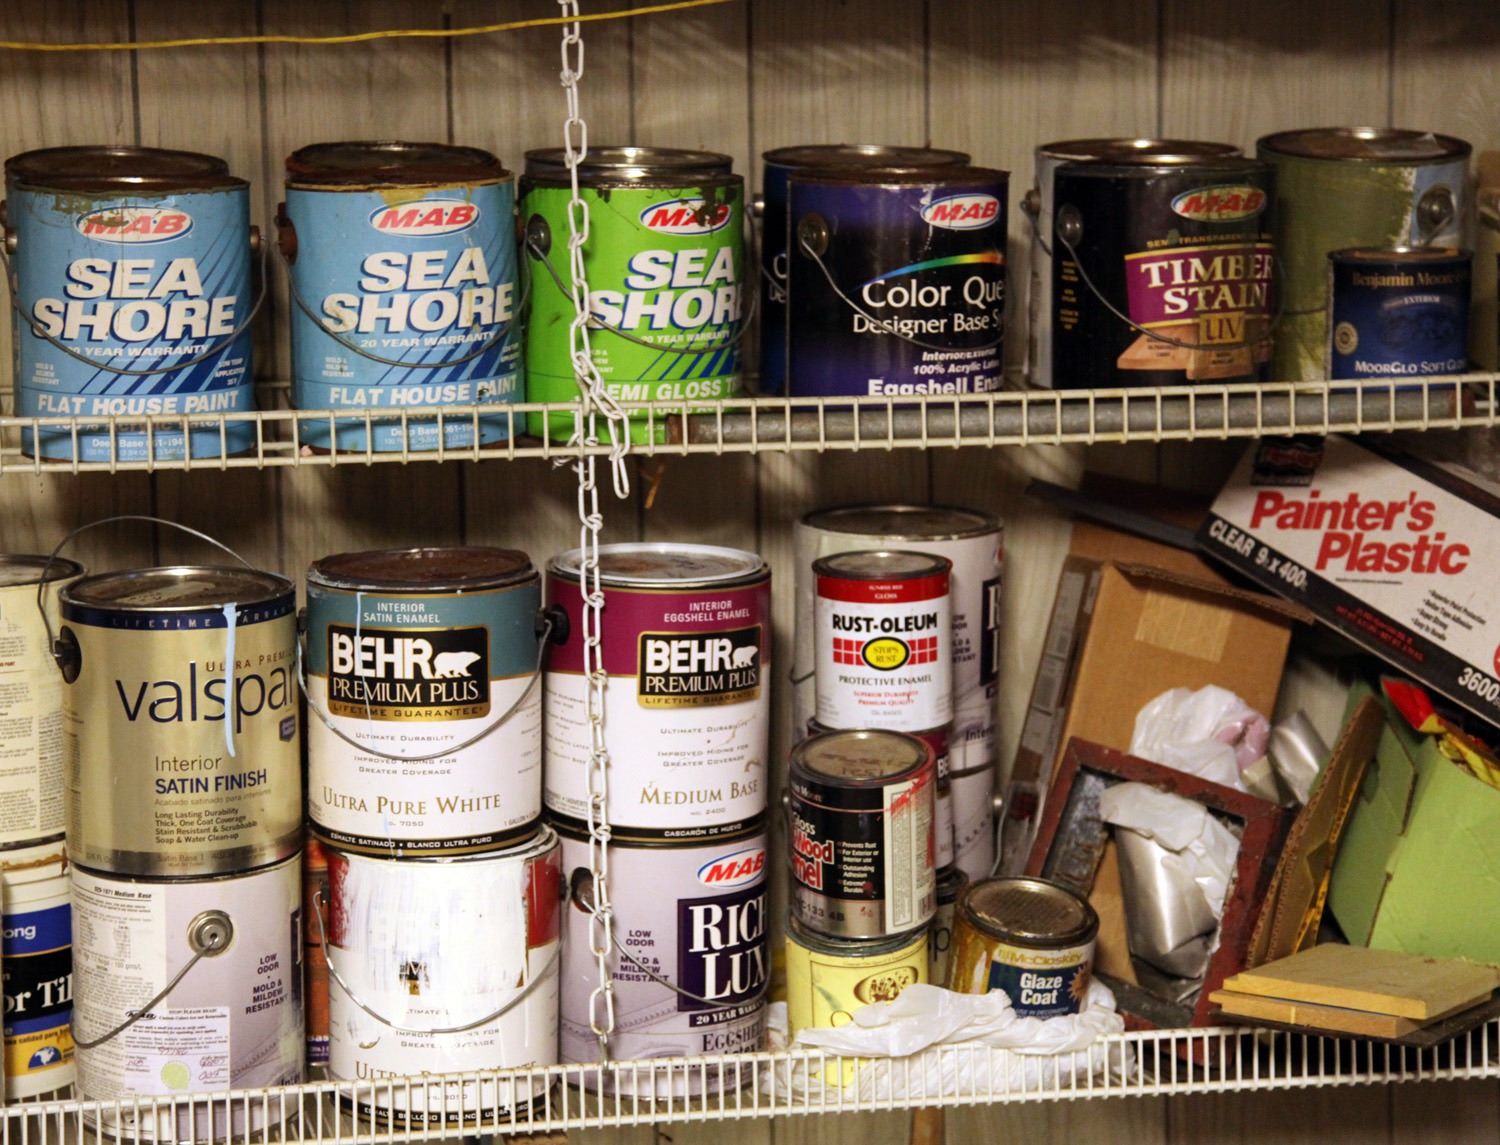
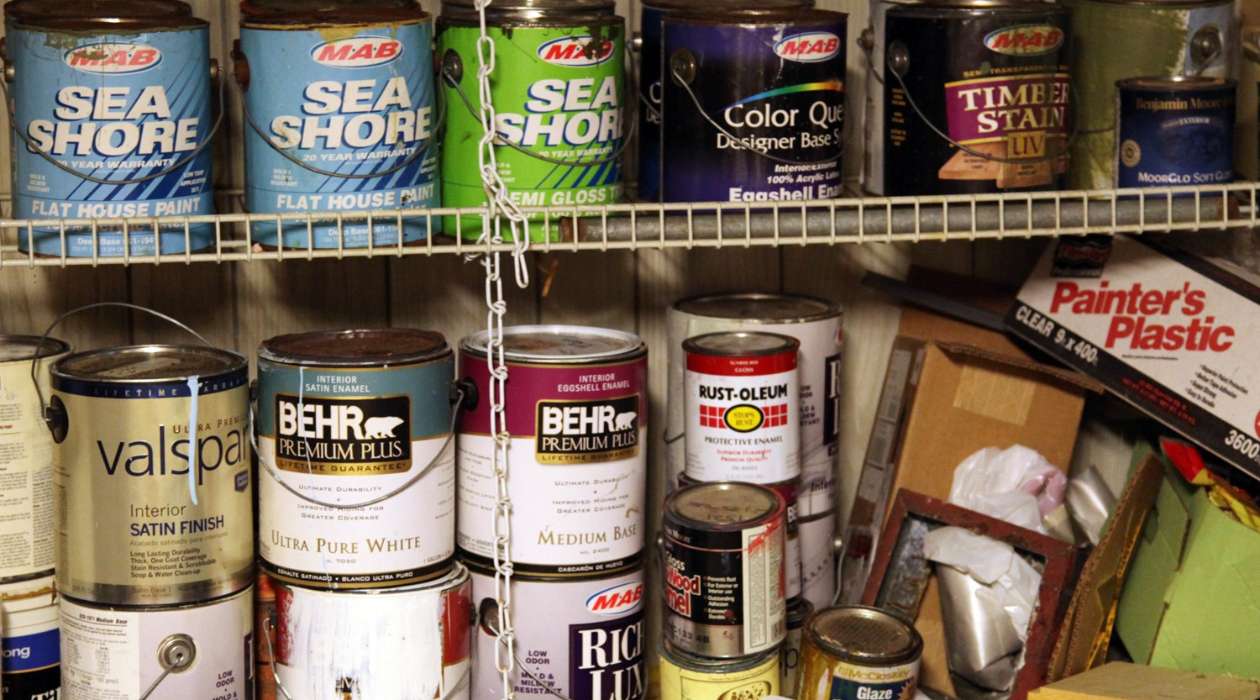
Choosing the Right Storage Containers
When it comes to storing house paint, the choice of storage containers plays a crucial role in preserving its quality. Here are some tips to help you select the right storage containers:
- Use Tightly-Sealed Paint Cans: Whenever possible, use the original paint cans for storage. They are specifically designed to keep air and moisture out, ensuring the longevity of the paint. Make sure the lids are tightly sealed by using a rubber mallet or a wooden block to tap them down securely.
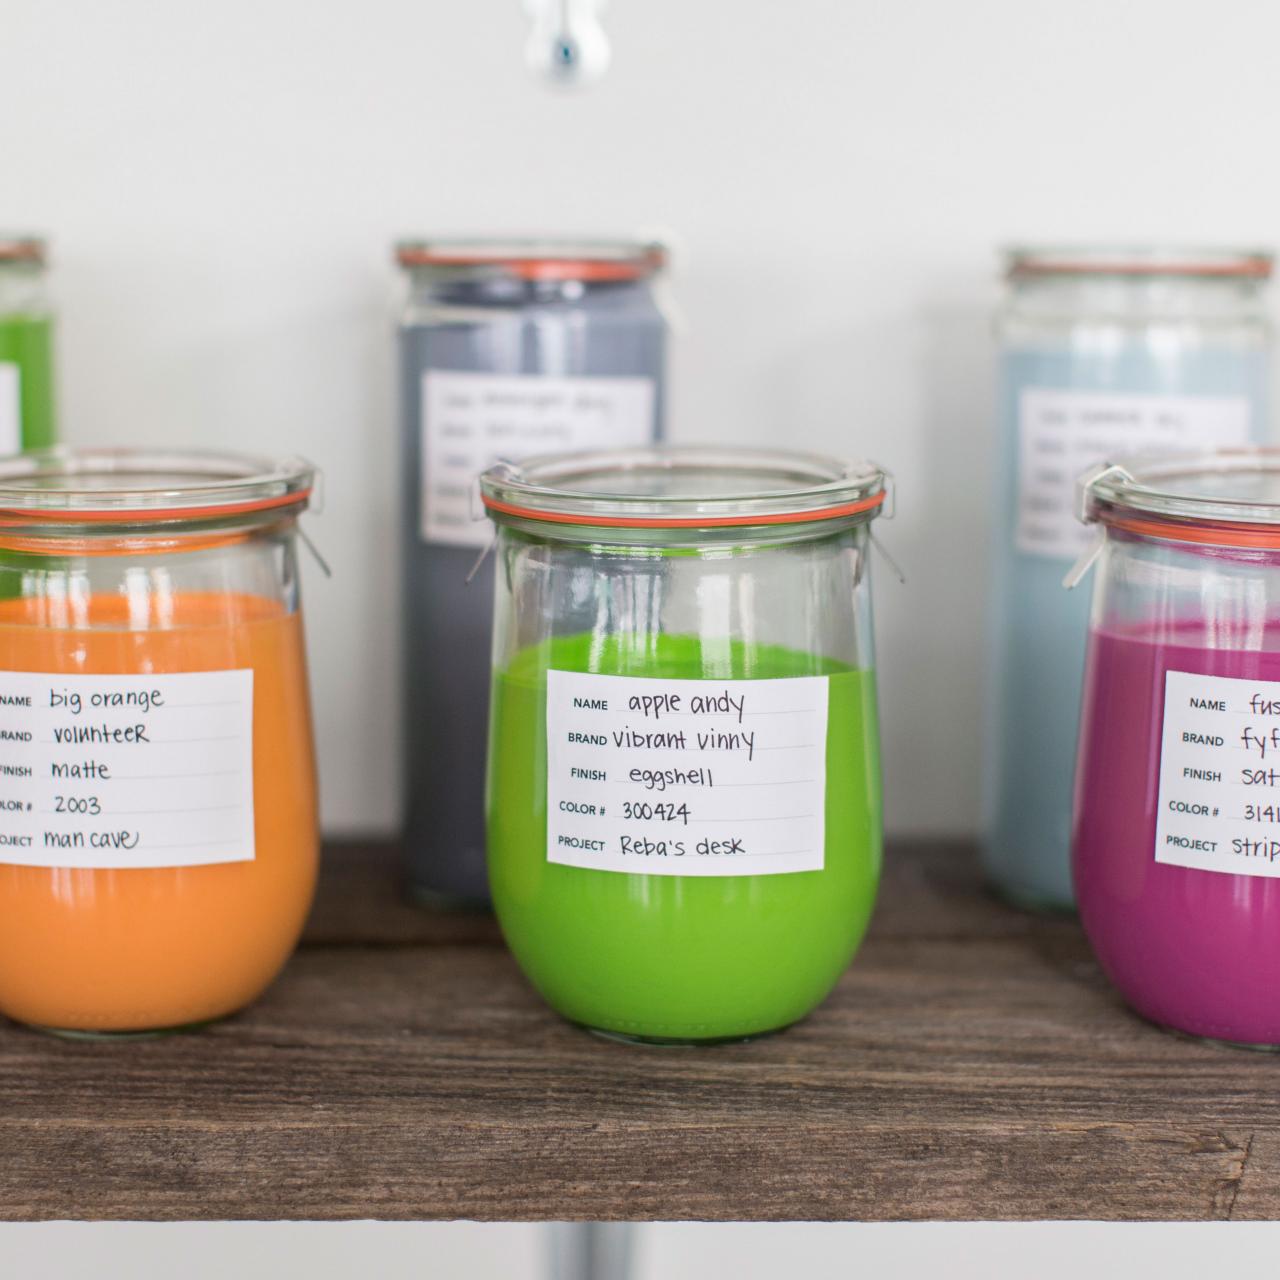
- Consider Transferring to Smaller Containers: If you have partially used paint cans or larger quantities of paint, it may be beneficial to transfer the paint into smaller containers. This reduces the amount of air in the container, minimizing the risk of drying out or clumping. Use containers made of glass or high-quality plastic that have airtight lids.
- Opt for Dark-Colored Containers: Light can degrade paint over time, causing color changes and reducing its quality. Consider using dark-colored containers to store paint, as they block out more light and help preserve the paint’s original color. If you don’t have dark-colored containers, consider wrapping the paint cans in opaque plastic or paper to protect them from light exposure.
- Ensure Containers Are Clean and Dry: Before transferring paint or using alternative containers, make sure they are clean and dry. Any residue or moisture can contaminate the paint and affect its quality. Clean the containers thoroughly and allow them to dry completely before transferring the paint.
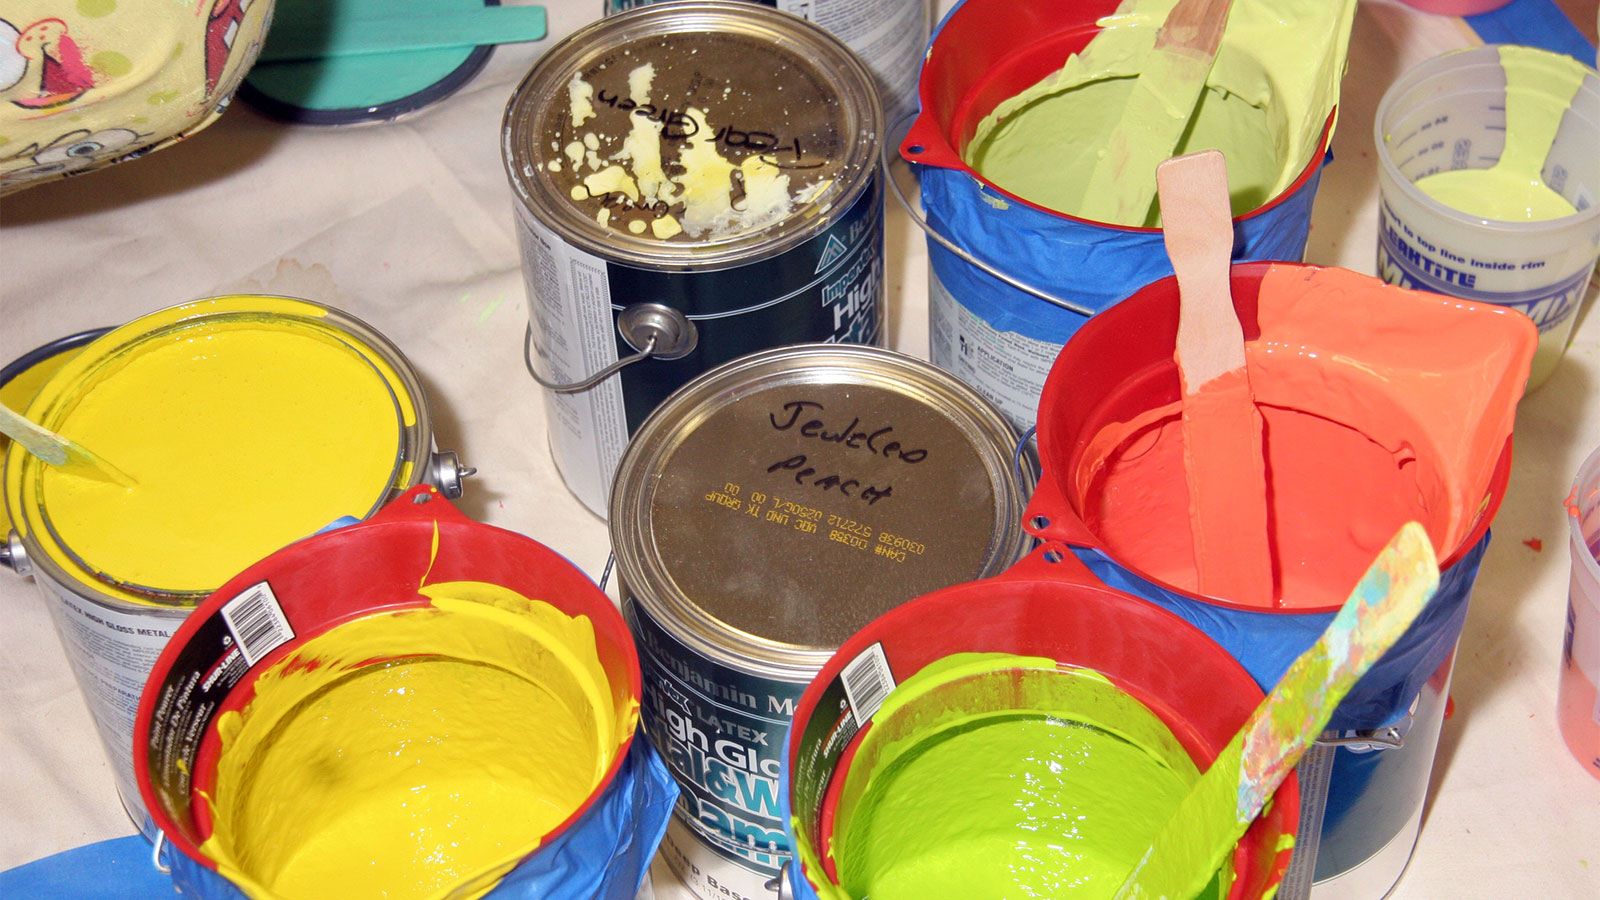
- Label Containers Clearly: Properly label each container with the paint color, brand, and date of purchase or use. This will help you identify the paint easily when needed and ensure you’re using the correct color. Use permanent markers or labels that won’t smear or fade over time.
- Store Containers Upright: To prevent leaks and maintain consistency, store paint containers upright. This helps preserve the paint’s proper viscosity and ensures that it doesn’t mix with air or other chemicals present in the storage area.
By selecting the right storage containers, you can minimize air and moisture exposure, prevent color changes, and prolong the shelf life of your paint. However, proper sealing and labeling of the containers are equally important to maintain the paint’s usability.
Store house paint in a cool, dry place away from direct sunlight and extreme temperatures. Make sure the lid is tightly sealed to prevent air from getting in and causing the paint to dry out.
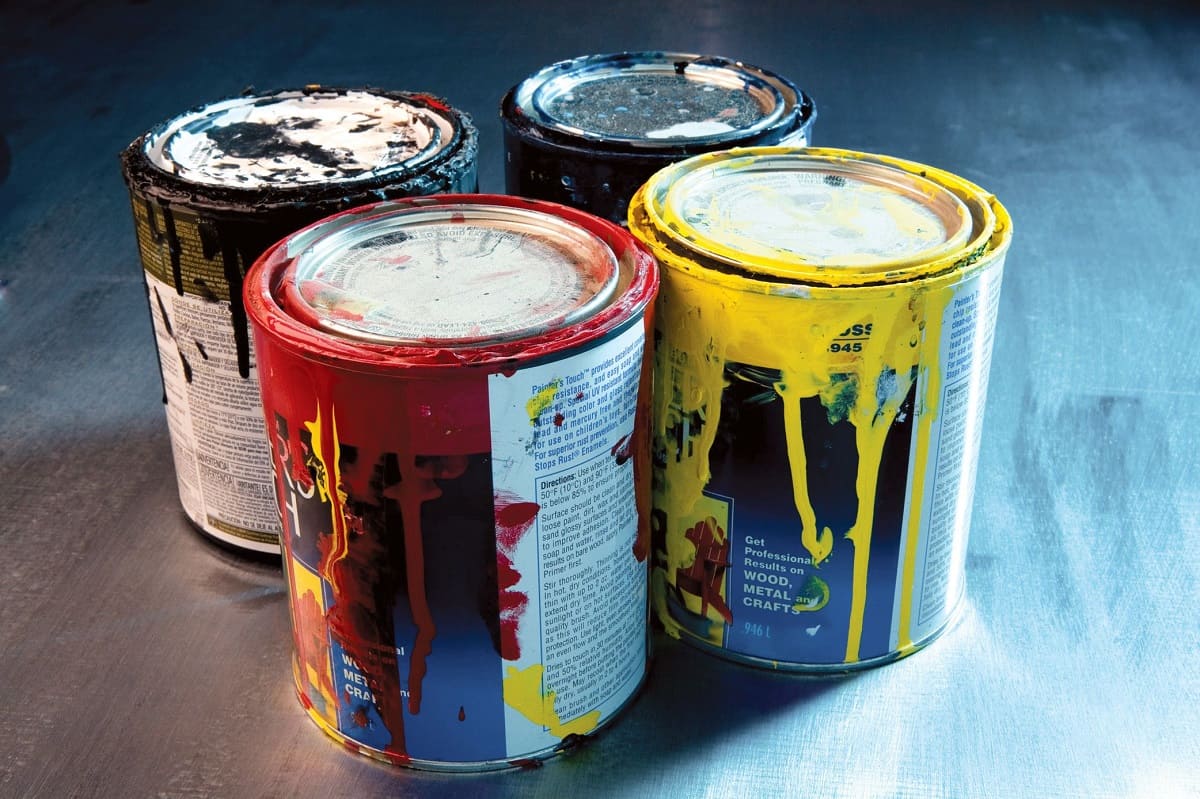
Properly Sealing and Labeling Paint Containers
When storing house paint, it is crucial to properly seal and label the containers to ensure the paint remains fresh and easily identifiable. Here are some important steps to follow:
- Check for Proper Seal: Whether you are using original paint cans or transferring the paint to different containers, ensure that the lids or caps provide a tight seal. This prevents air and moisture from entering the container and maintains the paint’s consistency over time. Use a rubber mallet or a wooden block to tap the lids down securely.
- Protect Edges and Rims: Inspect the edges and rims of the paint cans or containers for any dried paint residue that could interfere with a proper seal. Use a clean cloth or paper towel to wipe away any excess paint before sealing the containers. This will prevent any leakage and maintain the paint’s integrity.
- Consider Using Plastic Wrap or Foil: For partially used paint cans or containers with small amounts of paint, you can further enhance the seal by covering the opening with plastic wrap or aluminum foil before replacing the lid. This extra layer helps minimize air exposure and maintain the paint’s freshness.
- Label the Containers Clearly: Proper labeling is essential to quickly identify the color, brand, and type of paint stored in each container. Use a permanent marker or labels that won’t smudge or fade over time. Include additional details such as the date of purchase or use, and any other relevant information that will help you determine the paint’s usability.
- Include Helpful Information: In addition to labeling the containers with basic details, you may find it useful to include extra information such as the room or area of the house where the paint was used, the type of finish (e.g., matte, semi-gloss), and the surface it was applied to (e.g., walls, trim). This information can be helpful for future touch-ups or when matching colors for new projects.
- Store Containers Upright: To prevent any accidental spills or mixing of paint, it’s important to store the containers upright. This helps maintain the proper consistency of the paint and ensures that it doesn’t come into contact with air or other chemicals that might be present in the storage area.
By sealing and labeling your paint containers properly, you can significantly extend the shelf life of the paint and make it easier to locate and use when needed. However, it’s not just the paint containers that require attention – don’t forget about the storage of paintbrushes and roller covers as well.
Read more: How To Paint A Brick House White
Storing Paint Brushes and Roller Covers
In addition to properly storing house paint, it is equally important to store paint brushes and roller covers correctly to ensure their longevity and optimal performance. Here are some tips to help you store them properly:
- Clean Brushes and Roller Covers: Before storing paint brushes and roller covers, clean them thoroughly to remove any residual paint. Rinse brushes with water or the appropriate solvent for the type of paint used. Use a brush comb or your fingers to remove excess paint from roller covers. Cleaning them properly will prevent paint from hardening and prolong their lifespan.
- Dry Thoroughly: After cleaning, allow the brushes and roller covers to air dry completely. Hang the brushes with their bristles facing down to maintain their shape and prevent them from getting misshapen. Lay roller covers flat or hang them to dry evenly without any wrinkles.
- Protect Bristles and Naps: To keep the bristles of brushes and the naps of roller covers in optimal condition, use protective covers or sleeves. These covers help keep the bristles or naps from getting misshapen, damaged, or bent during storage. You can find covers designed specifically for this purpose at your local paint or hardware store.
- Avoid Exposure to Air and Dust: When storing brushes and roller covers, it’s important to protect them from exposure to air and dust. Place them in airtight containers or sealable plastic bags to prevent dust and airborne contaminants from settling on the bristles or naps. This will ensure that the brushes and roller covers remain clean and ready for future use.
- Store Brushes and Roller Covers Upright: To maintain their shape and prevent damage, store brushes and roller covers upright. Place them in a container or holder specifically designed for paint brushes and roller covers. This helps prevent the bristles or naps from becoming misshapen or bent while in storage.
- Keep Away from Extreme Temperatures: Extreme heat or cold can affect the quality of the bristles and naps, causing them to become brittle or stiff. Avoid storing brushes and roller covers in areas prone to temperature fluctuations, such as garages or sheds without climate control. Store them in a cool, dry place to ensure their longevity.
By following these guidelines, you can ensure that your paint brushes and roller covers remain in excellent condition and are ready for use whenever you need them. Properly storing your painting tools not only saves you money but also helps you achieve better results in your future painting projects.
Tips for Organizing Paint Storage
Organizing your paint storage not only ensures that your paint remains in good condition but also makes it easier for you to locate and access the paint when you need it. Here are some helpful tips for organizing your paint storage:
- Categorize by Color and Type: Group your paint cans or containers by color and type (e.g., interior, exterior, primer). This makes it easier to find the specific paint you need for touch-ups or new projects without having to sift through all of your paint supplies.
- Create a Paint Inventory: Create an inventory list of the paint colors and quantities you have. This can be a simple spreadsheet or a note on your phone. Regularly update the list when you purchase new paint or use existing paint. Having an inventory will help you track your supplies and avoid unnecessary purchases.
- Arrange Paint Cans by Size: If you have multiple sizes of paint cans, consider organizing them by size. Place larger cans at the back and smaller cans at the front. This allows for easier access and prevents smaller cans from getting buried beneath larger ones.
- Utilize Shelves or Racks: Install shelves or racks in your storage area to maximize vertical space. This helps keep your paint off the floor and provides a clear view of your inventory. Consider using adjustable shelves or clear storage bins to further enhance organization and visibility.
- Label Shelves or Bins: Clearly label each shelf or bin to indicate the type or color of paint it contains. This eliminates the need to search through every container, saving you time and effort. You can use adhesive labels, color-coded stickers, or even paint swatches attached to each shelf or bin.
- Keep Supplies Handy: Create a designated area within your paint storage for paintbrushes, roller frames, drop cloths, and other painting supplies. Hang brushes on hooks or store them in a brush holder. Keep roller frames and covers in a separate container or pouch. This ensures that all your painting supplies are in one place and ready to use when needed.
- Don’t Forget Maintenance Tools: Include a section in your paint storage for maintenance tools like paint can openers, stir sticks, and cleaning materials. Having these tools easily accessible ensures that you can properly open and mix paint, as well as clean brushes and rollers after use.
- Regularly Check Expiration Dates: Paint does have a shelf life, so it’s important to periodically check for expired or deteriorated paint. Remove any paint that has passed its expiration date or shows signs of separating, drying out, or changing in consistency. This streamlines your inventory and ensures that you are working with usable paint.
- Dispose of Paint Properly: If you have leftover paint that you no longer need or that has become unusable, dispose of it properly according to local regulations. Contact your local waste management or recycling center for guidelines on how to safely dispose of paint.
By implementing these tips, you can organize your paint storage in a way that allows for easy access, efficient inventory management, and the preservation of your paint supplies. An organized paint storage system will save you time and ensure that your paint remains in good condition for future use.
Conclusion
Proper storage of house paint is essential for maintaining its quality and usability. By considering factors such as temperature, humidity, light, and the choice of storage containers, you can significantly extend the lifespan of your paint and ensure that it remains in good condition for future projects. Storing paint in a temperature-controlled environment helps prevent issues like drying out, color separation, and premature degradation.
Choosing the right storage containers, such as tightly-sealed paint cans or airtight containers, plays a crucial role in preserving the paint’s freshness and preventing air and moisture from entering. It is equally important to seal and label the containers properly, ensuring that the paint remains fresh and easily identifiable. Storing paint brushes and roller covers in a clean, dry, and protected manner helps maintain their optimal performance and prolongs their lifespan.
Organizing your paint storage by categorizing colors and types, creating an inventory, utilizing shelves or racks, and keeping your painting supplies handy can save you time and effort when searching for the right paint for your project. Regularly checking expiration dates and properly disposing of expired or unusable paint ensures an efficient and clutter-free storage area.
By implementing these storage techniques and organizational tips, you can ensure that your house paint and painting supplies are well-preserved, easily accessible, and ready for use whenever you need them. Proper storage not only saves you money but also allows you to achieve professional-looking results in your painting projects. So, take the time to organize and protect your paint supplies properly – your future self will thank you!
Frequently Asked Questions about How To Store House Paint
Was this page helpful?
At Storables.com, we guarantee accurate and reliable information. Our content, validated by Expert Board Contributors, is crafted following stringent Editorial Policies. We're committed to providing you with well-researched, expert-backed insights for all your informational needs.


0 thoughts on “How To Store House Paint”