Articles
How To Store Kefir Grains
Modified: December 7, 2023
Learn how to store kefir grains properly with our informative articles. Keep your kefir grains fresh and healthy for long-term use.
(Many of the links in this article redirect to a specific reviewed product. Your purchase of these products through affiliate links helps to generate commission for Storables.com, at no extra cost. Learn more)
Introduction
Kefir, a fermented milk drink, has gained popularity in recent years due to its various health benefits. Made from kefir grains, which are a combination of bacteria and yeast, kefir is rich in probiotics, vitamins, and minerals.
When you first start making kefir, you may find yourself with an abundance of kefir grains. These grains need to be stored properly to maintain their viability and to ensure that you can continue making fresh, homemade kefir.
In this article, we will discuss the different methods of storing kefir grains and provide you with some tips on how to keep them healthy and active for a long period of time.
Key Takeaways:
- Properly storing kefir grains is crucial for maintaining their viability and ensuring a continuous supply of fresh, homemade kefir. Whether in the refrigerator or at room temperature, the right methods and precautions are essential.
- Choosing the right storage container, preparing it properly, and periodically checking on the grains are key to maintaining the health and activity of kefir grains. Whether dormant or active, proper care ensures a steady supply of nutritious kefir.
Read more: How To Store Kefir
What are Kefir Grains?
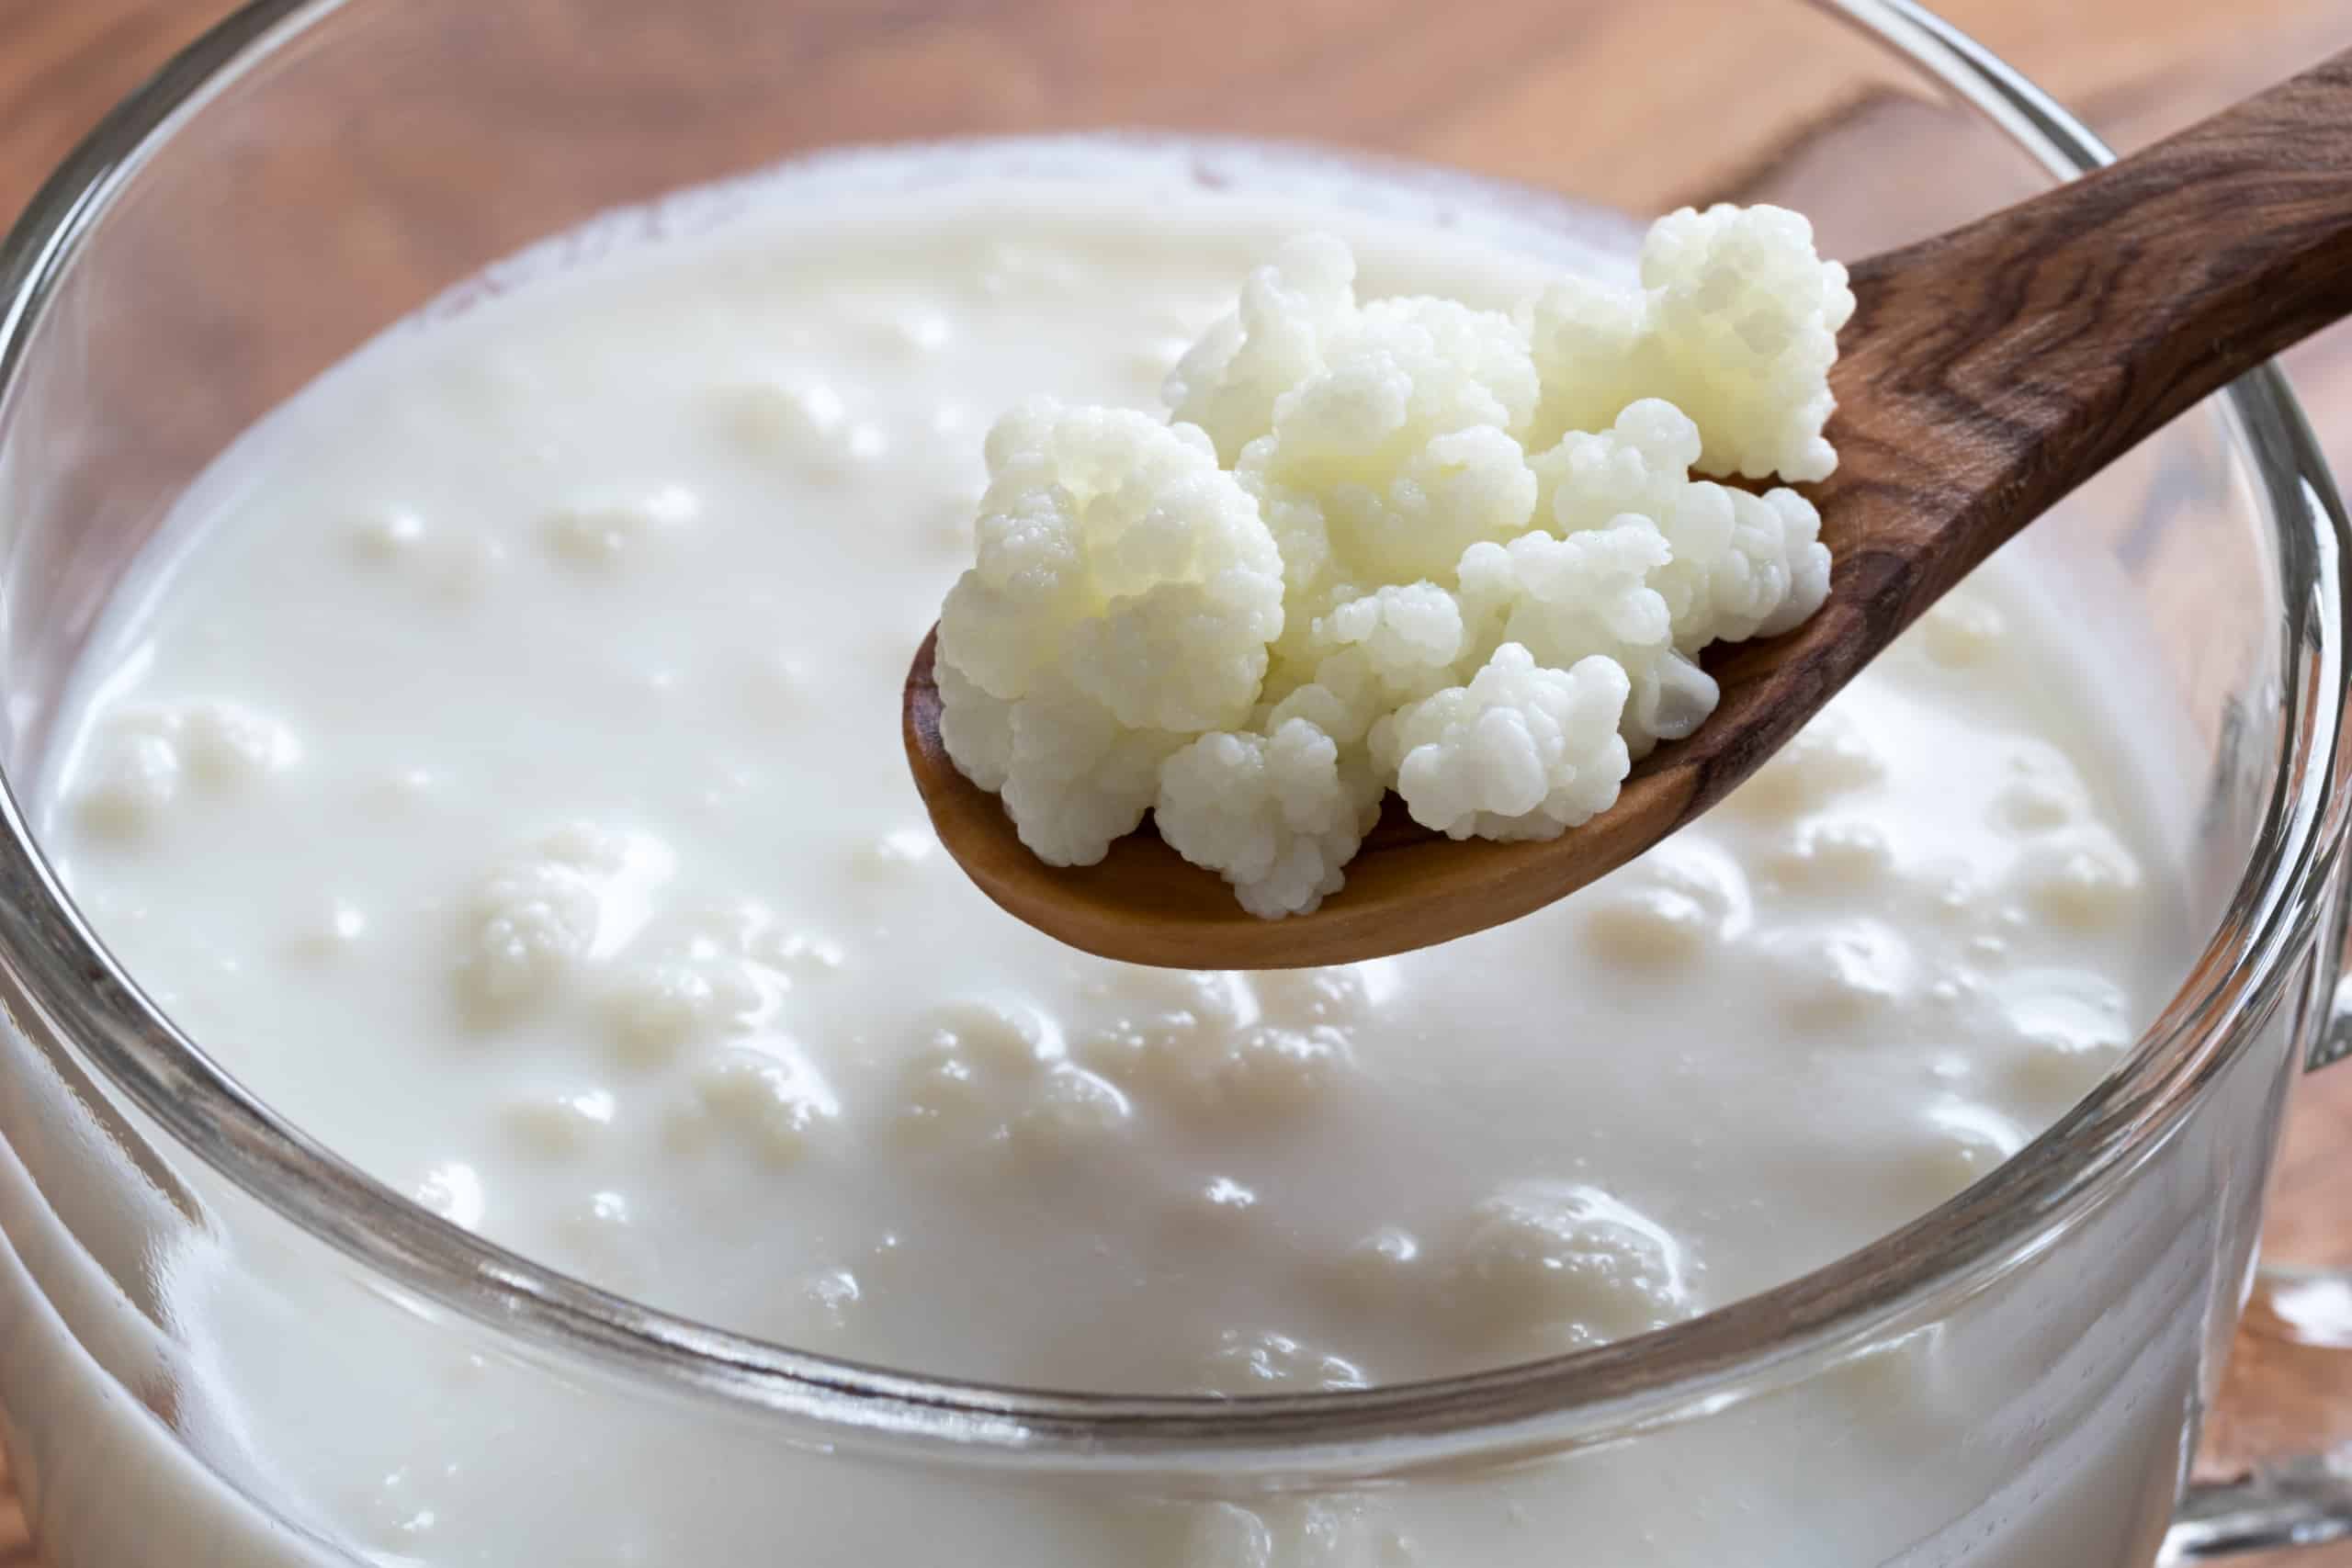
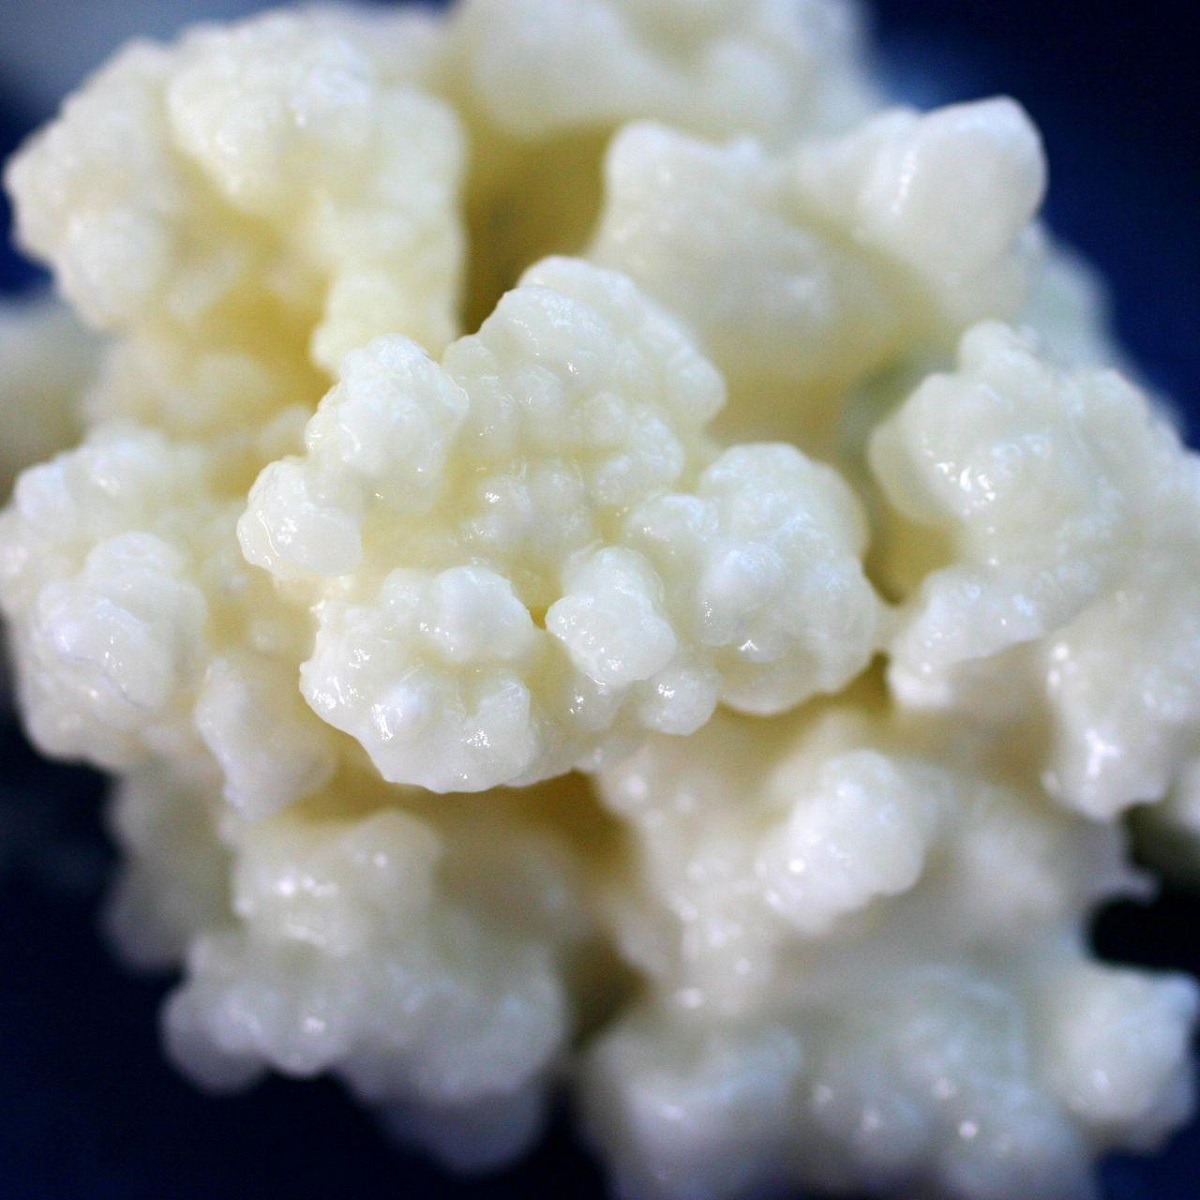
Kefir grains are small, gelatinous clusters of bacteria and yeast that resemble tiny cauliflower florets. Despite their name, kefir “grains” do not contain any actual grains like wheat or rice. They are called “grains” because of their grain-like appearance.
The combination of bacteria and yeast in kefir grains creates a symbiotic culture that ferments milk, transforming it into kefir. The fermentation process produces a tangy, slightly effervescent drink that is packed with probiotics.
Kefir grains are typically white or yellowish in color and have a delicate texture. They are composed of a matrix of proteins, lipids, and polysaccharides, which create a home for the bacteria and yeast that make up the grains.
These grains are living organisms and need to be cared for properly to keep them healthy and active. By providing them with the right conditions, you can continuously make kefir and even share grains with others.
It’s important to note that kefir grains are different from kefir starter cultures, which are usually in powdered form. Starter cultures contain specific strains of bacteria and yeast that are added to milk to initiate the fermentation process. Kefir grains, on the other hand, contain a diverse and complex community of microorganisms that contribute to the unique flavor and health benefits of kefir.
Choosing the Right Storage Container
When it comes to storing kefir grains, choosing the right storage container is crucial. The container should provide a suitable environment for the grains to maintain their activity and prevent any potential contamination.
Here are some important factors to consider when selecting a storage container for your kefir grains:
- Material: Choose a non-reactive material such as glass or food-grade plastic. Avoid containers made of metal or materials that may react with the acidic nature of kefir. Glass jars or containers with tight-fitting lids work well for storing kefir grains.
- Size: The container should be large enough to comfortably accommodate the kefir grains and the liquid they are stored in. Leave some room for expansion and growth of the grains.
- Airtightness: Opt for a container with an airtight seal to prevent exposure to air and potential contamination. This will help maintain the freshness and viability of the kefir grains.
- Transparency: It’s helpful to choose a clear or translucent container so that you can easily monitor the health and activity of the kefir grains without having to open the container.
- Cleanliness: Ensure that your storage container is thoroughly cleaned and sanitized before adding the kefir grains. This will prevent the growth of unwanted bacteria or mold.
Remember, the goal is to create a clean and controlled environment for your kefir grains to thrive. By selecting the right storage container, you can provide the grains with optimal conditions for their well-being.
Preparing the Storage Container
Before transferring your kefir grains to the storage container, it is important to properly prepare the container to ensure a clean and favorable environment for the grains. Here are the steps to prepare the storage container:
- Clean and sanitize: Thoroughly clean the storage container with hot soapy water. Rinse it well to remove any soap residue. Once clean, sanitize the container by using boiling water or a food-safe sanitizer.
- Dry the container: Make sure the container is completely dry before adding the kefir grains. Excess moisture can promote the growth of unwanted bacteria or mold.
- Leave some liquid behind: If you are transferring the kefir grains from a fermentation jar or container, leave a small amount of kefir behind. This liquid will provide some nourishment for the grains during storage.
By following these steps, you will create a clean and hygienic environment for your kefir grains. This will help preserve their vitality and ensure their long-term success.
Remember, maintaining cleanliness is essential when handling kefir grains. Taking the time to properly prepare the storage container will significantly reduce the risk of contamination and keep your kefir grains healthy and active.
Store kefir grains in a clean, airtight glass jar with fresh milk in the refrigerator. Change the milk every 1-2 weeks to keep the grains healthy and active.
Storing Kefir Grains in the Refrigerator
One of the most common methods for storing kefir grains is in the refrigerator. This method slows down the fermentation process and allows the grains to enter a dormant state. Here’s how to store kefir grains in the refrigerator:
- Prepare the storage container: Ensure that the storage container is clean, dry, and airtight. It is recommended to use a glass jar or airtight plastic container.
- Remove excess liquid: Before transferring the kefir grains to the storage container, strain them gently using a fine-mesh sieve. This will remove excess kefir and leave behind only the grains.
- Place the kefir grains in the storage container: Transfer the strained kefir grains into the prepared storage container. If the grains are still slightly moist, you can pat them dry with a clean paper towel.
- Add a small amount of milk: To keep the grains nourished during storage, you can add a small amount of fresh milk to the container. This will help maintain the viability of the grains.
- Seal the container: Ensure that the storage container is tightly sealed to prevent any air or moisture from entering. This will help maintain the freshness of the kefir grains.
- Store in the refrigerator: Place the sealed container with the kefir grains in the refrigerator. The optimal temperature for storing kefir grains in the refrigerator is between 35°F and 45°F (2°C and 7°C).
When stored in the refrigerator, kefir grains can remain dormant for several weeks, even up to a few months. It is important to periodically check on the grains and replace the milk every couple of weeks to keep them healthy.
Remember, when you are ready to use the kefir grains again, allow them to come to room temperature before adding them to fresh milk for fermentation.
Read more: How To Store Milk Kefir Grains
Storing Kefir Grains at Room Temperature
While many people choose to store kefir grains in the refrigerator, it is also possible to store them at room temperature if you plan to use them frequently or want to keep them active for continuous fermentation. Here are the steps for storing kefir grains at room temperature:
- Prepare the storage container: Clean and sanitize a glass jar or container that is suitable for fermentation. Make sure it is large enough to accommodate the kefir grains and the milk.
- Remove excess liquid: Gently strain the kefir grains using a fine-mesh sieve to remove excess kefir, leaving behind only the grains.
- Transfer the kefir grains to the storage container: Place the strained kefir grains into the prepared storage container.
- Add fresh milk: Pour fresh milk into the container, ensuring that there is enough milk to cover the kefir grains. The milk will provide nourishment for the grains during storage.
- Cover the container: Cover the container with a breathable cloth or a coffee filter to allow air circulation while keeping out contaminants.
- Leave the container at room temperature: Place the container in a spot away from direct sunlight and extreme temperatures. Ideally, aim for a temperature range of 68°F to 78°F (20°C to 25°C).
- Monitor and feed the grains: Check on the kefir grains daily or every couple of days. Stir the contents gently to ensure the grains are evenly distributed and oxygenated. If the milk becomes too acidic or starts to separate, replace it with fresh milk.
Storing kefir grains at room temperature allows them to remain active and continue fermenting the milk. This method is ideal for those who regularly make kefir and want to maintain a continuous fermentation process.
Keep in mind that kefir grains stored at room temperature may ferment milk more quickly, so it’s important to monitor and adjust the milk accordingly. Additionally, it’s essential to maintain cleanliness and proper hygiene practices throughout the process to prevent contamination.
With proper care, kefir grains can be stored at room temperature for an extended period, allowing you to enjoy fresh, homemade kefir whenever you desire.
How to Revive Dormant Kefir Grains
If you have stored your kefir grains for an extended period, whether in the refrigerator or at room temperature, they may become dormant. Dormant kefir grains can be revived and rejuvenated to their active state by following these steps:
- Remove the kefir grains from storage: Take out the kefir grains from their storage container or the refrigerator.
- Rinse the kefir grains: Gently rinse the kefir grains with filtered or non-chlorinated water to remove any residue or impurities. Avoid using tap water as chlorine and other chemicals may harm the grains.
- Rehydrate the kefir grains: Place the kefir grains in a clean glass jar or container and cover them with fresh milk. Ensure that the milk completely covers the grains.
- Allow the grains to rehydrate: Leave the jar at room temperature for 24-48 hours, allowing the kefir grains to rehydrate and come back to life. Stir the contents occasionally to distribute the microorganisms and oxygenate the mixture.
- Monitor the fermentation: Check on the kefir grains regularly to observe the fermentation process. The milk will start to thicken and may become slightly tangy or effervescent.
- Taste and adjust: After 24-48 hours, taste the kefir to assess its flavor. If the kefir is still weak or lacks acidity, you may need to continue the fermentation process for a little longer. If it tastes pleasant and tangy, it is ready to use.
- Begin regular kefir-making process: Once the kefir grains have been successfully revived, you can start using them again to make regular batches of fresh kefir. Simply strain out the grains and use the kefir for consumption or further fermentation.
It’s important to note that it may take a few batches for kefir grains to fully regain their strength and produce the desired consistency and flavor. Be patient, and continue to monitor and adjust the fermentation process as needed.
By following these steps, you can revive dormant kefir grains and bring them back to their active state, allowing you to enjoy the numerous health benefits and delicious taste of homemade kefir.
Conclusion
Properly storing kefir grains is essential for maintaining their viability and ensuring a continuous supply of fresh, homemade kefir. Whether you choose to store them in the refrigerator or at room temperature, following the right methods and taking necessary precautions will help keep your kefir grains healthy and active.
When storing kefir grains, it’s important to choose the right storage container made of non-reactive materials, such as glass or food-grade plastic. Preparing the container by cleaning and sanitizing it ensures a clean environment for the grains.
If you opt for refrigerator storage, straining the kefir grains, placing them in a sealed container, and keeping them in the refrigerator at an optimal temperature will maintain their dormant state for an extended period. Remember to periodically check on the grains and replace the milk to keep them nourished.
On the other hand, storing kefir grains at room temperature allows them to remain active, fermenting fresh milk continuously. Regularly monitoring the grains, maintaining cleanliness, and adjusting the milk as needed are crucial for successful storage at room temperature.
In the event that kefir grains become dormant, they can be revived by rinsing them, rehydrating them in fresh milk, and allowing them to ferment for 24-48 hours. With time and patience, the grains will regain their vitality and ability to produce flavorful kefir.
In conclusion, proper storage and care of kefir grains ensure their longevity and the ability to enjoy fresh, nutritious kefir regularly. By following the guidelines in this article, you can maintain the health and activity of your kefir grains, allowing you to enjoy the countless benefits of this delicious fermented beverage.
Frequently Asked Questions about How To Store Kefir Grains
Was this page helpful?
At Storables.com, we guarantee accurate and reliable information. Our content, validated by Expert Board Contributors, is crafted following stringent Editorial Policies. We're committed to providing you with well-researched, expert-backed insights for all your informational needs.


0 thoughts on “How To Store Kefir Grains”