Articles
How To Store Lettuce With Roots
Modified: September 1, 2024
Learn the best techniques for storing lettuce with roots in this informative article. Discover the tips and tricks to keep your lettuce fresh and crisp for longer.
(Many of the links in this article redirect to a specific reviewed product. Your purchase of these products through affiliate links helps to generate commission for Storables.com, at no extra cost. Learn more)
Introduction
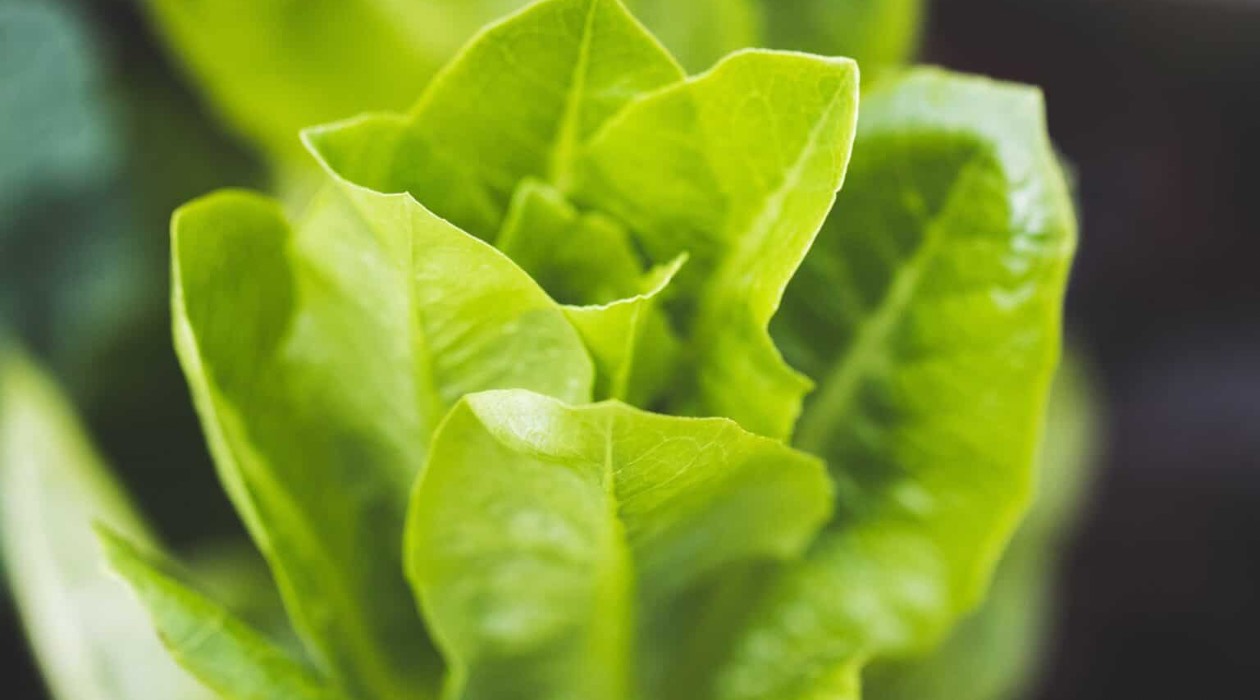
When it comes to storing lettuce, most people simply put it in a plastic bag or container in the refrigerator. However, there is a better way to extend the life of your lettuce and keep it fresh and crisp for longer. By storing lettuce with roots, you can ensure that it stays healthy and flavorful for days, or even weeks, while maintaining its nutritional value. In this article, we will explore the benefits of storing lettuce with roots and guide you through the process step by step.
Storing lettuce with roots has several advantages. One of the key benefits is that the roots help to keep the lettuce hydrated, preventing it from wilting or becoming limp. When you store lettuce without roots, it tends to dry out quickly, leading to a loss of crispness and freshness. By leaving the roots intact, you can essentially keep the lettuce alive for a longer period of time, maintaining its vibrant color and texture.
Additionally, storing lettuce with roots allows you to enjoy the full potential of this leafy green. The roots continue to absorb water and nutrients, enabling the lettuce to stay nourished and extend its shelf life. This means that you can have access to fresh lettuce whenever you need it, eliminating the need to make frequent trips to the grocery store.
Now that you understand the benefits of storing lettuce with roots, let’s go over the supplies you will need to get started.
Key Takeaways:
- Storing lettuce with roots extends its shelf life, preserves nutrition, saves money, and reduces food waste. Enjoy fresh, vibrant lettuce with simple supplies and easy steps.
- Harvest lettuce as needed, maintain moisture levels, and store in a cool, well-ventilated area for continuous freshness. Embrace the joy of crisp, flavorful lettuce with sustainable, root-to-plate practices.
Read more: How To Store Butter Lettuce With Roots
Benefits of Storing Lettuce with Roots
Storing lettuce with roots has numerous advantages that go beyond simply keeping it fresh for longer. Let’s take a closer look at some of the key benefits:
- Extended Shelf Life: By keeping the roots intact, the lettuce remains connected to its source of nutrients and moisture. This helps to extend its shelf life significantly, allowing you to enjoy crisp and fresh lettuce for a longer period of time. Instead of going limp and losing its flavor within a few days, lettuce stored with roots can remain vibrant and tasty for up to two weeks or more.
- Optimal Nutrition: When lettuce is harvested, it begins to lose nutrients over time. Storing it with roots helps to slow down this process and preserve its nutritional value. The roots continue to absorb water and essential nutrients, keeping the lettuce hydrated and nutrient-rich for an extended period.
- Cost-Effective: Buying fresh lettuce every few days can add up both in terms of cost and waste. By storing lettuce with roots, you can purchase larger quantities at once and use it as needed, reducing food waste and saving money in the long run.
- Convenient Access: When you store lettuce with roots, you have easy access to fresh lettuce whenever you need it. Instead of making frequent trips to the grocery store or settling for pre-packaged lettuce, you can simply harvest a few leaves as you need them. This not only ensures that you’re enjoying the freshest lettuce possible, but also adds a touch of greenery to your meals whenever desired.
- Sustainable Option: Storing lettuce with roots aligns with sustainable practices. By extending the lifespan of your lettuce, you reduce the amount of food waste that goes into landfills. Additionally, you can grow your own lettuce and store it with roots, eliminating the need for plastic packaging and transportation.
These are just a few of the benefits of storing lettuce with roots. Now let’s move on to the supplies you’ll need to get started.
Supplies Needed
Before you start storing lettuce with roots, it’s important to gather the necessary supplies. Don’t worry, you won’t need any fancy equipment – just a few everyday items that you likely already have in your kitchen. Here’s what you’ll need:
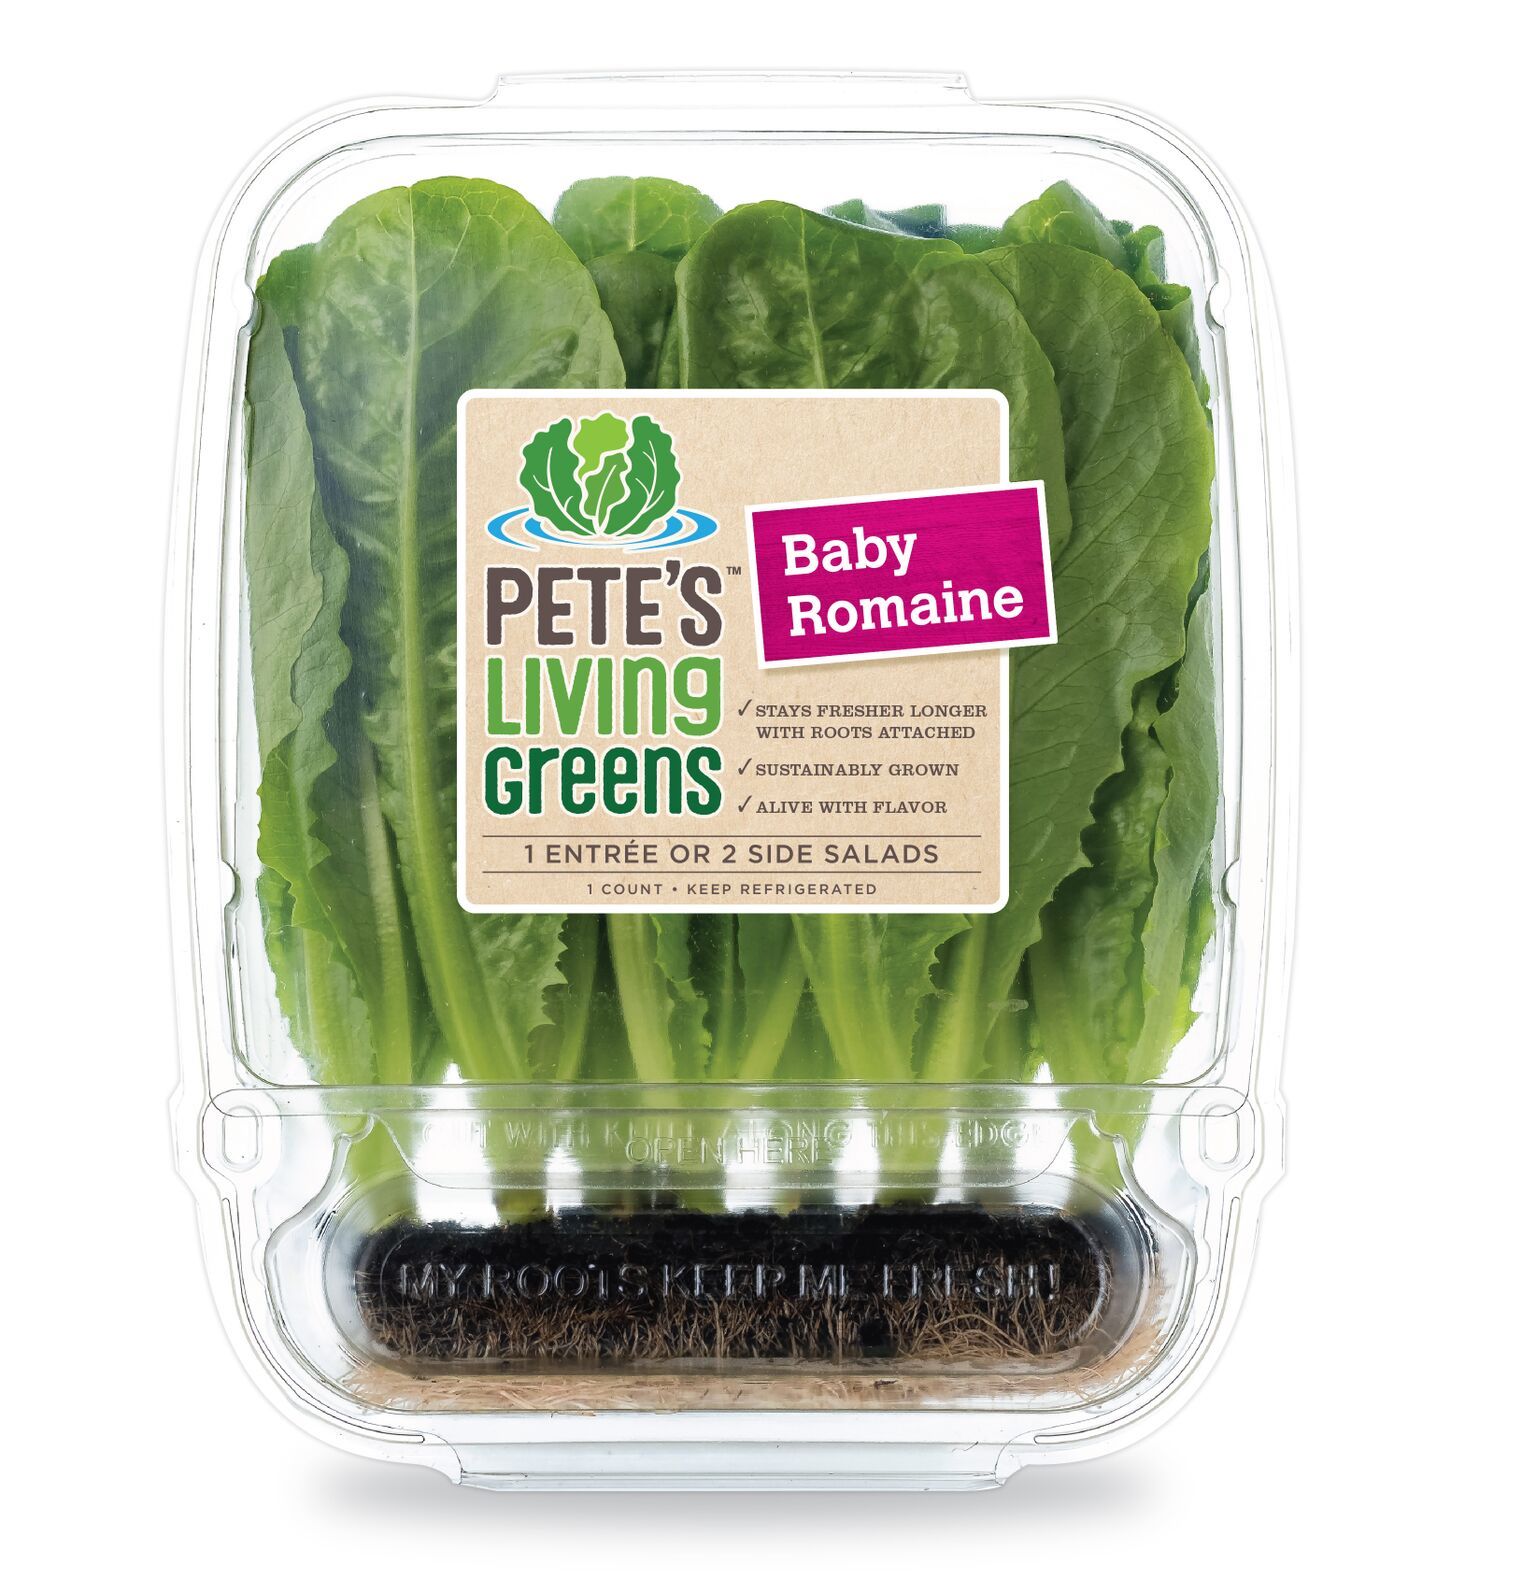
- Fresh Lettuce: Choose a head of lettuce that is still attached to its roots or has a stalk. Look for lettuce with crisp and vibrant leaves to ensure the best quality.
- Sharp Knife or Scissors: You will need a knife or scissors to harvest the lettuce from its roots. Make sure it’s clean and sharp to ensure a clean cut.
- A Container: Select a container with a tight-fitting lid, such as a plastic or glass container, to store the lettuce. The size of the container will depend on the amount of lettuce you plan to store.
- Water: You will need water to hydrate the lettuce roots. Preferably, use filtered or tap water that is at room temperature.
- Paper Towels or Cloth: Keep some paper towels or a clean cloth handy for drying the lettuce leaves and absorbing any excess moisture.
- Plastic Bag or Plastic Wrap: If you don’t have a container with a lid, you can use a plastic bag or plastic wrap to cover the container and seal in the moisture.
Once you have gathered these supplies, you’re ready to move on to the next step – harvesting the lettuce with roots.
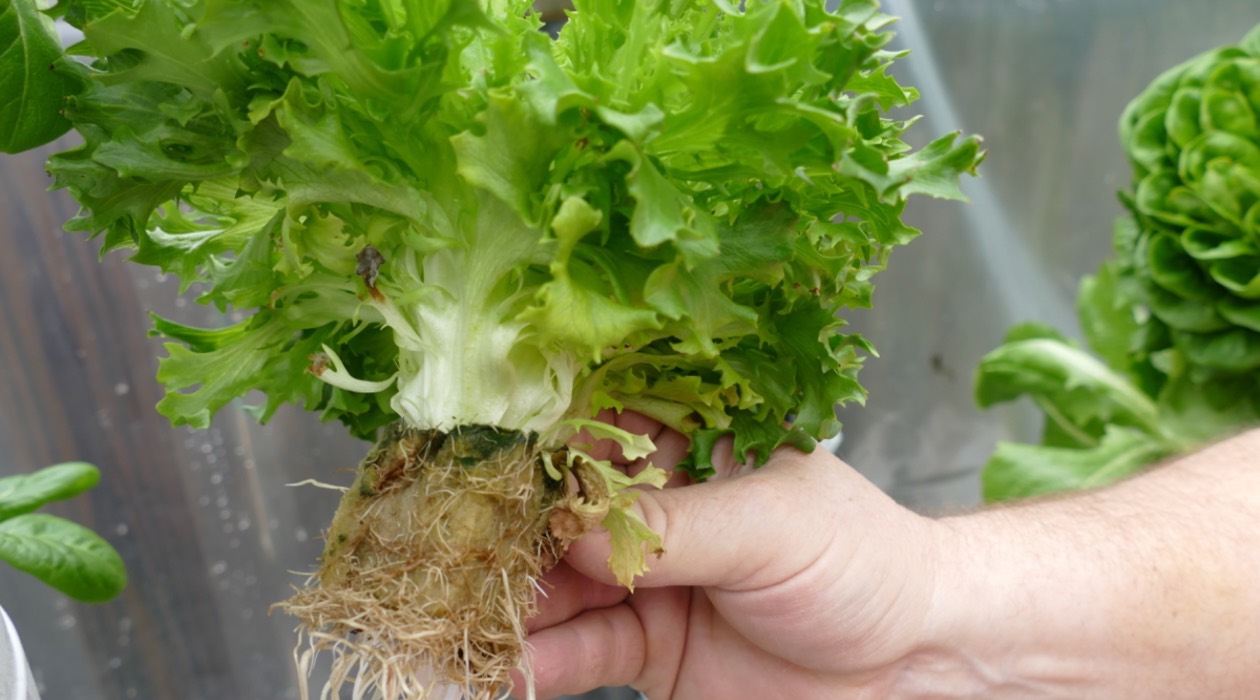
Step 1: Harvesting Lettuce with Roots
The first step to storing lettuce with roots is to harvest it properly. Follow these simple steps to ensure you get the best results:
- Choose a head of lettuce that is still attached to its roots or has a stalk. This could be from your own garden or a fresh head of lettuce you purchased.
- Inspect the lettuce to ensure it is free from any wilting, discoloration, or signs of damage. It’s important to start with a healthy head of lettuce for optimal results.
- Using a sharp knife or scissors, make a clean cut just above the roots or base of the lettuce. Be careful not to damage the roots during the harvesting process.
- If the lettuce is a head variety, you can simply cut the lettuce head from the stem, leaving the roots intact. If the lettuce is a leaf variety, you can cut off individual leaves, leaving a few inches of stem attached to each leaf.
- Once you have harvested the desired amount of lettuce, gently rinse the leaves and roots under cool running water to remove any dirt or debris. Pat the leaves dry with a paper towel or clean cloth to remove excess moisture.
Now that you have harvested the lettuce with its roots, it’s time to move on to the next step – cleaning the lettuce.
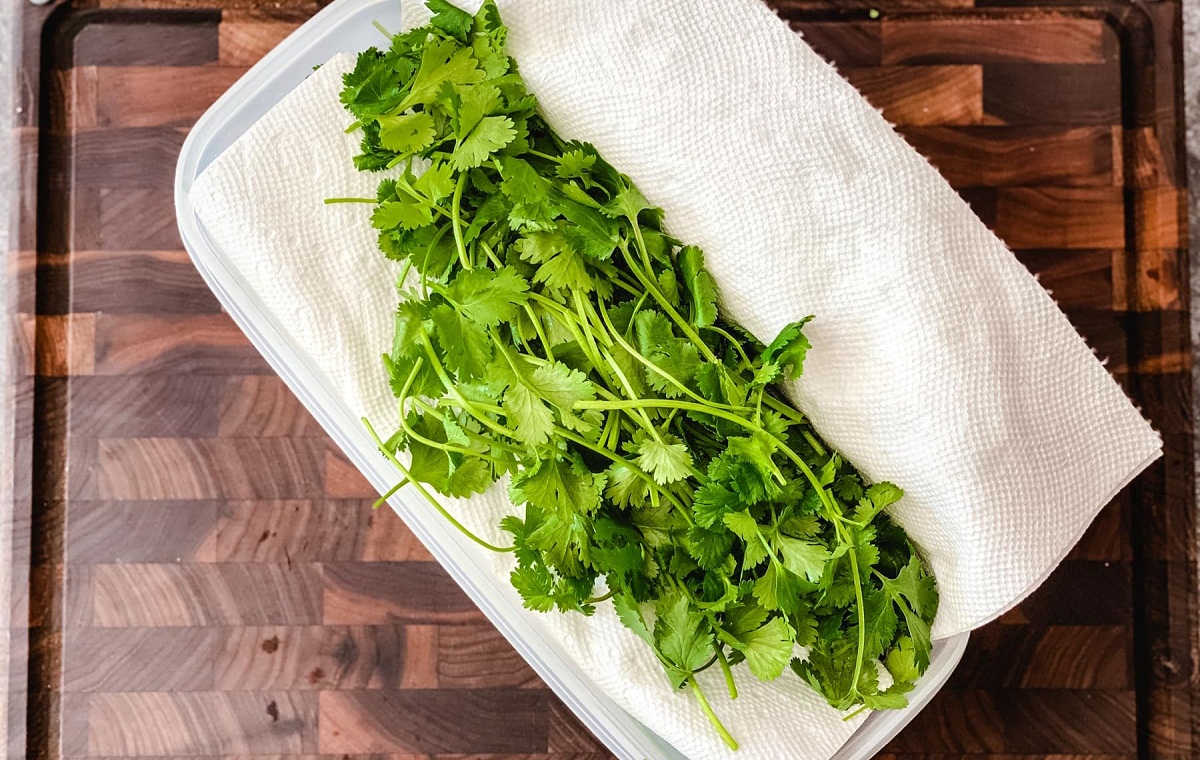
Step 2: Cleaning the Lettuce
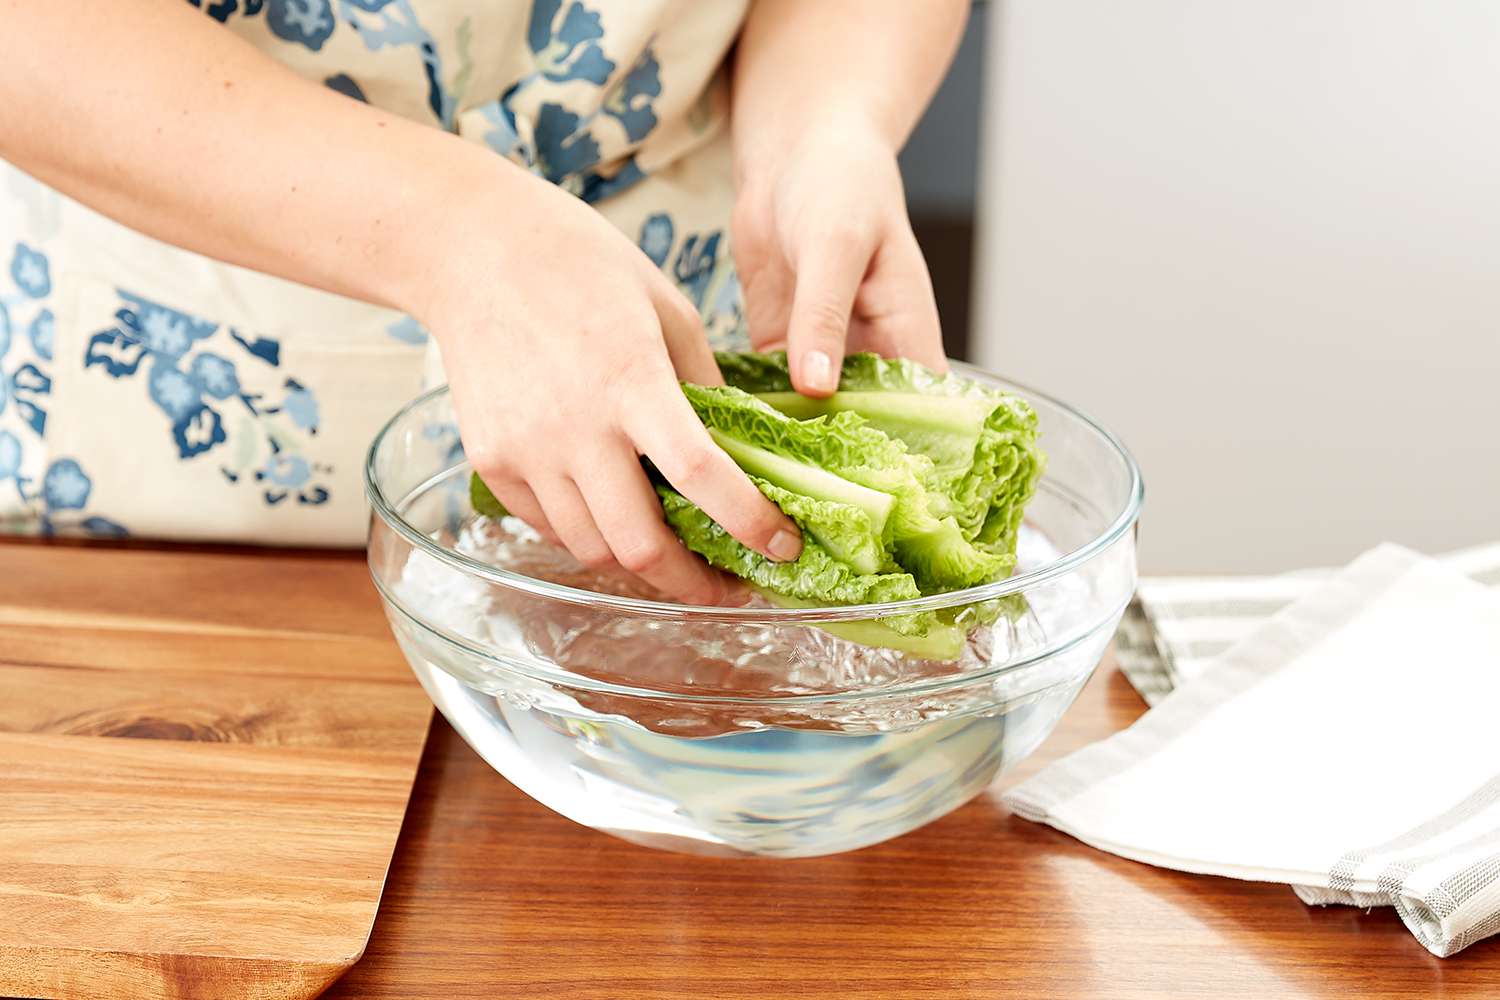
After harvesting the lettuce and before storing it with roots, it’s important to clean the lettuce to remove any dirt, insects, or residue. Follow these steps to ensure your lettuce is clean and ready to be stored:
- Fill a clean sink or a large bowl with cool water. Make sure there’s enough water to submerge the lettuce fully.
- Gently place the harvested lettuce into the water, making sure all the leaves and roots are fully submerged.
- Swish the lettuce around in the water, allowing the water to loosen any dirt or debris. You can also gently rub the leaves with your hands to remove any stubborn dirt.
- Let the lettuce sit in the water for a few minutes to allow any dirt or insects to settle at the bottom of the sink or bowl.
- After a few minutes, carefully lift the lettuce out of the water, trying not to disturb the settled dirt at the bottom.
- Discard the dirty water and refill the sink or bowl with fresh cool water.
- Gently place the lettuce back into the clean water and repeat the process of swishing and agitating the leaves to remove any remaining dirt or residue. You may need to repeat this step a couple of times until the water appears clean.
- Once the lettuce is clean, remove it from the water and gently shake off any excess moisture. You can also pat the leaves dry with a paper towel or clean cloth to absorb any remaining moisture on the surface.
Now that the lettuce is clean and dry, you’re ready to move on to the next step – preparing a storage container.
Read more: How To Store Lettuce
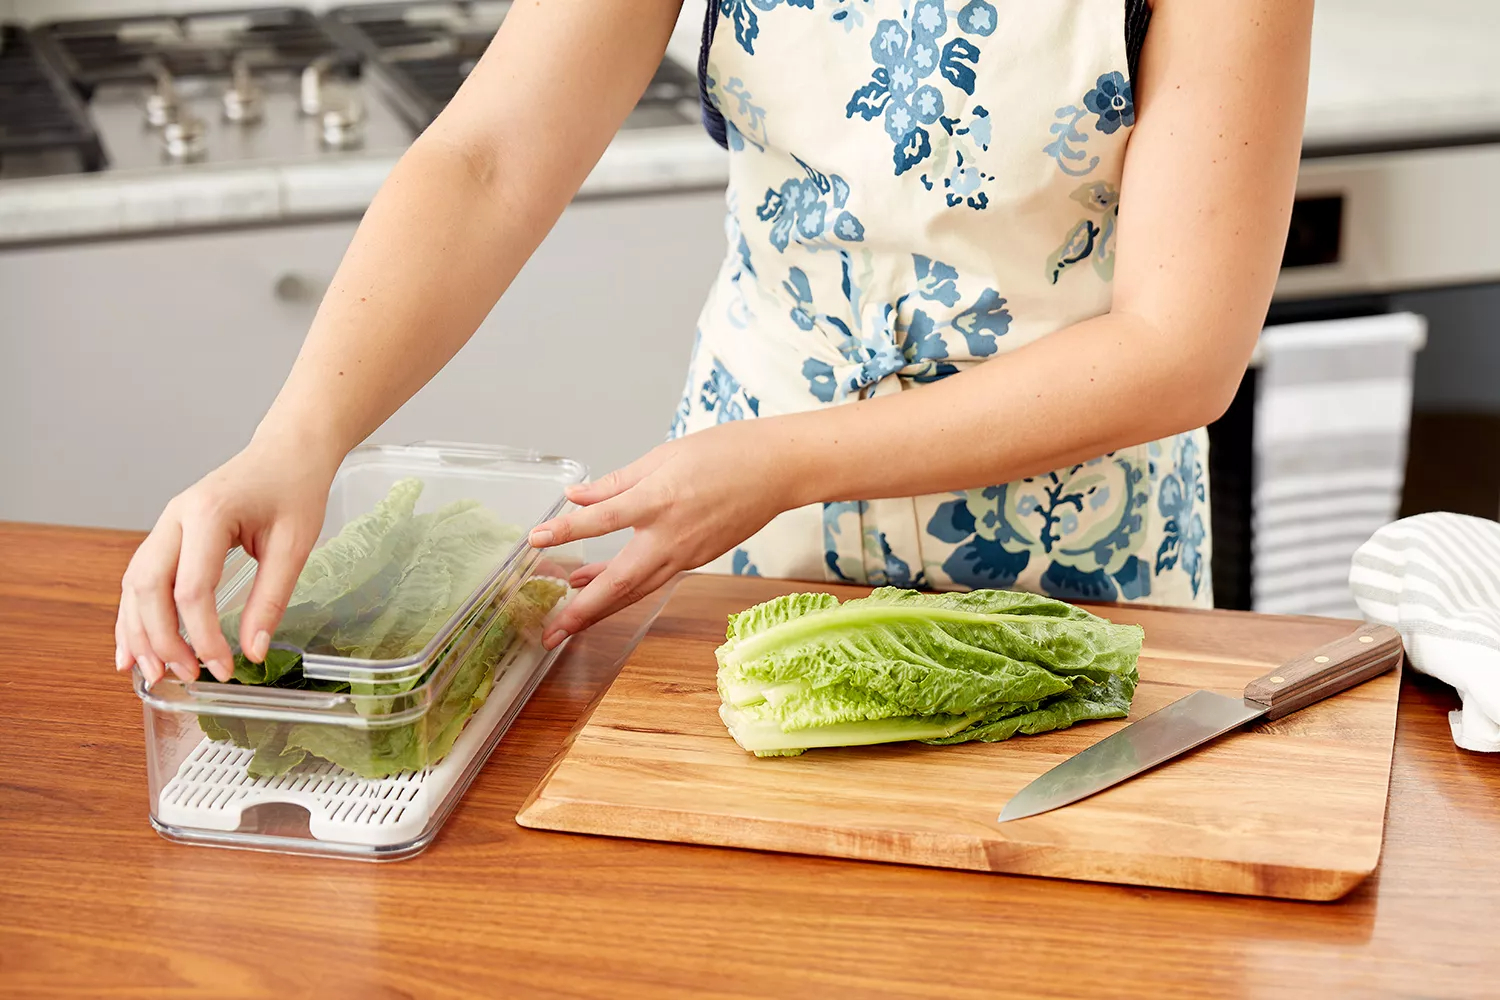
Step 3: Preparing a Storage Container
Before you can store the lettuce with roots, it’s important to prepare a suitable storage container. Follow these steps to ensure your lettuce stays fresh and properly stored:
- Select a storage container with a tight-fitting lid. Plastic or glass containers work well for this purpose. The size of the container will depend on the amount of lettuce you have harvested.
- Thoroughly clean and dry the storage container to ensure it is free from any dirt or residue. This will help to maintain the freshness and cleanliness of the lettuce.
- If you don’t have a container with a lid, you can use a plastic bag or plastic wrap to cover the container and seal in the moisture. Just make sure the bag or wrap is secure and tightly sealed.
- Line the bottom of the storage container with a layer of paper towels or a clean cloth. This will help absorb any excess moisture and prevent the lettuce from sitting in a pool of water.
- Place the lettuce, with the roots attached, into the storage container. If you are storing multiple heads of lettuce, make sure to leave enough space between each head to allow for proper air circulation.
- Ensure that the lettuce is arranged in a single layer, avoiding any overcrowding. This will help prevent the leaves from getting crushed or damaged.
- Close the lid of the container tightly or seal the plastic bag/plastic wrap, making sure it’s secure and airtight. This will help to maintain the moisture and crispness of the lettuce.
Now that the storage container is prepared, let’s move on to the next step – placing the lettuce in the container.
Store lettuce with roots intact in a container of water, covering the roots. Place in the refrigerator and change the water every few days to keep the lettuce fresh and crisp for longer.
Step 4: Placing the Lettuce in the Container
Now that you have prepared the storage container, it’s time to place the lettuce with roots in it. Follow these steps to ensure your lettuce is properly stored:
- Take the harvested lettuce with roots and carefully place it inside the prepared storage container. Make sure the lettuce is arranged in a single layer, with the roots facing downwards.
- If you are storing multiple heads of lettuce, leave enough space between each head to allow for proper air circulation. This will help prevent the lettuce from getting cramped and wilting.
- Do not overcrowd the container, as this can lead to moisture buildup and accelerated wilting. If necessary, use multiple containers or store the lettuce in batches.
- Close the lid of the container tightly or seal the plastic bag/plastic wrap securely to create an airtight seal. This will help to maintain the moisture and freshness of the lettuce.
- If using a plastic bag, you can twist the top and secure it with a rubber band or tie it with a twist tie to keep it closed. Just ensure that it is tightly sealed to prevent air from entering.
- Label the storage container with the date of harvest. This will help you keep track of the lettuce’s freshness and ensure you use it within the recommended time frame.
Now that the lettuce is properly placed in the container, let’s move on to the next step – watering the lettuce roots.
Step 5: Watering the Lettuce Roots
Watering the lettuce roots is a crucial step in storing lettuce with roots. By providing water to the roots, you can keep the lettuce hydrated and prolong its freshness. Follow these steps to ensure the roots receive the right amount of moisture:
- Before watering, make sure the container is properly sealed to maintain the humidity inside.
- Using a spray bottle or a watering can with a gentle shower head attachment, water the roots of the lettuce. Direct the water towards the base of the roots, ensuring that it reaches the soil or growing medium.
- Aim to moisten the soil or growing medium without over-saturating it. Avoid soaking the leaves as excessive moisture can lead to rotting or mold growth.
- Start by spraying a light layer of water over the roots, observing how the soil or growing medium responds. If it feels dry, continue watering until it is evenly moist.
- Monitor the moisture level of the soil or growing medium regularly. Depending on environmental conditions and the specific needs of the lettuce, you may need to water every few days or once a week.
- Ensure that there is no standing water in the container. If excess water pools at the bottom, carefully drain it to prevent waterlogging and root rot.
By providing proper hydration to the lettuce roots, you can help preserve the crispness and vitality of the leaves. Now that the lettuce roots are watered, let’s move on to the next step – finding the proper storage location.
Step 6: Proper Storage Location
Choosing the right storage location for your lettuce with roots is essential to maintain its freshness and quality. Follow these guidelines to ensure you store your lettuce in an ideal environment:
- Find a location in your home that is cool and well-ventilated. The temperature should ideally be between 32°F (0°C) and 40°F (4°C). Avoid storing the lettuce in areas that are too warm, as higher temperatures can cause the lettuce to wilt and deteriorate.
- Avoid placing the lettuce near sources of heat or direct sunlight. Heat and sunlight can accelerate the wilting process and cause the lettuce to spoil quickly.
- Keep the lettuce away from ethylene-producing fruits and vegetables, such as apples, bananas, and tomatoes. Ethylene is a natural gas that promotes ripening and can cause lettuce to deteriorate and become bitter.
- If your refrigerator has a separate crisper drawer, utilize it for storing the container of lettuce. The crisper drawer helps maintain optimal humidity levels and protects the lettuce from other foods that might transfer odors or flavors.
- Ensure that the storage location is free from any strong odors, as lettuce easily absorbs smells. Keep it away from pungent foods like onions, garlic, and strong spices.
- Regularly check the storage location for any signs of temperature fluctuations or high levels of humidity. Excessive moisture can cause the lettuce to become soggy and prone to spoilage, while dry air can make it wilt.
- If storing lettuce in a root vegetable container or in the ground, ensure that the soil is well-drained to prevent waterlogging. Check the moisture level regularly and adjust watering accordingly to maintain the balance between hydration and proper drainage.
By storing your lettuce in an appropriate location, you can maximize its freshness and maintain its quality for an extended period. Now that you’ve found the proper storage location, let’s move on to the next step – checking and maintaining moisture levels.
Read more: How To Store Strawberry Roots
Step 7: Checking and Maintaining Moisture Levels
Monitoring and maintaining the moisture levels of your stored lettuce is crucial to prevent wilting and keep it fresh. Follow these steps to ensure the lettuce maintains the optimal moisture balance:
- Regularly check the moisture levels of the soil or growing medium for container-stored lettuce. Insert your finger about an inch into the soil, and if it feels dry, it’s time to water it again.
- Use a spray bottle or a watering can with a gentle shower head attachment to water the roots of the lettuce. Aim to moisten the soil or growing medium without over-saturating it.
- Take note of the environmental conditions and adjust the watering frequency accordingly. During hot and dry weather, you may need to water more frequently, while cooler temperatures may require less frequent watering.
- Avoid overwatering, as excessive moisture can lead to root rot or mold development. It’s better to slightly underwater than overwater the lettuce.
- If you notice any signs of excess moisture, such as water pooling in the container or a foul smell, adjust your watering routine and consider improving the ventilation in the storage area.
- For lettuce stored in the ground, check the moisture level of the soil regularly. Water deeply when the soil feels dry to the touch, ensuring the roots receive adequate hydration.
- Observe the lettuce leaves for any signs of wilting or discoloration. If you notice any leaves starting to wilt or turn yellow, it may be an indication of insufficient moisture. Adjust your watering schedule accordingly.
By regularly checking and maintaining the moisture levels, you can ensure that your stored lettuce remains fresh and crisp for a longer period. Now that you know how to manage moisture levels, let’s move on to the next step – harvesting lettuce as you need it.
Step 8: Harvesting Lettuce as You Need It
One of the great advantages of storing lettuce with roots is that you can harvest it as you need it, ensuring maximum freshness and flavor. Follow these steps to harvest the lettuce as desired:
- When you’re ready to use the lettuce, open the storage container or remove the plastic bag/plastic wrap.
- Gently separate the desired amount of lettuce leaves from the rest, leaving the roots and remaining lettuce undisturbed.
- With a clean knife or pair of scissors, make a clean cut just above the remaining roots or base of the lettuce.
- Alternatively, if you stored individual leaves, carefully pinch or cut the leaves near the stem to remove them.
- Ensure that you harvest only the amount of lettuce you need for your immediate use. Leaving the remaining lettuce in the container will help maintain its freshness and prolong its shelf life.
- After harvesting the lettuce, rinse the leaves under cool running water to remove any dirt or debris, and pat them dry with a paper towel or clean cloth.
- Store any remaining lettuce back in the container, close the lid tightly, or seal the plastic bag/plastic wrap for continued storage.
- Continue to check and maintain the moisture levels of the storage container, watering the lettuce roots as needed.
By harvesting lettuce as you need it, you can enjoy the freshest leaves while allowing the remaining lettuce to continue growing and staying fresh. This ensures you have a continuous supply of crisp and flavorful lettuce throughout its storage period.
Now that you know how to harvest lettuce as needed, you’re ready to enjoy the benefits of storing lettuce with roots. Remember to maintain proper moisture levels and store the lettuce in a suitable location to maximize its freshness and longevity.
Happy lettuce storing and harvesting!
Conclusion
Storing lettuce with roots is a simple yet effective method to keep your lettuce fresh, crisp, and flavorful for an extended period. By following the steps outlined in this guide, you can enjoy the benefits of storing lettuce with roots and significantly prolong its shelf life.
Storing lettuce with roots offers a range of advantages. It keeps the lettuce hydrated, maintains its nutritional value, reduces waste, and provides convenient access to fresh lettuce whenever you need it. Additionally, it aligns with sustainable practices by reducing food waste and minimizing packaging.
To store lettuce with roots, you only need a few basic supplies such as fresh lettuce, a container with a tight-fitting lid, water, and a clean cloth or paper towels. Harvest the lettuce with care, clean it thoroughly, and place it in the prepared container. Make sure to water the roots regularly, check and maintain moisture levels, and store the lettuce in a cool, well-ventilated area.
When you’re ready to use the lettuce, simply harvest the desired amount and rinse the leaves before incorporating them into your meals. By harvesting as you need it, you can experience the ultimate freshness and taste of your lettuce while ensuring that the remaining lettuce continues to thrive.
Storing lettuce with roots is a fantastic way to enjoy the full benefits of this leafy green. Whether you’re growing your own lettuce or purchasing it from a store, storing it with roots will prolong its freshness and nutritional value. Give it a try and discover the joy of having crisp, vibrant lettuce on hand whenever you need it.
Remember to experiment with different lettuce varieties and find the method that works best for you. Enjoy the journey of storing lettuce with roots and relish the delicious and nutritious salads, sandwiches, and other creations you can make with your fresh and vibrant lettuce.
Happy lettuce storing and bon appétit!
Frequently Asked Questions about How To Store Lettuce With Roots
Was this page helpful?
At Storables.com, we guarantee accurate and reliable information. Our content, validated by Expert Board Contributors, is crafted following stringent Editorial Policies. We're committed to providing you with well-researched, expert-backed insights for all your informational needs.


0 thoughts on “How To Store Lettuce With Roots”