Articles
How To Store Liquid Culture Syringes
Modified: December 7, 2023
Discover effective methods for storing liquid culture syringes with our informative articles. Learn how to properly preserve and maintain your cultures for optimal growth and success.
(Many of the links in this article redirect to a specific reviewed product. Your purchase of these products through affiliate links helps to generate commission for Storables.com, at no extra cost. Learn more)
Introduction
When it comes to cultivating mushrooms, one of the key components is having a reliable source of liquid culture syringes. Liquid culture syringes contain a concentrated solution of mycelium, the vegetative part of the fungus, which can be used to inoculate substrates for mushroom cultivation. These syringes are essential for the successful propagation of mushroom mycelium, making them a valuable tool for both beginner and experienced cultivators.
However, it’s important to understand that the longevity and efficacy of liquid culture syringes largely depend on proper storage techniques. Improper storage can lead to contamination, loss of viability, and ultimately, unsuccessful mushroom cultivation. Therefore, in this article, we will dive into the steps and best practices for storing liquid culture syringes to ensure their longevity and effectiveness.
By following these guidelines, you can maximize the shelf life of your liquid culture syringes and increase your chances of successful mushroom cultivation.
Key Takeaways:
- Proper storage of liquid culture syringes is crucial for successful mushroom cultivation. Follow the steps to maintain viability, prevent contamination, and increase your chances of a bountiful harvest.
- Creating a clean, sterile environment and properly labeling and sealing storage vials are key to maximizing the shelf life of liquid culture syringes. Refrigerate them at the right temperature to preserve viability.
Read more: How To Store Mushroom Liquid Culture
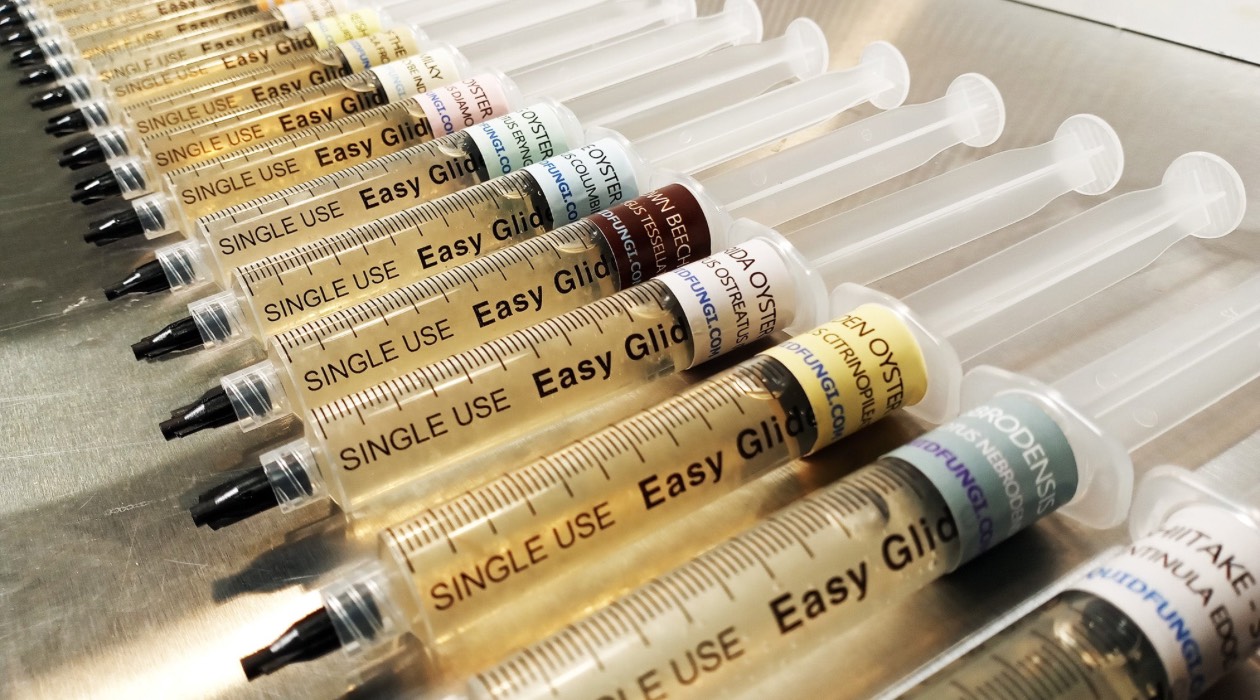
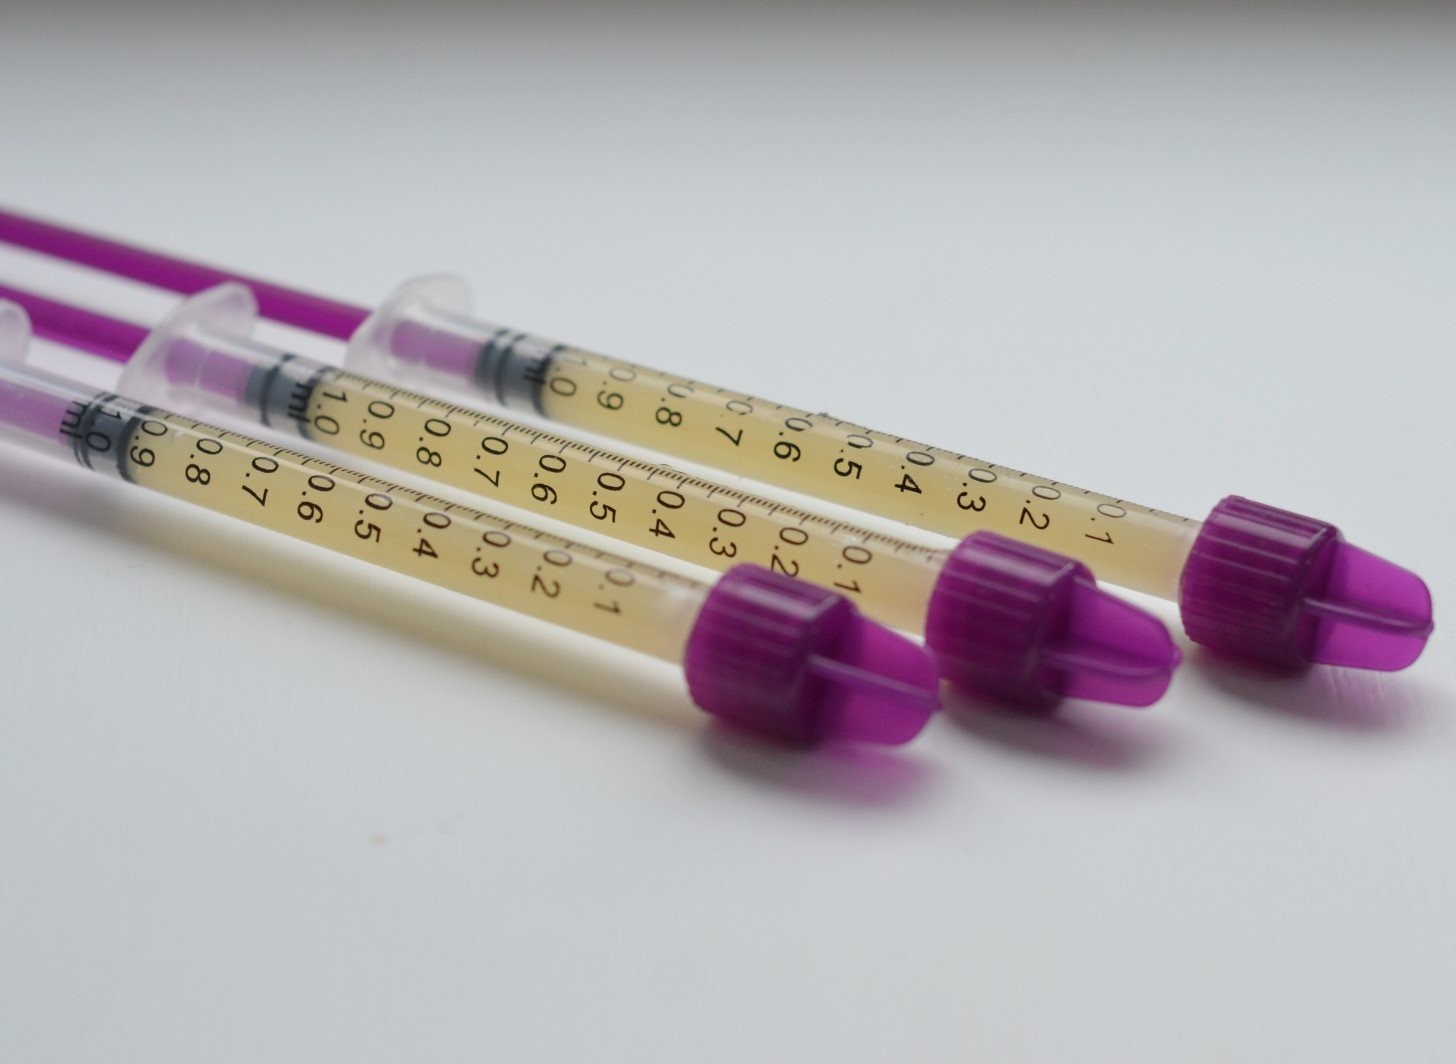
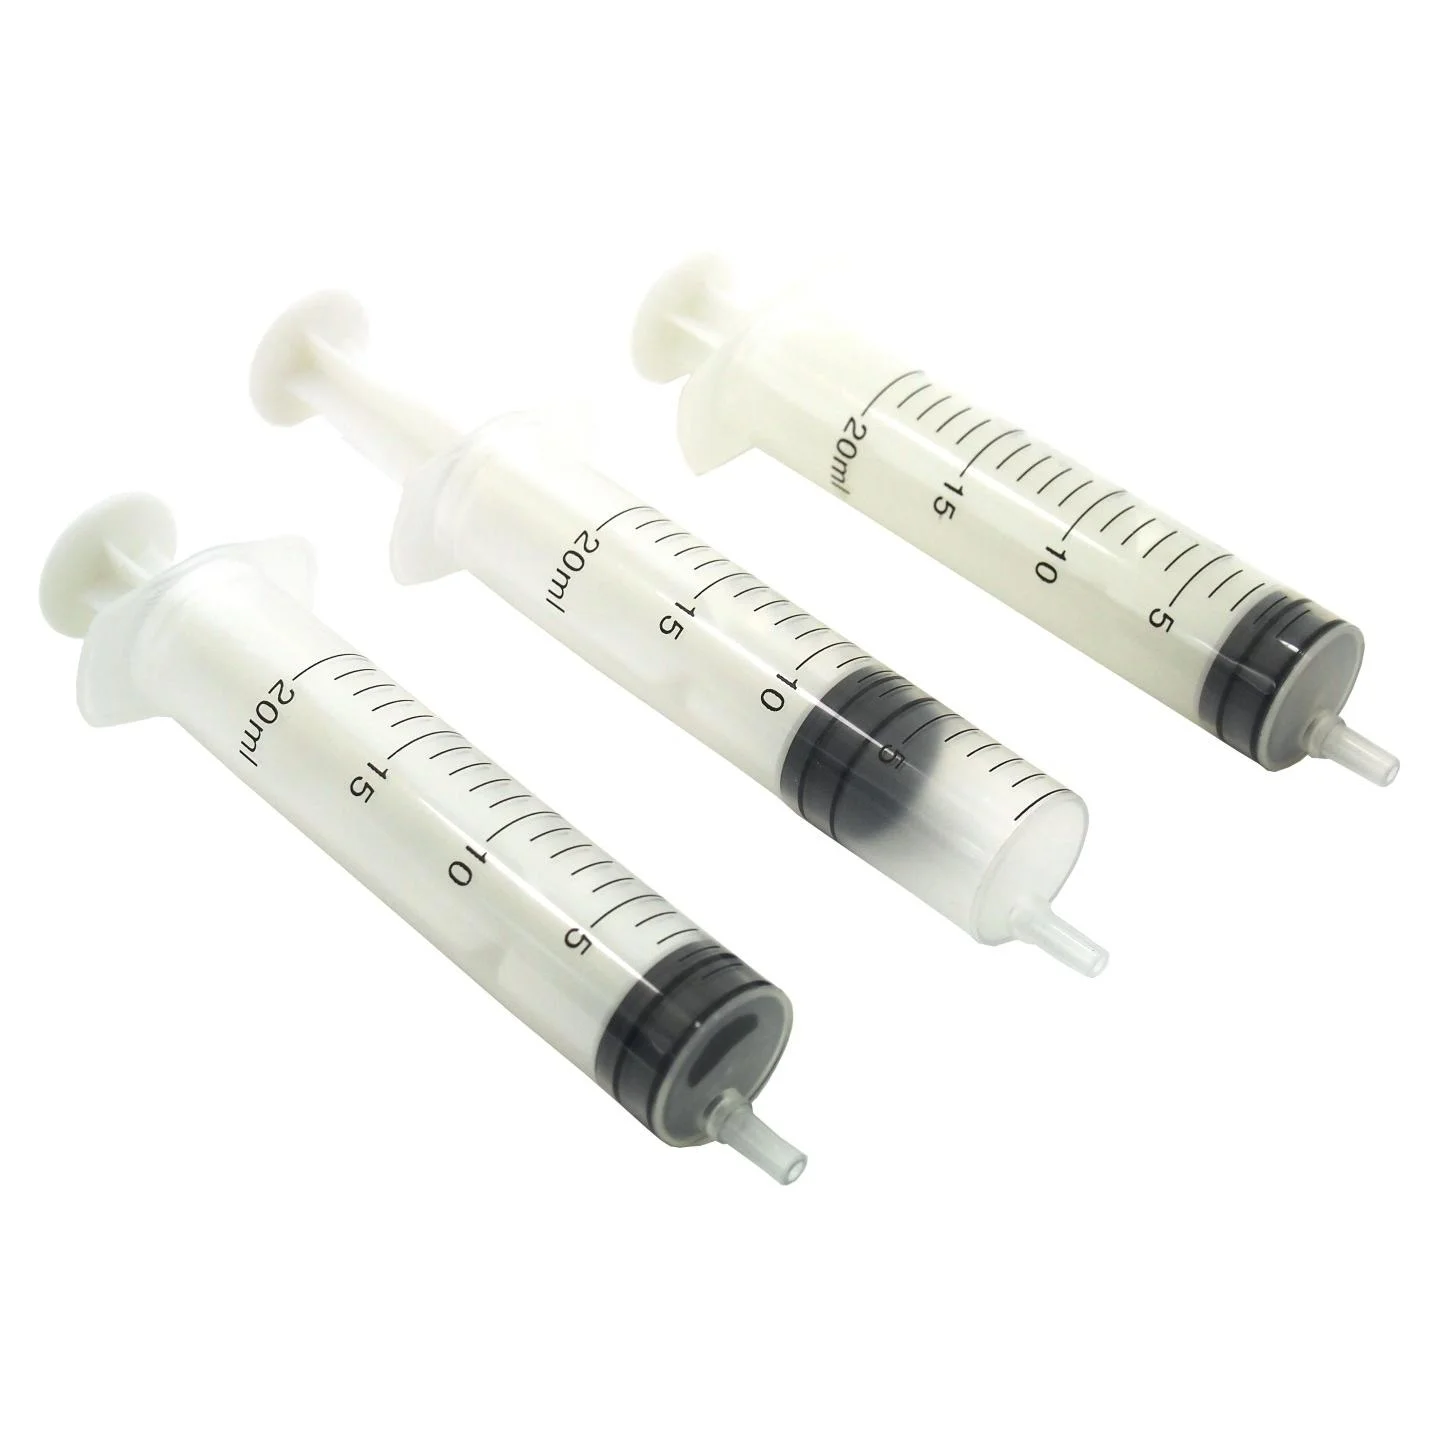
What is a Liquid Culture Syringe?
A liquid culture syringe is a sterilized glass or plastic syringe filled with a concentrated solution of mushroom mycelium suspended in a nutrient-rich liquid medium. The liquid culture is prepared by inoculating a sterile growth medium with live mycelium, allowing it to grow and multiply over a period of time.
Liquid culture syringes are commonly used in mushroom cultivation as a convenient and efficient method for inoculating substrates. The mycelium contained within the syringe serves as the source of inoculum, which is injected into a chosen substrate such as grain, sawdust, or agar. Once the mycelium is introduced to the substrate, it will colonize and eventually fruit, leading to the growth of mushrooms.
Compared to other methods of inoculation, such as agar wedges or spore prints, liquid culture syringes offer several advantages. Firstly, they provide a higher concentration of viable mycelium, increasing the chances of successful colonization. Additionally, liquid culture syringes allow for more precise and controlled inoculation, as the mycelium is evenly distributed within the liquid medium. This ensures a consistent and uniform colonization of the substrate.
Moreover, liquid culture syringes can be stored for longer periods, extending the shelf life of the mycelium. This is beneficial for cultivators as it allows for flexibility in planning and timing their cultivation projects. However, it is crucial to store these syringes properly to maintain their viability and potency.
Importance of Proper Storage
Proper storage is essential to maintain the viability and effectiveness of liquid culture syringes. When stored correctly, the mycelium in the syringe remains healthy and active, ensuring successful colonization of the substrate and the growth of high-quality mushrooms. On the other hand, improper storage can lead to contamination, loss of viability, and wasted efforts.
Contamination is a common concern in mushroom cultivation, and it can occur if the liquid culture syringes are not stored in a clean and sterile environment. The syringes can be exposed to bacteria, molds, or other contaminants, which can multiply and outcompete the mycelium, rendering the syringe ineffective. Therefore, it is crucial to store the syringes in a clean space and handle them using proper sterile techniques.
Loss of viability is another issue that can arise from improper storage. The mycelium in the syringe is living and metabolically active. If exposed to unsuitable environmental conditions, such as extreme temperatures or excessive light, the mycelium can become stressed or even die off, leading to decreased viability. This can result in slow or unsuccessful colonization of the substrate and ultimately, poor mushroom growth.
By following proper storage practices, you can prolong the shelf life of liquid culture syringes and preserve their potency. This allows you to have a reliable and ready-to-use source of mycelium whenever you are ready to inoculate a substrate for mushroom cultivation. It also provides flexibility in planning your cultivation projects, ensuring that you have viable syringes on hand whenever you need them.
Overall, proper storage of liquid culture syringes is vital for maintaining their integrity and effectiveness. By taking the necessary precautions and following the guidelines outlined in this article, you can maximize the viability of the mycelium and increase your chances of successful mushroom cultivation.
Materials Needed
Before diving into the storage process, it’s important to gather all the necessary materials to ensure a smooth and successful procedure. Here are the materials you’ll need to properly store your liquid culture syringes:
- Liquid culture syringes: These can either be pre-filled syringes that you purchased or empty syringes that you will fill with your own liquid culture solution.
- Storage vials: Opt for sterile glass or plastic vials with a luer lock or screw-on cap. These should be able to hold the liquid culture solution and maintain a proper seal to prevent contamination.
- Alcohol wipes: To sterilize the storage vials and the outside of the liquid culture syringes.
- Labels and marker: For properly labeling the storage vials with the strain and date of the liquid culture syringe.
- Ethanol or isopropyl alcohol: For disinfecting your working area and maintaining a sterile environment.
- Gloves: Wear disposable gloves to prevent contamination and maintain a clean and sterile environment.
- Clean and sterile workspace: Ensure that you have a dedicated, clean, and sterile area to work in. This can be a laminar flow hood, a glove box, or a well-sanitized countertop covered with clean plastic wrap.
By having all the necessary materials ready, you can streamline the storage process and minimize the risk of contamination or mishaps. Having a clean and sterile workspace, necessary supplies, and labeling materials will help you maintain organization and ensure the longevity of your liquid culture syringes.
Step 1: Clean and Sterilize
The first step in properly storing liquid culture syringes is to ensure a clean and sterile working environment. This minimizes the risk of contamination and maintains the integrity of the mycelium within the syringe. Follow these steps to clean and sterilize your workspace:
- Clean your working area: Start by thoroughly cleaning your work surface. Remove any clutter or debris and wipe down the area with a suitable disinfectant, such as ethanol or isopropyl alcohol. Make sure to clean all surfaces that will come into contact with the syringes and storage vials.
- Wear gloves: Put on a pair of disposable gloves before handling any of the equipment or supplies. This helps prevent the transfer of bacteria or contaminants from your hands to the syringes.
- Sterilize the storage vials: Take your sterile storage vials and wipe the outside with alcohol wipes. This ensures that the vials are clean and free from any potential contaminants. Allow the vials to air dry before proceeding.
- Sanitize the liquid culture syringes: If you are using pre-filled liquid culture syringes, wipe the outside of the syringes with alcohol wipes to sterilize them. If you are filling the syringes yourself, make sure to sterilize both the syringe and the needle using an alcohol wipe or by soaking them in an alcohol solution. Allow them to dry completely before moving on to the next step.
- Sanitize your hands: Before handling the syringes or storage vials, wash your hands thoroughly with soap and water. Dry them using a clean towel or air dry them. Avoid touching anything that could potentially contaminate your hands after washing them.
By following these steps, you create a clean and sterile environment to work in, reducing the risk of introducing contaminants to your liquid culture syringes. This will help maintain the integrity and viability of the mycelium within the syringes, ensuring successful future cultivation.
Store liquid culture syringes in a cool, dark place to prolong their shelf life. Keep them in a sealed container to prevent contamination.
Read more: How To Store Colostrum In Syringe
Step 2: Prepare the Storage Vials
Now that your workspace is clean and sterile, it’s time to prepare the storage vials for the liquid culture syringes. Follow these steps to ensure the vials are ready to hold the precious mycelium:
- Inspect the vials: Before proceeding, carefully inspect each storage vial for any cracks, chips, or other damage. Discard any damaged vials as they may compromise the integrity of the stored liquid culture.
- Add a sterile solution: Depending on your preference and the specific requirements of your liquid culture, you may need to add a small amount of sterilized solution to the vials before filling them with the liquid culture syringes. This can help create a suitable environment for the mycelium within the syringe.
- Label the vials: Using the labels and marker, clearly label each vial with the strain of the liquid culture and the date it was prepared. This will help you keep track of the different strains and the age of each syringe, ensuring you use them in a timely manner.
- Keep everything sterile: Throughout the process of preparing the vials, ensure that everything remains sterile. Avoid touching the inside of the vials or the cap with your hands or any non-sterile surfaces. If necessary, use clean forceps or sterile gloves to handle the vials.
By properly preparing the storage vials, you create a suitable and sterile environment for storing the liquid culture syringes. This step is crucial in maintaining the integrity and viability of the mycelium, ensuring successful inoculation and mushroom cultivation in the future.
Step 3: Fill the Vials with Liquid Culture
With the storage vials prepared, it’s time to fill them with the liquid culture from the syringes. Follow these steps to ensure a successful and contamination-free process:
- Prepare the liquid culture syringe: If you are using pre-filled liquid culture syringes, ensure that the caps and needles are securely tightened. If you are filling the syringes yourself, make sure the solution is well mixed by gently shaking the syringe to distribute the mycelium throughout the liquid.
- Wipe the needle with alcohol: Take an alcohol wipe and clean the needle of the liquid culture syringe. This helps to sterilize the needle and prevent any potential contaminants from entering the vials.
- Fill the vials: Carefully insert the needle into the storage vial and slowly depress the plunger to dispense the liquid culture. Start with a small amount and gradually fill the vial, leaving a small headspace at the top to allow for expansion and prevent leakage. Repeat this process for each vial, ensuring that the liquid culture is evenly distributed among them.
- Avoid cross-contamination: To prevent cross-contamination between different strains, use a new or sterilized needle for each vial. If you are reusing the same needle, clean it with alcohol wipes between vials to minimize the risk of introducing contaminants.
By filling the storage vials with the liquid culture syringes, you are transferring the mycelium into a conducive environment for storage. Take care to maintain sterility throughout the process to minimize the risk of contamination and ensure the viability of the mycelium.
Step 4: Seal and Label the Vials
After filling the vials with the liquid culture, it’s crucial to properly seal and label them for identification and future use. Follow these steps to ensure the vials are securely sealed and appropriately labeled:
- Tighten the caps: Ensure that the caps of the storage vials are securely tightened to create an airtight seal. This helps prevent any potential contaminants from entering the vials during storage.
- Label the vials: Using the labels and a marker, clearly mark each vial with the strain name and the date of preparation. This information is essential for keeping track of the different liquid cultures and their freshness.
- Include any additional information: If desired, you can also include additional information on the labels, such as the agar or nutrient medium used, or any specific instructions or notes relevant to the strain.
- Store the vials upright: Place the sealed and labeled vials upright in a clean and dedicated storage area. Keeping them in an upright position helps prevent any potential leakage and allows for easy identification and organization.
By properly sealing and labeling the vials, you ensure the integrity and identification of your liquid culture syringes. The airtight seal helps maintain the viability of the mycelium, while the clear labels allow you to easily identify and select the desired strains when needed.
Step 5: Store in the RefrigeratorThe final step in properly storing liquid culture syringes is to place them in the refrigerator. Follow these guidelines to ensure the optimal storage conditions:
- Select a dedicated area: Find a designated space in the refrigerator specifically for storing your liquid culture syringes. This area should be clean, free from potential contaminants, and away from any food items.
- Maintain a consistent temperature: The ideal temperature for storing liquid culture syringes is between 35°F to 45°F (2°C to 7°C). This cool temperature helps preserve the viability of the mycelium for an extended period.
- Prevent exposure to light: Light can have a detrimental effect on the mycelium, causing it to deteriorate. Store the vials in a dark area of the refrigerator or place them in a light-proof container to protect them from any potential light exposure.
- Avoid excessive movement: Limit any unnecessary movement or shaking of the vials while in storage. This helps maintain the integrity of the mycelium and prevents any potential disturbance or disruption.
- Regularly check for contamination: While in storage, periodically inspect the vials for any signs of contamination, such as discoloration, unusual growth, or foul odors. If any vials show signs of contamination, discard them immediately to prevent further spread.
By storing your liquid culture syringes in a refrigerator with the proper conditions, you can extend the shelf life and maintain the viability of the mycelium. This ensures that your liquid culture syringes will be ready for use whenever you need them in your mushroom cultivation projects.
Read more: How To Store Mushroom Spore Syringes
Conclusion
Proper storage of liquid culture syringes is critical for maintaining the viability and effectiveness of the mycelium within. By following the steps outlined in this guide, you can ensure the longevity of your liquid culture syringes, increasing your chances of successful mushroom cultivation.
Starting with a clean and sterile workspace, you can minimize the risk of contamination. Properly preparing the storage vials creates an environment suitable for the mycelium, while labeling them helps with organization and identification.
When filling the vials with liquid culture, maintaining sterility ensures the integrity of the mycelium remains intact. Sealing the vials tightly and labeling them properly allows for easy identification and prevents any potential leakage or mix-ups.
Finally, storing the vials in the refrigerator at the appropriate temperature, away from light and excessive movement, helps preserve the viability of the mycelium. Regularly checking for contamination and discarding any affected vials is essential for preventing the spread of contaminants.
By implementing these storage practices, you can maintain a ready-to-use source of liquid culture syringes for your mushroom cultivation projects, increasing your chances of successful colonization and growth.
Remember, storing liquid culture syringes properly is just one piece of the puzzle in successful mushroom cultivation. It’s also important to follow proper inoculation techniques, provide suitable growing conditions, and monitor for optimal growth. With knowledge, patience, and diligence, you can enjoy the rewards of a bountiful and successful mushroom harvest.
Frequently Asked Questions about How To Store Liquid Culture Syringes
Was this page helpful?
At Storables.com, we guarantee accurate and reliable information. Our content, validated by Expert Board Contributors, is crafted following stringent Editorial Policies. We're committed to providing you with well-researched, expert-backed insights for all your informational needs.


0 thoughts on “How To Store Liquid Culture Syringes”