Articles
How To Polish Cultured Marble Countertops
Modified: August 27, 2024
Learn how to polish cultured marble countertops in this informative article. Discover the best techniques and products for achieving a shiny, pristine finish.
(Many of the links in this article redirect to a specific reviewed product. Your purchase of these products through affiliate links helps to generate commission for Storables.com, at no extra cost. Learn more)
Introduction
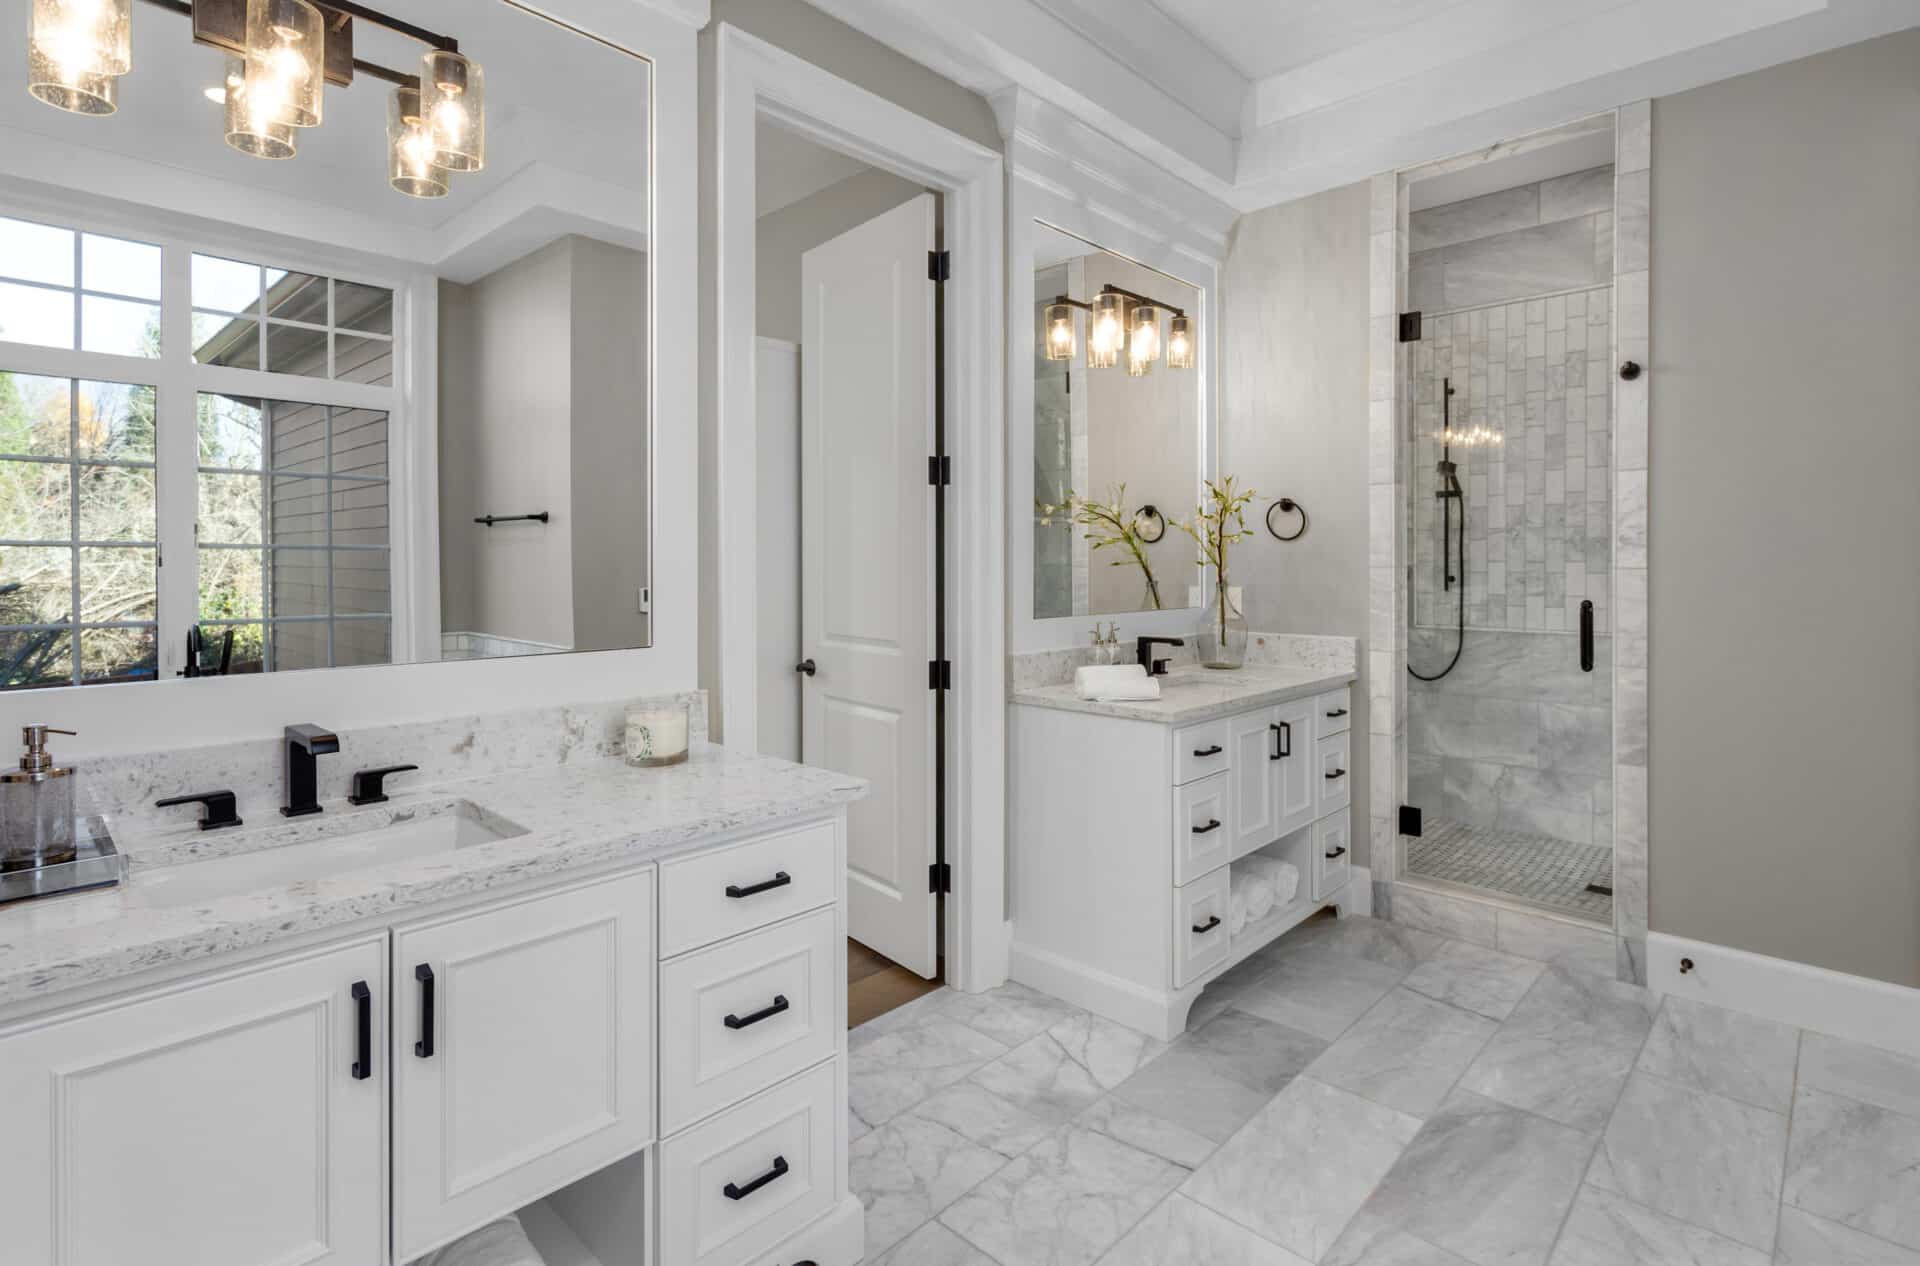
Welcome to the world of cultured marble countertops! These beautiful surfaces have become a popular choice for many homeowners due to their durability, affordability, and versatility. Whether you have just installed new cultured marble countertops or you’ve had them for years, proper maintenance is essential in keeping them looking their best.
In this article, we will guide you through the process of polishing your cultured marble countertops to restore their original shine. We will provide step-by-step instructions and insider tips to ensure a successful and satisfying outcome. So, let’s dive in and learn how to transform your countertops from dull to dazzling!
Before we begin, it’s important to note that the process of polishing cultured marble countertops may vary depending on the specific product and manufacturer’s recommendations. Therefore, it’s always a good idea to consult the care and maintenance guidelines provided by your countertop supplier before proceeding.
Now that you’re ready, let’s explore the world of cultured marble countertops and discover the secrets to achieving a high-quality polish that will make your countertops the envy of all!
Key Takeaways:
- Cultured marble countertops offer durability, affordability, and versatility, making them a popular choice for homeowners. Proper maintenance, including cleaning, stain removal, and polishing, can restore their shine and elegance.
- The process of polishing cultured marble countertops involves preparing the work area, gathering the necessary tools, cleaning, sanding, applying polish, and buffing. Regular maintenance, such as prompt spill cleanup and avoiding abrasive materials, is essential for preserving the polished finish.
Read more: What Are Marble Countertops
Understanding Cultured Marble Countertops
Cultured marble countertops are a blend of crushed natural stone, usually marble, and a synthetic polymer resin. This combination creates a durable and versatile material that mimics the appearance of natural marble but at a fraction of the cost. The result is a beautiful and affordable option for homeowners looking to add a touch of elegance to their kitchens or bathrooms.
One of the main advantages of cultured marble countertops is their versatility in terms of colors and patterns. The manufacturing process allows for a wide range of customization options, enabling homeowners to choose from a variety of hues and veining patterns that can match any interior design style. Whether you prefer a classic white marble look or a bold and striking color, cultured marble countertops offer endless possibilities to elevate the aesthetic appeal of your space.
In addition to their aesthetic appeal, cultured marble countertops are also known for their durability. The combination of natural stone and resin creates a resilient surface that is resistant to scratches, stains, and heat. This makes them a practical choice for high-traffic areas such as kitchens and bathrooms where spills and frequent use are common.
Maintenance-wise, cultured marble countertops are relatively easy to care for. Regular cleaning with mild soap and water is usually sufficient to keep them in good condition. However, over time, the surface may become dull and lose its shine. This is where the process of polishing comes into play.
Polishing cultured marble countertops not only restores their luster but also helps to hide minor scratches and imperfections. The process involves using specific materials and techniques to gently buff the surface, removing any dullness and revealing the natural beauty of the material.
Now that we have a better understanding of what cultured marble countertops are and their advantages, let’s move on to the next step – preparing the work area.
Preparing the Work Area
Before you begin the process of polishing your cultured marble countertops, it’s important to properly prepare the work area. Taking the time to do this will ensure a smooth and efficient polishing process, as well as protect the surrounding surfaces and minimize any potential damage.
Here are some key steps to follow when preparing the work area:
- Clean and clear the countertops: Start by removing any objects, appliances, or items from the countertops. This will give you a clear space to work with and prevent any accidental damage during the polishing process. Additionally, thoroughly clean the countertops with a mild soap and water solution to remove any dirt, debris, or grease.
- Protect the surrounding areas: Use painter’s tape to outline the edges of the countertops, protecting the adjoining surfaces such as cabinets or walls from any accidental polishing residue or scratches. Cover the floors and cabinets with drop cloths or plastic sheets to further protect them from any potential damage.
- Ventilate the area: Polishing products may emit fumes, so make sure the work area is well-ventilated. Open windows and doors, or use fans to ensure proper airflow throughout the space. This will help minimize any potential inhalation of fumes and ensure a comfortable working environment.
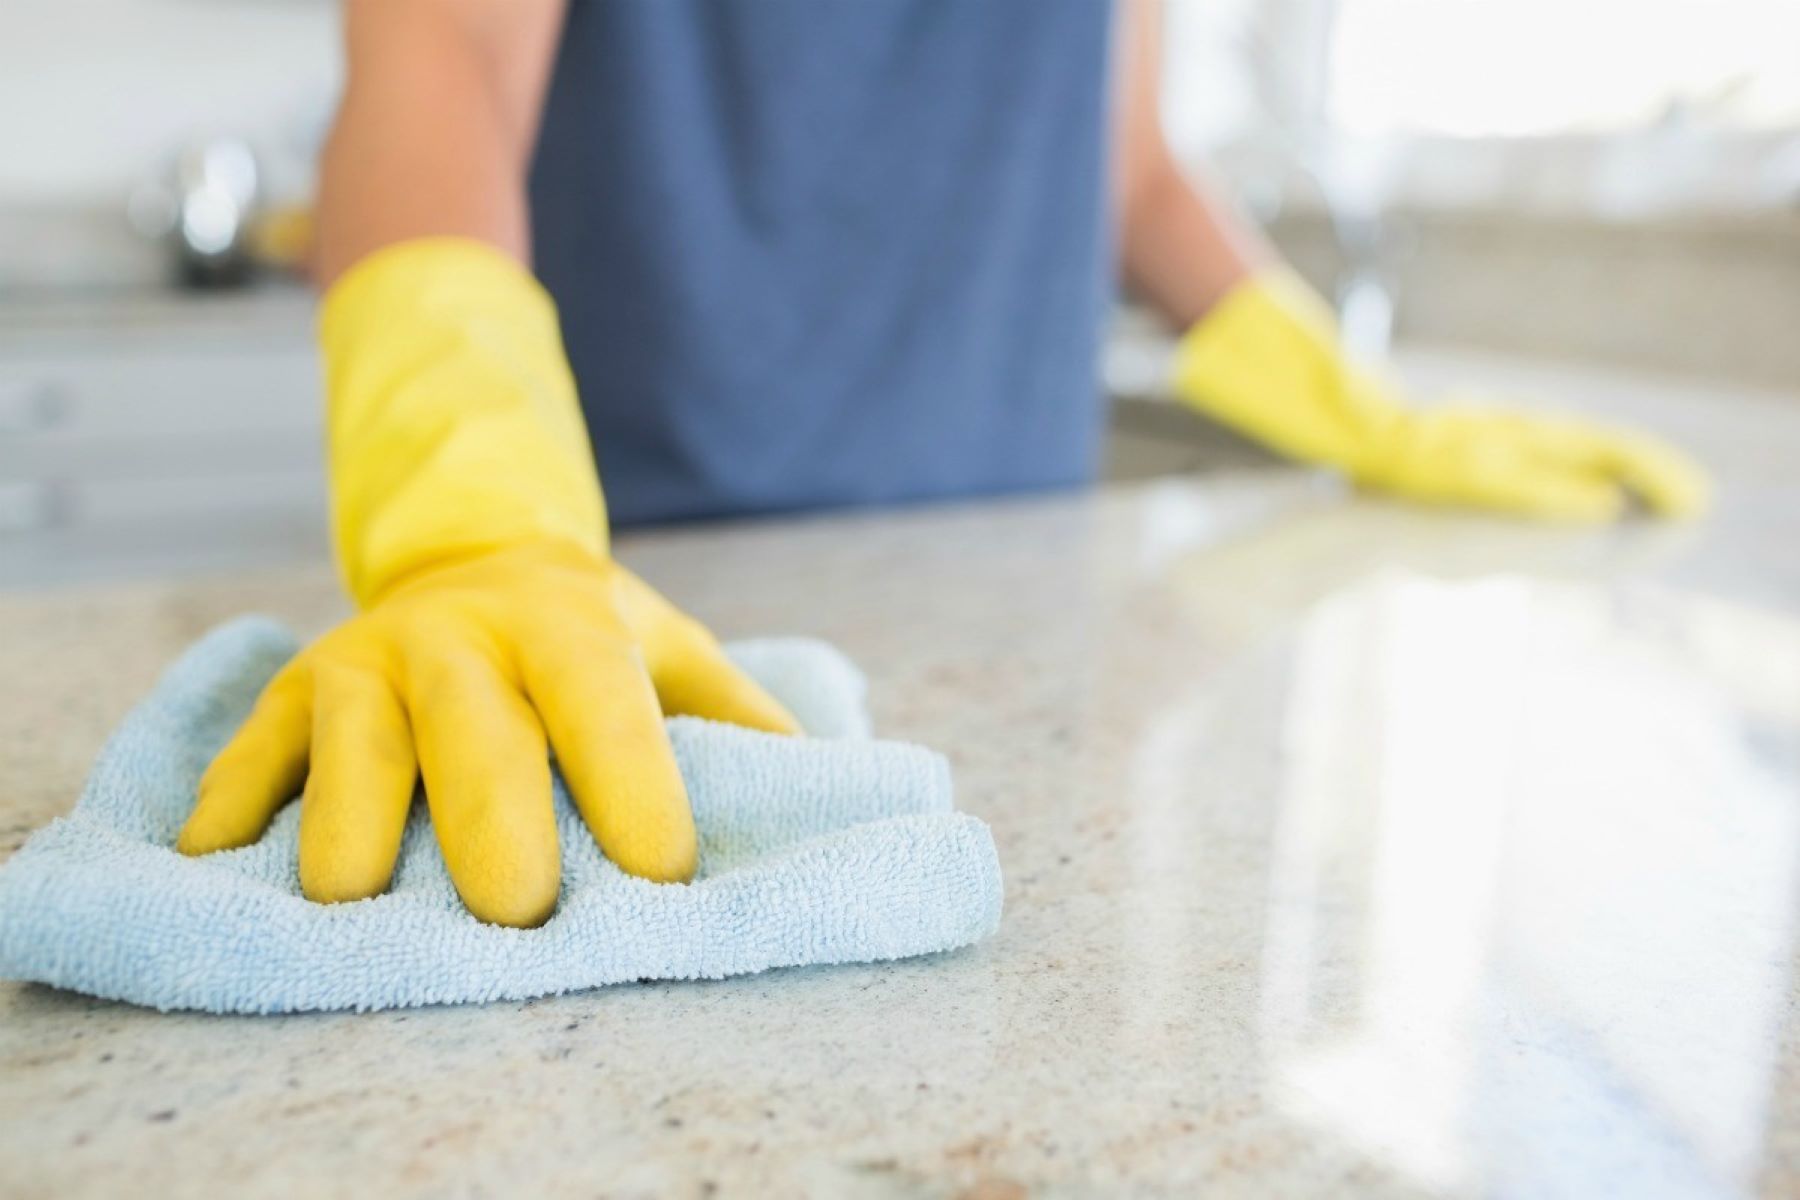
- Wear appropriate protective gear: Protect yourself by wearing rubber gloves and safety goggles. This will shield your skin and eyes from any potential irritation or exposure to chemical products. Additionally, it’s advisable to wear old clothing or an apron to protect your clothes from any accidental spills or splatters.
By following these simple steps, you will create a safe and organized work area that will facilitate the polishing process and protect your surroundings. Now that everything is in place, let’s move on to the next step – gathering the necessary tools and materials.
Gathering the Necessary Tools and Materials
Before you can begin the process of polishing your cultured marble countertops, it’s important to gather all the necessary tools and materials. Having everything prepared and within reach will ensure a smooth and efficient polishing process.
Here are the essential tools and materials you will need:
- Sanding block or sandpaper: You’ll need a sanding block or sandpaper with different grits to smooth out any scratches or imperfections on the surface of the countertops. It’s recommended to start with a low grit sandpaper (around 220) and gradually work your way up to higher grits for a smooth finish.
- Polishing compound: A good quality polishing compound specifically designed for use on cultured marble countertops is essential. This compound will help restore the shine and luster to the surface. Make sure to choose a polishing compound that is formulated for use on marble or stone surfaces.
- Buffer or polishing machine: To achieve the best results, using a buffer or a polishing machine is highly recommended. These tools will help evenly distribute the polishing compound and ensure a consistent and smooth finish. If you don’t have access to a buffer or polishing machine, you can use a soft microfiber cloth or a lambswool pad instead.
- Soft microfiber cloths: These cloths are perfect for wiping away any excess polishing compound and buffing the surface to a high shine. Make sure to have a few clean and dry microfiber cloths on hand for this step.
- Water: Water will be used throughout the polishing process to wet the surface of the countertops and keep the sanding process smooth. Have a spray bottle filled with clean water within reach.
- Protective gloves and goggles: It’s important to protect yourself during the polishing process. Wear rubber gloves to shield your hands from any chemical irritation and safety goggles to protect your eyes from any potential debris or splatters.
By gathering all these tools and materials before you begin, you’ll be fully equipped to tackle the polishing process and achieve the best results. Now that you have everything in place, it’s time to move on to the next step – cleaning the countertops!
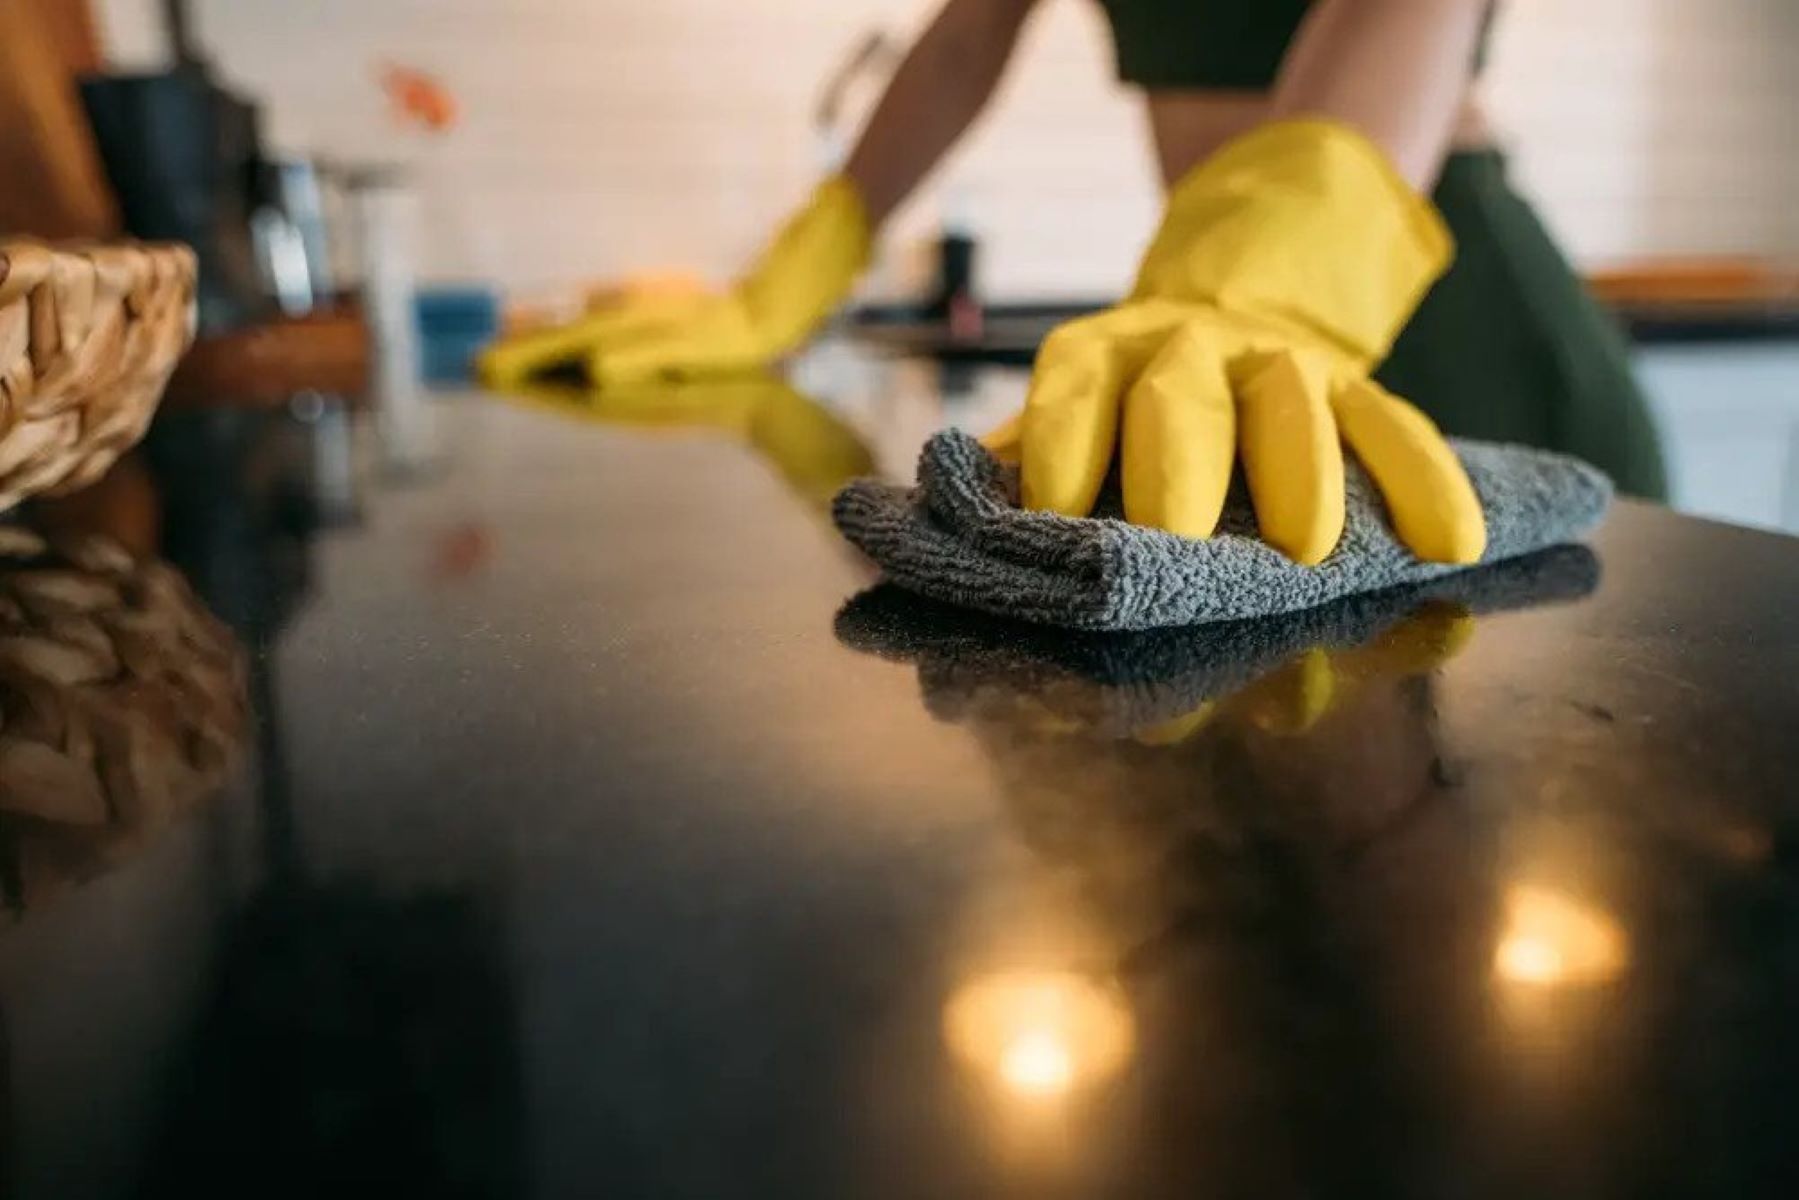
Cleaning the Countertops
Before you can start polishing your cultured marble countertops, it’s crucial to ensure that they are clean and free of any dirt, debris, or stains. Cleaning the countertops thoroughly will help to achieve better polishing results and restore the natural shine of the surface.
Here’s a step-by-step guide on how to clean your countertops:
- Remove any loose debris: Begin by removing any loose dust, crumbs, or debris from the countertops. Use a soft brush or a damp cloth to gently sweep away the dirt. This will prevent any scratching or scratching the surface during the cleaning process.
- Prepare a mild cleaning solution: Next, prepare a mild cleaning solution by mixing a few drops of dish soap with warm water in a clean bucket or basin. Avoid using harsh or abrasive cleaners, as they can damage the surface of the cultured marble.
- Apply and scrub the cleaning solution: Dip a soft cloth or sponge into the soapy water and wring out the excess moisture. Gently scrub the countertops in a circular motion, focusing on any areas that are particularly dirty or stained. Be sure to pay attention to the edges and corners of the countertops as well.
- Rinse with clean water: Once you’ve thoroughly cleaned the countertops, rinse off the cleaning solution with clean water. You can use a spray bottle filled with water or a clean damp cloth to wipe away any residue.
- Dry with a microfiber cloth: Finally, use a soft microfiber cloth to dry the countertops completely. This will prevent any streaking or water spots from forming on the surface. Make sure to dry all the corners and edges as well.
Following these steps will help you achieve a clean and debris-free surface, ready for the polishing process. It’s important to note that regular cleaning of your cultured marble countertops is important to maintain their beauty and integrity. Avoid using abrasive cleaners or scrubbing pads, as they can scratch or damage the surface.
Now that your countertops are clean and dry, we can move on to the next step – removing stains and scratches, if there are any.
Read more: What Is Cultured Marble Vanity Tops
Removing Stains and Scratches
If your cultured marble countertops have any stubborn stains or scratches, it’s essential to address them before proceeding with the polishing process. By taking the time to remove stains and minimize the appearance of scratches, you’ll achieve a smoother and more polished finish.
Here’s a step-by-step guide on how to remove stains and scratches from your countertops:
- Identify the type of stain: Different types of stains require different treatment methods. Before attempting to remove a stain, determine what caused it and consult the appropriate stain removal technique. Common stains on cultured marble countertops include oil-based stains, water stains, and rust stains.
- Prepare a stain removal solution: Once you’ve identified the type of stain, prepare a stain removal solution accordingly. For oil-based stains, use a mixture of baking soda and water to form a paste. For water and rust stains, use a specialized stain remover recommended for use on marble surfaces. Carefully follow the manufacturer’s instructions when using any stain removal product.
- Apply the stain removal solution: Apply the stain removal solution to the affected area on the countertop. Use a soft cloth or sponge to gently rub the solution into the stain. Be sure to cover the entire stain and allow the solution to sit for the recommended amount of time.
- Gently scrub and rinse: After allowing the stain removal solution to work its magic, use a soft cloth or sponge to gently scrub the stained area. Be careful not to scrub too vigorously, as this can further damage the surface. Once you’ve scrubbed the area, rinse it thoroughly with clean water.
- Dry the countertop: After removing the stain, use a soft cloth or towel to dry the countertop thoroughly. This will prevent any water spots or streaking from occurring.
- Address minor scratches: For minor scratches on the surface of your cultured marble countertops, you can use a fine-grit sanding block or sandpaper to gently buff them out. Start with a low grit (around 220) and gradually work your way up to a higher grit (e.g., 400, 600) for a smooth finish. Remember to sand in straight motions and not in circular motions to avoid creating noticeable swirl marks.
By following these steps, you can effectively remove stains and minimize the appearance of scratches on your cultured marble countertops. However, it’s important to note that deep scratches or more severe damage may require professional repair or restoration services.
Now that you’ve addressed any stains or scratches, it’s time to move on to the next step – sanding the countertops in preparation for polishing.
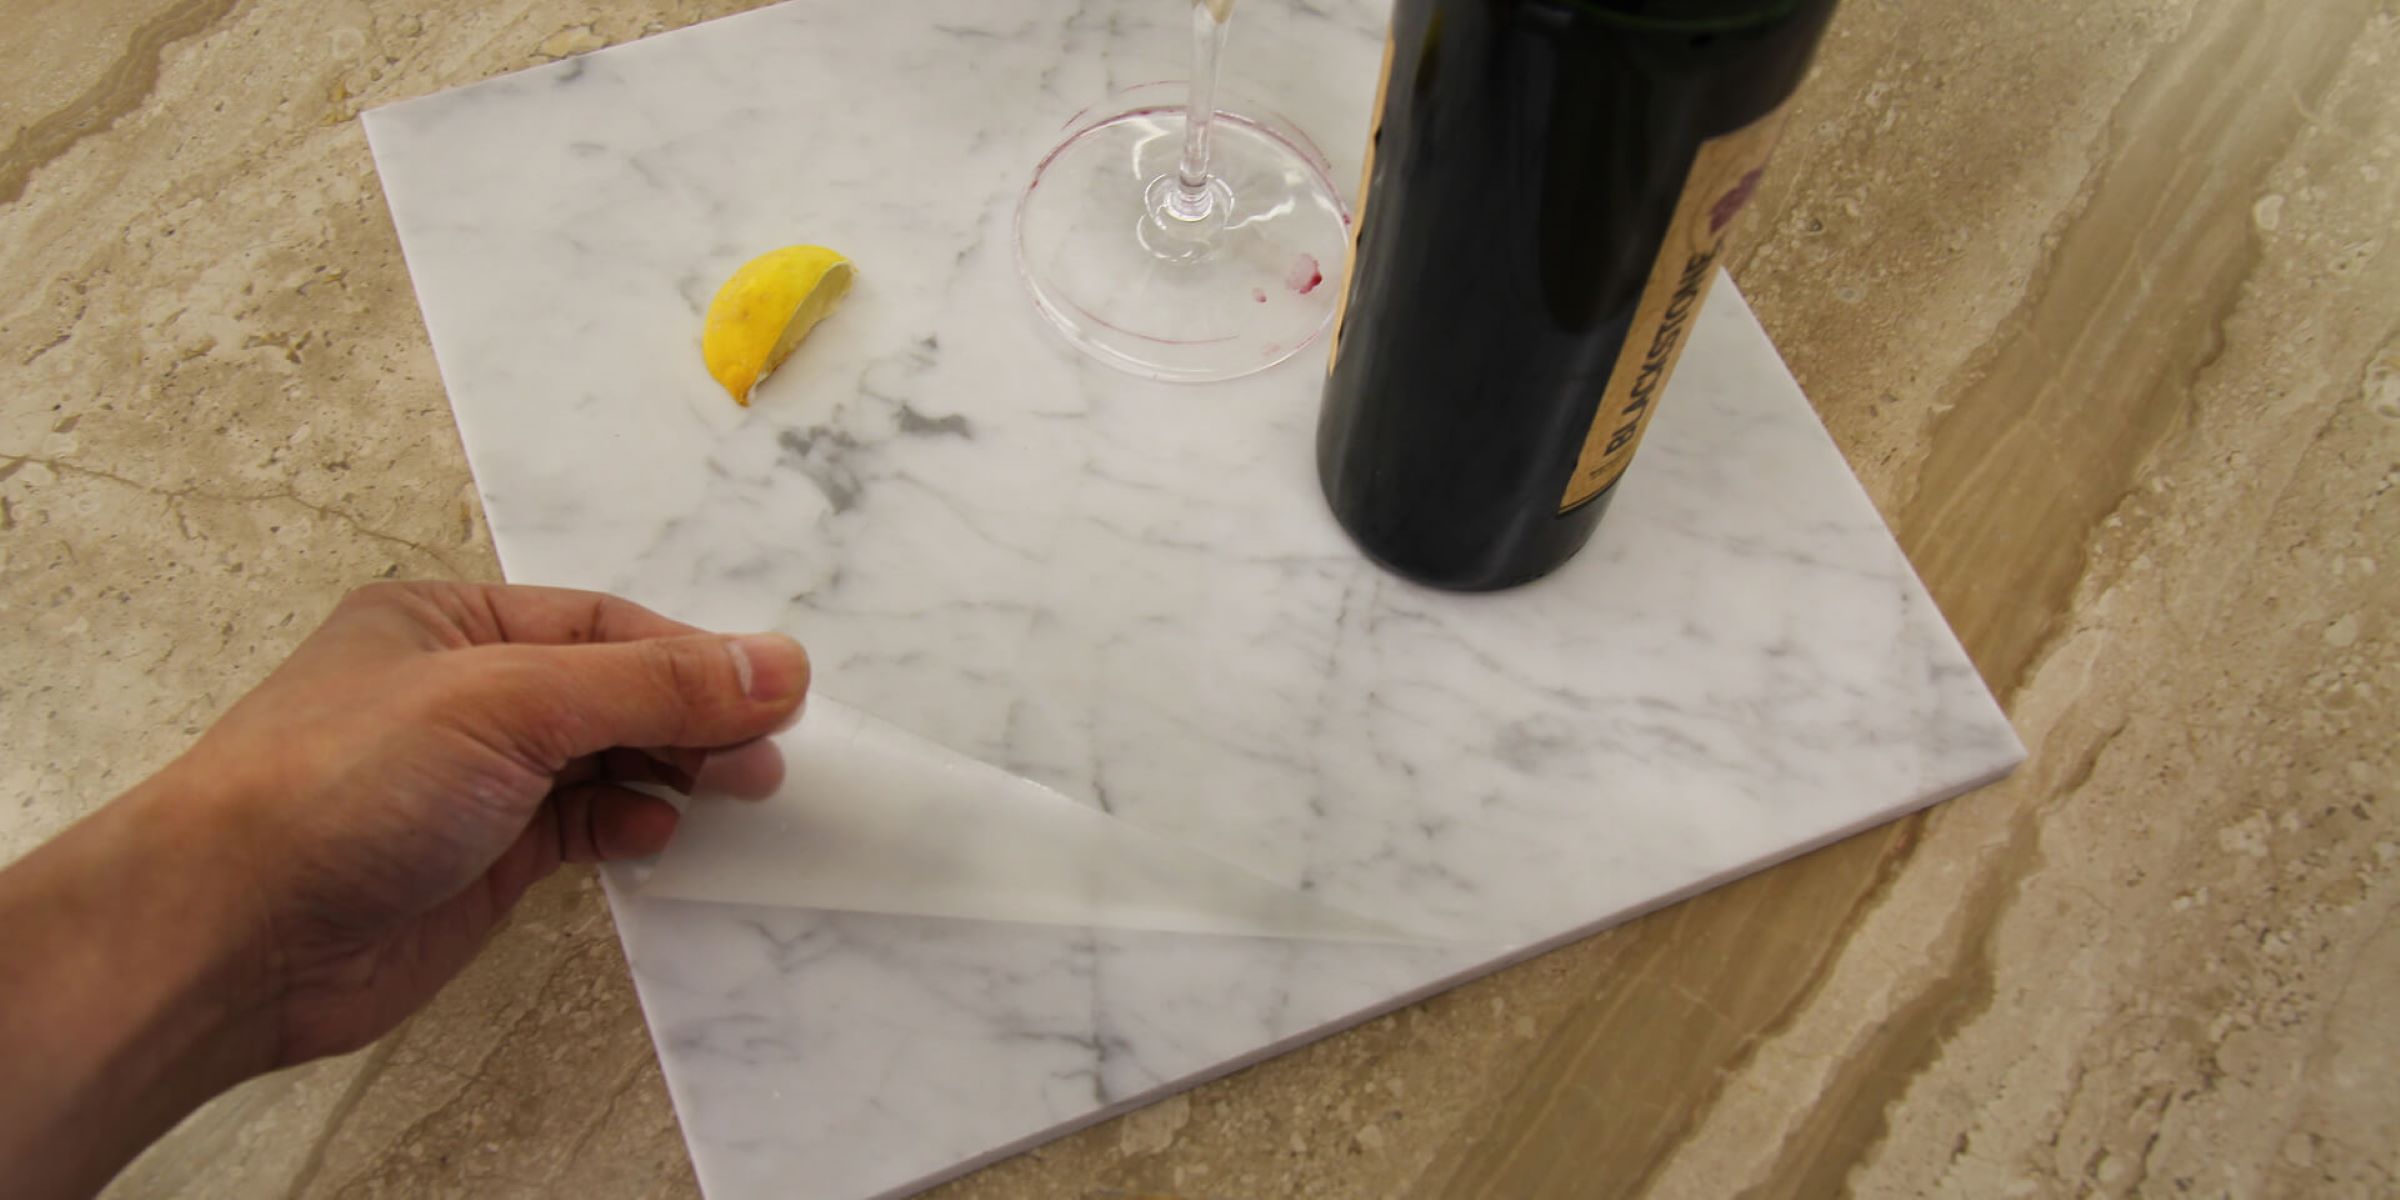
Use a mild, non-abrasive cleaner and a soft cloth to polish cultured marble countertops. Avoid harsh chemicals or abrasive sponges to prevent damage.
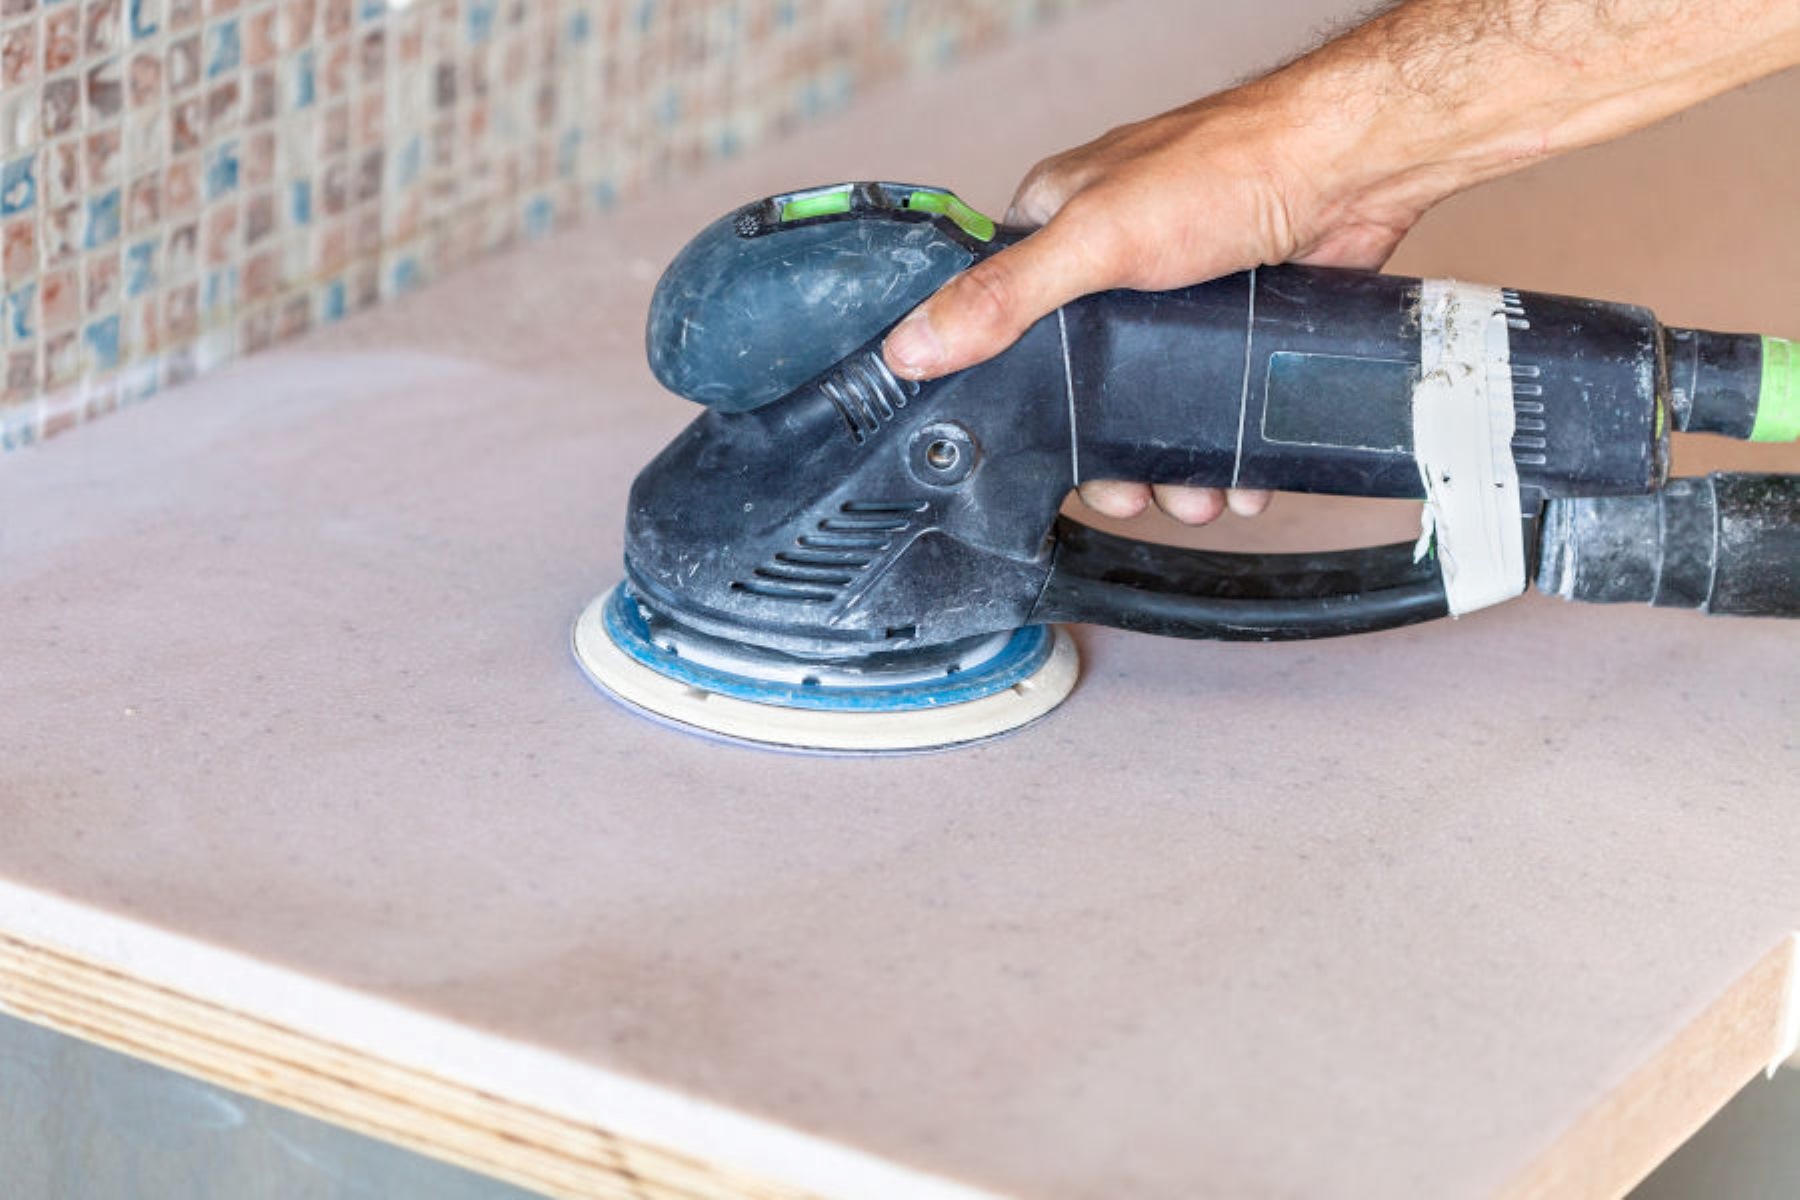
Sanding the Countertops
Once you have cleaned the cultured marble countertops and addressed any stains or minor scratches, the next step in the polishing process is sanding. Sanding helps to smooth out the surface and prepare it for the polishing compound, ensuring a more even and consistent finish.
Here’s a step-by-step guide on how to sand your countertops:
- Prepare the sanding block or sandpaper: If using a sanding block, make sure it is clean and free of any debris. If using sandpaper, choose the appropriate grit for the level of sanding required. Start with a lower grit (around 220) and gradually work your way up to higher grits for a smoother finish (e.g., 400, 600).
- Wet the countertop surface: Before you begin sanding, wet the surface of the countertops with clean water. This will help lubricate the sanding process and prevent dust buildup. You can use a spray bottle or a damp sponge to moisten the surface.
- Sand in straight motions: With the wet surface, start sanding the countertops using the sanding block or sandpaper. It’s important to sand in straight motions, following the grain of the marble, and apply even pressure. Avoid sanding in circular motions, as this can create visible swirl marks on the surface.
- Check your progress: Periodically stop and wipe away any debris or dust with a damp cloth to assess your progress. This will give you a better idea of how much more sanding is needed to achieve a smooth and even surface. Continue sanding until you are satisfied with the results.
- Dry and clean the countertops: Once you have finished sanding, dry the countertops with a clean and dry cloth or towel. Remove any remaining dust or residue from the sanding process using a damp cloth or sponge. Ensure that the surface is clean and dry before moving on to the next step.
Remember, the purpose of sanding is to create a smooth and uniform surface for the polishing process. Take your time and be patient during this step to achieve the desired results. Ensure that you have properly cleaned any debris or dust from the sanding process to prevent it from interfering with the polishing compound.
Now that you have successfully sanded the countertops, it’s time to move on to the next exciting step – applying the polish!
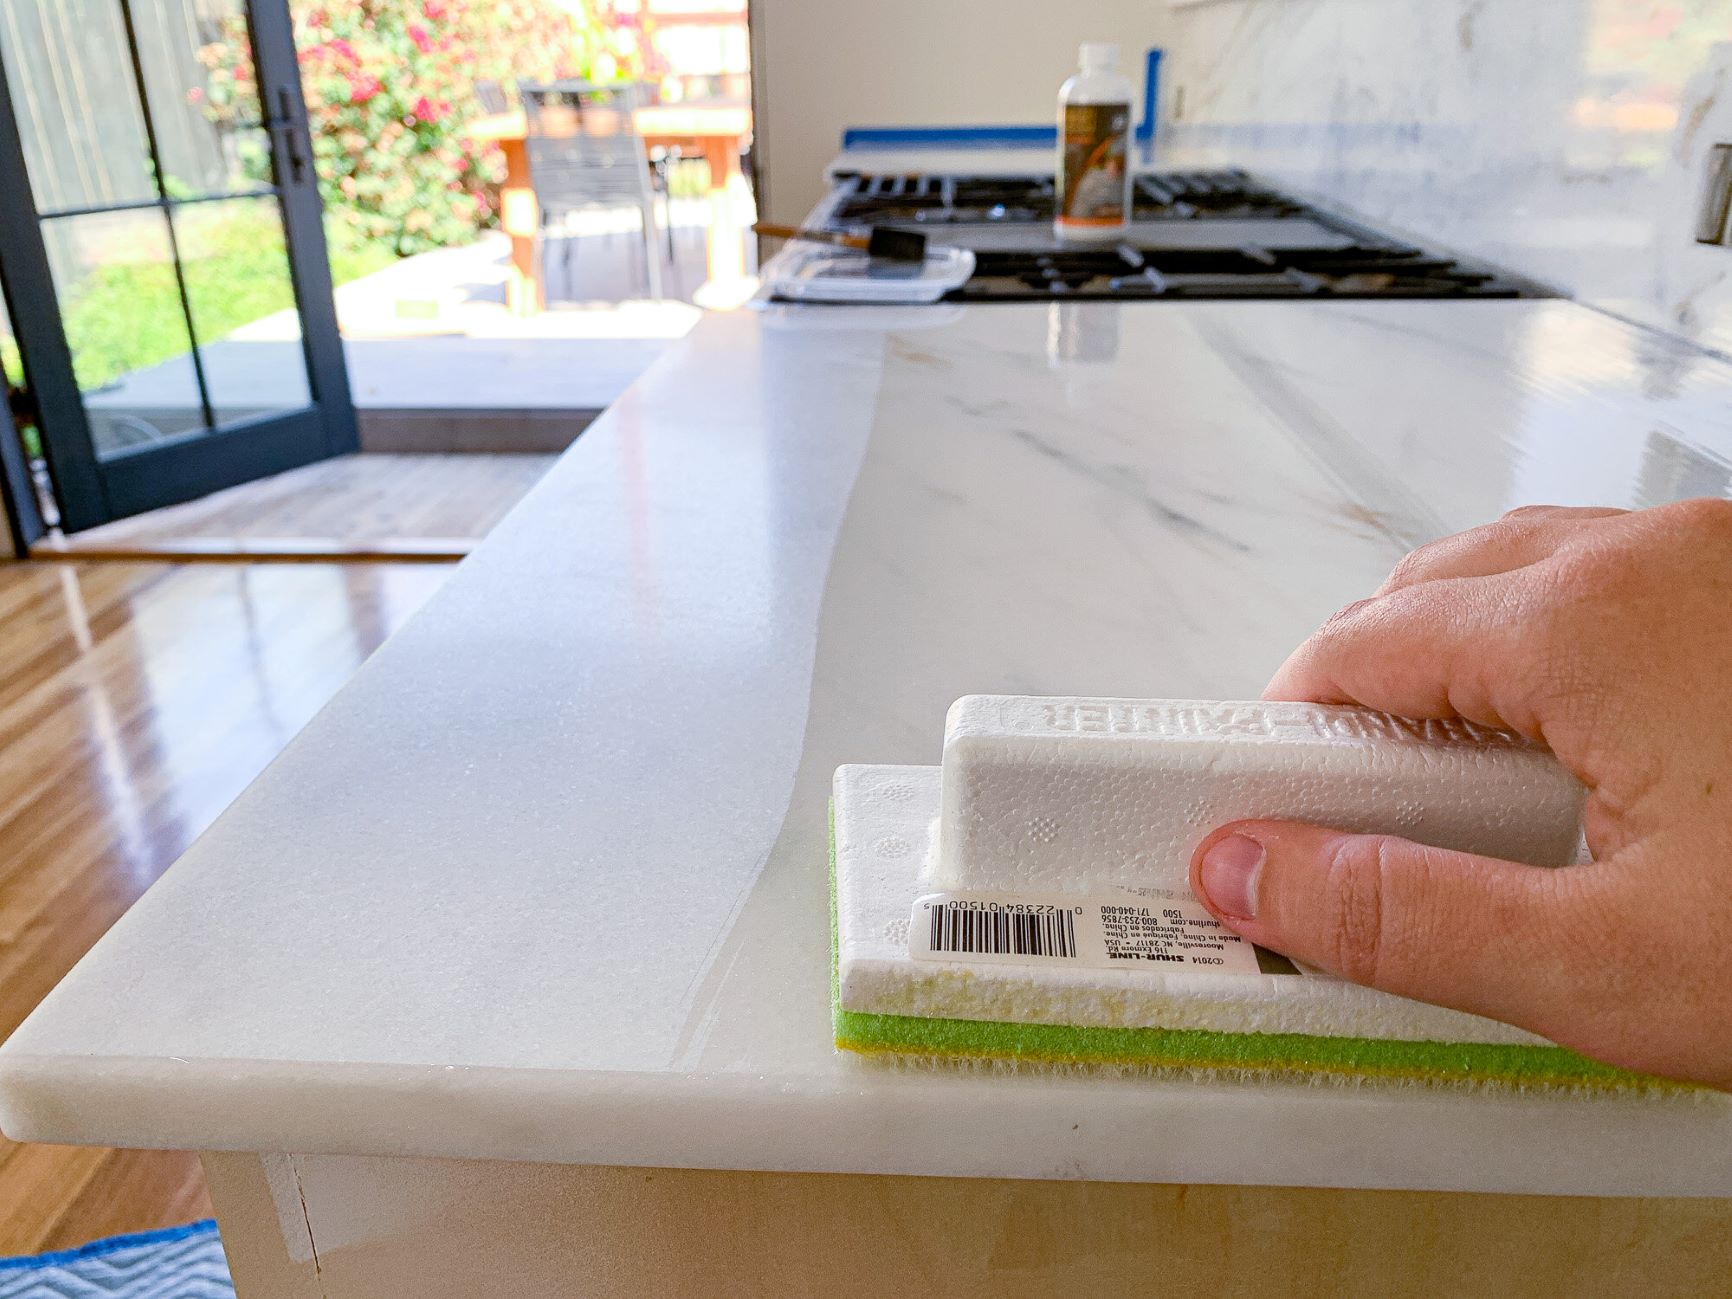
Applying the Polish
Now that you have prepared and sanded your cultured marble countertops, it’s time to apply the polish and bring back their natural shine. Using a high-quality polishing compound specifically designed for use on marble surfaces, you can achieve a lustrous and flawless finish.
Here’s a step-by-step guide on how to apply the polish to your countertops:
- Read and follow the instructions: It’s important to carefully read and follow the instructions provided with the polishing compound you are using. Different products may have specific application techniques and curing times. Ensure that you understand and adhere to these instructions for the best results.
- Apply the polish compound: Apply a small amount of polish compound onto the surface of the countertop. You can use a clean, soft cloth or a lambswool pad attached to a buffer or polishing machine. Start with a small section of the countertop and spread the polish evenly in circular motions. Work in manageable sections to ensure thorough coverage.
- Buff the polish compound: Once the polish compound is applied, use the buffer or polishing machine to buff the surface in circular motions. This will help distribute the polish evenly and activate its polishing properties. If you don’t have access to a buffer or polishing machine, you can use a clean, dry microfiber cloth to buff the surface manually.
- Work methodically: Continue applying and buffing the polish compound section by section until you have covered the entire countertop. Take your time and ensure consistent coverage and pressure during the buffing process. Pay extra attention to any areas that may require more attention, such as scratches or dull spots.
- Check for evenness: After buffing the polish compound, step back and inspect the countertop for any unevenness or missed spots. If necessary, reapply the polish compound on those areas and buff accordingly to achieve a uniform finish. It’s crucial to maintain consistency throughout the polishing process.
Applying the polish compound is a crucial step in restoring the shine and luster of your cultured marble countertops. Take your time and ensure thorough coverage, paying attention to any areas that may require extra attention. Following these steps will help you achieve a beautiful and radiant finish.
Now that you’ve successfully applied the polish compound, it’s time to move on to the next step – buffing and adding those finishing touches!
Buffing and Finishing Touches
After applying the polish compound to your cultured marble countertops, it’s time to bring out their shiny potential by buffing the surface. This step will refine the polish, removing any residue and enhancing the overall shine of the countertops.
Here’s a step-by-step guide on how to properly buff your countertops:
- Clean the surface: Before starting the buffing process, ensure that the countertop surface is clean and free from any residual polish or debris. Use a clean, dry microfiber cloth to wipe away any excess polish, paying attention to the edges and corners.
- Attach a buffing pad: If you’re using a buffer or polishing machine, attach a clean and soft buffing pad to the tool. Make sure the pad is secure and centered to ensure optimal results during the buffing process.
- Buff in circular motions: With the buffer or polishing machine set to a low speed, gently move the pad in circular motions around the countertop surface. Maintain a consistent motion and pressure as you work your way across the countertops. Be sure to cover all areas evenly for a uniform shine.
- Check for streaks or excess polish: While buffing, periodically stop to check for any streaks or areas with excess polish. If you notice any, use a clean microfiber cloth to gently buff away the residue. This step will ensure a flawless and streak-free shine.
- Repeat if necessary: Depending on the desired level of shine, you may need to repeat the buffing process one or two more times. This will help achieve a high-gloss finish and eliminate any remaining dull spots.
Once you’re satisfied with the level of shine and the overall appearance of your cultured marble countertops, take the time to add the finishing touches to enhance their beauty and protect the surface. Consider applying a marble sealer or a protective coating recommended for use on cultured marble surfaces. This will help maintain the shine and protect the countertops from future stains or damage.
Remember, regular maintenance is key to preserving the shine and beauty of your countertops. Clean spills promptly, avoid using harsh or abrasive cleaners, and use cutting boards or hot pads to protect the surface from scratches and heat damage.
Now that you’ve completed the buffing process and added the finishing touches, your cultured marble countertops are ready to shine bright in your kitchen or bathroom! Take a step back and admire the transformation you’ve achieved through the polishing process.
In the next and final step, we’ll discuss some helpful tips for maintaining the polished look of your countertops so that they continue to impress for years to come.
Read more: How To Refinish Cultured Marble Vanity Top
Maintaining the Polished Countertops
Now that you have successfully polished your cultured marble countertops to a radiant shine, it’s important to establish a maintenance routine to keep them looking their best. Proper care and regular maintenance will help preserve the polished finish and extend the lifespan of your countertops.
Here are some helpful tips for maintaining the polished look of your countertops:
- Clean spills promptly: Accidents happen, but it’s crucial to clean up any spills on your countertops promptly. Avoid letting liquid substances, such as acidic juices or harsh cleaning agents, sit on the surface for an extended period of time. Wipe up spills immediately with a soft cloth or sponge.
- Use mild cleaning solutions: When it comes to routine cleaning, use only mild and non-abrasive cleaning solutions. Harsh chemicals or abrasive cleaners can scratch or damage the polished surface. Stick to mild dish soap and warm water or specialized stone cleaners designed for use on marble surfaces.
- Avoid abrasive materials: When cleaning or wiping down the countertops, avoid using rough or abrasive materials such as scouring pads or abrasive sponges. Stick to soft microfiber cloths or non-abrasive sponges to prevent scratches or dulling of the polished finish.
- Use cutting boards and hot pads: To prevent scratches and heat damage, always use cutting boards when slicing or chopping food, and use hot pads or trivets when placing hot cookware or utensils on the countertops. This will help protect the surface from accidental damage.
- Regularly dust and wipe: Incorporate regular dusting and wiping into your cleaning routine. Use a soft, dry cloth to remove dust and debris from the surface. This will help prevent the build-up of dirt and maintain the shine of the countertops.
- Reapply sealant as needed: Depending on the type of cultured marble and the specific sealant used, the countertops may require periodic reapplication of sealant. Follow the manufacturer’s instructions and recommendations to maintain the protective layer and enhance the longevity of the polished finish.
By following these maintenance tips, you can ensure that your polished cultured marble countertops retain their beauty and shine for years to come. Regular cleaning and gentle care will help prevent damage and maintain the elegance of your countertops.
Remember, each countertop may have unique care and maintenance requirements. Always refer to the guidelines provided by the manufacturer or supplier for specific instructions. By taking good care of your polished countertops, you’ll continue to enjoy their stunning appearance in your kitchen or bathroom.
Congratulations on successfully polishing your cultured marble countertops and learning how to maintain their polished look!
With proper care and maintenance, your countertops will be a focal point in your home for many years to come.
Enjoy the beauty and shine that your polished cultured marble countertops bring to your space!
For any further questions or assistance, feel free to reach out and enjoy the beauty of your polished countertops!
Conclusion
Congratulations on completing the journey to polish your cultured marble countertops! By following the steps outlined in this article, you have learned how to bring back the shine and luster to your countertops, transforming them into stunning focal points in your kitchen or bathroom.
Understanding the nature of cultured marble countertops and preparing the work area were essential first steps. Gathering the necessary tools and materials helped to ensure a smooth and efficient polishing process. From there, you learned how to clean the countertops, remove stains and scratches, and fully sand the surface in preparation for polishing.
Applying the polish and buffing the countertops were the key steps that brought back the brilliant shine, enhancing their beauty and elegance. Finally, we discussed the importance of maintaining the polished look through proper care and regular maintenance.
Remember, each cultured marble countertop may have unique characteristics, so it’s crucial to consult the manufacturer’s guidelines for specific care and maintenance instructions. Regular cleaning, prompt spill cleanup, and avoiding abrasive materials are integral to preserving the polished finish of your countertops.
By investing time and effort in the polishing process and committing to proper maintenance, you can enjoy the beauty and durability of your cultured marble countertops for years to come.
We hope that this article has provided you with the knowledge and guidance you need to successfully polish your countertops and keep them looking their best. Enjoy the stunning transformation and take pride in the renewed appearance of your cultured marble countertops!
If you have any further questions or need assistance, don’t hesitate to reach out. Happy polishing!
Frequently Asked Questions about How To Polish Cultured Marble Countertops
Was this page helpful?
At Storables.com, we guarantee accurate and reliable information. Our content, validated by Expert Board Contributors, is crafted following stringent Editorial Policies. We're committed to providing you with well-researched, expert-backed insights for all your informational needs.


0 thoughts on “How To Polish Cultured Marble Countertops”