Articles
How To Store Mussels In Fridge Overnight
Modified: August 16, 2024
Learn how to store mussels articles in the fridge overnight for the freshest and most flavorful results. Easy step-by-step guide with tips and tricks.
(Many of the links in this article redirect to a specific reviewed product. Your purchase of these products through affiliate links helps to generate commission for Storables.com, at no extra cost. Learn more)
Introduction
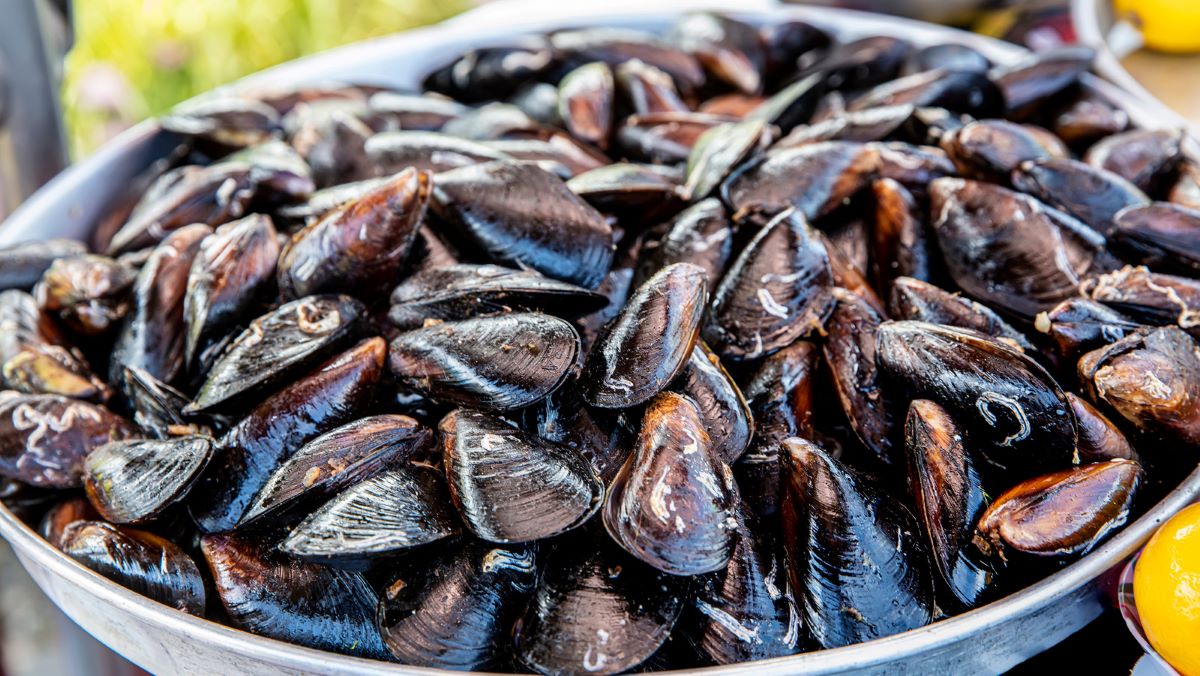
When it comes to seafood, mussels are a delicious and versatile option that can be enjoyed in various dishes. Whether you plan to cook a savory seafood pasta or indulge in steamed mussels with a flavorful broth, it’s important to start with fresh ingredients. However, sometimes you may not be able to use the mussels immediately after purchasing them. In such cases, storing mussels properly in the fridge overnight is crucial to maintain their freshness and quality.
In this article, we will walk you through the step-by-step process of storing mussels in the fridge overnight. By following these simple guidelines, you can ensure that your mussels remain in the best condition until you are ready to prepare and enjoy them.
Key Takeaways:
- Properly storing mussels in the fridge overnight ensures their freshness. From choosing fresh mussels to checking their condition before cooking, these steps guarantee high-quality seafood for your culinary creations.
- Cleaning, sorting, and storing mussels in a clean container with a damp cloth or paper towels maintains their moisture and quality. Checking for freshness before cooking ensures safe and flavorful seafood dishes.
Read more: How To Store Cooked Mussels In Fridge
Choosing and Buying Fresh Mussels
Before diving into the storage process, it’s essential to select fresh mussels from a reputable source. Here are a few tips to help you choose and buy the best mussels:
- Look for live mussels: Choose mussels that are alive and tightly closed. If a mussel is open, tap it gently on the counter. If it closes, it is still alive and safe to purchase. Discard any mussels that remain open.
- Examine the shells: The shells of fresh mussels should be shiny, smooth, and without any cracks or chips. Avoid mussels with broken shells, as they may be dead or have spoiled meat.
- Fresh ocean smell: Take a whiff of the mussels. Fresh mussels should have a pleasant, slightly salty smell reminiscent of the ocean. If they have a strong fishy or ammonia-like odor, it could indicate that they are not fresh.
- Buy from trusted sources: Purchase mussels from reputable seafood markets or grocery stores that have a high turnover. This ensures that you are getting the freshest mussels available.
Remember, it’s best to buy mussels on the day you plan to use them. However, if you aren’t able to cook them immediately, follow the steps below to properly store them in the fridge overnight.
Cleaning and Prepping Mussels
Before storing mussels in the fridge overnight, it’s crucial to clean and prep them properly. This ensures that any dirt or debris is removed and that the mussels are in the best condition for storage. Here’s how you can clean and prep mussels:
- Inspect the mussels: Examine each mussel carefully. Discard any mussels that are cracked, broken, or already open and do not close when tapped.
- Remove the beards: Mussels have a string-like strand called a “beard” that helps them cling to surfaces. To remove the beards, grasp them firmly between your thumb and forefinger and tug them away from the shell in a strong, downward motion. Discard the beards.
- Rinse the mussels: Rinse the mussels thoroughly under cold running water. Use your hands or a brush to gently scrub away any dirt, sand, or debris on the shells. This step helps to remove any surface impurities and ensures cleaner mussels.
- Soak in cold water (optional): Some chefs recommend soaking mussels in a bowl of cold water for about 20-30 minutes to help purge any remaining grit. This step is optional but can be beneficial if you want to ensure cleaner mussels.
- Drain and dry: Once the mussels are cleaned, drain them well and pat them dry with a clean kitchen towel or paper towels. Removing excess moisture from the mussels helps to prevent them from becoming waterlogged and losing their freshness.
Now that your mussels are clean and prepped, it’s time to move on to storing them in the fridge overnight. Follow the steps below for proper storage.
Storing Mussels in the Fridge Overnight
Properly storing your mussels in the fridge overnight is crucial to maintain their freshness and quality. Here is a step-by-step guide on how to store mussels in the fridge:
- Step 1: Remove Mussels from Packaging
- Step 2: Rinse Mussels Properly
- Step 3: Sort and Discard Any Clams or Mussels
- Step 4: Store Mussels in a Container
- Step 5: Cover Mussels with a Damp Cloth or Paper Towels
- Step 6: Store Mussels in the Fridge
- Step 7: Check for Freshness Before Cooking
Take the mussels out of any packaging or bags they came in. It is best to store them in a clean container to prevent any cross-contamination or odors from affecting their flavor.
If you haven’t already rinsed and cleaned the mussels, give them a quick rinse under cold running water to remove any remaining dirt or debris. This step helps to ensure that your mussels are as clean as possible.
Sort through the mussels and discard any that are already open or cracked. Additionally, discard any clams or mussels that do not close when tapped, as they may not be alive and safe to consume.
Place the cleaned mussels in a container with a lid. It’s best to use a shallow container that allows air circulation to prevent moisture buildup and maintain the mussels’ freshness.
To help retain moisture and prevent the mussels from drying out, cover them with a damp cloth or paper towels. This extra layer helps to maintain the desired humidity levels for the mussels.
Place the container of mussels in the refrigerator. Ideally, store them at a temperature between 32°F (0°C) and 40°F (4°C). Avoid placing them near strong odors or foods that can easily absorb odors.
Before using the mussels, it’s important to check their freshness. Live mussels will have tightly closed shells. If any mussels are open, tap them gently on the counter. If they close, they are still alive and safe to consume. If they remain open, discard them.
By following these steps, you can ensure that your mussels remain fresh and of high quality when stored in the fridge overnight. Now you can enjoy them in your favorite seafood recipes without worrying about loss of flavor or spoilage.
Step 1: Remove Mussels from Packaging
The first step in storing mussels in the fridge overnight is to remove them from any packaging they may have come in. Most mussels are typically sold in mesh bags or plastic containers, which may not be the ideal storage environment for them.
Take a moment to inspect the packaging and make sure there are no broken shells or mussels that have already opened. Discard any mussels that are damaged or have opened shells, as they may not be safe to consume.
Once you’ve checked the packaging, carefully transfer the mussels to a clean container. It’s best to use a shallow container with a lid, as this allows for proper air circulation and helps to prevent moisture buildup.
By removing the mussels from their original packaging, you can ensure better control over their storage conditions and minimize the risk of cross-contamination or odors affecting their flavor. It also allows you to inspect and sort the mussels before storing them in the fridge.
Remember, freshness is key when it comes to seafood, and proper storage practices play a crucial role in maintaining the quality of your mussels. So, take the time to remove them from their packaging and set them up for success in their new storage container in the fridge.
Read more: How To Store Mussels And Clams
Step 2: Rinse Mussels Properly
After removing the mussels from their packaging, it’s important to give them a thorough rinse under cold running water. This step helps to remove any surface impurities such as dirt, sand, or debris that may be present on the shells.
To rinse the mussels properly, follow these simple steps:
- Hold the mussels under cold running water: Place the mussels in a colander or strainer and hold them under cold running water. Ensure that the water is running gently, as high water pressure may damage the delicate shells.
- Gently scrub the shells: Use your hands or a brush with soft bristles to gently scrub the shells of the mussels. Pay extra attention to areas where dirt or debris may be trapped, such as around the hinge or ridges of the shells.
- Inspect for any remaining impurities: As you rinse and scrub the mussels, visually inspect them for any remaining impurities or debris. If you come across any damaged mussels or ones with open shells that do not close when tapped, discard them.
- Continue rinsing until the water runs clear: Keep rinsing the mussels under cold water until the water runs clear and there are no visible signs of dirt or debris. This ensures that your mussels are properly cleaned and ready for storage.
Rinsing the mussels is an essential step in preparing them for storage. It not only helps to remove any dirt or debris but also ensures that you are starting with clean mussels that are free from any potential contaminants.
Remember, handling mussels with care and rinsing them properly sets the stage for their optimal storage in the fridge overnight. So take the time to give your mussels a good rinse before moving on to the next step.
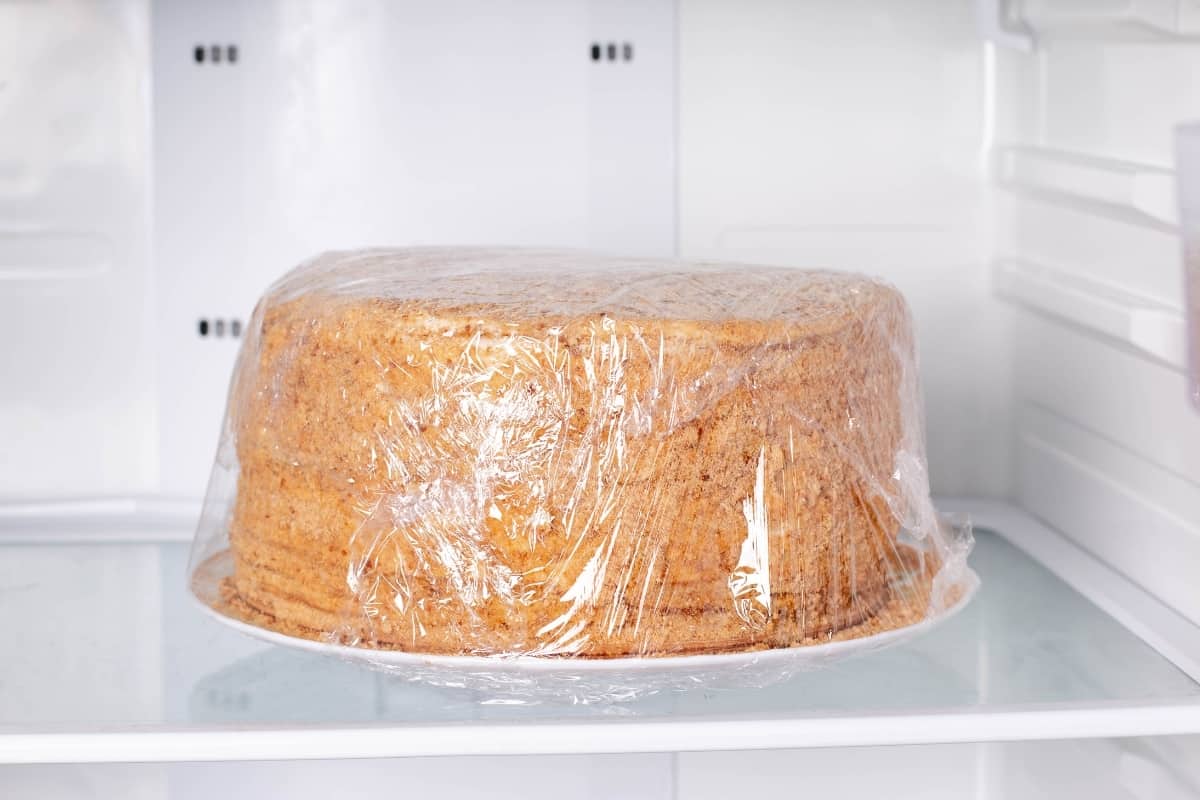
After purchasing mussels, store them in a bowl covered with a damp cloth or paper towel in the fridge. Do not store them in an airtight container or in water, as they need to breathe. Use them within 1-2 days for the best quality.
Step 3: Sort and Discard Any Clams or Mussels
Once you have rinsed the mussels, it’s important to carefully sort through them and discard any clams or mussels that are not suitable for storage. This step ensures that only the freshest and best-quality mussels are kept for later use.
Here’s how you can sort and discard any clams or mussels:
- Inspect the mussels carefully: Take a closer look at each mussel and examine its shell. Look for any mussels that have already opened or have cracked shells. These are indications that the mussel may be dead or compromised, and it’s best to discard them.
- Tap the open mussels gently: If you come across any mussels that are open, gently tap them on a hard surface, such as a kitchen countertop. Live mussels will respond by closing their shells. If the mussel does not close after a few taps, discard it as it may be spoiled or no longer alive.
- Check for any off odors: Give the remaining mussels a gentle sniff. Fresh mussels should have a clean and slightly briny aroma, reminiscent of the ocean. If any mussels have a strong fishy or ammonia-like smell, it’s best to discard them as they may not be fresh.
- Remove any clams or non-mussel shells: Sometimes, you may find clams or shells of other types of shellfish mixed in with your mussels. Make sure to remove these non-mussel shells as they can affect the storage conditions and potentially spoil the mussels.
By sorting through the mussels and discarding any clams or mussels that are not suitable for storage, you ensure that only the best mussels are kept for later use. This improves the overall quality and freshness of the mussels when they are stored in the fridge overnight.
Take the time to carefully inspect and sort your mussels before moving on to the next step of storing them in a container. This extra step ensures that you are starting with the highest quality mussels for your culinary creations.
Step 4: Store Mussels in a Container
After sorting through the mussels and discarding any clams or mussels that are not suitable for storage, it’s time to transfer the remaining mussels to a proper container. The right container helps to maintain the freshness and quality of the mussels while they are stored in the fridge overnight.
Here’s how you can store the mussels in a container:
- Select a clean and shallow container: Choose a container that is clean, food-safe, and shallow. It should have enough space to hold all the mussels without overcrowding them. Avoid using deep containers, as they may restrict airflow and increase moisture buildup.
- Arrange the mussels in a single layer: Place the cleaned and sorted mussels in a single layer inside the container. This allows for better air circulation and helps to prevent the mussels from getting crushed or damaged.
- Avoid overcrowding: Ensure that the mussels are arranged in the container without overcrowding them. Overcrowding can lead to increased moisture and condensation, which may negatively impact the quality of the mussels during storage.
- Leave some space at the top: It’s important to leave some space between the mussels and the lid of the container. This space allows for proper air circulation and helps to prevent the mussels from getting squished or damaged when the lid is closed.
By storing the mussels in a clean and shallow container, you create an optimal environment for them during their time in the fridge. This ensures that the mussels are properly protected and allows for better air circulation, helping to maintain their freshness and quality.
Now that your mussels are securely placed in the container, you’re ready to move on to the next step of storing them overnight in the fridge. Remember to handle the mussels with care to avoid any unnecessary damage.
Step 5: Cover Mussels with a Damp Cloth or Paper Towels
To ensure that the mussels stay moist and retain their freshness while stored in the fridge overnight, it’s important to cover them with a damp cloth or paper towels. This extra layer provides a barrier against excessive moisture loss and helps maintain an optimal environment for the mussels.
Here’s how you can cover the mussels with a damp cloth or paper towels:
- Prepare a damp cloth or paper towels: Moisten a clean cloth or several layers of paper towels with water. Squeeze out any excess moisture so that they are damp but not dripping wet.
- Cover the mussels with the damp cloth or paper towels: Gently drape the damp cloth or place the damp paper towels over the mussels in the container. Make sure to cover them completely, ensuring that the cloth or towels touch the mussels’ shells.
- Avoid soaking the mussels: It’s important not to oversaturate the cloth or paper towels. You want them to be damp, not soaking wet. Excessive moisture can lead to waterlogging the mussels and compromising their quality.
- Check and re-moisten if needed: Over time, the cloth or paper towels may dry out. Check on the mussels periodically and re-moisten the cloth or paper towels if needed to maintain the desired level of moisture.
By covering the mussels with a damp cloth or paper towels, you create a microclimate within the container that helps to prevent excessive moisture loss and maintain the appropriate humidity level. This step is crucial for ensuring that the mussels remain fresh and succulent until you’re ready to use them.
Now that the mussels are properly covered, securely place the lid on the container and move on to the next step of storing them in the fridge overnight. This additional layer of protection will help preserve the mussels’ quality for your upcoming culinary endeavors.
Read more: How To Store Crepes Overnight
Step 6: Store Mussels in the Fridge
Now that you have properly prepared the mussels for storage, it’s time to place them in the refrigerator. Storing mussels in the fridge overnight helps to maintain their freshness and preserve their delicate flavor until you are ready to prepare them.
Follow these steps to store the mussels in the fridge:
- Choose an appropriate spot: Find a designated spot in your refrigerator where you can place the container of mussels. It’s best to store them in the main compartment rather than the door, as the temperature is more stable there.
- Keep mussels away from strong odors: Ensure that the mussels are not placed near strong-smelling foods in the fridge, as they can absorb odors. This is important to maintain the integrity of the mussels’ flavor.
- Set the temperature: Ideally, set the fridge temperature between 32°F (0°C) and 40°F (4°C). This range helps to keep the mussels at an optimal temperature, preventing them from freezing or becoming too warm.
- Store the mussels in the container: Carefully place the container of mussels in the designated spot in the fridge. Make sure the lid is securely closed to maintain a controlled environment.
It’s important to note that mussels are highly perishable, and it’s best to use them within 1 to 2 days of purchase. Therefore, it’s recommended to store them in the fridge only if you plan to cook them the following day.
By storing the mussels in the fridge at the right temperature and away from strong odors, you can help maintain their freshness and extend their shelf life overnight. It’s always a good idea to double-check the freshness of the mussels before cooking them.
With the mussels safely stored in the fridge, you’re one step closer to enjoying a delicious seafood dish. Just remember to handle them with care and check for freshness before preparing them.
Step 7: Check for Freshness Before Cooking
Before cooking the mussels, it’s crucial to check their freshness. This step ensures that you are using mussels that are safe to consume and will provide the best flavor in your dish. By checking for freshness, you can identify any mussels that may have spoiled during storage.
Here’s what you should do to check the freshness of the mussels:
- Inspect the shells: Take a close look at the shells of the mussels. Live mussels will have tightly closed shells, while any that have opened may indicate spoilage.
- Tap the open mussels: If you notice any mussels with open shells, gently tap them on a hard surface such as a kitchen countertop. Live mussels will respond by closing their shells. If a mussel remains open after tapping, it is likely dead and should be discarded.
- Use your senses: Give the mussels a gentle sniff. Fresh mussels should have a clean and slightly briny smell, reminiscent of the ocean. If there is a strong fishy or ammonia-like odor, it’s a sign that the mussels may have gone bad and should not be consumed.
- Look for signs of life: Alive mussels will react when handled. Gently squeeze the shell of a mussel between your fingers. If it closes or reacts by moving slightly, it is likely alive. Discard any mussels that do not show any signs of life.
It’s important to note that mussels are highly perishable, and their freshness deteriorates quickly. Therefore, it’s recommended to use them within 1 to 2 days of purchase, including the overnight storage period in the fridge.
By checking for freshness before cooking, you can ensure that you are using healthy and high-quality mussels in your dish. It’s always better to be cautious and discard any mussels that show signs of spoilage to prevent any potential foodborne illnesses.
Now that you have checked the freshness of the mussels, you can proceed to cook them and prepare a delightful seafood dish. Enjoy!
Conclusion
Storing mussels in the fridge overnight is a simple yet crucial process to maintain their freshness and quality until you are ready to cook and enjoy them. By following the steps outlined in this article, you can ensure that your mussels remain in the best possible condition for your culinary creations.
Starting with choosing and buying fresh mussels, inspecting their shells and sorting out any damaged or open ones, you set the stage for successful storage. Cleaning and prepping the mussels by rinsing them thoroughly and removing any beards ensures that they are clean and ready for storage.
Once the mussels are properly prepared, storing them in a clean container and covering them with a damp cloth or paper towels helps to maintain their moisture and prevent drying out. Placing them in the fridge at the right temperature and away from strong odors ensures that they remain in pristine condition.
Before using the mussels, it is essential to check their freshness. Inspect their shells, tap the open ones to ensure they close, and use your senses to detect any off odors. Discard any mussels that show signs of spoilage to avoid any potential risks.
Remember that mussels are highly perishable, and it’s best to consume them within 1 to 2 days of purchase. It’s important to store them in the fridge only if you plan to cook them the following day.
By following these guidelines, you can confidently store mussels in the fridge overnight and be assured of their quality when it comes time to prepare your favorite seafood dishes. Whether you’re steaming them, adding them to a pasta dish, or creating a flavorful seafood stew, properly stored mussels will elevate your culinary creations with their delicate and briny flavors.
So, go ahead and bring home those fresh mussels, store them correctly, and indulge in a delicious seafood feast for yourself and your loved ones.
Frequently Asked Questions about How To Store Mussels In Fridge Overnight
Was this page helpful?
At Storables.com, we guarantee accurate and reliable information. Our content, validated by Expert Board Contributors, is crafted following stringent Editorial Policies. We're committed to providing you with well-researched, expert-backed insights for all your informational needs.


0 thoughts on “How To Store Mussels In Fridge Overnight”