Articles
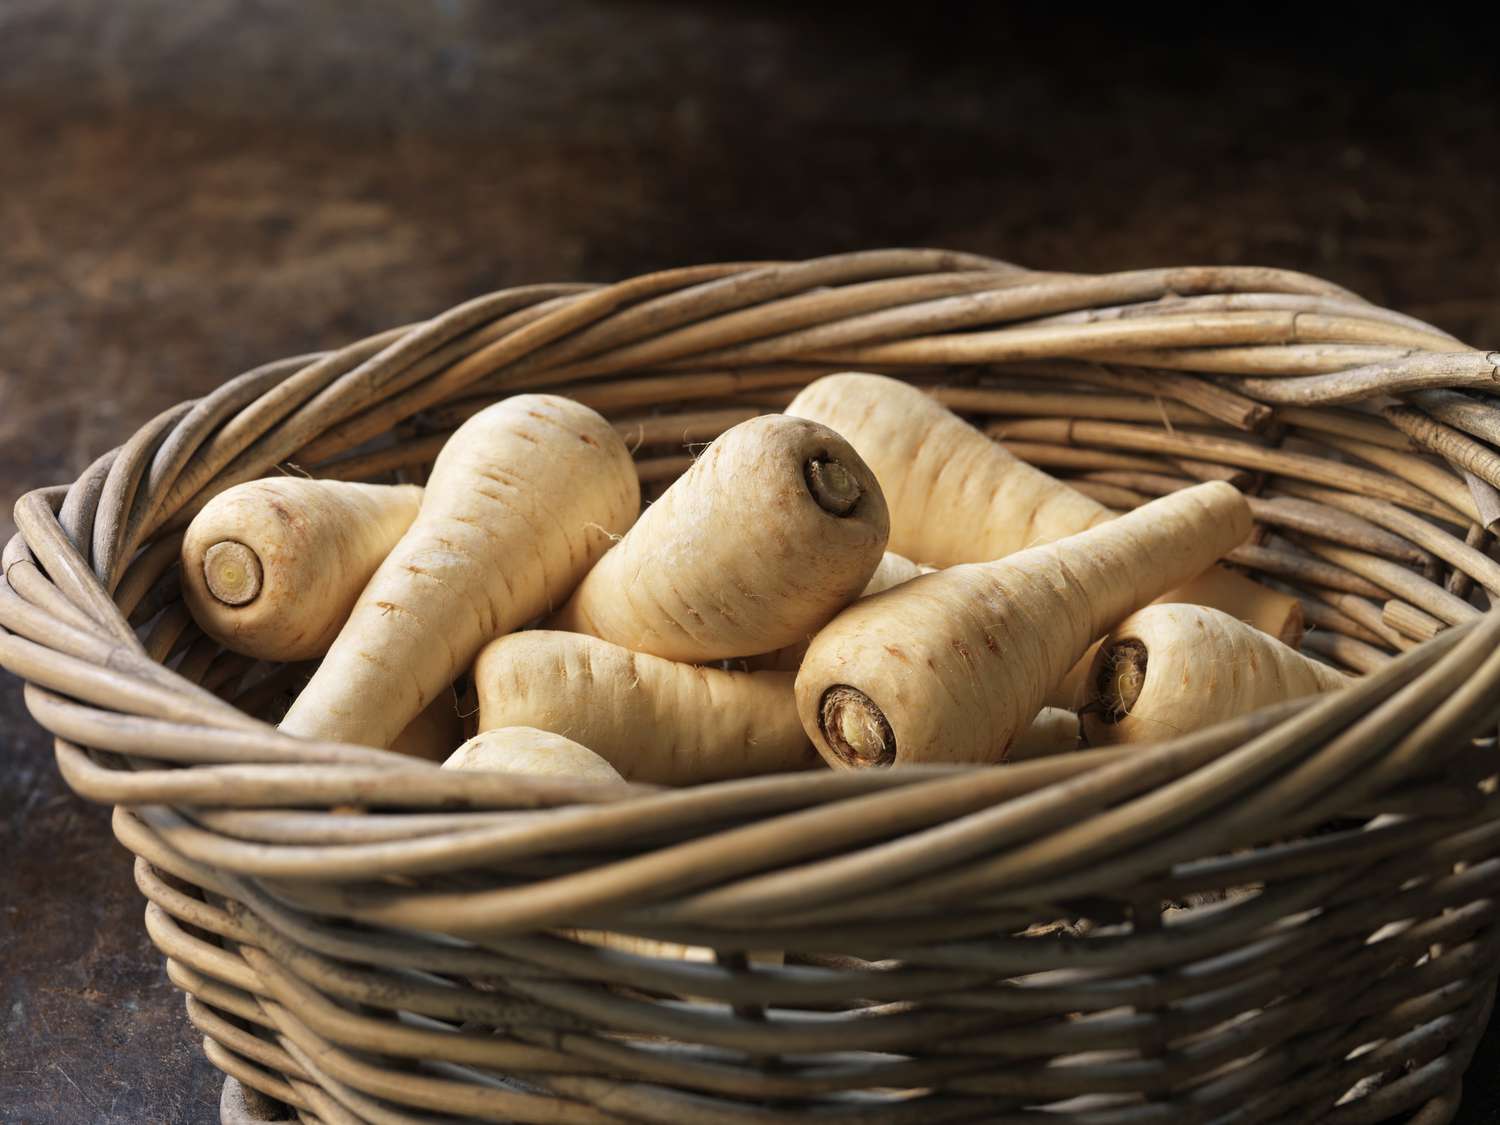
How To Store Parsnips
Modified: January 19, 2024
Learn how to effectively store and preserve fresh parsnips with our informative articles. Keep your parsnips fresh and delicious for longer with our expert tips and techniques.
(Many of the links in this article redirect to a specific reviewed product. Your purchase of these products through affiliate links helps to generate commission for Storables.com, at no extra cost. Learn more)
Introduction
Welcome to our comprehensive guide on how to store parsnips! As winter approaches and the harvest season comes to an end, it’s important to know how to properly store your parsnips to ensure they stay fresh and flavorful for as long as possible. Parsnips are a versatile root vegetable that can be used in a variety of dishes, from hearty soups and stews to roasted side dishes. By following the right storage methods, you can enjoy the earthy sweetness of parsnips all year round.
In this article, we will cover the various methods of storing parsnips, including refrigeration, freezing, and root cellar storage. We’ll also share tips on how to extend the shelf life of parsnips and provide suggestions on using stored parsnips in your culinary endeavors. So, let’s dive in and learn how to keep your parsnips fresh and delicious!
Key Takeaways:
- Store parsnips in the refrigerator for short-term freshness, freeze them for long-term storage, or use a root cellar to enjoy their earthy sweetness all year round.
- Extend the shelf life of parsnips by storing them unwashed, removing greens, and regularly inspecting for spoilage. Get creative with roasted, mashed, or pureed parsnip dishes!
Read more: How To Grow Parsnips From Seeds
Choosing the Right Parsnips
The first step to storing parsnips successfully is to choose the right ones at the grocery store or farmers’ market. Look for parsnips that are firm, smooth, and free from blemishes or soft spots. Smaller parsnips tend to have a sweeter flavor, while larger ones may be more woody in texture. It’s also important to select parsnips with vibrant, healthy-looking greens if they are still attached.
When it comes to size, opt for medium-sized parsnips as they are easier to store and cook evenly. Avoid parsnips that feel overly soft or have a strong, unpleasant odor, as these are signs of spoilage. Additionally, choose parsnips with a uniform color throughout, as discoloration may indicate decay or bruising.
Whether you’re harvesting parsnips from your own garden or purchasing them, it’s crucial to handle them gently to prevent damage. Rough handling can lead to bruising and hasten the spoilage process. Remember, the quality of the parsnips you choose will greatly affect their shelf life, so take the time to select the best ones available.
Preparing Parsnips for Storage
Before storing parsnips, it’s important to properly prepare them to ensure the best possible storage results. Here’s a step-by-step guide on how to prepare parsnips for storage:
- Trim the Greens: If your parsnips still have greens attached, trim them down to about an inch from the root. Leaving a small portion of the greens helps to retain moisture and freshness.
- Remove Excess Soil: Gently brush off any excess soil from the parsnips. Avoid washing them, as moisture can lead to spoilage. Instead, use a soft brush or cloth to remove any dirt or debris from the surface.
- Cut off Blemishes: Inspect the parsnips and cut off any blemishes or damaged areas. By removing these imperfections, you can prevent them from affecting the other parsnips during storage.
- Let Them Dry: Allow the parsnips to air dry for a short period. Placing them on a clean towel or rack for a couple of hours will help remove any lingering moisture.
- Separate Small and Large Parsnips: Sort your parsnips by size. Larger parsnips can take longer to cook and tend to have a tougher texture. By separating them, you can easily choose the right size when it comes time to use them.
Once you’ve completed these steps, your parsnips are ready to be stored using one of the following methods: refrigeration, freezing, or root cellar storage. The method you choose will depend on your preference and the length of time you wish to store the parsnips.
Storing Parsnips in the Refrigerator
The refrigerator is a convenient option for short-term parsnip storage, allowing you to keep them fresh for up to three weeks. Here’s how to store parsnips in the refrigerator:
- Wrap Individual Parsnips: Individually wrap each parsnip in paper towels or place them in perforated plastic bags. This helps to absorb excess moisture and prevents them from drying out.
- Choose the Right Drawer: Place the wrapped parsnips in the crisper drawer of your refrigerator. This drawer is designed to maintain higher humidity levels, which is ideal for root vegetables like parsnips.
- Avoid Ethylene-Producing Fruits: Keep parsnips away from ethylene-producing fruits like apples and bananas. Ethylene can accelerate the ripening and spoilage process of parsnips.
- Check Regularly: Periodically check on your stored parsnips and remove any that show signs of spoilage. Discard any parsnips that have become soft, discolored, or have a foul odor.
Remember, storing parsnips in the refrigerator is suitable for short-term storage. If you plan to store them for a longer period or want to preserve their fresh flavors for an extended time, freezing or using a root cellar may be a better option.
Freezing Parsnips for Long-Term Storage
If you want to extend the shelf life of your parsnips and preserve their flavor and texture for an extended period, freezing is a great option. Freezing parsnips allows you to store them for up to 10 to 12 months. Here’s how to freeze parsnips:
- Blanching: Start by blanching the parsnips. Blanching is a process that helps to preserve the color, flavor, and texture of the vegetables. Bring a large pot of water to a boil, then carefully add the parsnips.
- Blanching Time: Small to medium parsnips should be blanched for 2 to 3 minutes, while larger parsnips may require 5 minutes. Blanching time starts when the water returns to a boil after adding the parsnips.
- Cooling: After blanching, quickly transfer the parsnips to an ice bath to cool them down and stop the cooking process. Leave them in the ice bath for the same amount of time that they were blanched.
- Draining and Drying: Once cooled, remove the parsnips from the ice bath and pat them dry with paper towels. Ensuring they are dry will prevent ice crystals from forming during the freezing process.
- Packaging: Place the blanched and dried parsnips into freezer-safe bags or airtight containers. Remove as much air as possible from the bags before sealing them.
- Labeling: Don’t forget to label the containers or bags with the date of freezing. This will help you keep track of their freshness and make it easier to identify them later.
- Freezing: Put the labeled containers or bags in the freezer and store them at 0°F or below. The low temperature will maintain the quality of the parsnips during the freezing process.
When you’re ready to use the frozen parsnips, simply thaw them in the refrigerator overnight before cooking with them. Freezing parsnips is a great way to have this delicious vegetable readily available throughout the year, whether you’re making soups, stews, or roasted dishes.
Store parsnips in a cool, dark place, such as the refrigerator or a root cellar. Keep them in a perforated plastic bag to maintain moisture and prevent them from drying out. Avoid storing them near fruits, as the ethylene gas they produce can cause the parsnips to spoil faster.
Read more: How To Store Store-Bought Bread
Storing Parsnips in a Root Cellar
If you have access to a root cellar or a cool, dry basement, storing parsnips in such a space can keep them fresh and flavorful for several months. Here’s how to store parsnips in a root cellar:
- Cleaning and Trimming: Start by cleaning and trimming your parsnips as mentioned earlier in the article. Remove the greens and gently brush off any excess soil.
- Prepare the Storage Container: Find a suitable container for storing the parsnips, such as a wooden crate, a mesh bag, or a slotted wooden box. Ensure that the container has good ventilation to prevent moisture buildup.
- Layering: Place a layer of straw or newspaper at the bottom of the container to provide insulation and absorb any moisture. Arrange the parsnips in a single layer on top of the bedding material.
- Spacing: Make sure to leave some space between each parsnip to allow for proper air circulation. This will help prevent them from rotting or developing mold.
- Covering: Once the first layer is complete, add another layer of straw or newspaper on top of the parsnips. Continue layering parsnips and bedding material until the container is nearly full.
- Location: Place the container of parsnips in a root cellar or cool basement that maintains a temperature range of about 32°F to 40°F (0°C to 4°C) with a humidity level of around 90 percent.
- Monitoring: Regularly check on the stored parsnips, inspecting them for any signs of spoilage, rot, or sprouting. Remove any affected parsnips to prevent the spread of decay.
Storing parsnips in a root cellar allows them to gradually mature and develop a sweeter flavor over time. This method is ideal for those who have a surplus of parsnips and want to enjoy them during the winter months when fresh produce may be harder to come by.
Extending the Shelf Life of Parsnips
If you want to maximize the shelf life of your parsnips, there are a few additional tips and techniques you can follow. By implementing these strategies, you can ensure that your parsnips stay fresh for as long as possible:
- Store Unwashed: It’s crucial to store parsnips unwashed. Washing them before storage can introduce moisture, which can cause spoilage. Leave the soil on until you’re ready to use them.
- Remove Greens: While it’s okay to leave a small portion of greens attached for short-term storage, it’s best to remove them for long-term storage. Greens draw moisture from the root and can cause faster spoilage.
- Regularly Inspect: It’s important to frequently check on your stored parsnips. Remove any parsnips that show signs of decay, softness, or mold. One spoiled parsnip can quickly affect the surrounding ones.
- Separate from Other Produce: To prevent ethylene gas from accelerating the ripening process, store parsnips away from fruits and vegetables that emit this gas. Ethylene-sensitive produce, such as leafy greens and potatoes, should be stored separately.
- Avoid Exposure to Light: Light can cause parsnips to sprout and turn green. To prevent this, store them in a dark, cool location like a pantry or root cellar.
- Consider Pickling: Pickling is a great way to extend the shelf life of parsnips. The acidity of the pickling solution helps preserve the parsnips and adds a delicious tangy flavor to them.
By following these tips, you can significantly prolong the shelf life of your parsnips and enjoy their fresh taste for weeks or even months after harvest.
Tips for Using Stored Parsnips
Now that you have successfully stored your parsnips, it’s time to enjoy them in various culinary creations. Here are some tips for using stored parsnips:
- Roasting: Roasting parsnips brings out their natural sweetness and gives them a delicious caramelized flavor. Toss them with some olive oil, salt, and your choice of herbs and roast them in the oven until they turn golden brown and tender.
- Soups and Stews: Parsnips add depth and complexity to soups and stews. Chop them into small pieces and add them to hearty winter soups or comforting stews for a sweet and earthy flavor.
- Mashed Parsnips: Similar to mashed potatoes, mashed parsnips make a delightful side dish. Boil the parsnips until tender, then mash them with butter, garlic, and seasonings of your choice for a creamy and flavorful alternative to mashed potatoes.
- Purees: Pureeing parsnips adds a velvety texture to dishes. Blend cooked parsnips until smooth and use the puree as a base for sauces, dips, or even in baking recipes like bread or cakes.
- Gratin: Layer sliced parsnips with cheese, cream, and breadcrumbs for a delicious parsnip gratin. Bake until bubbly and golden for a comforting and indulgent dish.
- Parsnip Fries: Cut parsnips into thin strips, toss them with olive oil, salt, and your preferred seasonings, then bake them in the oven until crispy. Enjoy them as a healthier alternative to traditional French fries.
- Parsnip Chips: Slice parsnips thinly and fry or bake them until crispy to create parsnip chips. These make for a nutritious and flavorful snack.
- Add to Stir-Fries: Thinly sliced parsnips can be added to stir-fries, bringing a unique flavor and texture to the dish. Pair them with other vegetables, tofu, or meat for a delicious and satisfying meal.
These are just a few ideas to get you started, but don’t be afraid to get creative and experiment with different recipes and flavor combinations. Stored parsnips can be used in a variety of dishes to add a touch of sweetness and earthiness to your meals.
Conclusion
Congratulations! You’ve reached the end of our comprehensive guide on how to store parsnips. By following the tips and techniques outlined in this article, you can ensure that your parsnips stay fresh, flavorful, and ready to use for an extended period.
Whether you choose to store your parsnips in the refrigerator, freezer, or a root cellar, it’s important to handle them with care and properly prepare them for storage. Remember to choose the best quality parsnips, trim and clean them thoroughly, and select the appropriate storage method based on your needs.
With the right storage techniques in place, you can enjoy the earthy sweetness of parsnips in a variety of dishes throughout the year. From roasted parsnip side dishes to hearty soups, stews, and even creative recipes like parsnip chips, the possibilities are endless.
So, whether you harvest parsnips from your own garden or purchase them from a local store, make the most out of their flavors and nutritional benefits by storing them properly. With a little planning and attention to detail, you can enjoy the natural goodness of parsnips long after the harvest season is over.
Now it’s time to put your knowledge into action! Head to the kitchen, grab those stored parsnips, and let your culinary creativity lead the way. Bon appétit!
Frequently Asked Questions about How To Store Parsnips
Was this page helpful?
At Storables.com, we guarantee accurate and reliable information. Our content, validated by Expert Board Contributors, is crafted following stringent Editorial Policies. We're committed to providing you with well-researched, expert-backed insights for all your informational needs.


0 thoughts on “How To Store Parsnips”