Articles
How To Store Spanakopita
Modified: February 29, 2024
Learn the best techniques for storing spanakopita in this informative article. Find out how to keep it fresh and delicious for longer periods.
(Many of the links in this article redirect to a specific reviewed product. Your purchase of these products through affiliate links helps to generate commission for Storables.com, at no extra cost. Learn more)
Introduction
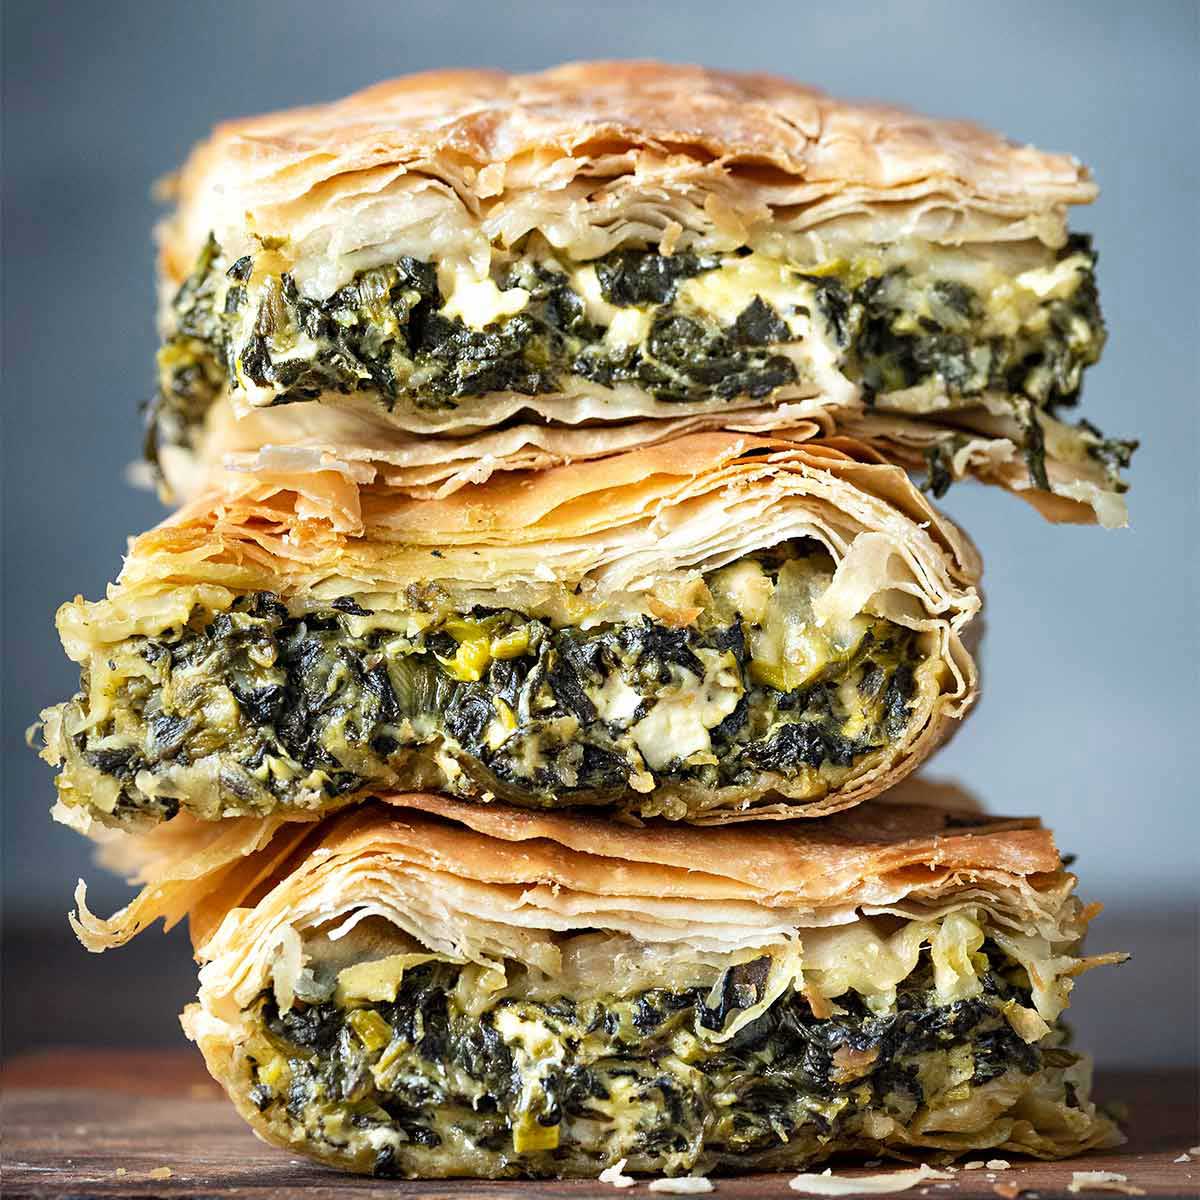
Welcome to the delicious world of spanakopita! If you’ve ever tasted this traditional Greek savory pastry, you know just how mouthwatering it can be. Spanakopita is a beloved dish made with layers of flaky phyllo pastry filled with a delectable mixture of spinach, feta cheese, onions, herbs, and spices. Whether you’ve made a homemade batch or have some leftover spanakopita, knowing how to store it properly is crucial to ensure its freshness and taste.
In this article, we will guide you through the process of storing spanakopita to maintain its delightful flavors and texture. From understanding the components of spanakopita to reheating it to perfection, we’ve got you covered.
So, if you’re ready to embark on this culinary adventure with us, let’s dive in and discover the secrets to storing spanakopita.
Key Takeaways:
- Master the art of storing spanakopita to preserve its delightful flavors and textures, whether refrigerating for a few days or freezing for longer-term enjoyment. Reheat with care to restore its crispy perfection.
- Choose high-quality ingredients, prepare the filling with finesse, and assemble with precision to create the perfect spanakopita. Store and reheat mindfully for a delightful culinary experience every time.
Read more: How To Store Store-Bought Bread
Understanding Spanakopita
Before we delve into the details of storing spanakopita, let’s take a moment to understand this delectable Greek dish. Spanakopita, also known as spinach pie, is a popular pastry that features layers of delicate phyllo dough filled with a savory mixture of spinach, feta cheese, onions, and aromatic herbs.
The combination of the crisp, flaky exterior and the rich, flavorful filling makes spanakopita a favorite among both Greeks and food enthusiasts worldwide. Whether you serve it as an appetizer, a side dish, or a main course, spanakopita is sure to be a crowd-pleaser.
The key to the mouthwatering taste of spanakopita lies in the quality of the ingredients used. Fresh spinach, preferably organic, is the star of the show. It brings a vibrant color and a slightly earthy flavor to the dish. When combined with tangy feta cheese, aromatic herbs like dill and mint, and the subtle sweetness of onions, the filling of spanakopita becomes a harmonious symphony of flavors.
The phyllo dough used in spanakopita is another essential component. Phyllo dough is incredibly thin and delicate, providing the perfect contrast to the hearty filling. It can be store-bought or made from scratch, depending on your preference and time constraints.
Now that we have a good understanding of what spanakopita is and its key ingredients, let’s move on to the crucial steps of storing this delicious dish to ensure its longevity and flavor.
Choosing the Right Ingredients
When it comes to creating a mouthwatering spanakopita, using the right ingredients is crucial. Here are some factors to consider when choosing your ingredients:
1. Spinach: Opt for fresh spinach leaves, preferably organic, for the best flavor and texture. Avoid using canned or frozen spinach as they may have excess water content, which can make the spanakopita soggy.
2. Feta Cheese: Look for high-quality feta cheese, preferably made from sheep’s milk or a combination of sheep’s and goat’s milk. This type of feta cheese has a tangy and creamy flavor that pairs perfectly with the spinach filling.
3. Phyllo Dough: You have two options when it comes to phyllo dough: store-bought or homemade. Store-bought phyllo dough is a convenient choice, readily available in the frozen section of most grocery stores. However, if you have the time and inclination, making your own phyllo dough from scratch can result in an even more delicate and flavorful spanakopita.
4. Aromatics: Dill and mint are commonly used herbs in spanakopita, adding a refreshing and aromatic element to the dish. Fresh herbs are always preferred, but if you don’t have access to them, dried herbs can be used as well, though in smaller quantities.
5. Onions: Red or yellow onions are commonly used to add a touch of sweetness and depth of flavor to the filling. Make sure to sauté the onions until they are soft and translucent before incorporating them into the spanakopita mixture.
By selecting fresh, high-quality ingredients, you’ll set the foundation for a flavor-packed spanakopita. Now, let’s move on to the preparation of the filling.
Preparing the Filling
The filling is the heart and soul of spanakopita, and getting it just right is essential for a delicious end result. Here’s how to prepare the perfect spanakopita filling:
1. Sauté the onions: Start by sautéing finely chopped onions in a bit of olive oil until they become soft and translucent. This process helps to bring out their natural sweetness and adds depth of flavor to the filling.
2. Add the spinach: Once the onions are cooked, add fresh spinach leaves to the pan. You may need to do this in batches as the spinach wilts down. Cook the spinach until it is completely wilted and any excess water has evaporated.
3. Drain and squeeze: After cooking the spinach, it’s important to drain and squeeze out any excess liquid. This step is crucial to prevent a watery filling that can make the spanakopita soggy. Allow the spinach to cool slightly before squeezing it between your hands or using a cheesecloth to remove as much moisture as possible.
4. Combine with feta and herbs: In a mixing bowl, combine the cooked spinach and onions with crumbled feta cheese. Add in finely chopped dill and mint, along with a pinch of salt and pepper to taste. Mix well until all the ingredients are evenly incorporated.
5. Taste and adjust: Take a moment to taste the filling and adjust the seasoning if needed. Remember that feta cheese can be quite salty, so be judicious when adding additional salt.
Once the filling is prepared, you’re ready to assemble your spanakopita. Let’s move on to the next step!
Assembling the Spanakopita
Now that the filling is prepared, it’s time to assemble the spanakopita. Follow these steps for a perfectly layered and delicious result:
1. Prepare the phyllo dough: If you are using store-bought phyllo dough, make sure to thaw it according to the package instructions. Take care to handle the delicate sheets gently to prevent tearing.
2. Brush with melted butter or oil: To prevent the phyllo dough from drying out and to add a rich flavor, brush each sheet with melted butter or olive oil using a pastry brush. This will help create a crispy, golden crust.
3. Layer the phyllo sheets: Place one sheet of phyllo dough on a clean and flat surface. Brush it with butter or oil, and then stack another sheet on top, slightly overlapping. Repeat this process until you have about 6-8 layers.
4. Add the filling: Spoon the prepared spinach and feta filling evenly over the layered phyllo dough, leaving a border around the edges. Spread it out in a thin, even layer.
5. Fold and roll: Carefully fold and roll the phyllo dough with the filling, starting from one edge, to create a tight log or triangular shape. Trim any excess phyllo if necessary. Repeat this process with the remaining phyllo and filling.
6. Brush the top: Once the spanakopita is assembled, brush the top of each piece with melted butter or oil. This will help achieve a lovely golden-brown color when baked.
Your spanakopita is now ready to be baked to perfection. However, if you have some leftovers or need to store it for later, let’s explore the best ways to do so.
Store spanakopita in an airtight container in the refrigerator for up to 3 days. To reheat, place in a 350°F oven for 10-15 minutes until heated through and crispy. Do not store at room temperature to avoid spoilage.
Read more: How To Store Basil From Grocery Store
Storing Spanakopita
Spanakopita can be stored to enjoy later, whether you have leftovers or want to prepare it in advance. Follow these guidelines to keep your spanakopita fresh:
1. Refrigerating: Place the spanakopita in an airtight container or wrap it tightly with plastic wrap. Refrigerate it for up to 3-4 days. Make sure to consume it within this time for the best flavor and texture.
2. Freezing: Spanakopita can also be frozen for longer storage. Wrap each individual piece or the whole spanakopita tightly with plastic wrap, followed by a layer of aluminum foil or place them in a freezer bag. Frozen spanakopita can be stored for up to 2-3 months.
3. Labeling: When storing spanakopita in the fridge or freezer, it’s important to label the containers or packages with the date of preparation. This will help you keep track of its freshness and use it within recommended timeframes.
4. Stack carefully: If you’re storing multiple pieces of spanakopita, make sure to stack them with a layer of parchment paper or wax paper in between to prevent them from sticking together.
Now that you know how to properly store spanakopita, let’s move on to the reheating process to ensure it tastes just as delicious as when it was freshly baked.
Reheating Spanakopita
Reheating spanakopita is a breeze and can be done in a few simple steps to restore its crispy texture and flavorful filling. Here’s how you can reheat your spanakopita:
1. Oven method: Preheat your oven to 350°F (175°C). Remove the spanakopita from the refrigerator or freezer and place it on a baking sheet lined with parchment paper. Bake for about 15-20 minutes for refrigerated spanakopita or 25-30 minutes for frozen spanakopita, or until the pastry is golden brown and the filling is heated through.
2. Toaster oven or air fryer: If you have a toaster oven or an air fryer, these appliances can be great alternatives for reheating spanakopita. Follow the manufacturer’s instructions for baking or air frying the spanakopita until it reaches the desired level of crispness and warmth.
3. Reheating individual portions: If you only want to reheat a few pieces of spanakopita, using a microwave is a convenient option. Place one or two pieces on a microwave-safe plate and heat them on high for about 1-2 minutes, or until the filling is hot and the pastry is crispy.
4. Let it rest: After reheating, allow the spanakopita to rest for a few minutes to prevent any filling from spilling out. This will also help the flavors to settle and the pastry to become crisp before serving.
Now that you know how to reheating spanakopita, let’s explore some additional tips for proper storage and handling to ensure the best results.
Tips for Proper Storage
To maintain the freshness and quality of spanakopita during storage, consider the following tips:
1. Cool completely before storing: Allow the spanakopita to cool completely before storing it. This helps to prevent condensation from forming inside the container or wrapping, which can make the pastry soggy.
2. Separate layers with parchment paper: If you’re stacking multiple pieces of spanakopita, place a layer of parchment paper between each layer to prevent them from sticking together. This makes it easier to remove individual pieces without damaging them.
3. Avoid moisture exposure: Spanakopita can become soggy when exposed to moisture. To prevent this, make sure the storage container or wrap is airtight and moisture-resistant. This helps to maintain the crispness of the pastry and the quality of the filling.
4. Re-seal properly: When refrigerating or freezing spanakopita, ensure that the container or wrap is tightly sealed to prevent air from entering. This helps to maintain the flavors and prevent freezer burn, if applicable.
5. Reheat just what you need: If you have leftover spanakopita, it’s best to reheat only the portions you plan to consume. This helps to maintain the overall quality of the dish. Repeatedly reheating and cooling the same batch can impact its texture and taste.
6. Use within recommended timeframes: Spanakopita is best enjoyed fresh, so try to consume it within 3-4 days if refrigerated or within 2-3 months if frozen. As time goes on, the quality and texture may deteriorate.
By following these tips, you can ensure that your spanakopita stays fresh and delicious for as long as possible. Now it’s time to savor the mouthwatering flavors of your homemade or store-bought spanakopita.
Conclusion
Congratulations! You are now equipped with the knowledge and tips to store and enjoy spanakopita to its fullest. From understanding the delicious components of spanakopita to choosing the right ingredients, preparing the filling, assembling the pastry, and storing it properly, you have learned the key steps to ensure its freshness and taste.
Remember, spanakopita can be refrigerated for a few days or frozen for longer-term storage. When reheating, use the oven, toaster oven, air fryer, or microwave to bring back its crispy texture and delectable flavors.
Proper storage and handling will help you enjoy spanakopita at its best, whether you’re savoring it as a leftover or making it ahead of time for future enjoyment.
Now go ahead and indulge in the delightful flavors of spanakopita, knowing that you have the skills to store it properly and make the most of this traditional Greek treat. Enjoy!
Frequently Asked Questions about How To Store Spanakopita
Was this page helpful?
At Storables.com, we guarantee accurate and reliable information. Our content, validated by Expert Board Contributors, is crafted following stringent Editorial Policies. We're committed to providing you with well-researched, expert-backed insights for all your informational needs.


0 thoughts on “How To Store Spanakopita”