Articles
How To Store Rakes And Shovels
Modified: March 19, 2024
Learn how to properly store your rakes and shovels with these helpful articles. Keep your garden tools organized and protected all year round.
(Many of the links in this article redirect to a specific reviewed product. Your purchase of these products through affiliate links helps to generate commission for Storables.com, at no extra cost. Learn more)
Introduction
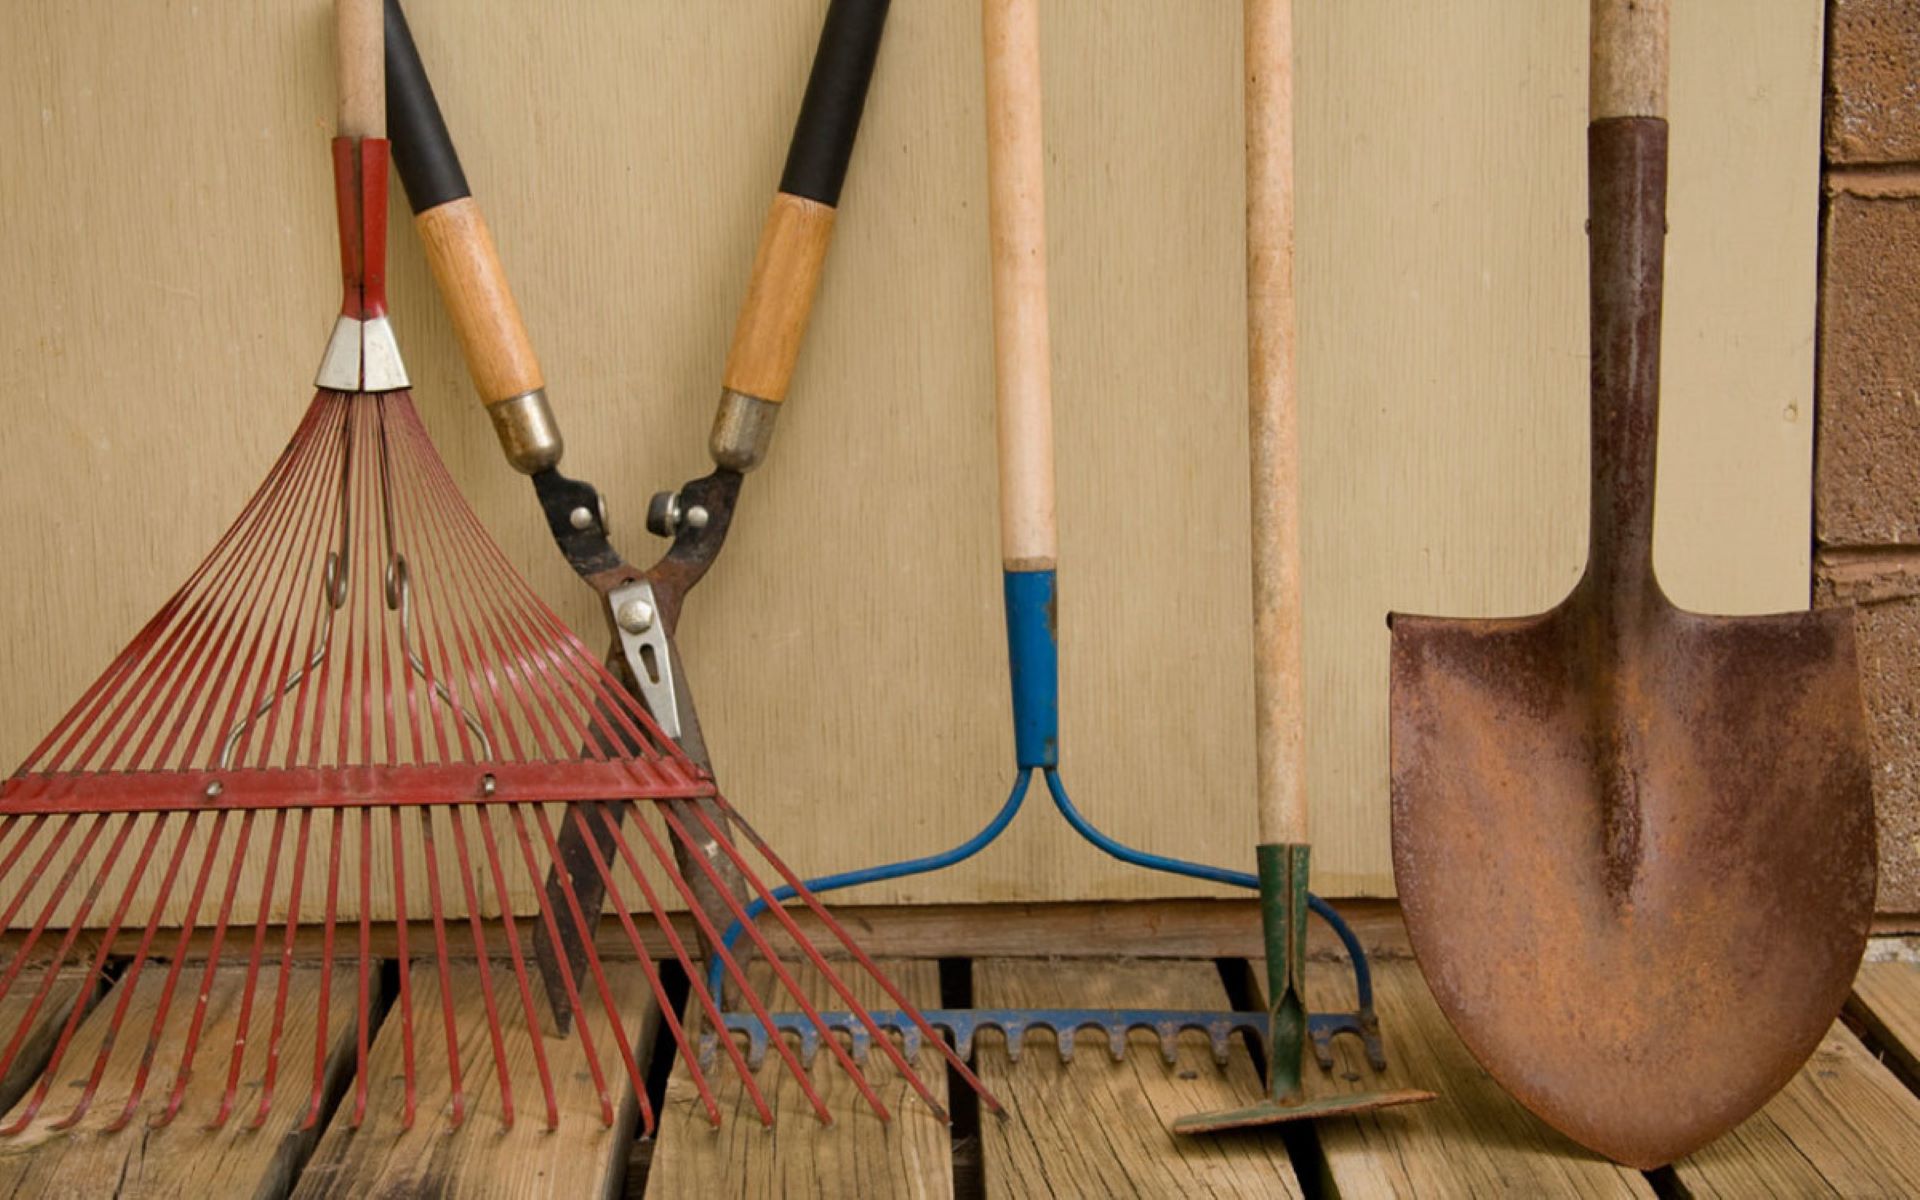
When it comes to storing rakes and shovels, it’s important to find the right solution. These tools are essential for maintaining a well-kept garden or yard, but leaving them lying around can create a cluttered and unsafe environment. Proper storage not only helps to organize your tools but also prolongs their lifespan and keeps them in good condition for future use.
In this article, we will explore various methods for storing rakes and shovels, ensuring they are easily accessible, well-protected, and out of the way. From cleaning and maintenance to different storage options, we will cover everything you need to know to keep your tools organized and in the best possible shape. Let’s get started!
Key Takeaways:
- Proper cleaning and maintenance of rakes and shovels is crucial for their longevity. Regularly remove dirt, inspect for damages, remove rust, sharpen blades, and apply lubrication to keep them in optimal condition.
- Utilizing vertical storage options, such as wall-mounted hooks, pegboards, or racks, provides an efficient and space-saving solution for organizing rakes and shovels. Maximize space and keep tools easily accessible with these versatile storage methods.
Read more: How To Store Shovels And Rakes
Proper Cleaning and Maintenance
Before storing your rakes and shovels, it’s crucial to clean and maintain them properly. This helps to remove any dirt, debris, or rust that may have accumulated on the tools and ensures their longevity. Here are some steps you can follow for proper cleaning and maintenance:
- Remove dirt and debris: Start by using a stiff brush or a wire brush to remove any dirt, mud, or debris from the blades or tines of your tools. Make sure to clean both the front and back surfaces thoroughly.
- Inspect for damages: While cleaning, inspect your tools for any signs of damage, such as bent tines or blades. Replace or repair any damaged parts to ensure the tools function properly.
- Remove rust: If you notice any rust spots on your tools, use steel wool or sandpaper to gently remove the rust. Apply a rust remover or a mixture of equal parts vinegar and water for stubborn rust stains.
- Sharpen the blades: To maintain the efficiency of your tools, regularly sharpen the blades of your shovels and the tines of your rakes. Use a file or a sharpening stone to gently sharpen the edges, working in one direction for the best results.
- Apply lubrication: After cleaning and sharpening, apply a thin layer of lubricating oil to the metal parts of your tools to prevent rust and corrosion. Make sure to wipe off any excess oil before storing them.
- Handle maintenance: Inspect the handles of your rakes and shovels for any cracks or splinters. Sand down any rough areas and apply a protective coating of varnish or wood preservative to prevent further damage.
By following these cleaning and maintenance steps, you can ensure that your rakes and shovels remain in optimal condition, ready for use whenever you need them.
Choosing the Right Storage Location
When it comes to storing rakes and shovels, selecting the right storage location is essential. You want to ensure that the tools are easily accessible and protected from weather elements and potential damage. Here are some factors to consider when choosing the right storage location:
- Indoor vs. outdoor: Determine whether you want to store your tools indoors or outdoors. Indoor storage offers better protection from the elements and reduces the risk of theft, while outdoor storage provides convenience and saves indoor space.
- Climate control: If you choose to store your tools indoors, consider a storage space with climate control. Extreme temperature fluctuations and high humidity can cause rust and corrosion on metal tools, so it’s important to keep them in a controlled environment.
- Accessibility: Select a storage location that is easily accessible, especially if you frequently use your rakes and shovels. This prevents the hassle of navigating through cluttered spaces or going through multiple obstacles to reach your tools.
- Protection from the elements: Outdoor storage spaces like sheds should offer adequate protection from rain, snow, and excessive sunlight. Look for sheds or storage units with proper sealing and weather-resistant materials.
- Security: If you opt for outdoor storage, prioritize security. Choose a location that is well-lit and consider installing security measures such as locks or surveillance cameras to prevent theft.
- Space availability: Assess the amount of space you have available for storage. This will help you determine whether you need a small storage solution like wall hooks or pegboards, or if a larger structure like a garden shed or garage is necessary.
By considering these factors, you can select the ideal storage location that suits your needs and ensures the safety and accessibility of your rakes and shovels.
Using Wall Hooks
Wall hooks are a simple yet effective way to store and organize your rakes and shovels. They are easy to install and allow you to keep your tools off the ground, saving valuable floor space. Here’s how you can use wall hooks for storage:
- Select the right hooks: Choose heavy-duty hooks that are designed to hold the weight of your rakes and shovels. Look for hooks with a rubber or foam coating to prevent scratches and keep your tools in place.
- Mark the spacing: Measure the spacing between the hooks based on the length of your tools. Leave enough distance between each hook to avoid overcrowding and ensure easy access to your tools.
- Mark the mounting points: Use a pencil to mark the mounting points on the wall, ensuring they are level and at the desired height. You can use a stud finder to locate the studs for added stability.
- Install the hooks: Use a drill to create pilot holes at the marked mounting points. Then, screw in the hooks securely, making sure they are level and properly anchored into the wall.
- Hang the tools: Once the hooks are installed, hang your rakes and shovels by placing the handles over the hooks. Make sure to space them evenly and avoid overcrowding. You can also use additional hooks for smaller gardening tools or accessories.
- Secure the tools: To prevent the tools from slipping off the hooks, you can secure them further by tying a piece of string or using a bungee cord around the handles and attaching it to the wall.
Using wall hooks is a convenient and space-saving option for storing rakes and shovels. It keeps your tools organized and easily accessible, making your gardening tasks more efficient.
Building a Storage Rack
If you have some woodworking skills and the necessary tools, building a storage rack can be a great option for storing your rakes and shovels. A storage rack provides a dedicated space for your tools and allows for efficient organization. Here’s how you can build your own storage rack:
- Gather the materials: Start by gathering the necessary materials, including a sturdy wooden board or plywood for the rack, screws or nails for assembly, a saw for cutting the board, and a drill for creating pilot holes.
- Measure and cut the board: Measure the length and width of your available space and determine the dimensions for your storage rack. Use a saw to cut the wooden board into several pieces, including two longer pieces for the sides and shorter pieces for the crossbars that will hold the tools.
- Assemble the frame: Lay out the cut pieces and begin assembling the frame of the storage rack. Use screws or nails to attach the shorter crossbar pieces evenly between the longer side pieces, creating a ladder-like structure.
- Secure the rack to the wall: Find the studs in the wall where you plan to install the storage rack. Use a level to ensure the rack is straight, then attach it securely to the wall using screws or nails through the longer side pieces.
- Add additional features: Depending on your preferences, you can add hooks or hangers to the storage rack for hanging smaller tools or accessories. You can also attach a shelf or storage bin at the bottom of the rack to store smaller items like gardening gloves or seeds.
- Organize your tools: Once the storage rack is complete, arrange your rakes and shovels on the crossbars, making sure to space them evenly and avoid overcrowding. You can also label or color-code the spaces for each tool to maintain organization.
Building a storage rack allows you to customize the size and design to fit your specific needs. It provides a sturdy and efficient solution for storing your rakes and shovels, keeping them neatly organized in your garage, shed, or any other designated space.
Read more: How To Shovel A Driveway
Utilizing a Garden Shed
A garden shed is an excellent storage option for rakes and shovels, providing ample space to keep your tools organized and protected. If you have a garden shed or are considering getting one, here are some tips for utilizing it effectively:
- Clean and prepare the shed: Before storing your tools in the shed, ensure it is clean and free from any dirt or debris. Sweep or vacuum the floor, wipe down the surfaces, and remove any pests or cobwebs. Consider adding shelves or hooks for better organization.
- Designate specific areas: Allocate specific areas within the shed for different tools and equipment. Create zones for rakes, shovels, and other gardening tools, as well as separate spaces for pots, fertilizers, and other supplies. This helps to keep everything well-organized and easy to find.
- Hang tools on walls: Utilize the vertical space in the shed by hanging rakes and shovels on the walls. Install wall hooks or a pegboard system to keep the tools within reach and prevent them from cluttering the floor.
- Use storage bins: Invest in storage bins or containers to store smaller gardening items and accessories. Label the bins accordingly to quickly locate what you need. This keeps your shed tidy and makes it easier to find specific items when you need them.
- Create a workbench: If you have enough space, consider setting up a workbench in your garden shed. This provides a dedicated area for potting plants, doing small repairs, or storing tools temporarily during gardening tasks.
- Consider shelving: Install shelves in your shed to maximize storage space. This allows you to keep smaller tools, pots, seed packets, and other items organized and easily accessible. Arrange the shelves based on the frequency of use, keeping frequently used items at eye level for convenience.
- Maintain proper ventilation: Ensure your garden shed has adequate ventilation to prevent moisture buildup, which can lead to rust and damage to your tools. Open windows or install air vents to promote airflow and keep the shed dry.
A garden shed provides a dedicated space for storing rakes and shovels, protecting them from the elements and keeping them organized. By utilizing the shed effectively, you can create a functional and efficient storage solution for your gardening tools.
Store rakes and shovels by hanging them on a wall-mounted rack or storing them in a designated corner with the handles facing up to prevent tripping and keep them organized.
Storing Tools in a Garage
A garage is a common storage space for rakes and shovels, especially for those without a garden shed. To ensure your tools are stored safely and efficiently in the garage, follow these tips:
- Create designated areas: Allocate specific areas in your garage for different types of tools. Group rakes and shovels together in one area, and separate them from other tools such as hammers or power tools. This makes it easier to find and access the tools you need.
- Utilize wall space: Install wall-mounted storage systems, such as pegboards or slat walls, to hang your tools. Use hooks or specialized tool hangers to keep rakes and shovels off the floor and neatly organized on the wall. This not only saves space but also allows for easy visibility and access.
- Consider overhead storage: If you have limited wall space, consider utilizing the ceiling or overhead area for storage. Install ceiling racks or use overhead hoists to hang rakes and shovels. This keeps them out of the way and frees up valuable floor and wall space.
- Use storage cabinets or shelves: Install storage cabinets or shelves in your garage to store smaller hand tools and accessories. Use labeled containers or bins to keep items organized and easily identifiable. This helps to reduce clutter and ensures that everything has a designated place.
- Keep the floor clear: Avoid leaving tools lying on the garage floor. Not only can they pose a trip hazard, but they’re also more likely to get damaged or lost. Use designated storage solutions to keep the floor clear and create a safer and more organized space.
- Maintain climate control: Ensure your garage is well-ventilated and has proper insulation if you live in an area with extreme temperature fluctuations or high humidity. This will help prevent rust and corrosion on your tools, keeping them in good condition for longer.
- Secure the garage: If you store valuable tools in your garage, it’s essential to prioritize security. Install locks on doors and windows, and consider adding an alarm system or motion-sensor lights to deter potential intruders.
Storing rakes and shovels in the garage requires proper organization and storage solutions to maximize space and prevent damage. By implementing these tips, you can effectively store your tools in the garage while maintaining a clean and functional space.
Hanging Tools on Pegboards
Pegboards are versatile storage solutions that work exceptionally well for hanging and organizing tools, including rakes and shovels. Here’s how you can effectively use pegboards to store your tools:
- Select the right pegboard: Choose a pegboard that is large enough to accommodate all your tools while fitting into the available wall space. Opt for a durable material like metal or reinforced plastic that can withstand the weight of your tools.
- Plan the layout: Before hanging the pegboard, plan and visualize where you want to place each tool. This will help you determine the spacing between pegs and ensure an organized arrangement.
- Mount the pegboard: Position the pegboard against the wall and secure it in place using screws or wall anchors. Make sure the pegboard is level to ensure a uniform display of your tools. You can also use spacers behind the pegboard to create space for hooks or hangers.
- Choose appropriate pegboard accessories: Select a variety of pegboard hooks, brackets, and hangers to accommodate different types of tools. Use longer hooks for hanging rakes, shovels, or other long-handled tools, and smaller hooks or baskets for smaller hand tools or accessories.
- Arrange the tools: Hang the tools on the pegboard by inserting the hooks or brackets into the desired pegholes. Place the tools in a logical order, grouping similar items together. This makes it easier to find and retrieve the tools when needed.
- Label and outline: Consider labeling each tool’s hanging spot on the pegboard or using outline shapes to indicate where each tool should be placed. This helps to maintain organization and ensures that tools are returned to their proper locations after use.
- Optimize space: Use the vertical space on the pegboard efficiently by stacking tools or utilizing shelf attachments. Additionally, you can install a smaller pegboard above or beside the main pegboard to accommodate more tools and maximize storage capacity.
- Regularly assess and adjust: As your tool collection grows or changes, regularly reassess the arrangement and adjust the placement of the tools on the pegboard. This ensures that the storage system remains organized and accommodates your changing needs.
Hanging tools on pegboards offers a practical and visually appealing storage solution. It keeps your rakes and shovels easily accessible, provides an organized display, and maximizes the use of wall space in your garage, workshop, or storage area.
Creating a Tool Organizer
Creating a tool organizer is a great way to keep your rakes and shovels in order and easily accessible. With a few simple materials and some creativity, you can design a custom tool organizer that suits your needs. Here’s how:
- Determine the design: Consider your available space and the number of tools you need to organize. Decide whether you want a wall-mounted organizer, a freestanding rack, or a portable caddy. Sketch out your desired design to help visualize the final product.
- Gather the materials: Depending on your design, gather the necessary materials such as wood or metal panels, screws, nails, brackets, hooks, and any other hardware required for assembly.
- Measure and cut the materials: Measure and mark the dimensions for your organizer based on your design. Use a saw or appropriate cutting tools to cut the materials to size. Sand any rough edges and surfaces to create a smooth finish.
- Assemble the organizer: Assemble the organizer according to your design. Use screws, nails, or brackets to secure the various components together, ensuring stability and durability. If necessary, reinforce critical joints with adhesive or additional hardware.
- Add hooks or mounts: Install hooks, mounts, or brackets onto the organizer to hang your rakes and shovels. Arrange them in a logical manner, spacing them appropriately to avoid overcrowding. Use sturdy hooks or mounts capable of holding the weight of your tools.
- Include additional storage features: Consider incorporating additional storage features into your organizer. This could include shelves for smaller tools, drawers for accessories, or compartments for gloves and other gardening essentials. Customize the organizer to suit your specific needs and preferences.
- Paint or finish: Apply a coat of paint or finish to the organizer to protect the material and enhance its appearance. Choose a color that matches your personal style or complements the surrounding space.
- Install or place the organizer: Mount the organizer onto the wall, if applicable, using screws or brackets. Alternatively, place the freestanding rack or caddy in the desired location. Ensure the organizer is stable and secure before placing your tools in it.
- Organize your tools: Arrange your rakes and shovels on the organizer, making sure each tool has its designated spot. Consider labeling or color-coding the sections to further streamline organization and quickly locate the right tool for the job.
A custom-made tool organizer provides a tailored solution for storing rakes and shovels, allowing you to keep your tools organized, protected, and easily accessible whenever you need them. Plus, the satisfaction of creating a functional organizer tailored to your needs is an added bonus.
Read more: How To Use A Carpet Rake
Storing Tools in a Garden Tool Shed
A garden tool shed is a dedicated space for storing and organizing your rakes and shovels, along with other gardening equipment. It provides protection from the elements and keeps your tools easily accessible. Here are some tips for storing tools in a garden tool shed:
- Clean and prepare the shed: Before storing your tools, clean and prepare the shed. Remove any dirt or debris and sweep the floor. Consider adding shelves, hooks, or hanging systems to maximize storage space.
- Group tools by type: Organize your tools by type to make them easier to find. Group rakes together, shovels in another area, and smaller gardening tools in a separate section. This makes it more efficient to locate the tools you need.
- Use vertical storage: Utilize vertical space in the shed by installing wall hooks, pegboards, or racks. Hang rakes and shovels on the walls to keep them off the floor and easily visible. This also prevents them from leaning against each other and getting tangled.
- Invest in storage containers: Use storage containers or bins to keep smaller gardening tools and accessories organized. Label the containers to easily identify the contents, making it quick to find what you need. Stack the containers to maximize vertical storage.
- Consider a tool rack: Install a tool rack to store long-handled tools, such as rakes and shovels. A tool rack keeps them upright and prevents them from falling over, making it easier to grab the tool you need without compromising other items in the shed.
- Secure the shed: Ensure the shed is secure by installing a lock on the doors and windows. This helps to keep your tools safe from theft and unauthorized access. Additionally, consider installing motion-sensor lights or an alarm system for added security.
- Maintain proper ventilation: Ensure the shed has proper ventilation to prevent excess moisture buildup. Proper airflow helps prevent rust and corrosion on metal tools. Ventilate the shed by opening windows or installing vents to promote air circulation.
- Regularly maintain and inspect: Schedule regular maintenance and inspections of your garden tool shed. Check for any signs of damage, leaks, or pests. Repair and address any issues promptly, ensuring your tools remain in a clean and well-maintained environment.
Storing tools in a garden tool shed provides a dedicated space, keeping them organized and protected from the elements. By following these tips, you can create a functional and efficient storage solution for your rakes and shovels, allowing for easy access and maximizing the lifespan of your tools.
Using Vertical Storage Options
Using vertical storage options is a smart and efficient way to store your rakes and shovels. It helps maximize space, keep your tools organized, and allows for easy access when needed. Here are some vertical storage solutions to consider:
- Wall-mounted hooks: Install wall hooks to hang your rakes and shovels. Place them at appropriate intervals along the wall, ensuring stability and sufficient space between each tool. This method keeps your tools off the floor, reduces clutter, and provides a clean and organized storage solution.
- Pegboards: Mount a pegboard on the wall and use hooks or brackets to hang your tools. Pegboards offer versatility as you can easily rearrange the hooks or add new ones to accommodate different sizes and types of tools. It allows for easy visibility and quick access to your rakes and shovels.
- Vertical racks: Consider using vertical racks designed specifically for tool storage. These racks typically have slots or hooks that securely hold your tools in an upright position. They are often adjustable and can accommodate various tool sizes. The advantage of vertical racks is that they save floor space and keep your tools easily accessible.
- Shelf-mounted brackets: Install shelf-mounted brackets onto existing shelves or walls to create vertical storage for your rakes and shovels. These brackets usually have slots or clips that can hold long-handled tools securely, keeping them in a vertical position and out of the way.
- Overhead storage: Utilize the overhead space in your garage or shed by installing ceiling-mounted storage systems. These systems typically consist of racks or hoists that allow you to hang your rakes and shovels from the ceiling. Overhead storage frees up valuable floor space and keeps your tools organized and easily accessible.
- Tool towers: Consider using tool towers specifically designed for vertical storage. These towers are typically multi-tiered and have slots or hooks to hold your rakes and shovels in an upright position. Tool towers are compact and ideal for small spaces, providing a convenient and organized storage solution.
- Hanging storage bags: If you have limited wall or floor space, hanging storage bags can be a great option. These bags typically have pockets or loops where you can store small gardening tools, including hand trowels or forks. Hang them on hooks or racks to keep your tools organized and easily accessible.
- Custom shelves: Design and build custom shelves that cater specifically to the dimensions of your rakes and shovels. Create slots or dividers in the shelves to hold the tools upright. Custom shelves allow for a tailored storage solution that maximizes space and keeps your tools organized.
Using vertical storage options provides an effective way to store your rakes and shovels, keeping your workspace clutter-free and making it easy to find and access your tools. Choose the option that best suits your needs and available space, and enjoy the benefits of a well-organized storage system.
Conclusion
Storing rakes and shovels properly is essential for maintaining an organized and efficient garden or yard. With the right storage techniques and solutions, you can keep your tools easily accessible, protected, and in excellent condition. Here’s a recap of the key points we discussed:
Firstly, proper cleaning and maintenance of your tools is crucial before storage. Remove dirt, inspect for damages, remove rust, sharpen blades, and apply lubrication to ensure their longevity.
Choosing the right storage location is important. Determine whether to store your tools indoors or outdoors, consider climate control, accessibility, protection from the elements, security, and available space.
Utilizing wall hooks is a simple and effective solution to keep your tools off the ground and save floor space. Install hooks securely and hang your rakes and shovels to ensure easy access and organization.
Building a storage rack provides a customized storage solution that fits your specific needs. Use sturdy materials, measure and cut accurately, assemble the rack securely, and arrange your tools accordingly.
A garden shed is an excellent option for storing gardening tools. Clean and prepare the shed, group tools by type, use vertical storage options like hooks and shelves, and ensure proper ventilation and security.
Hanging tools on pegboards is a versatile and visually appealing storage solution. Select the right pegboard, plan the layout, mount it securely, arrange tools with appropriate hooks, and enjoy the benefits of easy accessibility and organization.
Creating a tool organizer allows you to design a custom storage solution that fits your space and needs. Gather the materials, measure and cut accurately, assemble the organizer, add hooks or mounts, and organize your tools accordingly.
Storing tools in a garden tool shed provides a dedicated space for your rakes and shovels. Clean and prepare the shed, group tools by type, use vertical storage options, secure the shed, maintain proper ventilation, and regularly inspect and maintain the shed.
Using vertical storage options, such as wall-mounted hooks, pegboards, racks, or overhead storage, helps maximize space and keep your tools easily accessible. Choose the option that suits your needs and available space, and enjoy the benefits of an organized and clutter-free storage system.
In conclusion, by implementing these strategies for storing rakes and shovels, you can create a well-organized and functional storage system. Proper storage not only keeps your tools in good condition but also saves space and allows for easy accessibility. So, take the time to clean and maintain your tools, choose the right storage location and solutions, and enjoy a well-organized garden or yard!
Frequently Asked Questions about How To Store Rakes And Shovels
Was this page helpful?
At Storables.com, we guarantee accurate and reliable information. Our content, validated by Expert Board Contributors, is crafted following stringent Editorial Policies. We're committed to providing you with well-researched, expert-backed insights for all your informational needs.

0 thoughts on “How To Store Rakes And Shovels”