Articles
How To Store Shallots Long Term
Modified: December 7, 2023
Learn how to store shallots long term with our informative articles. Find the best methods for preserving shallots and keeping them fresh.
(Many of the links in this article redirect to a specific reviewed product. Your purchase of these products through affiliate links helps to generate commission for Storables.com, at no extra cost. Learn more)
Introduction
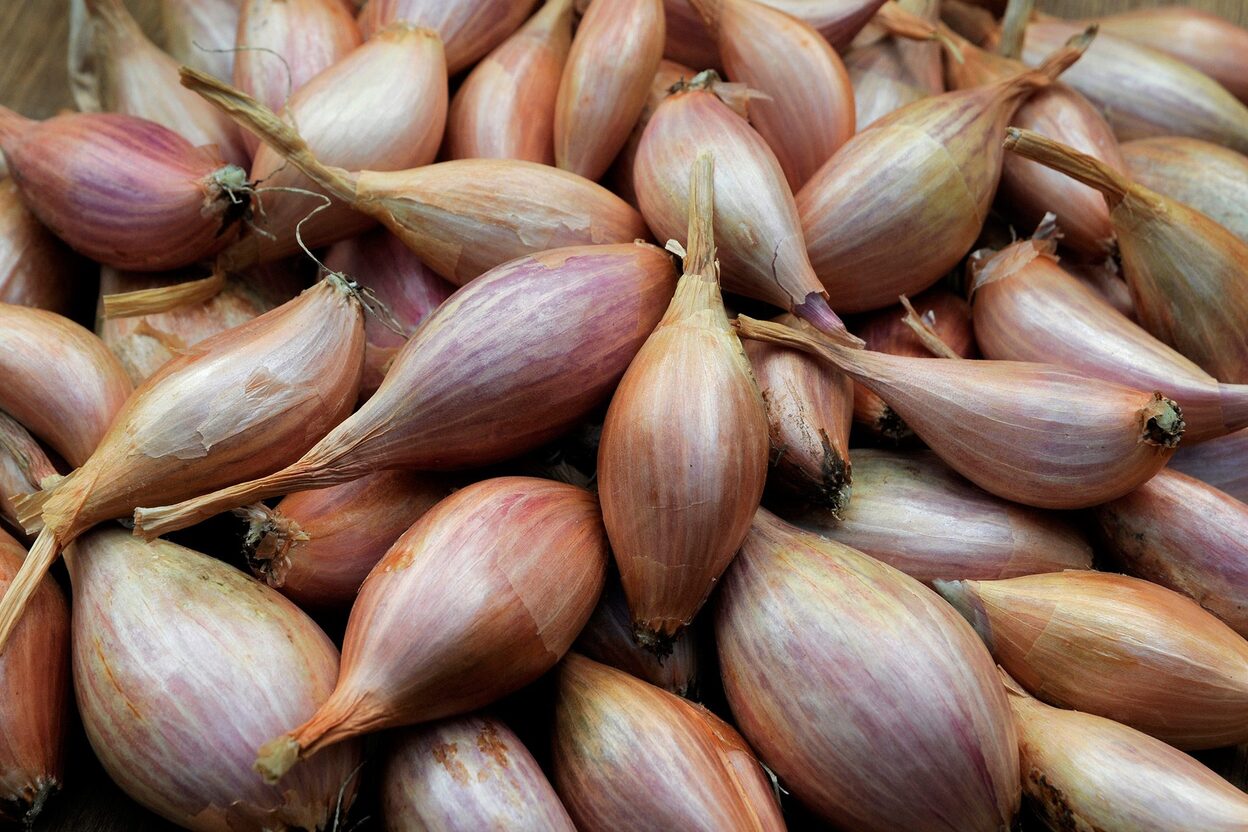
Welcome to our comprehensive guide on how to store shallots long term. Shallots are a versatile and flavorful member of the onion family, and learning how to store them properly ensures that you can enjoy their delicious taste for months on end. Whether you grow your own shallots or purchase them in bulk, storing them correctly is essential to preserve their quality and prevent spoilage.
In this article, we will explore the benefits of storing shallots long term, provide tips on choosing the right shallots, guide you through the harvesting and preparation process, and offer effective storage methods to keep your shallots fresh and flavorful. We will also discuss ways to prevent spoilage and mold growth, as well as how to incorporate stored shallots into your everyday cooking.
So, if you’re ready to discover the secrets to successfully storing shallots for an extended period, let’s get started!
Key Takeaways:
- Extend the shelf life of shallots by choosing high-quality, properly cured bulbs and storing them in a cool, dry location with good air circulation. Regularly check and sort stored shallots to prevent spoilage and mold growth.
- Stored shallots offer year-round convenience, cost savings, and enhanced flavor. Use them in sautés, roasts, dressings, and more to elevate everyday dishes with their unique and versatile taste.
Read more: How To Store Shallots
Benefits of Storing Shallots Long Term
Storing shallots long term brings a wealth of benefits. Here are some of the reasons why it’s worth considering:
- Prolonged Shelf Life: Shallots, like other root vegetables, have a limited shelf life. By storing them properly, you can extend their freshness and usability for several months, allowing you to enjoy their unique flavor and culinary versatility long after harvest.
- Cost Savings: Buying shallots in bulk during their peak season or when they are on sale can lead to significant cost savings. By storing them long term, you can take advantage of these opportunities and have a ready supply of shallots whenever you need them, without having to pay premium prices.
- Convenience and Accessibility: Having a stash of stored shallots in your kitchen provides the convenience of readily available ingredients. This eliminates the need for frequent trips to the grocery store and ensures that you always have shallots on hand when a recipe calls for them.
- Year-Round Availability: By storing shallots, you can enjoy their flavor and health benefits throughout the year, even when they are out of season. This allows you to add their distinct taste to a variety of dishes and maintain a well-rounded culinary repertoire regardless of the time of year.
- Enhanced Flavor Development: Some chefs believe that storing shallots for an extended period can enhance their flavor by allowing them to mature and develop a more intense and complex taste. This is especially true for certain heirloom varieties that benefit from an aging process.
By understanding the benefits of storing shallots long term, you can see how it can be a worthwhile endeavor. Not only does it provide practical advantages in terms of cost savings and convenience, but it also allows you to elevate your dishes with the unique flavor of shallots at any time of the year.
Choosing the Right Shallots for Long-Term Storage
When it comes to storing shallots long term, selecting the right variety is crucial. Here are some key considerations to keep in mind:
- Choose Good Quality Shallots: Look for shallots that are firm, plump, and free from blemishes or soft spots. Avoid shallots that have started to sprout or show signs of decay, as they will not store well.
- Opt for Firm Bulbs: The bulbs should feel firm and heavy in your hand. Avoid shallots that are overly soft or mushy, as this indicates poor quality and a shorter shelf life.
- Consider Storage-Friendly Varieties: Some shallot varieties are better suited for long-term storage due to their thicker, more protective skins. Examples include French Gray Shallots, Ambition Shallots, and Zebrune Shallots. These varieties tend to have a longer shelf life and maintain their flavor and texture well after harvest.
- Check for Proper Curing: Curing is the process of drying shallots after they are harvested. Look for shallots that have been properly cured, as this helps improve their storage potential. Cured shallots will have dry, papery skins and a more intense flavor.
It’s worth noting that shallots purchased directly from farmers or specialty markets often have better storage potential compared to those found in regular grocery stores. These shallots are often fresher and have undergone proper curing, making them more durable and suitable for long-term storage.
By selecting high-quality shallots with the right characteristics for long-term storage, you set yourself up for success in preserving their flavor and freshness for an extended period. This careful selection process ensures that you have the best possible shallots to enjoy in your culinary endeavors.
Harvesting Shallots for Storage
The process of harvesting shallots for storage is just as important as selecting the right ones. Here are the steps to follow:
- Determine the Right Time: Shallots are typically ready for harvest when their foliage starts to turn yellow and deteriorate. This usually occurs in late summer or early fall, depending on your location and the variety of shallots you are growing. The foliage acts as a signal that the shallots have reached maturity and are ready to be harvested.
- Loosen the Soil: Gently loosen the soil around the base of the shallot plants using a garden fork or small shovel. Take care not to damage the bulbs, as they are delicate.
- Lift the Plants: Using your hands or a gardening tool, carefully lift the shallot plants out of the ground, making sure to keep the bulbs intact. Shake off any excess soil, but avoid removing the thin outer skin layer.
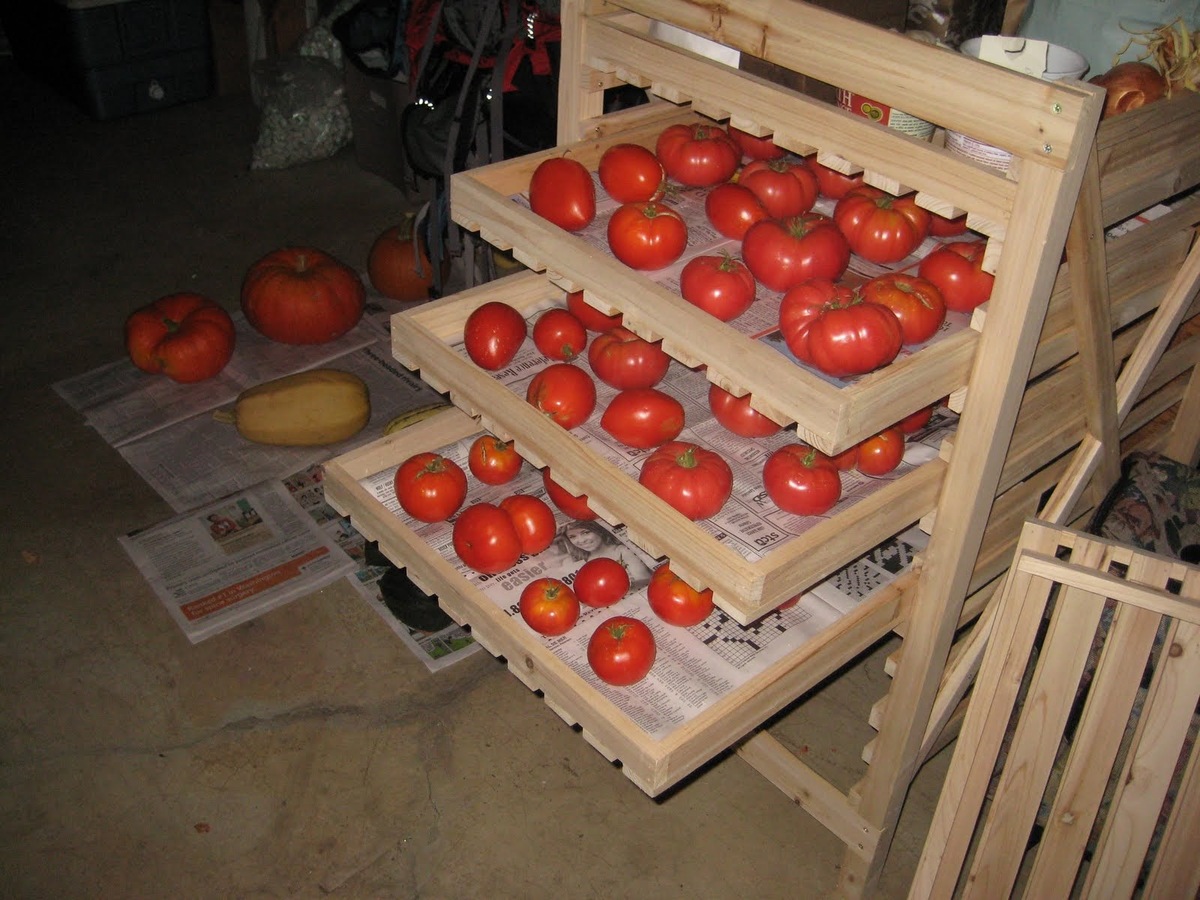
- Cure the Shallots: Allow the harvested shallots to cure in a dry, well-ventilated area for 1-2 weeks. This helps toughen the outer skins, promotes further drying, and enhances their storage potential.
- Trim the Tops: After curing, trim the dried foliage and roots off the shallots, leaving about 1 inch of stem attached. This neatens the appearance and makes them easier to handle and store.
It’s important to handle the shallots gently during the harvesting process to minimize bruising or damage, as this can lead to spoilage during storage. Additionally, avoid washing the shallots after harvest, as excess moisture can promote rotting.
By following these steps, you can ensure that your shallots are harvested at the right time and are in optimal condition for storage. This careful harvesting process sets the stage for successful long-term storage and preserving the flavor and quality of your shallots.
Preparing Shallots for Long-Term Storage
Properly preparing shallots before storing them is essential for maximizing their longevity and maintaining their quality. Follow these steps to prepare your shallots for long-term storage:
- Remove Outer Skins: Start by removing any loose or damaged outer skins from the shallots. Gently peel away the papery layers, being careful not to damage the shallot bulbs.
- Avoid Washing: Unlike some other produce, shallots should not be washed before storage. Excess moisture can promote mold growth and spoilage. Instead, gently brush off any dirt or debris with a soft-bristled brush or cloth.
- Cut Off Tops: Trim the tops of the shallots, leaving about ½ inch of stem attached. This helps to prevent moisture loss and makes handling and storage easier.
- Inspect for Damaged Shallots: Sort through the shallots and remove any that are bruised, soft, or showing signs of rot. Damaged shallots can affect the entire batch, so it’s important to remove them to prevent spoilage.
It’s important to note that some sources recommend dusting the shallots with powdered sulfur or wood ash before storage as a natural fungicide. However, this step is optional and may not be necessary if you inspect and sort your shallots carefully.
By taking the time to properly prepare your shallots, you ensure that they are ready for long-term storage and minimize the risk of spoilage. These simple steps help maintain the freshness and quality of your shallots as they await their culinary destiny.
Store shallots in a cool, dark, and well-ventilated place, such as a pantry or cellar. Keep them in a mesh bag or a basket to allow for air circulation, and make sure to remove any sprouting or rotting shallots to prevent spoilage.
Read more: How To Store Shallots In The Fridge
Storing Shallots in a Cool and Dry Location
The storage environment plays a crucial role in determining the longevity and quality of stored shallots. Here are some tips for storing shallots in a cool and dry location:
- Choose the Right Storage Container: Select a container that allows for good air circulation and prevents excessive moisture buildup. Mesh bags, wire baskets, or wooden crates are excellent options as they provide ventilation and help maintain the proper humidity levels.
- Keep Them Cool: Shallots prefer cooler temperatures for long-term storage. Ideally, the storage location should be between 35°F and 50°F (1.5°C and 10°C). This can be a root cellar, basement, garage, or even an unheated pantry, as long as the temperature remains consistent.
- Avoid Exposure to Sunlight: Shallots are sensitive to light, which can cause them to sprout prematurely. Store them in a dark area to prevent unwanted sprouting. If using a wire basket or crate, cover it with a cloth or place it inside a paper bag to shield the shallots from light.
- Maintain Low Humidity: Moisture promotes mold growth and can lead to the deterioration of your stored shallots. Choose a storage location with low humidity, ideally below 60%. Avoid storing shallots in areas prone to dampness or near sources of moisture.
- Monitor and Adjust: Regularly check on your stored shallots to ensure they are staying cool and dry. If you notice signs of sprouting or mold growth, remove the affected shallots and adjust the storage conditions if necessary.
Remember, the goal is to create an environment that closely mimics the natural conditions in which shallots thrive. By providing a cool and dry storage location, you can extend the shelf life of your shallots and enjoy their flavor and culinary benefits for an extended period.
Implementing these storage tips will help preserve the quality of your shallots and ensure that they remain fresh and ready to use whenever you need them.
Checking and Sorting Stored Shallots Regularly
Regularly checking and sorting your stored shallots is an essential step in maintaining their quality and preventing spoilage. Here’s why it’s important and how to do it:
Why Check and Sort Stored Shallots?
Over time, shallots may start to deteriorate, sprout, or develop mold. By checking on them regularly, you can identify and remove any shallots that are showing signs of spoilage. This prevents the spread of mold or rot to the rest of your stored shallots, ensuring that you only use the ones that are in good condition.
How to Check and Sort Stored Shallots:
- Inspect for Mold: Examine each shallot carefully for any signs of mold growth. Mold may appear as fuzzy or powdery patches and can cause the shallot to become soft or rotten. If you come across any moldy shallots, remove them from the storage container immediately.
- Look for Sprouting Shallots: Sprouting is a natural process as shallots age, but excessive sprouting can affect their flavor and quality. Check for any shallots that are sprouting profusely or have long sprouts. It’s best to use these shallots first, as their flavor may be milder than freshly harvested ones.
- Remove Bruised or Soft Shallots: Inspect the shallots for any signs of bruising, softness, or shriveling. These are indicators of deterioration and can lead to faster spoilage if not removed. Set aside any shallots that show these signs and use them as soon as possible.
- Organize by Size: If you have shallots of different sizes, consider organizing them by size. This makes it easier to select the size of shallot you need for a particular recipe without having to sift through the entire batch.
Checking and sorting stored shallots should be done at regular intervals, especially during the first few weeks of storage. This helps identify and address any issues early on, ensuring that your stored shallots remain in good condition for a longer period.
By dedicating a few minutes to check and sort your stored shallots regularly, you can enjoy the benefits of fresh and quality shallots in your cooking for an extended period of time.
Preventing Spoilage and Mold Growth
Preventing spoilage and mold growth is crucial for ensuring the longevity and quality of your stored shallots. Here are some effective strategies to help you keep your shallots in optimal condition:
- Proper Storage Conditions: As mentioned earlier, storing shallots in a cool and dry location with good air circulation is essential. Maintaining a consistent temperature, low humidity, and darkness helps prevent moisture buildup and inhibits the growth of mold and bacteria.
- Avoid Stacking or Crowding: Do not stack or overcrowd shallots during storage, as this restricts air circulation and creates a breeding ground for mold and rot. Providing enough space between each shallot allows for better ventilation and reduces the risk of spoilage.
- Regularly Inspect and Sort: As discussed in the previous section, regularly checking and sorting stored shallots is critical. Remove any shallots showing signs of mold, soft spots, or sprouting. By promptly removing affected shallots, you can prevent the spread of mold and keep the rest of your shallots fresh.
- Avoid Excessive Handling: Rough handling can bruise or damage shallots, making them more susceptible to spoilage. Handle them gently and minimize unnecessary touching or moving of the shallots to avoid unnecessary damage.
- Do Not Refrigerate: While some vegetables benefit from refrigeration, shallots are best stored in cool, dry conditions. Refrigeration can cause shallots to become soft and lose flavor. It is recommended to store them in a cool pantry or cellar instead.
By following these preventive measures, you can significantly reduce the risk of spoilage and mold growth, allowing you to enjoy your stored shallots for an extended period of time.
Remember, a little vigilance goes a long way in preserving the quality and flavor of your stored shallots. With proper storage and regular monitoring, you can enjoy the taste of fresh shallots in your recipes throughout the year.
Using Stored Shallots in Everyday Cooking
Having a stash of stored shallots opens up a world of culinary possibilities in your everyday cooking. Here are some inspirational ideas on how to use stored shallots to enhance your dishes:
- Sautéed Shallots: Shallots are known for their mild, sweet flavor when cooked. Sauté them in butter or oil until they become translucent and slightly caramelized. Use them as a base for sauces, soups, stir-fries, and pasta dishes for added depth and complexity.
- Roasted Shallots: Roasting shallots brings out their natural sweetness and adds a delicious caramelized flavor to your dishes. Toss whole or halved shallots with olive oil, salt, and pepper, then roast them until they are soft and golden. Add roasted shallots to salads, grain bowls, or serve them as a side dish with roasted meats.
- Shallot Vinaigrette: Create a tangy and flavorful dressing by combining finely minced shallots with vinegar, mustard, and oil. Drizzle the dressing over salads or use it as a marinade for grilled vegetables or meats.
- Shallot Infused Oil: Infuse oil with the aromatic flavor of shallots by combining peeled shallots with your choice of oil in a jar or bottle. Let it sit for a few days to develop the flavor, then use the infused oil in dressings, marinades, or for sautéing.
- Shallot Butter: Make a compound butter by blending finely minced shallots with softened butter and your choice of herbs or spices. Use the shallot butter to add rich flavor to steaks, seafood, roasted vegetables, or spread it on crusty bread.
- Shallot Relish: Finely dice shallots and mix them with vinegar, sugar, and spices to create a tangy and sweet relish. Use it as a topping for grilled meats, sandwiches, or as an accompaniment to cheese and charcuterie boards.
These are just a few ideas to get your creativity flowing. Shallots are versatile and can be used in a wide range of dishes, from appetizers and side dishes to main courses and sauces. Experiment with different cooking methods and flavor combinations to discover how stored shallots can elevate your everyday recipes.
Remember to adjust the amount of shallots to suit your taste preferences. Shallots have a milder flavor compared to regular onions, so you may want to use slightly more in your recipes to achieve the desired taste.
With stored shallots at your disposal, you can easily add depth and complexity to your dishes, making each meal a flavorful experience.
Read more: How To Store Meat Long Term
Conclusion
Congratulations! You are now equipped with the knowledge and techniques to store shallots long term and enjoy their delightful flavor in your everyday cooking. By following the steps outlined in this guide, you can extend the shelf life of shallots and maintain their quality for months on end.
Remember the key points:
- Choose high-quality shallots with firm bulbs and proper curing for long-term storage.
- Harvest shallots at the right time and handle them with care to minimize damage.
- Prepare shallots by removing outer skins, but avoid washing them to prevent excess moisture.
- Store shallots in a cool and dry location, ensuring proper air circulation.
- Regularly check and sort stored shallots to remove any signs of spoilage.
- Take preventive measures to avoid mold growth and spoilage, such as avoiding excessive handling and stacking.
- Explore various cooking methods and use stored shallots to add flavor to your dishes.
By implementing these tips, you can enjoy the benefits of shallots year-round, saving money, and adding a burst of flavor to your favorite recipes.
So, whether you’re sautéing shallots for a savory sauce, roasting them for a caramelized sweetness, or incorporating them into dressings and condiments, stored shallots will undoubtedly elevate your culinary creations.
Now, it’s time to put your knowledge into action. Stock up on shallots, store them properly, and let your creativity flow in the kitchen. Enjoy the wonderful taste and versatility of shallots in your everyday cooking!
Frequently Asked Questions about How To Store Shallots Long Term
Was this page helpful?
At Storables.com, we guarantee accurate and reliable information. Our content, validated by Expert Board Contributors, is crafted following stringent Editorial Policies. We're committed to providing you with well-researched, expert-backed insights for all your informational needs.


0 thoughts on “How To Store Shallots Long Term”