Articles
How To Store Stencils
Modified: August 27, 2024
Discover the best ways to store your stencils with our informative articles. Keep your stencils organized and in top condition for future use.
(Many of the links in this article redirect to a specific reviewed product. Your purchase of these products through affiliate links helps to generate commission for Storables.com, at no extra cost. Learn more)
Introduction
Stencils are valuable tools for artists, crafters, and DIY enthusiasts. They allow for precise and consistent designs, making them a popular choice for various artistic and decorative projects. Whether you have a small collection of stencils or an extensive assortment, proper storage is essential to keep them in good condition and easily accessible.
In this article, we will explore different storage solutions and techniques to help you keep your stencils organized and protected. From folders and envelopes to storage bins and boxes, we will cover various options that cater to different needs and preferences. We will also discuss the importance of proper labeling and organization to make finding and using your stencils a breeze.
Additionally, we will address the importance of protecting your stencils from damage, such as bending, tearing, and fading. We will provide tips on storing your stencils in a climate-controlled environment to prevent exposure to extreme temperatures and humidity.
So, whether you are a professional artist, a hobbyist, or someone who enjoys occasional DIY projects, this article will guide you through the process of storing your stencils effectively, ensuring their longevity and easy accessibility whenever inspiration strikes.
Key Takeaways:
- Properly storing and organizing stencils is crucial for preserving their quality and ensuring easy access for creative projects. Choose suitable storage solutions, prepare stencils for storage, and protect them from damage to unleash your creativity hassle-free.
- Storing stencils in a climate-controlled environment, organizing them by category, and labeling them accurately are key to maintaining an organized and well-preserved stencil collection. By implementing best storage practices, you can save time and effort when searching for specific designs and focus on bringing your artistic ideas to life.
Read more: How To Stencil On Glass
Choosing the Right Storage Solution
When it comes to storing stencils, one size does not fit all. The right storage solution depends on the size of your stencil collection, the materials they are made of, and your personal preferences. Here are a few options to consider:
- Folders or Envelopes: Folders and envelopes are a simple yet effective way to store stencils. They are great for smaller collections or if you want to keep your stencils organized by category. Look for folders or envelopes that are made of durable materials, such as heavy-duty plastic or cardstock, to protect your stencils from bending and tearing. Clear options are especially useful as they allow you to easily see the stencils inside without having to open each one.
- Storage Bins or Boxes: If you have a larger stencil collection or prefer a more compact storage option, consider using storage bins or boxes. Plastic storage bins with dividers or compartments are ideal for keeping stencils separated and organized. Make sure to choose bins or boxes that are sturdy and stackable, so you can easily store them on shelves or in cabinets.
- Art Portfolios: For artists or professionals who have a large number of stencils and often need to transport them, art portfolios are an excellent choice. Art portfolios are typically lightweight, durable, and come in various sizes. They often include sleeves or pockets where you can insert your stencils, keeping them protected and organized. Some art portfolios even have adjustable straps for easy carrying.
Consider your storage space and accessibility needs when choosing the right storage solution. If you have limited space, opt for compact options like folders or storage bins. If you frequently use your stencils and need quick access, consider solutions that allow for easy browsing and retrieval, such as clear folders or portfolios with page flips.
Remember, the goal is to keep your stencils safe from damage while keeping them easily accessible. Choose a solution that aligns with your storage needs and personal preferences to ensure a hassle-free experience when using your stencils for your creative projects.
Preparing Your Stencils for Storage
Before you store your stencils, it’s essential to prepare them properly to ensure their longevity and protect them from damage. Here are some steps you can take to prepare your stencils for storage:
- Clean your stencils: Before storing your stencils, make sure they are clean and free from any excess paint or debris. Use a mild soap or stencil cleaner and a soft brush or sponge to gently clean both sides of the stencil. Rinse it thoroughly with water and let it dry completely before storing it. This simple step will prevent any leftover paint or dirt from transferring onto other stencils and help maintain the integrity of the designs.
- Store flat: It’s best to store stencils flat to prevent them from warping or bending over time. If your stencils are large or rigid and cannot be stored completely flat, consider placing them between pieces of acid-free tissue paper or cardboard to provide additional support and protection. This will help maintain the shape and prevent any creases or damage.
- Protect fragile stencils: If you have stencils made of delicate materials, such as thin plastic or acetate, take extra precautions to protect them. Consider placing them in a protective sleeve or envelope to prevent them from tearing or stretching. You can also use archival tissue paper to wrap fragile stencils individually before storing them.
- Avoid excessive handling: When preparing your stencils for storage, try to minimize excessive handling to prevent smudging or damaging the designs. Use clean and dry hands or wear thin cotton gloves to protect the stencils from any oils or dirt on your hands.
By properly preparing your stencils for storage, you can ensure they remain in excellent condition and are ready for use whenever you need them. Taking these steps will help extend the lifespan of your stencils and preserve the quality of the designs, allowing you to enjoy them for years to come.
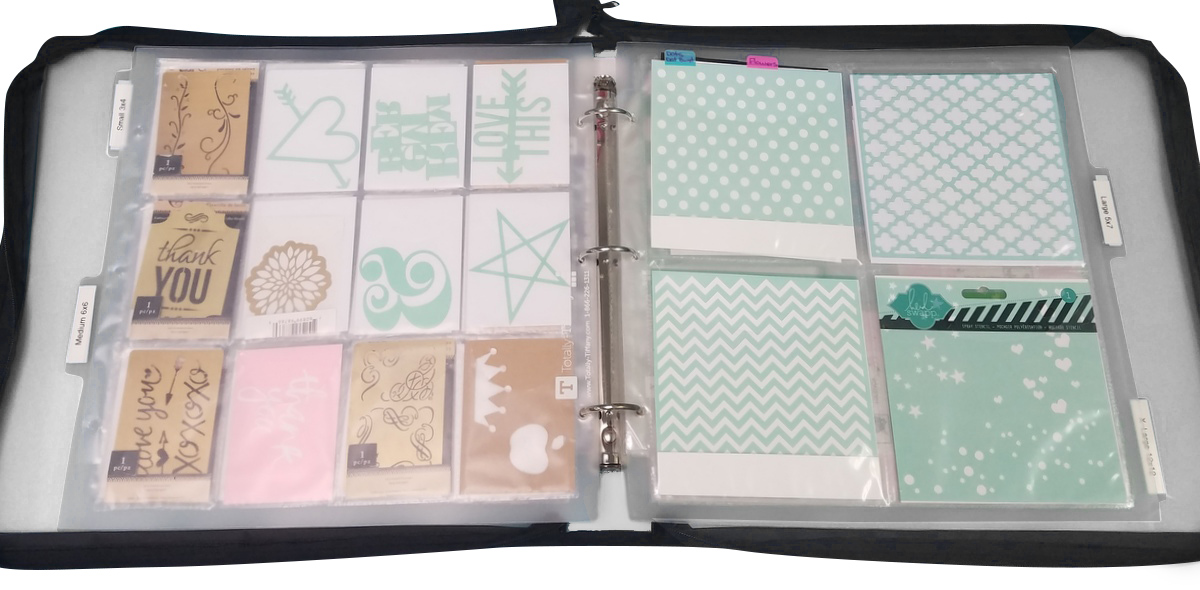
Storing Stencils in Folders or Envelopes
Folders and envelopes are a popular and affordable option for storing stencils. They provide a simple and organized way to keep your stencils safe and easily accessible. Here are some tips on storing stencils in folders or envelopes:
- Choose the right size: Select folders or envelopes that are large enough to comfortably hold your stencils without bending or folding them. It’s essential to choose a size that allows the stencils to lay flat and unfold completely when needed.
- Use heavy-duty materials: Opt for folders or envelopes made of durable materials, such as heavy-duty plastic or cardstock. These materials will protect your stencils from bending, tearing, and moisture. Clear plastic folders or envelopes are particularly useful as they allow you to easily see the stencils inside without having to open each one.
- Organize by category: To make finding specific stencils easier, consider organizing them by category. For example, you can group floral stencils together, letter stencils in another section, and so on. This organization method will save you time and effort when searching for particular designs.
- Label each folder or envelope: Labeling is crucial for quick and efficient stencil retrieval. Use a marker or label maker to clearly label each folder or envelope with the corresponding stencil category or design name. This labeling system will help you locate the desired stencil without having to open multiple folders or envelopes.
- Store in a dry and cool place: To protect your stencils from humidity and temperature fluctuations, store the folders or envelopes in a dry and cool place. Avoid storing them in areas that are prone to moisture, such as basements or attics. A well-ventilated storage area will help prevent any potential damage to your stencils.
Storing stencils in folders or envelopes is a convenient and space-saving solution. It allows you to keep your collection organized and protected, while also offering easy access to your stencils when needed. Follow these tips to ensure that your stencils remain in excellent condition for future creative endeavors.
Using Storage Bins or Boxes for Stencil Storage
If you have a larger stencil collection or prefer a more compact storage option, using storage bins or boxes can be an excellent choice. Here are some tips for storing stencils in storage bins or boxes:
- Select the right size: Choose storage bins or boxes that are spacious enough to accommodate your stencils without folding or bending them. It’s essential to have sufficient room for the stencils to lay flat or stand vertically, depending on your preference.
- Consider dividers or compartments: Look for storage bins or boxes that have dividers or compartments. These can help keep your stencils organized and prevent them from shifting or getting mixed up. Dividers can be particularly useful if you have different stencil sizes or want to separate stencils by category.
- Opt for sturdy and stackable options: Choose storage bins or boxes that are made of durable materials and can be stacked securely. This will maximize your storage space while keeping your stencils protected. Additionally, consider using plastic bins or boxes with latching lids to prevent dust and moisture from entering.
- Label the bins or boxes: Labeling is essential to easily locate specific stencils within a collection. Use adhesive labels or a label maker to identify the contents of each storage bin or box. Consider including categories, design names, or numbering systems for efficient organization and retrieval of stencils.
- Store in a clean and dry area: It’s important to store the storage bins or boxes in a clean and dry area to ensure the longevity of your stencils. Avoid areas that are prone to moisture or extreme temperature changes, as this can damage the stencils. A cool and well-ventilated space is ideal for stencil storage.
Using storage bins or boxes enables you to keep your stencil collection neatly organized and easily accessible. The versatility of these storage solutions allows you to stack them vertically, saving valuable shelf or cabinet space. With proper labeling and a systematic approach to storage, you can efficiently locate and retrieve the stencils you need for your projects. Follow these tips to ensure that your stencils remain in excellent condition and well-preserved for future use.
Read more: How To Use Quilt Stencils
Organizing Stencils by Category
When it comes to managing a stencil collection, organizing them by category can be a game-changer. By grouping stencils based on their designs, themes, or styles, you can easily locate specific stencils for your projects. Here are some tips for organizing stencils by category:
- Choose your category system: Determine how you want to categorize your stencils. You can categorize them based on themes, such as flowers, animals, letters, or patterns. Alternatively, you can categorize them based on a specific style, like vintage, modern, or geometric. The choice ultimately depends on your preferences and the nature of your stencil collection.
- Create labeled sections: Whether you’re using folders, envelopes, storage bins, or boxes, designate sections for each stencil category. Use dividers or separate compartments if available. This way, you can easily locate the specific category you need and find the stencil you’re looking for without sifting through the entire collection.
- Consider subcategories: If your stencil collection is extensive, you may want to create subcategories within each main category. For example, within the “animals” category, you can have subcategories like “pets,” “wildlife,” or “marine life.” This level of organization can further streamline your search process and make finding the right stencil even more efficient.
- Label folders, envelopes, or bins: Proper labeling is essential for quick and easy identification. Use adhesive labels, label makers, or even handwritten labels to clearly mark each section or category. Make sure the labels are visible and legible to avoid confusion. Consider using color-coded labels for an added visual cue.
- Regularly review and update: As your stencil collection grows, it’s important to regularly review and update your organization system. Remove any stencils that no longer fit a particular category or consider creating new categories if needed. This ongoing maintenance will ensure that your organization system remains efficient and relevant.
Organizing stencils by category not only makes it easier to find specific designs but also enhances your creative process. It allows you to quickly browse through relevant options and sparks inspiration for various projects. With a well-organized stencil collection, you’ll spend less time searching and more time creating.
Store stencils in a flat, dry place to prevent warping. Keep them in a folder or file organizer to easily find and access them when needed.
Labeling Your Stencils
Properly labeling your stencils is a crucial step in maintaining an organized collection and facilitating easy identification. Clear and accurate labels will save you time and effort when searching for specific designs. Here are some tips for labeling your stencils:
- Use waterproof and durable labels: Since stencils may come into contact with water or paint during use, it’s important to use waterproof labels that won’t smudge or fade. Opt for durable label materials, such as vinyl or polyester, to ensure longevity.
- Provide essential information: Include essential information on the labels, such as the stencil’s name, size, and any relevant details. This information will help you quickly identify the stencil you need, especially if you have multiple stencils with similar designs.
- Consider numbering your stencils: Numbering your stencils can simplify the organization and retrieval process. Assign a unique number to each stencil and create a corresponding index or catalog that lists the stencil number, name, and any additional information. This system can be especially helpful for larger collections or when working on complex projects that require multiple stencils.
- Label storage containers or sleeves: In addition to labeling individual stencils, it’s important to label the storage containers or sleeves that hold your stencils. Clearly mark the outside of folders, envelopes, bins, or boxes with the corresponding stencil category or theme. This will make it easier to locate the specific container or sleeve you need without having to open each one.
- Use consistent labeling: Establish a consistent labeling style and format to maintain uniformity throughout your stencil collection. This will make it easier to read and understand the labels at a glance. Use consistent font sizes, colors, and placement so that your labels are visually cohesive.
- Regularly update or revise labels: Stencils may undergo changes over time, such as being resized, repurposed, or retired. Make it a habit to regularly review and update your labels to reflect any changes in your stencil collection. Remove outdated or inaccurate labels and replace them with updated information to keep your collection organized.
Properly labeling your stencils will streamline your creative process and make it easier to access the designs you need. Take the time to label your stencils and storage containers accurately using durable and waterproof materials. By implementing a consistent labeling system, you’ll save valuable time and effort, allowing you to focus on your artistic projects.
Storing Stencils Vertically
Storing stencils vertically is a space-saving and convenient method that not only helps protect the stencils but also allows for easier access when retrieving specific designs. Here are some tips for storing stencils vertically:
- Choose the right storage container: Look for storage containers that are designed to hold stencils vertically. There are specialized stencil storage systems available in the market with slots or compartments specifically designed to securely hold stencils in an upright position. Alternatively, you can use magazine holders, file organizers, or even repurpose shoeboxes with dividers.
- Group similar-sized stencils together: To ensure that the stencils fit properly within the storage container, group similar-sized stencils together. This will prevent smaller stencils from slipping between larger ones and help maintain the integrity of the designs. Depending on the size of your collection, you may need multiple storage containers to separate stencils by size or category.
- Consider using protective sleeves: To provide additional protection, you can place stencils inside protective sleeves before storing them vertically. Clear plastic sleeves or sheet protectors work well for this purpose. The sleeves prevent the stencils from getting damaged due to friction or accidental bending while being stored vertically.
- Label the storage container: Clearly label the storage container or dividers with the corresponding stencil category or theme. This will make it easier to locate specific designs when needed. Use adhesive labels or label makers to ensure the labels are legible and visible at a glance.
- Store in a dry and cool environment: To maintain the quality of the stencils, it’s important to store them in a dry and cool environment. Avoid areas that are prone to moisture or extreme temperature fluctuations, as these can damage the stencils. A well-ventilated space will help prevent any potential damage, such as warping or mold growth.
Storing stencils vertically not only saves space but also keeps them organized and easily accessible. By following these tips, you can protect your stencils and ensure that they remain in excellent condition for future creative endeavors.
Protecting Stencils from Damage
Stencils are valuable tools that require proper care and protection to ensure their longevity. By taking steps to protect your stencils from damage, you can preserve their quality and use them for years to come. Here are some tips for protecting your stencils:
- Handle with clean hands: Before using your stencils, make sure your hands are clean and dry. Oils and dirt from your hands can transfer onto the stencils, potentially causing damage or altering the designs. If necessary, wear thin cotton gloves to prevent direct contact with the stencils.
- Store stencils properly: Whether you choose to store your stencils in folders, envelopes, storage bins, or boxes, ensure they are stored flat or vertically as recommended. Storing them properly helps prevent bending, warping, or tearing while minimizing the risk of accidental damage.
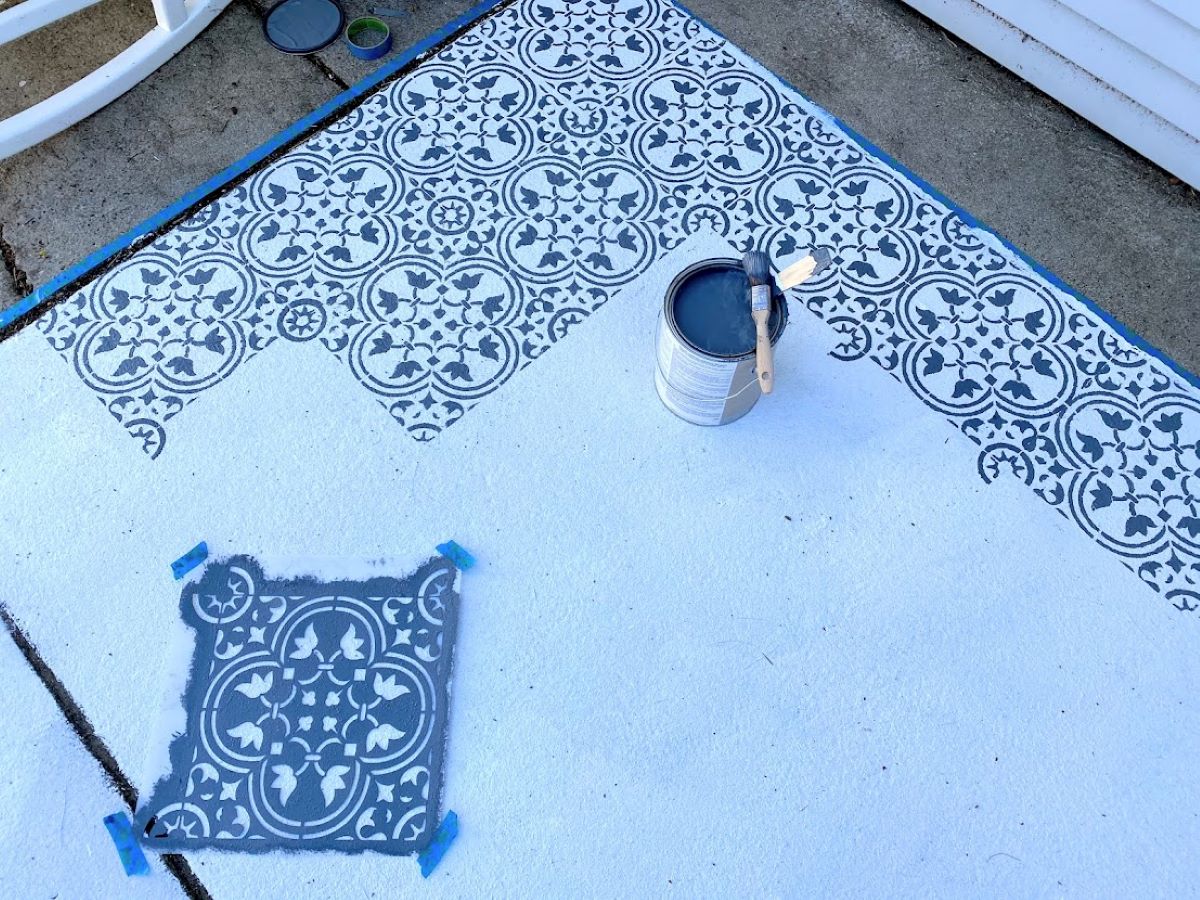
- Avoid excessive pressure: When using stencils, apply gentle and even pressure to avoid damaging the stencil or the surface you are working on. Excessive pressure can cause the stencil to bend or tear, compromising its future use. Take your time and use a light touch to achieve the desired results.
- Clean stencils carefully: After each use, clean your stencils using a mild soap or stencil cleaner and a soft brush or sponge. Gently scrub both sides of the stencil to remove any residual paint or debris. Rinse thoroughly with water and pat dry with a lint-free cloth or let them air dry completely.
- Prevent exposure to extreme temperatures: Stencils are typically made from materials like plastic or acetate, which can be sensitive to extreme temperatures. Avoid storing or using the stencils in environments with high heat or direct sunlight, as this can cause warping or melting of the stencil material.
- Keep stencils away from sharp objects: To avoid accidental tearing or cutting of your stencils, store them away from sharp objects or tools. Keep them in a separate compartment or container to minimize the risk of accidental damage.
- Store in a climate-controlled environment: If possible, store your stencils in a climate-controlled environment. Extremes of humidity and temperature can damage the stencils over time. A cool and dry area with stable humidity levels will help ensure the stencils remain in optimal condition.
- Inspect periodically: Regularly inspect your stencils for any signs of wear or damage. Look for any cracking, peeling, or distortion in the designs. If you notice any issues, consider replacing or repairing the stencil to prevent further damage.
By following these tips, you can protect your stencils from damage and maintain their quality. Proper handling, storage, and cleaning can extend the lifespan of your stencils, allowing you to continue using them for your artistic projects.
Read more: How To Use A Stencil Printer
Storing Stencils in a Climate-Controlled Environment
Storing stencils in a climate-controlled environment is crucial for their preservation and longevity. Extreme temperatures and humidity can cause damage to stencil materials, affecting their quality and functionality. Here are some tips for storing stencils in a climate-controlled environment:
- Avoid extreme heat and cold: Stencils are often made from materials like plastic or acetate, which can be sensitive to temperature fluctuations. Avoid storing stencils in areas that are exposed to direct sunlight, as excessive heat can warp or melt the materials. Similarly, extreme cold temperatures can make the stencil material brittle and prone to cracking.
- Control humidity levels: High humidity levels can cause stencil materials to absorb moisture, leading to warping and degradation. It’s important to store stencils in an area with controlled humidity levels. Ideally, the humidity should be between 40% to 60%. Avoid storing stencils in areas prone to dampness, such as basements or attics, as these areas are more likely to have fluctuating humidity levels.
- Consider using a dehumidifier or humidifier: Depending on your climate and local conditions, you may need to use dehumidifiers or humidifiers to control the humidity levels in your storage area. Dehumidifiers help remove excess moisture from the air, while humidifiers add moisture when the air is too dry. This can help maintain a stable environment for your stencils.
- Choose a suitable storage location: Select a storage location that is away from direct sunlight, heat sources, and areas with high humidity. Ideally, the storage area should be well-ventilated to prevent the buildup of moisture. A room or closet with a stable temperature and humidity level is ideal for stencil storage.
- Monitor the environment: Use a hygrometer or a digital climate monitor to regularly check the temperature and humidity levels in your stencil storage area. This allows you to identify any sudden changes or deviations from the optimal range. You may need to make adjustments, such as using a dehumidifier or humidifier, to maintain the desired climate conditions for your stencils.
- Inspect stencils periodically: Regularly inspect your stored stencils for any signs of damage or degradation. Check for any warping, brittleness, discoloration, or mold growth. If you notice any issues, remove the affected stencils from the storage area and take appropriate steps to address the problem, such as repairing or replacing damaged stencils.
Storing stencils in a climate-controlled environment helps preserve their quality and ensure they remain in optimal condition. By controlling the temperature and humidity levels, you can minimize the risk of damage caused by environmental factors. Follow these tips to create a suitable storage environment for your stencils and enjoy their long-lasting usability.
Conclusion
Storing your stencils properly is essential for preserving their quality, ensuring their longevity, and making them easily accessible for your creative projects. By following the tips and techniques discussed in this article, you can maintain an organized stencil collection while protecting them from damage. Whether you choose to store your stencils in folders, envelopes, storage bins, or boxes, remember to consider the size and material of your stencils, choose suitable storage solutions, and label them accurately for easy identification.
Preparing your stencils for storage by cleaning them and storing them flat or vertically will help prevent bending, warping, and other forms of damage. Protecting your stencils from excessive pressure and exposure to extreme temperatures will ensure their integrity. Additionally, storing your stencils in a climate-controlled environment, monitoring temperature and humidity levels and regularly inspecting them will help keep them in optimal condition.
Proper storage and protection are not only important for the physical condition of your stencils but also for your creative process. An organized and well-maintained stencil collection saves you time and effort when searching for specific designs, inspires creativity, and allows you to focus on bringing your artistic ideas to life.
Remember, each stencil is a valuable tool that deserves proper care and attention. By implementing the best storage practices outlined in this article, you can enjoy the benefits of a well-organized stencil collection and unleash your creativity without worrying about the condition or accessibility of your stencils.
So, take the time to choose the right storage solution, prepare your stencils for storage, organize them by category, label them accurately, store them in a climate-controlled environment, and protect them from damage. Your stencils will be ready and waiting for your next artistic adventure.
Frequently Asked Questions about How To Store Stencils
Was this page helpful?
At Storables.com, we guarantee accurate and reliable information. Our content, validated by Expert Board Contributors, is crafted following stringent Editorial Policies. We're committed to providing you with well-researched, expert-backed insights for all your informational needs.


0 thoughts on “How To Store Stencils”