Articles
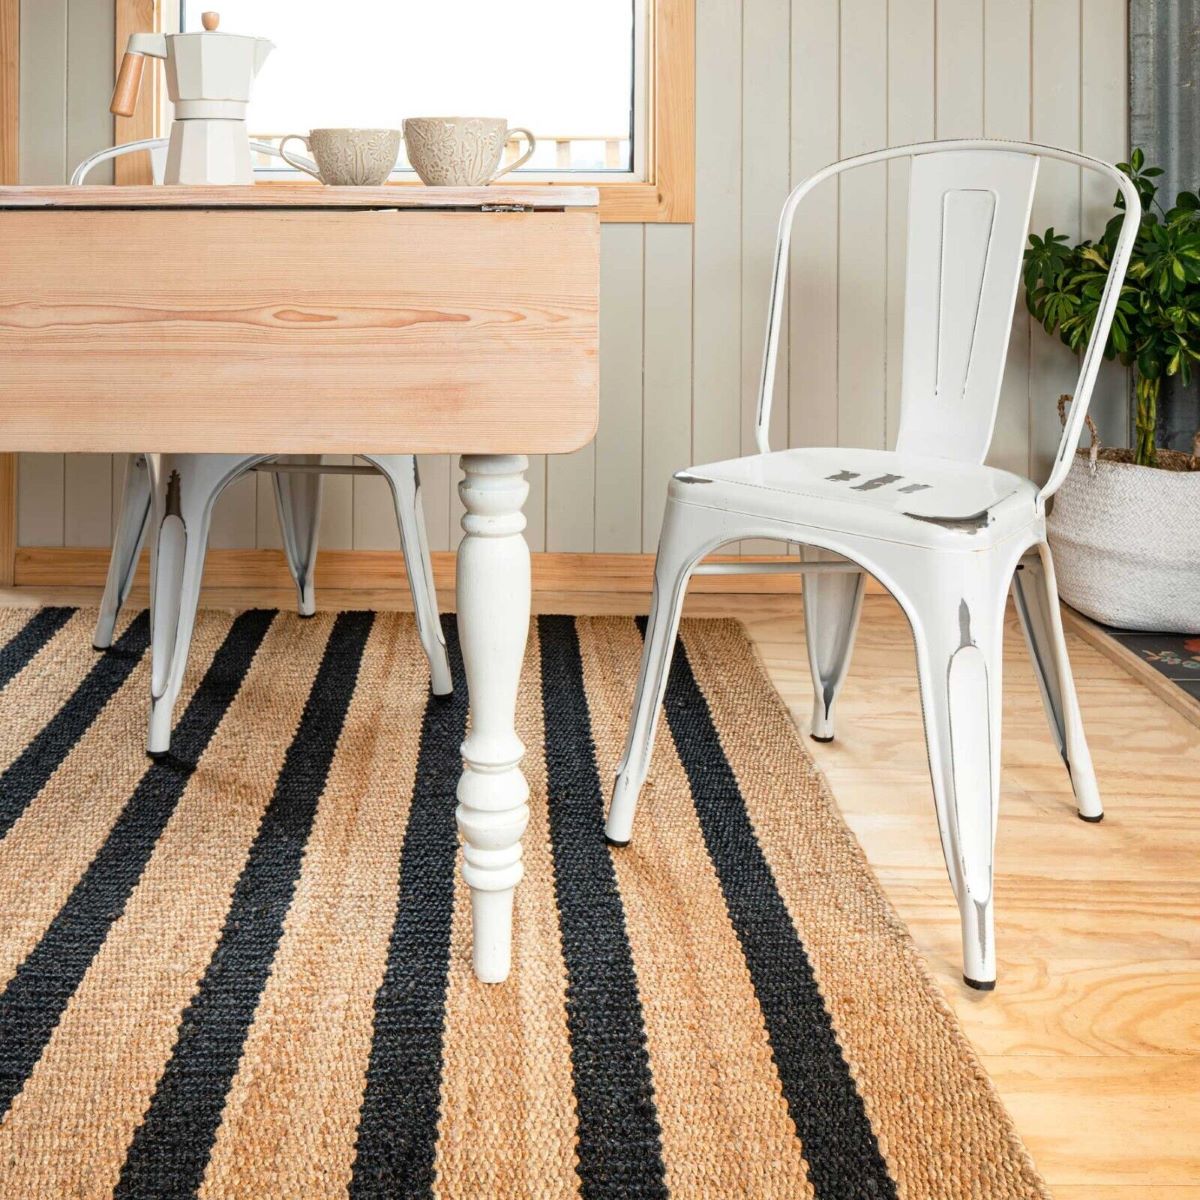
How To Strip Rugs
Modified: October 18, 2024
Learn how to strip rugs with our informative articles. Discover expert tips and techniques for achieving the best results.
(Many of the links in this article redirect to a specific reviewed product. Your purchase of these products through affiliate links helps to generate commission for Storables.com, at no extra cost. Learn more)
Introduction
Welcome to our comprehensive guide on how to strip rugs. Over time, rugs can accumulate dirt, stains, and even old finishes or sealants that need to be removed. Stripping your rug is a crucial step in renewing its appearance and maintaining its longevity. Whether you have an antique rug or a modern one, this guide will walk you through the necessary steps to effectively strip your rug and achieve beautiful results.
Before diving into the process, it’s important to note that different rugs may require different stripping methods. Factors such as the rug’s material, age, condition, and level of soiling should be taken into account when determining the most appropriate method for stripping. Don’t worry, though. We’ll cover multiple methods so you can choose the one that suits your rug best.
Throughout this guide, we will provide step-by-step instructions, along with tips and insights, to ensure a successful rug stripping experience. So, let’s roll up our sleeves and get started on transforming your rug into a clean and revitalized centerpiece for your space.
Key Takeaways:
- Proper preparation, section-by-section approach, and thorough rinsing are crucial for effective rug stripping. Choose the right method based on your rug’s material and condition for optimal results.
- After stripping, thorough cleaning, and optional reapplication of finish or sealant can enhance your rug’s appearance and longevity. Enjoy a renewed, revitalized rug in your space!
Read also: 13 Amazing Soundproofing Rug for 2025
Preparing the Area
Before you begin the rug stripping process, it’s important to prepare the area to ensure everything goes smoothly. Here are some steps to follow:
- Clear the space: Remove any furniture, decorations, or obstacles from the area where the rug is located. This will give you a clear workspace and prevent any accidental damage.
- Protect the surrounding surfaces: Depending on the stripping method you choose, it’s essential to protect the surrounding surfaces such as hardwood floors or tiles. Lay down drop cloths or plastic sheets to prevent any inadvertent damage or spills.
- Ventilate the area: Some stripping methods may involve the use of chemicals or strong odors, so ensure that the room is well-ventilated. Open windows or use fans to circulate fresh air throughout the space.
- Wear protective gear: Stripping rugs can be a messy and potentially hazardous task. Protect yourself by wearing gloves, safety glasses, and a mask to avoid contact with chemicals, dust, or fumes.
By taking these precautionary measures, you can create a safe and organized environment for stripping your rug. Once the area is properly prepared, you can move on to gathering the necessary tools and materials for the task.
Gathering the Necessary Tools and Materials
Before you begin the rug stripping process, it’s essential to gather all the necessary tools and materials. Having everything prepared in advance will make the process more efficient and ensure that you have everything you need. Here are the essential tools and materials you’ll need:
- Stripping solution: Depending on the stripping method you choose, you may need a specific stripping solution. Some common options include commercially available rug strippers or natural solutions like vinegar and water. Research and choose the appropriate stripping solution for your particular rug.
- Clean water: Having access to clean water is crucial for rinsing the rug during and after the stripping process. Ensure you have sufficient clean water available in buckets or a sink nearby.
- Scrub brush or sponge: A scrub brush or sponge will help you apply the stripping solution and agitate the rug’s fibers to remove dirt, stains, and old finishes. Choose a brush or sponge with bristles that are suitable for your rug’s material.
- Protective gloves: Since you may be working with chemicals or strong cleaning agents, it’s important to protect your hands from irritation or chemical exposure. Opt for sturdy gloves that are chemical-resistant.
- Drop cloths or plastic sheets: As mentioned earlier, you’ll need drop cloths or plastic sheets to protect the surrounding surfaces from any potential spills or damage during the stripping process.
- Bucket or container: You’ll need a bucket or container to mix the stripping solution if it’s not a ready-to-use product. Additionally, you can use it to hold water for rinsing the rug.
- Towels or rags: Keep some towels or rags on hand to help absorb excess water, remove residue, or dry the rug after the stripping process.
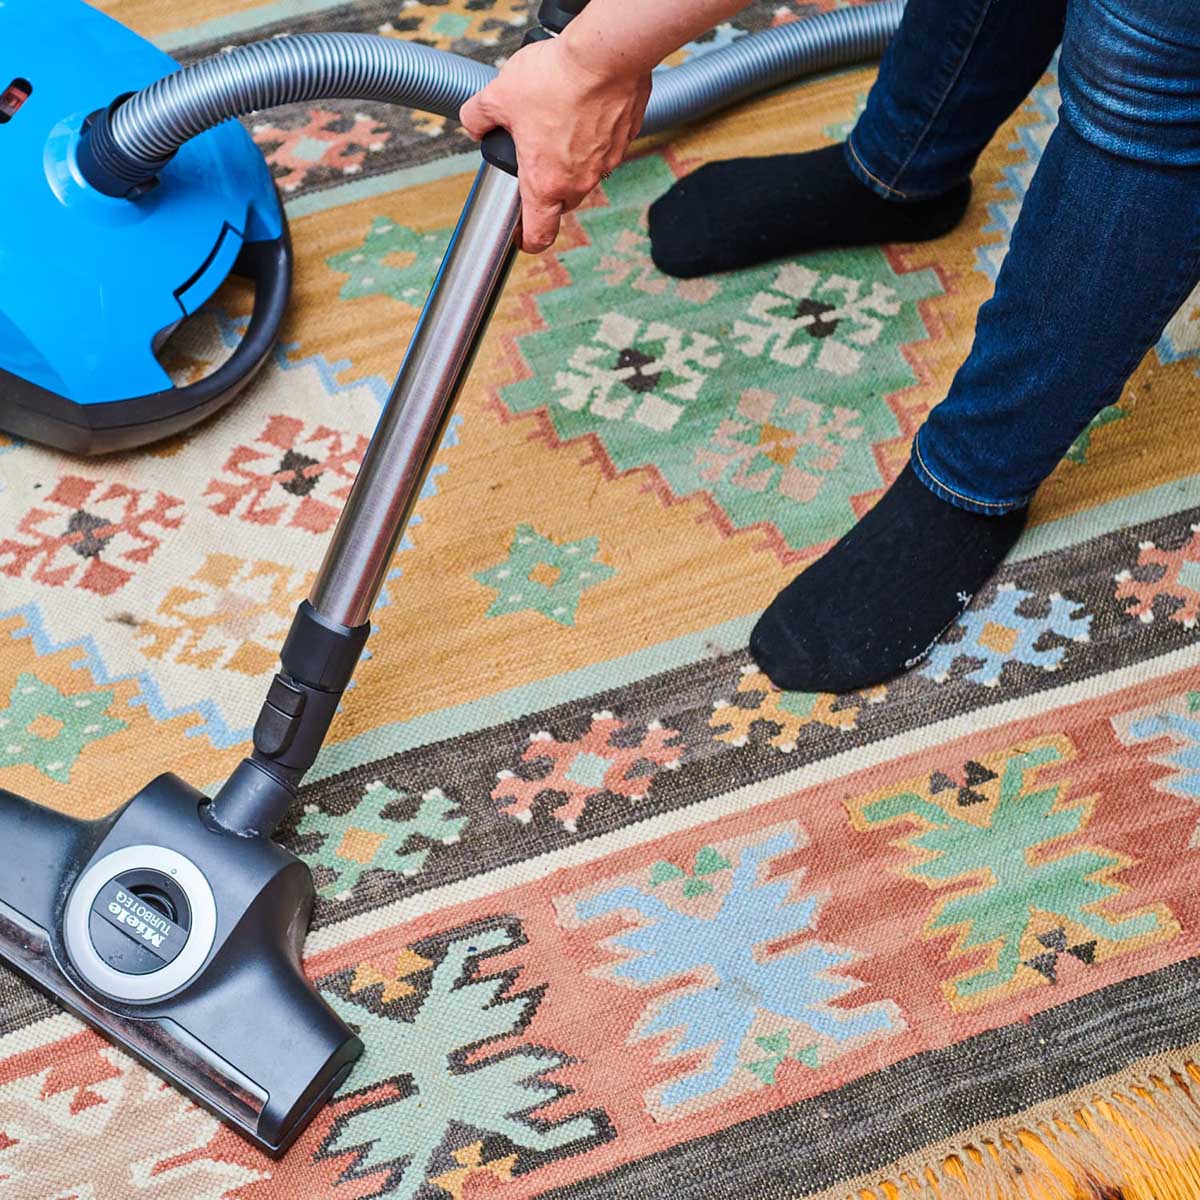
- Vacuum cleaner: Before starting the stripping process, it’s important to thoroughly vacuum the rug to remove any loose dirt, dust, or debris. Ensure you have a vacuum cleaner with a suitable attachment for cleaning rugs.
By gathering these tools and materials beforehand, you’ll be well-equipped for the rug stripping process. Each item serves a specific purpose in ensuring that your rug is effectively stripped and cleaned. With everything prepared, you’re now ready to move on to the next steps of removing furniture and preparing the rug.
Removing Furniture and Preparing the Rug
Before you can start stripping your rug, it’s crucial to remove any furniture or obstacles from the area. This will give you ample space to work and prevent any accidental damage to the furniture. Here’s how to remove furniture and prepare the rug:
- Clear the area: Begin by removing any furniture, decorations, or other items from the rug. Take care when moving heavy furniture to avoid injuries and protect your flooring. If the furniture is too heavy to move, you can place sliders or furniture pads underneath to easily shift them without scratching the floor.
- Vacuum the rug: Once the area is clear, thoroughly vacuum the rug to remove any loose dirt, dust, or debris. This step will ensure that the stripping process is more effective by removing surface particles.
- Inspect the rug: Take a close look at your rug and identify any areas that require special attention. Note any stains, spots, or heavily soiled areas that may need extra treatment during the stripping process.
- Test for colorfastness: Before applying any stripping solution to the entire rug, it’s essential to test for colorfastness. Choose a small inconspicuous area of the rug, such as a corner or edge, and apply a small amount of stripping solution. Gently blot the spot with a clean white cloth and check for any color transfer. If there is no color transfer or damage, it’s safe to proceed. However, if you notice any color bleeding or damage, consider using a milder solution or consult a professional for assistance.
- Protect delicate elements: If your rug has delicate elements, such as fringe or decorative embellishments, take the necessary precautions to protect them during the stripping process. You can cover them with plastic wrap or tape them down to avoid damage from the stripping solution or scrubbing.
By removing furniture and properly preparing the rug, you create a clean and accessible workspace. Remember to take your time during this stage to ensure that everything is cleared away and the rug is ready for the next steps. In the next section, we’ll explore different stripping methods to choose from based on your rug’s needs.
Selecting the Appropriate Stripping Method
Choosing the right stripping method is crucial for effectively removing dirt, stains, and old finishes from your rug. The method you select will depend on several factors, including the rug’s material, condition, and level of soiling. Here, we’ll explore three common stripping methods: the dry stripping method, the wet stripping method, and the steam stripping method. Consider these options to determine the most suitable approach for your rug.
Read more: How To Choose Rugs
Dry Stripping Method
The dry stripping method is ideal for rugs that are sensitive to moisture or those that cannot be soaked or washed. This method involves using a powder or dry solvent to absorb and lift dirt and debris from the rug’s fibers. Here’s how to perform the dry stripping method:
- First, sprinkle the dry stripping powder or solvent evenly over the entire rug’s surface. Make sure to follow the product instructions for application guidelines.
- Next, use a soft-bristle brush or broom to gently work the powder or solvent into the rug’s fibers. This will help loosen dirt and any old finishes that may be present.
- Allow the powder or solvent to sit on the rug for the recommended time specified by the product. This will give it enough time to penetrate and lift the dirt and residue.
- Finally, thoroughly vacuum the rug to remove the powder or solvent residue, along with the loosened dirt and debris. Be sure to use a vacuum cleaner suitable for rugs and take your time to ensure thorough cleaning.
Wet Stripping Method
The wet stripping method is a more traditional approach that involves using a liquid stripping solution to break down dirt, stains, and finishes. This method is suitable for rugs that can withstand moisture and thorough cleaning. Here’s how to perform the wet stripping method:
- Mix the stripping solution according to the product instructions. Alternatively, you can create a natural solution by combining equal parts of water and vinegar.
- Dampen a clean sponge or scrub brush with the stripping solution. Be sure not to soak the rug excessively, as this can cause damage.
- Gently scrub the rug’s surface in small sections. Work in a circular motion to dislodge dirt, stains, and old finishes. Pay special attention to heavily soiled areas.
- Once a section has been scrubbed, use a clean cloth or sponge to blot and rinse the area with clean water. This will help remove any residue from the stripping solution.
- Repeat the process on the remaining sections of the rug until you’ve covered the entire surface.
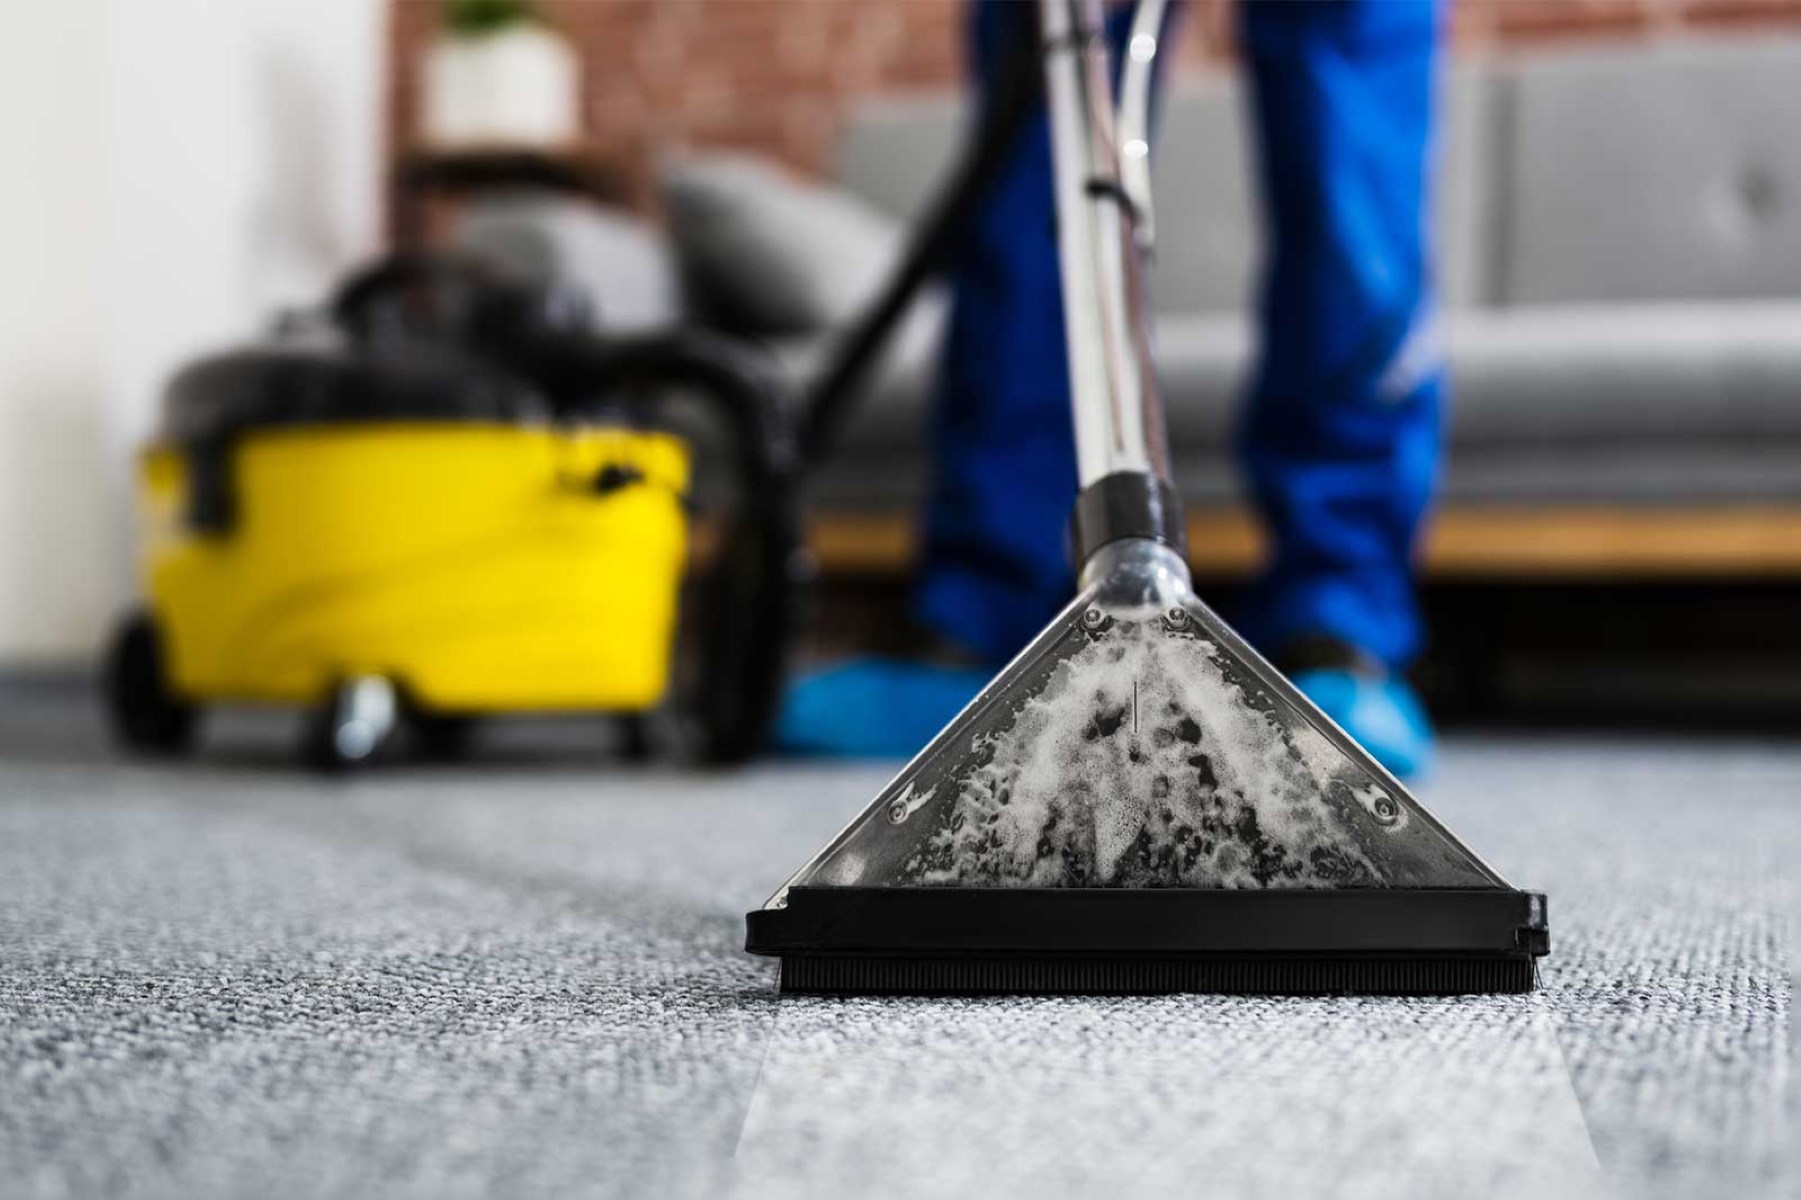
Steam Stripping Method
The steam stripping method is an effective technique that utilizes high-temperature steam to break down dirt, stains, and finishes from the rug. This method requires a steam cleaner or a professional-grade carpet cleaning machine. Here’s how to perform the steam stripping method:
- Fill the steam cleaner with water according to the manufacturer’s instructions.
- Begin by vacuuming the rug to remove loose dirt and debris.
- Using the steam cleaner, start at one end of the rug and move across the surface in slow, overlapping passes. The steam will loosen dirt and grime while the machine simultaneously extracts it.
- Pay extra attention to high-traffic areas and spots with stains. Use additional steam and passes if necessary.
- Allow the rug to dry completely before placing furniture back in the space. This may take several hours or overnight, depending on the rug’s size and thickness.
Consider the condition and specific requirements of your rug before selecting a stripping method. Each method has its advantages, so choose the one that is most appropriate for your rug’s material and condition. Next, we’ll dive into the step-by-step process of applying the chosen stripping method to your rug.
Dry Stripping Method
The dry stripping method is an excellent choice for rugs that are sensitive to moisture or cannot be soaked or washed. This method utilizes a dry stripping powder or solvent to absorb and lift dirt, debris, and old finishes from the rug’s fibers. Here’s how to perform the dry stripping method:
- Start by ensuring that the rug is clean and free of loose dirt and debris. Thoroughly vacuum the surface to remove any loose particles.
- Next, choose a dry stripping powder or solvent that is suitable for your rug’s material. You can find these products at local home improvement stores or online. Read the instructions provided with the product for proper application guidelines.
- Evenly sprinkle the dry stripping powder or distribute the dry stripping solvent onto the rug’s surface. Ensure that all areas are covered, paying extra attention to heavily soiled or stained areas.
- Using a soft-bristle brush or broom, gently work the stripping powder or solvent into the rug’s fibers. This will help loosen dirt, debris, and any old finishes present on the rug.
- Allow the dry stripping powder or solvent to sit on the rug for the recommended time specified by the product instructions. This typically ranges from 15 minutes to several hours, depending on the product and the rug’s condition.
- After the recommended waiting period, thoroughly vacuum the rug to remove the stripping powder or solvent residue, along with the loosened dirt and debris. Be meticulous in your vacuuming to ensure all residue is eliminated from the rug’s fibers.
- For any stubborn areas that may require additional attention, you can repeat the process by reapplying the dry stripping powder or solvent and gently brushing it into the fibers before vacuuming again.
- Once the rug is completely free of residue and looks clean, allow it to fully air out and dry. You can hang the rug outdoors or place it in a well-ventilated area to facilitate the drying process.
By following these steps, you can effectively strip your rug using the dry stripping method. This technique is particularly useful for rugs that are delicate or sensitive to moisture, as it ensures deep cleaning without the risk of damage. Always refer to the product instructions and exercise caution when using any stripping powder or solvent. Now that you know how to dry strip your rug, you can move on to the next section to explore the wet stripping method.
Read more: How To Dry Rugs
Wet Stripping Method
The wet stripping method is a traditional approach for removing dirt, stains, and old finishes from rugs. This method involves using a liquid stripping solution to break down and lift dirt and residues from the rug’s fibers. Here’s how to perform the wet stripping method:
- Start by preparing the stripping solution. You can either use a commercial rug stripper or create a natural solution by mixing equal parts of water and white vinegar. Ensure you have enough solution to cover the entire rug.
- To protect the surrounding area, place plastic sheets or drop cloths underneath the rug to catch any drips or spills.
- Take a clean sponge or scrub brush and dampen it with the stripping solution. Be careful not to oversaturate the rug, as excessive moisture can cause damage.
- Choose a small section of the rug to begin with, and gently scrub the area with the damp sponge or brush. Work in circular motions to dislodge dirt, stains, and old finishes. Pay extra attention to heavily soiled areas.
- After scrubbing, use a clean cloth or sponge to blot and rinse the area with clean water. This will help remove any residue from the stripping solution and prevent it from further penetrating the rug.
- Continue working in small sections, repeating the process of scrubbing with the stripping solution and rinsing with clean water. It’s essential to work systematically and avoid letting the solution sit on the rug for too long.
- Once you have treated the entire rug, thoroughly rinse it with clean water to ensure all residue is removed.
- To remove excess water from the rug, gently press down with clean towels or use a wet-vacuum cleaner. Avoid wringing or twisting the rug, as this can cause damage to the fibers.
- Finally, hang the rug or lay it flat on a clean, dry surface to air dry completely. Ensure proper ventilation to promote faster drying and prevent any mold or mildew growth.
By following these step-by-step instructions, you can effectively strip your rug using the wet stripping method. This technique is suitable for rugs that can withstand moisture and thorough cleaning. Remember to test a small area for colorfastness before applying the stripping solution to the entire rug. With the wet stripping method completed, you can move on to the next section to learn about the steam stripping method.
Steam Stripping Method
The steam stripping method is an effective approach for thoroughly cleaning and removing dirt, stains, and old finishes from rugs. This method utilizes high-temperature steam to break down and lift residues from the rug’s fibers. Here’s how to perform the steam stripping method:
- Begin by preparing the steam cleaner according to the manufacturer’s instructions. Fill the steam cleaner with water and allow it to heat up to the appropriate temperature.
- Vacuum the rug thoroughly to remove any loose dirt, dust, or debris. This will help prevent dirt from being further embedded in the rug’s fibers during the steam cleaning process.
- Starting at one end of the rug, slowly pass the steam cleaner over the surface in straight, overlapping lines. The high-temperature steam will help break down dirt and residues, while the machine’s suction removes them.
- Pay extra attention to areas with stains or heavy soiling. You may need to make multiple passes or hold the steam cleaner in place for a few seconds to effectively clean these spots.
- Once you have covered the entire rug, allow it to air dry completely. This may take several hours or overnight, depending on the rug’s size and thickness. Ensure that the rug is fully dry before placing furniture back on it to prevent any moisture-related damage.
- After the rug has dried, vacuum it one more time to lift any remaining loose debris or fibers that may have resurfaced during the steam cleaning process.
It’s important to note that the steam stripping method requires a steam cleaner or a professional-grade carpet cleaning machine. If you don’t have access to these devices, it’s best to consider other stripping methods. Additionally, steam cleaning may not be suitable for delicate or antique rugs, as excessive moisture and heat could cause damage. Always check the manufacturer’s guidelines and test a small, inconspicuous area before proceeding with the entire rug.
By following these steps, you can effectively strip your rug using the steam stripping method. This method deep cleans the rug and removes stubborn dirt and residues, leaving it refreshed and revitalized. With the steam stripping method completed, you can now move on to the next section to learn about the application process for your chosen stripping method.
Applying the Chosen Stripping Method
Now that you have selected the appropriate stripping method for your rug, it’s time to put that method into action. Whether you have chosen the dry stripping method, the wet stripping method, or the steam stripping method, follow these general steps to apply your chosen method:
- Work in sections: Divide your rug into manageable sections, especially if you have a large rug. This will ensure that you give proper attention to every part of the rug and prevent the stripping solution from drying out before you can thoroughly clean it.
- Apply the stripping solution: Depending on the method, use either the dry stripping powder or solvent, the wet stripping solution, or the steam cleaner to apply the appropriate solution to the section of the rug you are working on.
- Follow product instructions: If you are using a commercial stripping solution, carefully read and follow the instructions provided by the manufacturer. This will ensure that you are using the product correctly and achieving the best results.
- Scrub or agitate the rug fibers: Use a soft-bristle brush, sponge, or the appropriate attachment on your steam cleaner to scrub or agitate the rug fibers. This step helps to dislodge dirt, stains, and old finishes, allowing the stripping solution to penetrate deeply into the rug.
- Let the solution sit: Depending on the method and product instructions, allow the stripping solution to sit on the rug for the recommended amount of time. This allows the solution to work its magic and break down the dirt and residues.
- Rinse or remove the residue: After the designated time, follow the method-specific steps to remove the residue. This may involve vacuuming, blotting with clean water, or using the suction on your steam cleaner to extract the solution and dirt.
- Repeat as necessary: If there are stubborn stains or heavy soiling, you may need to repeat the process for specific areas. Apply the stripping solution, agitate the fibers, and rinse as needed until the desired results are achieved.
- Air dry the rug: Once the entire rug has been treated and rinsed, allow it to air dry completely. Hang it up or lay it flat in a well-ventilated area. Ensure that the rug is fully dry before placing it back in its original location.
Remember to follow the specific instructions outlined in the previous sections for your chosen method, whether it’s the dry stripping method, the wet stripping method, or the steam stripping method. Each method has its own nuances and guidelines, so be sure to refer back to the appropriate section for detailed instructions.
By following these general steps and adapting them to your chosen method, you can effectively apply the stripping solution and remove dirt, stains, and old finishes from your rug. Once the rug is clean and dry, you can move on to the next steps of removing excess residue and cleaning and drying the stripped rug for a rejuvenated and refreshed look.
When stripping a rug, start by vacuuming it thoroughly to remove any loose dirt and debris. Then, use a rug cleaner or a mixture of mild detergent and water to spot clean any stains. Finally, use a rug shampooer or a mixture of water and vinegar to deep clean the entire rug, following the manufacturer’s instructions. Allow the rug to dry completely before placing it back in the room.
Working in Sections
When it comes to stripping your rug, working in sections is essential for ensuring thorough and efficient cleaning. This approach allows you to give proper attention to every part of the rug and ensures that the stripping solution remains effective throughout the process. Here’s how to work in sections when stripping your rug:
- Divide the rug: Start by mentally or physically dividing the rug into manageable sections. This is particularly important for larger rugs to prevent the stripping solution from drying out before you have a chance to clean the entire rug.
- Focus on one section at a time: Begin with one section and complete the entire stripping process before moving on to the next. This includes applying the stripping solution, scrubbing the fibers, and rinsing or removing the residue.
- Apply the stripping solution: Depending on your chosen method (dry, wet, or steam stripping), apply the appropriate stripping solution to the section you’re working on. Be sure to follow the instructions specific to your chosen method and product.
- Scrub or agitate the fibers: Use a soft-bristle brush, sponge, or the appropriate attachment on your cleaning tool to scrub or agitate the rug fibers in the selected section. This helps to loosen dirt, stains, and old finishes, allowing the stripping solution to penetrate deeper into the rug.
- Let the solution sit: Allow the stripping solution to sit on the rug for the recommended amount of time, as specified by the product instructions. This gives the solution sufficient time to break down dirt and residues.
- Rinse or remove the residue: After the designated time has passed, rinse or remove the residue from the section. Follow the specific steps for your chosen method, whether it’s vacuuming, blotting with clean water, or using the suction on your cleaning tool to extract the solution and dirt.
- Move on to the next section: Once you have completed the entire stripping process for the current section, move on to the next section of the rug. Continue working in this manner until you have treated and cleaned the entire rug.
Working in sections ensures that you give thorough attention to each part of the rug, resulting in a uniformly clean and refreshed surface. It also prevents the stripping solution from drying out and losing its effectiveness, as you can work on one section at a time without the solution evaporating. Remember to be patient and thorough during each step of the process to achieve the best results.
By following these guidelines and adapting them to your specific stripping method, you can effectively work in sections and strip your rug with precision and efficiency. Once you have completed the process for the entire rug, you can move on to the next steps of removing excess residue and cleaning and drying the stripped rug for a finished and revitalized look.
Read more: How To Freshen Rugs
Removing Excess Residue
After you have stripped your rug using the chosen method, it’s important to remove any excess residue that may remain on the fibers. This step ensures that your rug is clean, free from any leftover stripping solution, and ready for the final cleaning and drying process. Here’s how to remove excess residue from your stripped rug:
- Inspect the rug: Take a close look at the rug and check for any visible residue or leftover stripping solution. Look for areas that appear sticky or have a dull, hazy appearance.
- Blot with clean water: Dampen a clean cloth or sponge with clean water, and gently blot the areas where residue is present. Blotting helps to loosen and lift the residue from the rug’s fibers.
- Use a mild detergent: If the residue is stubborn and doesn’t come off with water alone, you can mix a small amount of mild detergent with water. Apply the soapy solution to the residue and gently blot or scrub the area to remove the remaining residue.
- Rinse with clean water: Once you have removed the excess residue, rinse the rug thoroughly with clean water. This step is important to ensure that all residue and detergent are completely removed from the fibers.
- Blot or remove excess water: After rinsing, use clean towels or a wet-vacuum cleaner to blot or remove any excess water from the rug. Avoid rubbing or wringing the rug, as this can damage the fibers.
- Air dry: Hang the rug or lay it flat on a clean, dry surface and allow it to air dry completely. Ensure proper ventilation to speed up the drying process and prevent any mold or mildew growth.
- Check for residue: Once the rug is dry, inspect it again to ensure that all residue has been successfully removed. If you notice any remaining residue, repeat the rinsing and blotting process until the rug is entirely clean.
Removing excess residue is a vital step to ensure that your rug is thoroughly cleaned and ready for the final stages of the process. By following these steps, you can effectively eliminate any leftover stripping solution or residue, leaving your rug fresh and revitalized.
With the excess residue removed, you are now ready to proceed to the next steps: cleaning and drying the stripped rug. These final steps will ensure that your rug is fully cleansed and prepared for its renewed role in your space.
Cleaning and Drying the Stripped Rug
Once you have successfully stripped your rug and removed any excess residue, the next important step is to thoroughly clean and dry the rug. This process ensures that your rug is fresh, free from any residual dirt or cleaning products, and ready to be placed back in your space. Here’s how to clean and dry your stripped rug:
- Vacuum the rug: Before proceeding with cleaning, thoroughly vacuum the rug once again to remove any loose dirt, dust, or fibers. This step helps to ensure a clean and debris-free surface.
- Spot clean any remaining stains: If there are any stubborn stains still lingering on the rug, now is the time to spot clean them. Use a mild detergent or a stain-specific cleaner and follow the instructions provided. Gently blot the stains until they are lifted.
- Prepare a gentle cleaning solution: In a bucket or container, mix a mild detergent or rug-specific cleaner with clean water. Be sure to follow the instructions on the cleaning product for the appropriate dilution ratio.
- Test the cleaning solution: Before applying the cleaning solution to the entire rug, test it on a small, inconspicuous area to check for colorfastness. Apply a small amount of the solution, blot it with a clean cloth, and check for any color bleeding or damage.
- Apply the cleaning solution to the rug: Dip a clean sponge or soft-bristle brush into the cleaning solution and gently scrub the entire surface of the rug. Work in sections, focusing on heavily soiled areas or spots that require extra attention.
- Rinse thoroughly: Once you have scrubbed the rug, rinse it thoroughly with clean water to remove any remaining cleaning solution. You can do this by blotting the rug with a damp cloth or using a garden hose to gently spray water over the surface.
- Remove excess water: After rinsing, remove any excess water from the rug by blotting it with clean towels or using a wet-vacuum cleaner. Press down gently to absorb the water, but avoid rubbing or wringing the rug to prevent damage to the fibers.
- Air dry completely: Hang the rug or lay it flat on a clean, dry surface in a well-ventilated area. Allow the rug to air dry completely before placing it back in your space. This may take several hours or even a few days, depending on the rug’s size and thickness.
- Fluff or brush the fibers: Once the rug is fully dry, use a soft brush or your hand to gently fluff or brush the fibers. This helps to restore the rug’s texture and appearance.
Cleaning and drying your stripped rug is the final step in the process, ensuring that the rug is clean, refreshed, and ready for use. By following these steps, you can enjoy a clean and revitalized rug in your space.
Remember, always refer to the instructions provided by the cleaning product manufacturer and test any solutions on a small area before applying them to the entire rug. With the rug now clean and dry, you can choose to apply a finish or sealant for added protection, or simply place your beautifully cleaned rug back in its designated spot.
By following this comprehensive guide, you have successfully learned how to strip rugs effectively, using different methods and techniques. Now you can enjoy the benefits of a clean and rejuvenated rug that enhances the aesthetics and comfort of your space.
Reapplying a Finish or Sealant (Optional)
After successfully stripping and cleaning your rug, you may choose to reapply a finish or sealant to enhance its appearance and protect it from future stains and damage. This optional step can help prolong the life of your rug and maintain its beauty. Here’s how to reapply a finish or sealant to your rug:
- Choose the right finish: Select a finish or sealant that is suitable for your rug’s material. There are various options available, such as rug-specific sealants or finishes designed for specific fibers like wool or synthetic materials. Read the product labels to ensure compatibility.
- Prepare the area: Clear the area around the rug to provide ample space to work. Lay down plastic sheets or drop cloths to protect the surrounding surfaces from any potential drips or spills during the application process.
- Read the manufacturer’s instructions: Carefully read and follow the instructions provided by the manufacturer of the chosen finish or sealant. Each product may have specific application guidelines and drying times.
- Apply the finish or sealant: Using a clean brush or sponge, apply the finish or sealant to the entire rug’s surface. Work in small sections, ensuring even coverage. Take care not to oversaturate the rug, as this can lead to excessive drying time or uneven finish application.
- Allow drying time: Once the finish or sealant has been applied, allow the rug to dry completely according to the manufacturer’s instructions. This may range from a few hours to overnight, depending on the product and environmental factors.
- Reapply if necessary: If a second coat is recommended or desired, wait for the initial coat to dry completely, and then repeat the application process. This can provide an added layer of protection and enhance the finish of the rug.
- Allow curing time: After the final coat, it’s important to allow the finish or sealant to cure fully. This ensures that it bonds properly to the rug’s fibers and provides maximum protection. Follow the product instructions for the recommended curing time.
- Replace in the designated area: Once the rug has fully dried and the finish or sealant has cured, place it back in its designated spot. Take care when moving furniture back onto the rug to prevent any damage to the finish.
Reapplying a finish or sealant to your rug is an optional step, but it can help protect the rug and enhance its longevity. The finish or sealant forms a protective barrier, making it easier to clean and maintain the rug in the future.
Remember to carefully choose the appropriate finish or sealant for your specific rug material and carefully follow the manufacturer’s instructions for application and drying times. With the finish or sealant applied, your rug is now ready to be enjoyed in all its renewed beauty and protected from potential stains and damage.
By following this optional step, you can further enhance the appearance and extend the lifespan of your stripped and cleaned rug.
Conclusion
Congratulations! You have now completed the comprehensive process of stripping and rejuvenating your rug. By following the step-by-step instructions and utilizing the appropriate stripping method, you have successfully removed dirt, stains, and old finishes, leaving your rug clean, refreshed, and ready to be enjoyed once again.
Throughout this guide, we discussed different stripping methods, including the dry stripping method, wet stripping method, and steam stripping method. You learned how to prepare the area, gather the necessary tools and materials, remove furniture, and prepare the rug for the stripping process. We also explored the importance of working in sections, removing excess residue, and thoroughly cleaning and drying the stripped rug.
Remember, each rug is unique, and it’s crucial to consider its material, condition, and level of soiling when selecting the most appropriate stripping method. By taking these factors into account, you ensured that your rug was treated with care and received the best cleaning approach.
Additionally, while reapplying a finish or sealant is optional, it can provide an extra layer of protection and enhance the rug’s appearance. If you choose to do so, following the manufacturer’s instructions and selecting a suitable finish or sealant for your rug’s material is essential.
Now that you have completed the rug stripping process, take a moment to enjoy the transformation. Your rug is now renewed, clean, and ready to take center stage in your space. With proper care and maintenance, it will continue to bring beauty and warmth for years to come.
Remember to routinely vacuum your rug, attend to spills promptly, and follow any specific care instructions provided by the manufacturer. Regular maintenance will help prolong the rug’s lifespan and prevent the need for frequent stripping in the future.
Thank you for following this comprehensive guide on how to strip rugs. We hope it has empowered you with the knowledge and confidence to tackle this process successfully. Enjoy your newly revitalized rug!
Frequently Asked Questions about How To Strip Rugs
Was this page helpful?
At Storables.com, we guarantee accurate and reliable information. Our content, validated by Expert Board Contributors, is crafted following stringent Editorial Policies. We're committed to providing you with well-researched, expert-backed insights for all your informational needs.


0 thoughts on “How To Strip Rugs”