Articles
How To Sanitize Rugs
Modified: October 20, 2024
Discover effective methods and tips to sanitize your rugs in this informative articles. Keep your home clean and germ-free with our expert advice.
(Many of the links in this article redirect to a specific reviewed product. Your purchase of these products through affiliate links helps to generate commission for Storables.com, at no extra cost. Learn more)
Introduction
Welcome to the world of rug sanitization! Keeping your rugs clean and free from germs is not only important for maintaining a healthy living environment but also for preserving the beauty and longevity of your rugs. In this article, we will delve into the importance of sanitizing rugs and provide you with a comprehensive guide on how to effectively sanitize your rugs.
Rugs are not just decorative pieces; they can also harbor dirt, dust, allergens, and even bacteria. Regular vacuuming may help remove the surface debris, but it’s essential to go beyond that and eliminate any hidden contaminants. Proper rug sanitization can help reduce the risk of allergies, respiratory issues, and other health problems caused by the accumulation of germs and allergens.
When it comes to choosing the right sanitizing method for your rugs, it’s crucial to evaluate the material and construction of your rug. Different types of rugs may require different cleaning techniques to ensure the best results without causing damage. Whether you have a delicate Persian rug or a durable synthetic one, we will guide you through the process of selecting the most suitable method.
Now, let’s dive into the step-by-step guide on how to sanitize your rugs effectively. We will cover everything from preparing the rug for sanitization to choosing natural cleaning agents, utilizing steam cleaning, dealing with stains and spills, and drying the rug properly.
Before we begin with the sanitizing process, it’s important to prepare the rug appropriately. This includes removing any furniture or obstacles from the rug, providing ample space for maneuvering the cleaning equipment, and performing a thorough vacuuming to eliminate loose dirt and debris.
When vacuuming the rug, it’s essential to use the proper technique and equipment. Ensure that your vacuum cleaner has a beater bar or a power brush attachment designed for rugs. Slowly and evenly vacuum the rug in different directions to reach deep into the fibers and remove as much dirt and dust as possible.
Natural cleaning agents, such as baking soda, vinegar, or mild dish soap, can be excellent options for sanitizing your rugs. These agents are effective in breaking down stains, neutralizing odors, and killing germs without the use of harsh chemicals. We will guide you on how to use these natural cleaning agents correctly.
If your rug allows for steam cleaning, it can be a highly effective method to sanitize and refresh the fibers. We will walk you through the step-by-step process of using a steam cleaner, including filling the machine with water, allowing it to heat up, and carefully going over the entire surface of the rug.
Accidents happen, and rugs inevitably experience spills and stains. We will provide you with tips on how to handle these situations promptly and effectively, whether it’s blotting the spill immediately, using stain removers, or seeking professional help for stubborn stains.
After the sanitization process, it’s crucial to ensure that the rug dries completely to prevent mold and mildew growth. We will provide you with tips on how to speed up the drying process and avoid potential damage to your rug.
Lastly, we will share some additional tips and tricks for rug sanitization, including regular maintenance, spot cleaning, and preventive measures to keep your rugs clean and germ-free.
With this comprehensive guide in hand, you will be equipped with the knowledge and techniques to effectively sanitize your rugs. So let’s get started and give your rugs the deep cleaning they deserve!
Key Takeaways:
- Proper rug sanitization is crucial for maintaining a healthy living environment, extending the lifespan of your rugs, and preventing allergies and respiratory issues caused by hidden contaminants.
- Choosing the right sanitizing method, using natural cleaning agents, and ensuring effective drying are essential steps in achieving cleaner, fresher, and more enjoyable rugs for your home.
Read more: How To Sanitize A Hot Tub
Importance of Sanitizing Rugs
Rugs are not just beautiful additions to our homes; they also serve as breeding grounds for dirt, allergens, and harmful bacteria. Regular vacuuming may help remove surface debris, but it’s essential to go beyond that and sanitize your rugs to ensure a clean and healthy living environment. Let’s delve into the importance of rug sanitization:
1. Health and Hygiene: Sanitizing your rugs is crucial for maintaining a healthy living space. Rugs accumulate dust, allergens, pet dander, and bacteria over time, which can lead to various health issues. These allergens and irritants can cause allergies, respiratory problems, and even skin irritations. By sanitizing your rugs, you can eliminate these contaminants and create a healthier environment for you and your family.
2. Allergen Control: If you or your family members suffer from allergies or asthma, it’s even more important to regularly sanitize your rugs. Dust mites, pollen, and other allergens can become trapped in the fibers of the rug, triggering allergic reactions. By sanitizing your rugs, you can effectively control allergens and reduce the risk of allergic symptoms.
3. Odor Elimination: Over time, rugs can absorb various odors, such as pet odors, food smells, and musty odors. These odors can linger in the fibers and make your home smell unpleasant. Sanitizing your rugs helps eliminate these odors, leaving your home smelling fresh and clean.
4. Prolonged Rug Lifespan: A well-maintained and sanitized rug will last longer. Regularly sanitizing your rugs helps remove dirt and debris that can cause wear and tear on the fibers. By extending the lifespan of your rugs, you not only save money but also maintain the aesthetic appeal of your home.
5. Improved Indoor Air Quality: Rugs act as filters, trapping airborne particles that can circulate in your home’s air. However, if the rugs are not properly cleaned and sanitized, these particles can be released back into the air, compromising the indoor air quality. A clean and sanitized rug helps improve the air quality in your home, reducing the risk of respiratory issues and promoting better overall health.
6. Preventing Mold and Mildew: Moisture is a breeding ground for mold and mildew, and rugs can easily trap dampness. This can occur from spills, pet accidents, or simply high humidity levels. Sanitizing your rugs helps eliminate any moisture and prevents the growth of mold and mildew, which can damage both the rug and the underlying flooring.
7. Aesthetics and Comfort: A clean rug enhances the overall appearance of your living space. Regular sanitization helps maintain the vibrant colors of your rug and keeps it looking fresh and inviting. In addition, a clean rug provides a comfortable surface for walking or lounging, free from dirt and debris.
Overall, the importance of sanitizing rugs cannot be overstated. From improving health and hygiene to prolonging rug lifespan and enhancing the aesthetics of your home, rug sanitization plays a crucial role in creating a clean, healthy, and comfortable living environment. So, make it a priority to include regular rug sanitization in your cleaning routine and reap the numerous benefits it offers!
Choosing the Right Sanitizing Method
When it comes to sanitizing your rugs, it’s important to choose the right method that is suitable for the material and construction of your rug. While some rugs can withstand vigorous cleaning methods, others are more delicate and require gentler treatment. Here are some factors to consider when choosing the right sanitizing method for your rugs:
1. Rug Material: Different rug materials require different cleaning approaches. Natural fibers like wool, silk, or cotton may require more gentle cleaning methods to avoid damage, such as handwashing or dry cleaning. On the other hand, synthetic materials like nylon or polyester can tolerate more aggressive cleaning techniques, such as machine washing or steam cleaning. Identify the material of your rug to determine the appropriate sanitizing method.
2. Rug Construction: Consider the construction of your rug, specifically the pile type and weave. For example, high-pile or shaggy rugs tend to trap more dirt and require thorough cleaning methods, while flatweave or low-pile rugs can be more easily maintained. Also, rugs with delicate or intricate patterns may be more susceptible to damage, requiring extra caution during the sanitizing process.
3. Rug Size and Portability: The size and portability of your rug can also influence the sanitizing method you choose. Smaller rugs that are easily movable may allow for more versatile cleaning options, such as machine washing or taking them outside for a deep clean. Larger rugs may require professional cleaning services or specialized equipment like carpet cleaners or steamers.
4. Stain and Odor Concerns: If your rug has stubborn stains or lingering odors, you may need to consider more intensive cleaning methods. Spot cleaning, using enzymatic cleaners, or hiring professional cleaners can be effective options for tackling tough stains and odors. It’s important to choose a method that not only sanitizes the rug but also addresses specific issues like stains and odors.
5. Personal Preference and Practicality: Consider your personal preferences and practicality when choosing a sanitizing method. Some methods may require more time and effort, while others may be more convenient and quick. Also, take into account any sensitivities or allergies you or your family members may have to certain cleaning agents, as this can affect your choice of sanitizing method.
6. Manufacturer’s Recommendations: Lastly, check the manufacturer’s recommendations for cleaning and sanitizing your specific rug. Manufacturers often provide guidelines on the best practices for maintaining and cleaning their rugs. Following their recommendations ensures that you are using a method that is safe and suitable for your rug.
Taking all of these factors into consideration will help you select the most appropriate sanitizing method for your rugs. Whether you choose to clean your rugs manually, use a steam cleaner, or seek professional assistance, it’s important to prioritize the safety and preservation of your rug while ensuring effective sanitization. By choosing the right method, you can maintain the cleanliness and longevity of your rugs, contributing to a healthier and more beautiful living environment.
Step-by-Step Guide to Sanitizing Rugs
Sanitizing your rugs is an essential part of maintaining a clean and healthy living environment. By following this step-by-step guide, you can effectively sanitize your rugs and ensure that they are free from dirt, allergens, and harmful bacteria:
Step 1: Prepare the Rug for Sanitization
Before you begin sanitizing your rug, remove any furniture or obstacles from the rug’s surface. This will provide you with ample space to maneuver and clean the rug effectively. Additionally, perform a thorough vacuuming to remove loose dirt and debris from the rug.
Step 2: Vacuum the Rug Properly
Using a vacuum cleaner with a beater bar or power brush attachment, slowly and evenly vacuum the entire rug in different directions. This will help remove deep-seated dirt, dust, and allergens from the fibers. Pay attention to high-traffic areas and focus on removing as much debris as possible.
Step 3: Pre-Treat Stains and Spills
If your rug has any visible stains or spills, pre-treat them before proceeding with the sanitization process. Blot the stain immediately with a clean cloth or paper towel to absorb any excess liquid. Then, depending on the type of stain, use a suitable stain remover or a mixture of mild dish soap and water to gently clean the affected area. Avoid scrubbing vigorously, as this may damage the fibers.
Step 4: Choose Natural Cleaning Agents
Consider using natural cleaning agents for sanitizing your rugs. Baking soda, vinegar, and mild dish soap can be effective in breaking down stains, neutralizing odors, and killing germs without the use of harsh chemicals. Dilute these agents with water according to instructions and apply them to the rug using a sponge or soft brush.
Step 5: Steam Clean the Rug
If your rug allows for steam cleaning, it can be a highly effective method for killing germs and refreshing the fibers. Following the manufacturer’s instructions, fill the steam cleaner with water and allow it to heat up. Then, slowly and evenly go over the entire surface of the rug, making sure to cover all areas. Allow the rug to dry completely after steam cleaning.
Step 6: Dry the Rug Effectively
After sanitizing your rug, it’s crucial to ensure that it dries completely to prevent mold and mildew growth. Hang the rug up to air dry in a well-ventilated area, or lay it flat on a clean surface if it’s small enough. Avoid direct sunlight or heat sources, as they can fade or damage the rug. Use fans or open windows to aid in the drying process.
Step 7: Apply Protective Treatments (Optional)
If desired, you can apply protective treatments to your rug to enhance its resistance to stains and spills. Look for rug protectors specifically designed for your rug’s material, and follow the instructions for application carefully. This extra step can help prolong the cleanliness and lifespan of your rug.
Step 8: Regular Maintenance
To maintain the cleanliness of your rug, incorporate regular maintenance into your cleaning routine. Vacuum the rug at least once a week to remove loose debris, and promptly address any spills or accidents to prevent stains and odors from setting in.
By following this step-by-step guide, you can effectively sanitize your rugs and create a cleaner and healthier living environment. Remember to consider the material and construction of your rug, choose the appropriate cleaning agents and methods, and prioritize proper drying to ensure optimal results. With regular rug sanitization, you can enjoy fresh, clean, and germ-free rugs for years to come.
Preparing the Rug for Sanitization
Properly preparing your rug before sanitization is essential to ensure effective cleaning and optimal results. By following these steps, you can adequately prepare your rug for the sanitization process:
Step 1: Remove Furniture and Obstacles
Prior to sanitizing your rug, clear the area by removing any furniture or obstacles from the rug’s surface. This will provide you with ample space to maneuver and clean the rug effectively. Move any furniture off the rug and store it in a different room temporarily.
Step 2: Shake or Beat the Rug (If Applicable)
If your rug is small enough and the weather permits, take the rug outside and give it a good shake or beat it using a rug beater. This will help loosen and remove any loose dirt, dust, and debris that may be trapped within the fibers. Alternatively, you can hang the rug over a sturdy railing or clothesline and use a broom or a carpet beater to gently beat the dirt out.
Step 3: Lay the Rug on a Clean Surface
Once the rug has been shaken or beaten, lay it on a clean and flat surface, such as a clean floor or a large tarp. This will provide a stable base for the sanitization process and prevent any dirt or debris from transferring back onto the rug during the cleaning process.
Step 4: Inspect the Rug for Pre-existing Stains or Damage
Take a close look at your rug and inspect it for any pre-existing stains, spots, or damage. Note down any areas that require special attention or additional treatment during the sanitization process. Identifying these spots ahead of time will allow you to tackle them effectively during the cleaning process.
Step 5: Test for Colorfastness (If Necessary)
If you are using any cleaning agents or solutions on your rug, it’s important to test for colorfastness before proceeding with the entire sanitization process. Choose an inconspicuous area of the rug, such as a corner or an edge, and apply a small amount of the cleaning solution. Blot the area with a clean white cloth and check for any color transfer or damage. If no color change or damage occurs, you can proceed with confidence.
Step 6: Vacuum the Rug
Before moving on to the actual sanitization process, it’s important to give the rug a thorough vacuuming. Use a vacuum cleaner with a beater bar or a power brush attachment to remove any loose dirt, dust, and debris from the rug’s surface. Vacuum in different directions to ensure all areas of the rug have been covered.
By properly preparing your rug for sanitization, you will create an optimal environment for effective cleaning and sanitization. Removing furniture and obstacles, shaking or beating the rug, inspecting for pre-existing stains or damage, testing for colorfastness, and vacuuming the rug will set the stage for a successful sanitization process. Remember to take your time and be thorough in your preparation before moving on to the next steps of the rug sanitization process.
Read more: How To Sanitize A Carpet
Vacuuming the Rug Properly
Vacuuming your rug is an essential step in maintaining its cleanliness and removing loose dirt, dust, and debris. However, it’s important to vacuum the rug properly to ensure maximum effectiveness and prevent damage to the delicate fibers. Follow these steps to vacuum your rug properly:
Step 1: Choose the Right Vacuum Cleaner
Make sure you have a vacuum cleaner with the appropriate attachments for rugs. Ideally, your vacuum cleaner should have a beater bar or a power brush attachment specifically designed for rugs. This will help agitate the fibers, allowing for a deeper clean.
Step 2: Prepare the Rug
Before you begin vacuuming, prepare the rug by removing any furniture or obstacles from the surface. This will allow you to have a clear path for vacuuming and ensure that you can cover all areas of the rug effectively. If the rug is too large to move, try to vacuum around and under the furniture to the best of your ability.
Step 3: Adjust the Vacuum Height
Adjust the height of your vacuum cleaner to the appropriate setting for your rug. Most vacuum cleaners have adjustable height settings to accommodate different types of flooring. For rugs with a high or shaggy pile, increase the height to avoid excessive suction and potential damage to the fibers. For low-pile rugs, decrease the height to ensure a thorough clean.
Step 4: Start with a Clean Filter and Bag/Canister
Before you begin vacuuming, ensure that the filter and bag or canister of your vacuum cleaner is clean and empty. This will allow for maximum suction power and prevent debris from being recirculated into the air. Clean or replace the filter and empty the bag or canister as needed.
Step 5: Vacuum in Multiple Directions
When vacuuming the rug, it’s important to go over the entire surface in multiple directions. This will help dislodge and remove dirt and debris that may be trapped within the fibers. Start by vacuuming horizontally, then vertically, and finally diagonally to ensure thorough coverage.
Step 6: Take Your Time
Avoid rushing through the vacuuming process. Take your time and make slow, deliberate passes over the rug. This allows the vacuum cleaner to effectively remove dirt and dust from deep within the fibers. Pay special attention to high-traffic areas, as they tend to accumulate more dirt and may require additional passes.
Step 7: Vacuum Both Sides (If Possible)
If your rug is small enough and easy to maneuver, consider flipping it over and vacuuming the back as well. This will help remove any dirt or dust that may have settled on the underside of the rug. However, if your rug is too large to flip, prioritize vacuuming the top surface thoroughly.
Step 8: Clean Vacuum Attachments Regularly
After vacuuming the rug, clean your vacuum cleaner attachments thoroughly to prevent any build-up of dirt or debris. Refer to the manufacturer’s instructions for cleaning and maintaining your specific vacuum cleaner model. A clean and well-maintained vacuum cleaner will ensure optimal performance for future rug cleanings.
By following these steps and vacuuming your rug properly, you can effectively remove loose dirt, dust, and debris, keeping your rug clean and maintaining its appearance and longevity. Regular vacuuming, combined with other sanitizing methods, will contribute to a cleaner and healthier living environment.
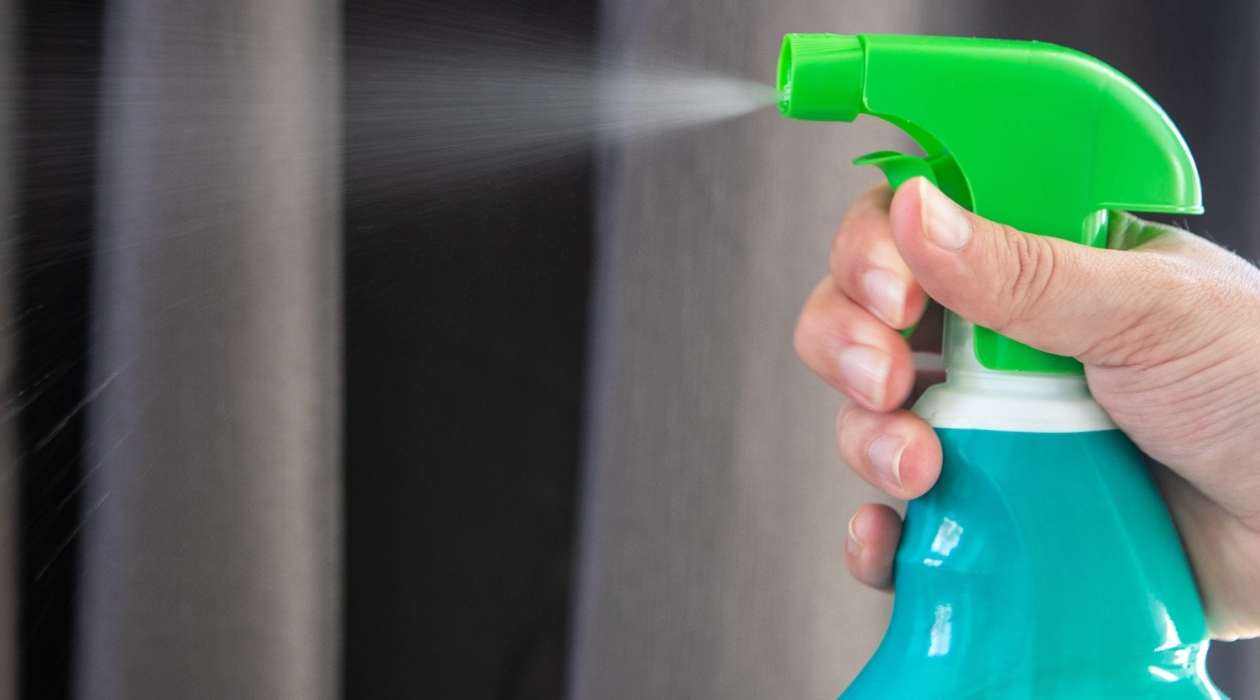
To sanitize rugs, mix equal parts water and white vinegar in a spray bottle and mist the rug. Let it sit for 10 minutes, then blot with a clean cloth. This will help kill bacteria and remove odors.
Using Natural Cleaning Agents
When it comes to sanitizing your rugs, natural cleaning agents can be a safe and effective alternative to harsh chemicals. Natural cleaning agents are not only better for the environment but also gentler on your rugs, helping to maintain their integrity and prolong their lifespan. Here are some commonly used natural cleaning agents and how to use them:
1. Baking Soda: Baking soda is a versatile and affordable natural cleaning agent that can help eliminate odors and break down stains on your rugs. To use baking soda, sprinkle a generous amount over the entire surface of the rug. Gently work it into the fibers using a soft brush or broom. Leave the baking soda on the rug for several hours, or even overnight, to allow it to absorb odors and draw out dirt. Vacuum the rug thoroughly to remove the baking soda along with the trapped odors and dirt.
2. Vinegar: Vinegar is another excellent natural cleaning agent that can help remove stains, kill bacteria, and neutralize odors. To use vinegar, mix equal parts white vinegar and water in a spray bottle. Lightly spray the mixture onto the stained or odorous areas of the rug. Let it sit for a few minutes to allow the vinegar to work its magic. Blot the area with a clean cloth or sponge to remove the vinegar solution and any residue. Finally, dampen another clean cloth with water and blot the area again to rinse away any remaining vinegar.
3. Mild Dish Soap: Mild dish soap, such as a natural or plant-based one, can be effective in cleaning and sanitizing your rugs. Fill a bucket or basin with warm water and add a small amount of mild dish soap. Mix the solution gently until it creates suds. Dip a soft brush or sponge into the soapy water and lightly scrub the rug in a circular motion, focusing on stained or heavily soiled areas. Avoid scrubbing too aggressively, as this can damage the rug’s fibers. Rinse the brush or sponge frequently and change the soapy water as needed. After scrubbing, rinse the rug thoroughly with clean water to remove any soap residue. Gently blot the excess moisture with a clean towel or allow the rug to air dry.
4. Hydrogen Peroxide: Hydrogen peroxide can be used to tackle tough stains and brighten discolored areas on your rugs. However, it’s important to perform a spot test in an inconspicuous area first, as hydrogen peroxide can have a bleaching effect on certain rug materials. If your rug passes the spot test, mix a solution of equal parts hydrogen peroxide and water. Apply the mixture to the stained area and allow it to sit for a few minutes. Blot the area with a clean cloth or sponge to lift the stain. Rinse the area with water and blot dry.
5. Lemon Juice: Lemon juice is a natural disinfectant and deodorizer that can effectively sanitize your rugs. Mix equal parts lemon juice and water in a spray bottle. Spray the mixture onto the desired areas of the rug, focusing on stains or odorous spots. Allow it to sit for a few minutes before blotting the area with a clean cloth or sponge. Lemon juice can also help brighten and revitalize rugs with natural fibers such as wool or cotton.
When using natural cleaning agents on your rugs, it’s essential to follow the instructions and test them in an inconspicuous area before applying them to the entire rug. Additionally, it’s important to blot or dab stains rather than scrubbing them vigorously, as excessive scrubbing can damage the rug’s fibers. With these natural cleaning agents, you can effectively sanitize your rugs while keeping them free from harsh chemicals.
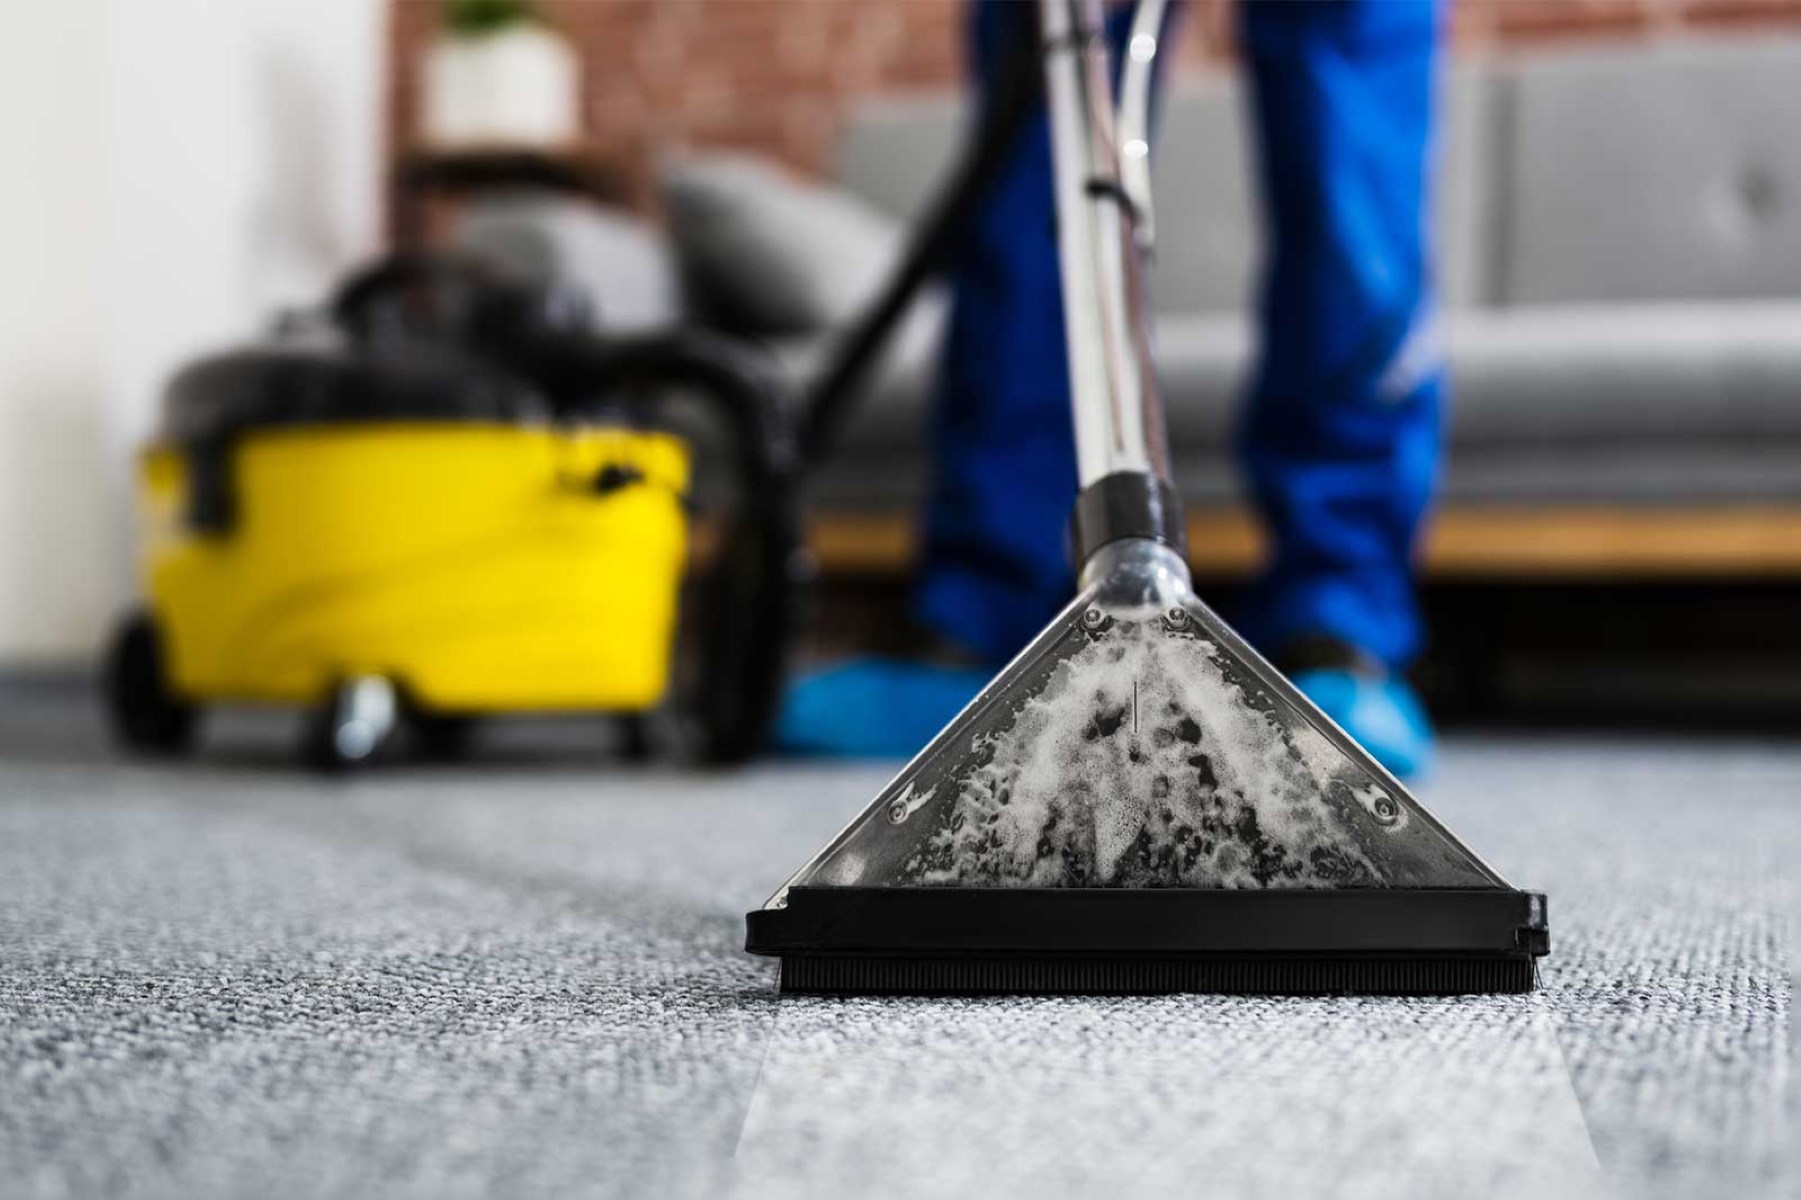
Steam Cleaning the Rug
Steam cleaning is a highly effective method for thoroughly sanitizing rugs and removing deep-seated dirt, allergens, and bacteria. This technique uses the power of hot steam to penetrate the rug fibers and provide a deep clean. Here is a step-by-step guide on how to steam clean your rug:
Step 1: Check if Your Rug is Suitable for Steam Cleaning
Before proceeding with steam cleaning, ensure that your rug is compatible with this method. Most synthetic rugs, such as nylon or polyester, are suitable for steam cleaning. However, natural fiber rugs like wool or silk may require more specialized care. Check the manufacturer’s recommendations or consult a professional cleaner if you are unsure.
Step 2: Prepare the Steam Cleaner
Start by filling the steam cleaner’s tank with water according to the manufacturer’s instructions. In some models, you may need to add a cleaning solution specifically formulated for steam cleaners. Allow the machine to heat up and reach the recommended temperature before starting the cleaning process.
Step 3: Vacuum the Rug
It’s important to vacuum the rug thoroughly before using a steam cleaner. This step helps remove loose dirt, debris, and surface dust, allowing the steam cleaner to focus on deeper cleaning. Use a vacuum cleaner with a beater bar or power brush attachment to ensure a thorough clean.
Step 4: Test the Steam Cleaner
Prior to using the steam cleaner on your rug, test it on a small, inconspicuous area to check for any adverse effects. This step helps you ensure that the steam cleaner won’t cause any damage or discoloration to your rug. Follow the manufacturer’s instructions for testing and determine if the steam cleaner is suitable for your particular rug.
Step 5: Start Steam Cleaning
Begin by starting at one corner of the rug and slowly move the steam cleaner over the surface in straight, overlapping lines. Be sure to cover the entire area of the rug. The steam will penetrate deep into the rug fibers, loosening dirt and killing germs. The machine’s suction will then extract the steam, along with the dirt and debris, into a separate tank.
Step 6: Work in Sections
To ensure thorough cleaning, divide the rug into manageable sections and work on one section at a time. This allows you to give proper attention to each area and ensures that no spot is missed. Take your time and maintain a steady pace to allow the steam to penetrate effectively.
Step 7: Pay Extra Attention to Heavily Soiled Areas
If there are any heavily soiled or stained areas on the rug, give them some extra attention. Slowly pass the steam cleaner over these spots multiple times until the dirt and stains are visibly reduced or eliminated. You may need to apply additional cleaning solution to stubborn stains before proceeding with the steam cleaner.
Step 8: Allow the Rug to Dry
Once you have completed steam cleaning the entire rug, allow it to dry completely before placing any furniture or walking on it. Do not place the rug back in its original position until it is completely dry, as this can cause mold or mildew growth. Use fans, open windows, or a dehumidifier to speed up the drying process.
Steam cleaning your rug can effectively sanitize it and remove deep-seated dirt and allergens. However, it’s important to follow the manufacturer’s instructions for your specific steam cleaner and consider the compatibility of your rug with this cleaning method. With proper technique and attention to detail, steam cleaning can leave your rug fresh, clean, and ready to be enjoyed.
Dealing with Stains and Spills
Stains and spills are inevitable accidents that can happen to even the most careful homeowners. When it comes to maintaining the cleanliness and appearance of your rugs, addressing stains and spills promptly and effectively is crucial. Here are some steps to help you deal with stains and spills on your rugs:
Step 1: Act Quickly
As soon as a spill or stain occurs, it’s important to act quickly to prevent the stain from setting or spreading. Grab a clean white cloth or paper towel and gently blot the affected area to soak up as much of the liquid as possible. Avoid rubbing or scrubbing, as it can push the stain deeper into the fibers.
Step 2: Blot, Don’t Rub
When blotting, work from the outside of the stain toward the center. This helps prevent the stain from spreading further. Use a clean portion of the cloth or paper towel for each blotting motion, and continue until no more liquid transfers onto the cloth.
Step 3: Identify the Stain and Rug Material
Identifying the type of stain and your rug’s material can help you choose the appropriate cleaning solution and technique. Common stains include food and beverage spills, pet accidents, ink or dye stains, and oil-based stains. Refer to the manufacturer’s guidelines for your rug’s specific material to ensure you use the right cleaning method.
Step 4: Use Suitable Stain Removal Methods
For water-based stains such as coffee or wine, a mixture of mild dish soap and water can often be effective. Apply a small amount of the soapy solution to the stain and blot gently. For oil-based stains, such as grease or makeup, use a dry cleaning solvent or a specialized stain remover designed for your rug’s material. Follow the instructions on the product label and be cautious with the amount applied.
Step 5: Test Stain Removers in an Inconspicuous Area
Before applying any stain remover to the visible part of the rug, test it in an inconspicuous area first. This will help you determine if the remedy is safe for your rug’s material and if it causes any discoloration or damage. Wait for the test area to dry and assess the results before proceeding with the entire stain removal process.
Step 6: Patience and Persistence
Sometimes, stains may require multiple treatments to completely remove. Be patient and persistent in your stain removal efforts. Repeat the blotting and treatment process until the stain is no longer visible or significantly reduced. Avoid scrubbing aggressively, as it can damage the rug’s fibers.
Step 7: Rinse and Blot
After treating the stain, rinse the area with clean water to remove any remaining cleaning solution. Blot the area with a clean cloth or sponge to remove excess moisture and cleaning residue. Ensure that the area is thoroughly dried to prevent any mold or mildew growth.
Step 8: Seek Professional Help, if Needed
If you are unable to remove the stain on your own or if it persists after your efforts, it may be time to seek professional help. Professional rug cleaners have specialized equipment and expertise to tackle stubborn stains effectively without causing damage to the rug.
Dealing with stains and spills promptly and using the appropriate cleaning techniques will help maintain the cleanliness and appearance of your rugs. By addressing stains quickly and using the right methods, you can prolong the life of your rugs and keep them looking fresh and beautiful.
Read more: How To Sanitize A Dryer
Drying the Rug Effectively
Properly drying your rug after cleaning is crucial to prevent mold, mildew, and odors. When moisture is trapped in the rug fibers, it can create an ideal environment for the growth of bacteria and mold. To ensure your rug is thoroughly dried and ready for use, follow these steps for effective drying:
Step 1: Remove Excess Moisture
After cleaning your rug, remove any excess moisture by blotting it with absorbent towels or cloths. Press down firmly to soak up as much water as possible. Repeat this process, using clean towels, until no more moisture is being absorbed. Be careful not to rub the rug vigorously, as this can damage the fibers.
Step 2: Air Circulation and Ventilation
Provide good air circulation and ventilation in the room where the rug is drying. Open windows, turn on fans, or use a dehumidifier to facilitate the drying process. This helps to evaporate moisture from the rug and prevents condensation or humidity from prolonging the drying time.
Step 3: Hang the Rug
If your rug is small enough and appropriate for hanging, you can hang it up to dry. Use a sturdy clothesline or a drying rack. Avoid hanging the rug in direct sunlight, as prolonged exposure to sunlight can cause fading or color distortion. Hang the rug evenly and ensure that it is fully supported to prevent stretching or distortion of the fibers.
Step 4: Lay the Rug Flat
If you prefer not to hang the rug, you can lay it flat on a clean, dry surface. Lay the rug on a dry towel, a clean sheet, or a mesh drying rack. Avoid placing the rug directly on top of hardwood floors or other porous surfaces, as moisture can seep into these materials and cause damage.
Step 5: Flip the Rug
During the drying process, periodically flip the rug to ensure both sides receive proper airflow and drying. This helps to prevent moisture from being trapped underneath, reducing the risk of mold or mildew growth. Flip the rug every few hours until it is completely dry.
Step 6: Use Fans or Air Movers
Use fans or air movers to facilitate faster drying. Position them strategically to create airflow around the rug. This helps to speed up the evaporation process and ensures that the rug dries thoroughly. Ensure that the fans are not directly blowing onto the rug, as this can cause the fibers to become distorted.
Step 7: Check for Complete Dryness
Before returning the rug to its original position or exposing it to foot traffic, ensure that it is completely dry. Feel the rug’s surface to determine if any dampness remains. If the rug feels cool or moist to the touch, continue the drying process until it is completely dry.
Step 8: Expert Assistance (If Necessary)
If you are unsure about the drying process or have concerns about the rug’s moisture level, consider seeking assistance from professional rug cleaners. They have the expertise, specialized equipment, and knowledge to ensure your rug is properly dried without risking damage.
By following these steps, you can effectively dry your rug after cleaning and maintain its freshness, appearance, and integrity. Proper drying helps to prevent mold growth, odors, and potential damage, ensuring that your rug remains clean and ready to enjoy for years to come.
Additional Tips for Rug Sanitization
When it comes to rug sanitization, there are a few additional tips and tricks that can help improve the effectiveness of the cleaning process and maintain the cleanliness of your rugs. Consider the following tips to enhance your rug sanitization routine:
Tip 1: Regular Maintenance
Implement regular maintenance practices to keep your rugs clean between deep cleanings. Vacuum your rugs at least once a week to remove loose dirt and debris. Regular maintenance helps prevent the build-up of dirt and allergens, prolonging the time between deep sanitization sessions.
Tip 2: Spot Cleaning
Address spills and stains promptly through spot cleaning. Blot the affected area with a clean cloth or paper towel immediately after a spill occurs to soak up as much liquid as possible. Then, use a suitable stain remover or cleaning agent to treat the stain according to the rug’s material. Prompt attention to spills can prevent them from setting in and becoming more challenging to remove.
Tip 3: Consider Rug Pads
Use rug pads underneath your rugs to provide extra cushioning and prevent them from slipping or sliding. Rug pads also help with airflow, reducing the risk of moisture accumulation underneath the rug. Be sure to choose rug pads suitable for the type of flooring and rug material to prevent any damage.
Tip 4: Rotate Your Rugs
Rotate your rugs periodically to minimize wear and tear. By rotating them, you distribute the traffic and sunlight exposure more evenly, helping to maintain the rug’s appearance and prolong its lifespan. Additionally, rotating your rugs can prevent uneven fading and ensure that all areas of the rug receive equal care and cleaning attention.
Tip 5: Avoid Direct Sunlight
Avoid placing your rugs in direct sunlight for extended periods of time. Sunlight exposure can cause the colors to fade and weaken the fibers over time. If your rugs are exposed to sunlight, consider using window treatments or UV-blocking films to protect them from harmful rays.
Tip 6: Professional Rug Cleaning
Periodically, consider hiring professional rug cleaners to deep clean and sanitize your rugs. Professional cleaners have the expertise and specialized equipment to thoroughly clean rugs without causing damage. They can remove deep-seated dirt, stains, and allergens effectively, restoring the beauty and freshness of your rugs.
Tip 7: Read Manufacturer’s Instructions
Always refer to the manufacturer’s instructions and guidelines specific to your rug’s material and construction. Manufacturers provide valuable information on how to maintain and clean their rugs, ensuring that you use the appropriate cleaning methods and products. Following these instructions helps to prevent damage and prolong the life of your rugs.
Tip 8: Consult Professionals for Delicate Rugs
If you have delicate or antique rugs, consider consulting with professionals who specialize in cleaning and caring for such rugs. Delicate rugs may require specialized treatment and handling to preserve their beauty and value. Professionals can provide expert advice and services tailored to your specific rug’s needs.
Tip 9: Test Cleaning Agents
Before using any cleaning agents or solutions on your rugs, perform a spot test in an inconspicuous area. This ensures that the cleaning agent doesn’t cause any unwanted discoloration, damage, or adverse reactions to the rug’s fibers. Wait for the test area to dry and assess the results before proceeding with full-scale cleaning.
Tip 10: Regularly Clean Underneath Rugs
Don’t forget to clean the surface underneath your rugs regularly. Dirt and debris can accumulate beneath the rug, and if left unaddressed, they can transfer back onto the clean rug surface. Vacuum and clean the floor beneath the rug periodically to maintain a clean and hygienic environment.
By incorporating these additional tips into your rug sanitization routine, you can enhance the cleanliness, appearance, and longevity of your rugs. Regular maintenance, prompt spot cleaning, professional cleaning when necessary, and attention to care instructions will help keep your rugs in optimal condition for years to come.
Conclusion
Proper rug sanitization is essential not only for maintaining a clean and healthy living environment but also for preserving the beauty and longevity of your rugs. By following the steps and tips outlined in this comprehensive guide, you can effectively sanitize your rugs, removing dirt, allergens, and bacteria that can accumulate over time.
We explored the importance of rug sanitization, highlighting the impact it has on health, hygiene, and the overall lifespan of your rugs. We discussed how to choose the right sanitizing method based on the material and construction of your rugs, ensuring optimal results without causing damage.
The step-by-step guide provided clear instructions on how to prepare your rug for sanitization, vacuum it properly, and use natural cleaning agents. We also covered the process of steam cleaning, dealing with stains and spills, and drying the rug effectively to prevent mold and mildew growth.
Moreover, we shared additional tips to enhance your rug sanitization routine, including regular maintenance, spot cleaning, rug rotation, and consulting professionals for delicate rugs. By incorporating these tips, you can maintain the cleanliness, appearance, and longevity of your rugs in the long run.
Remember, each rug is unique, and it’s essential to read and follow the manufacturer’s instructions specific to your rug’s material and construction. By doing so, you can ensure that you’re using the appropriate cleaning methods and products for your rug’s care.
In the end, a clean and fresh rug not only enhances the aesthetic appeal of your living space but also contributes to a healthier environment for you and your family. Making rug sanitization a regular part of your cleaning routine will help eliminate allergens, bacteria, and odors, providing you with a cleaner and more comfortable home.
So, go ahead and give your rugs the deep cleaning they deserve. With the knowledge and techniques shared in this guide, you can achieve cleaner, fresher, and more enjoyable rugs that will continue to bring beauty and comfort to your home for years to come.
Frequently Asked Questions about How To Sanitize Rugs
Was this page helpful?
At Storables.com, we guarantee accurate and reliable information. Our content, validated by Expert Board Contributors, is crafted following stringent Editorial Policies. We're committed to providing you with well-researched, expert-backed insights for all your informational needs.
0 thoughts on “How To Sanitize Rugs”