Articles
How To Test A Dryer Heating Element
Modified: August 19, 2024
Looking for articles on how to test a dryer heating element? Find step-by-step guides and expert tips to diagnose and fix your dryer's heating issue here.
(Many of the links in this article redirect to a specific reviewed product. Your purchase of these products through affiliate links helps to generate commission for Storables.com, at no extra cost. Learn more)
Introduction
A dryer is an essential appliance in many households, providing convenience and efficiency in drying clothes. However, like any other appliance, a dryer can experience issues over time. One common problem is a malfunctioning heating element, which can cause the dryer to fail in drying clothes effectively.
If you notice that your dryer is not generating enough heat or taking longer than usual to dry clothes, it may be time to test the heating element. Testing the dryer heating element is a simple process that can help you determine whether it needs to be replaced or if there are other underlying issues causing the problem.
In this article, we will walk you through the step-by-step process of testing a dryer heating element. By following these instructions and taking the necessary safety precautions, you can diagnose the issue and take appropriate action to restore your dryer’s functionality.
Key Takeaways:
- Ensure safety by following proper procedures when testing a dryer heating element, including unplugging the dryer, wearing protective gear, and working in a well-ventilated area.
- Testing for continuity and resistance using a multimeter can help determine the functionality of the dryer heating element, providing valuable insights for maintenance and repair.
Read more: How To Fix Dryer Heating Element
Tools and Materials Needed
Before you begin testing the dryer heating element, make sure you have the following tools and materials on hand:
- Multimeter – This device will be used to test the continuity and resistance of the heating element.
- Screwdriver – You may need to remove screws or panels to access the heating element.
- Electrical tape – This will be used to secure any loose wires or connections.
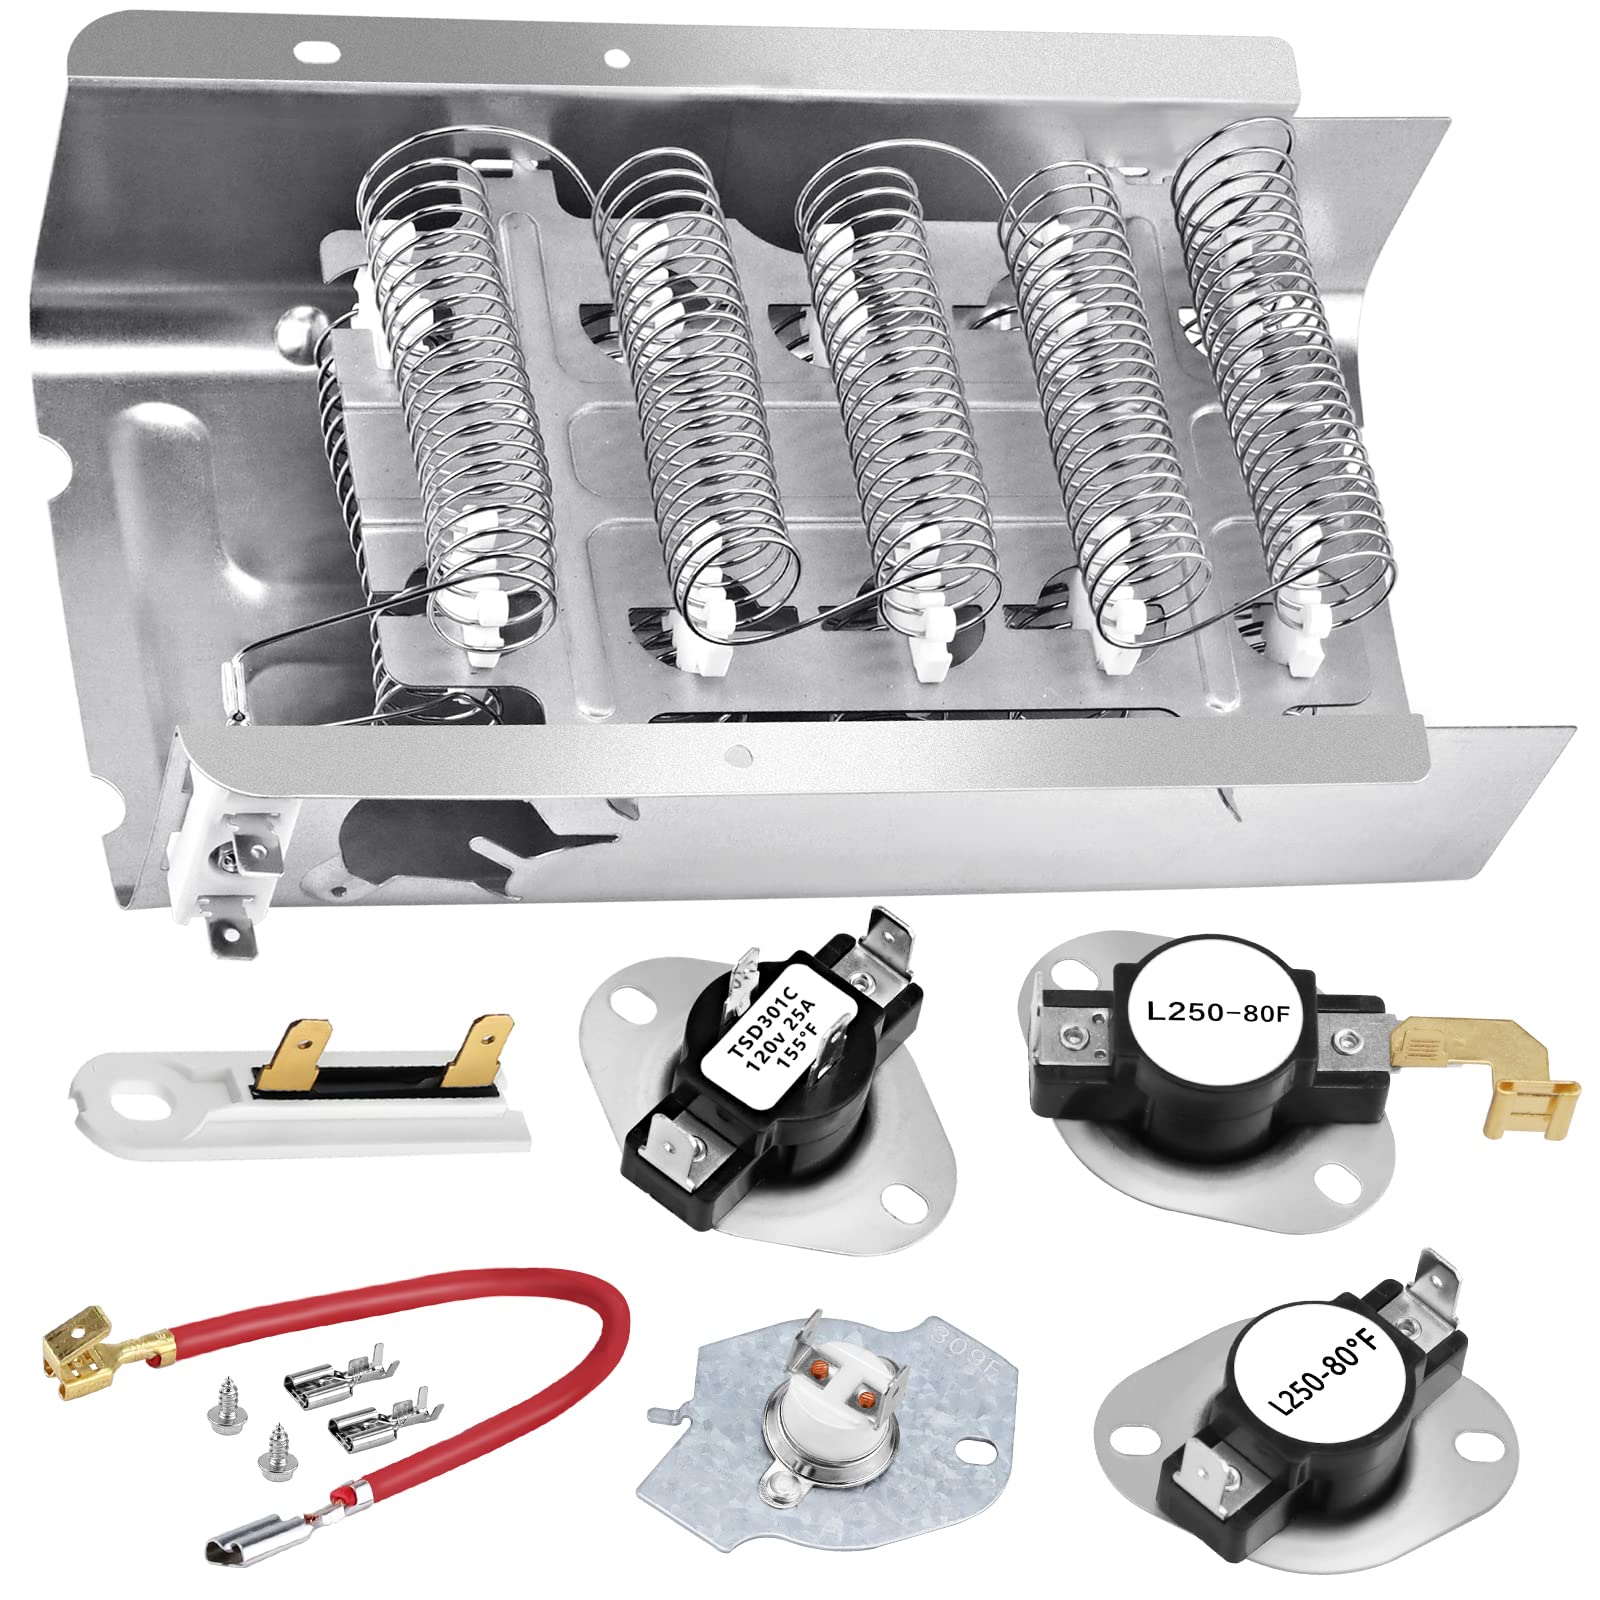
- Replacement heating element (optional) – If your heating element is found to be faulty, you may need to purchase a new one for replacement.
It’s important to note that the specific tools and materials required may vary depending on the brand and model of your dryer. Be sure to consult your dryer’s user manual or manufacturer’s website for any additional tools or materials that may be needed.
Once you have gathered all the necessary tools and materials, you’ll be ready to begin testing the dryer heating element. Remember to unplug the dryer and follow all safety precautions to avoid any potential electrical hazards.
Step 1: Safety Precautions
Before starting any repair or testing process, it is crucial to prioritize your safety. Working with electrical appliances can be hazardous if proper precautions are not taken. Follow these safety guidelines to ensure a safe testing experience:
- Unplug the dryer – Before conducting any tests, always disconnect the dryer from the power source by unplugging it. This will prevent any accidental electrical shocks or injuries.
- Wear protective gear – It’s essential to protect yourself during the testing process. Wear safety goggles and gloves to safeguard against potential hazards.
- Work in a well-ventilated area – Ensure that the testing area is well-ventilated to prevent the buildup of any harmful fumes or gases. If necessary, open windows or turn on fans to improve airflow.
- Keep the area clean and tidy – Remove any clutter or obstacles around the dryer to provide a safe and clear working environment. This will minimize the risk of accidents or injuries.
- Avoid water or wet surfaces – Never conduct tests on a damp or wet surface. Dry off any water spills or moisture to prevent electrical shorts or other hazards.
- Follow manufacturer’s instructions – Consult your dryer’s user manual for specific safety guidelines and instructions provided by the manufacturer.
By following these safety measures, you can ensure a secure testing process and reduce the risk of accidents or injuries. Always prioritize your well-being and take necessary precautions when working with electrical appliances.
Step 2: Power Off and Unplug the Dryer
Before proceeding with any testing or repair work, it is crucial to disconnect your dryer from the power source. This step is essential to prevent any potential electrical shocks or injuries during the testing process. Follow these steps to power off and unplug your dryer:
- Locate the dryer’s power cord – The power cord is typically located at the back of the dryer. It is connected to an electrical outlet or power source.
- Turn off the dryer – Ensure that the dryer is turned off by pressing the power button or turning the knob to the “off” position. This will ensure that the dryer is not connected to any power supply.
- Unplug the dryer – Carefully unplug the power cord from the electrical outlet. Gently pull on the plug, making sure not to tug on the cord itself. This will completely disconnect the dryer from the power source.
- Confirm power disconnection – Double-check that the dryer is no longer receiving any power by testing the control panel or any indicator lights. If there is no power, you can proceed to the next step.
By following these steps, you can be confident that your dryer is not receiving any power supply, minimizing the risk of electrical accidents. It is important to remember that working on a connected dryer can be extremely dangerous and should never be attempted. Always prioritize safety and ensure that your dryer is fully unplugged before proceeding with any testing or repair work.
Step 3: Locate and Access the Heating Element
To test the dryer heating element, you will need to locate and access it within your dryer. The exact location of the heating element may vary depending on the make and model of your dryer, so consult your user manual or the manufacturer’s website for specific instructions. Follow these general steps to locate and access the heating element:
- Remove the lint screen – Start by removing the lint screen from the top of the dryer. This will provide you with better access to the interior of the dryer.
- Remove the dryer’s top panel – Depending on your dryer model, you may need to remove the top panel to access the heating element. This is typically done by removing a few screws or releasing clips that hold the panel in place.
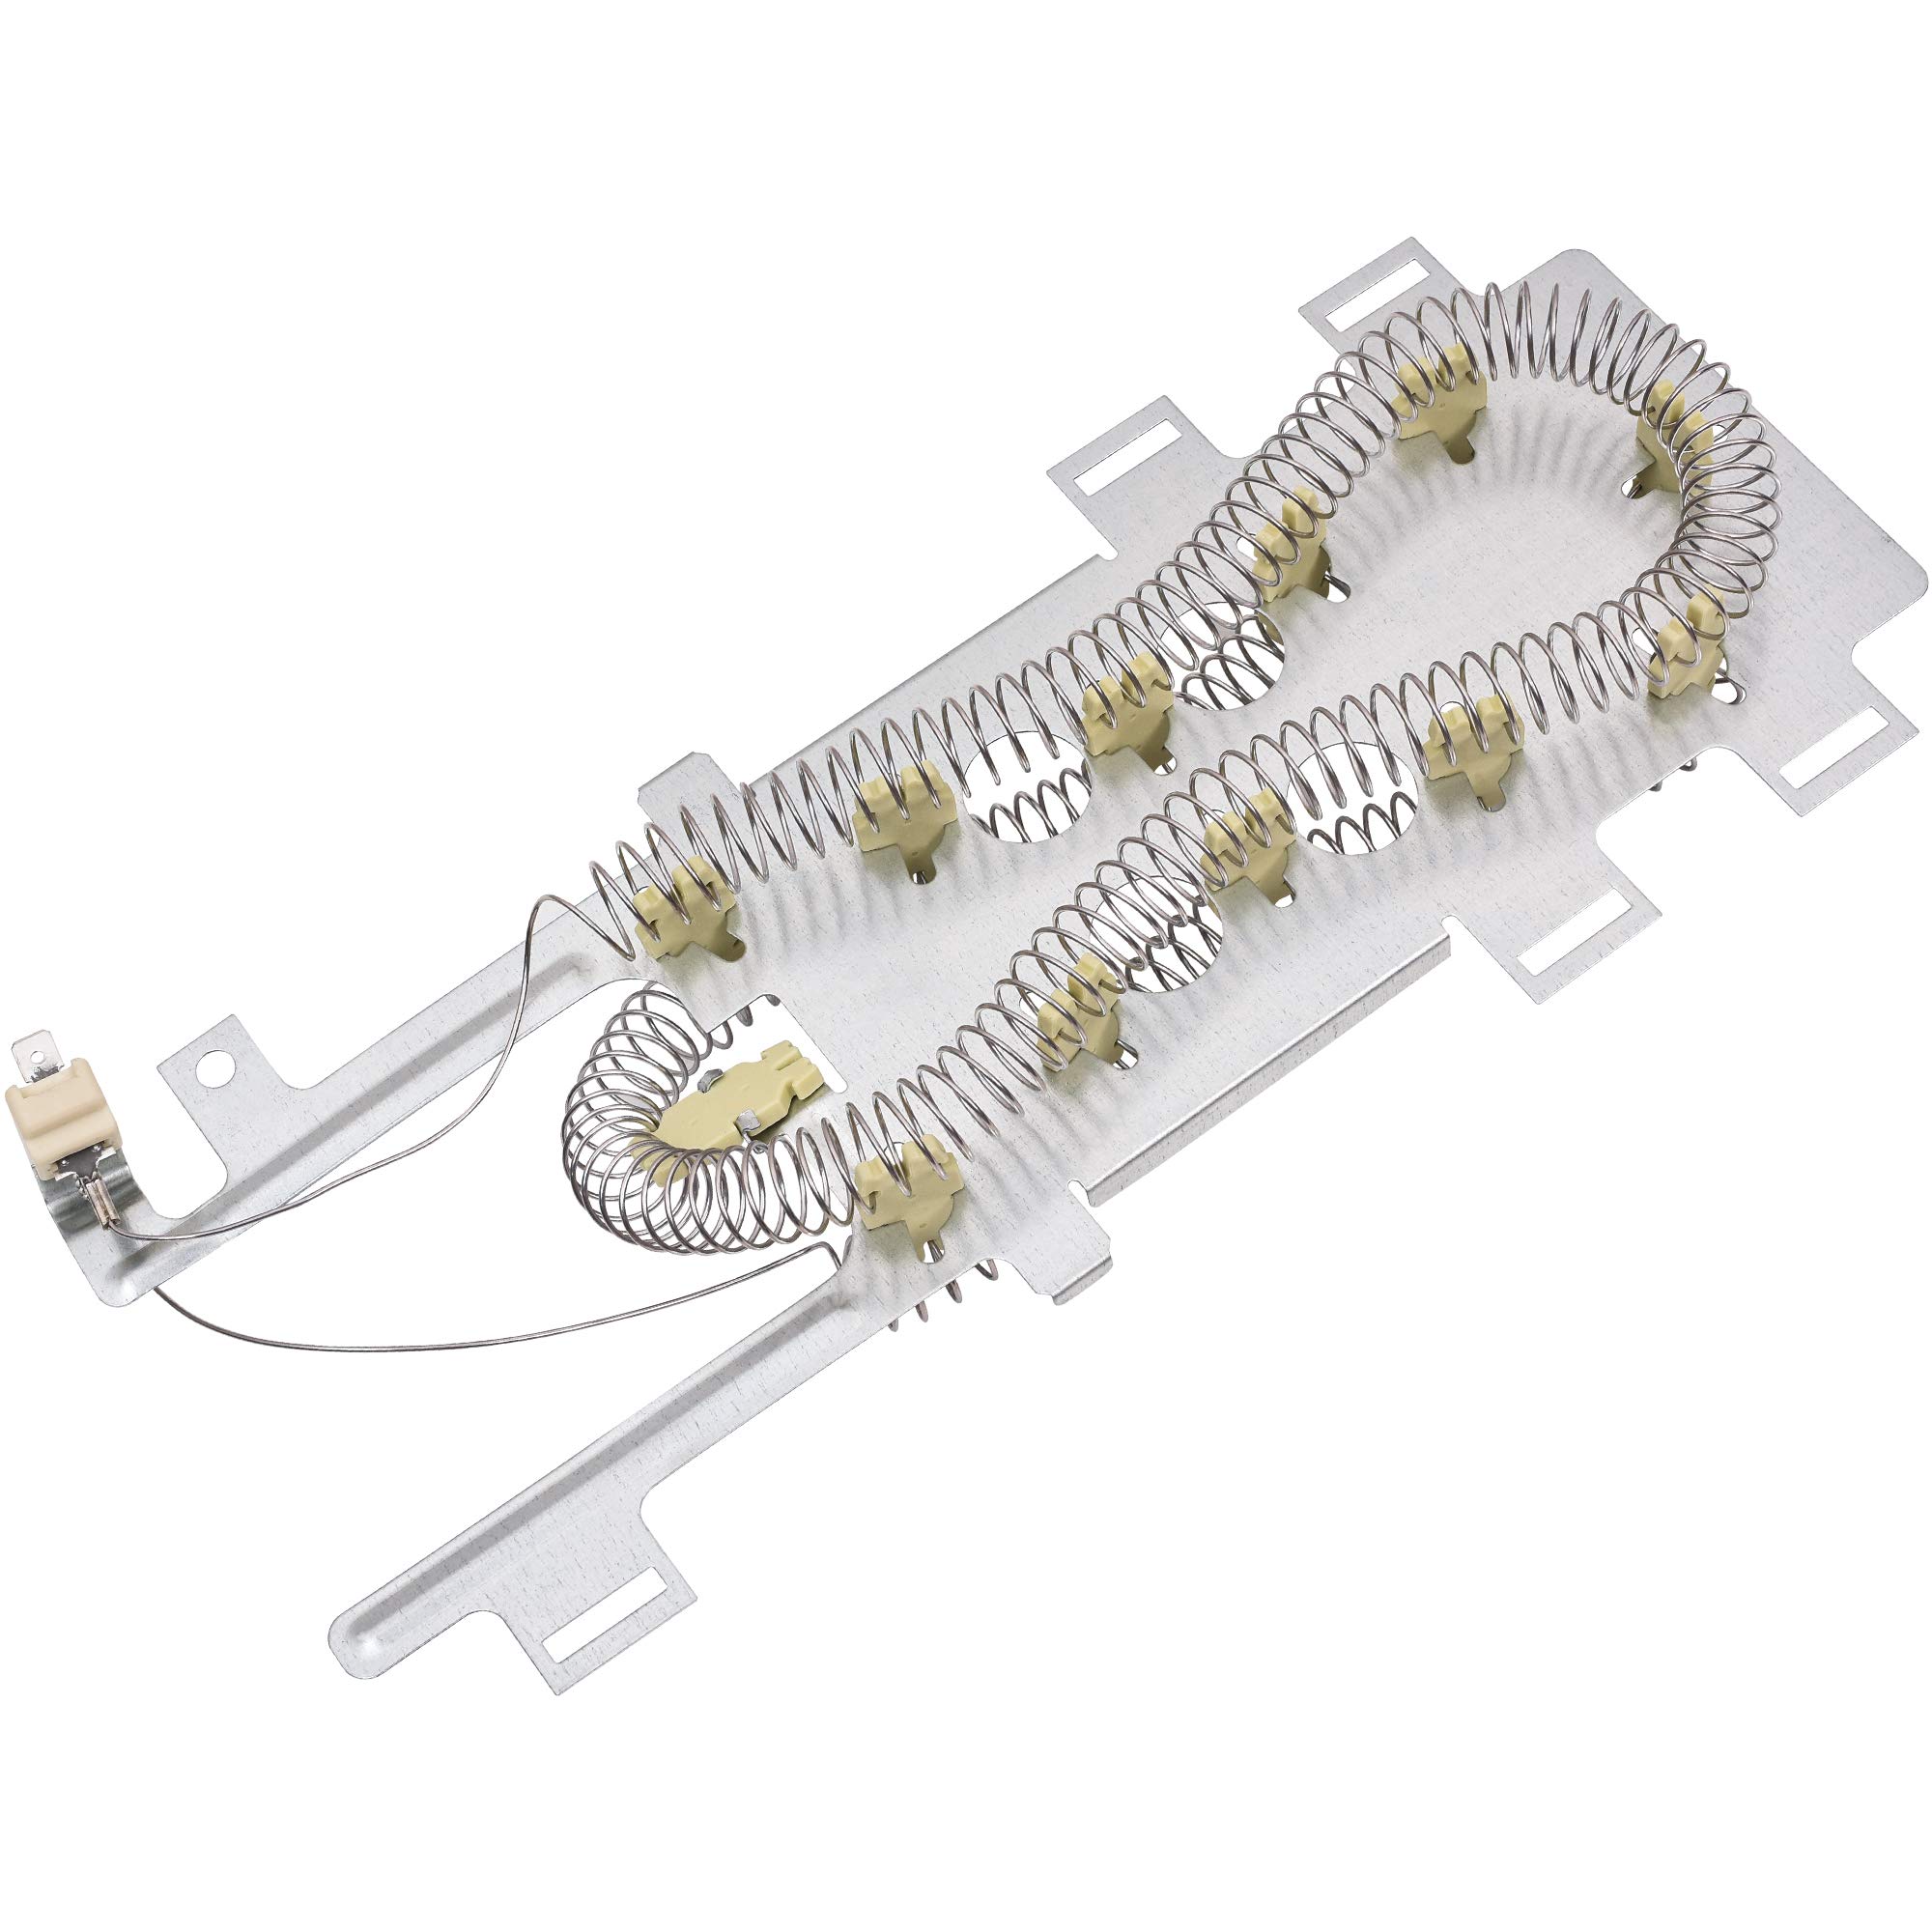
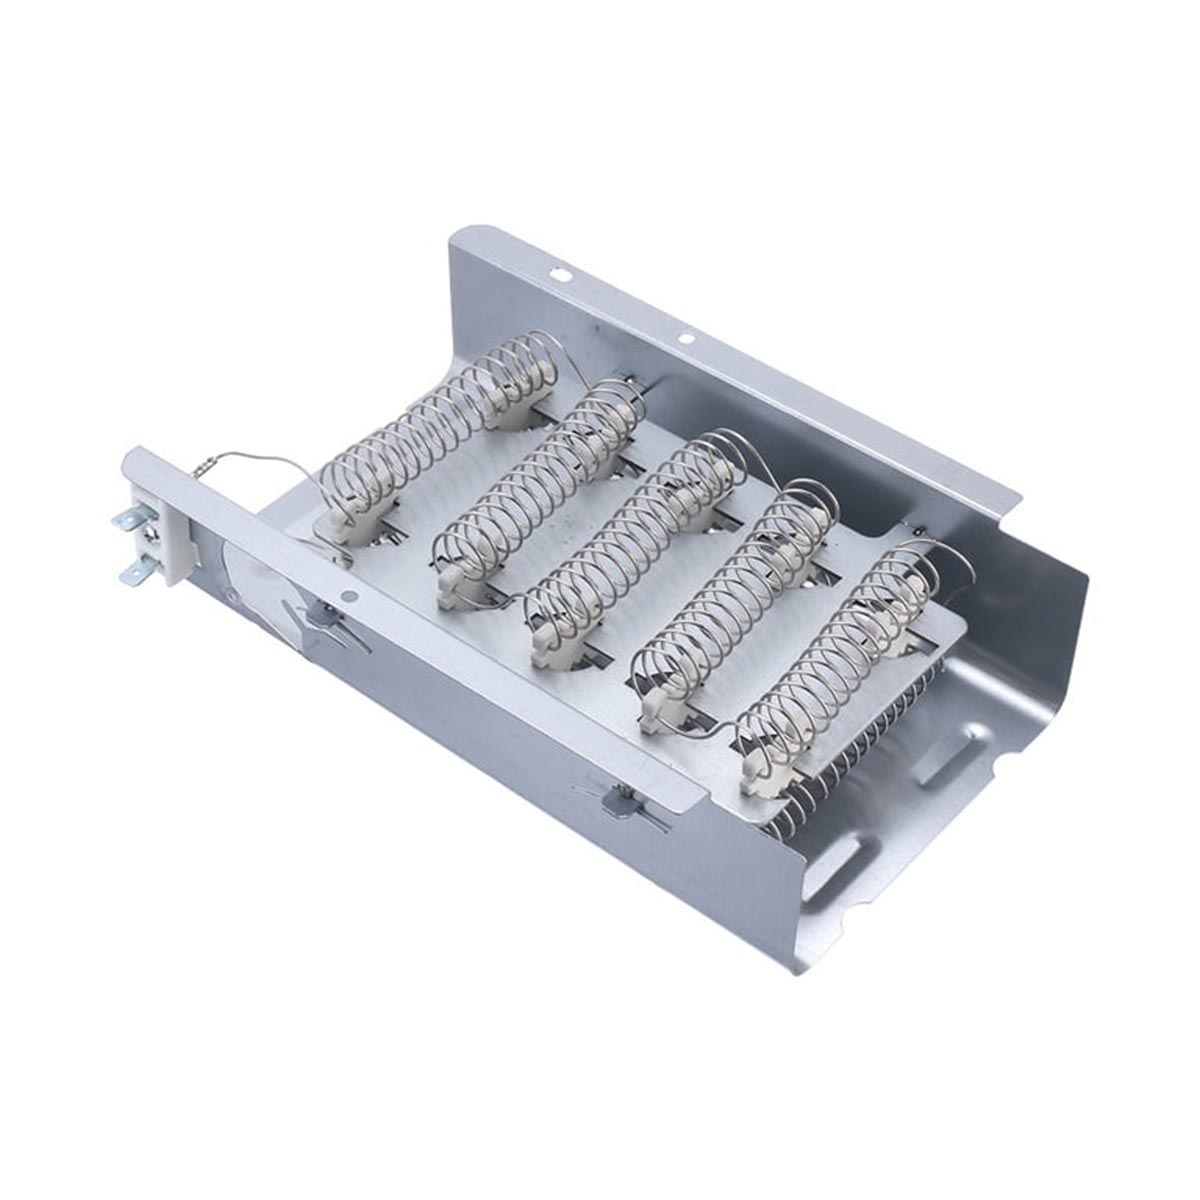
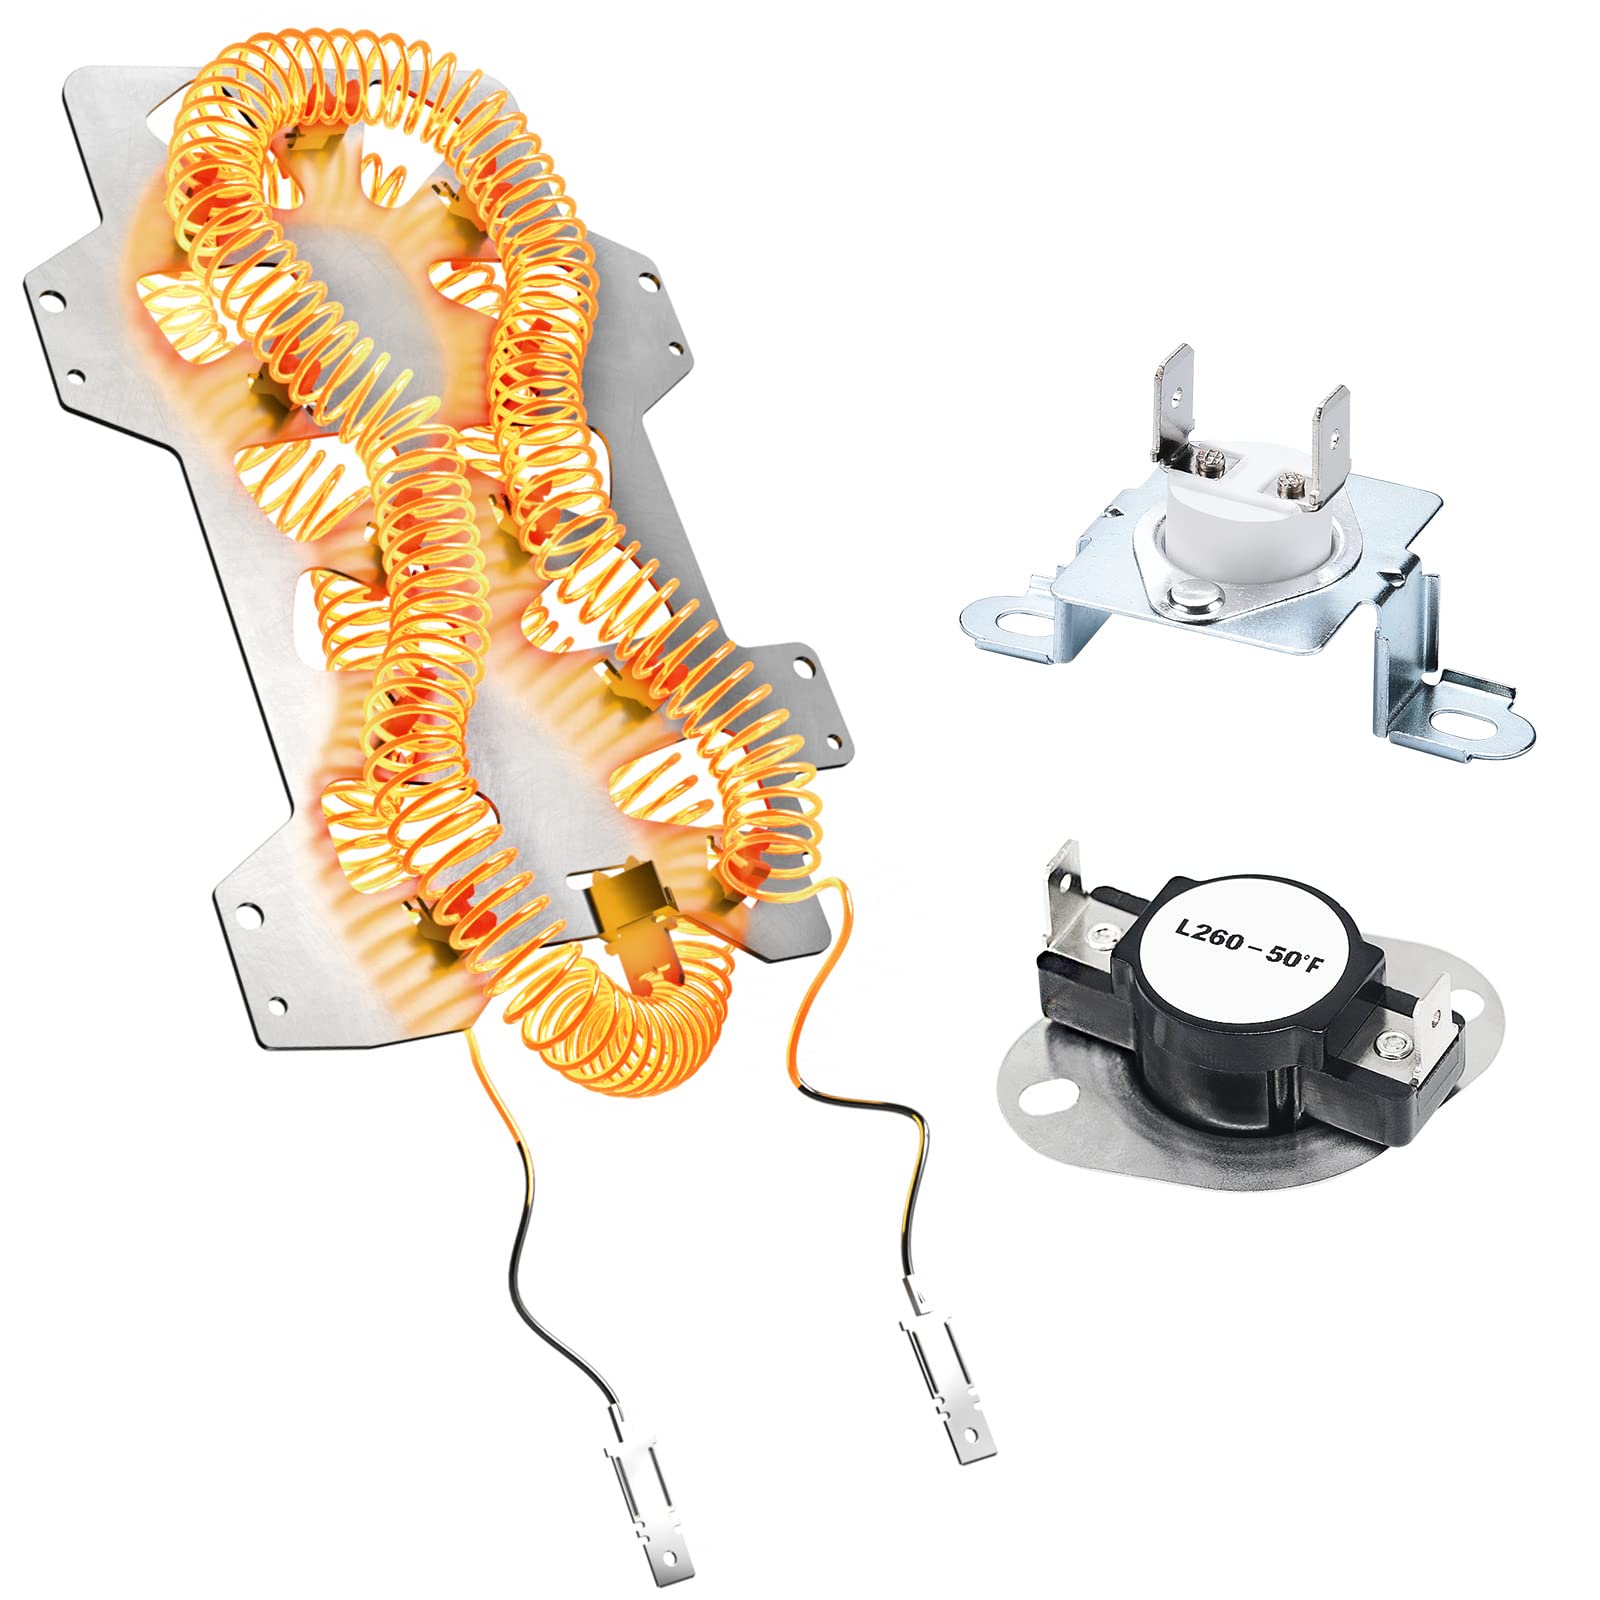
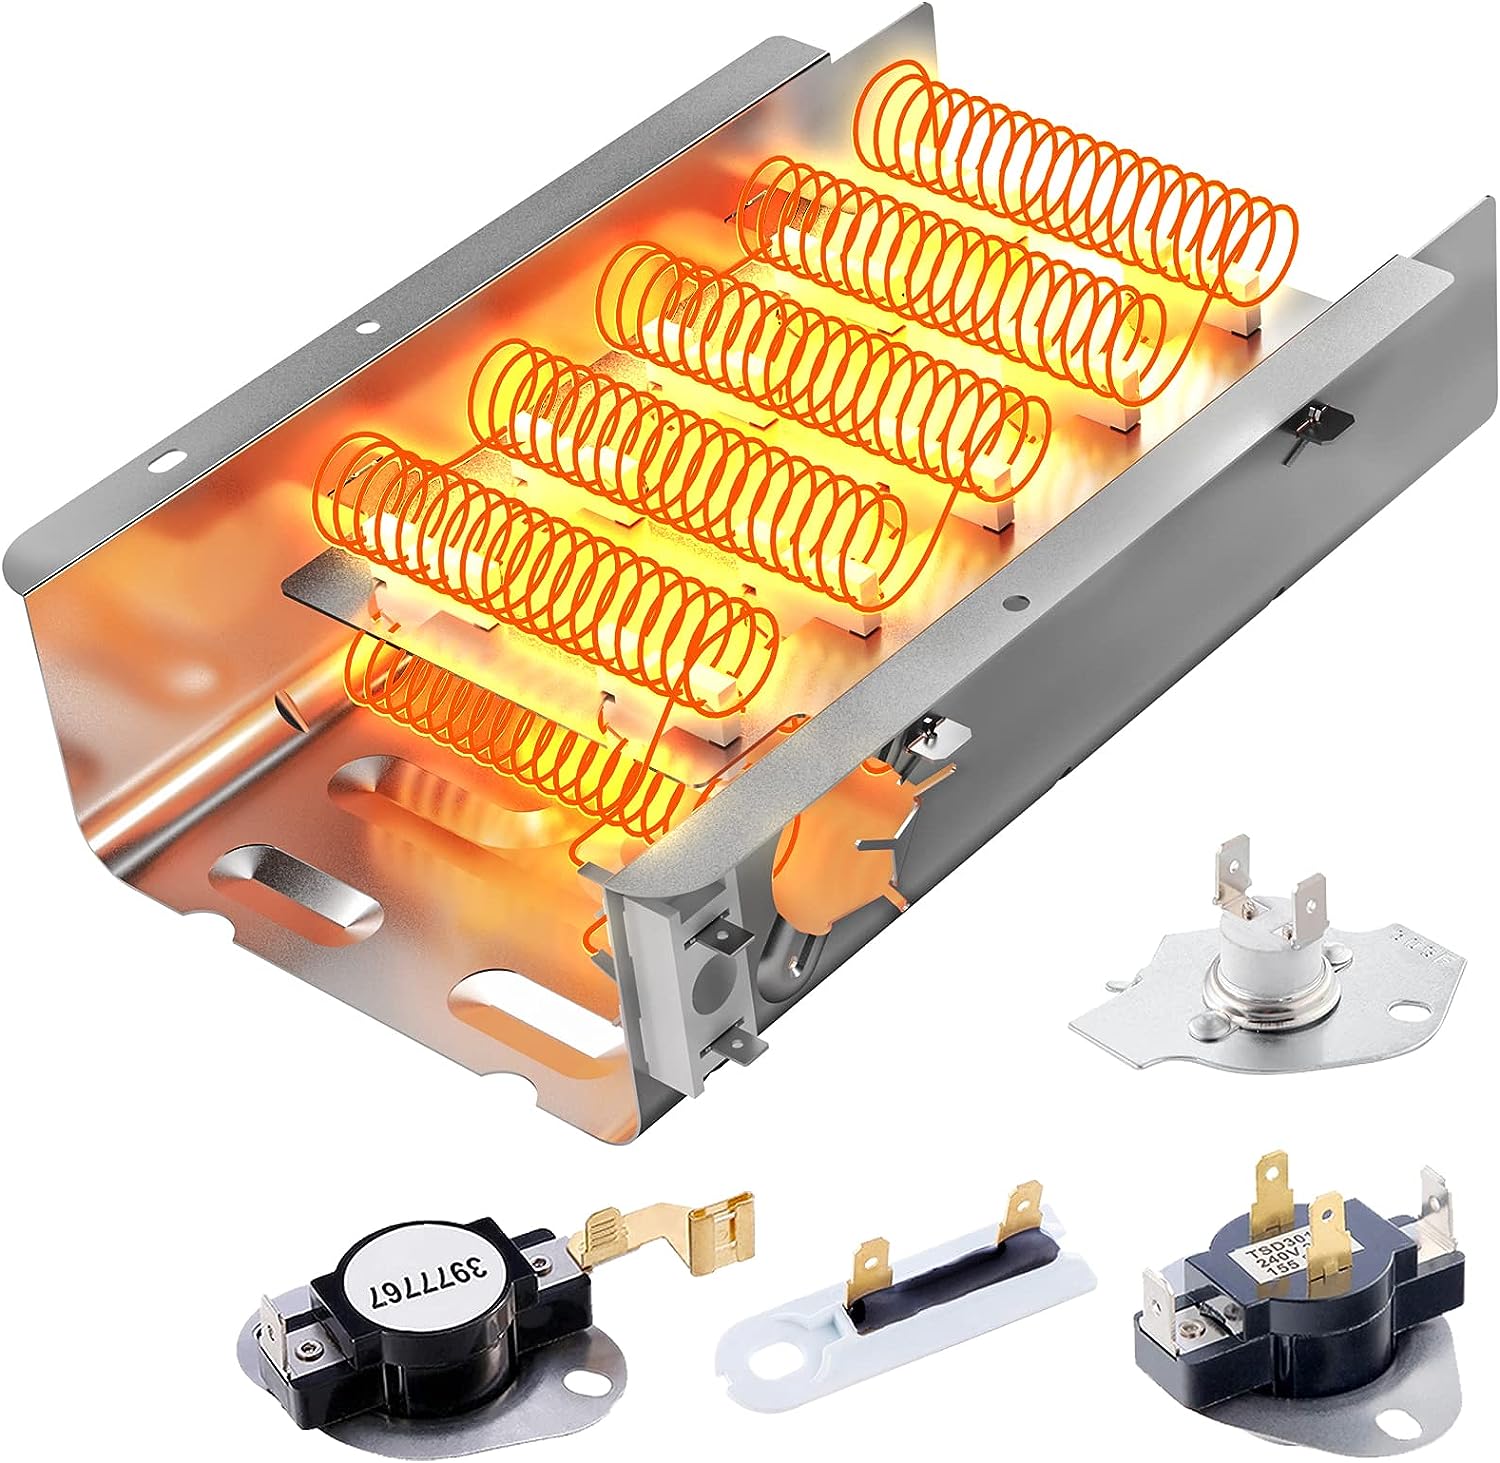
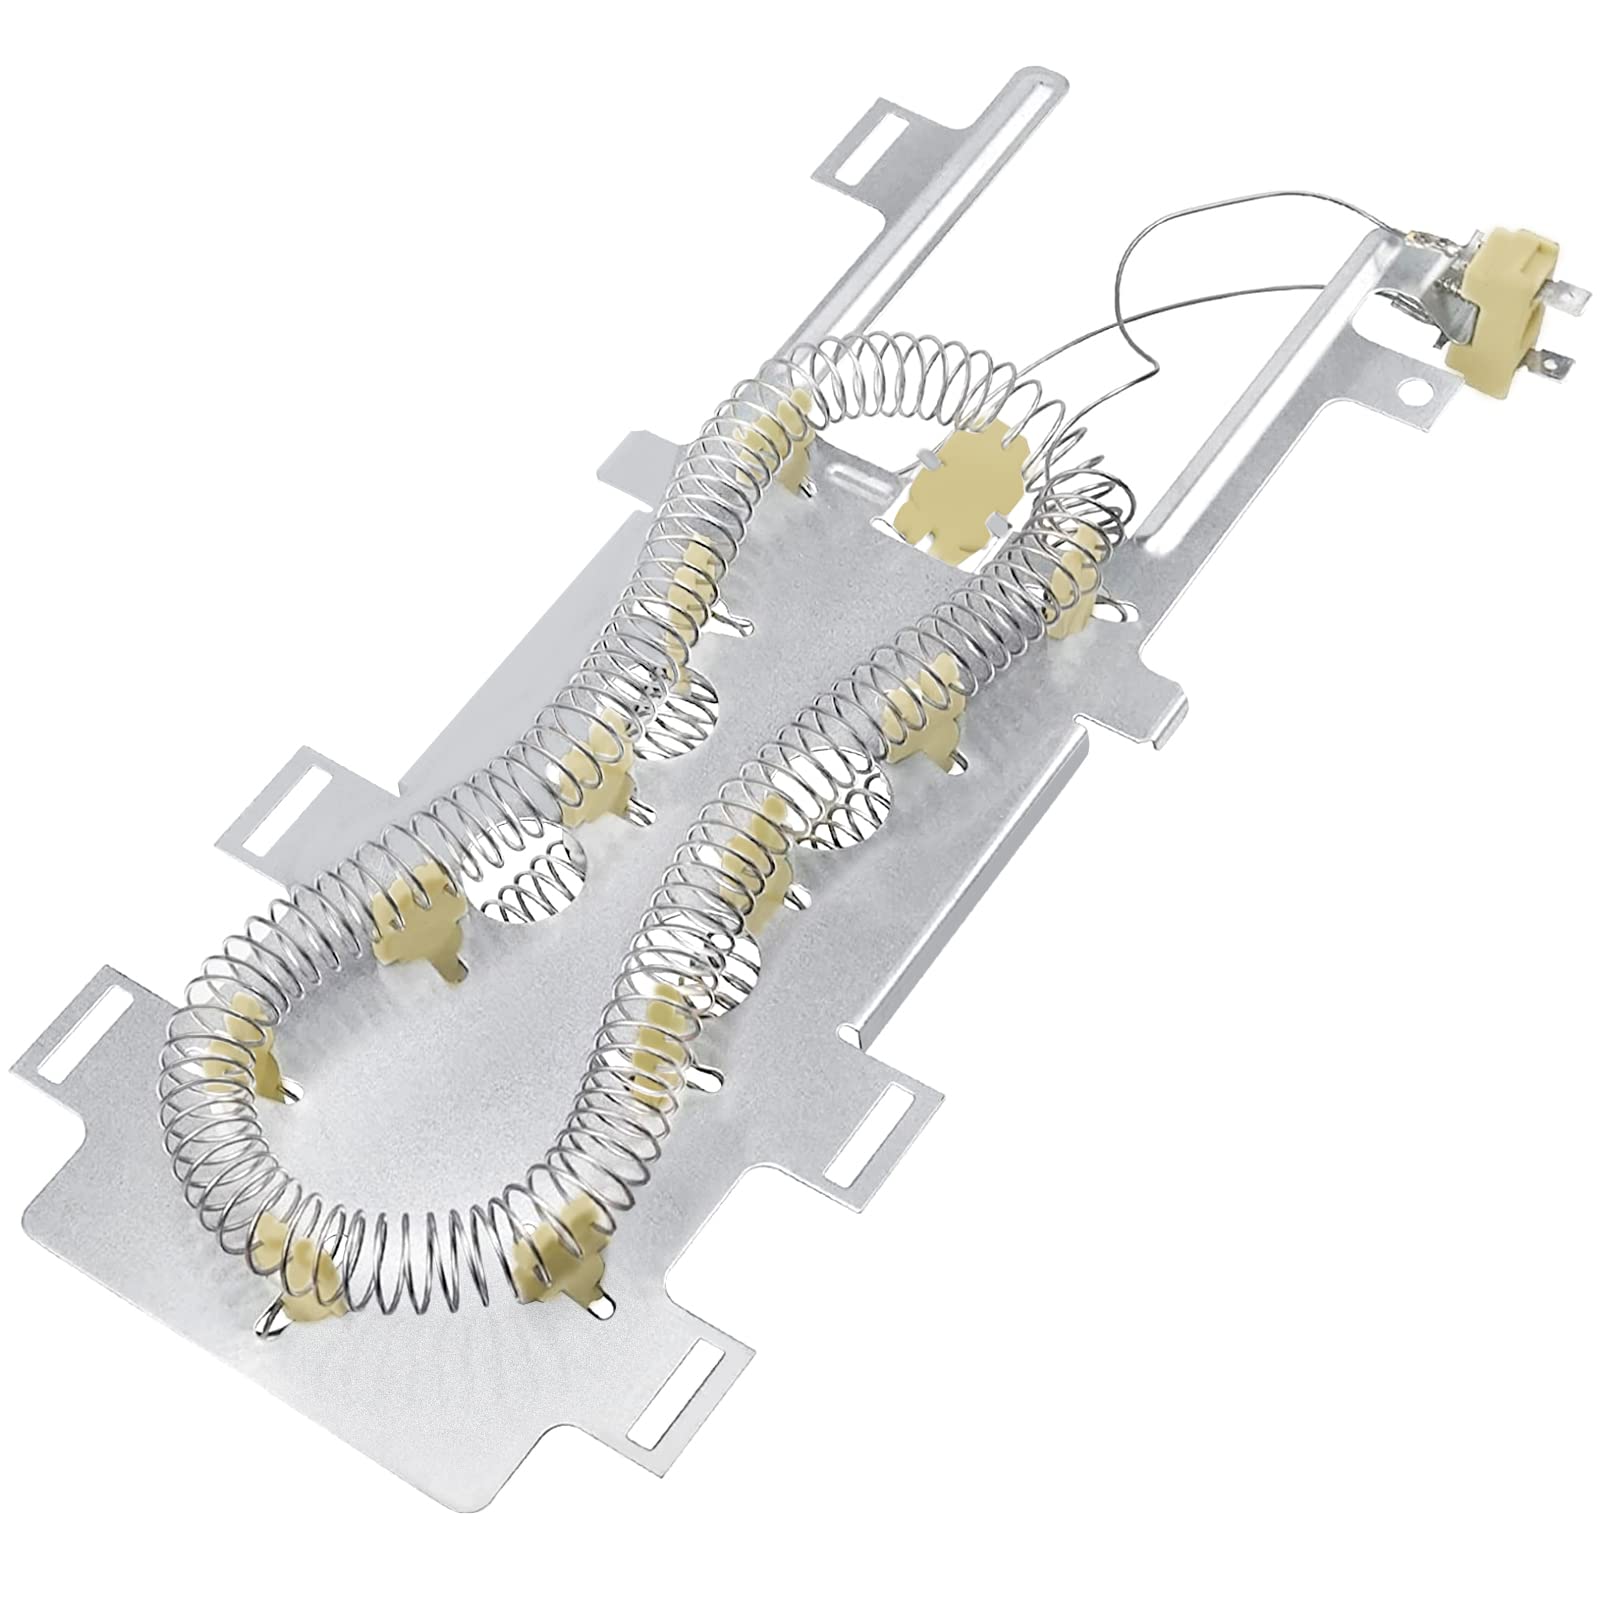
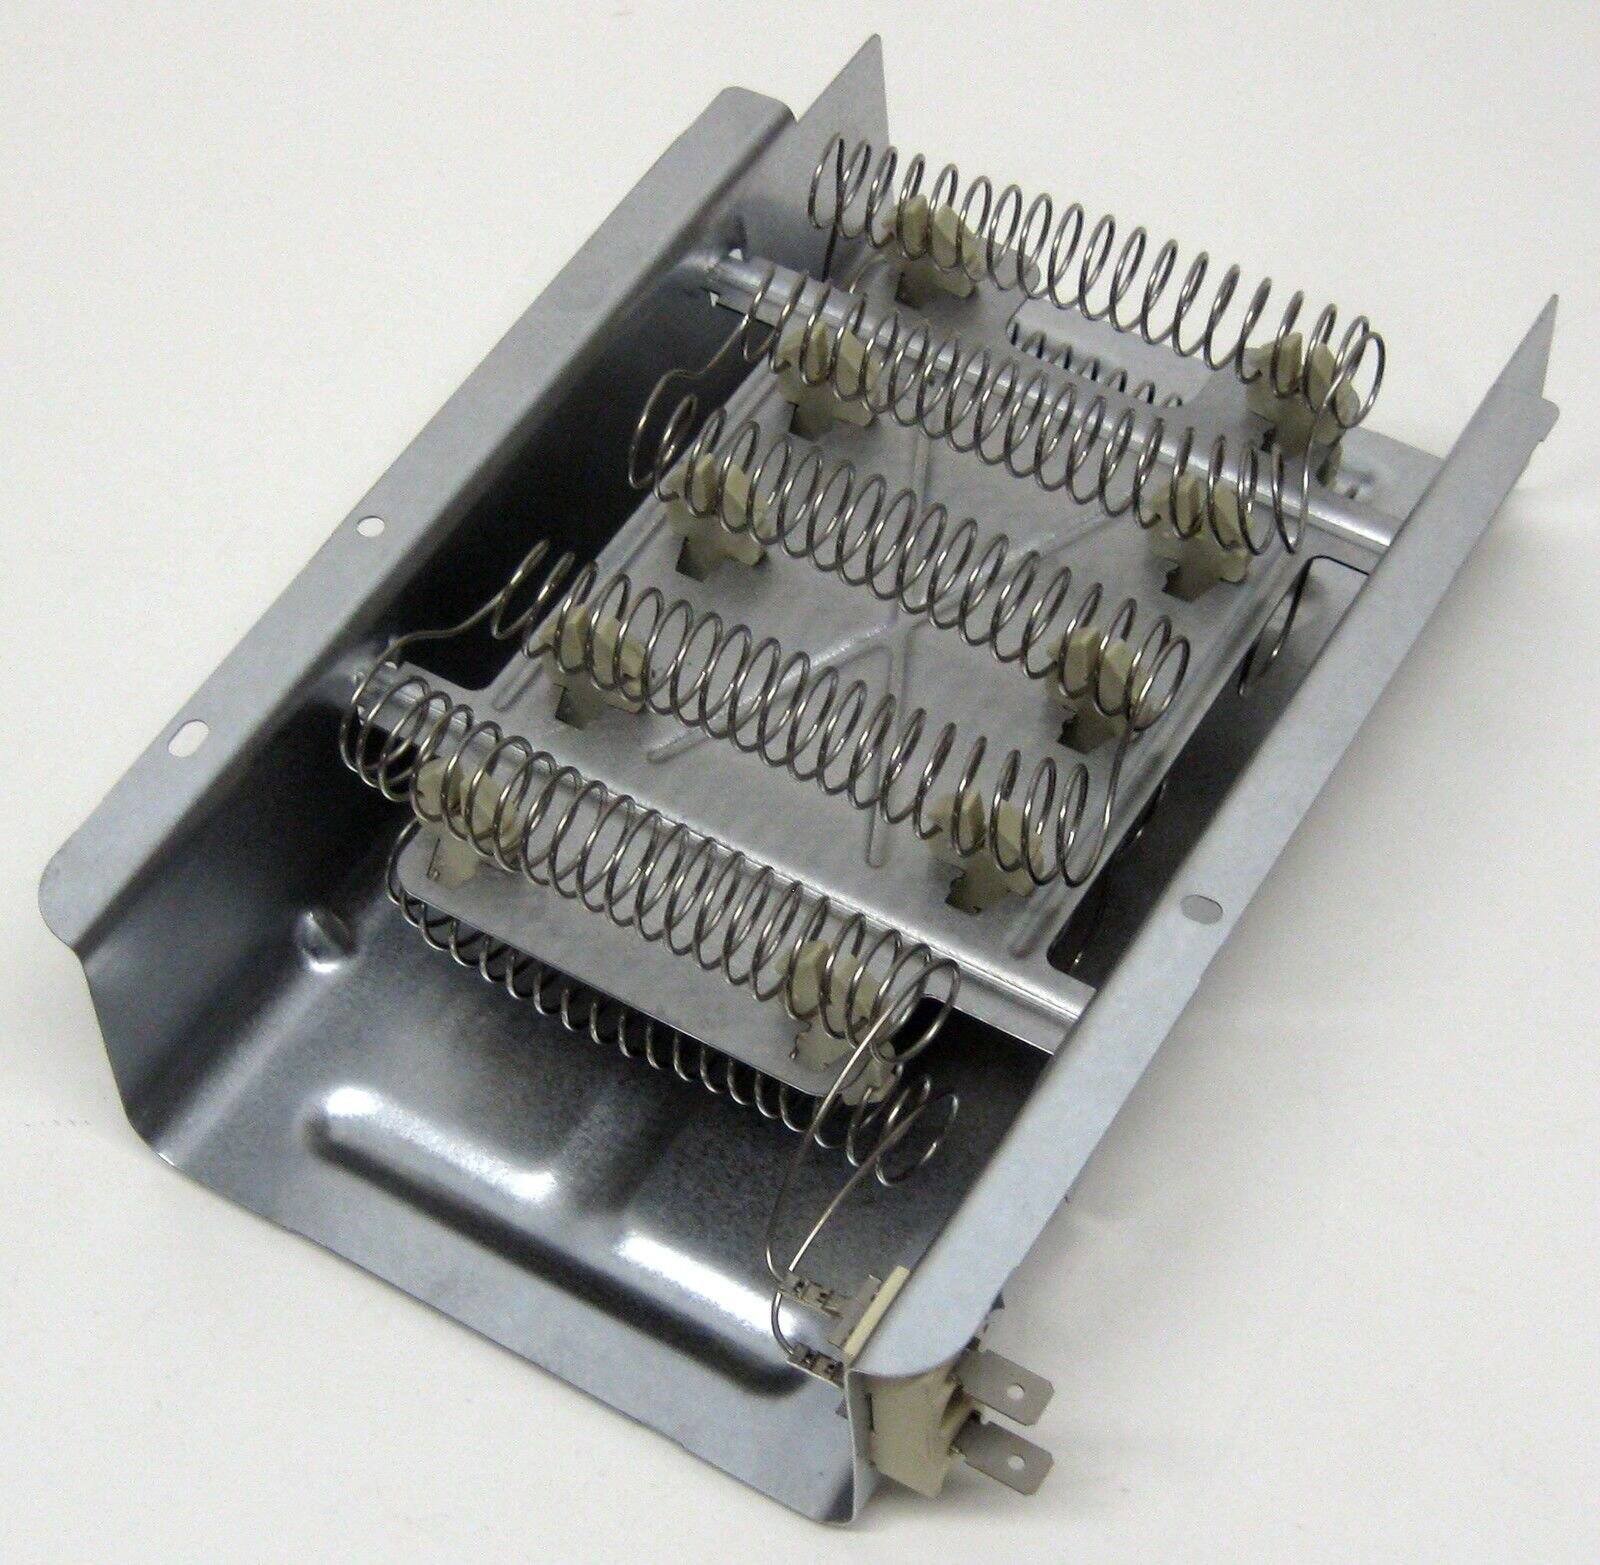
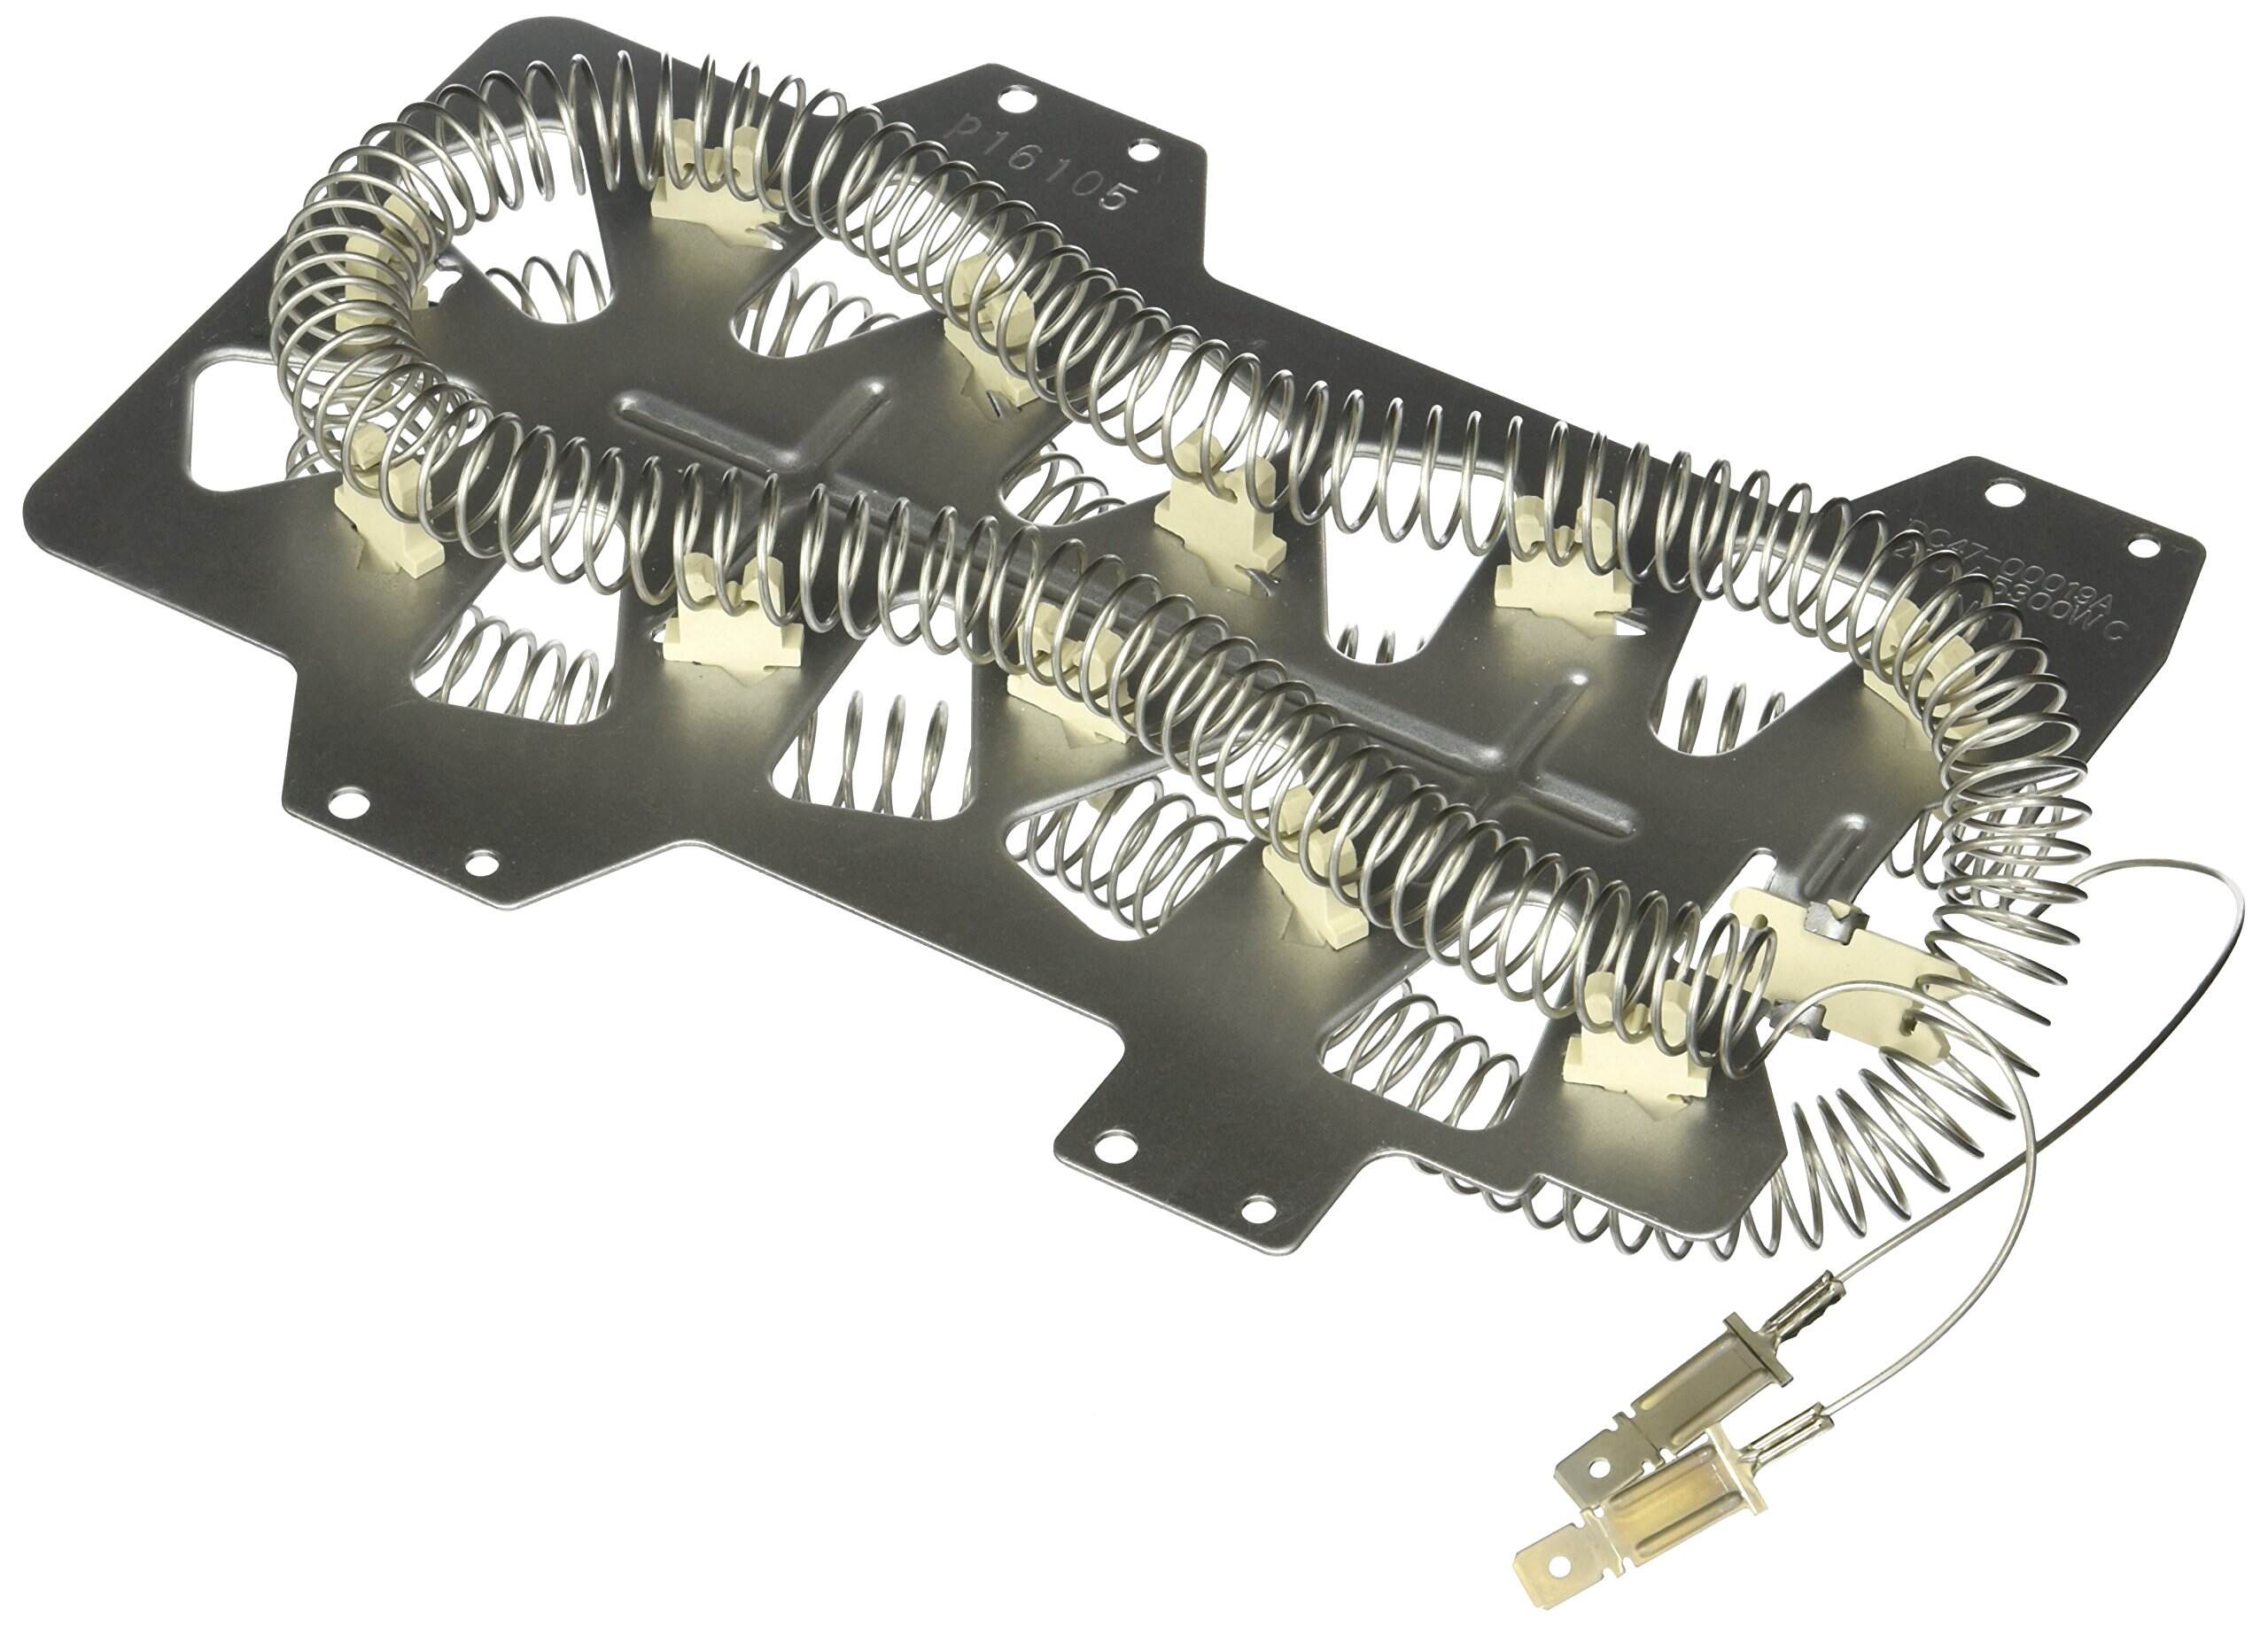
- Locate the heating element – Once you have removed the top panel, locate the heating element. It is a metallic coil-like component that is usually situated at the back of the dryer or inside the drum.
Note: In some dryers, the heating element may be located in the front or on the bottom, so be sure to consult your user manual for specific instructions.
Once you have located the heating element, take a moment to visually inspect it for any signs of damage, such as broken coils or visible burns. If there are any visible issues, it is likely that the heating element needs to be replaced. If there are no apparent problems, proceed to the next step to test the heating element’s functionality.
Read more: How To Replace Maytag Dryer Heating Element
Step 4: Visual Inspection
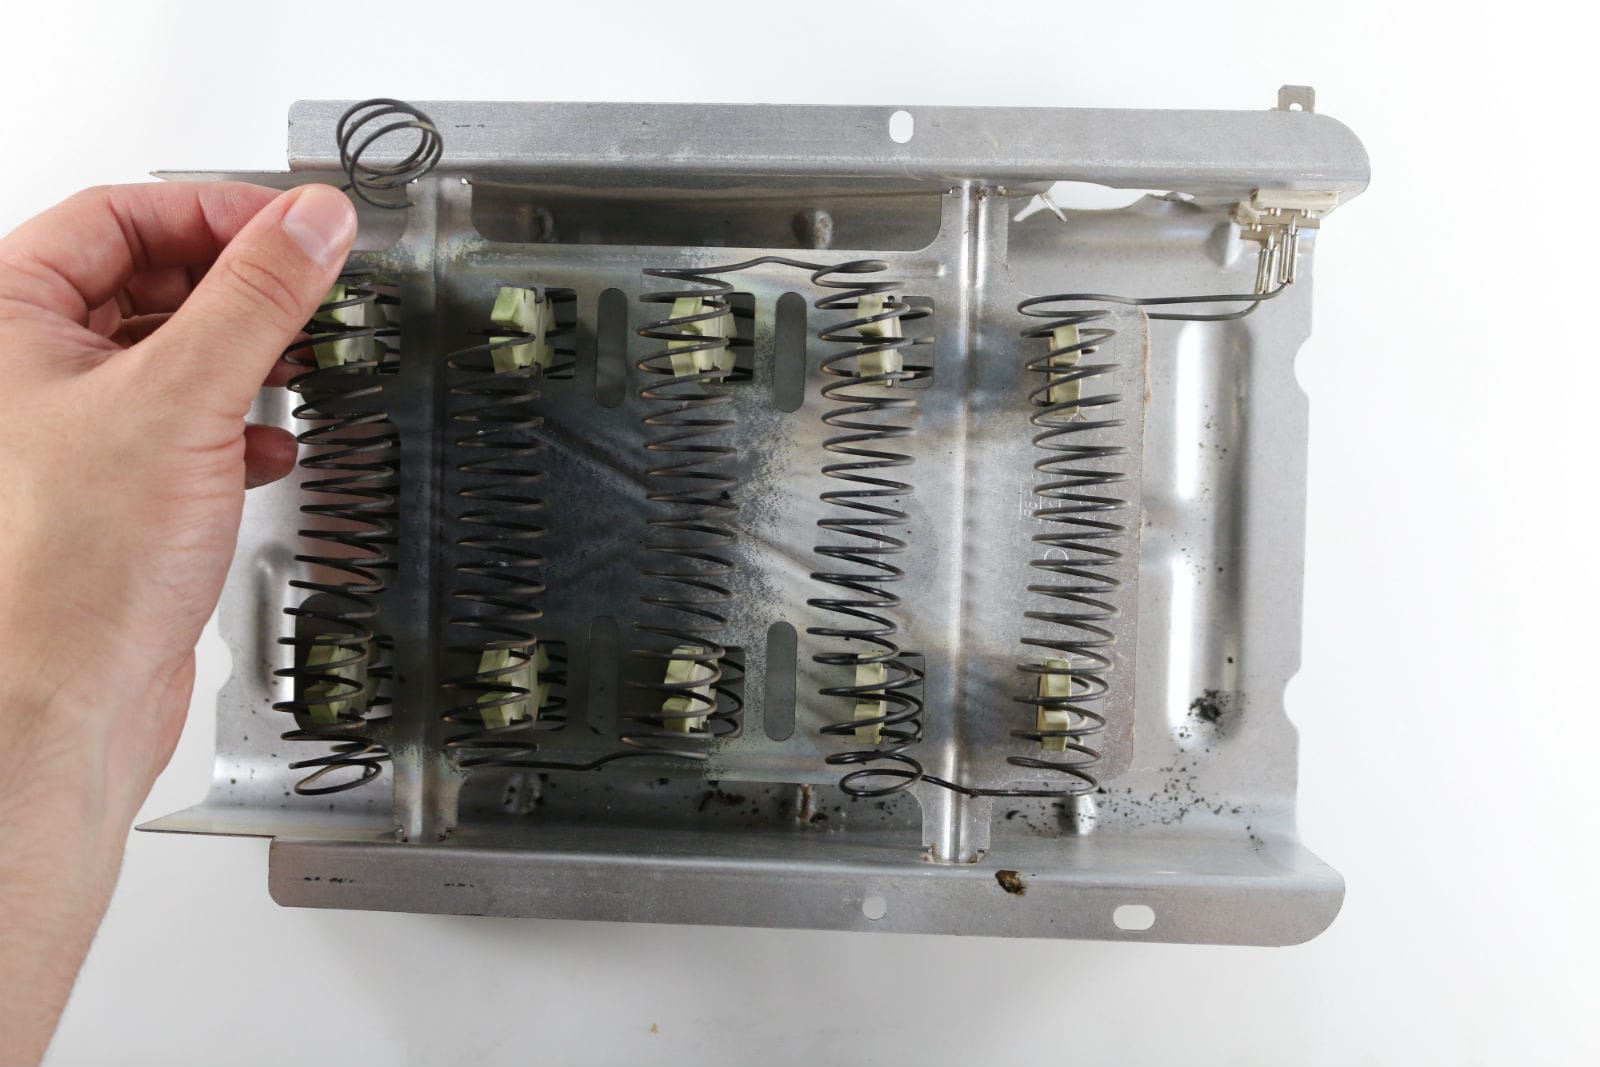
After locating the heating element, it is important to conduct a visual inspection to identify any visible signs of damage or wear. These visual cues can help determine if the heating element is functioning properly or if it needs to be replaced. Follow these steps to visually inspect the heating element:
- Inspect for physical damage – Carefully examine the heating element for any visible signs of physical damage, such as broken coils, cracks, or disconnections. These issues may indicate that the heating element is faulty and needs replacing.
- Check for debris or blockages – Look for any debris or lint buildup around the heating element. Accumulated debris can block airflow, resulting in insufficient heat distribution. If there is significant lint or debris present, clean the area using a soft brush or vacuum cleaner attachment.
- Inspect for discoloration or burning – Look for any discoloration or burn marks on the heating element. Discoloration or burning may indicate overheating or a short circuit, which can cause the heating element to malfunction. If there are signs of overheating, it is recommended to replace the heating element.
- Ensure proper connections – Check the connections between the heating element and the wiring harness. Make sure they are secure and free of corrosion or loose connections. If any issues are found, reconnect the wires or replace them if necessary.
By conducting a thorough visual inspection, you can identify any visible issues with the heating element. If you notice any significant damage, discoloration, or loose connections, it is likely that the heating element needs to be replaced. However, if the heating element appears to be in good condition, proceed to the next steps to perform electrical tests for a more accurate assessment.
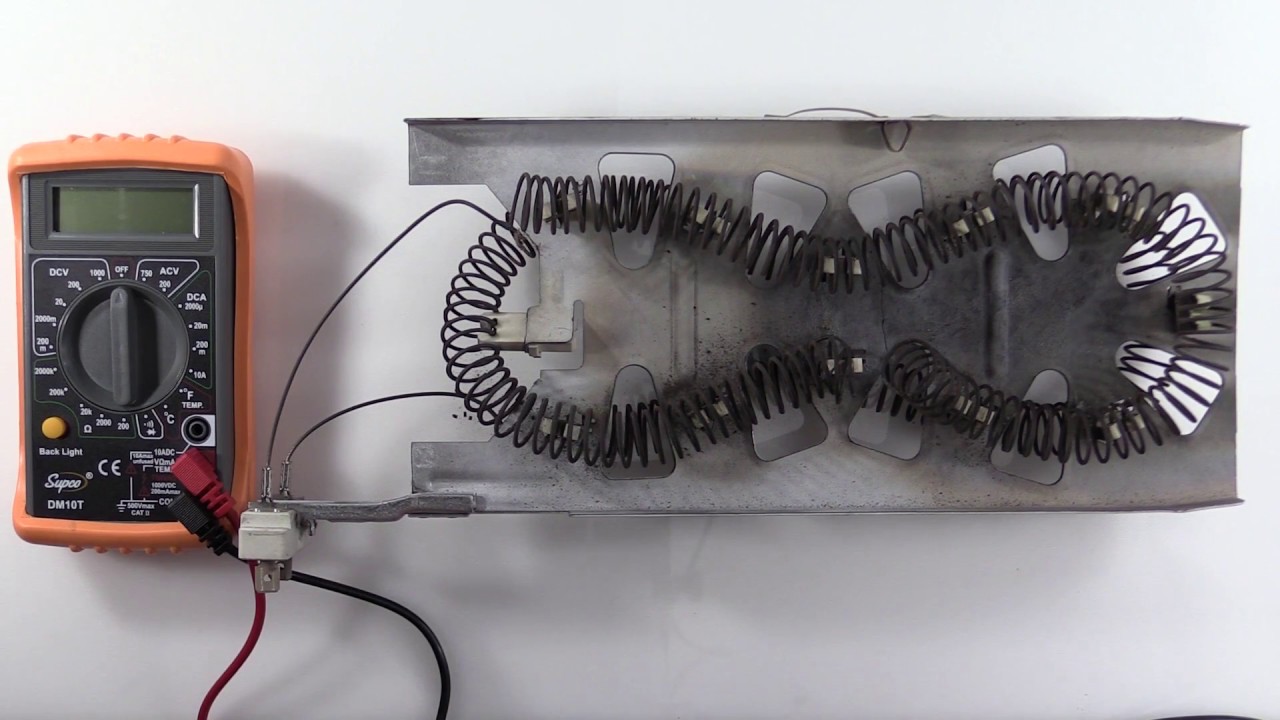
When testing a dryer heating element, use a multimeter to check for continuity. If there is no continuity, the heating element is faulty and needs to be replaced.
Step 5: Testing for Continuity
Testing for continuity is an important step in determining the functionality of the dryer heating element. Continuity refers to the uninterrupted flow of electrical current through the heating element. Follow these steps to test the continuity of the heating element using a multimeter:
- Set the multimeter to the continuity mode – Turn on your multimeter and set it to the continuity mode. This mode will allow the multimeter to detect whether there is a complete circuit or continuity in the heating element.
- Disconnect the heating element – Locate the wires connected to the heating element and disconnect them. This will isolate the heating element from the rest of the dryer’s electrical components.
- Touch the multimeter leads – Hold one multimeter lead to each terminal of the heating element. Make sure the leads are making direct contact with the metal terminals.
- Check the multimeter reading – The multimeter should display a reading indicating continuity. A reading of 0 or near 0 ohms means there is continuity, indicating that the heating element is functioning properly. However, if the multimeter shows no continuity or a significantly high resistance reading, it indicates a faulty heating element.
If the heating element fails the continuity test, it is likely that it requires replacement. A lack of continuity means that the electrical current is not flowing through the heating element, resulting in inadequate heat production. In this case, proceed to the next step to test the resistance of the heating element for further confirmation.
Step 6: Testing for Resistance
Testing the resistance of the dryer heating element provides additional insight into its functionality. Resistance refers to the measure of opposition to the flow of electrical current. Follow these steps to test the resistance of the heating element using a multimeter:
- Set the multimeter to the resistance mode – Turn on your multimeter and set it to the resistance mode. This mode allows you to measure the resistance of the heating element.
- Disconnect the heating element – Ensure that the dryer is still unplugged, and disconnect the wires from the heating element. The heating element should now be isolated from the rest of the electrical components.
- Touch the multimeter leads – Touch one multimeter lead to each terminal of the heating element. Ensure that the leads are making direct contact with the metal terminals.
- Check the multimeter reading – The multimeter will display the resistance value of the heating element in ohms. Compare this reading with the specifications provided by the manufacturer. If the resistance reading falls within the acceptable range, it indicates that the heating element is functioning properly. However, if the resistance reading is significantly higher or lower than the specified range, it suggests a faulty heating element.
If the resistance reading is outside the acceptable range, the heating element is likely the cause of the dryer’s heating issues and will need to be replaced. It is important to consult your dryer’s user manual or the manufacturer’s specifications for the recommended resistance range. This ensures accurate testing and assessment of the heating element’s condition.
Testing for continuity and resistance provides valuable information about the health of the heating element. By carrying out these tests, you can confidently determine if the heating element is working properly or if it requires replacement.
Step 7: Replacing the Heating Element (if necessary)
If the heating element fails the continuity and resistance tests, it is likely that it needs to be replaced. Here are the steps to follow to replace the heating element:
- Order a replacement heating element – Locate the model number and brand of your dryer to ensure you purchase the correct heating element. Order a replacement from a trusted supplier or directly from the manufacturer.
- Unplug the dryer – Before proceeding with the replacement, ensure the dryer is unplugged to avoid any electrical accidents.
- Access the heating element – Refer back to step 3 and follow the instructions to locate and access the heating element in your dryer.
- Disconnect the wires – Carefully disconnect the wires that are connected to the heating element. Take note of their positions and how they are connected to ensure the correct reconnection later.
- Remove the old heating element – Use a screwdriver or other appropriate tools to remove any screws or mounting brackets that secure the heating element in place. Take out the old heating element from its housing.
- Install the new heating element – Insert the new heating element into the housing and secure it in place using the screws or mounting brackets. Ensure it is properly aligned and positioned.
- Reconnect the wires – Attach the wires to the corresponding terminals on the new heating element, following the notes made during disconnection. Ensure a secure and proper connection.
- Reassemble the dryer – Put back any panels or components that were removed to access the heating element. Secure them in place using screws or clips.
- Plug in the dryer and test – Finally, plug in the dryer, turn it on, and test it to confirm that the new heating element is working correctly. Run a test cycle to ensure proper heating and drying performance.
It’s important to note that the replacement process may vary depending on the specific make and model of your dryer. Always refer to your dryer’s user manual or consult the manufacturer’s instructions for detailed guidance on replacing the heating element.
If you are unsure about your ability to replace the heating element, it is recommended to seek the assistance of a professional appliance technician. They have the expertise and experience to safely and effectively replace the heating element.
Read also: 13 Best Dryer Heating Element For 2025
Step 8: Power On and Test the Dryer
After replacing the heating element or conducting any repairs, the final step is to power on the dryer and test its functionality. Here’s what you need to do:
- Ensure safety measures – Before powering on the dryer, double-check that all the components are securely reassembled and there are no loose wires or connections. Also, ensure that the area around the dryer is clear of any obstacles.
- Plug in the dryer – Insert the dryer’s power cord into the electrical outlet and ensure it is secure.
- Turn on the dryer – Press the power button or turn the knob to the desired drying cycle. Set the time and temperature as needed.
- Run a test cycle – Start the dryer and let it run through a complete drying cycle. Observe if the heating element is producing adequate heat and if the clothes are drying properly.
- Monitor dryer performance – As the dryer runs, monitor its performance. Ensure it is heating to the desired temperature and that there are no unusual noises or smells. Check if the clothes are drying within a reasonable timeframe.
- Make adjustments if necessary – If you notice any issues during the test cycle, such as inadequate heat or prolonged drying time, you may need to recheck the heating element or seek further assistance from a professional technician.
By following these steps and testing the dryer’s functionality, you can ascertain if the heating element replacement or repair has been successful. Proper heating and drying performance indicate that the dryer is now operating correctly.
Remember to always prioritize safety when working with electrical appliances. If you are unsure or uncomfortable performing any repairs or tests, it is recommended to seek the services of a professional technician to ensure proper and safe operation of your dryer.
Conclusion
Testing the heating element in your dryer is an essential troubleshooting step to determine its functionality and identify any underlying issues. By following the step-by-step process outlined in this article, you can easily assess whether the heating element is working properly or if it needs to be replaced.
Remember to always prioritize safety during the testing and repair process. Unplug the dryer and take proper precautions, such as wearing protective gear and working in a well-ventilated area. This will help prevent any accidents or injuries while handling electrical components.
If the heating element fails the continuity or resistance tests, it is likely that it requires replacement. Order a replacement heating element and follow the manufacturer’s instructions for installation. If you are unsure, it is advisable to seek assistance from a professional technician to ensure proper installation and avoid further damage to your dryer.
Once the heating element has been replaced or repaired, power on the dryer and test its functionality. Run a complete drying cycle and monitor its performance. Adequate heat generation and proper drying indicate that the heating element replacement or repair was successful.
By following these guidelines and conducting regular maintenance for your dryer, you can extend its lifespan and ensure efficient and effective drying of your clothes. A working heating element is crucial for optimal drying performance, and proper testing and maintenance are key steps in keeping your dryer in excellent condition.
Frequently Asked Questions about How To Test A Dryer Heating Element
Was this page helpful?
At Storables.com, we guarantee accurate and reliable information. Our content, validated by Expert Board Contributors, is crafted following stringent Editorial Policies. We're committed to providing you with well-researched, expert-backed insights for all your informational needs.


0 thoughts on “How To Test A Dryer Heating Element”