Articles
How To Safely Terminate Electrical Wire
Modified: October 20, 2024
Learn how to safely terminate electrical wire with our informative articles. Discover essential tips and techniques for ensuring a secure and efficient connection.
(Many of the links in this article redirect to a specific reviewed product. Your purchase of these products through affiliate links helps to generate commission for Storables.com, at no extra cost. Learn more)
Introduction
Electrical wire termination is a critical process that involves effectively and safely connecting wires to devices or other wires. Whether you are an experienced electrician or a DIY enthusiast, knowing how to safely terminate electrical wire is essential for any electrical project. Failure to terminate wires correctly can lead to electrical hazards such as short circuits, power outages, or even fires.
In this article, we will guide you through the process of safely terminating electrical wire. We will cover the basic steps involved, the necessary tools and equipment, and provide you with useful tips to ensure a successful and secure wire termination.
Before we dive into the details, it’s important to emphasize the significance of safety when working with electrical systems. Always follow proper safety procedures, including turning off the power supply before attempting any wire termination. If you are unsure about any aspect of the process, it’s best to consult a qualified electrician.
Now, let’s explore the ins and outs of safely terminating electrical wire and empower you to handle your electrical projects with confidence.
Key Takeaways:
- Safely terminating electrical wire involves crucial steps such as turning off power, preparing the work area, and choosing the right termination method. Prioritizing safety and thorough inspection ensures reliable connections.
- Properly cutting, stripping, and securing the wire, followed by testing the connection and inspecting the work, are essential for successful wire termination. Always prioritize safety and seek professional assistance when in doubt.
Understanding Electrical Wire Termination
Electrical wire termination is the process of connecting the ends of electrical wires to devices or other wires to establish a secure and reliable electrical connection. It is a crucial step in any electrical installation or repair project.
Proper wire termination ensures that electrical current can flow efficiently and safely through the circuit, minimizing the risk of overheating, short circuits, or electrical failures. There are various methods for wire termination, depending on the specific application and type of wire being used.
Some common types of wire termination methods include:
- Wire nuts: Wire nuts are twist-on connectors that join two or more wires together. They are commonly used in residential and commercial wiring installations and are color-coded for easy identification of wire sizes.
- Crimp connectors: Crimp connectors, also known as butt connectors, require a crimping tool to secure the wires together. They are commonly used in automotive wiring and other applications that require a strong and durable connection.
- Soldering: Soldering involves melting a metal alloy (solder) onto the wires to create a permanent connection. This method is often used in small electronic projects or when working with delicate wires.
- Terminal blocks: Terminal blocks are used to connect multiple wires to a common connection point. They provide a convenient and organized way to terminate wires in industrial or commercial installations.
When choosing the appropriate wire termination method, several factors should be considered, including the wire gauge, the electrical load, the environment, and the specific requirements of the application.
It’s important to note that incorrect or poorly executed wire terminations can lead to various issues, such as loose connections, electrical resistance, or heat buildup. Over time, these problems can compromise the integrity of the electrical system and increase the risk of electrical faults or malfunctions.
Now that we have a general understanding of wire termination, let’s move on to the tools and equipment you will need to safely terminate electrical wire.
Tools and Equipment Needed
Before you begin the process of terminating electrical wire, it’s important to gather the necessary tools and equipment to ensure a smooth and successful termination. Having the right tools at hand will not only make the job easier but also help maintain the integrity of the electrical connections.
Here are some essential tools and equipment you will need:
- Wire cutters: Wire cutters are essential for cutting the electrical wire to the desired length. They come in various sizes and can handle different wire gauges.
- Wire strippers: Wire strippers are used to remove the insulation from the wire ends, exposing the conductive metal. They have different size markings to accommodate various wire gauges.
- Crimping tool: If you are using crimp connectors for wire termination, a crimping tool is necessary to secure the connectors onto the wire ends.
- Soldering iron: If you choose to solder the wire ends, a soldering iron will be required to melt the solder and create a permanent connection.
- Heat shrink tubing: Heat shrink tubing is used to provide insulation and protection to the wire termination. It shrinks when heated, creating a tight seal around the connection.
- Terminal blocks or connectors: Depending on your specific wiring setup, you may need terminal blocks or connectors to join multiple wires together or make a secure connection to devices.
- Screwdrivers: Screwdrivers, both flathead and Phillips, are commonly used for securing wire termination devices and making electrical connections.
- Electrical tape: Electrical tape is handy for insulating exposed wire ends or securing the wire termination devices.
- Multimeter: A multimeter is a versatile tool used for measuring voltage, current, and continuity. It can be used to test the integrity of the wire termination after completion.
It’s important to note that the specific tools and equipment needed may vary depending on the wire termination method and the complexity of the project. Always ensure that your tools are in good working condition and follow manufacturer instructions for safe usage.
Now that you have all the necessary tools and equipment, it’s time to move on to the step-by-step process of safely terminating electrical wire.
Step 1: Turn Off Power to the Circuit
Before you start working on terminating electrical wire, it is crucial to ensure your safety by turning off the power to the circuit you will be working on. This step is essential to prevent any potential electrical shocks or accidents during the termination process.
Follow these steps to turn off the power:
- Identify the circuit breaker or fuse box that controls the circuit you will be working on. It is important to have a clear understanding of your electrical system and its circuit layout. If you are unsure, consult an electrician or refer to your circuit breaker panel diagram.
- Open the circuit breaker panel or fuse box cover.
- Locate the circuit breaker that corresponds to the circuit you will be working on. If you have a fuse box, find the appropriate fuse.
- Switch off the circuit breaker by flipping the switch to the “off” position. If you have a fuse box, carefully remove the fuse corresponding to the circuit.
- Use a non-contact voltage tester to verify that the power to the circuit has been successfully turned off. This handy tool will indicate if there is any live current still present in the wires.
It’s important to note that some electrical systems may have multiple circuit breaker panels or subpanels. Ensure that you have identified the correct panel before proceeding. In addition, always exercise caution when working with electrical systems, even after turning off the power. Treat all wires as if they are live until you have verified their status with a voltage tester.
By following this important first step and turning off the power to the circuit, you have taken crucial precautions to ensure your safety during the wire termination process. With the power off, you can confidently move on to the next steps of preparing the work area.
Step 2: Prepare the Work Area
Once you have turned off the power to the circuit, the next step is to prepare your work area to ensure a safe and organized environment. Proper preparation will help streamline the wire termination process and minimize the risk of accidents or damage to surrounding components.
Follow these steps to prepare your work area:
- Gather all the tools and equipment you will need for the wire termination process. Having everything within reach will save you time and prevent unnecessary interruptions.
- Clear the area around the installation or termination point. Remove any objects, debris, or obstacles that may impede your work or pose a safety hazard.
- Ensure adequate lighting in the work area. Good visibility is essential for accurate wire identification and proper connection.
- If working with live wires that cannot be completely disconnected, take additional safety measures. Use insulated gloves, insulated tools, and work on a non-conductive surface to minimize the risk of electrical shock.
- Consider using a workbench or a stable surface to perform the wire termination. This will provide a comfortable and secure workspace.
- Prepare any necessary protective measures. If working near flammable materials or sensitive components, consider using flame-resistant materials or install protective barriers to shield them from sparks or heat.
- Keep a fire extinguisher nearby in case of emergencies. It’s always better to be prepared for unforeseen accidents.
Remember, safety should always be your top priority when working with electrical systems. Take the time to adequately prepare your work area before proceeding to the next steps.
With the work area properly prepared, you are ready to move on to the next step: identifying the wire to be terminated.
Step 3: Identify the Wire to Be Terminated
Once you have prepared the work area, it’s time to identify the specific wire that needs to be terminated. Proper identification of the wire will ensure that you are working on the correct connection point and avoid any confusion during the termination process.
Follow these steps to identify the wire to be terminated:
- Examine the electrical system or circuit diagram to determine the wire you need to terminate. If you are working on a specific device or component, refer to the manufacturer’s documentation or labeling to identify the relevant wires.
- If the wires are not clearly labeled, use a non-contact voltage tester to identify the live wires. Ensure that the power is still switched off at the circuit breaker or fuse box.
- If you are terminating multiple wires, use wire markers or labels to distinguish between them. This will prevent confusion and ensure proper connections.
- Inspect the wire insulation to ensure it is in good condition. Look for any signs of damage, such as cuts, fraying, or exposed conductors. If the wire insulation is compromised, it may need to be repaired or replaced before proceeding with the termination.
- Take note of the wire gauge. The wire gauge determines the diameter of the wire and affects its current-carrying capacity. Ensure that your termination method and connectors are suitable for the wire gauge.
It’s important to be diligent in identifying the correct wire to be terminated. Working on the wrong wire can lead to incorrect connections, electrical faults, or even damage to the electrical system.
Once you have successfully identified the wire to be terminated and ensured its proper condition, you can move on to the next step: cutting and stripping the wire.
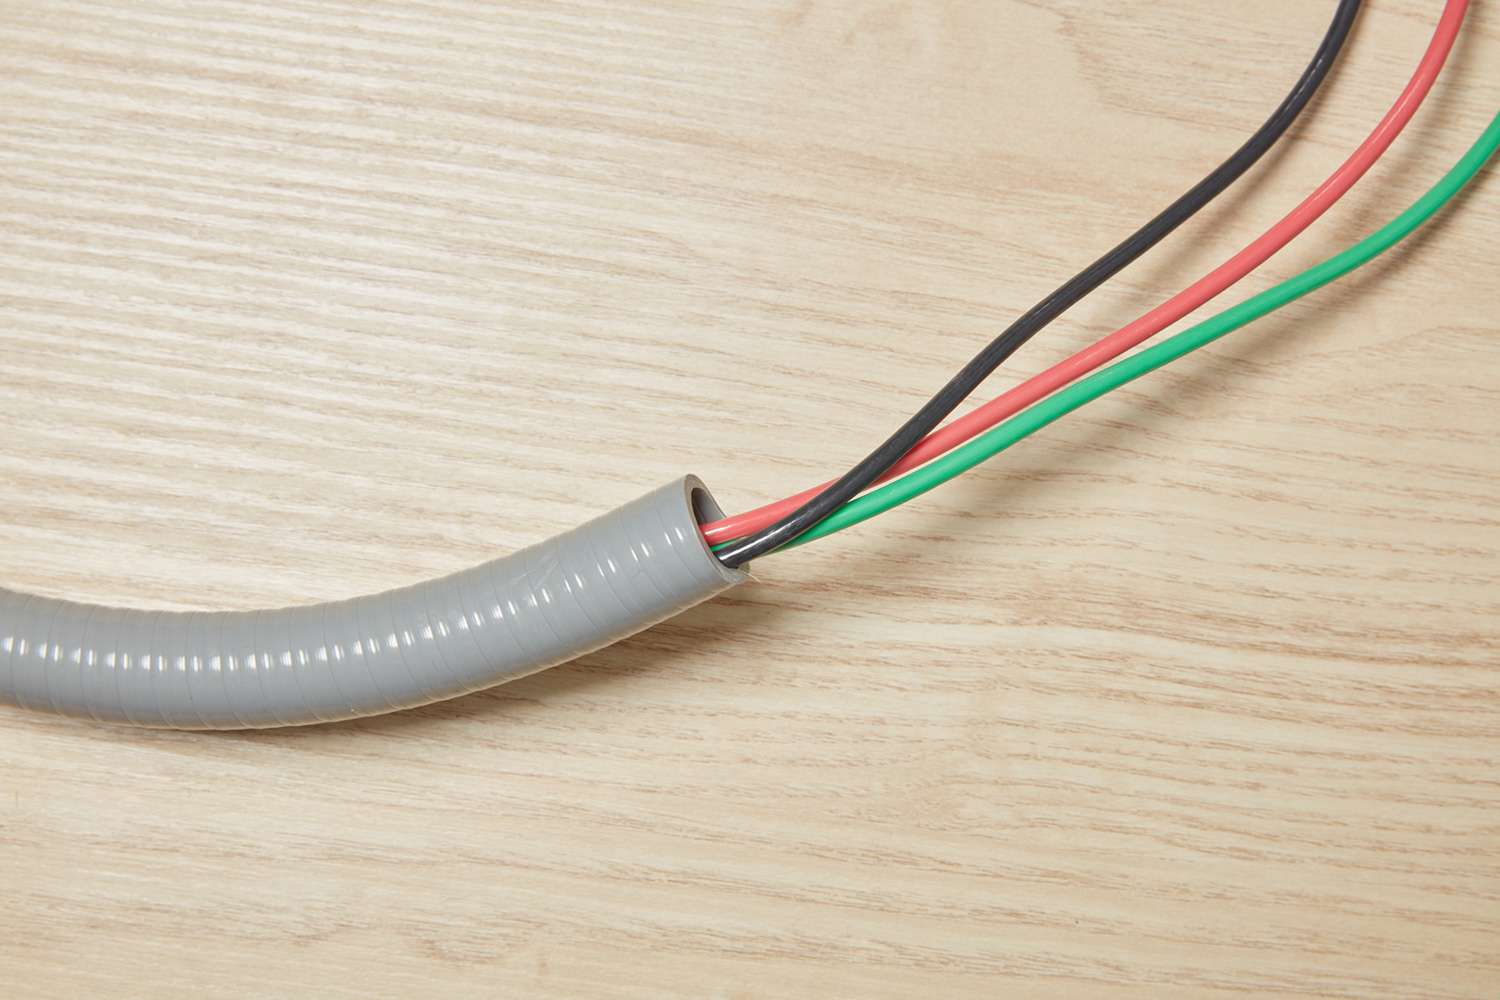
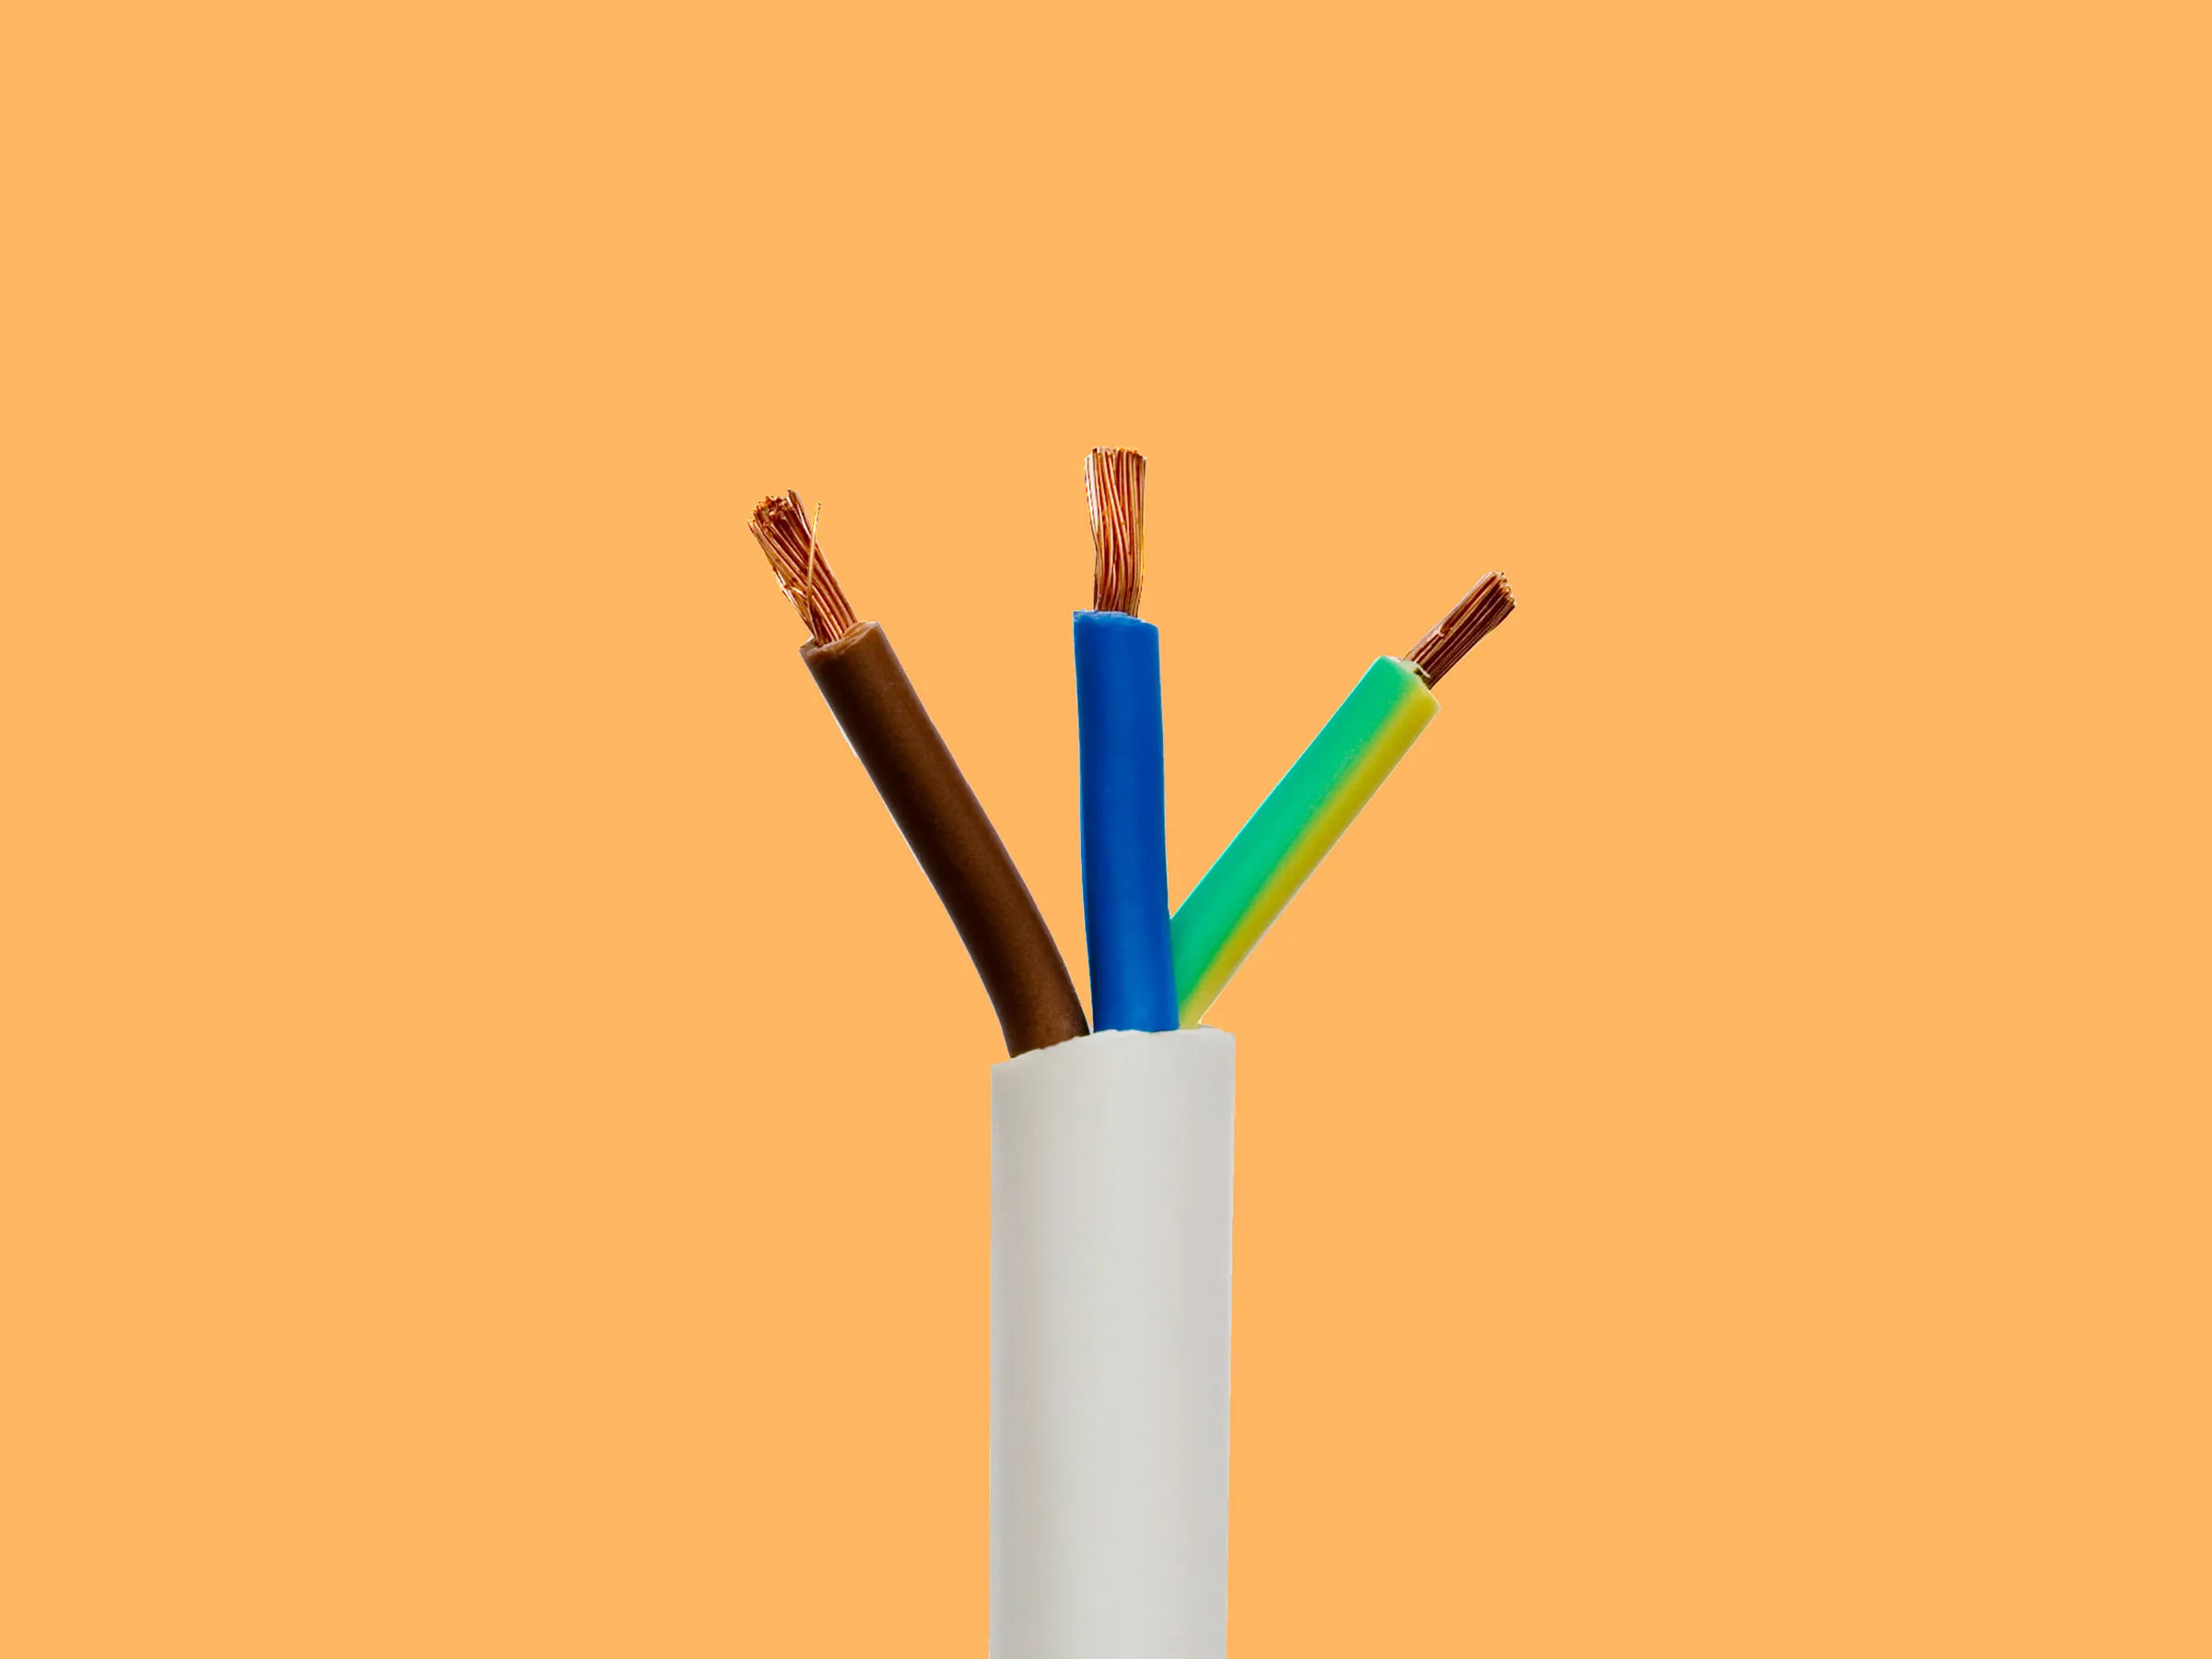
Step 4: Cut and Strip the Wire
After identifying the wire to be terminated, the next step is to prepare the wire by cutting it to the appropriate length and stripping off the insulation from the ends. Properly cutting and stripping the wire ensures a clean and secure connection for termination.
Follow these steps to cut and strip the wire:
- Measure and mark the desired length of the wire. Use wire cutters to make an accurate cut at the marked point. Ensure that the cut is clean and straight.
- Inspect the cut end of the wire to ensure there are no frayed strands or sharp edges. If necessary, trim any irregularities using the wire cutters.
- Locate the appropriate stripping gauge on your wire strippers that matches the wire gauge. This will prevent excessive stripping and damage to the conductor.
- Position the wire within the stripping gauge, ensuring that it is centered. Squeeze the wire strippers firmly to cut through the insulation without damaging the underlying conductor.
- Gently twist the strippers or pull the insulation off to remove the cut section of the insulation. Be careful not to tug too forcefully, as this may damage the wire strands.
- Repeat the stripping process for the other end of the wire if necessary.
- Once the wire ends are stripped, visually inspect the exposed conductors. Ensure that there are no loose strands or any signs of damage.
It’s important to note that when cutting and stripping the wire, accuracy is crucial. Errors in length or improper stripping can result in poor connections, compromised conductivity, or even short circuits.
With the wire properly cut and stripped, you are now ready to move on to the next step: choosing the proper termination method.
When terminating electrical wire, always turn off the power at the breaker before working on the wires. Use a wire stripper to carefully remove the insulation, and ensure the exposed wire is the correct length for the terminal. Double check all connections before restoring power.
Step 5: Choose the Proper Termination Method
Once the wire is cut and stripped, the next step in the wire termination process is to choose the appropriate method for terminating the wire. The right termination method will depend on factors such as the type of wire, the application, and the specific requirements of the electrical system.
Here are some common wire termination methods:
- Wire nuts: Wire nuts are commonly used for residential and commercial wiring applications. They consist of a twist-on connector that securely joins two or more wires together.
- Crimp connectors: Crimp connectors are used when a strong and durable connection is required. They require a crimping tool to compress the connector onto the wire ends, creating a secure bond.
- Soldering: Soldering involves melting a metal alloy (solder) onto the wire ends to create a permanent connection. This method is often used in small electronic projects or when working with delicate wires.
- Terminal blocks or connectors: Terminal blocks or connectors provide a convenient way to connect multiple wires to a common connection point. They are widely used in industrial or commercial wiring installations.
When choosing the proper termination method, consider the following factors:
- Wire compatibility: Ensure that the termination method is suitable for the type of wire being used, such as solid or stranded wires.
- Application: Consider the specific application and the electrical load the wire will be carrying. Some methods may be better suited for high voltage or high current applications.
- Environment: If the wire will be exposed to harsh conditions, such as extreme temperatures, moisture, or vibrations, choose a termination method that can withstand those conditions.
- Electrical code compliance: Consult local electrical codes and regulations to ensure that the chosen termination method meets the required standards.
Take your time to evaluate these factors and choose the proper termination method that best suits your specific needs. Once you have decided on the method, you can proceed to the next step of attaching the termination device.
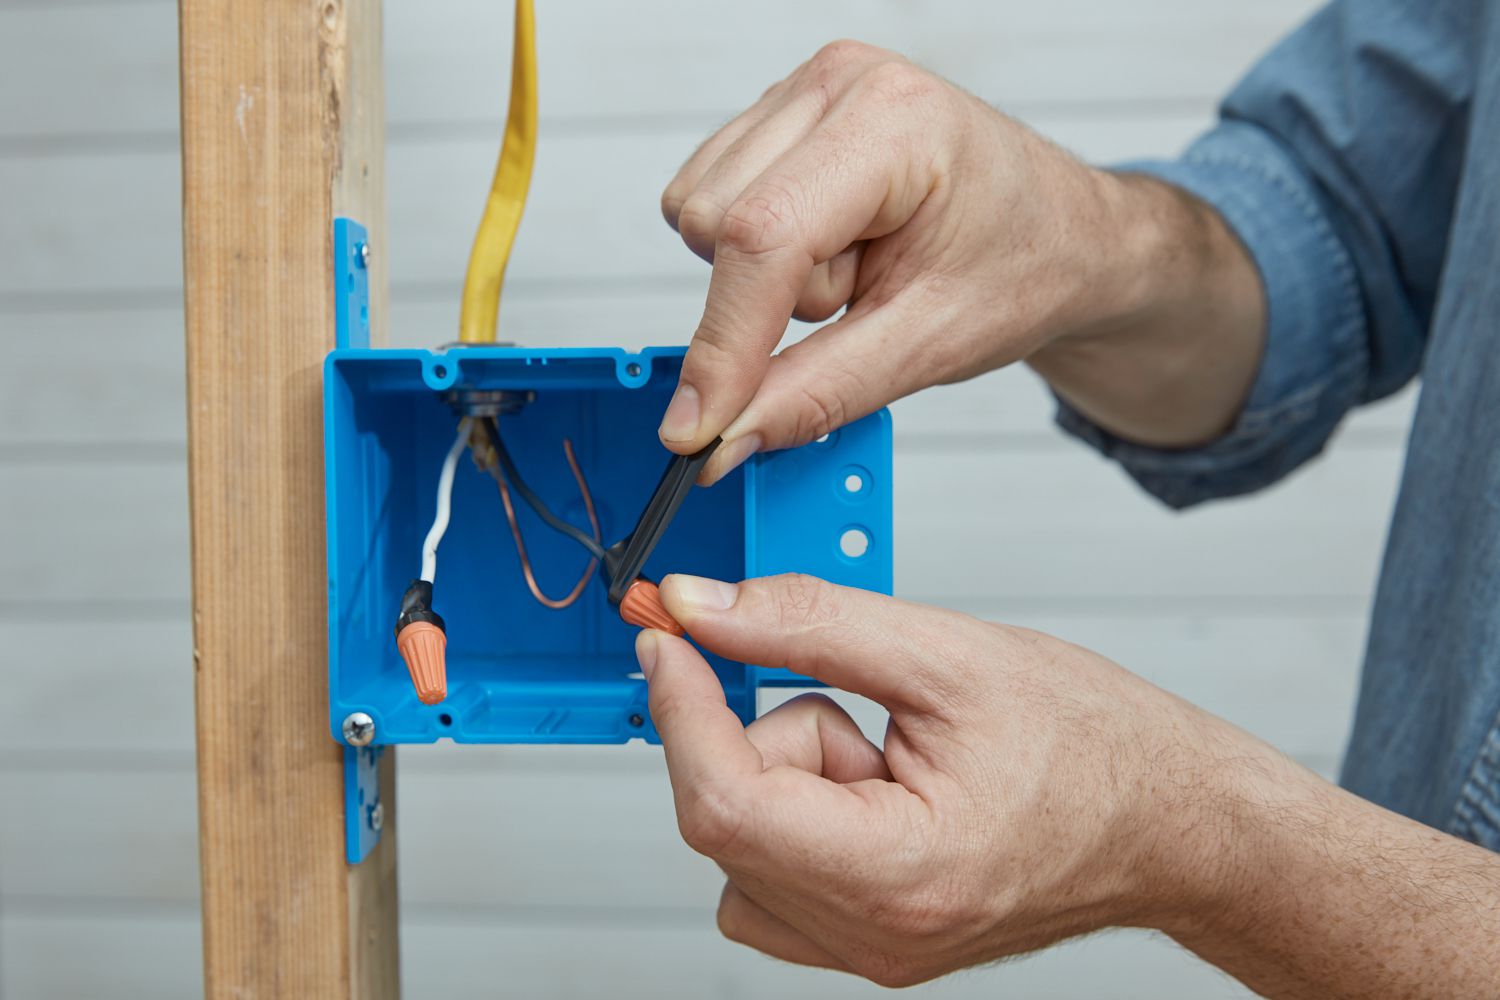
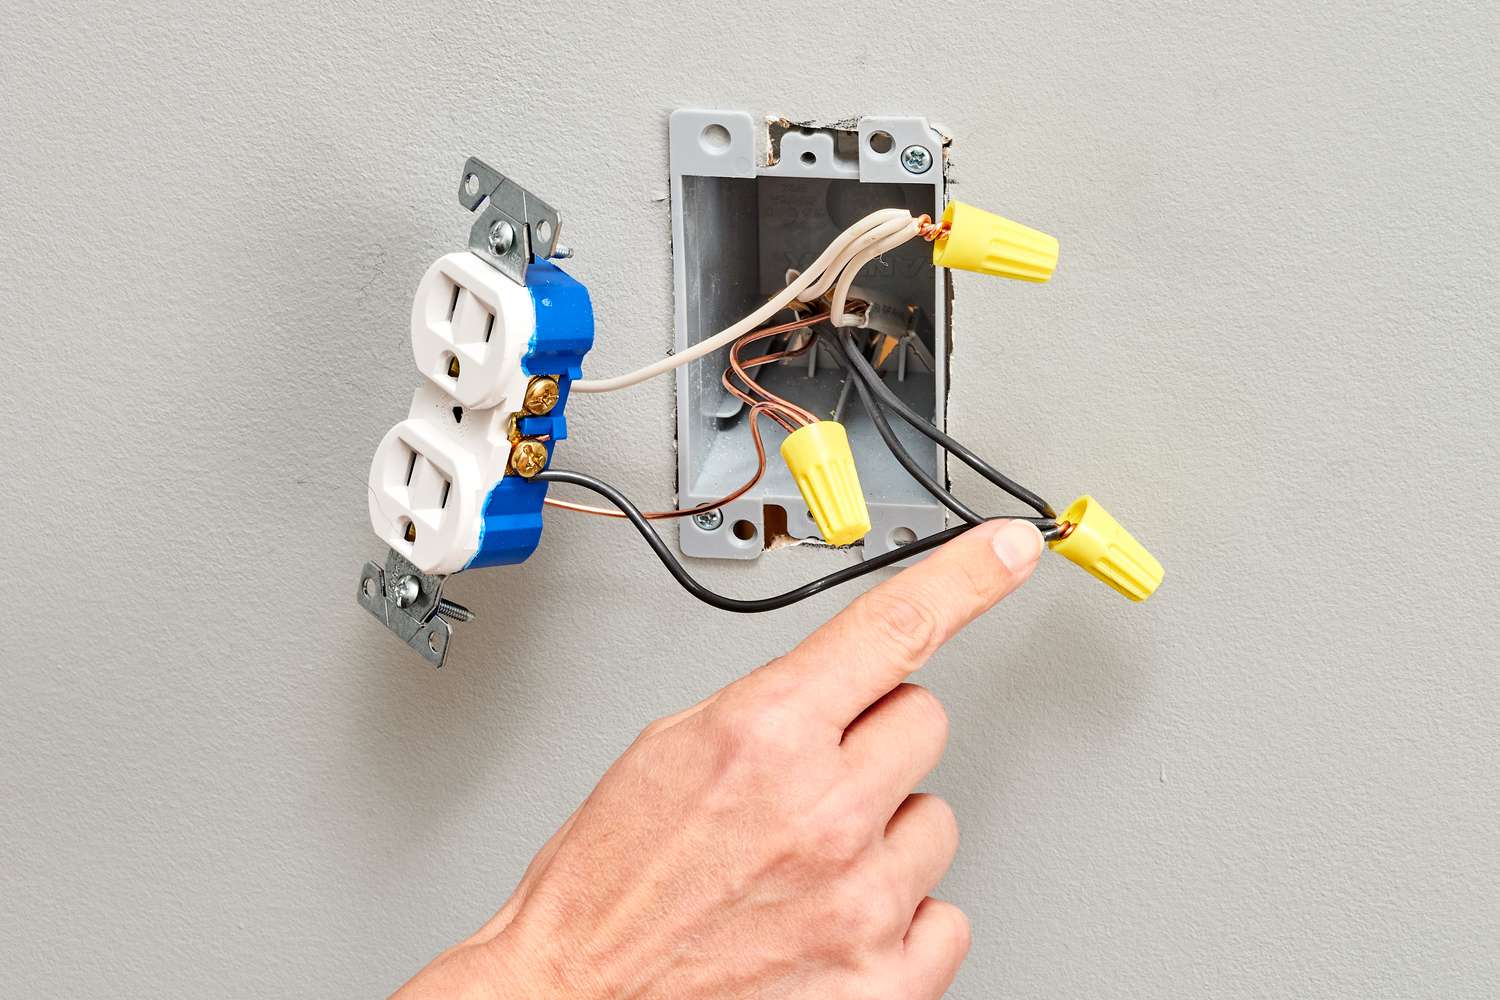
Step 6: Attach the Termination Device
Now that you have chosen the appropriate termination method, it’s time to attach the termination device to the wire ends. The termination device will securely hold and connect the wires, ensuring a reliable electrical connection.
Follow these steps to attach the termination device:
- If you are using wire nuts, select the appropriate size and type that matches the wire gauge. Some wire nuts may have color-coded markings to guide you in choosing the correct size.
- Twist the wire ends together in a clockwise direction, ensuring a tight and secure connection.
- Place the wire nut over the twisted wire ends and continue twisting the wire nut in a clockwise direction until it is firmly seated. Be sure to follow the manufacturer’s instructions for the specific wire nut being used.
- If crimp connectors are being used, slide the connector onto the stripped wire end. Position the wire strands evenly inside the connector barrel.
- Use a crimping tool to crimp the connector securely onto the wire strands. Apply sufficient pressure to create a strong and reliable bond.
- If soldering is the chosen method, heat the soldering iron to the appropriate temperature. Place the solder wire on the heated soldering iron tip, and let it melt and flow onto the wire strands to create a secure solder joint.
- If using terminal blocks or connectors, refer to the manufacturer’s instructions for proper installation. Follow the recommended procedures for inserting the wire ends into the terminal block or connector and tightening the screws or terminals to secure the connection.
Ensure that the termination device is properly fitted and secured to the wire ends. A loose or improperly attached termination device can lead to poor electrical conductivity, which can cause issues such as heat buildup or intermittent connections.
Take care to follow the specific instructions and precautions for the chosen termination method to ensure a reliable and durable connection.
With the termination device successfully attached, you are ready to move on to the next step of securing the termination.
Read more: What Is 4 Wire Electrical Wire
Step 7: Secure the Termination
Once the termination device is attached, the next step is to secure the termination to ensure stability and reliability. Properly securing the termination will prevent any accidental disconnections or movement that could compromise the electrical connection.
Follow these steps to secure the termination:
- If using wire nuts, ensure that they are tightly secured. Give the wire nut a gentle tug to confirm that it is securely fastened and won’t easily come loose.
- If using crimp connectors, check that the connector is properly crimped onto the wire strands. Gently pull on the connector to confirm that it is securely connected and won’t slip off.
- If soldering the wire termination, verify that the solder joint is smooth, even, and completely covers the wire strands. A properly soldered joint should be solid and stable.
- If using terminal blocks or connectors, double-check that the wire ends are properly inserted into the terminal block or connector and tightened securely. Make sure there is no excessive movement or play in the connection.
- Use zip ties or cable clamps to neatly secure and organize the wires, especially in scenarios where multiple wires are being terminated. This will help prevent strain on the connections and reduce the risk of accidental damage.
- If necessary, apply electrical tape or heat shrink tubing over the terminated wires to provide insulation and added protection. Ensure that the exposed wire ends and termination device are covered adequately.
It’s important to pay attention to the quality and security of the termination. A loose or unstable termination can result in electrical resistance, heat buildup, or intermittent connections, leading to potential hazards or system failures.
By properly securing the termination, you can ensure a robust and reliable electrical connection.
Now that the termination is securely in place, you can move on to the next step: testing the connection.
Step 8: Test the Connection
Once the termination is secured, it’s essential to test the connection to ensure its electrical integrity. Testing the connection will verify that current can flow through the wire without any issues, and that the termination is functioning as intended.
Follow these steps to test the connection:
- Double-check that the power to the circuit is still switched off. It’s crucial to maintain your safety during the testing process.
- Use a multimeter set to the appropriate voltage or continuity mode.
- Place one probe of the multimeter on one side of the terminated wire, and the other probe on the corresponding destination point or device where the wire is meant to be connected.
- Check the multimeter reading. If the connection is secure and functional, the multimeter should show continuity (a complete circuit) or the expected voltage reading.
- Repeat the testing process for each terminated wire to ensure all connections are working properly.
If the multimeter reading indicates an open circuit, no continuity, or an unexpected voltage reading, this may indicate a faulty or poorly terminated connection. In such cases, double-check the termination, ensure the wires are securely connected, and troubleshoot any potential issues.
It’s important to note that if you are uncertain about the testing process or concerned about electrical safety, it is advisable to consult a qualified electrician to perform the testing for you.
By testing the connection, you can be confident that the termination has been successfully completed and that the electrical connection is working as intended.
With the connection tested, you are now ready to move on to the final steps of restoring power and inspecting the work.
Step 9: Restore Power and Inspect the Work
With the wire termination completed and the connection tested, it’s time to restore power to the circuit and inspect your work to ensure everything is in proper order. This final step will allow you to verify that the electrical system is functioning correctly and that the wire termination has been successfully executed.
Follow these steps to restore power and inspect the work:
- Return to the circuit breaker panel or fuse box and switch the corresponding circuit breaker or insert the fuse to restore power to the circuit.
- Carefully observe the terminated wire and its surroundings, looking for any signs of abnormal behavior, such as sparking, smoke, unusual heat, or flickering lights. If you notice any of these signs, immediately turn off the power and reevaluate your termination.
- Test the functionality of any devices or equipment connected to the terminated wires, ensuring that they are operating as expected.
- If possible, monitor the wire termination over a period to ensure its long-term stability and reliability. Pay attention to any signs of deterioration or loose connections.
- Inspect the overall neatness and organization of the termination, ensuring that wires are properly secured, labeled (if necessary), and free from any unnecessary strain or tension.
During the inspection, if you notice any issues or concerns with the termination or the performance of the electrical system, it is advisable to consult a qualified electrician for further evaluation or assistance.
By taking the time to restore power and thoroughly inspect the completed wire termination, you can have confidence in the quality and safety of your work.
Congratulations! You have successfully completed the process of safely terminating electrical wire. By following these steps and taking the necessary precautions, you have ensured the reliability and functionality of your electrical connections.
Remember, electrical work can be complex and potentially hazardous, so it’s always important to prioritize safety and, when in doubt, seek professional assistance.
Thank you for reading this guide, and we hope it has been helpful in your electrical wiring endeavors!
Conclusion
Terminating electrical wire is a fundamental skill that is essential for any electrical project. By following the step-by-step guide outlined in this article, you can safely and effectively terminate wires, ensuring reliable and secure electrical connections.
Understanding the various termination methods and choosing the appropriate one for your specific application is crucial. Wire nuts, crimp connectors, soldering, and terminal blocks each have their advantages and considerations, so it’s important to evaluate your needs and select the most suitable method.
Throughout the termination process, it’s essential to prioritize safety. Always turn off the power to the circuit before starting any work, and take the necessary precautions to protect yourself and others from electrical hazards.
Proper preparation, including clearing the work area, gathering the necessary tools and equipment, and identifying the wire to be terminated, sets the stage for a smooth and successful termination.
Carefully cutting and stripping the wire, followed by attaching the termination device and securing the connection, ensures a reliable and durable termination.
Testing the connection using a multimeter helps confirm the integrity of the termination, while restoring power and inspecting the work allows you to verify the proper functionality of the electrical system.
Remember, if at any point you feel unsure or uncomfortable with the wire termination process, it’s always best to consult a qualified electrician for guidance and assistance.
By following these guidelines and taking the necessary precautions, you will be able to safely and effectively terminate electrical wire, empowering you to confidently tackle a wide range of electrical projects.
Thank you for reading this comprehensive guide on how to safely terminate electrical wire. We hope it has provided you with valuable insights and knowledge to tackle your next wiring endeavor with confidence.
Now that you've mastered safely terminating electrical wires, why not expand your skills further? Our next guide, "How To Run Overhead Electrical Wire To Garage," dives into efficient techniques for extending your electrical system. Perfect for homeowners aiming to enhance garage setups through safe, effective wiring practices. Don't miss out on these practical insights that could transform your approach to home electrical projects.
Frequently Asked Questions about How To Safely Terminate Electrical Wire
Was this page helpful?
At Storables.com, we guarantee accurate and reliable information. Our content, validated by Expert Board Contributors, is crafted following stringent Editorial Policies. We're committed to providing you with well-researched, expert-backed insights for all your informational needs.


0 thoughts on “How To Safely Terminate Electrical Wire”