Articles
How To Replace Maytag Dryer Heating Element
Modified: October 19, 2024
Learn how to replace the heating element in your Maytag dryer with this informative article. Avoid costly repairs and keep your dryer running efficiently.
(Many of the links in this article redirect to a specific reviewed product. Your purchase of these products through affiliate links helps to generate commission for Storables.com, at no extra cost. Learn more)
Introduction
Welcome to our comprehensive guide on how to replace the heating element in your Maytag dryer. If your dryer is no longer producing heat or is taking a long time to dry your clothes, the heating element may be the culprit. By following the steps outlined in this article, you’ll be able to replace the heating element and restore your dryer’s optimal performance.
Before we begin, we want to emphasize the importance of safety during any repair or maintenance task. Always make sure to disconnect the power supply before attempting any repairs on your dryer. Additionally, consider wearing protective gloves and eyewear to safeguard yourself from potential injuries. If you don’t feel comfortable performing the repair, it’s best to consult a professional technician.
Now, let’s gather the necessary tools and materials before we delve into the step-by-step process of replacing the heating element in your Maytag dryer.
Key Takeaways:
- Prioritize safety by disconnecting the power, wearing protective gear, and following step-by-step instructions when replacing your Maytag dryer’s heating element to ensure a smooth and accident-free repair process.
- Gather the necessary tools and materials, test the new heating element’s functionality, and seek professional assistance if needed to successfully restore your Maytag dryer’s optimal performance.
Safety Precautions
Before you start working on your Maytag dryer, it’s crucial to take certain safety precautions to prevent accidents or injuries. Follow these guidelines to ensure a safe repair process:
- Disconnect the power: Before attempting any repairs on your dryer, unplug it from the electrical outlet. This will protect you from electric shock.
- Wear protective gear: Always wear protective gloves and safety goggles to shield your hands and eyes from debris and potential hazards.
- Work in a well-ventilated area: Ensure that the repair area is properly ventilated to prevent the buildup of harmful fumes or gases.
- Use the right tools: Make sure you have the appropriate tools for the repair job to minimize the risk of accidents. Refer to the manufacturer’s instructions or your dryer’s manual for the recommended tools.
- Follow the instructions: Carefully read and follow the step-by-step instructions provided in this guide. Avoid taking shortcuts or improvising unless you have the necessary expertise.
- Do not force parts: If a component doesn’t seem to fit or come loose easily, do not force it. Applying excessive pressure can damage the component and lead to further problems.
- Keep children and pets away: During the repair process, ensure that children and pets are kept away from the work area to prevent accidents or distractions.
- Consult a professional if unsure: If you are unsure about any aspect of the repair process or feel uncomfortable performing the repair yourself, it is recommended to seek assistance from a qualified technician.
By following these safety precautions, you can minimize the risks associated with repairing your Maytag dryer’s heating element. Now let’s move on to the next section, where we will discuss the tools and materials required for the job.
Tools and Materials Required
Before you begin replacing the heating element in your Maytag dryer, gather the following tools and materials:
- Screwdriver set: A set of both Phillips and flathead screwdrivers will be necessary for removing screws and panels.
- Multi-meter: This tool will allow you to test the continuity of the heating element to determine if it is faulty.
- Nut driver: A nut driver will be helpful for removing and installing screws that have nuts on them.
- Wire strippers: These will be needed if you need to replace any wires during the repair process.
- Pliers: Pliers can be used for gripping and manipulating wires or other small components.
- Vent brush: If you’re already accessing the heating element, it’s a good time to clean the lint buildup in the dryer vent. A vent brush will help you thoroughly clean the vent and improve the dryer’s performance.
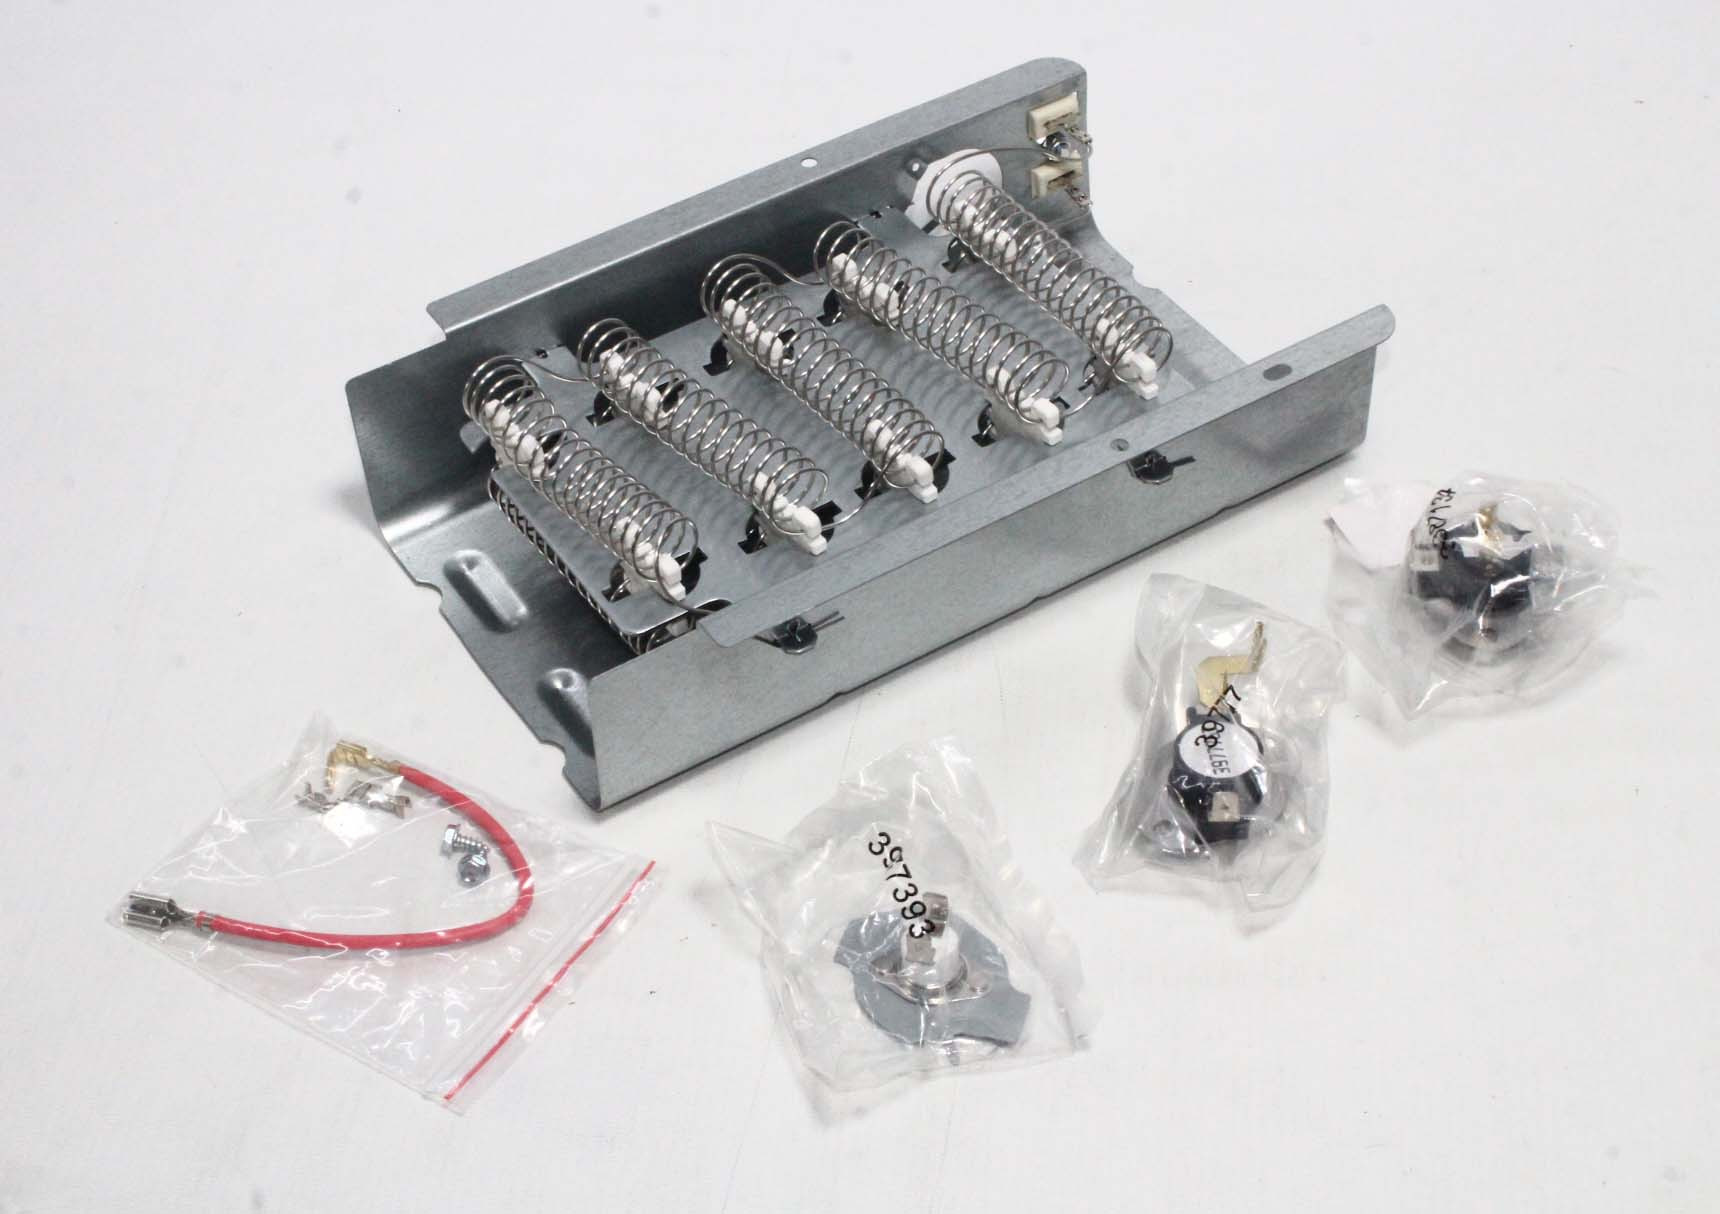
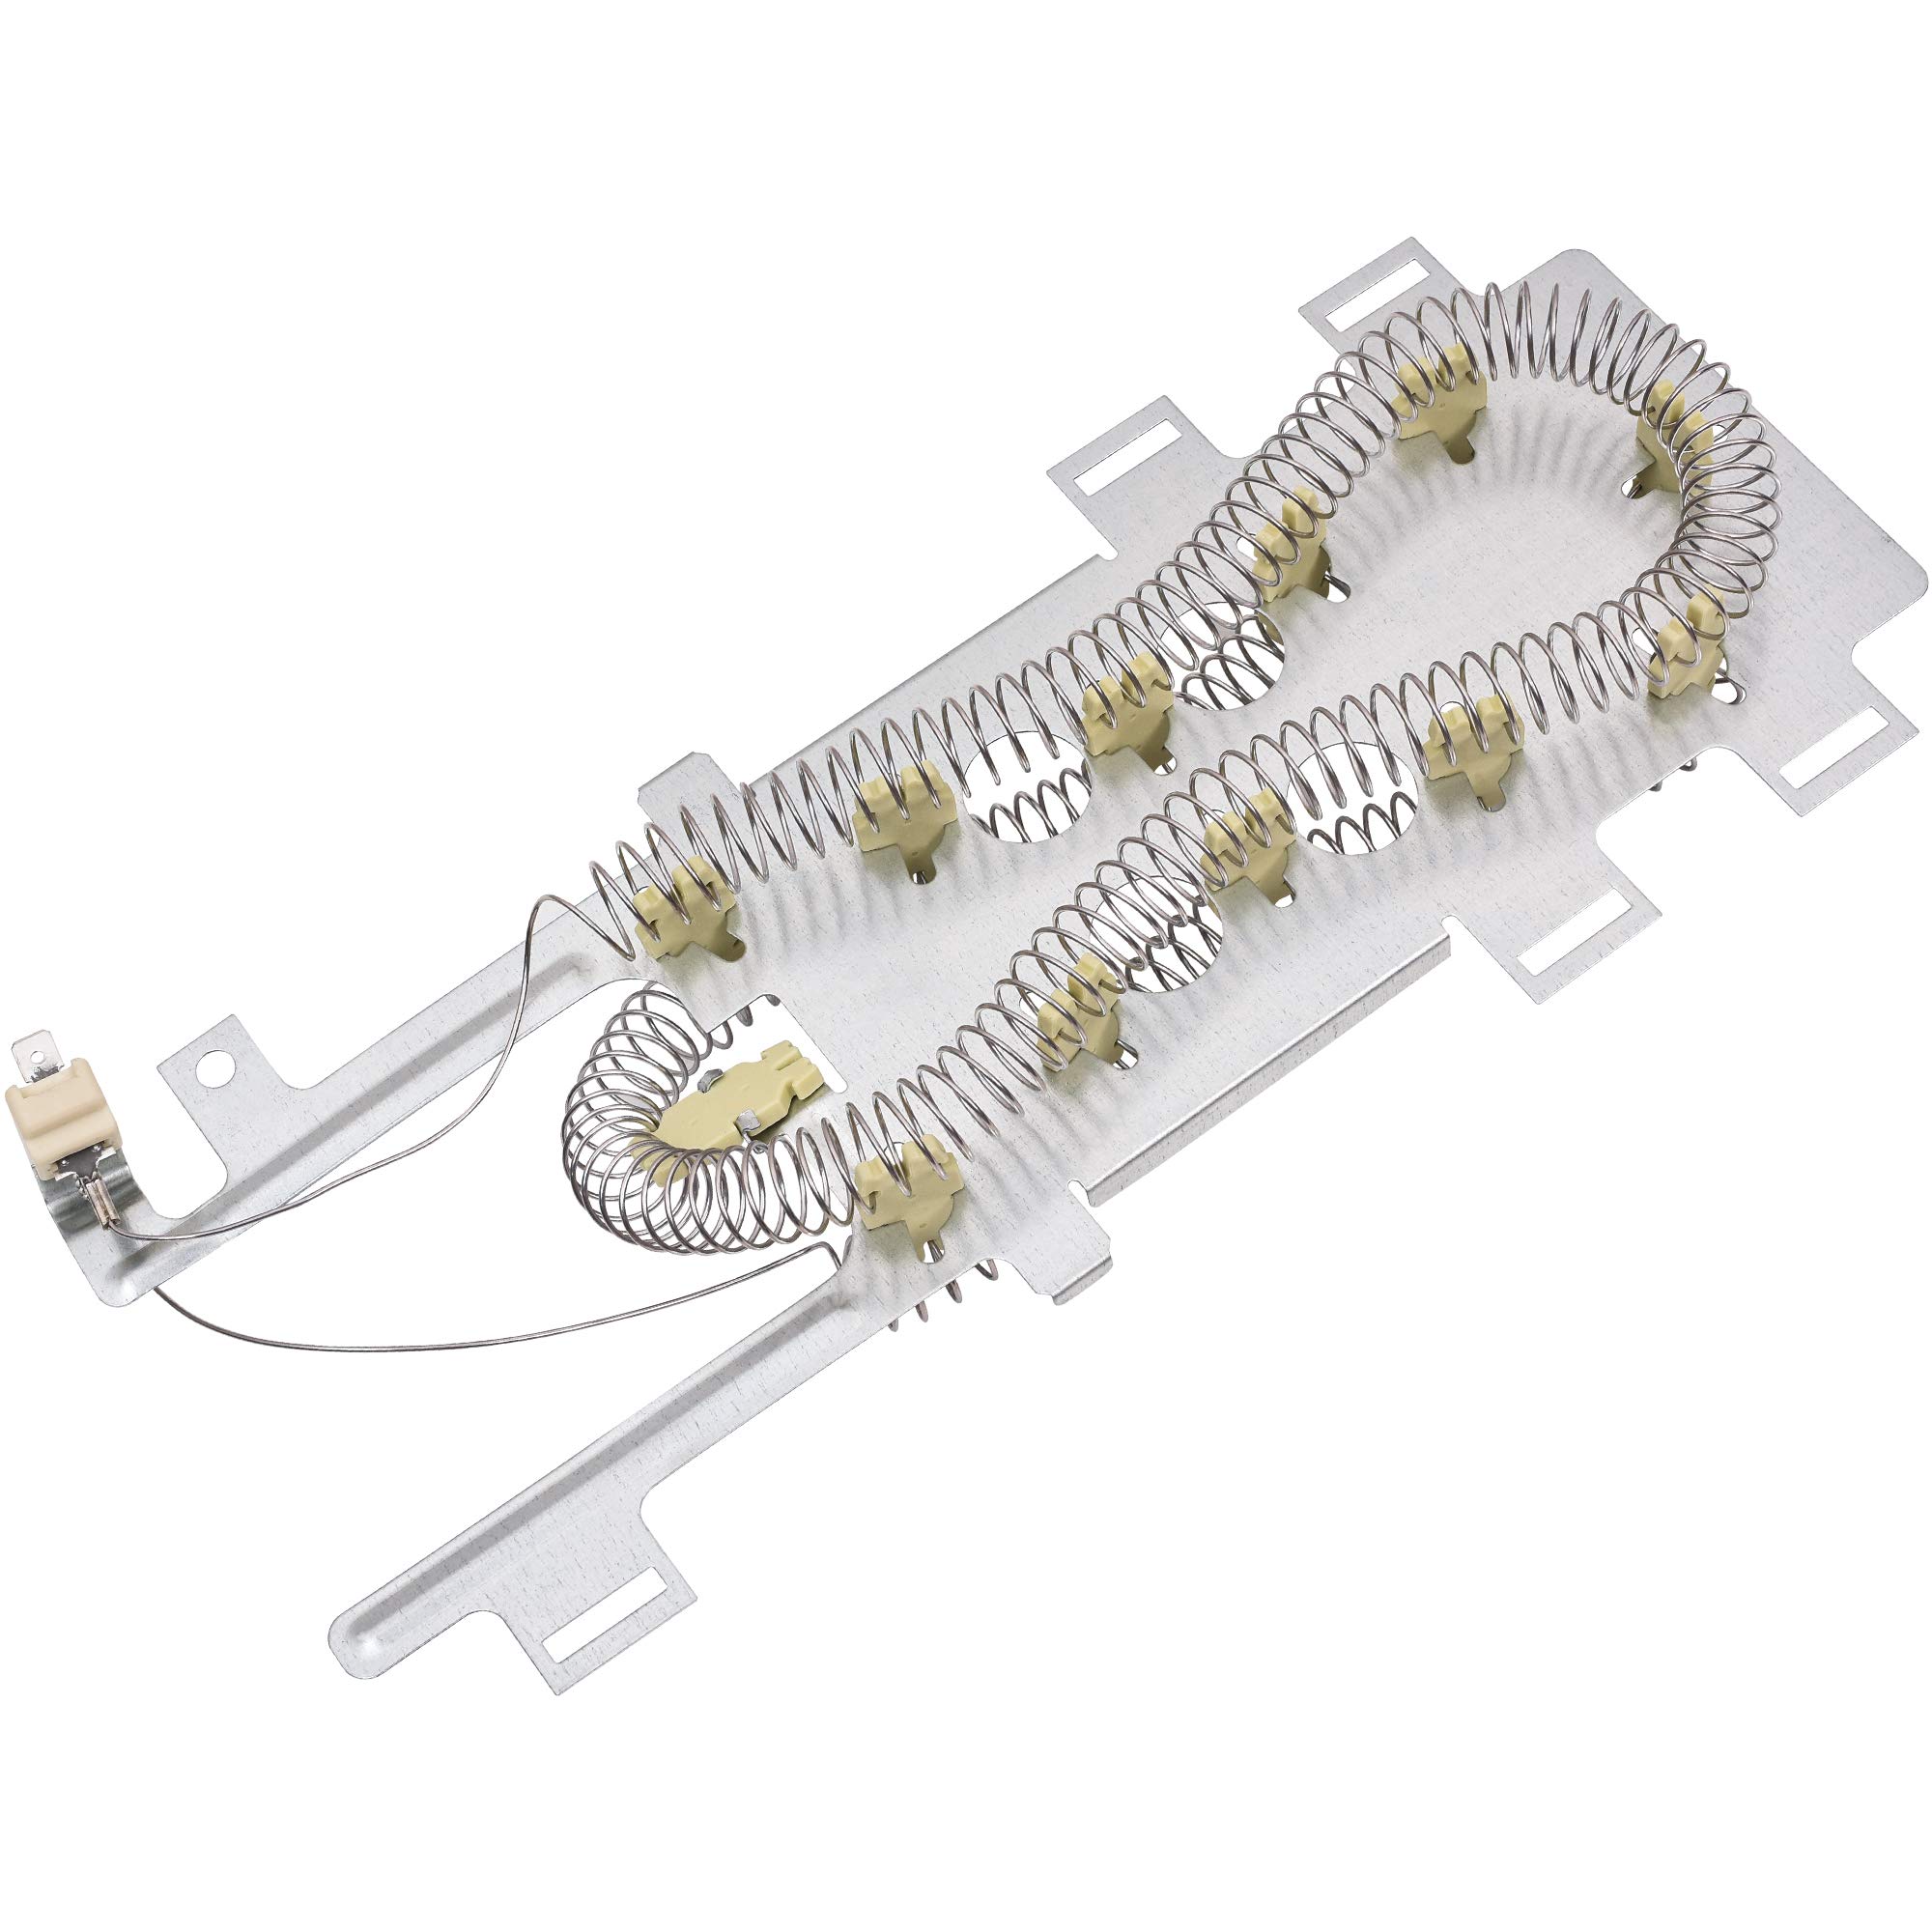
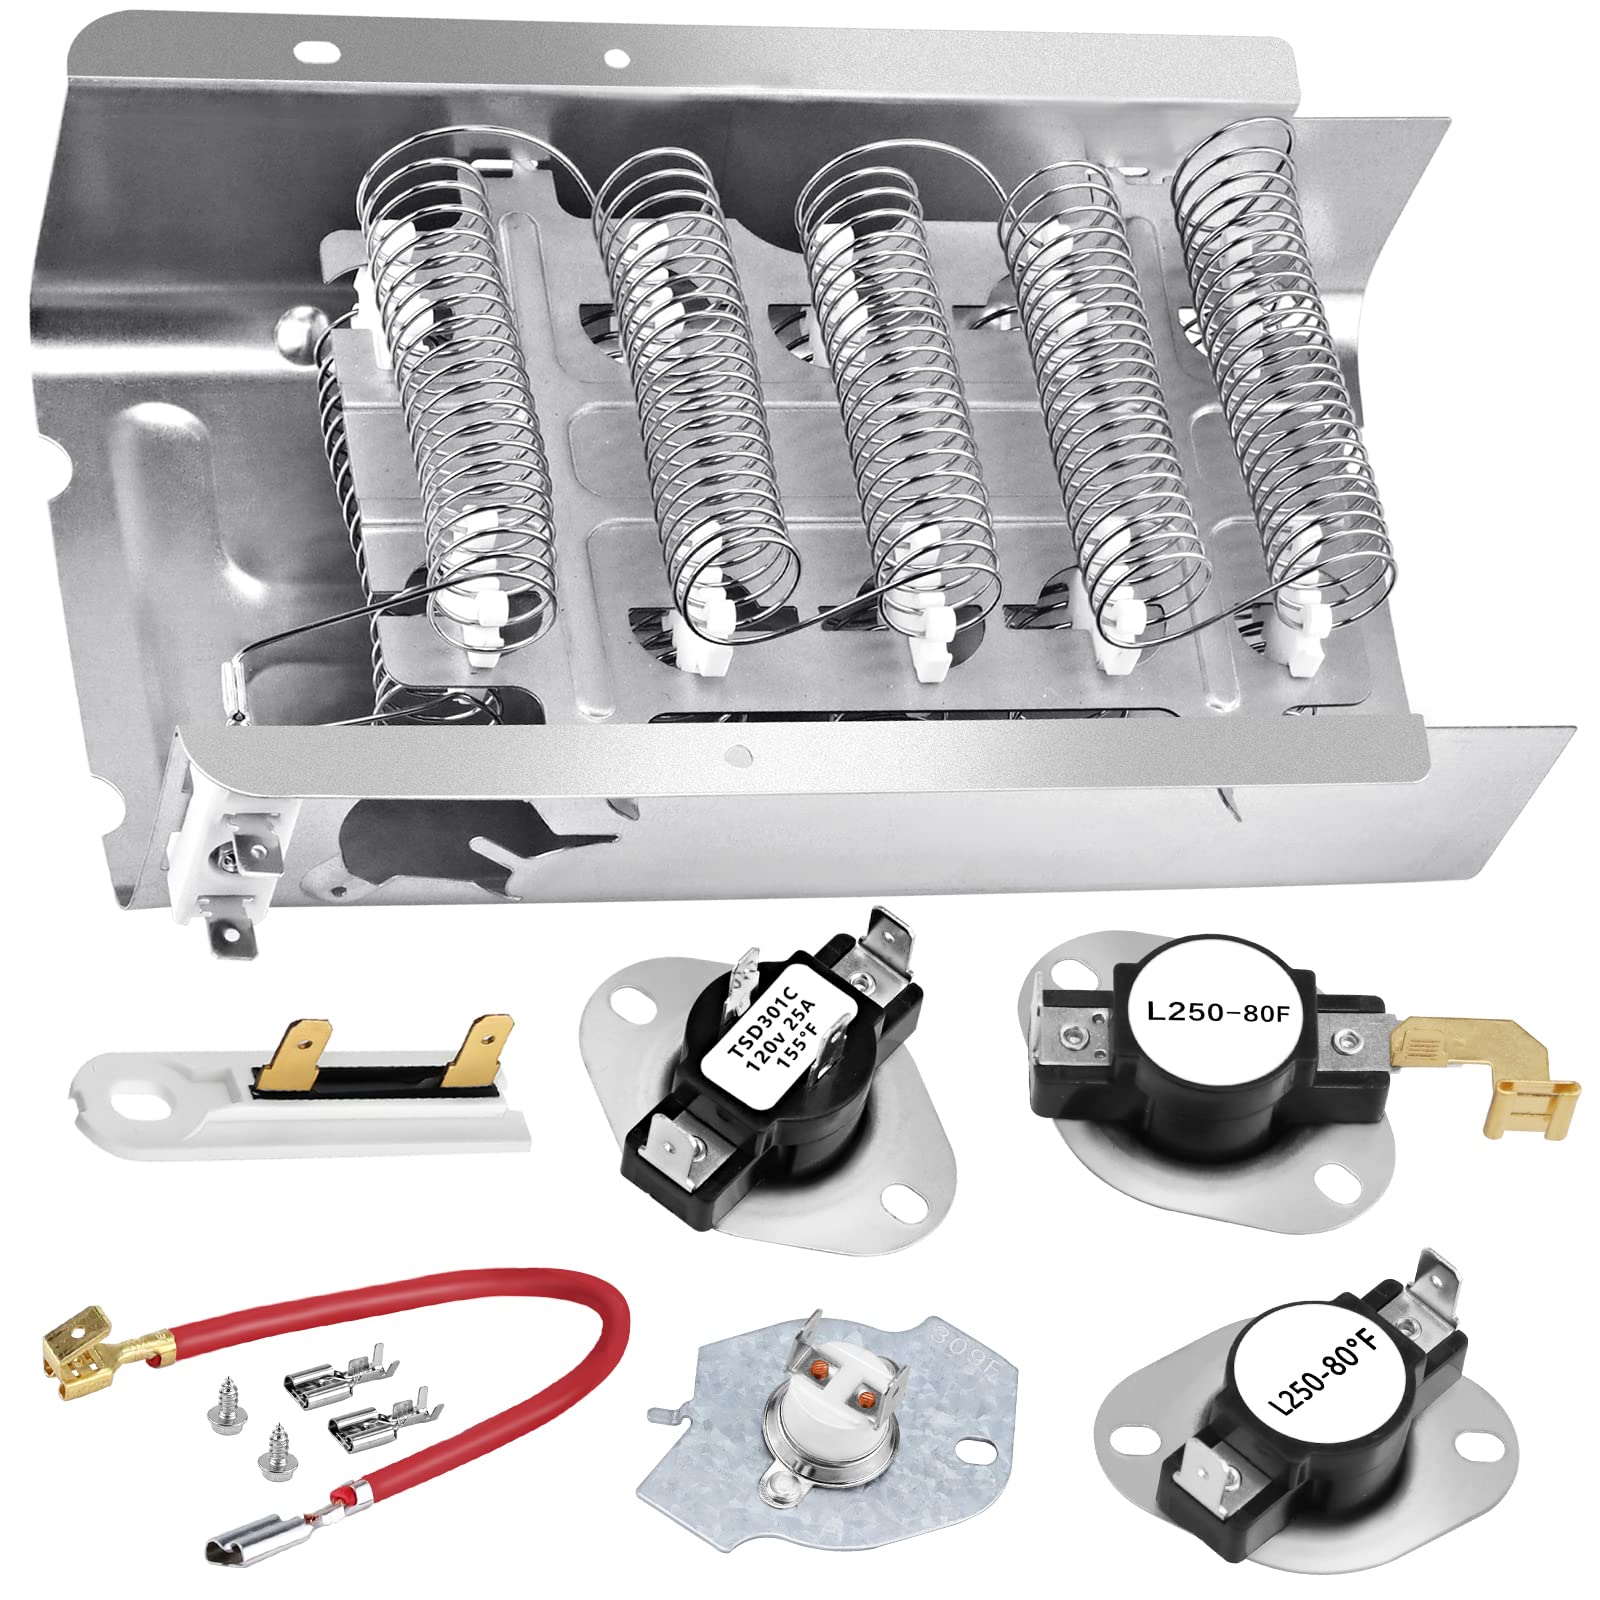
- Replacement heating element: Make sure to purchase a compatible heating element for your specific Maytag dryer model. Consult your dryer’s manual or the manufacturer’s website for the correct part number.
- Additional materials: Depending on your specific dryer model and the replacement heating element, you may need additional materials such as wire connectors, electrical tape, or insulation.
Having these tools and materials ready before you start the repair will ensure a smoother process and minimize any unnecessary delays. Now that you’re equipped with the necessary tools, let’s move on to the step-by-step instructions for replacing the heating element in your Maytag dryer.
Step 1: Disconnect the Power
The first and most crucial step in replacing the heating element in your Maytag dryer is to disconnect the power supply. This step is critical to ensure your safety during the repair process. Here’s how to do it:
- Locate the power cord at the back of your dryer. It should be plugged into an electrical outlet.
- Gently unplug the power cord from the outlet to disconnect the power supply. Make sure to handle the cord carefully to avoid any damage.
- Alternatively, if your dryer is hardwired, locate the circuit breaker for the dryer in your electrical panel.
- Switch off the circuit breaker dedicated to your dryer to cut off the power supply.
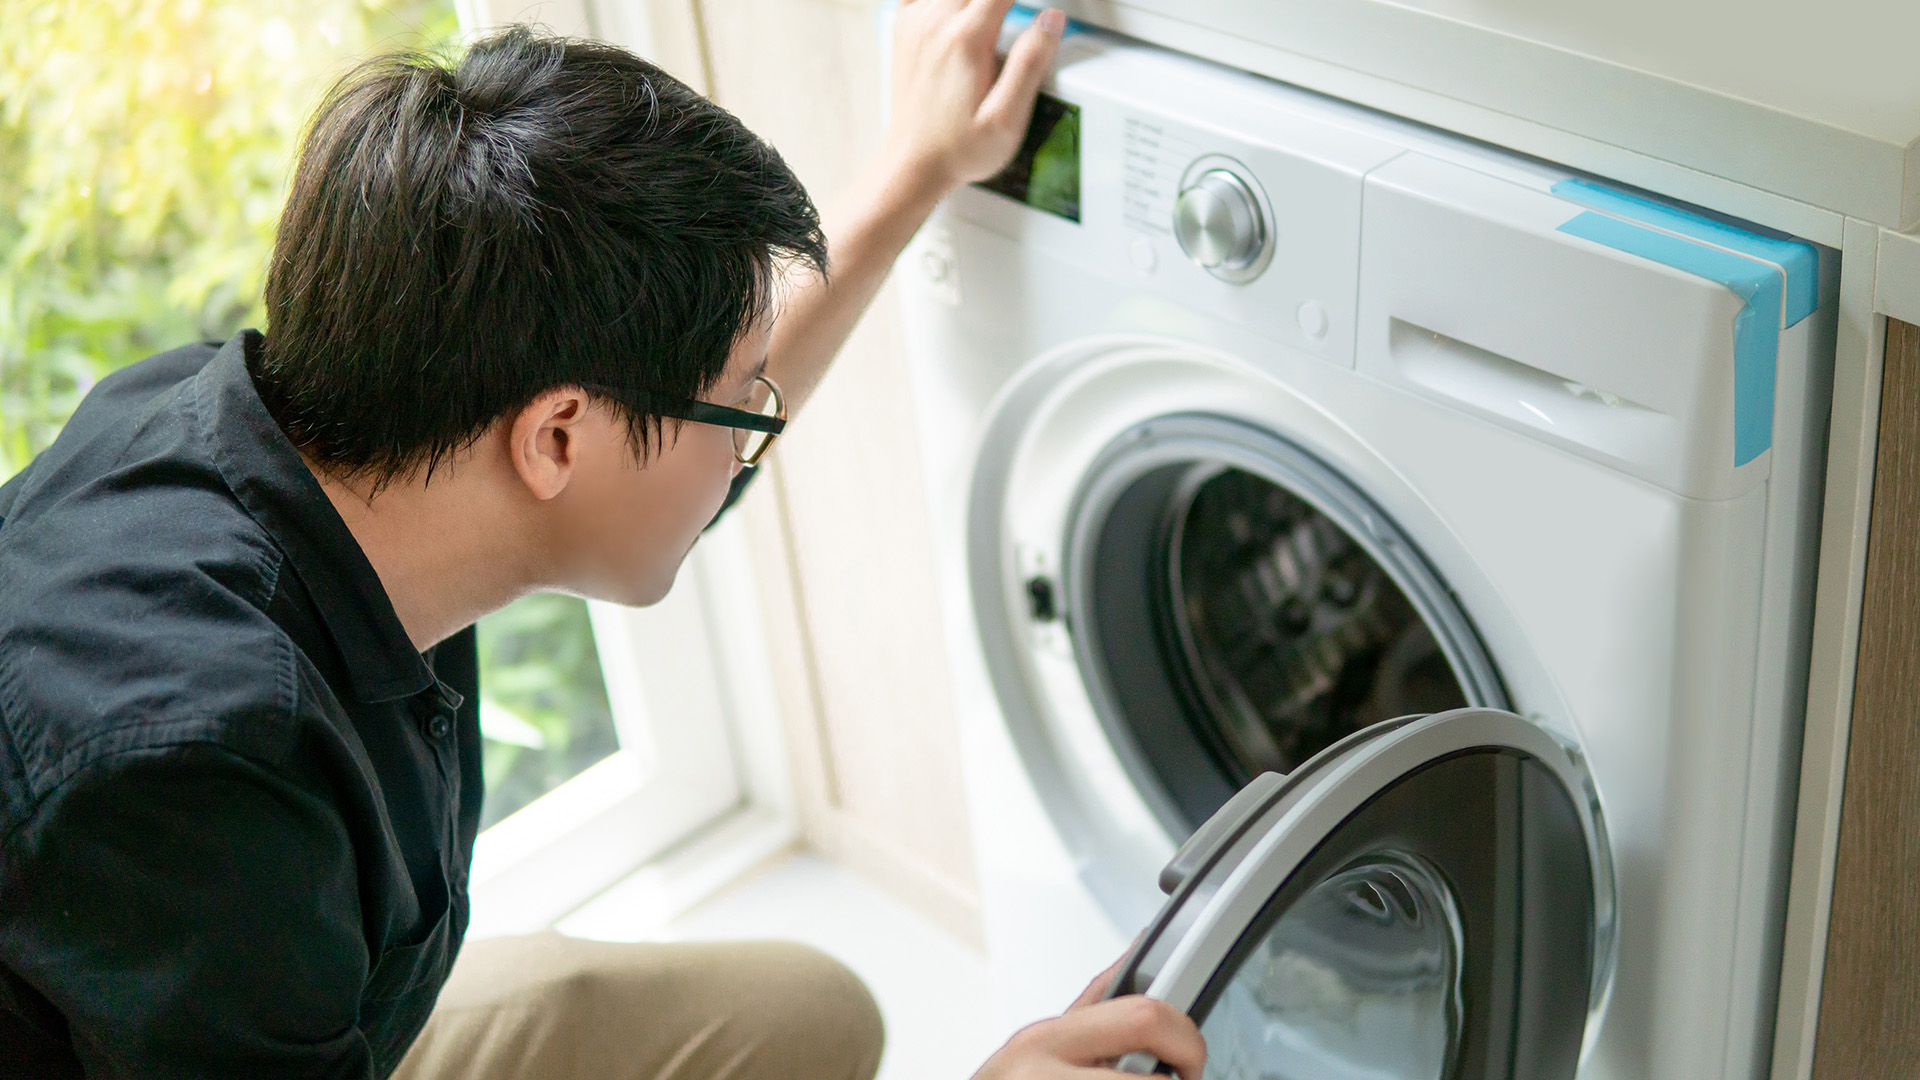
- Confirm that the power is truly disconnected by checking that the dryer does not operate when you press any buttons or turn the control knob.
By disconnecting the power supply, you eliminate the risk of electric shock while working on your Maytag dryer. Before proceeding to the next step, double-check that the power is indeed disconnected. Now that you’re sure the dryer is safely powered off, let’s move on to removing the back panel in the next step.
Step 2: Remove the Back Panel
Now that you have disconnected the power supply, it’s time to remove the back panel of the Maytag dryer. Removing the back panel will provide you with access to the heating element and other components. Follow these steps:
- Locate the screws securing the back panel to the dryer. These screws are typically located along the edges of the panel.
- Using a screwdriver, carefully remove the screws by turning them counterclockwise. Place the screws in a safe place to prevent loss.
- Once all the screws are removed, gently pull the back panel away from the dryer. Be cautious, as there may be wires or connectors attached to the panel. Take note of their positions to ensure easy reassembly later.
- If there are any wires or connectors attached to the back panel, carefully disconnect them. You may need to use pliers or gently pull to detach them.
- Set the back panel aside in a secure location.
Removing the back panel gives you a clear view of the internal components of the dryer, including the heating element. Take a moment to familiarize yourself with the layout and positioning of these components before proceeding to the next step. In the next step, we will locate and test the heating element to confirm if it is the cause of the issue.
Read more: How To Replace A Dishwasher Heating Element
Step 3: Locate and Test the Heating Element
Now that you have removed the back panel, it’s time to locate and test the heating element in your Maytag dryer. Testing the heating element will help determine if it is functioning properly or if it needs to be replaced. Follow these steps:
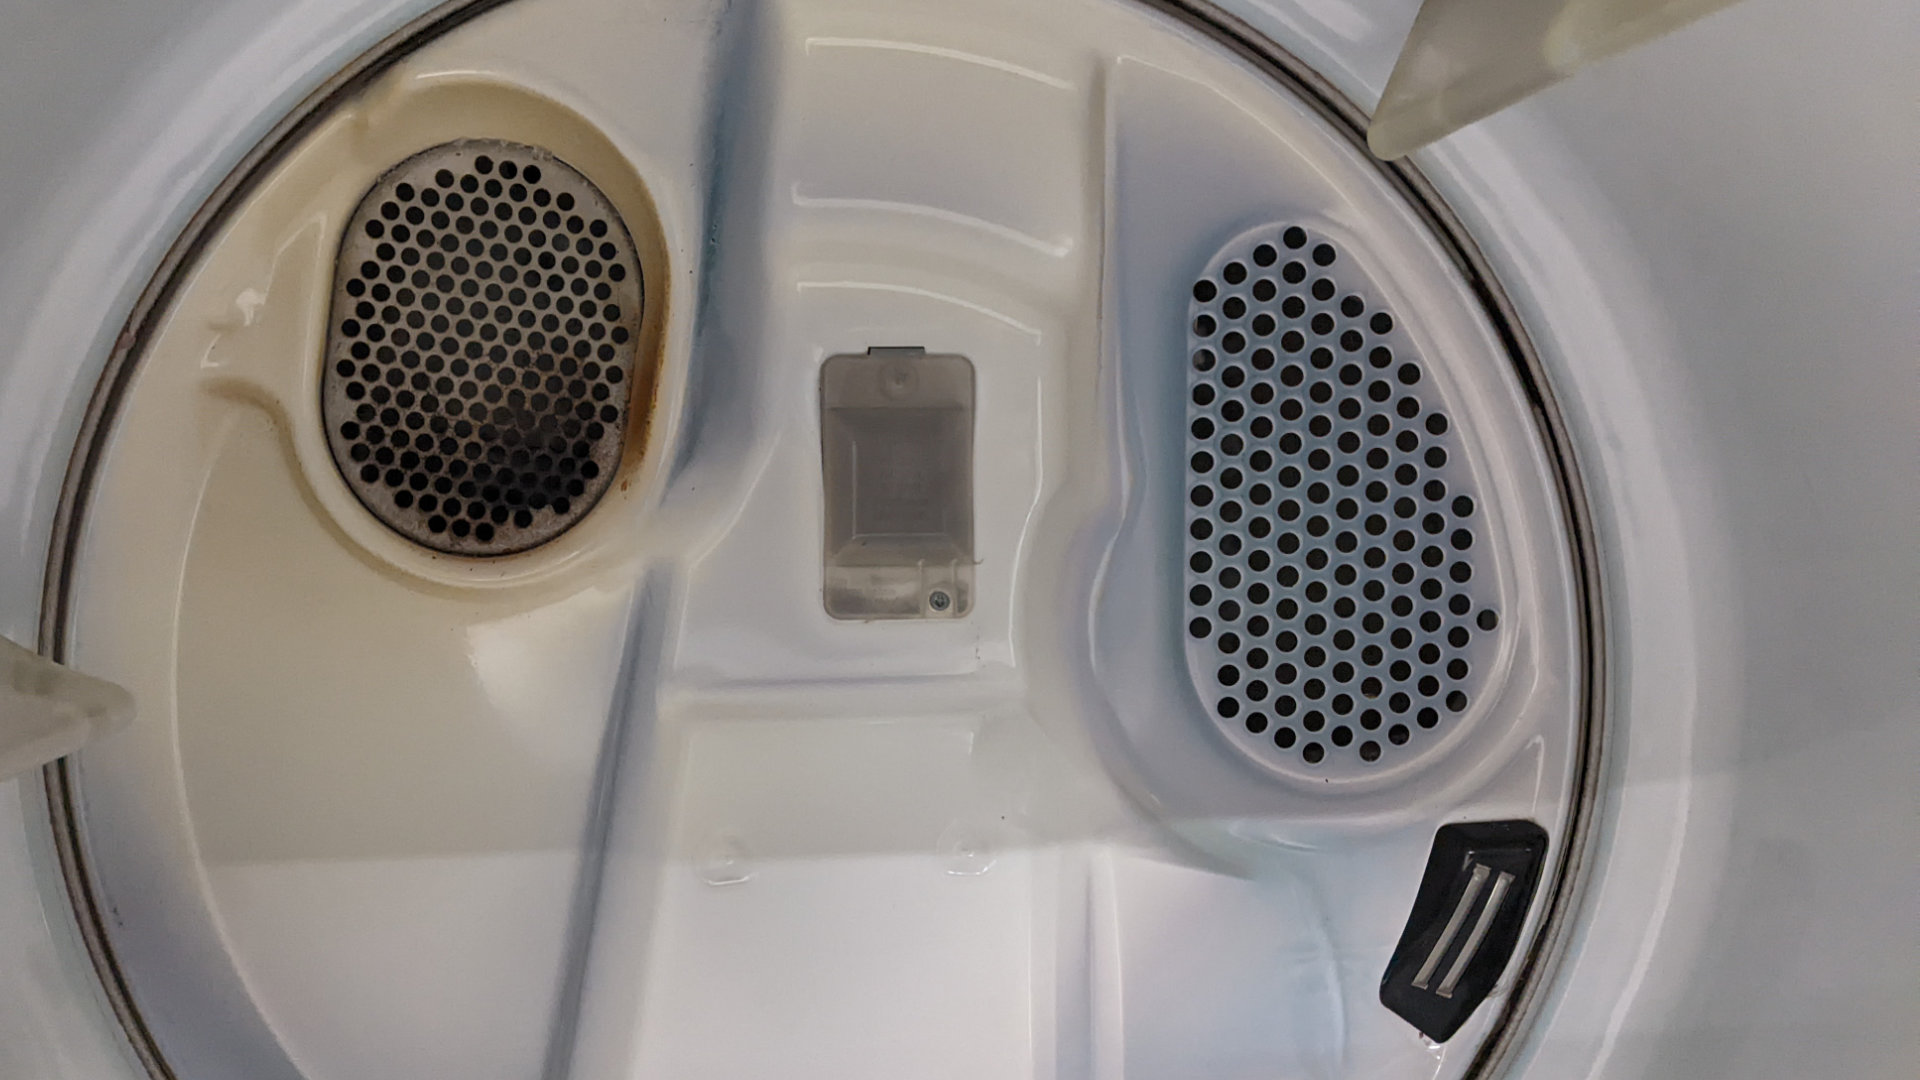
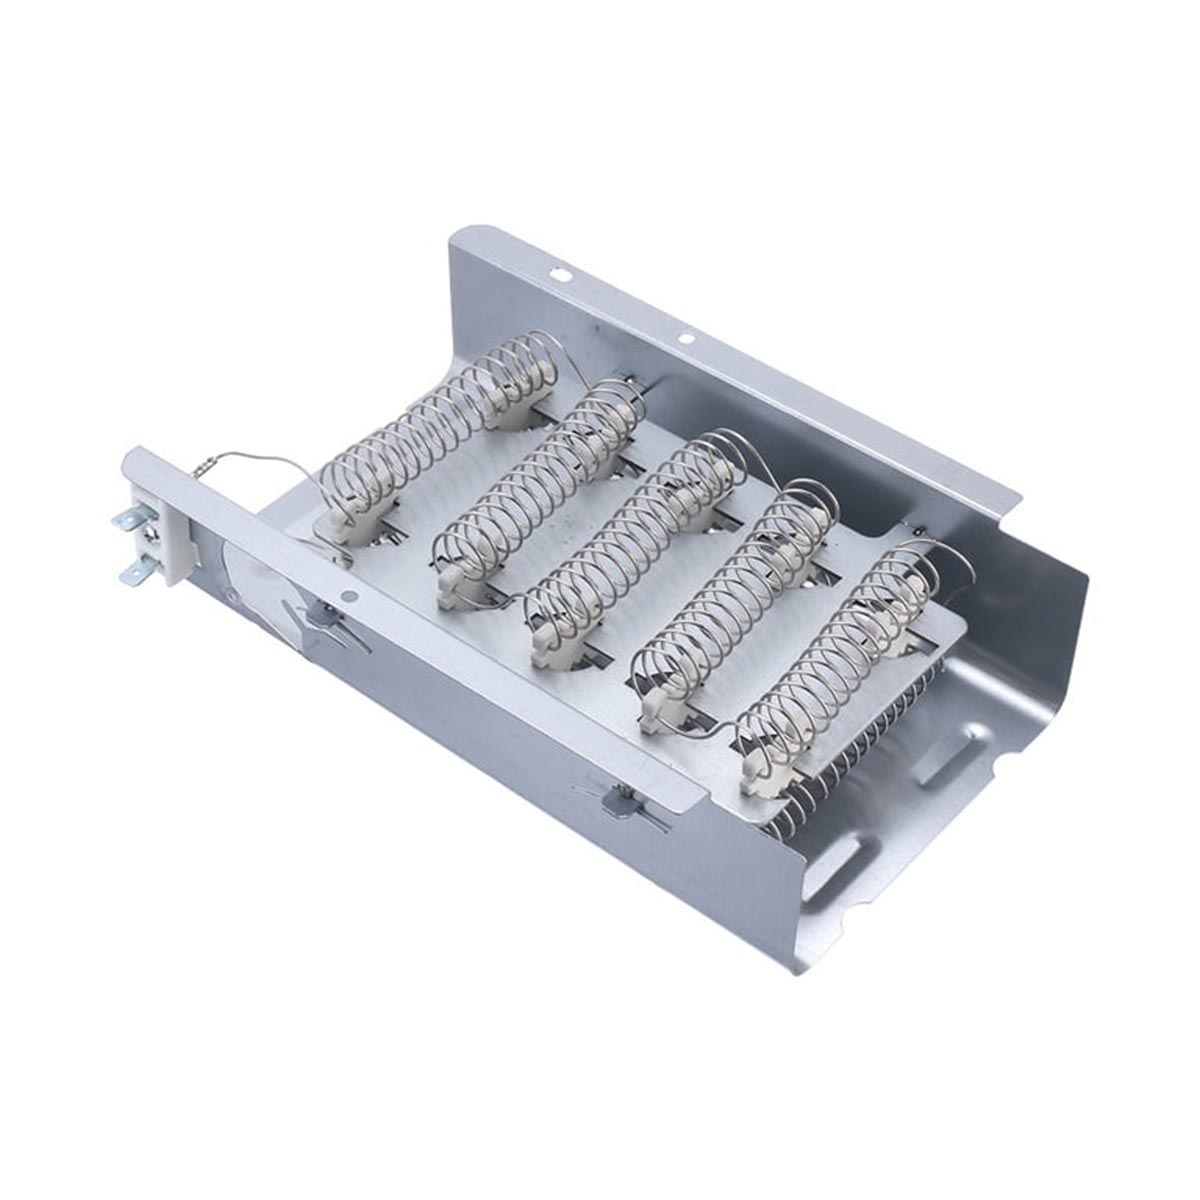
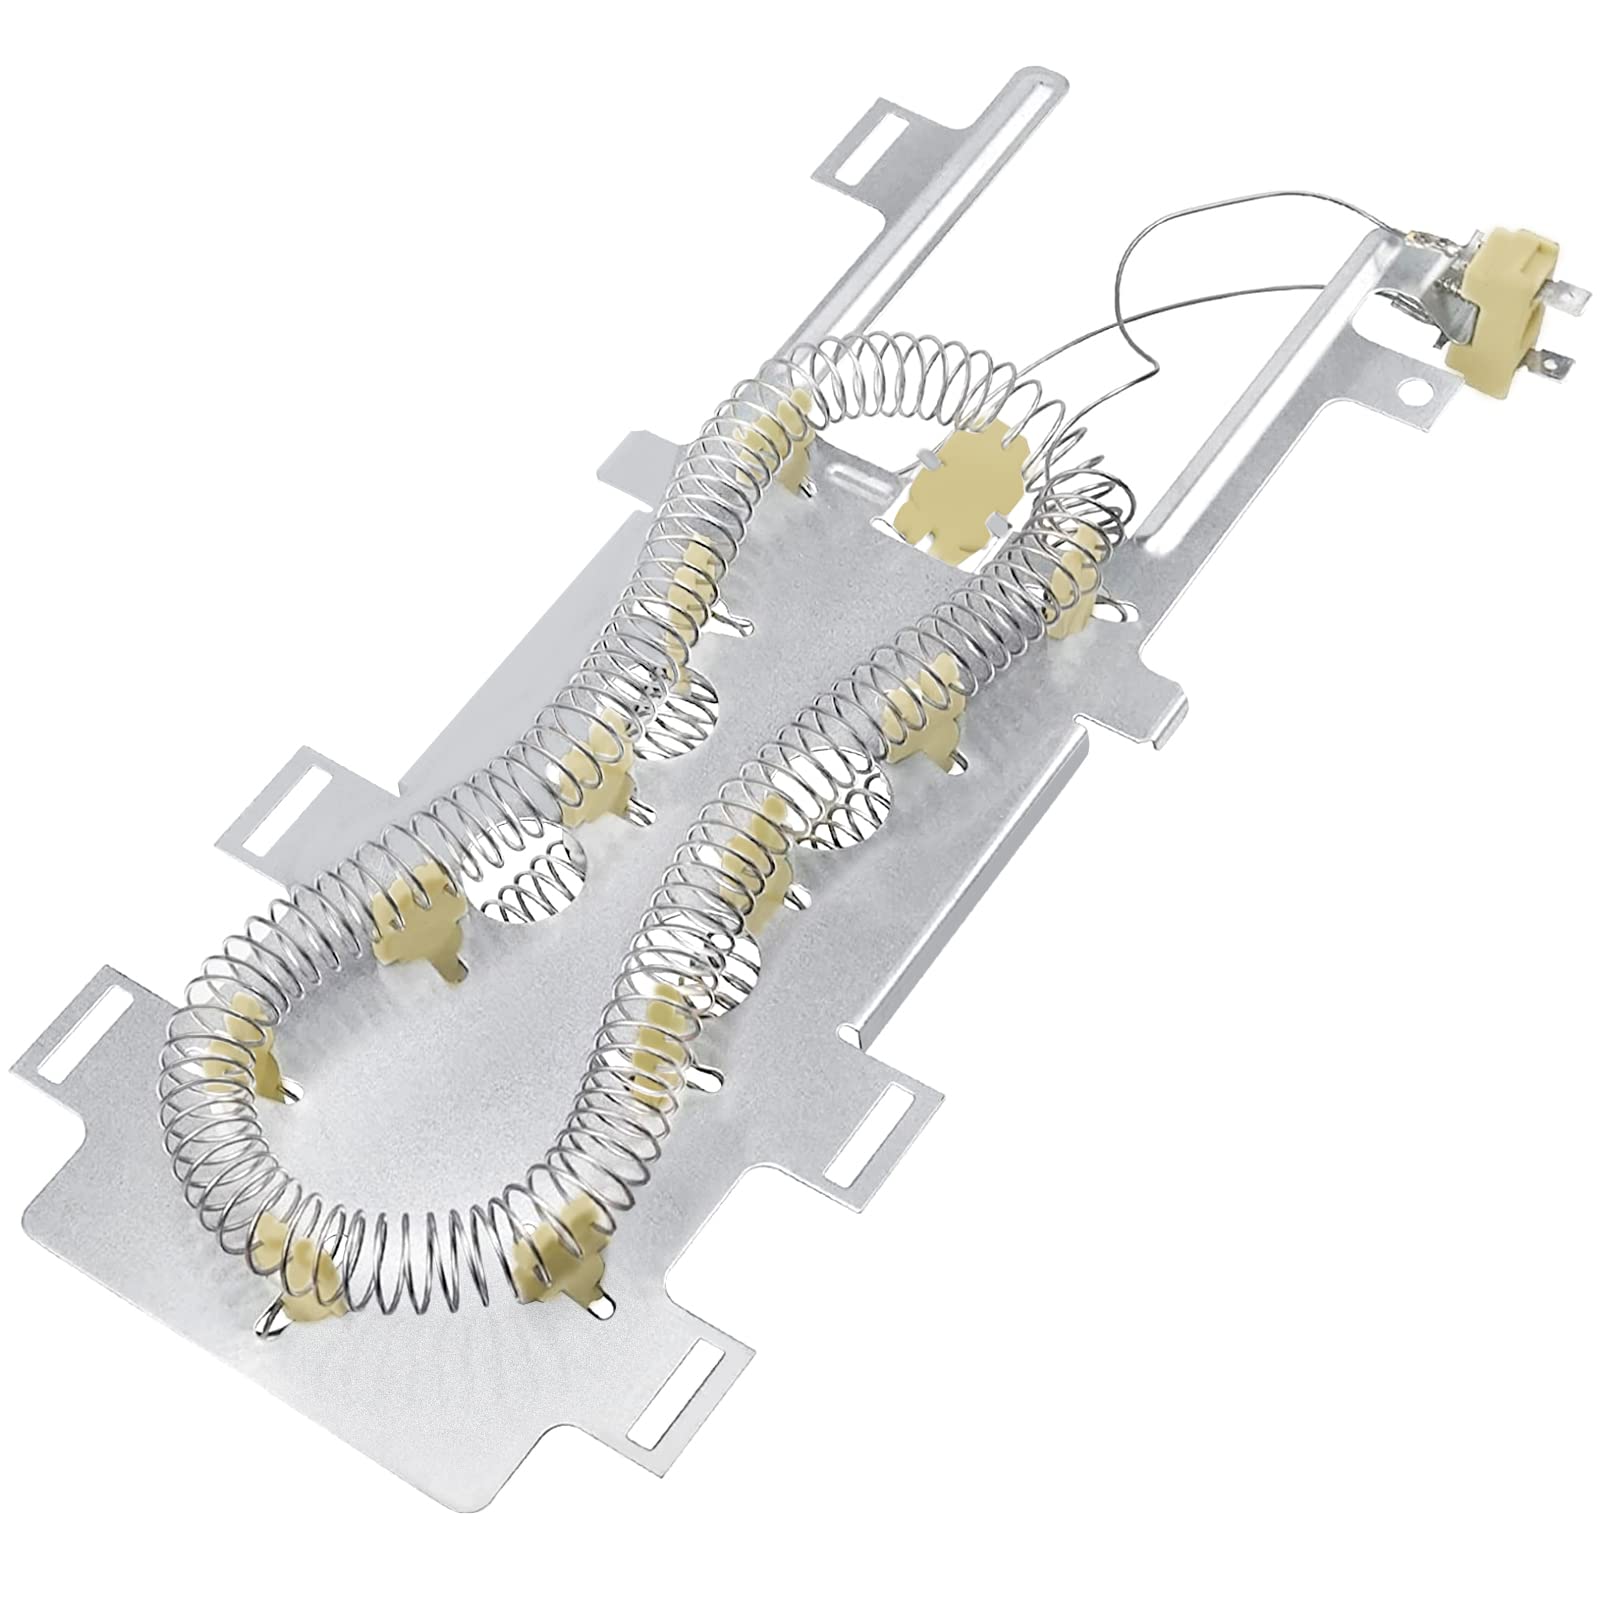
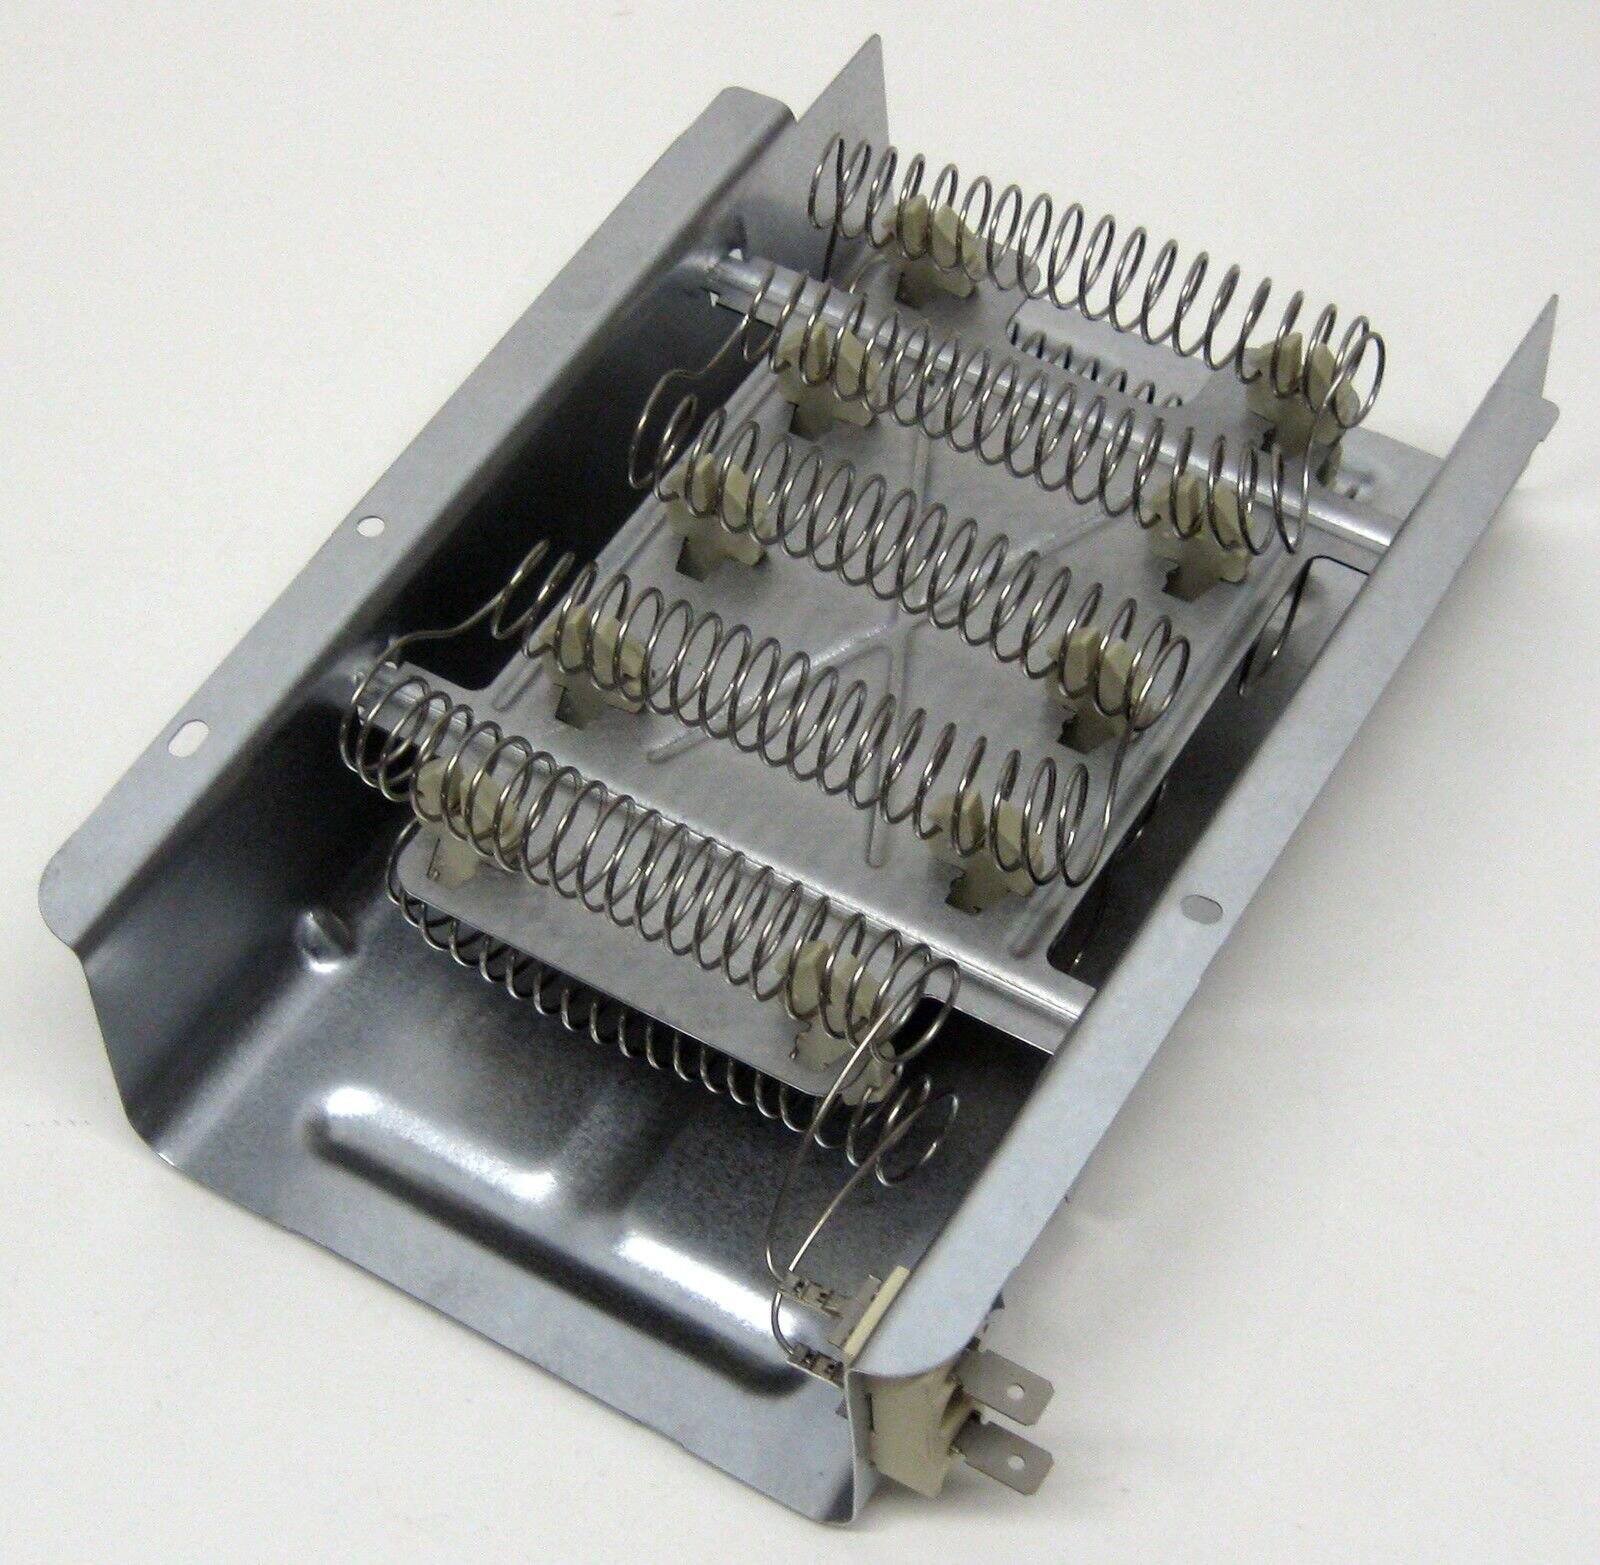
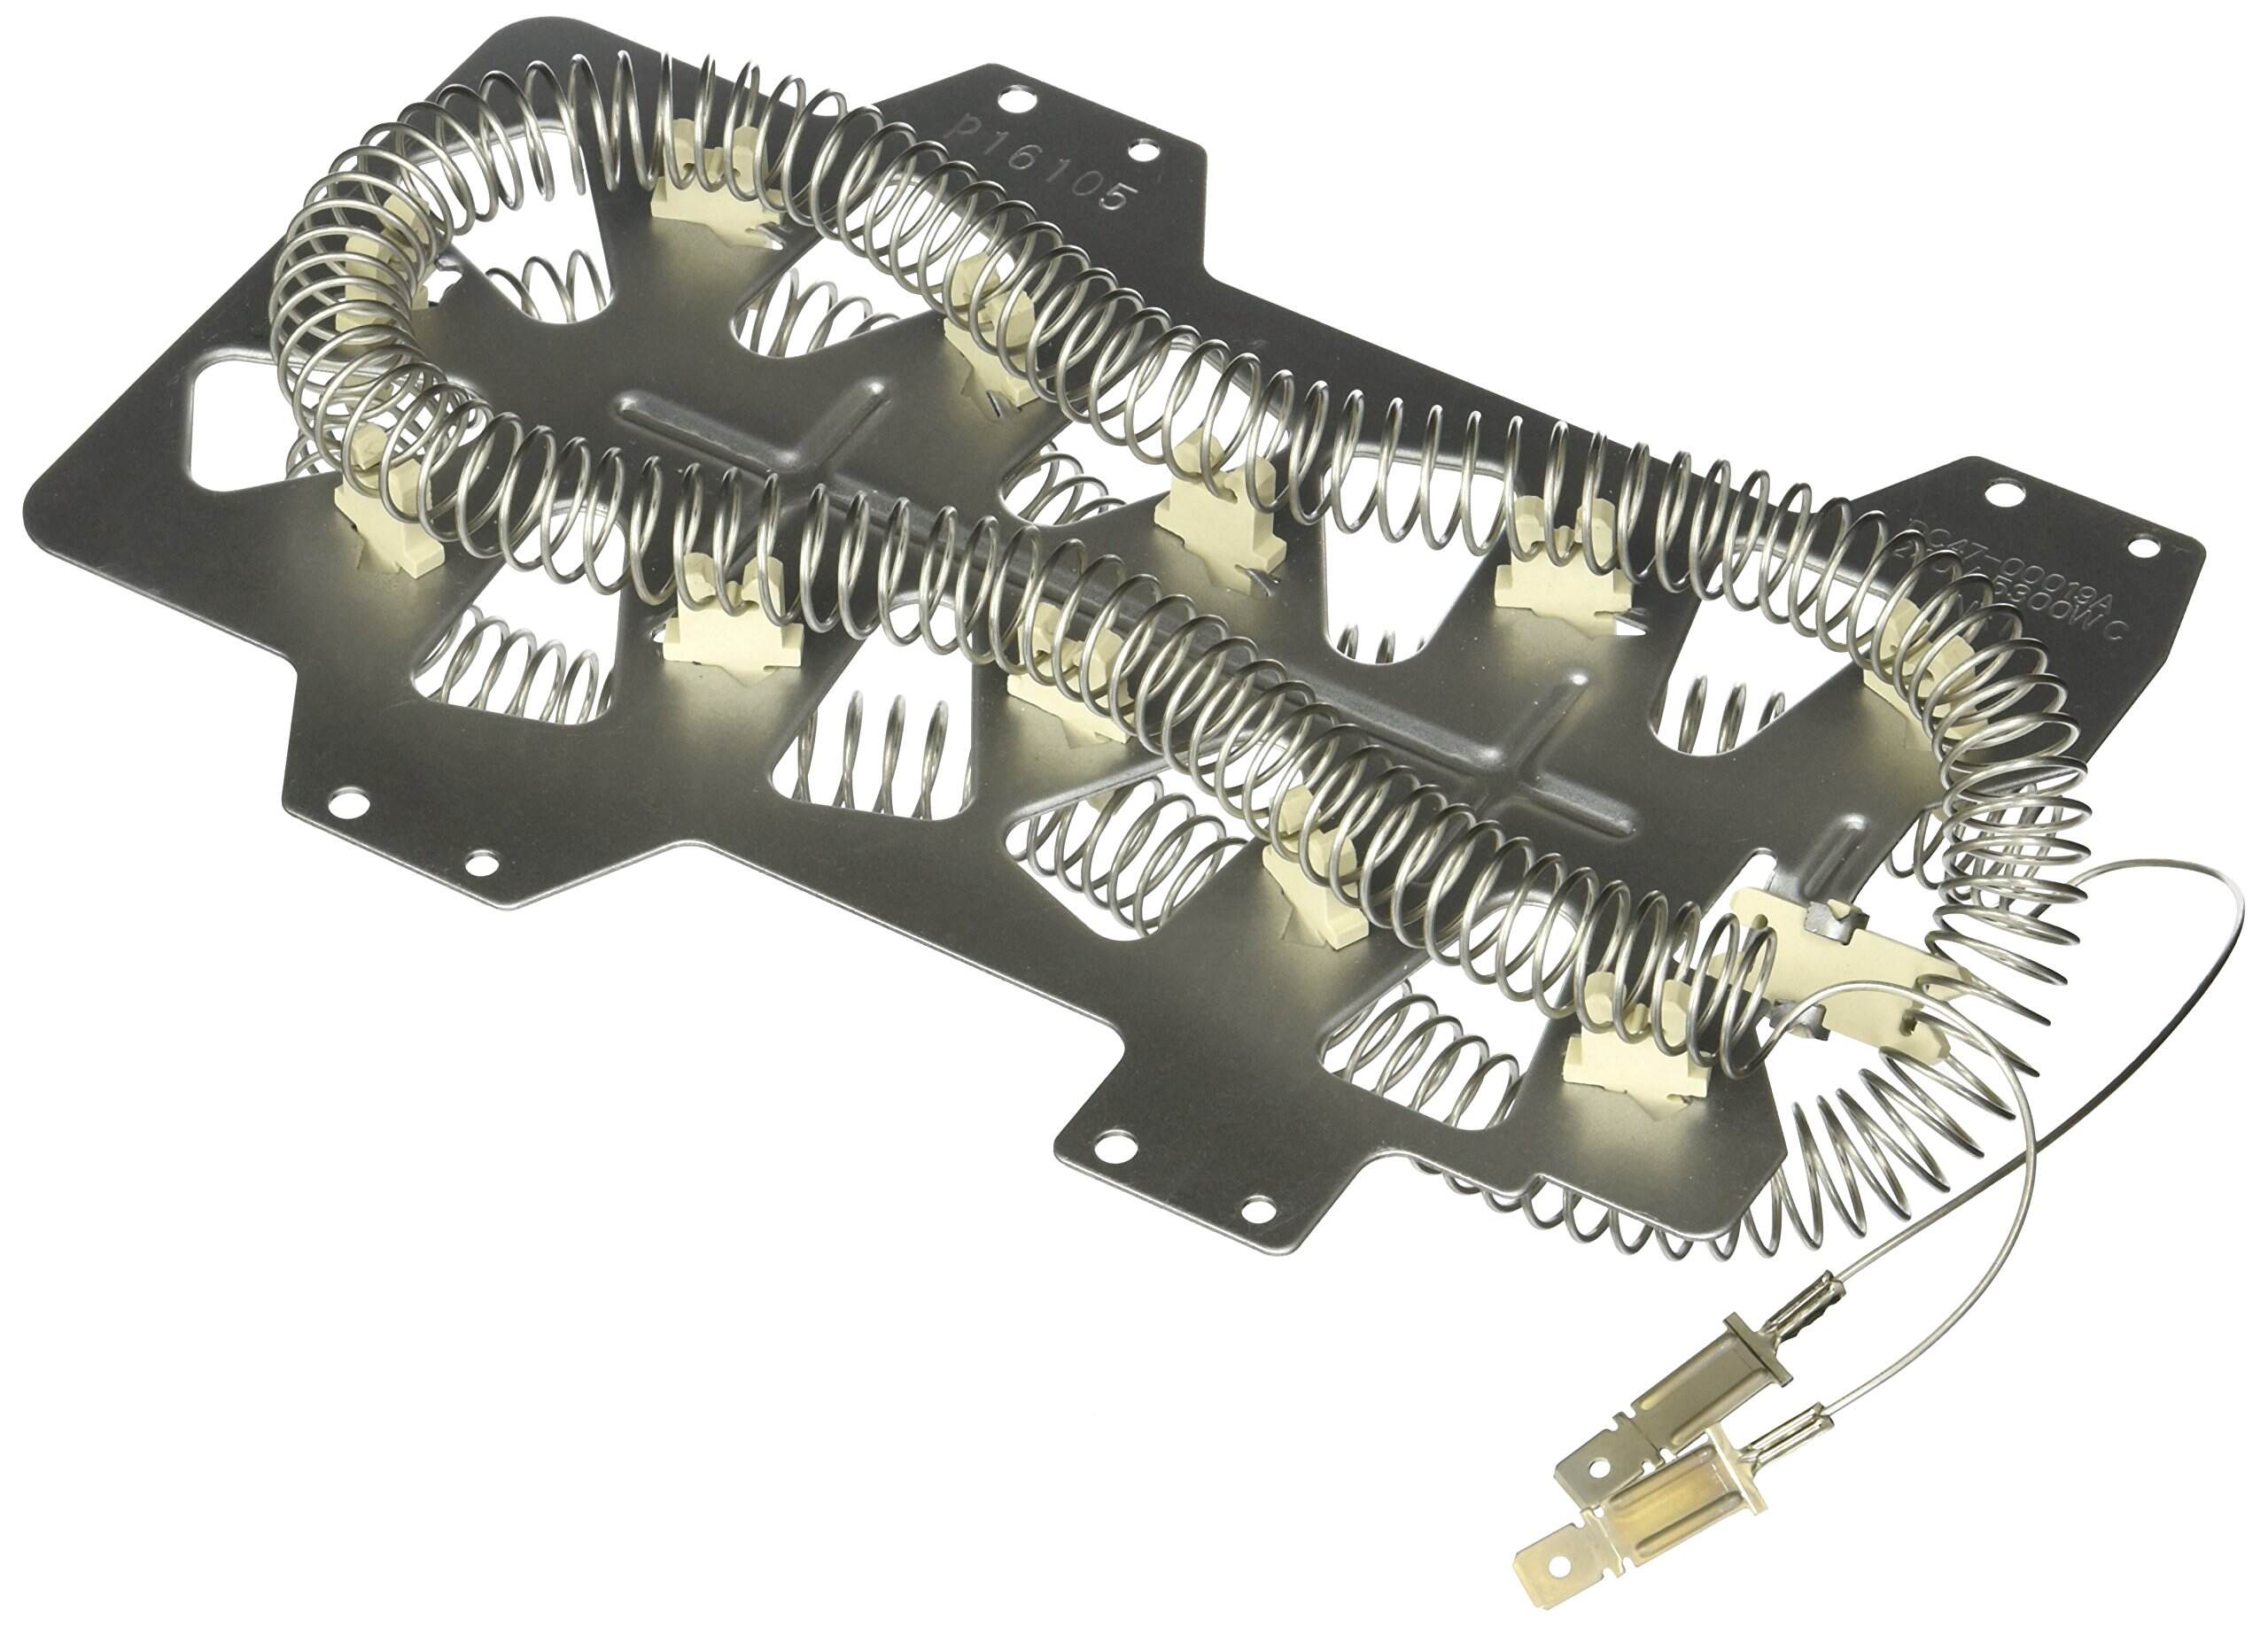
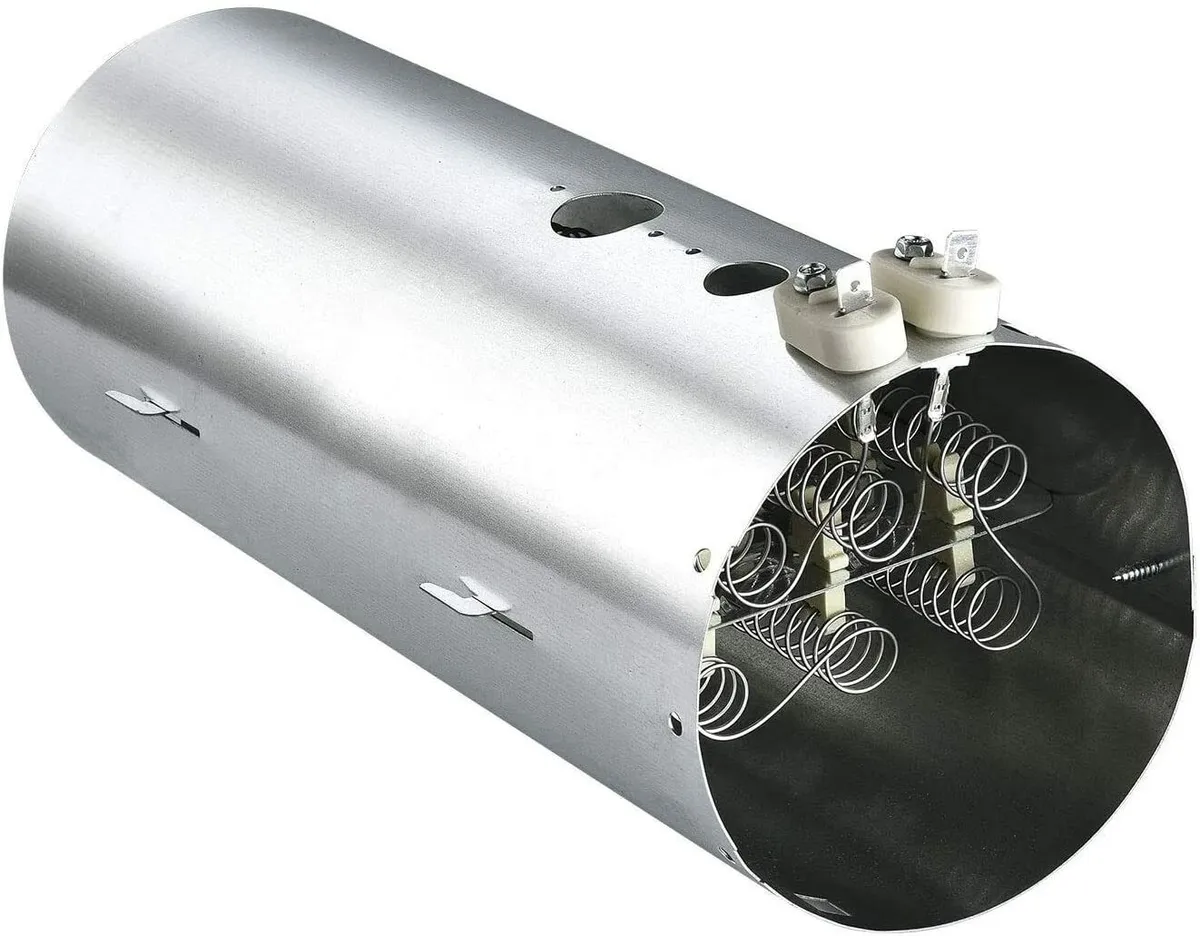
- Locate the heating element inside the dryer. It is typically a long, rectangular metal component.
- Inspect the heating element for any visible signs of damage or breaks. If you notice any visual damage, it is likely that the heating element is faulty and needs to be replaced.
- Test the continuity of the heating element using a multi-meter. Set the multi-meter to the continuity or ohms setting.
- Touch one probe of the multi-meter to each terminal of the heating element.
- If the multi-meter reads a reading close to zero or a low resistance, it indicates that the heating element has continuity and is functioning properly.
- If the multi-meter does not show any reading or shows a high resistance, it indicates that the heating element is faulty and needs to be replaced.
Testing the continuity of the heating element will help you determine if it is the cause of your dryer’s heating issues. If the heating element tests positive for continuity, move on to the next step. However, if it fails the continuity test, proceed to step 4 to replace the heating element with a new one. Remember to consult your dryer’s manual or the manufacturer’s website for the correct replacement heating element for your specific Maytag dryer model.
When replacing the heating element in a Maytag dryer, always disconnect the power supply and refer to the manufacturer’s instructions for the specific model. It’s also a good idea to take a photo of the wiring before disconnecting it to ensure proper reconnection.
Step 4: Remove the Old Heating Element
If the heating element in your Maytag dryer has failed the continuity test in the previous step, it’s time to remove the old heating element and replace it with a new one. Follow these steps to remove the old heating element:
- Identify the wires connected to the heating element. Take note of their positions and how they are connected to the element.
- Using pliers, carefully disconnect the wires from the terminals of the heating element. If necessary, use a screwdriver to loosen any screws securing the wires.
- If there are any mounting brackets or screws holding the heating element in place, remove them using the appropriate tools. Keep track of these fasteners to facilitate easy reassembly.
- Gently pull out the old heating element from its position inside the dryer. Take care not to damage any surrounding components or wires.
- Inspect the area around the old heating element for any accumulated lint or debris. Clean out any buildup using a vacuum or a brush.
By following these steps, you will have successfully removed the old heating element from your Maytag dryer. Keep the old heating element aside and prepare to install the new one in the next step. Make sure to match the specifications of the old heating element with the replacement to ensure compatibility.
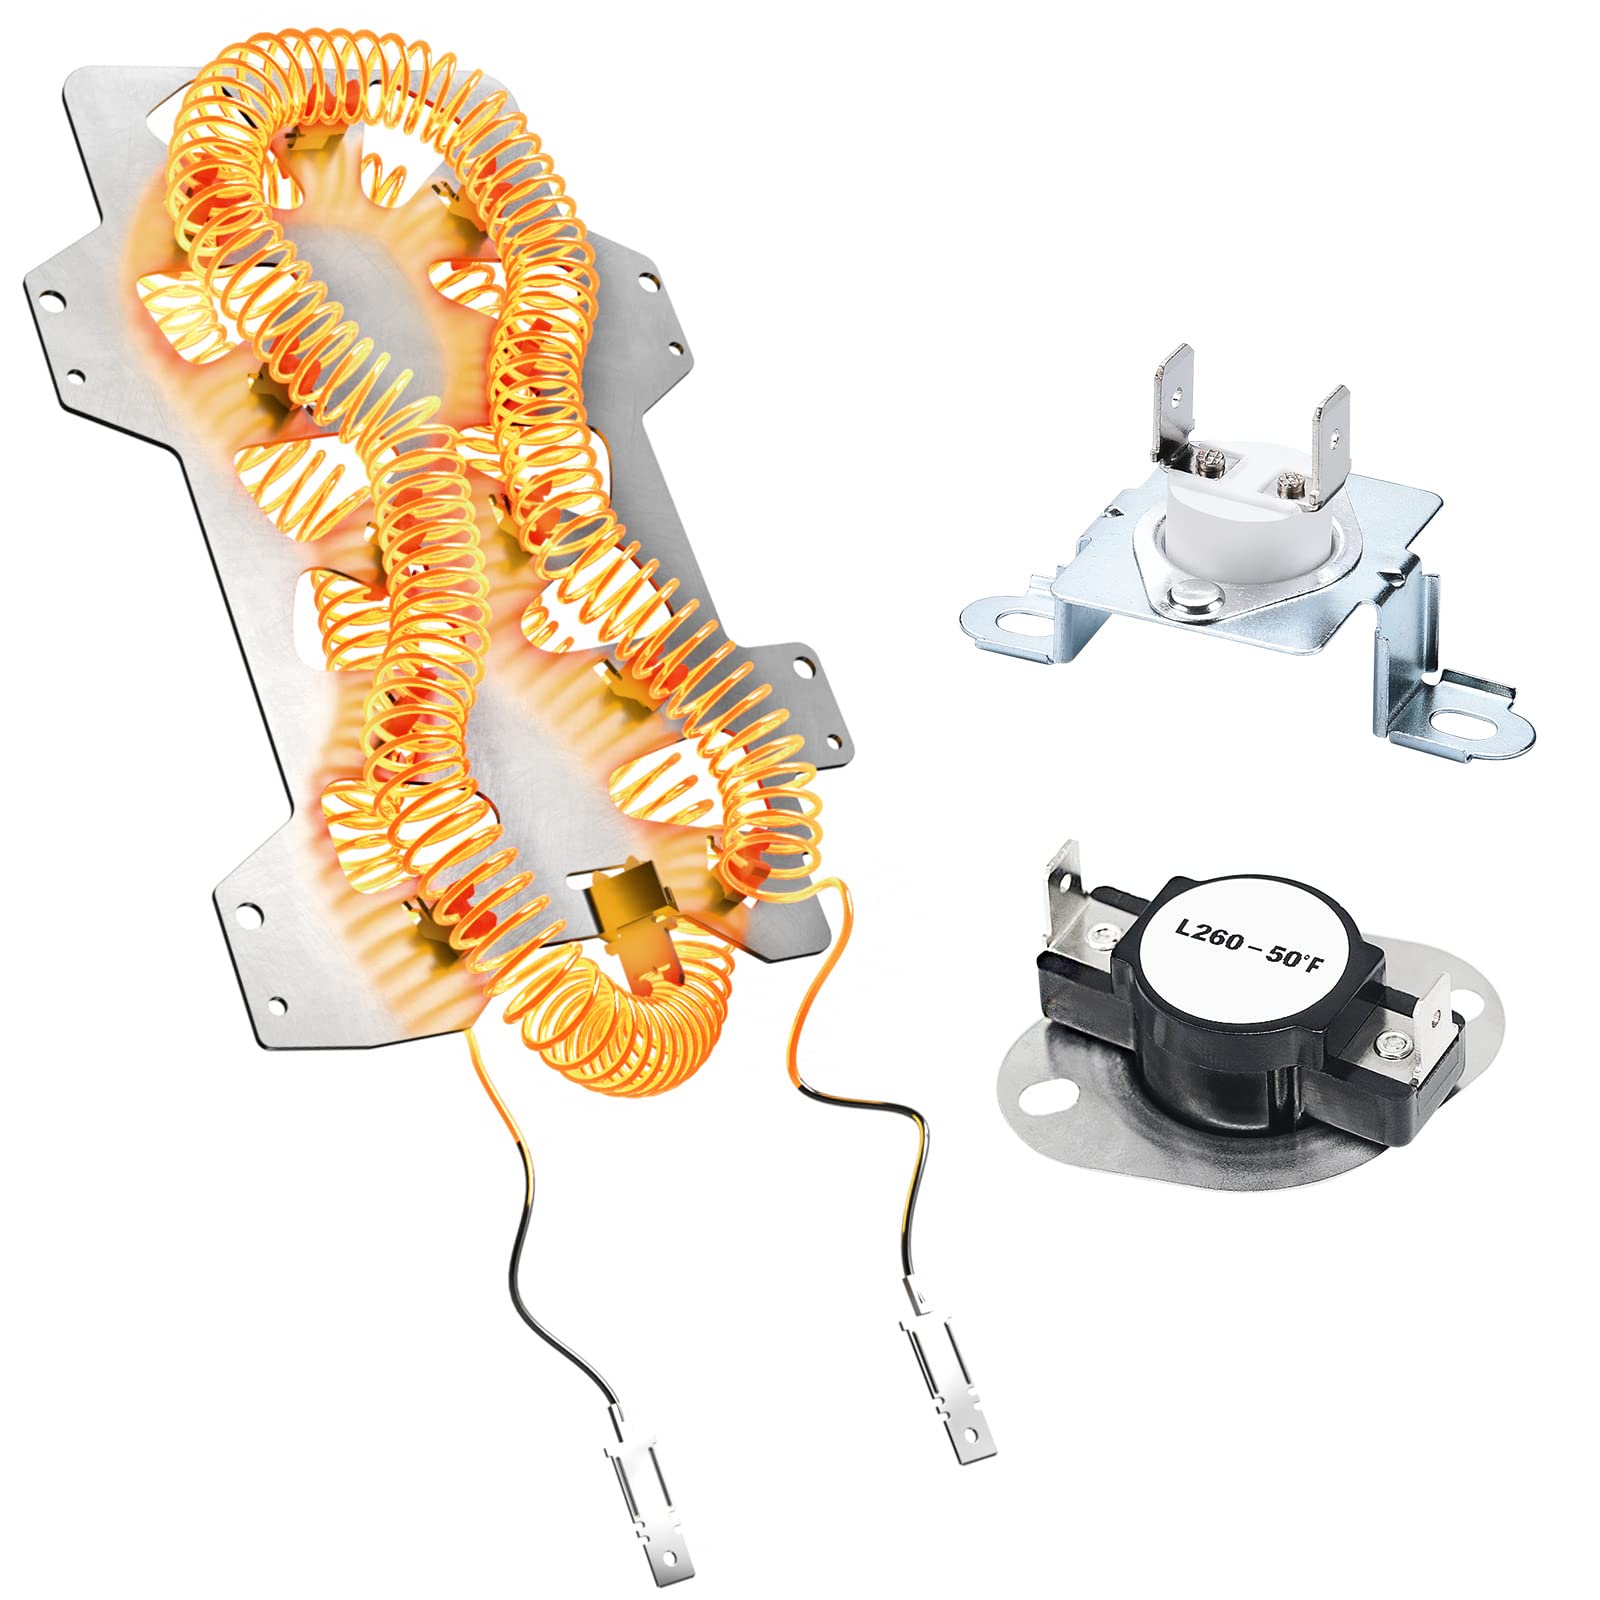
Step 5: Install the New Heating Element
Now that you have successfully removed the old heating element, it’s time to install the new heating element in your Maytag dryer. Follow these steps to install the new heating element:
- Take the new heating element and carefully position it in the same spot where the old heating element was located. Ensure that it is aligned properly.
- If there were mounting brackets or screws that held the old heating element in place, reattach them to secure the new heating element. Use the appropriate tools to tighten the brackets or screws as needed.
- Take the wires that were disconnected from the old heating element and reconnect them to the corresponding terminals on the new heating element. Make sure to match the wire colors and positions to ensure proper connections.
- If necessary, use pliers or a screwdriver to secure the wires to the terminals by tightening any screws or clamps.
- Double-check that all connections are secure and properly fastened.
Once you have installed the new heating element and ensured all connections are secure, you are ready to reassemble the remaining components of your Maytag dryer in the next step.
Step 6: Reassemble the Dryer
After installing the new heating element in your Maytag dryer, it’s time to reassemble the dryer and put everything back together. Follow these steps to reassemble the dryer:
- Retrieve the back panel that you set aside earlier. Align it with the back of the dryer and carefully slide it into place.
- Reattach the screws that secure the back panel to the dryer. Use a screwdriver to tighten the screws, ensuring that they are snug but not overly tight.
- If any wires or connectors were disconnected from the back panel, reconnect them to their respective positions. Make sure they are properly aligned and securely fastened.
- Once all the connections are reestablished, give the back panel a gentle push to ensure it is firmly in place.
- Verify that all the screws are tightened and the back panel is securely attached to the dryer.
With the dryer reassembled, you’re almost ready to test its functionality. However, there is one more step to complete before you can do that. In the next step, we will go over how to test the dryer to ensure it is working properly after the heating element replacement.
Read more: How To Test A Dryer Heating Element
Step 7: Test the Dryer’s Functionality
Now that you have reassembled the dryer, it’s time to test its functionality to ensure that the new heating element is working properly. Follow these steps to test your Maytag dryer:
- Plug the power cord back into the electrical outlet or switch on the circuit breaker dedicated to the dryer to restore power.
- Turn on the dryer and select a drying cycle.
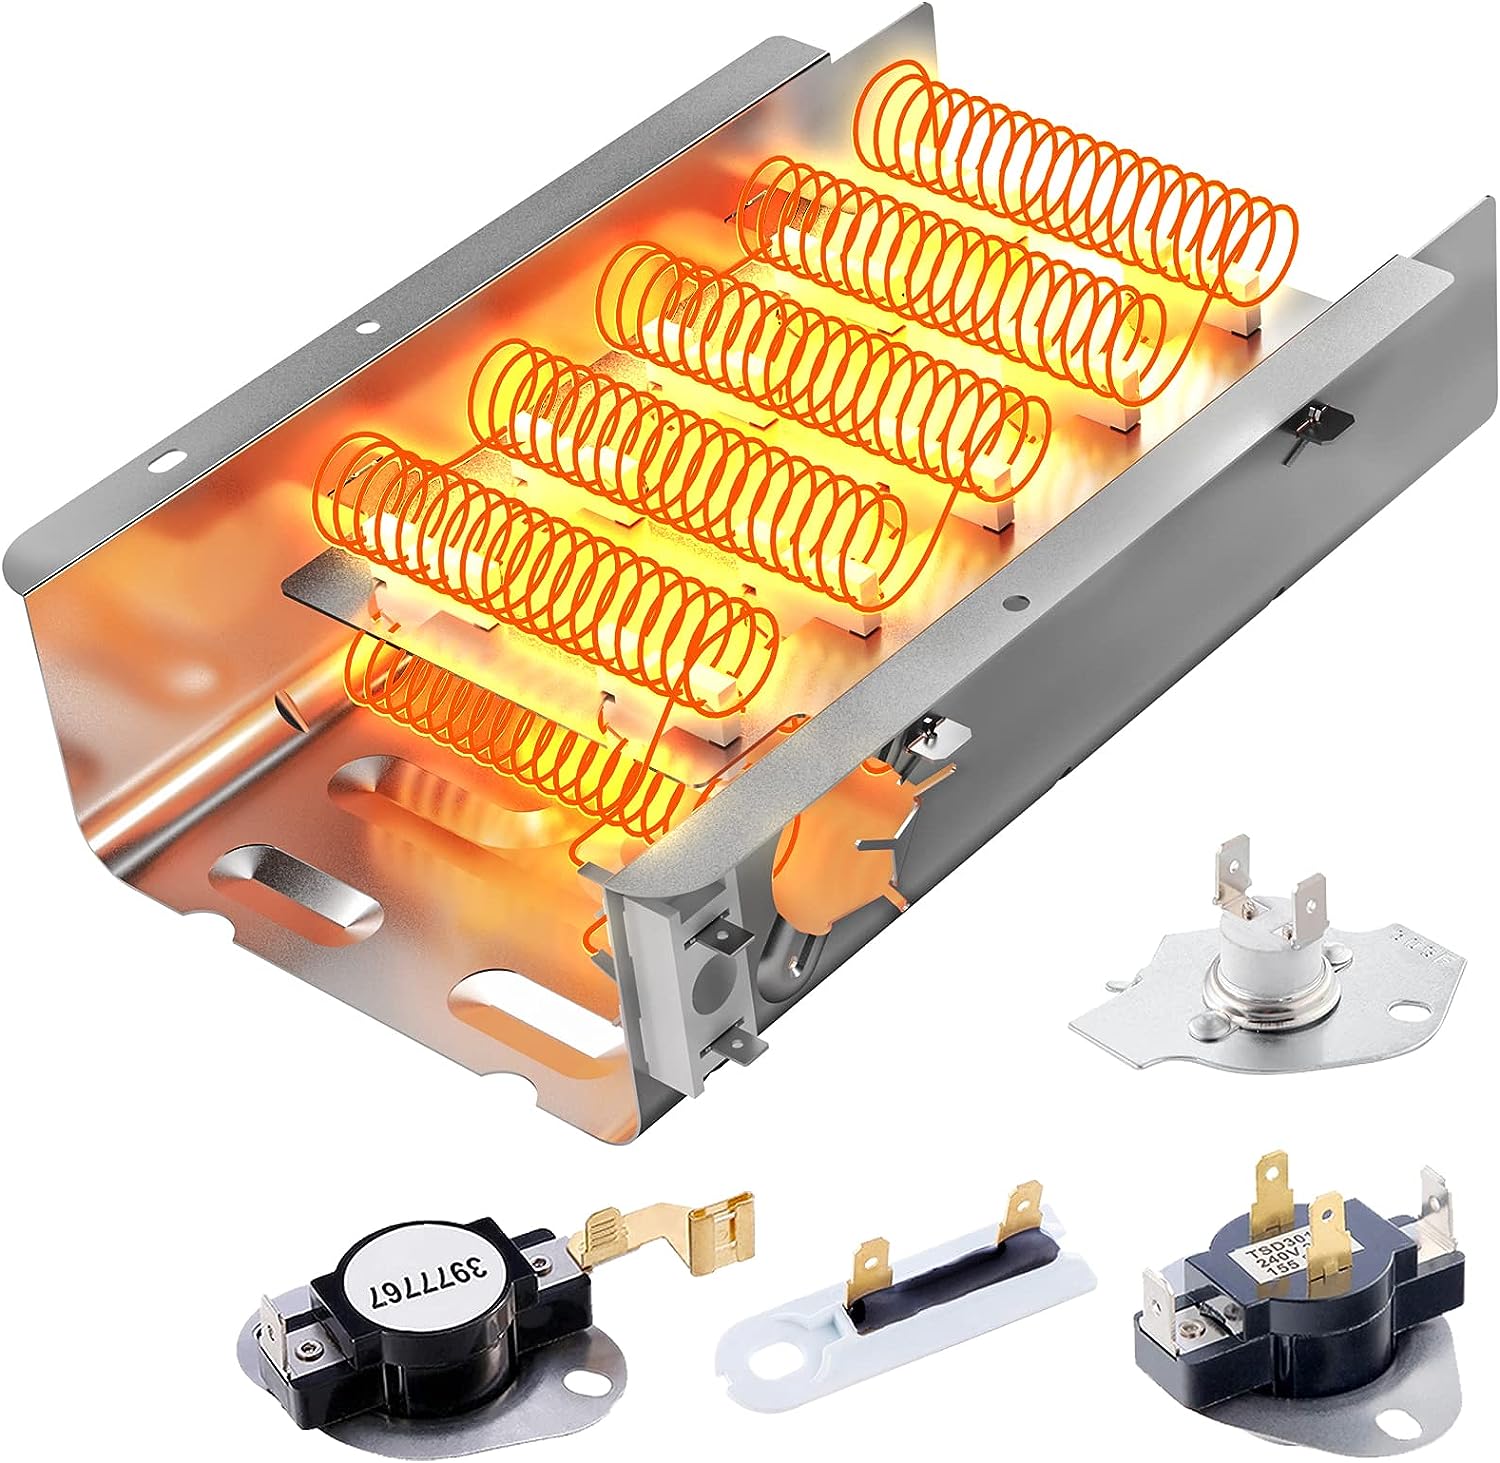
- Allow the dryer to run for a few minutes and monitor if the heating element is producing heat.
- Feel the air coming out of the dryer’s exhaust to check if it is getting hot. If the air is warm, it indicates that the new heating element is functioning properly.
- If the dryer is not producing heat or the air remains cold, double-check the connections of the new heating element to ensure they are properly secured. Also, make sure that the power supply is correctly connected.
- If you have confirmed that the connections are secure and the power supply is correct, but the dryer is still not heating, it may indicate a different issue. At this point, it is recommended to consult a professional technician for further diagnosis and repair.
- If everything is functioning as expected and the dryer is producing heat, congratulations! You have successfully replaced the heating element in your Maytag dryer.
Remember to always follow safety guidelines and use caution when testing the functionality of your dryer. If you encounter any issues or are unsure about the results, it is best to seek professional assistance for a more accurate diagnosis.
With your Maytag dryer now back in working condition, you can enjoy efficient and effective drying of your clothes once again. Always refer to your dryer’s manual and follow manufacturer instructions for routine maintenance to ensure its longevity and optimal performance.
Thank you for using our guide to replace the heating element in your Maytag dryer. We hope this step-by-step process has been helpful, and we wish you success in your DIY repair endeavors.
Conclusion
Congratulations on successfully replacing the heating element in your Maytag dryer! By following the step-by-step guide outlined in this article, you have taken the necessary steps to restore your dryer’s heating functionality and ensure efficient drying of your clothes.
We started by emphasizing the importance of safety precautions, including disconnecting the power supply and wearing protective gear. Safety should always be the top priority during any repair or maintenance task.
We then discussed the tools and materials required for the job, ensuring that you had everything you needed before starting the repair process.
Next, we provided a step-by-step guide to disconnect the power, remove the back panel, locate and test the heating element, remove the old heating element, install the new heating element, reassemble the dryer, and finally, test the dryer’s functionality.
By following each step carefully and paying attention to details, you have successfully completed the heating element replacement. It’s crucial to remember that if you encounter any issues or are unsure about the results during the testing phase, it’s best to consult a professional technician for further assistance.
Proper maintenance and regular inspection of your dryer can help prevent issues with the heating element in the future. Cleaning the lint trap and exhaust vent regularly will ensure optimal airflow and minimize the risk of lint buildup, contributing to the longevity of the heating element.
We hope this guide has empowered you to tackle a common appliance repair task on your own. However, if you’re ever uncomfortable or unsure about performing a repair, it’s always wise to seek the expertise of a professional technician.
Thank you for using our guide, and we wish you continued success in maintaining and repairing your Maytag dryer!
Fresh off learning how to replace your Maytag dryer's heating element, why not dive deeper into keeping your household in top shape? Maintaining your home isn't just about fixing appliances; it involves a whole range of activities that ensure everything runs smoothly and looks great. Whether you're new to homeownership or a seasoned pro, knowing which tasks to tackle can save you time and money. Ready to keep your living space in prime condition? Check out our guide on essential home upkeep.
Frequently Asked Questions about How To Replace Maytag Dryer Heating Element
Was this page helpful?
At Storables.com, we guarantee accurate and reliable information. Our content, validated by Expert Board Contributors, is crafted following stringent Editorial Policies. We're committed to providing you with well-researched, expert-backed insights for all your informational needs.


0 thoughts on “How To Replace Maytag Dryer Heating Element”