Articles
How To Change A Dryer Plug
Modified: March 2, 2024
Learn how to change a dryer plug with this helpful step-by-step guide. Find all the information and tips you need in this comprehensive article.
(Many of the links in this article redirect to a specific reviewed product. Your purchase of these products through affiliate links helps to generate commission for Storables.com, at no extra cost. Learn more)
Introduction
Changing a dryer plug is a common task that many homeowners may need to handle at some point. Whether you’re moving to a new home with a different electrical setup or simply need to replace a damaged plug, knowing how to change a dryer plug is a useful skill to have.
In this article, we will guide you through the step-by-step process of changing a dryer plug. We’ll cover the tools and materials you’ll need, as well as provide detailed instructions on how to safely disconnect and reconnect the plug. By the end of this article, you’ll have the knowledge and confidence to tackle this DIY task with ease.
Before we dive into the process, it’s important to note that working with electrical components can be dangerous if not done properly. If you’re unsure or uncomfortable with any step in the process, it’s always best to consult a qualified electrician.
With that said, let’s get started!
Key Takeaways:
- Changing a dryer plug requires the right tools, careful inspection of wiring, and testing the new connection. Prioritize safety and follow the step-by-step guide for a successful DIY project.
- By following the detailed instructions in this article, homeowners can confidently change a dryer plug, saving time and money. Always consult a professional if unsure or uncomfortable with any step.
Read more: How To Wire A Dryer Plug
Tools and Materials Needed
Before you begin changing a dryer plug, make sure you have the following tools and materials ready:
- Screwdriver set: You’ll need a screwdriver with the appropriate size and type of screwdriver head for the screws on your dryer plug.
- Wire cutters/strippers: These will be necessary for cutting and stripping the wires when connecting the new dryer plug.
- Electrical tape: This will help secure and insulate the wires once they’re connected to the new plug.
- Voltage tester: A voltage tester is crucial for ensuring the power is completely turned off before you begin working on the dryer plug.
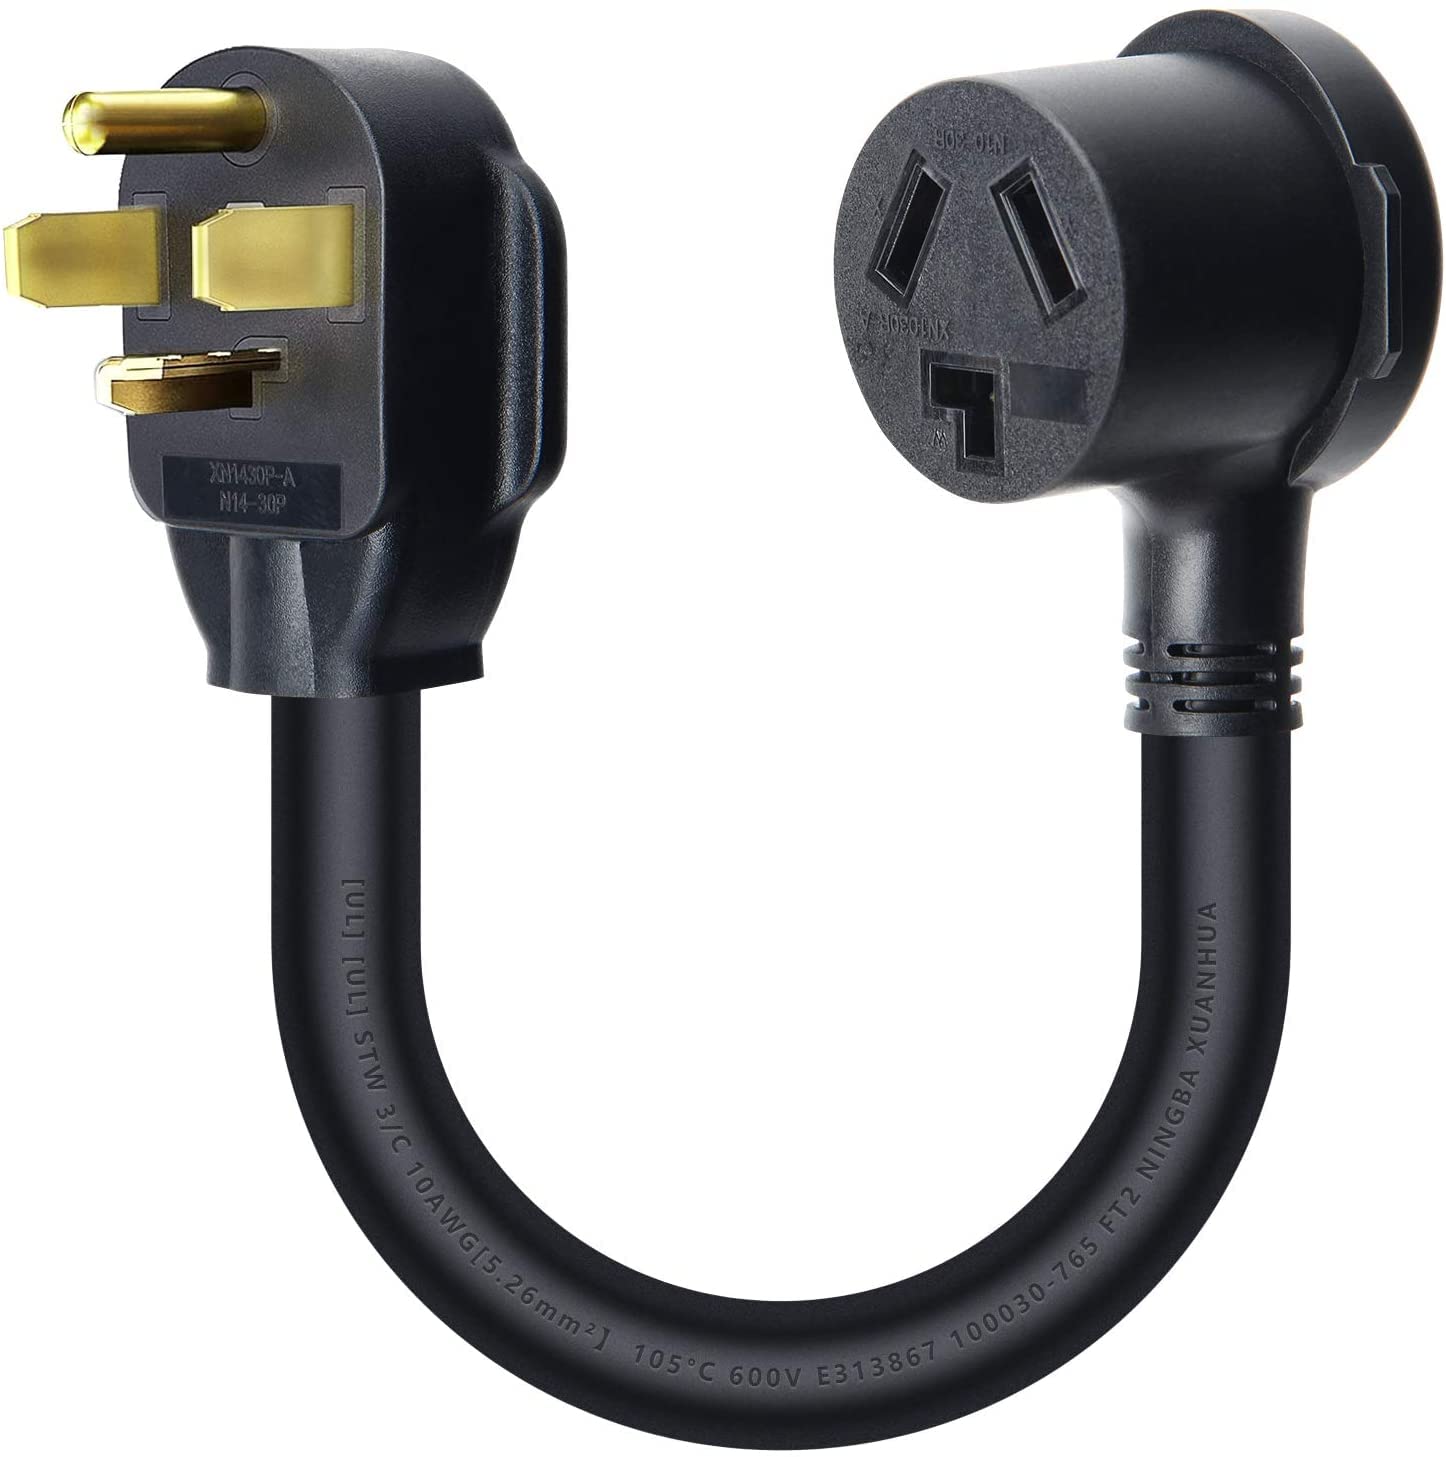
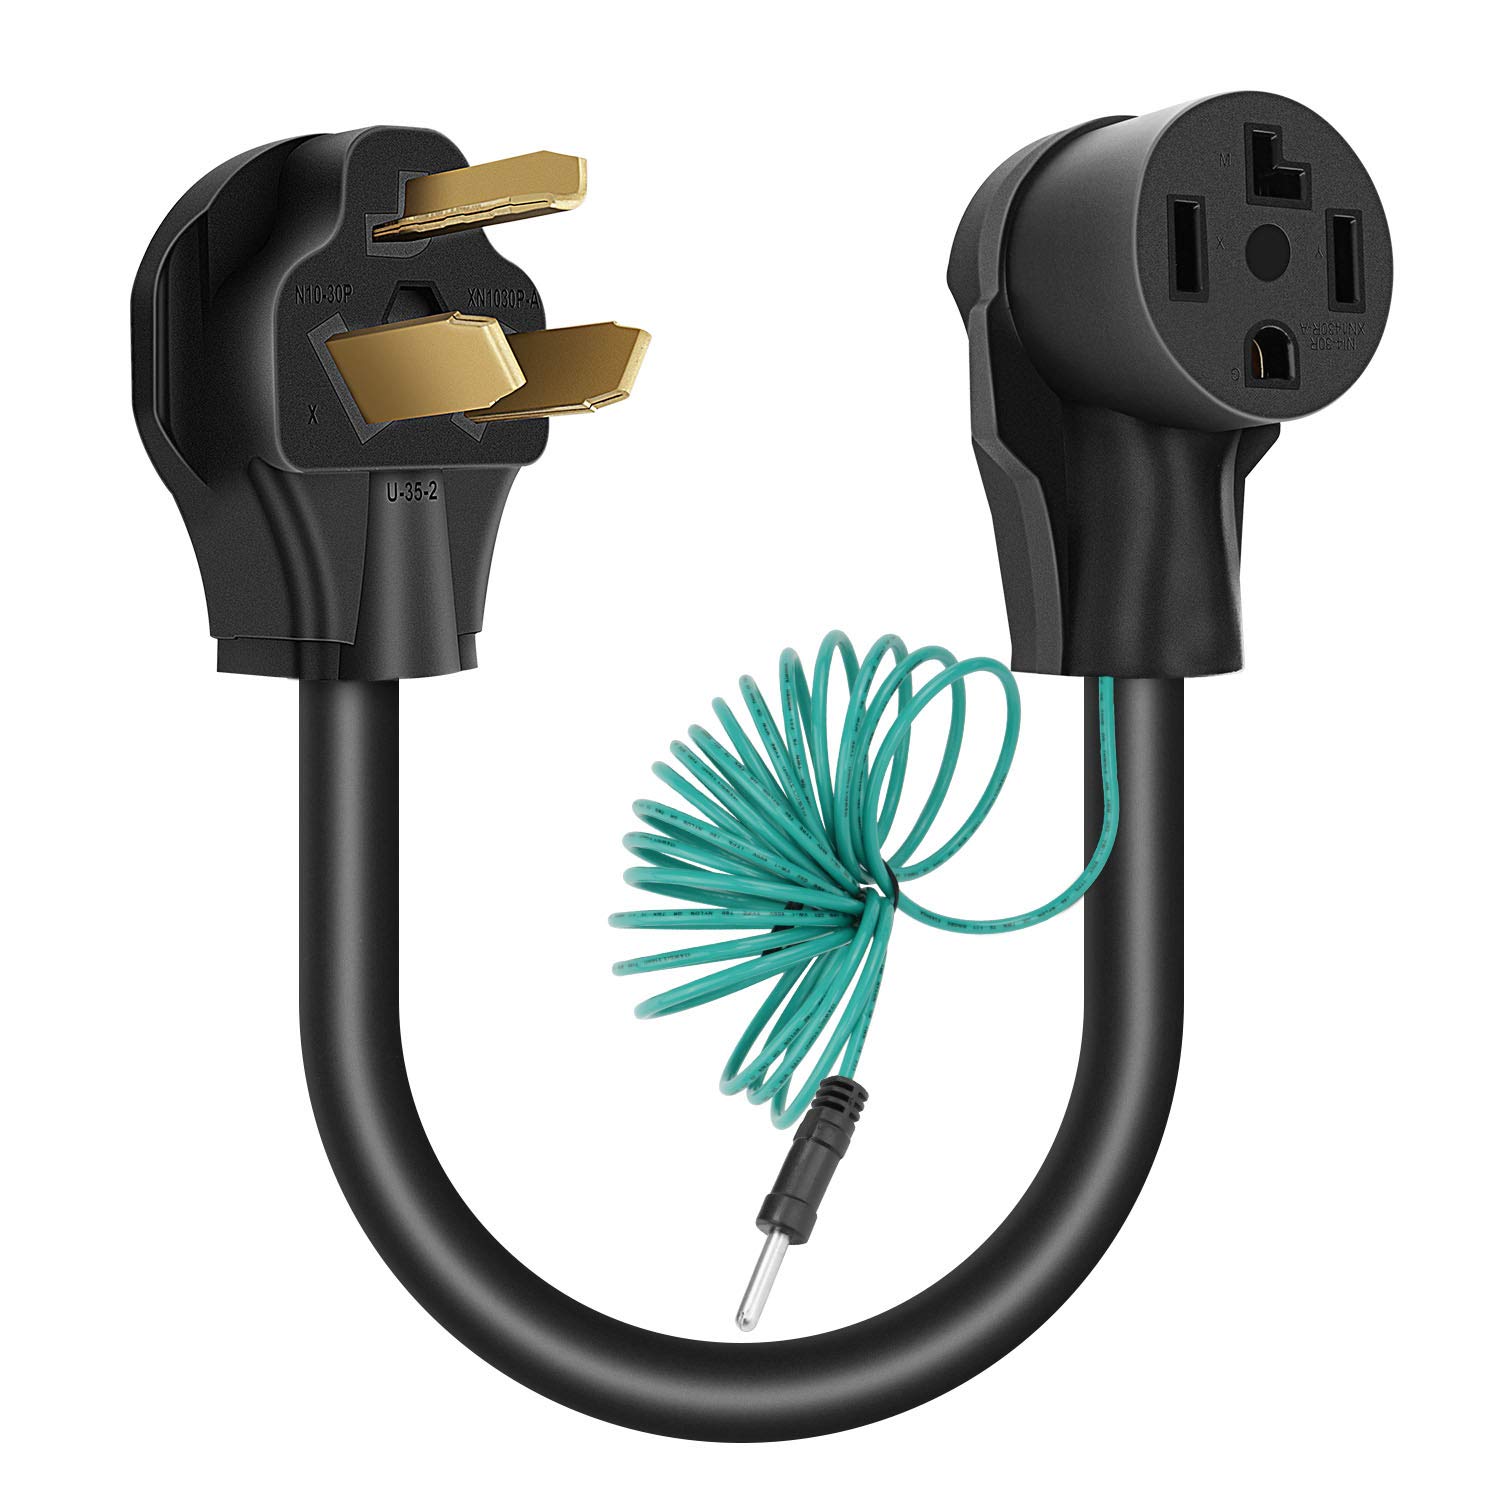
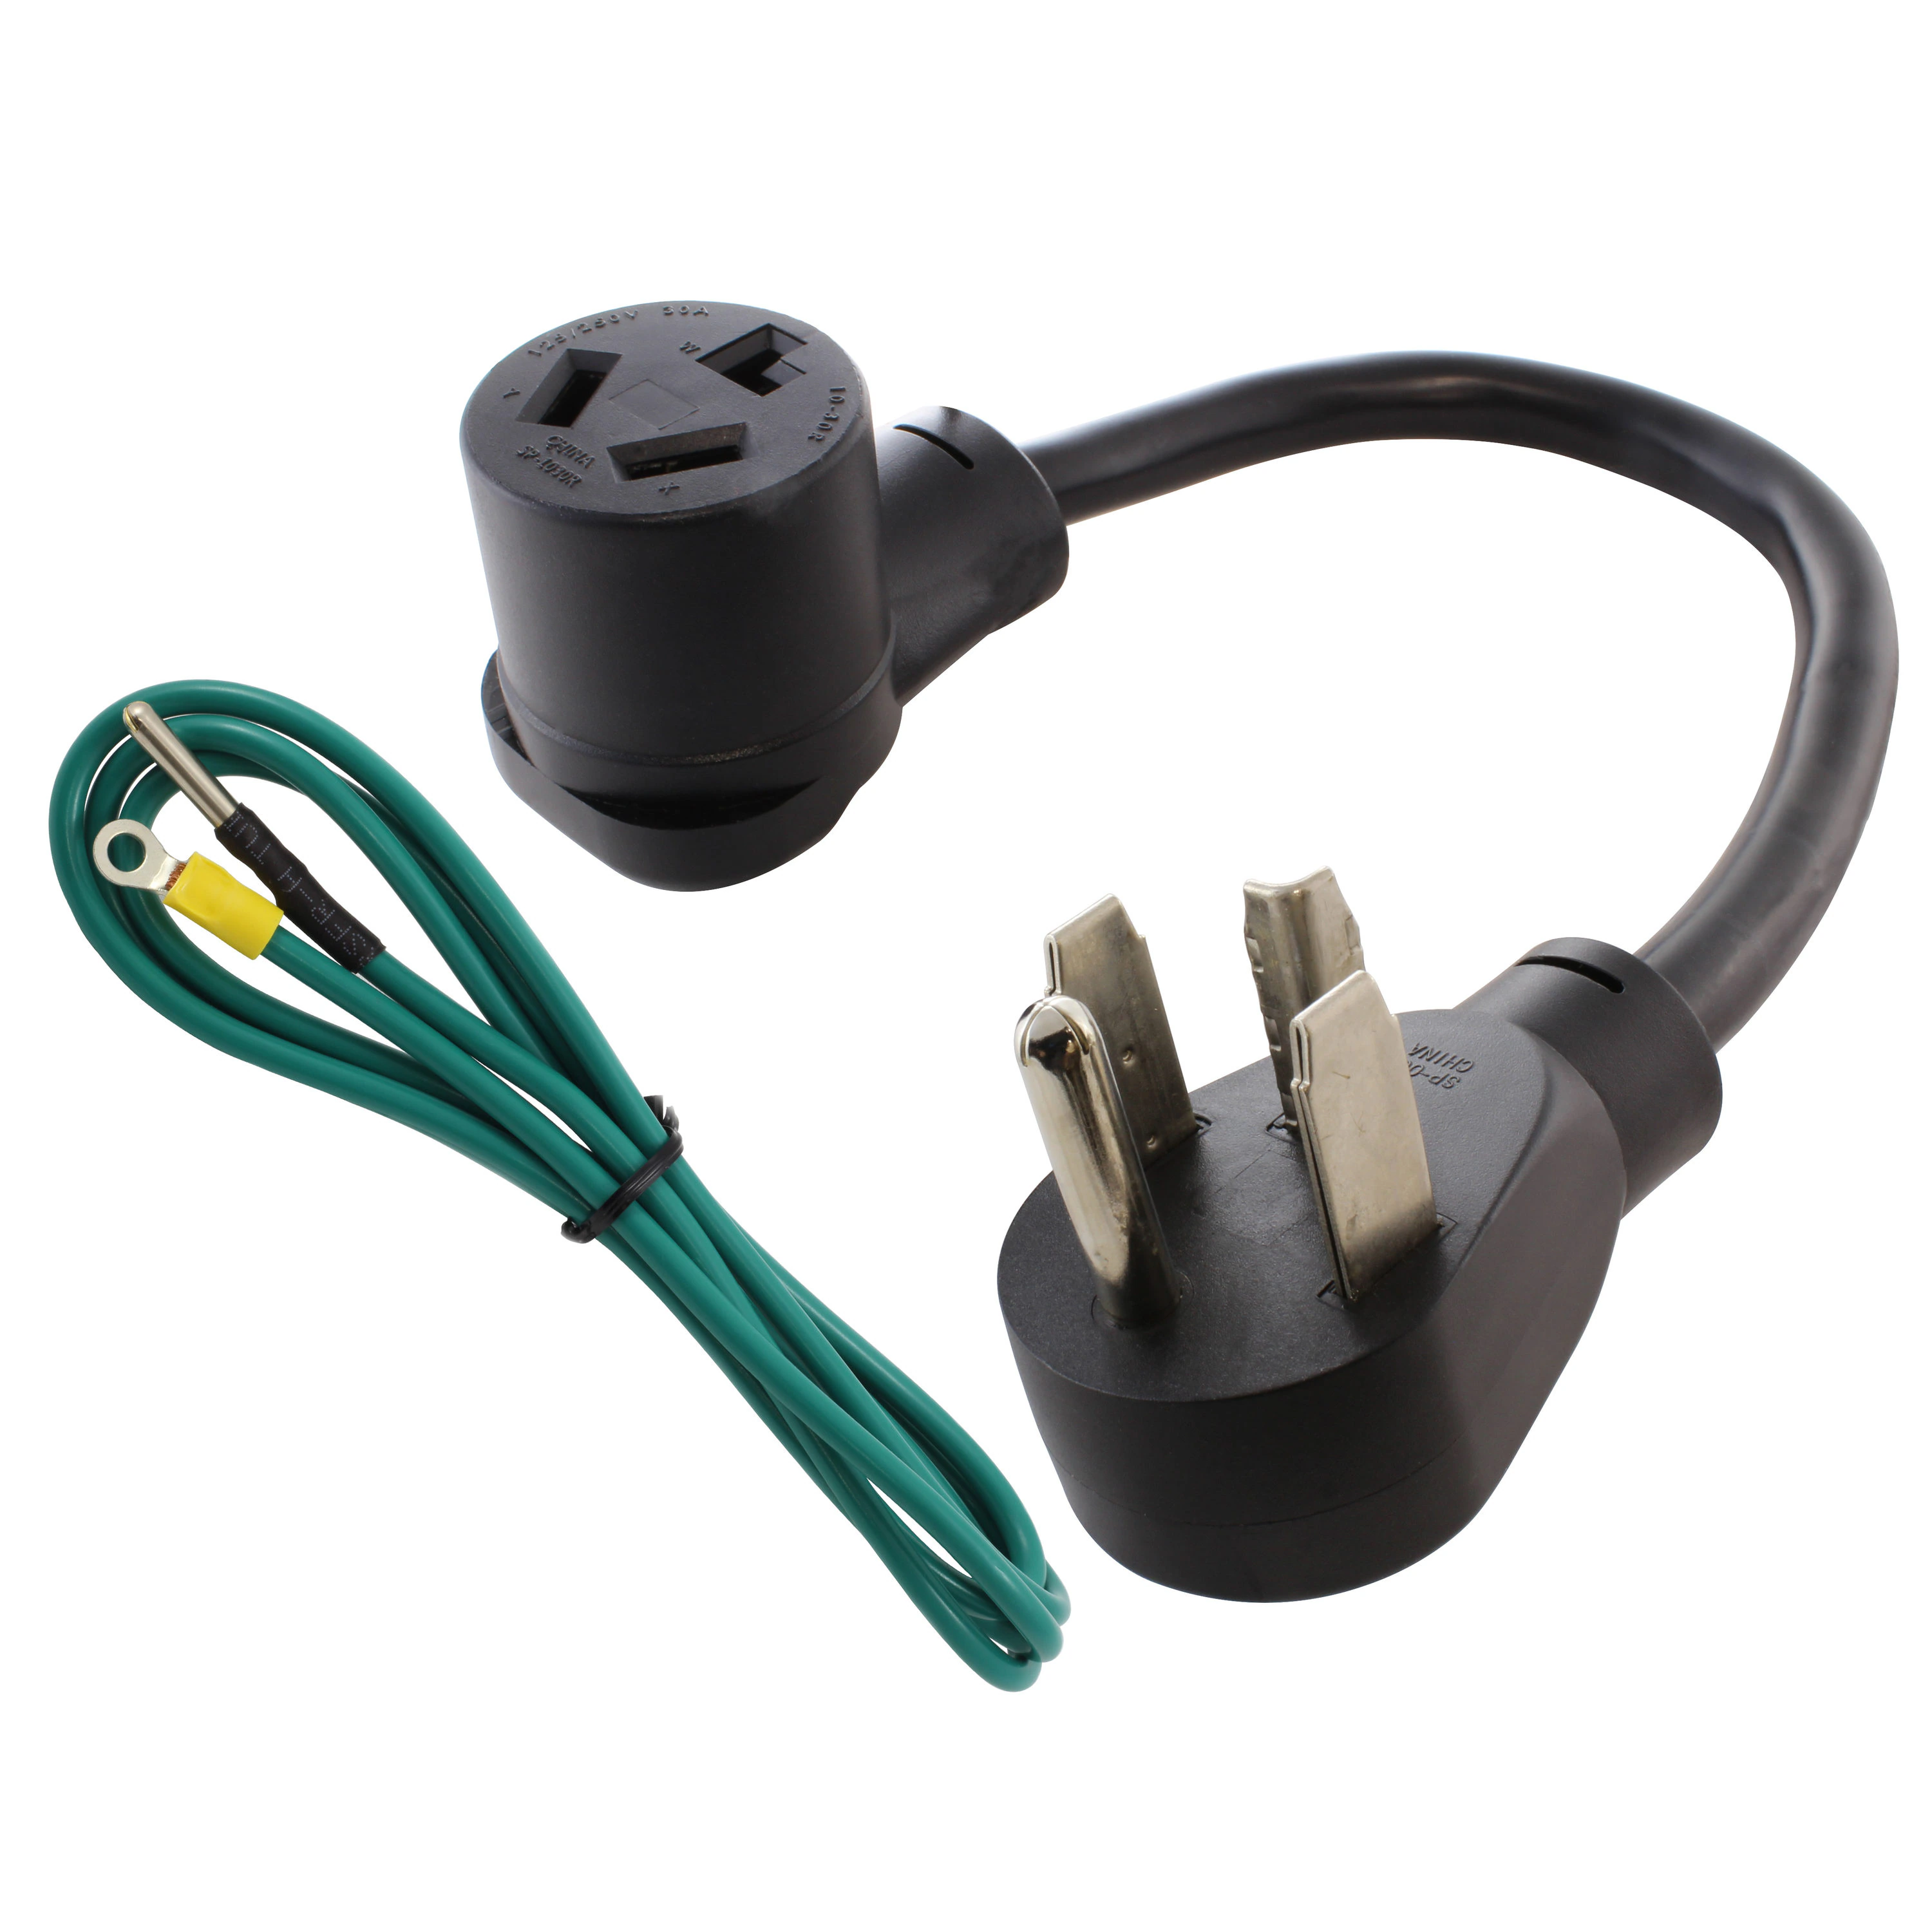
- New dryer plug: You’ll need to purchase a new dryer plug that matches the electrical requirements of your dryer and the outlet.
- Wire nuts: These will be used to securely connect the wires to the new dryer plug.
It’s important to note that the specific tools and materials needed may vary depending on the type and model of your dryer and the type of wiring setup in your home. Always consult the manufacturer’s instructions or a qualified professional if you are unsure about which tools and materials are required for your specific situation.
Once you’ve gathered all the necessary tools and materials, you’ll be ready to proceed with changing the dryer plug.
Step 1: Turn off the power
Before you can start working on changing the dryer plug, it’s crucial to ensure that the power to the dryer is completely turned off. This step is essential for your safety, as working with live electrical components can be dangerous.
Follow these steps to turn off the power:
- Locate the electrical panel or circuit breaker box in your home. This is typically found in the basement, utility room, or garage.
- Open the panel or circuit breaker box to access the breakers or fuses.
- Locate the breaker or fuse that controls the power to the dryer circuit. This may be labeled or identified as the “dryer” or “laundry” circuit.
- Switch off the breaker or remove the fuse that corresponds to the dryer circuit. This will cut off the power supply to the dryer.
- Double-check that the power is off by attempting to turn on the dryer. If it doesn’t power on or display any signs of electrical activity, you have successfully turned off the power.
It’s important to remember that some homes may have multiple panels or sub-panels, so make sure you turn off the appropriate breaker or remove the correct fuse for the dryer circuit.
Additionally, it’s a good practice to put a note or a small lock on the breaker or fuse box to indicate that you are working on the circuit. This will help prevent someone from accidentally turning the power back on while you’re working.
Once you have confirmed that the power is off, you can safely proceed to the next step of changing the dryer plug.
Step 2: Remove the old dryer plug
With the power safely turned off, it’s time to remove the old dryer plug. Follow these steps:
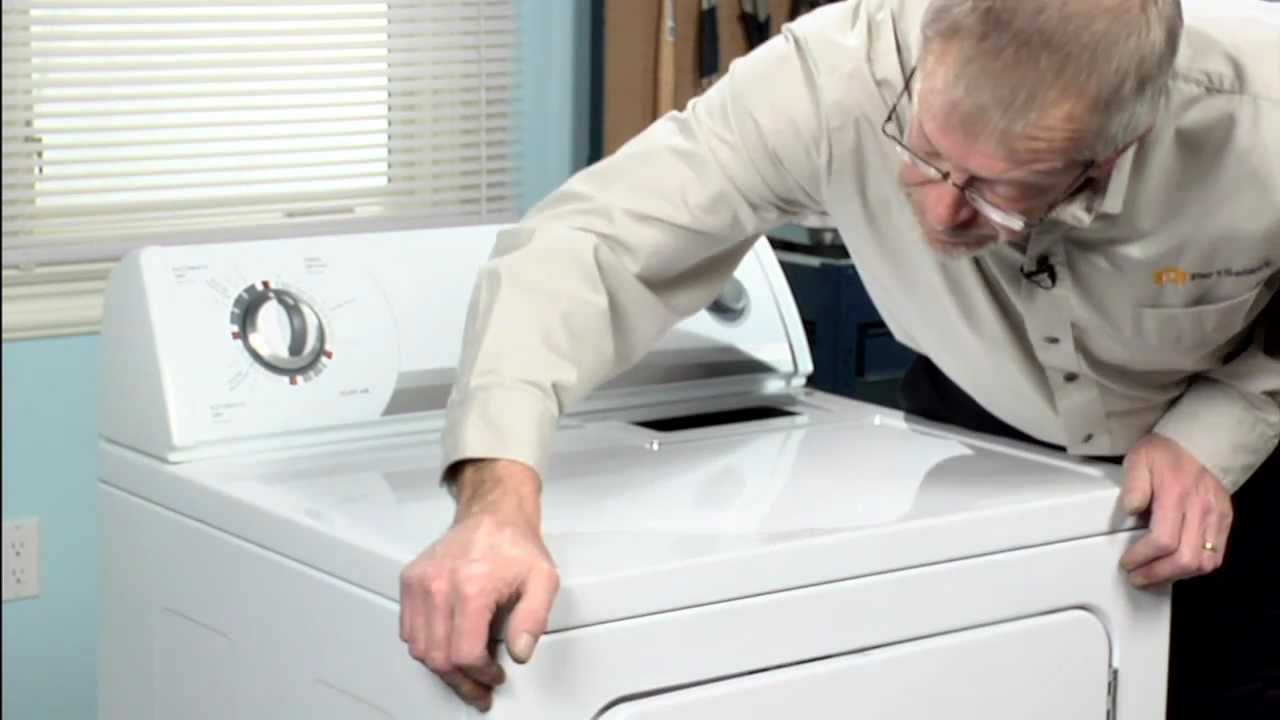
- Locate the back panel of your dryer where the plug is connected. This is usually at the bottom or near the bottom of the dryer.
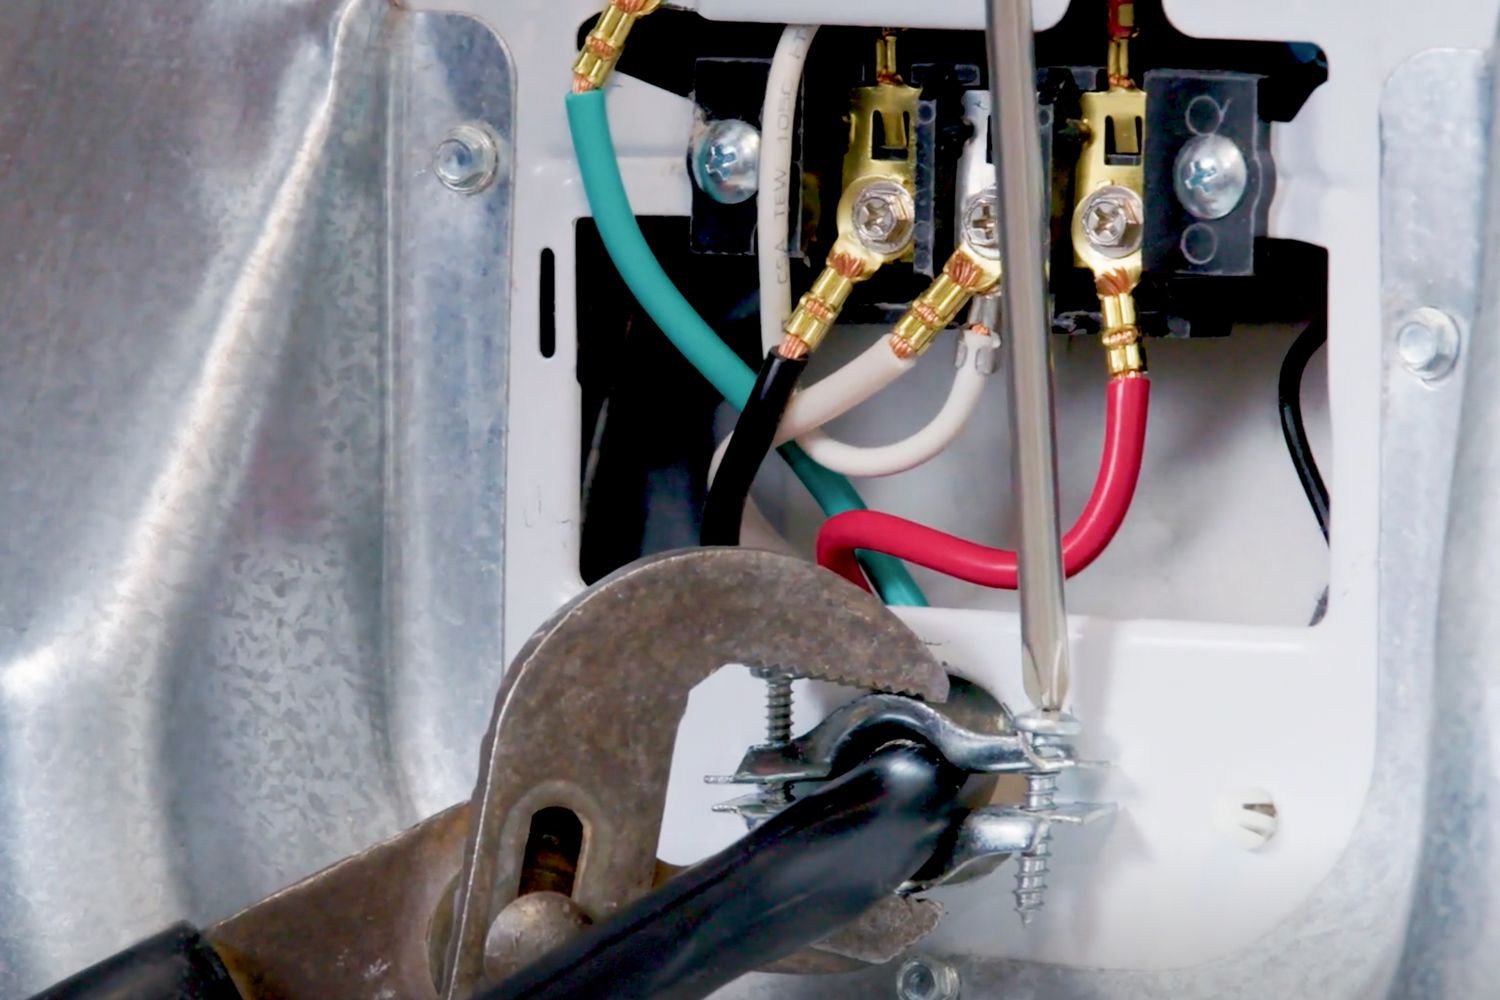
- Using the appropriate screwdriver, remove the screws that secure the dryer plug cover or access panel. Set the screws aside in a safe place.
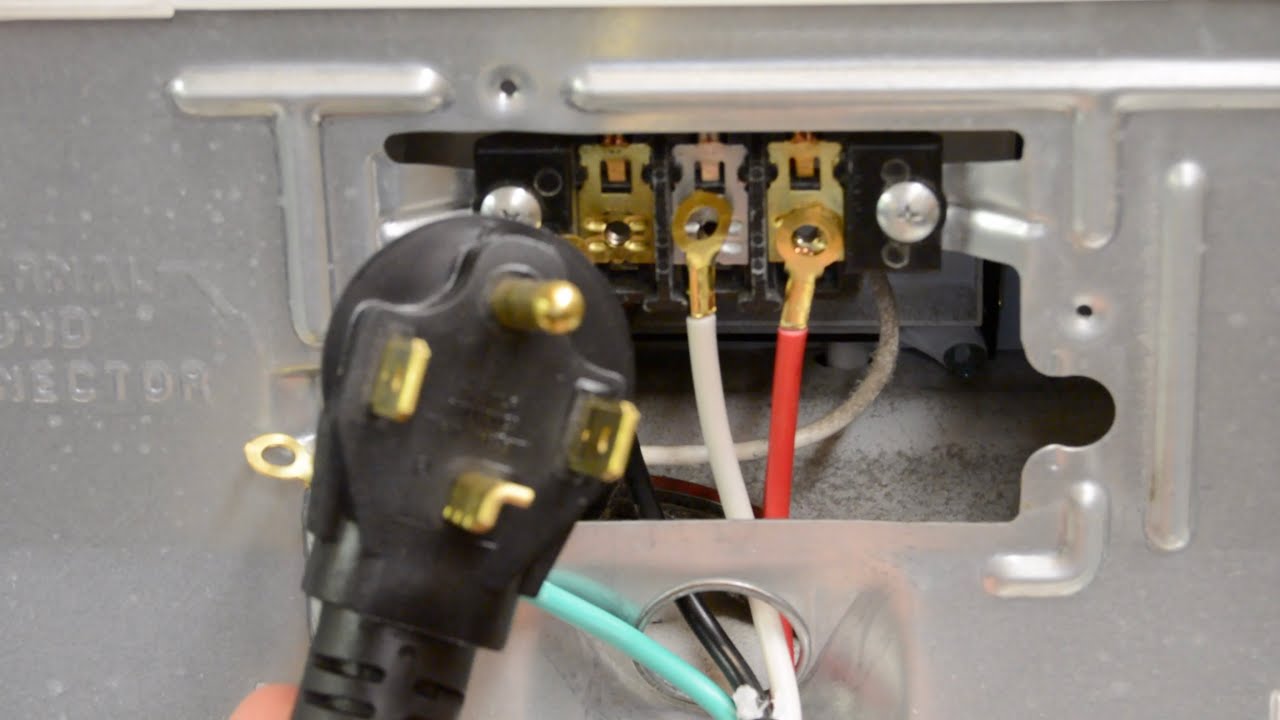
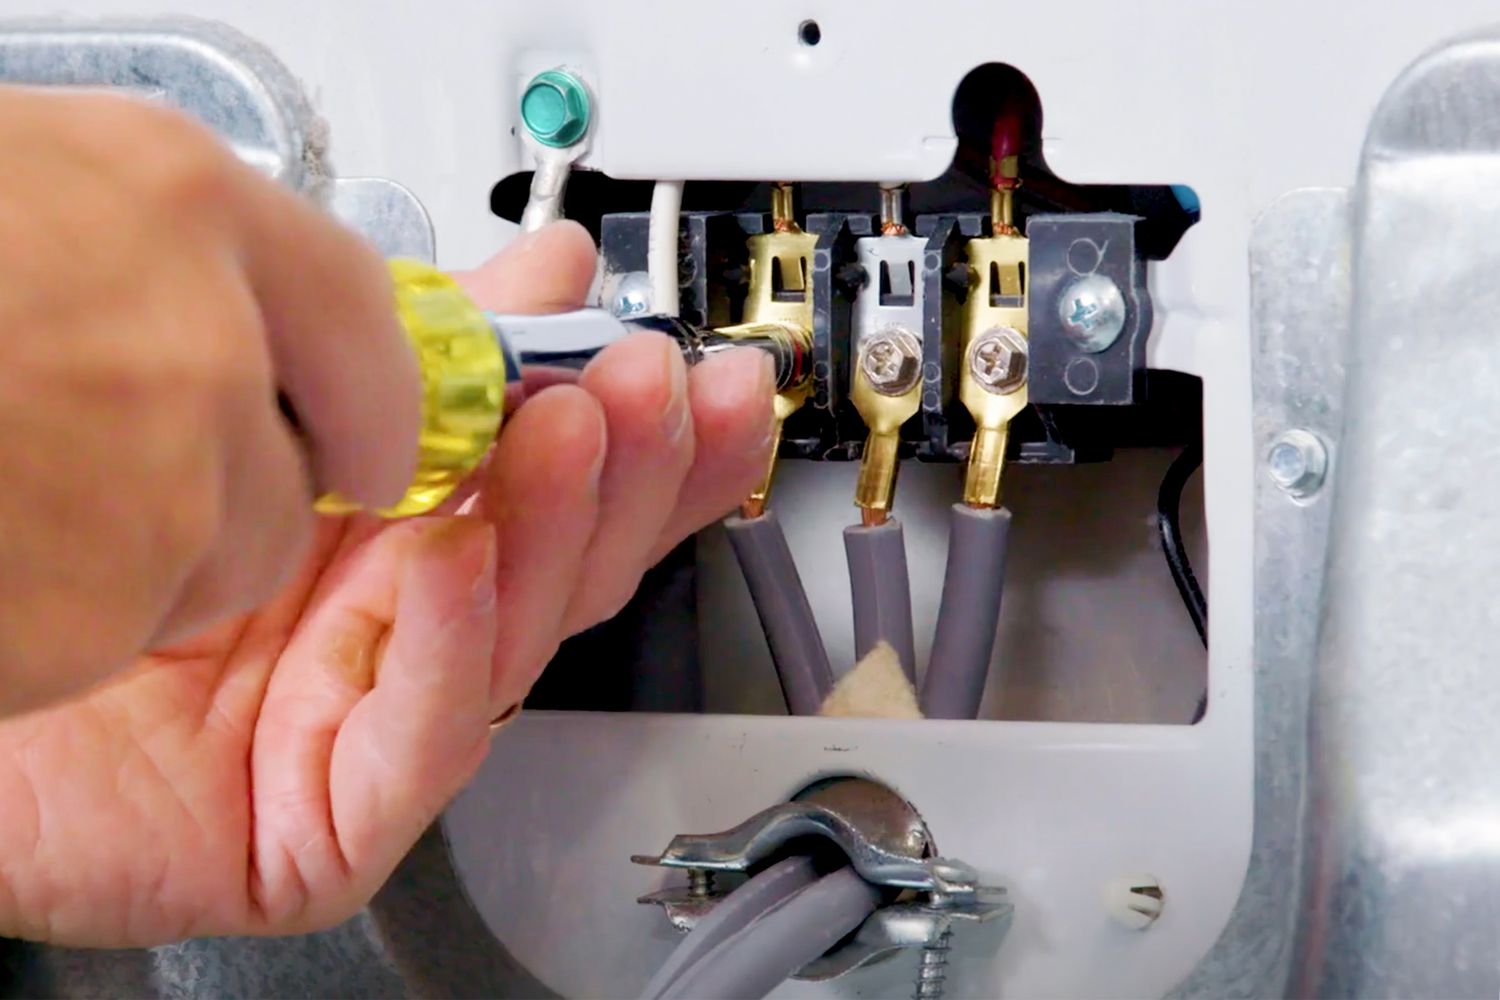
- Gently pull the cover or panel off to expose the wiring and the terminals of the dryer plug. Take note of how the wires are connected.
- Inspect the wires for any signs of damage, such as fraying or discoloration. If you notice any damage, it’s important to replace the wires along with the plug.
- Using the wire cutters or wire strippers, carefully remove the wires from the terminals of the old dryer plug. Take note of which wire was connected to each terminal.
- Once the wires are disconnected, set the old dryer plug aside.
Make sure to handle the old dryer plug with care, as it may have sharp edges or contain residual electrical charge. If you notice any signs of damage or wear, it’s best to replace the entire plug rather than reusing the old one.
By removing the old dryer plug, you’ve completed an essential step in the process of changing the plug. Next, we’ll move on to inspecting the wiring before installing the new dryer plug.
When changing a dryer plug, make sure to turn off the power at the circuit breaker before starting. Use a voltage tester to ensure the power is off before handling the wires.
Step 3: Inspect the wiring
After removing the old dryer plug, it’s important to inspect the wiring to ensure it is in good condition. This step is crucial for the safe installation of the new dryer plug. Follow these steps:
- Thoroughly examine the wires that were connected to the old dryer plug. Look for any signs of damage, such as fraying, melting, or exposed copper.
- If you notice any damaged wires, it’s important to replace them with new ones. Cut off the damaged portion of the wire using wire cutters, making sure to leave enough length to connect to the new dryer plug.
- Using wire strippers, carefully strip off about half an inch of insulation from the end of each wire. This will expose the copper conductors.
- Inspect the copper conductors for any signs of corrosion or discoloration. If there are any issues, it’s best to replace the entire wire to ensure a secure connection.
- Ensure that the wires are clean, with no debris or dirt on them. You can use a wire brush or a clean cloth to gently clean the copper conductors if needed.
Properly inspecting the wiring is crucial for the safe and effective connection of the new dryer plug. If you have any doubts about the condition of the wires, it’s best to replace them to avoid potential electrical hazards.
Once you have inspected the wiring and ensured its good condition, you’re ready to move on to the next step: installing the new dryer plug.
Read more: How To Change Name Of Smart Plug On Alexa
Step 4: Install the new dryer plug
Now that you have inspected the wiring and ensured its good condition, it’s time to install the new dryer plug. Follow these steps:
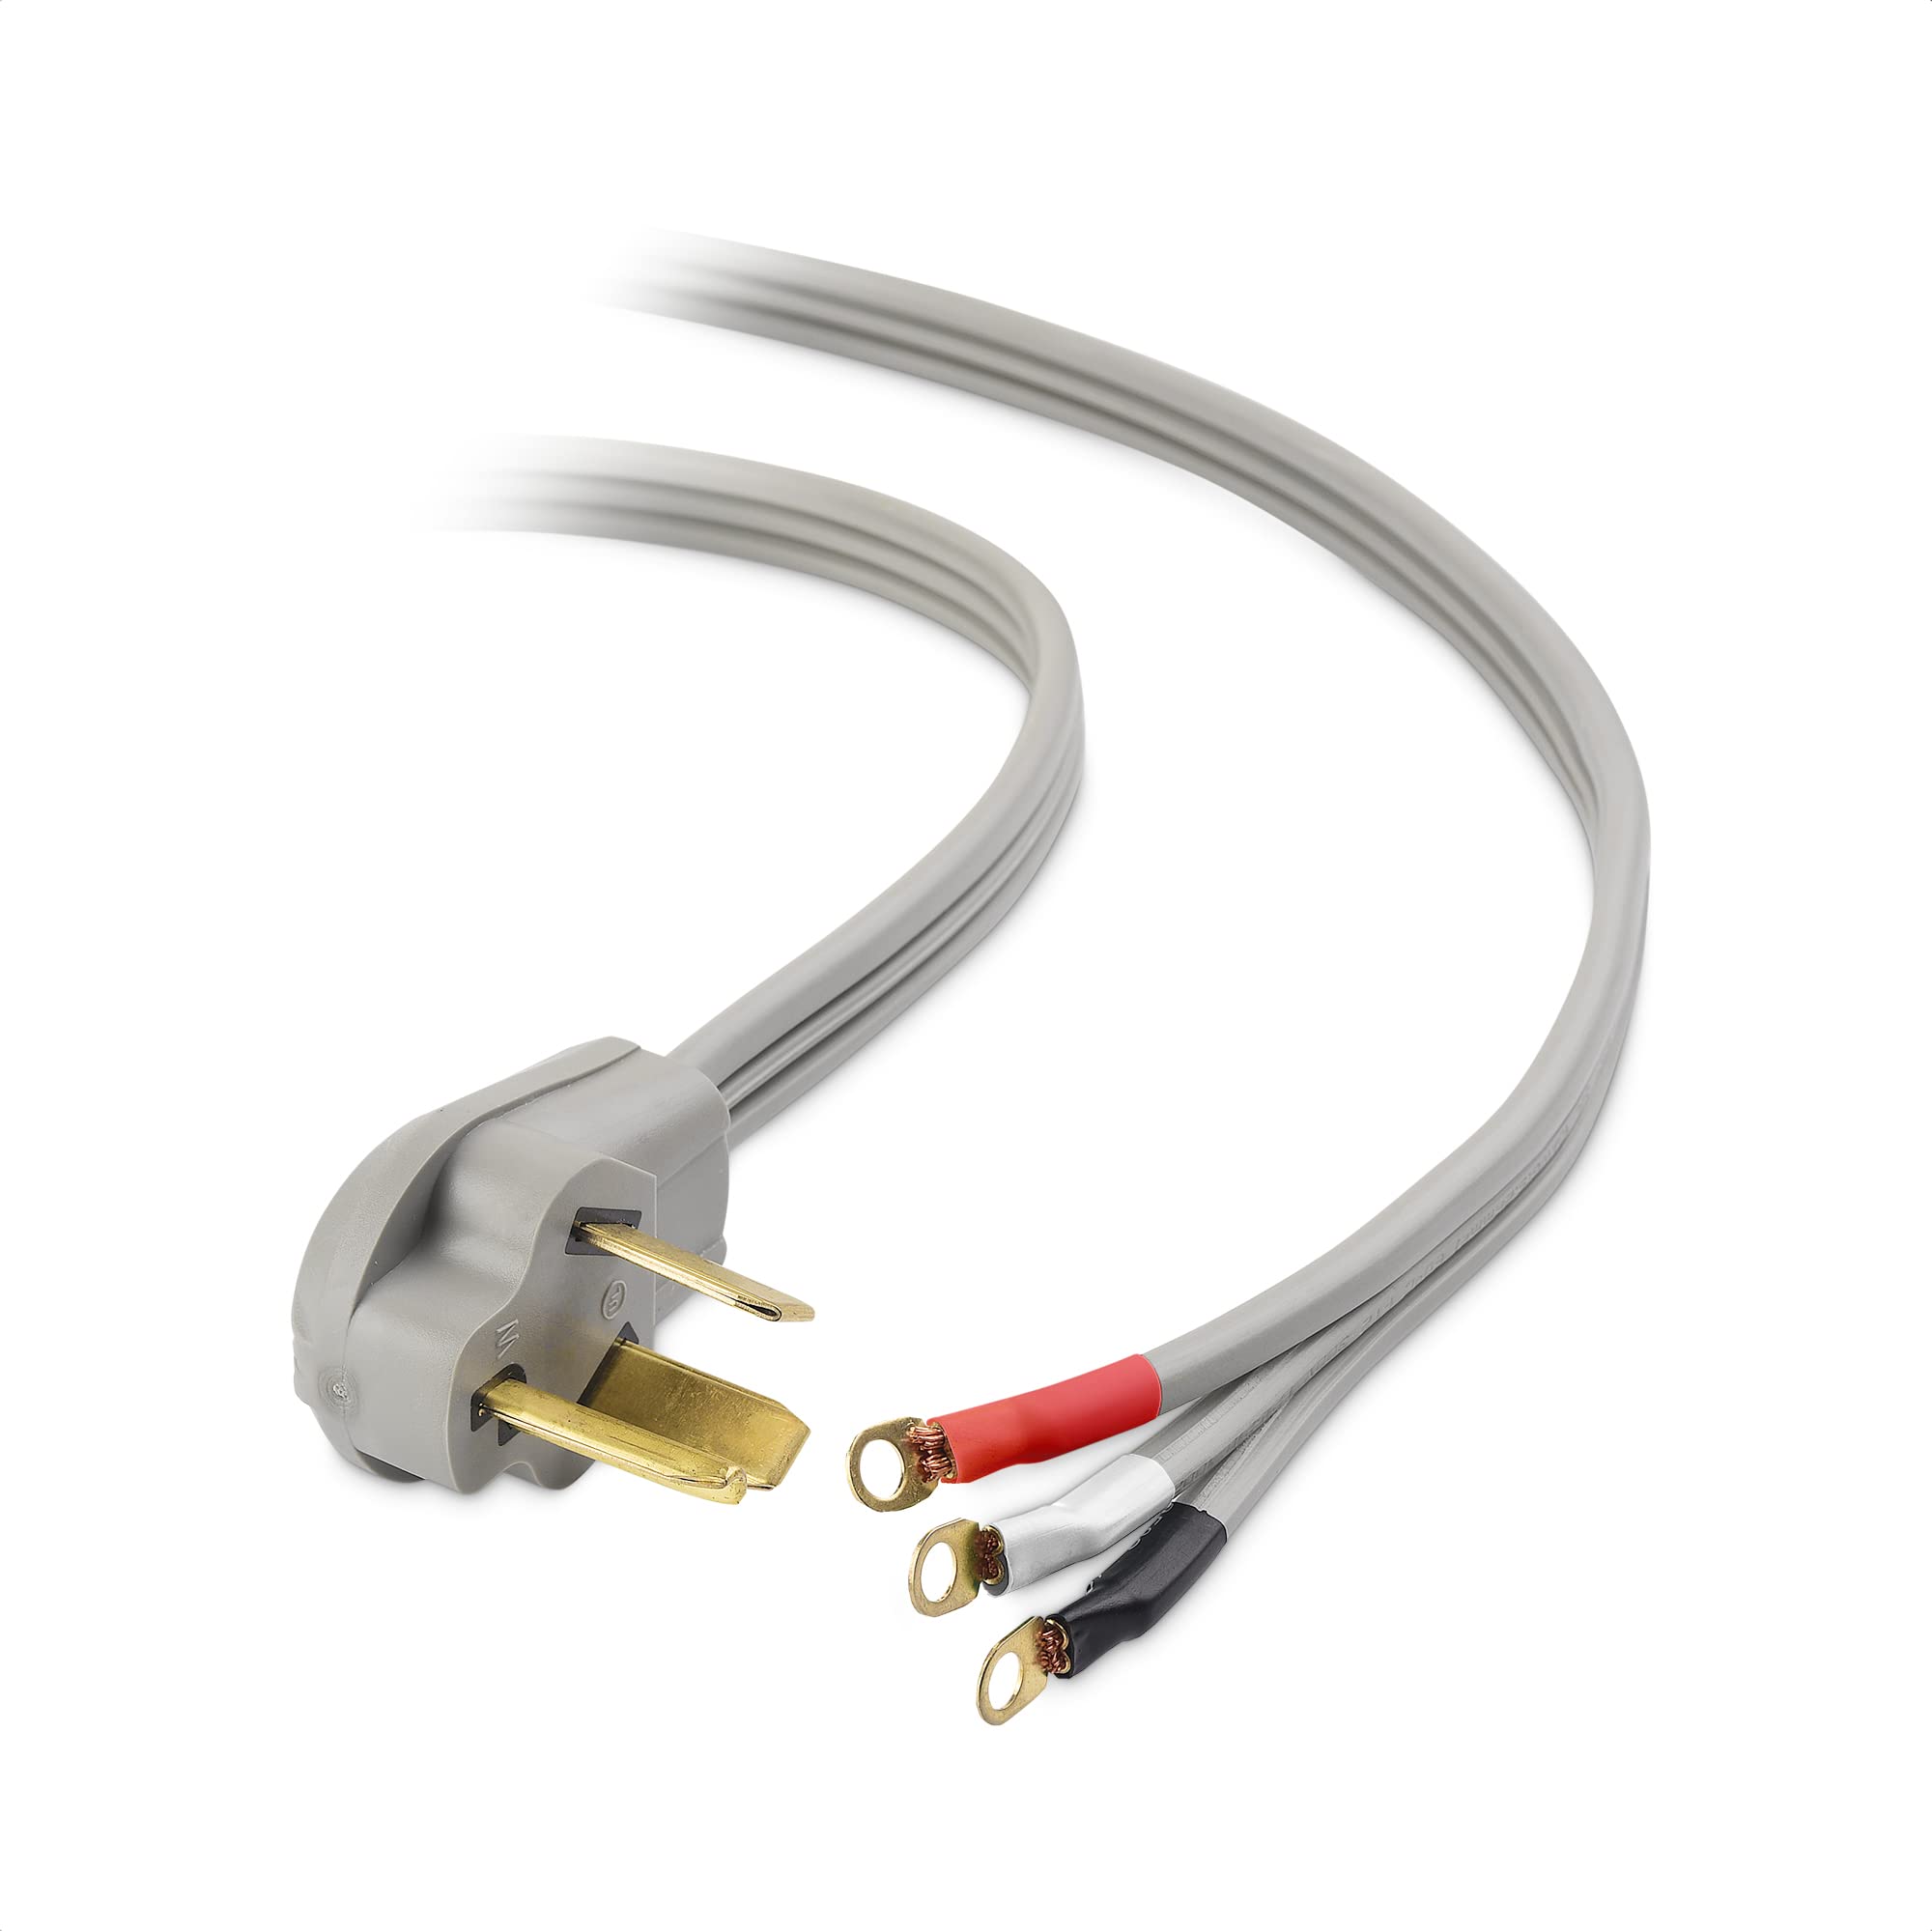
- Take the new dryer plug and identify the different terminals labeled “L” (for hot), “N” (for neutral), and “G” or a grounding symbol (for ground).
- Refer to your dryer’s manufacturer instructions or research the appropriate wiring configuration for your specific dryer model. This information will specify which color wire connects to each terminal.
- Take the stripped end of the wire that was originally connected to the “L” terminal on the old dryer plug.
- Insert the stripped end of the wire into the corresponding terminal on the new dryer plug, usually labeled “L.” Use a wire nut to securely fasten the wire to the terminal.
- Repeat this process with the remaining wires, connecting the stripped ends to the appropriate terminals on the new dryer plug (neutral to “N” and ground to “G”). Always use wire nuts to ensure a secure connection.
- Once all the wires are securely connected, make sure they are arranged neatly and do not touch each other or any metal parts of the dryer.
It’s important to follow the wiring configuration specified by your dryer manufacturer to ensure compatibility and safety. If you are unsure about the wiring, it’s best to consult a professional or the manufacturer for guidance.
By successfully installing the new dryer plug, you’re one step closer to completing the process. In the next step, we’ll test the dryer plug to ensure it’s functioning correctly.
Step 5: Test the dryer plug
After installing the new dryer plug, it’s important to test it to ensure the connection is secure and the dryer is receiving power. Follow these steps to test the dryer plug:
- Double-check that the power to the dryer is still turned off at the circuit breaker or fuse box.
- Move the dryer away from the wall to provide access to the plug and outlet.
- Take the plug of the dryer and firmly insert it into the new dryer plug outlet.
- Make sure the plug is inserted all the way and is secure. Ensure the plug and outlet match in terms of shape and configuration.
- Turn on the power to the dryer at the circuit breaker or replace the fuse.
- With caution, turn on the dryer and select a low heat setting. Listen for any unusual sounds or observe any sparks or smoke.
- Allow the dryer to run for a few minutes to ensure it’s operating properly and producing heat.
- Check the dryer’s control panel or display to ensure it’s receiving power and functioning correctly.
If the dryer turns on, heats up, and operates as expected, then the new dryer plug is functioning correctly. However, if you notice any issues or if the dryer does not turn on, it’s important to turn off the power and double-check the wiring connections.
If you encounter any problems during the testing process or are unsure about the functionality of the dryer plug, it’s advisable to seek assistance from a professional electrician.
By testing the new dryer plug, you can ensure that your dryer is safely and reliably connected to the power supply.
Conclusion
Changing a dryer plug is a task that may need to be done at some point for various reasons. By following the step-by-step guide provided in this article, you can successfully change a dryer plug with confidence and safety.
Remember to always prioritize safety when working with electrical components by turning off the power at the circuit breaker or fuse box before beginning any work. If you are unsure or uncomfortable with any step in the process, it is recommended to consult a qualified electrician.
Gathering the necessary tools and materials, turning off the power, removing the old dryer plug, inspecting the wiring, installing the new dryer plug, and testing the connection are all important steps to ensure a successful outcome and proper functioning of your dryer.
By following these instructions carefully, you can save time and money by avoiding the need to hire a professional for this relatively simple task. However, it’s important to note that every dryer and electrical setup may vary, so always refer to the manufacturer’s instructions or consult a professional if you have any concerns or questions.
We hope this guide has provided you with the knowledge and confidence to change a dryer plug effectively. Remember to prioritize safety and take your time during each step. By doing so, you’ll be able to enjoy a properly functioning dryer in no time.
Frequently Asked Questions about How To Change A Dryer Plug
Was this page helpful?
At Storables.com, we guarantee accurate and reliable information. Our content, validated by Expert Board Contributors, is crafted following stringent Editorial Policies. We're committed to providing you with well-researched, expert-backed insights for all your informational needs.


0 thoughts on “How To Change A Dryer Plug”