
Articles
How To Use Electric Power Washer
Modified: October 31, 2024
Learn how to use an electric power washer with our insightful articles. Discover tips and tricks to make your cleaning tasks easier and more efficient.
(Many of the links in this article redirect to a specific reviewed product. Your purchase of these products through affiliate links helps to generate commission for Storables.com, at no extra cost. Learn more)
Introduction
Welcome to the world of electric power washers! Whether you’re a homeowner looking to spruce up your outdoor space or a professional cleaner in need of a reliable tool, an electric power washer can be your best friend when it comes to outdoor cleaning tasks. In this article, we will explore the ins and outs of using an electric power washer effectively and safely.
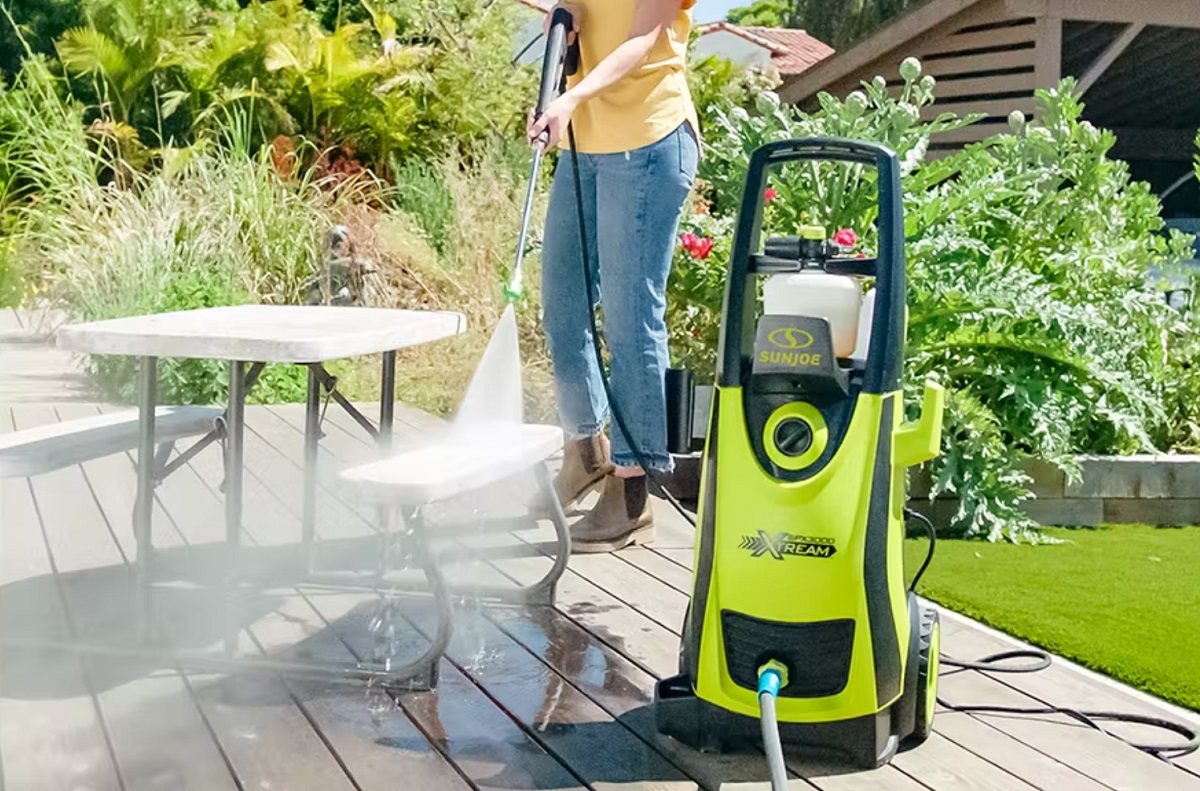
An electric power washer, also known as a pressure washer, is a versatile cleaning tool that uses high-pressure water to remove dirt, grime, stains, and debris from various surfaces. With the ability to deliver a powerful stream of water, electric power washers can tackle a wide range of cleaning tasks, including cleaning decks, driveways, sidewalks, patio furniture, vehicles, and more.
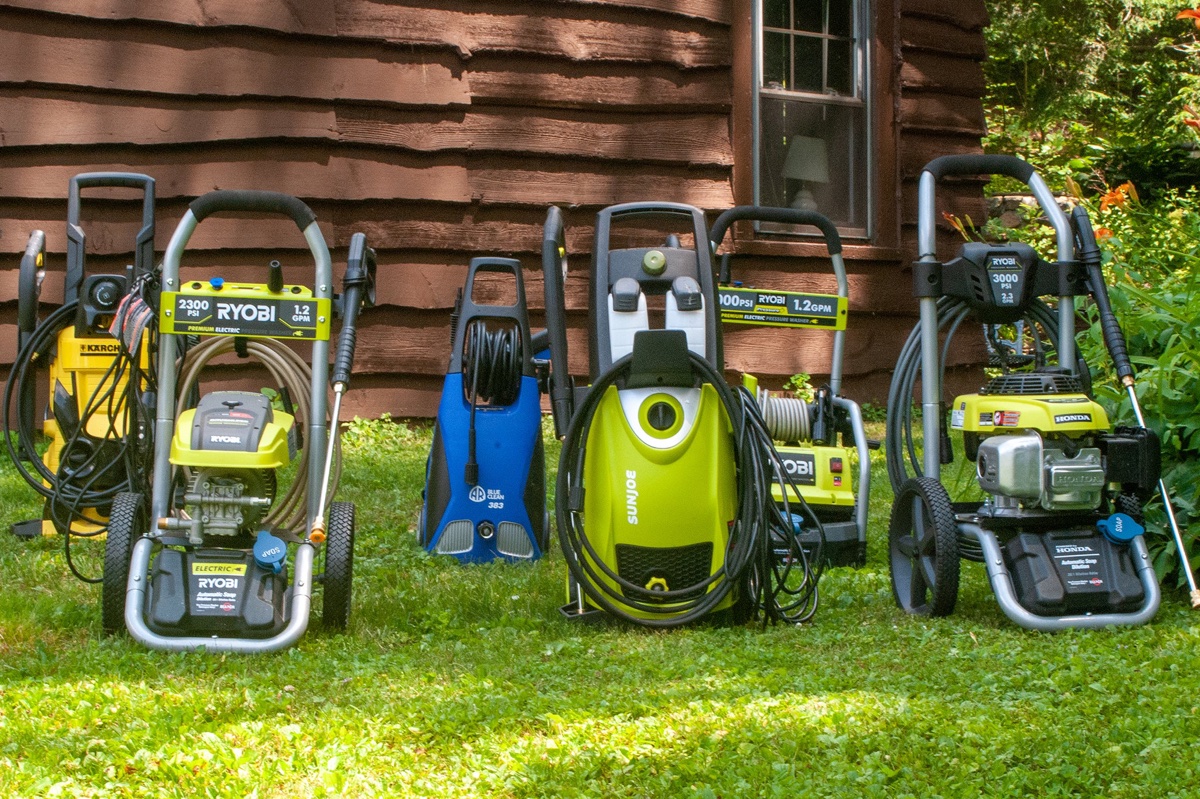
Unlike gas-powered power washers, electric power washers are typically more compact, lightweight, and easier to use. They are also more eco-friendly since they don’t emit any harmful fumes. Additionally, electric power washers are generally more affordable and require less maintenance compared to their gas counterparts.
In this article, we will guide you through the process of using an electric power washer, from the initial setup to proper maintenance and storage. We will also provide helpful tips and techniques for cleaning different surfaces to achieve the best results. Before we dive in, however, it is crucial to familiarize yourself with some safety precautions to ensure your well-being and the safety of those around you.
Key Takeaways:
- Safety first! Before using an electric power washer, familiarize yourself with safety precautions to protect yourself and others. From protective gear to adjusting water pressure, prioritize safety at all times.
- Proper assembly, maintenance, and troubleshooting are essential for maximizing the efficiency and longevity of your electric power washer. Follow the guidelines to ensure smooth operation and optimal cleaning results.
Read more: How Much Electricity Does A Power Strip Use
Safety Precautions
When working with any power tool, safety should always be your top priority. Electric power washers have a powerful spray that can cause serious injuries if not used correctly. Here are some essential safety precautions to keep in mind when using an electric power washer:
- Read the manual: Before using your electric power washer, carefully read and understand the manufacturer’s manual. Pay attention to safety instructions, operating procedures, and maintenance guidelines.
- Protective gear: Wear safety goggles or a face shield to protect your eyes from any debris that may be propelled by the high-pressure water. Additionally, wear ear protection to safeguard your hearing and gloves to protect your hands from chemicals or sharp surfaces.
- Clear the area: Before starting the power washer, make sure to remove any obstacles or debris from the cleaning area. This includes loose objects, plants, and furniture that could be damaged by the high-pressure water.
- Avoid electrical hazards: Keep the power cord and extension cord away from water and avoid standing in water while using the power washer. Use a ground fault circuit interrupter (GFCI) to protect against electrical shock.
- Adjust water pressure: Start with the lowest pressure setting and gradually increase it as needed. Using too much pressure can damage surfaces, so be cautious and test on a small, inconspicuous area before proceeding.
- Use correct nozzles: Choose the appropriate nozzle for the task at hand. Different nozzle types produce different spray patterns and pressures. Consult the user manual to determine which nozzle is suitable for your cleaning application.
- Be mindful of surfaces: Be aware of the material you are cleaning and adjust the water pressure accordingly. Delicate surfaces such as wood or paint may require lower pressure to avoid damage.
- Keep a safe distance: Stand a safe distance away from the surface being cleaned to prevent injuries from ricocheting debris. Maintain a distance of at least 2 feet and adjust as necessary based on the pressure and the surface being cleaned.
- Use caution on uneven surfaces: When working on uneven or slippery surfaces, maintain a stable footing to prevent falls. Be cautious of your surroundings and make sure you have a secure grip on the power washer.
- Proper storage: When you are finished using the electric power washer, turn it off, unplug it, and properly store it. Make sure the power cord and any accessories are neatly organized and protected from damage.
By following these safety precautions, you can ensure a safe and enjoyable experience while using your electric power washer. Now, let’s move on to the assembly and set-up process.
Assembly and Set-up
Before you can start using your electric power washer, you’ll need to assemble and set it up properly. Here are the steps to follow:
- Unbox and inspect: Carefully unbox the electric power washer and inspect all the components for any signs of damage. Ensure that all parts, including the hose, wand, nozzles, and power cord, are present and in good condition.
- Connect the handle and wand: Attach the handle to the main unit according to the manufacturer’s instructions. Then, connect the wand to the handle firmly but avoid overtightening.
- Attach the hose: Take the high-pressure hose and connect it to both the water inlet on the power washer and the trigger gun. Ensure that the connections are secure and leak-free.
- Connect the nozzle: Depending on the manufacturer, the nozzle may come pre-installed or require attachment. If it needs to be attached, carefully screw it onto the end of the wand until it is snug.
- Prepare the water source: If you are using a garden hose as your water source, make sure it is connected to a faucet with a sufficient water supply. Ensure that the water source is turned on and supplying water to the power washer.
- Check the detergent tank: If your electric power washer has a detergent tank, fill it with the appropriate cleaning solution according to the manufacturer’s instructions. Some models may require you to attach a separate detergent bottle.
- Secure the power cord: Before plugging in the power cord, ensure that it is clear of any obstructions and that it can reach a grounded electrical outlet. Avoid using extension cords unless specified by the manufacturer.
- Plug in and power on: Once all the connections are secure, plug in the power cord to a grounded outlet. Turn on the power switch on the power washer to activate the motor.
At this point, your electric power washer should be assembled and ready to use. In the next section, we will discuss how to connect the power washer to a power source and adjust the water pressure for optimal performance.
Connecting the Power Washer to a Power Source
Now that your electric power washer is assembled, it’s time to connect it to a power source. Follow these steps to safely connect your power washer:
- Locate a grounded outlet: Find a nearby outdoor electrical outlet that is grounded. It is crucial to use a properly grounded outlet to ensure electrical safety.
- Inspect the power cord: Before plugging in the power washer, carefully inspect the power cord for any signs of damage, such as frayed wires or exposed insulation. If you notice any damage, do not use the power washer and seek repairs or replacement.
- Untangle and straighten the power cord: Ensure that the power cord is free from any tangles or knots. Straighten the cord to avoid tripping hazards and make sure it can reach the outlet without strain.
- Plug in the power cord: Firmly insert the power cord’s plug into the grounded outlet. Ensure that the connection is secure and that the plug is fully inserted.
- Turn on the power washer: Locate the power switch on the power washer and move it to the “On” position. Depending on the model, there may be an additional switch or button to activate the motor.
- Verify power connection: Once the power washer is turned on, check for any power indicators or LEDs on the unit to confirm that it is receiving power. If no lights or indicators are present, double-check the power cord connection.
- Test the power washer: To ensure that the power washer is functioning correctly, briefly squeeze the trigger gun to release a small burst of water. Ensure that water is flowing properly without any leaks.
By following these steps, you can safely and effectively connect your power washer to a power source. In the next section, we will discuss how to adjust the water pressure to suit your cleaning needs.
Adjusting the Water Pressure
One of the key advantages of an electric power washer is the ability to adjust the water pressure to accommodate different cleaning tasks. Here’s how you can adjust the water pressure on your electric power washer:
- Refer to the user manual: Consult the user manual that came with your power washer to locate the pressure adjustment mechanism. Different models may have different methods of adjusting the water pressure.
- Identify the pressure control knob: Look for a knob or dial on the power washer that is specifically designated for controlling water pressure. It is often located near the pump or on the front of the unit.
- Start with the lowest setting: When starting a new cleaning task, always begin with the lowest pressure setting. Gradually increase the water pressure as needed, but be cautious not to exceed the recommended limits for the surface you are cleaning.
- Turn the knob clockwise to increase pressure: If you need more pressure, gently turn the pressure control knob clockwise. Each incremental turn will increase the water pressure. Take note of the marked pressure settings if available.
- Test the pressure: After making adjustments, test the water pressure by squeezing the trigger gun and observing the intensity of the spray. If the pressure is too high and causing damage or if it’s too low and not effective, make further adjustments accordingly.
- Be mindful of surface sensitivity: Different surfaces require different levels of water pressure. Delicate materials like wood or paint may require lower pressure to prevent damage, while tougher surfaces may need higher pressures to effectively remove dirt and grime.
- Consider using nozzles for pressure control: Some power washers come with interchangeable nozzles that have different spray patterns and pressure settings. Experiment with different nozzles to achieve the desired water pressure for various cleaning tasks.
- Monitor and adjust as needed: Throughout your cleaning session, pay attention to the effectiveness of the water pressure on different surfaces. If necessary, make adjustments to achieve optimal cleaning results.
By following these steps, you can confidently adjust the water pressure on your electric power washer to suit the specific cleaning task at hand. In the next section, we will discuss how to choose the right nozzle for your cleaning needs.
When using an electric power washer, always start with the lowest pressure setting and gradually increase as needed. This helps prevent damage to surfaces and ensures a more effective clean.
Choosing the Right Nozzle
The nozzle you use on your electric power washer can greatly impact the effectiveness and efficiency of your cleaning tasks. Different nozzles produce different spray patterns and pressure levels, allowing you to customize your cleaning approach. Here are some factors to consider when choosing the right nozzle for your electric power washer:
- Spray pattern: Nozzles are designed to produce various spray patterns, including 0-degree (pencil jet), 15-degree (concentrated jet), 25-degree (narrow angle), 40-degree (wide angle), and 65-degree (soap application). Each spray pattern serves a specific purpose, from concentrated cleaning power to gentle rinsing.
- Pressure level: Nozzles also offer different pressure settings to control the intensity of the water spray. Some power washers may have adjustable pressure at the nozzle itself, while others have fixed pressure settings. Consider the pressure required for your cleaning task and choose a nozzle that matches that pressure.
- Cleaning task: The type of surface you are cleaning is a crucial factor in selecting the right nozzle. For stubborn stains or heavy-duty cleaning, a narrower spray pattern with higher pressure may be suitable. For delicate surfaces or general cleaning, a wider spray pattern with lower pressure can be more appropriate.
- Manufacturer recommendations: Consult the user manual or the manufacturer’s recommendations for guidance on which nozzles are recommended for your specific power washer model. They may provide specific guidance based on pressure ratings or cleaning purposes.
- Experiment and adjust: It may take some trial and error to find the perfect nozzle for your cleaning needs. Start with a recommended nozzle and adjust as necessary to achieve the desired cleaning results. Keep in mind that using the wrong nozzle can potentially damage the surfaces you are cleaning.
- Consider using interchangeable nozzles: If your power washer allows for interchangeable nozzles, consider investing in a set of nozzles with various spray patterns. This will provide you with more flexibility and options for different cleaning tasks.
Remember, the right nozzle can make a significant difference in both the efficiency and the safety of your cleaning tasks. Take your time to choose the appropriate nozzle, and always prioritize the well-being of yourself and your surroundings. In the following section, we will dive into specific cleaning techniques for different surfaces using your electric power washer.
Cleaning Techniques for Different Surfaces
Your electric power washer can be a versatile tool for cleaning a variety of surfaces. However, it’s important to approach each surface with the right technique to achieve optimal results without causing damage. Here are some cleaning techniques for different surfaces:
- Decks and Patios: Start by sweeping away loose debris and dirt. Use a wide-angle nozzle or a surface cleaner attachment for even coverage. Move the nozzle in a sweeping motion, keeping a consistent distance from the surface. Be cautious not to linger too long in one spot to avoid etching the wood or leaving marks.
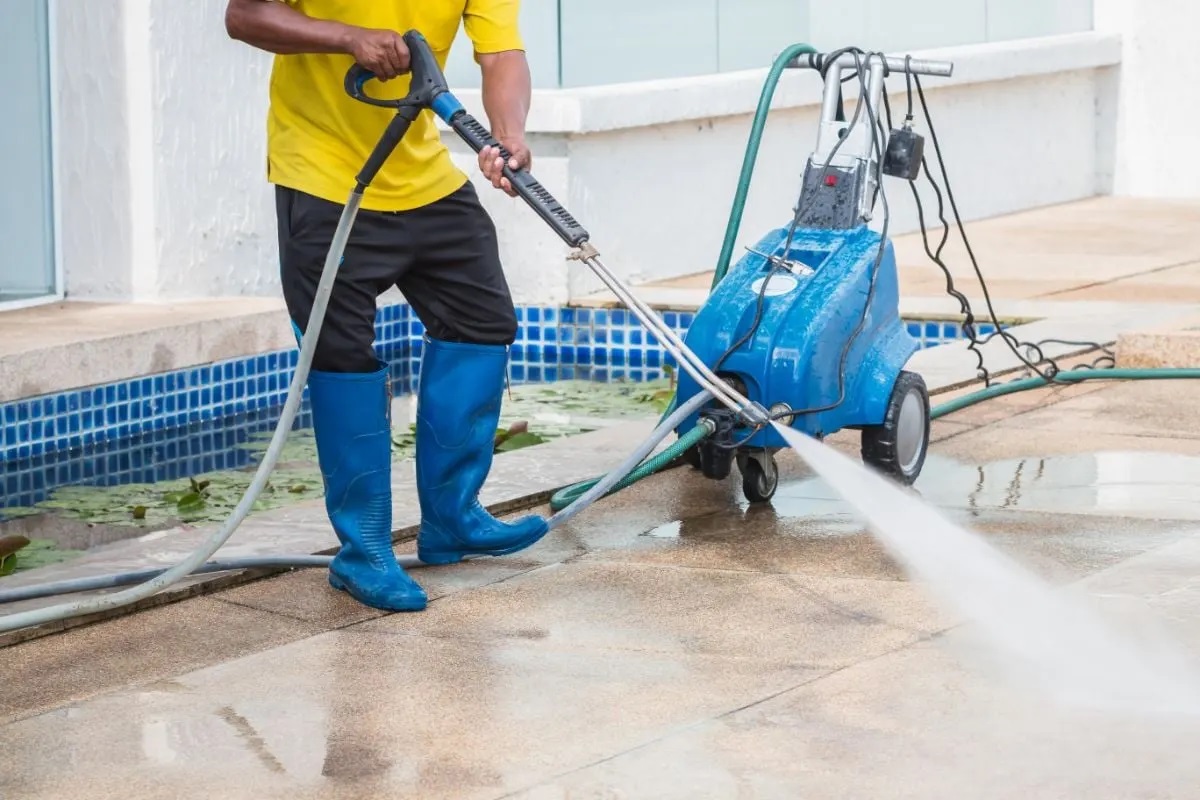
- Concrete Driveways and Walkways: Remove loose dirt and debris using a broom or leaf blower. For stained or heavily soiled areas, apply a detergent suitable for concrete surfaces. Allow the detergent to sit for a few minutes, then use a 15 or 25-degree nozzle at a distance of 6-8 inches to clean the surface. Rinse thoroughly with a wider spray pattern.
- Siding and Exterior Walls: Apply a detergent specifically formulated for house siding or exterior surfaces. Allow the detergent to dwell for a few minutes, then use a wide-angle or 25-degree nozzle to clean the surface. Start from the bottom and work your way up, keeping the nozzle at a slight downward angle. Rinse from the top down to prevent streaks.
- Outdoor Furniture: Brush off loose dirt or debris before cleaning. Use a detergent suitable for the material of your furniture. Apply the detergent and let it sit for a few minutes. Use a wide-angle or 40-degree nozzle to clean the furniture, keeping a moderate distance to avoid damaging the surfaces. Rinse thoroughly and allow the furniture to dry completely.
- Vehicles: Pre-rinse the vehicle to remove loose dirt. Use a foam cannon attachment or a bucket of soapy water to apply a car wash detergent. Starting from the top, use a 25 or 40-degree nozzle to clean the vehicle, maintaining a distance of 6-8 inches. Rinse thoroughly, ensuring all soap is removed. Avoid spraying directly at sensitive areas like windows or mirrors.
- Gutters and Downspouts: Attach a gutter cleaning attachment or a curved wand to your power washer. Position yourself carefully on a stable ladder and use the attachment to remove debris and build-up from the gutters and downspouts. Take caution to not apply excessive pressure and potentially dislodge or damage the gutters.
Remember to always test the pressure and cleaning technique on a small, inconspicuous area before proceeding to the entire surface. This will help you gauge the appropriate pressure and avoid any potential damage. Additionally, follow any manufacturer guidelines or recommendations specific to the surface you are cleaning.
Now that you have learned different cleaning techniques for various surfaces, let’s move on to the maintenance and storage practices to keep your electric power washer in optimal condition.
Maintenance and Storage
Proper maintenance and storage are crucial to ensure the longevity and optimal performance of your electric power washer. By following these maintenance practices, you can keep your power washer in excellent condition:
- Clean the unit: After each use, thoroughly clean the power washer, including the nozzles, hoses, and wand. Remove any dirt or debris that may have accumulated during the cleaning process. This will prevent clogs and ensure smooth operation next time.
- Flush the system: If you have used detergent during the cleaning process, make sure to flush the system with clean water to remove any residual detergent. This will prevent build-up and potential damage to the internal components.
- Inspect for damage: Regularly inspect all components of your power washer for any signs of damage or wear, such as leaks, cracks, or frayed cables. If you notice any issues, address them promptly to prevent further damage and potential safety hazards.
- Check and replace filters: Check the filters on your power washer regularly and clean or replace them as needed. Clogged filters can affect the performance and efficiency of the unit.
- Store in a dry place: After use, make sure to store your power washer in a dry and well-ventilated area. This will prevent moisture build-up, which can lead to corrosion or mold growth.
- Protect from freezing temperatures: If you live in an area with freezing temperatures, it is essential to winterize your power washer. Drain any remaining water from the unit and hoses to prevent freezing, which can cause damage to the pump and internal components.
- Secure the power cord: When storing your power washer, properly coil and secure the power cord to prevent any tangles or damage. This will prolong the life of the cord and make it easier for future use.
- Follow manufacturer guidelines: Always refer to the manufacturer’s instructions and guidelines for specific maintenance requirements and storage recommendations. Different power washer models may have unique needs.
By following these maintenance and storage practices, you can ensure that your electric power washer remains in excellent condition, ready to meet your cleaning needs for years to come.
Now that we have covered maintenance and storage, let’s move on to troubleshooting common issues that you may encounter with your electric power washer.
Troubleshooting Common Issues
While electric power washers are reliable tools, you might encounter some common issues during operation. Here are troubleshooting tips for addressing these common problems:
- Low or no pressure: If you’re experiencing low or no pressure, check that the water supply is turned on and that the hose is not kinked or blocked. Ensure that the nozzle is clean and that the water inlet filter is not clogged. Additionally, verify that the pressure control knob or settings are adjusted correctly for the desired water pressure.
- Loud or unusual noises: Unusual noises such as grinding or rattling sounds could indicate an issue with the motor or pump. Check for any loose or damaged components, and refer to the manufacturer’s troubleshooting guide for specific instructions.
- Leaks: Leaks can occur at various points in the power washer, including the hose connections, wand, or nozzles. Ensure that all connections are tightened properly, replace any damaged O-rings or seals, and secure any loose fittings. If the issue persists, contact the manufacturer for further assistance.
- Motor not starting: If the motor does not start, check that the power supply is connected and functioning correctly. Verify that the power switch is in the “On” position and that the electrical outlet is not overloaded. If the issue persists, consult the user manual or contact the manufacturer for troubleshooting steps.
- Inconsistent spray pattern: If the spray pattern is inconsistent or distorted, check for clogs in the nozzle or wand. Clean or replace any clogged or damaged components, and ensure that the nozzle is securely attached. Adjusting the water pressure or using a different nozzle may also resolve the issue.
- Excessive vibration: Excessive vibration can be caused by an unbalanced load or uneven surface. Ensure that the power washer is placed on a stable and level surface. If the load is unbalanced, redistribute the weight evenly. If the issue continues, consult the manufacturer’s troubleshooting guide for further assistance.
If you encounter persistent issues with your electric power washer that you cannot resolve through troubleshooting, it is recommended to contact the manufacturer or seek professional assistance for repairs.
With these troubleshooting tips, you can overcome common issues that may arise while using your electric power washer. Now, let’s wrap up this article.
Conclusion
Using an electric power washer can revolutionize your outdoor cleaning tasks, making them more efficient and effective. By following the right techniques and safety precautions, you can achieve outstanding cleaning results while prolonging the life of your power washer. Remember these key points as you embark on your cleaning journey:
Start by familiarizing yourself with the safety precautions to protect yourself and others during operation. Proper assembly and set-up ensure that your power washer functions smoothly and efficiently. Connecting your power washer to a grounded power source allows you to harness its full potential. Adjusting the water pressure and choosing the right nozzle allow you to customize your cleaning approach for different surfaces.
Cleaning techniques vary depending on the surface you’re tackling, so take the time to understand the specific needs of each surface. Maintenance and storage practices are essential to keep your power washer in top condition, ensuring its longevity and optimal performance. Finally, troubleshooting common issues empowers you to address any challenges that may arise during use.
With these tips and techniques in mind, you are now equipped to make the most of your electric power washer. Remember to always prioritize safety and read the manufacturer’s instructions for your specific model. Now, go forth and enjoy the convenience and power of your electric power washer as you transform your outdoor spaces.
Frequently Asked Questions about How To Use Electric Power Washer
Was this page helpful?
At Storables.com, we guarantee accurate and reliable information. Our content, validated by Expert Board Contributors, is crafted following stringent Editorial Policies. We're committed to providing you with well-researched, expert-backed insights for all your informational needs.



0 thoughts on “How To Use Electric Power Washer”