
Articles
How To Use Steamfast Steamer
Modified: September 1, 2024
Discover the best articles on how to effectively use the Steamfast steamer. Save time and get professional results with our step-by-step guides and tips.
(Many of the links in this article redirect to a specific reviewed product. Your purchase of these products through affiliate links helps to generate commission for Storables.com, at no extra cost. Learn more)
Introduction
Welcome to the world of efficient and effective garment care with the Steamfast Steamer. In this fast-paced life, nobody has the time or patience to deal with wrinkled clothes and curtains. Thankfully, the Steamfast Steamer comes to the rescue, offering a hassle-free solution to remove wrinkles and refresh your fabrics in a matter of minutes.
This comprehensive guide will walk you through everything you need to know about the Steamfast Steamer. From setting up the steamer to using it on different types of fabrics, we’ll cover it all. Say goodbye to the conventional iron and hello to the convenience of the Steamfast Steamer!
Whether you’re a fashion enthusiast, a busy professional, or a homeowner looking to keep your curtains pristine, the Steamfast Steamer is a game-changer. Its powerful steam technology not only removes wrinkles but also eliminates odors and kills bacteria, ensuring your fabrics are fresh and clean.
With its compact and lightweight design, the Steamfast Steamer is easy to use and store. Whether you’re at home or traveling, this versatile steamer will be your go-to companion for maintaining wrinkle-free clothing and drapes.
So, let’s dive in and learn how to make the most of your Steamfast Steamer. From assembly to troubleshooting, we’ll cover every aspect, ensuring you have a seamless and successful steaming experience. Get ready to say hello to perfectly pressed garments and say goodbye to hours spent ironing!
Key Takeaways:
- Say goodbye to wrinkles and hello to convenience with the Steamfast Steamer. Its powerful steam technology, versatile settings, and ease of use make it a game-changer for garment care at home or on the go.
- From delicate silk to sturdy cotton, the Steamfast Steamer handles various fabrics with ease. Its ability to refresh curtains and drapes adds to its versatility. With proper maintenance, it’s a reliable and efficient solution for wrinkle-free perfection.
Read also: 12 Best Steamfast Steamer for 2025
Overview of the Steamfast Steamer
The Steamfast Steamer is a versatile and powerful tool for removing wrinkles and refreshing fabrics. It is designed to provide a convenient and efficient solution for garment care, whether you’re at home or on the go.
One of the standout features of the Steamfast Steamer is its ability to produce high-temperature steam in just a matter of seconds. This steam penetrates deep into the fabric fibers, relaxing and softening them to remove even the most stubborn wrinkles. The steamer’s rapid heating technology ensures that you can start steaming within minutes, saving you valuable time.
Another key advantage of the Steamfast Steamer is its lightweight and compact design. It’s portable and easy to handle, making it ideal for travel or small living spaces. You can easily pack it in your suitcase and take it with you on business trips or vacations to ensure that your clothes always look their best.
The Steamfast Steamer also offers a range of steam control settings, allowing you to adjust the steam output according to the fabric type and the level of wrinkling. This flexibility ensures that you can safely steam delicate fabrics without causing any damage while effectively removing wrinkles from heavier materials.
In addition to its use for clothing, the Steamfast Steamer is also perfect for steaming curtains, drapes, and upholstery. It can quickly freshen up these fabrics, removing any lingering odors and bringing them back to life. The steamer’s gentle yet powerful steam ensures that there is no need for harsh chemicals or excessive washing, making it an environmentally friendly choice.
Overall, the Steamfast Steamer is a reliable and efficient garment care tool that offers convenience, versatility, and outstanding results. In the following sections, we will guide you through the process of setting up the steamer, filling the water tank, and provide tips and tricks for using it effectively on different types of fabrics. Let’s get started!
Setting Up the Steamfast Steamer
Before you embark on your steaming journey with the Steamfast Steamer, it’s important to properly set it up to ensure optimal performance. The setup process is quick and straightforward, requiring just a few simple steps.
- Unpack and inspect: Start by unpacking the Steamfast Steamer from its packaging. Carefully inspect the steamer and its accessories to ensure everything is in good condition and no parts are damaged or missing.
- Prepare a stable surface: Find a stable and flat surface to place the steamer on during operation. Make sure there is ample room around the steamer for safe and convenient steaming.
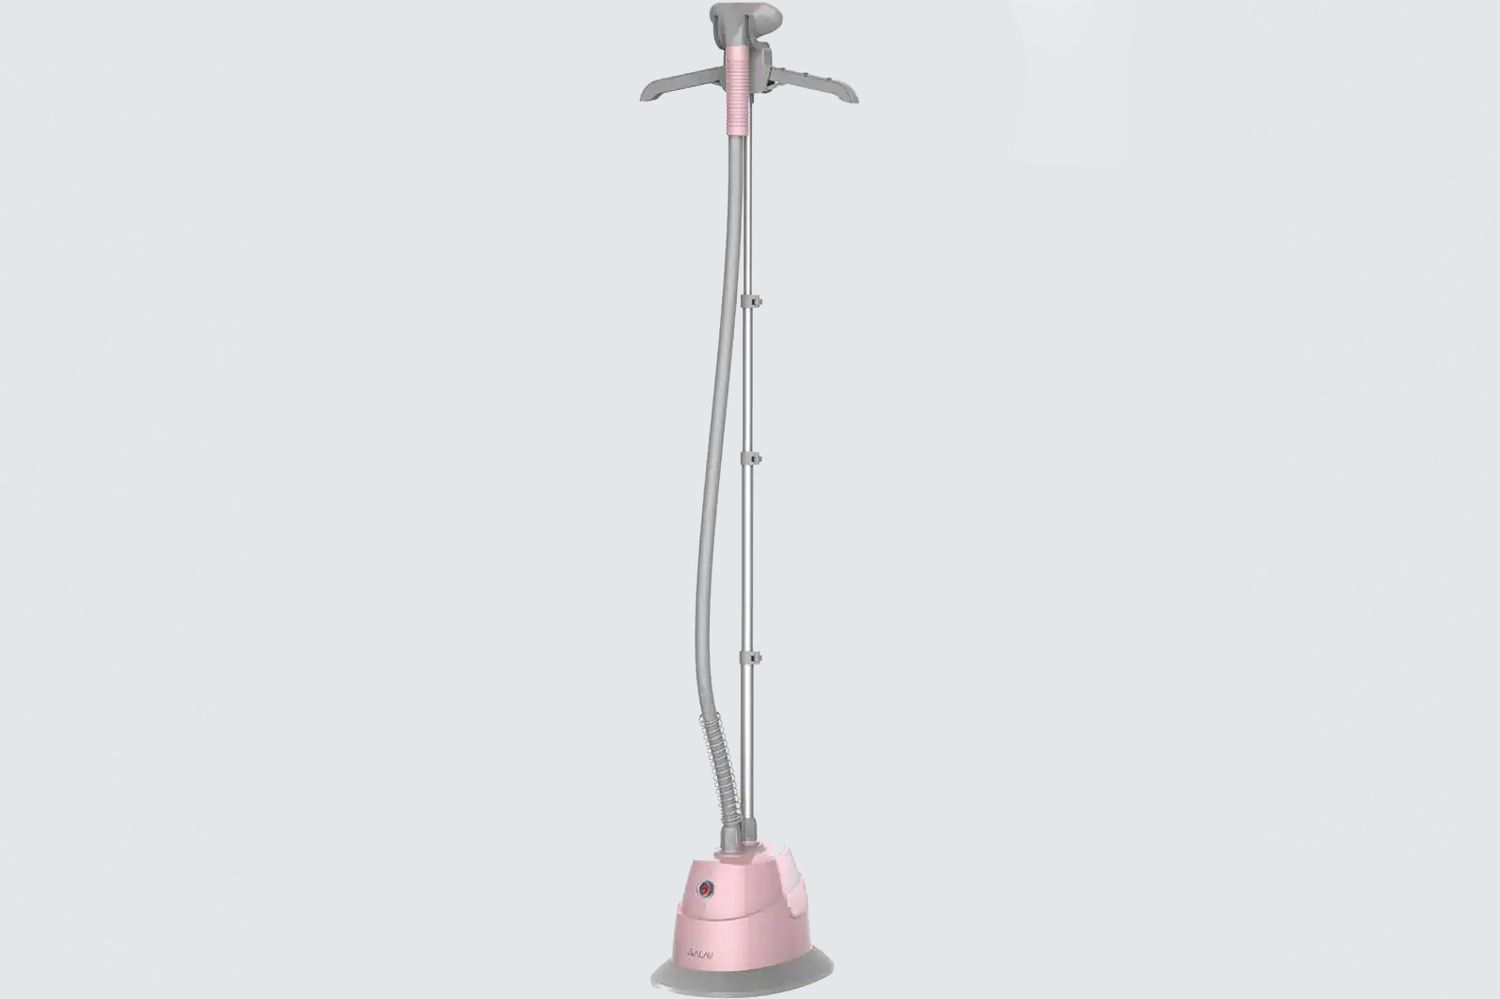
- Attach the telescopic pole: The Steamfast Steamer comes with a telescopic pole that provides height adjustment and support for hanging garments. Locate the telescopic pole and attach it securely to the base of the steamer. Ensure that it is firmly in place.
- Secure the steam hose: Connect one end of the steam hose to the steam outlet on the steamer. Tighten the connection to secure it in place, but be careful not to over-tighten and damage the threads.
- Attach clothing hanger: If you plan to steam garments, attach the clothing hanger to the top of the telescopic pole. This will provide a convenient and sturdy place to hang your clothes while steaming.
- Power cord placement: Unwind the power cord from the steamer and ensure it is free from any tangles or knots. Position the cord in a way that it doesn’t obstruct your movement or create a tripping hazard.
Once you have completed these steps, your Steamfast Steamer is now ready for use. However, before you start steaming, it’s important to fill the water tank with clean water. We’ll cover this process in the next section.
Remember, it’s crucial to follow the manufacturer’s instructions for setting up the Steamfast Steamer. This will help ensure a safe and efficient steaming experience and prolong the lifespan of your steamer. Now that your steamer is set up, let’s move on to filling the water tank and getting started with steaming!
Filling the Water Tank
Now that you have successfully set up your Steamfast Steamer, it’s time to fill the water tank. The water tank is responsible for generating the steam that will be used to remove wrinkles and refresh your fabrics. Follow these simple steps to ensure that the water tank is filled correctly:
- Locate the water tank: The water tank is typically located towards the base or the back of the steamer. Look for a detachable reservoir that can be easily accessed and removed.
- Remove the water tank: Gently lift or slide the water tank out of its designated slot. Be cautious not to spill any water during this process.
- Prepare clean water: Fill a clean container or jug with fresh, distilled water. Using distilled water is preferable to tap water as it helps prevent mineral buildup in the steamer, ensuring optimal performance and prolonging its lifespan.
- Pour water into the tank: Slowly pour the water from the container into the water tank, taking care not to overfill it. Follow the manufacturer’s instructions regarding the maximum water level.
- Replace the water tank: Once the water tank is filled, carefully slide it back into its designated slot in the steamer. Ensure that it is securely in place and properly connected.
- Secure the water tank cap: Some steamers may have a cap or lid on the water tank. If this is the case, make sure to securely fasten the cap to prevent any water from leaking during operation.
- Check for leaks: Before powering on the steamer, double-check that there are no leaks around the water tank. Any leaks may indicate an improper seal or a damaged tank, in which case you should contact the manufacturer for assistance.
By following these simple steps, you have successfully filled the water tank of your Steamfast Steamer. Now you’re ready to power on the steamer and start generating the steam needed to remove wrinkles and freshen your fabrics. In the next section, we will guide you through the process of attaching the steam nozzle and powering on the steamer.
Attaching the Steam Nozzle
Attaching the steam nozzle to your Steamfast Steamer is a crucial step in preparing it for use. The steam nozzle is the component responsible for directing the steam onto your fabrics to remove wrinkles effectively. Follow these steps to ensure that the steam nozzle is securely attached:
- Locate the steam nozzle: The steam nozzle is typically a detachable part that comes with your steamer. It is designed to fit securely onto the steamer’s steam outlet.
- Inspect the steam nozzle: Before attaching the steam nozzle, inspect it for any dirt or debris. Wipe it clean with a soft cloth if necessary to ensure optimal steam flow.
- Align the steam nozzle: Hold the steam nozzle and align it with the steam outlet on the steamer. The steam outlet is usually located near the top or front of the steamer, depending on the model.
- Push and twist to connect: Firmly push the steam nozzle onto the steam outlet and twist it clockwise until it locks into place. You should feel a slight resistance when the nozzle is securely attached.
- Ensure a tight seal: Check that the steam nozzle is tightly connected to the steam outlet to prevent any steam from escaping during operation. A loose connection may result in ineffective steaming.
- Test for stability: Gently tug on the steam nozzle to ensure that it is securely attached. It should not come off easily or wobble when handled.
Once you have successfully attached the steam nozzle, you are one step closer to enjoying the wrinkle-removing magic of the Steamfast Steamer. However, before you power on the steamer, make sure you have properly filled the water tank as described in the previous section.
With the steam nozzle securely attached and the water tank filled, you are now ready to power on the Steamfast Steamer and start steaming your fabrics. In the next section, we will guide you through the process of turning on the steamer and adjusting the steam control settings.
Read more: How To Use A Steamer
Powering On the Steamer
Now that you have successfully set up and prepared your Steamfast Steamer, it’s time to power it on and get ready for some wrinkle-removal action. Follow these simple steps to safely and effectively power on the steamer:
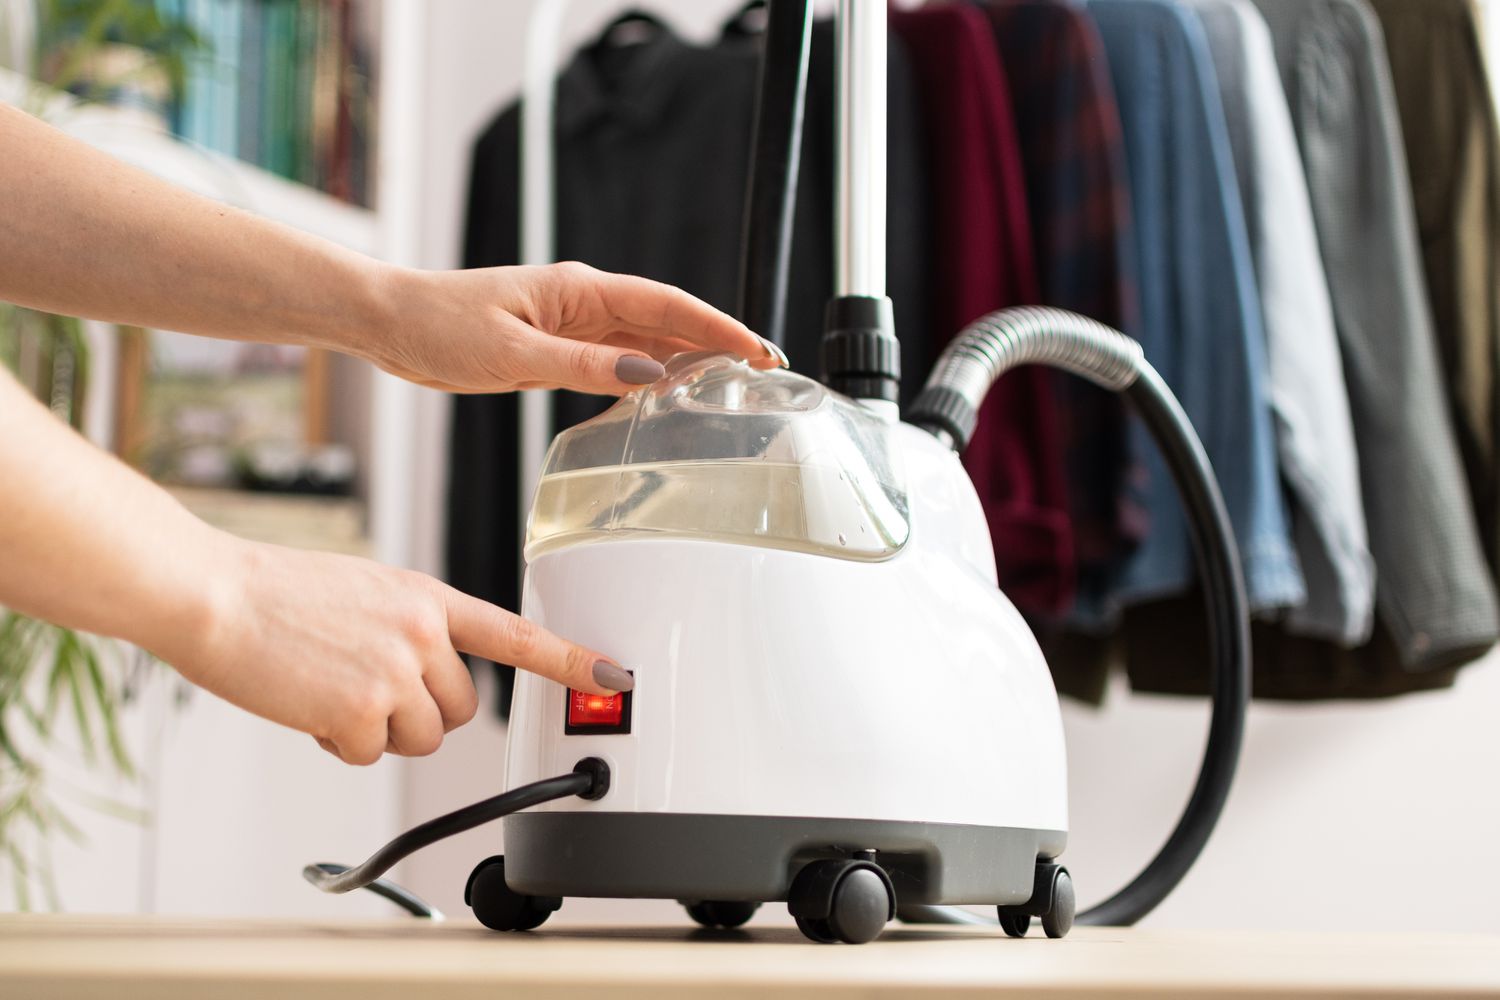
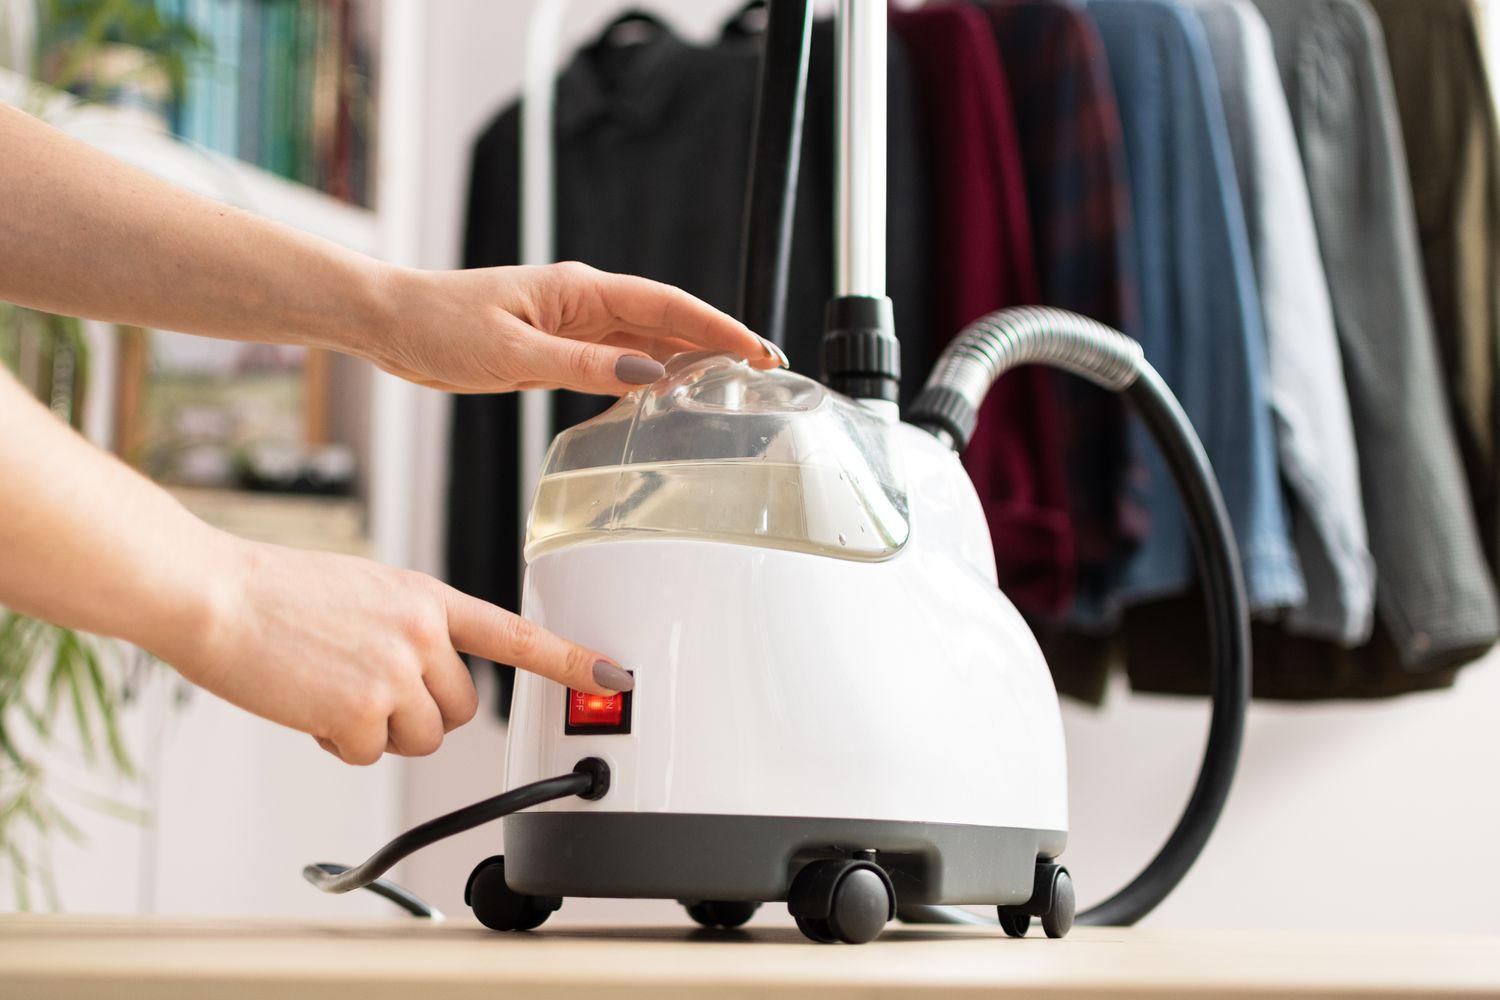
- Locate the power switch: The power switch is typically located on the main body of the Steamfast Steamer. It is usually labeled and easily identifiable.
- Power source: Ensure that your steamer is plugged into a suitable power outlet. Check that the power cord is properly connected to both the steamer and the electrical socket.
- Press the power switch: Gently press the power switch to turn on the steamer. You may hear a click or see an indicator light to confirm that the steamer is powered on.
- Wait for the steamer to heat up: Give the steamer a few minutes to heat up and generate steam. The exact time may vary depending on the model, so refer to the manufacturer’s instructions for specific heating times.
- Monitor the steam-ready indicator: Some steamers have a built-in indicator or gauge that shows when the steamer is ready to use. Keep an eye on this indicator, as it will let you know when the optimal steam temperature has been reached.
Once the Steamfast Steamer is powered on and heated up, it is now ready for use. You can now start using it to remove wrinkles from your various fabrics and enjoy the convenience and efficiency it provides.
Before you start steaming, it’s important to familiarize yourself with the steam control settings available on your steamer. These settings allow you to adjust the steam output according to the fabric type and the level of wrinkling. In the next section, we will explore the different steam control options and how to use them effectively.
Using the Steam Control Settings
The Steamfast Steamer offers a range of steam control settings, allowing you to adjust the steam output according to your specific needs. These settings ensure that you can safely and effectively steam different types of fabrics while achieving optimal results. Here’s how to use the steam control settings on your Steamfast Steamer:
- Identify the steam control options: Take a look at the control panel or interface of your steamer. You should find buttons or dials that allow you to adjust the steam output.
- Understand the steam levels: Typically, steam control settings are indicated by labels such as “Low,” “Medium,” and “High.” These levels represent the intensity of the steam output. Low settings are suitable for delicate fabrics, while higher settings are appropriate for thicker materials and more stubborn wrinkles.
- Start with a low setting: If you’re unsure of the appropriate steam setting for a specific fabric, it’s best to start with the lowest setting. This ensures that you don’t accidentally damage or scorch the fabric. You can always increase the steam level if needed.
- Test on a small, inconspicuous area: Before steaming a larger section of fabric, it’s a good idea to test the steam control setting on a small, hidden area. This allows you to ensure that the steam doesn’t cause any adverse effects on the fabric, such as discoloration or shrinkage.
- Adjust as needed: Based on the feedback from the test area, you can adjust the steam control setting accordingly. If the fabric can handle higher steam levels without any issues, you can gradually increase the steam setting to remove more stubborn wrinkles.
- Monitor the steam output: As you steam your fabrics, pay attention to the steam output. If you notice excessive moisture or droplets on the fabric, consider reducing the steam level to prevent over-saturation.
- Customize for different fabrics: Different fabrics have different needs. Adjust the steam control settings accordingly when transitioning from delicate fabrics such as silk or lace to heavier materials like cotton or denim. This ensures that you achieve the best results without causing any damage.
By utilizing the steam control settings on your Steamfast Steamer, you can confidently steam a wide range of fabrics, knowing that you have the flexibility to customize the steam output to suit your needs. Experiment with different settings and closely monitor the results to find the perfect balance for each fabric type.
In the next sections, we will explore how to effectively steam different types of fabrics, removing wrinkles and refreshing your garments with ease. Whether you’re dealing with delicate silk, crisp cotton, or stubborn linen, the Steamfast Steamer will become your go-to solution for achieving wrinkle-free perfection.
When using the Steamfast steamer, make sure to fill the water tank with distilled water to prevent mineral buildup and ensure optimal steaming performance.Steaming Different Types of Fabrics
One of the advantages of the Steamfast Steamer is its versatility in handling various types of fabrics. Whether you’re working with delicate silk, sturdy cotton, or resilient linen, the steamer can effectively remove wrinkles and refresh your garments. Here’s a guide on how to steam different types of fabrics with the Steamfast Steamer:
- Silk: Silk is a delicate fabric that requires gentle treatment. Set your steam control setting to the lowest level, and hold the steamer a few inches away from the fabric. Move the steamer in a sweeping motion, allowing the gentle steam to relax the fibers and remove wrinkles without causing damage.
- Cotton: Cotton is a durable fabric that can withstand higher steam levels. Set your steam control setting to medium or high, depending on the level of wrinkling. Move the steamer along the fabric, holding it closer to the material to penetrate deeper and effectively remove stubborn wrinkles.
- Linen: Linen can be quite resistant to wrinkles, so a higher steam level is usually necessary. Set your steam control setting to high and hold the steamer closer to the fabric. Glide the steamer slowly across the linen, focusing on the areas with the most wrinkles for effective wrinkle removal.
- Wool: Wool is a sensitive fabric that requires special care. Set the steam control setting to medium and hold the steamer at a safe distance to avoid damaging the fibers. Gently steam the wool by patting the fabric with the steamer, rather than gliding it, to prevent stretching or distorting the material.
- Synthetic fabrics: Synthetic fabrics like polyester or nylon are more heat-sensitive. Use a medium steam level and hold the steamer a few inches away from the fabric to avoid overheating or melting the fibers. Move the steamer in a sweeping or circular motion to evenly distribute the steam and eliminate wrinkles effectively.
It’s important to note that the above recommendations are general guidelines. Always refer to the garment’s care instructions or perform a small test on a hidden area before steaming the entire fabric. Additionally, remember to be patient and allow the steam to work its magic on the fabric. If there are particularly stubborn wrinkles, gently pass the steamer over the area without applying excessive pressure.
By understanding how to adjust the steam control settings and adapting your technique, you can confidently steam a variety of fabrics with the Steamfast Steamer. The next section will focus on removing wrinkles and refreshing garments, providing you with tips and tricks for achieving pristine, wrinkle-free results.
Removing Wrinkles and Refreshing Garments
The Steamfast Steamer is a powerful tool for removing wrinkles and refreshing your garments. Whether you have a wrinkled shirt, a crumpled dress, or a rumpled pair of pants, the steamer can quickly and effectively restore them to a pristine, freshly pressed condition. Follow these steps to remove wrinkles and refresh your garments with the Steamfast Steamer:
- Hang the garment: Start by hanging the garment on a sturdy hanger. This allows you to steam it easily and ensures that it maintains its shape while steaming.
- Prep the fabric: Gently smooth out any major wrinkles or folds on the garment by hand. This will make the steaming process more effective and efficient.
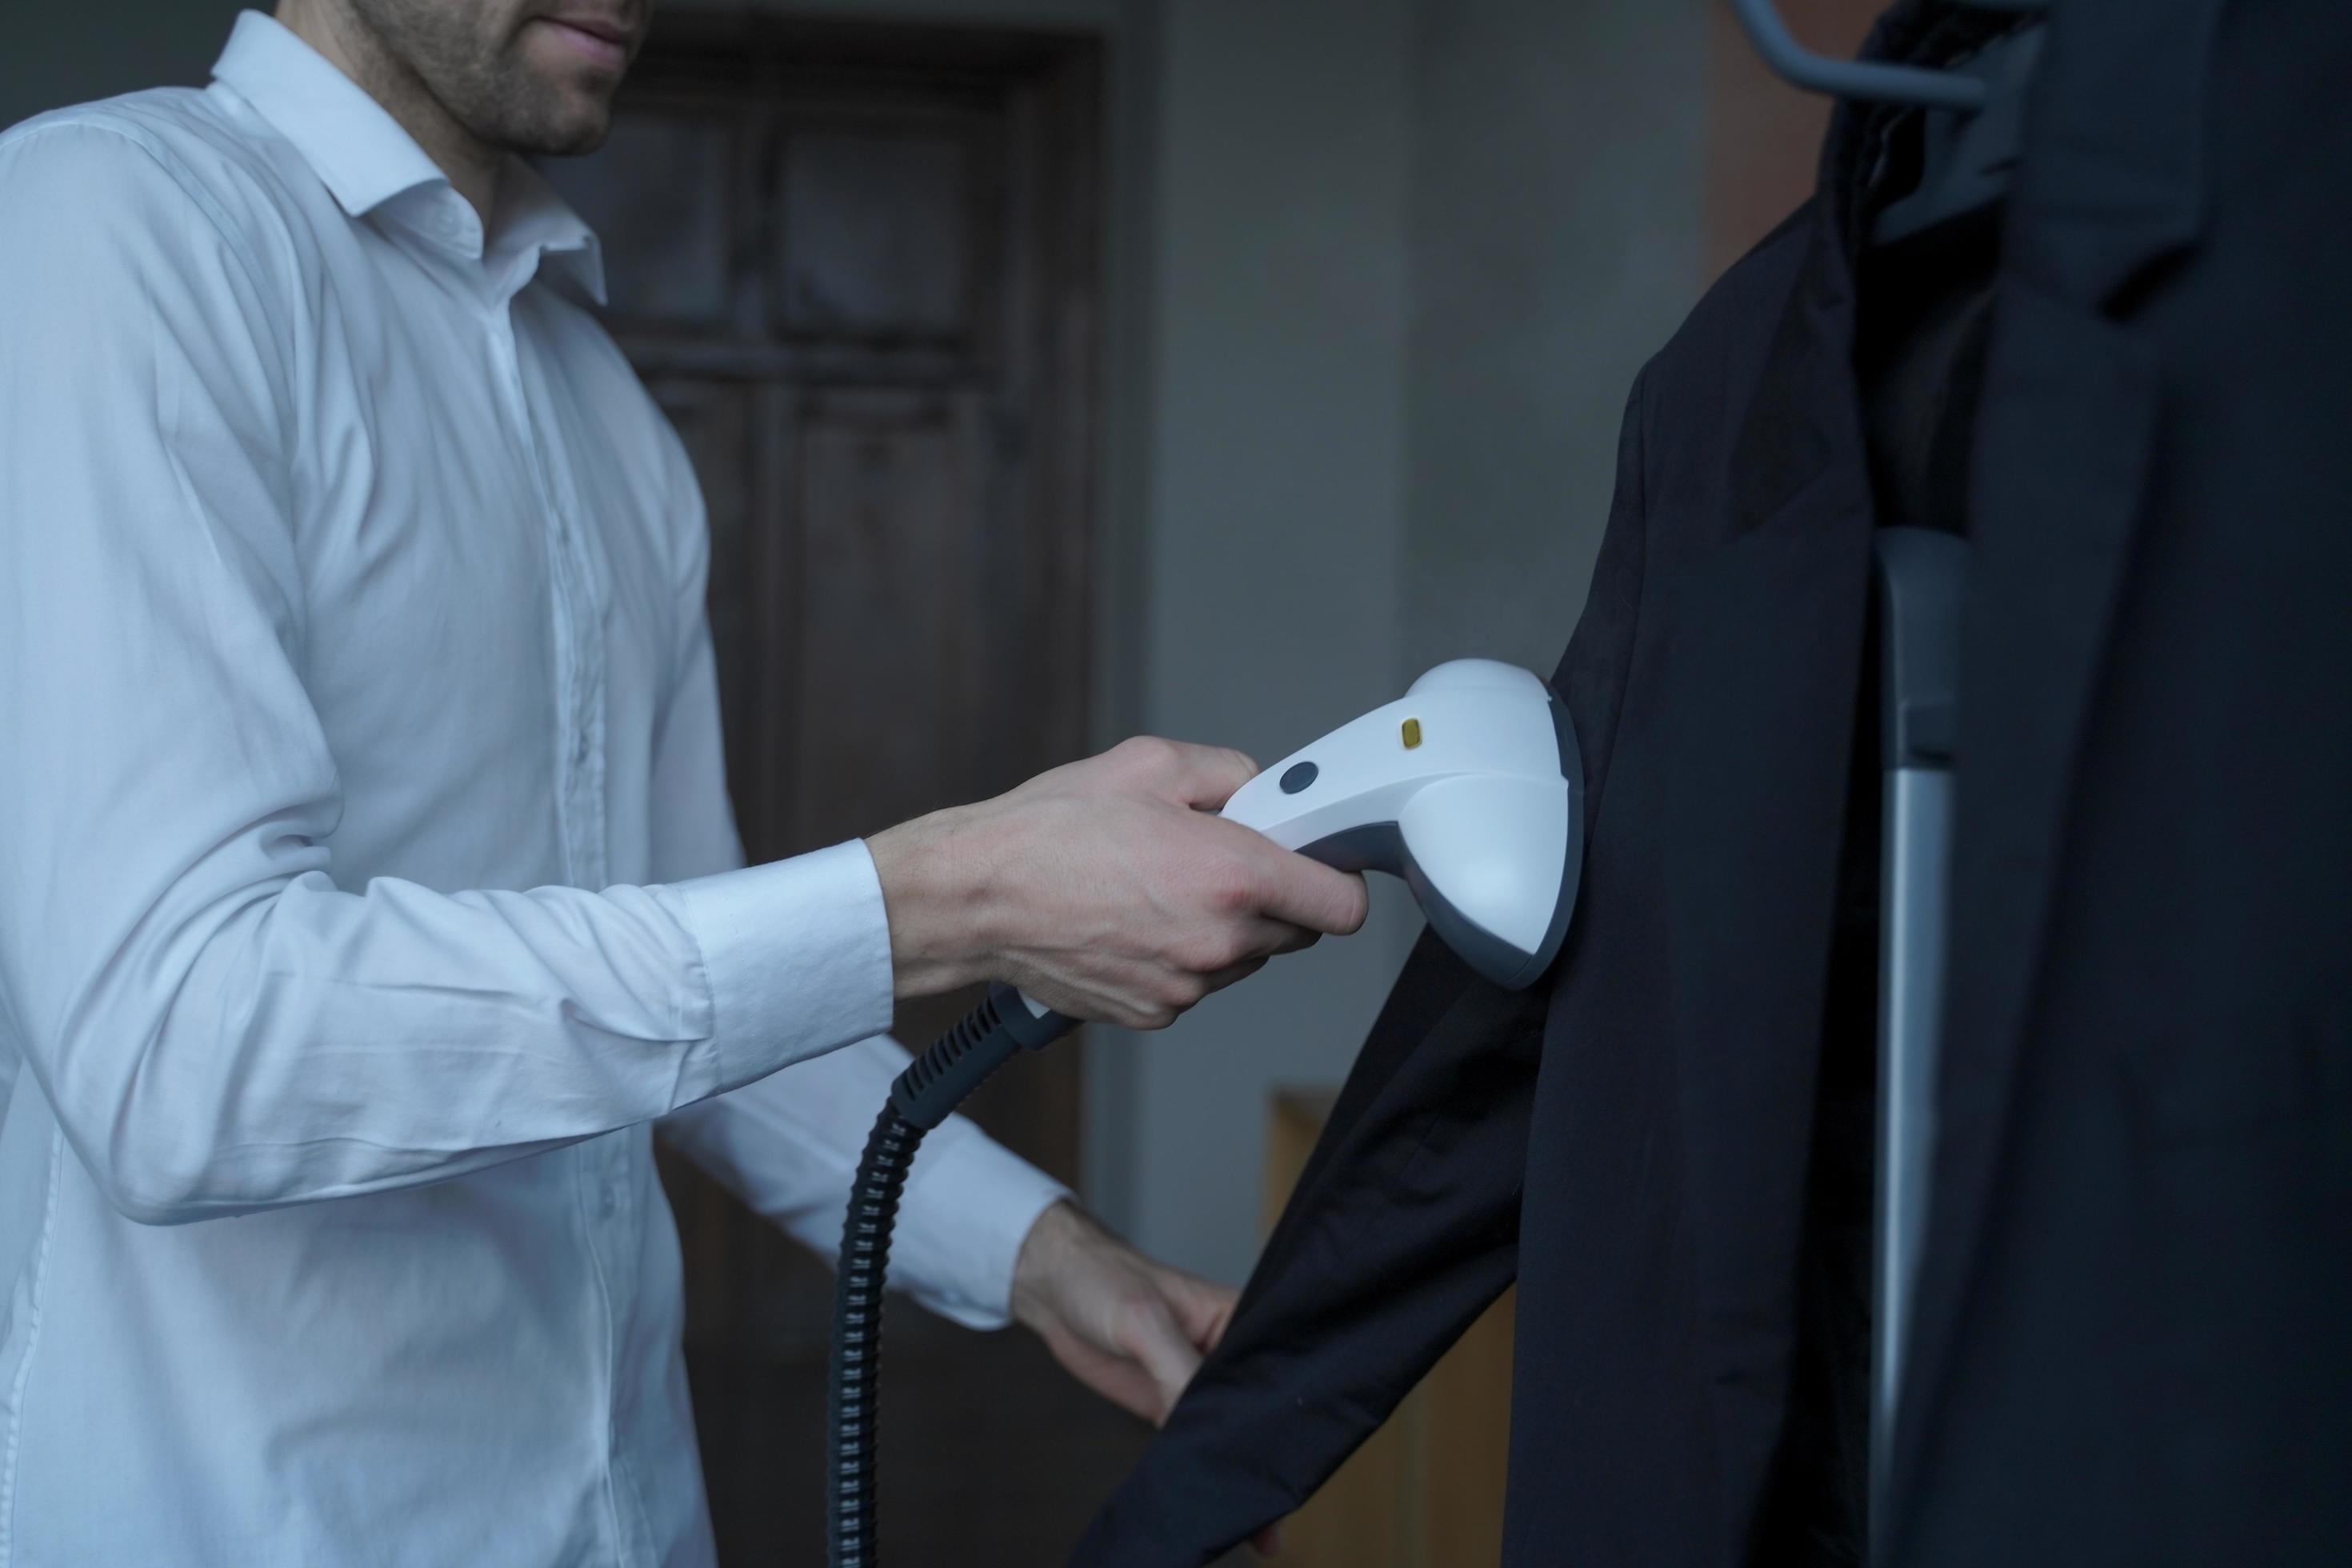
- Begin steaming: Hold the Steamfast Steamer with the steam nozzle facing the garment. Start at the top of the garment and work your way down, moving the steamer in a sweeping motion. Allow the steam to penetrate the fabric and relax the wrinkles as you move along.
- Pull fabric taut: For stubborn wrinkles, gently pull the fabric taut with one hand while steaming with the other. This helps to smooth out the wrinkles more effectively.
- Steam delicate areas with caution: When steaming around delicate areas like buttons, embellishments, or lace, be careful not to direct the steam directly onto them. Instead, hold the steamer slightly above the surface to avoid potential damage.
- Work on both sides: For garments with visible wrinkles on both sides, steam the front and back separately. Flip the garment over and repeat the steaming process to ensure all wrinkles are removed.
- Allow the fabric to dry: After steaming, allow the garment to air dry for a few minutes before wearing or storing it. This allows the fabric to regain its shape and ensures that any excess moisture evaporates.
- Consider using a pressing cloth: If you’re concerned about the direct contact of steam with certain fabrics, you can place a thin pressing cloth between the steamer and the fabric. This provides an additional layer of protection while still allowing steam to penetrate and remove wrinkles.
By following these steps, you can effectively remove wrinkles and refresh your garments with the Steamfast Steamer. Remember to exercise caution during the process and be mindful of delicate areas. It’s recommended to test the steamer on a small, inconspicuous area of the garment first to ensure that it reacts well to the steaming process.
Now that you know how to remove wrinkles and refresh your garments, let’s move on to steaming curtains and drapes in the next section. Discover how the Steamfast Steamer can help you achieve wrinkle-free and fabulous-looking window treatments.
Read more: How To Use A Hand Steamer
Steaming Curtains and Drapes
The Steamfast Steamer is not only great for removing wrinkles from garments but also for refreshing curtains and drapes. Steaming is a quick and effective way to eliminate wrinkles, remove dust, and give your window treatments a fresh and polished appearance. Here are the steps to steam curtains and drapes using the Steamfast Steamer:
- Prepare the area: Start by clearing the area around the curtains or drapes. Remove any items that may obstruct your access or get in the way during the steaming process. It’s best to have a clear and spacious working area.
- Hang the curtains: Hang the curtains or drapes on a sturdy curtain rod or a suitable hanger. Ensure that the fabric is evenly distributed without any bunching or folds to ensure a smooth steaming process.
- Start at the top: Begin steaming at the top of the curtains or drapes. Hold the steam nozzle a few inches away from the fabric and move it in a horizontal motion across the width of the fabric.
- Use long, sweeping motions: While steaming, use long, sweeping motions to evenly distribute the steam across the fabric. This ensures that all areas are thoroughly steamed and any wrinkles are effectively removed.
- Work in sections: Steaming curtains and drapes can be a time-consuming process, particularly if they are long or heavily wrinkled. Divide the fabric into manageable sections and work on one section at a time. This will ensure that you cover the entire surface without missing any spots.
- Steam both sides: If the curtains or drapes are visible from both sides, steam one side first and then flip them over to steam the other side. This ensures that both sides receive the benefits of the steam, resulting in overall wrinkle-free window treatments.
- Pay attention to pleats and folds: For curtains with pleats or folds, direct the steam into those areas to ensure that the steam penetrates and relaxes the fabric. Use your hand to gently smooth out any wrinkles as you steam.
- Be cautious with delicate fabrics: Some curtains or drapes may be made of delicate or sensitive fabrics. In such cases, test the steamer on a small, inconspicuous area first to ensure that the fabric reacts well to the steam and doesn’t get damaged.
- Allow the fabric to dry: After steaming, give the curtains or drapes some time to air dry. This allows any residual moisture to evaporate and ensures that the fabric regains its shape and fresh appearance.
By following these steps, you can effectively steam curtains and drapes to remove wrinkles and freshen their appearance. The Steamfast Steamer simplifies the process and saves you from the hassle of taking down and ironing curtains, making it a convenient and time-saving solution for maintaining your window treatments.
In the next section, we will explore the cleaning and maintenance of the Steamfast Steamer to ensure its longevity and optimal performance. Proper care and upkeep will ensure that your steamer continues to serve you well for years to come.
Cleaning and Maintenance
Regular cleaning and maintenance of your Steamfast Steamer are essential to keep it functioning optimally and prolong its lifespan. Here are the steps you should take to clean and maintain your steamer:
- Power off and unplug: Before starting any cleaning or maintenance tasks, make sure the steamer is turned off and unplugged from the power source. This is crucial for your safety.
- Empty the water tank: Empty the water tank to avoid any stagnant water or mineral buildup. Allow the tank to cool down before removing it to prevent any risk of burns.
- Wipe the exterior: Use a soft, damp cloth to wipe down the outer surface of the steamer. This removes any dust or dirt that may have accumulated, keeping your steamer looking clean and presentable.
- Clean the steam nozzle: Carefully detach the steam nozzle from the steamer, following the manufacturer’s instructions. Rinse it with water to remove any residue or mineral buildup. For stubborn deposits, you can gently scrub the nozzle with a toothbrush or a soft brush. Ensure the nozzle is completely dry before reattaching it.
- Descale if necessary: Over time, mineral deposits from the water may accumulate inside the steamer. If there is significant scaling, you may need to descale the steamer. Refer to the manufacturer’s instructions for the recommended descaling method and use suitable descaling solutions or vinegar diluted with water. Follow the instructions carefully to avoid damaging the steamer.
- Store with care: When you’re not using the steamer, make sure to store it in a dry and clean place. Ensure that the power cord is properly coiled and not tangled to prevent any damage. Store any accessories or attachments in a safe place, so they are readily available when you need them.
- Inspect for damage: Regularly inspect your steamer for any signs of damage or wear. Check the power cord for any fraying or exposed wires. If you notice any issues, refrain from using the steamer and contact the manufacturer or a qualified technician for assistance.
- Follow manufacturer’s guidelines: Always refer to the manufacturer’s instructions for specific cleaning and maintenance recommendations for your Steamfast Steamer. They may provide additional steps or precautions based on the model you own.
By following these cleaning and maintenance practices, you can ensure that your Steamfast Steamer remains in top condition and delivers optimal performance. Regular cleaning and proper upkeep not only extend the life of your steamer but also contribute to its efficient functionality, allowing you to enjoy wrinkle-free garments and fabrics for years to come.
Now that you have learned how to clean and maintain your steamer, let’s address some common troubleshooting issues that you may encounter and how to resolve them in the next section.
Troubleshooting Common Issues
While the Steamfast Steamer is designed to provide reliable performance, occasional issues may arise. Here are some common problems you may encounter while using your steamer and how to troubleshoot them:
- Steamer doesn’t produce steam: If your steamer fails to produce steam, ensure that the water tank is filled with sufficient water and securely attached. Check if the steamer is adequately heated and that the steam control settings are adjusted correctly. If the issue persists, consult the manufacturer’s instructions for troubleshooting or contact their customer support for further assistance.
- Steamer spits out water: Excessive water droplets or spitting can occur if the steam nozzle is too close to the fabric or if the steam control setting is too high. Ensure that the nozzle is held at a safe distance from the fabric and that the steam level is adjusted appropriately for the type of fabric you are steaming. If the problem persists, try descaling the steamer to remove any mineral buildup that could be affecting steam flow.
- Water leakage: If you notice water leaking from the steamer, ensure that the water tank is securely attached and that the cap or lid is tightly closed. Check for any cracks or damage in the tank or other parts of the steamer that may cause leakage. If the problem persists, contact the manufacturer for assistance or seek professional repair.
- Steamer doesn’t heat up: If your steamer fails to heat up, double-check that it is properly connected to a power source and that the power switch is turned on. Ensure that the power cord is fully inserted into both the steamer and the electrical outlet. If the issue persists, contact the manufacturer or seek professional assistance.
- Uneven steam distribution: If you notice uneven steam distribution, there may be mineral deposits or clogs in the steam nozzle. Remove the nozzle and clean it thoroughly to remove any obstructions. Ensure that the nozzle is properly reattached and that the steam control setting is adjusted correctly for efficient steam distribution.
- Weird odor or taste: If you detect strange odors or tastes while using the steamer, it may indicate mineral buildup or impurities in the water. Try using distilled water instead, as it reduces the risk of developing odors or tastes. Additionally, you can descale the steamer regularly to remove any mineral deposits that may cause undesirable smells or tastes.
If you encounter any other issues not mentioned above, consult the manufacturer’s instructions for specific troubleshooting steps or contact their customer support. It’s essential to follow their recommendations to avoid any safety hazards or further damage to your steamer.
Remember, maintaining your steamer properly, following the manufacturer’s guidelines, and performing regular cleaning and maintenance can prevent most issues and keep your Steamfast Steamer in excellent working condition.
With troubleshooting covered, let’s summarize what we’ve covered and conclude our comprehensive guide to using the Steamfast Steamer in the final section.
Conclusion
Congratulations! You’ve reached the end of our comprehensive guide on how to use the Steamfast Steamer. This versatile garment care tool offers a convenient and efficient solution for removing wrinkles and refreshing various fabrics, making it a valuable addition to your household or travel essentials.
We started by introducing you to the Steamfast Steamer and its impressive features, including its ability to generate high-temperature steam quickly. Its lightweight and compact design make it ideal for both home use and travel. We then walked you through the setup process, including attaching the telescopic pole and steam nozzle, as well as filling the water tank with clean water.
You learned how to adjust the steam control settings for different types of fabrics, ensuring safe and effective steaming results. We provided guidance on steaming various fabrics, including delicate silk, sturdy cotton, and resilient linen, to help you achieve wrinkle-free perfection.
We didn’t stop at garments alone. You also discovered how to effectively steam curtains and drapes, transforming them from drab to fab with the power of steam. We highlighted the importance of cleaning and maintaining your Steamfast Steamer regularly to ensure optimal performance and longevity.
Lastly, we addressed common troubleshooting issues that may arise and provided guidance on how to resolve them. By following the recommended troubleshooting steps and reaching out to the manufacturer’s customer support when necessary, you can overcome any challenges that come your way.
Now armed with the knowledge and know-how of using the Steamfast Steamer, you can confidently bid farewell to pesky wrinkles and enjoy effortlessly smooth and refreshed fabrics. So go ahead, steam away, and revel in the luxurious, wrinkle-free results!
Frequently Asked Questions about How To Use Steamfast Steamer
Was this page helpful?
At Storables.com, we guarantee accurate and reliable information. Our content, validated by Expert Board Contributors, is crafted following stringent Editorial Policies. We're committed to providing you with well-researched, expert-backed insights for all your informational needs.

0 thoughts on “How To Use Steamfast Steamer”