Articles
Homedics Steamer How To Use
Modified: August 24, 2024
Learn how to effectively use the Homedics steamer with these informative articles. Step-by-step guides and tips to achieve wrinkle-free clothes.
(Many of the links in this article redirect to a specific reviewed product. Your purchase of these products through affiliate links helps to generate commission for Storables.com, at no extra cost. Learn more)
Introduction
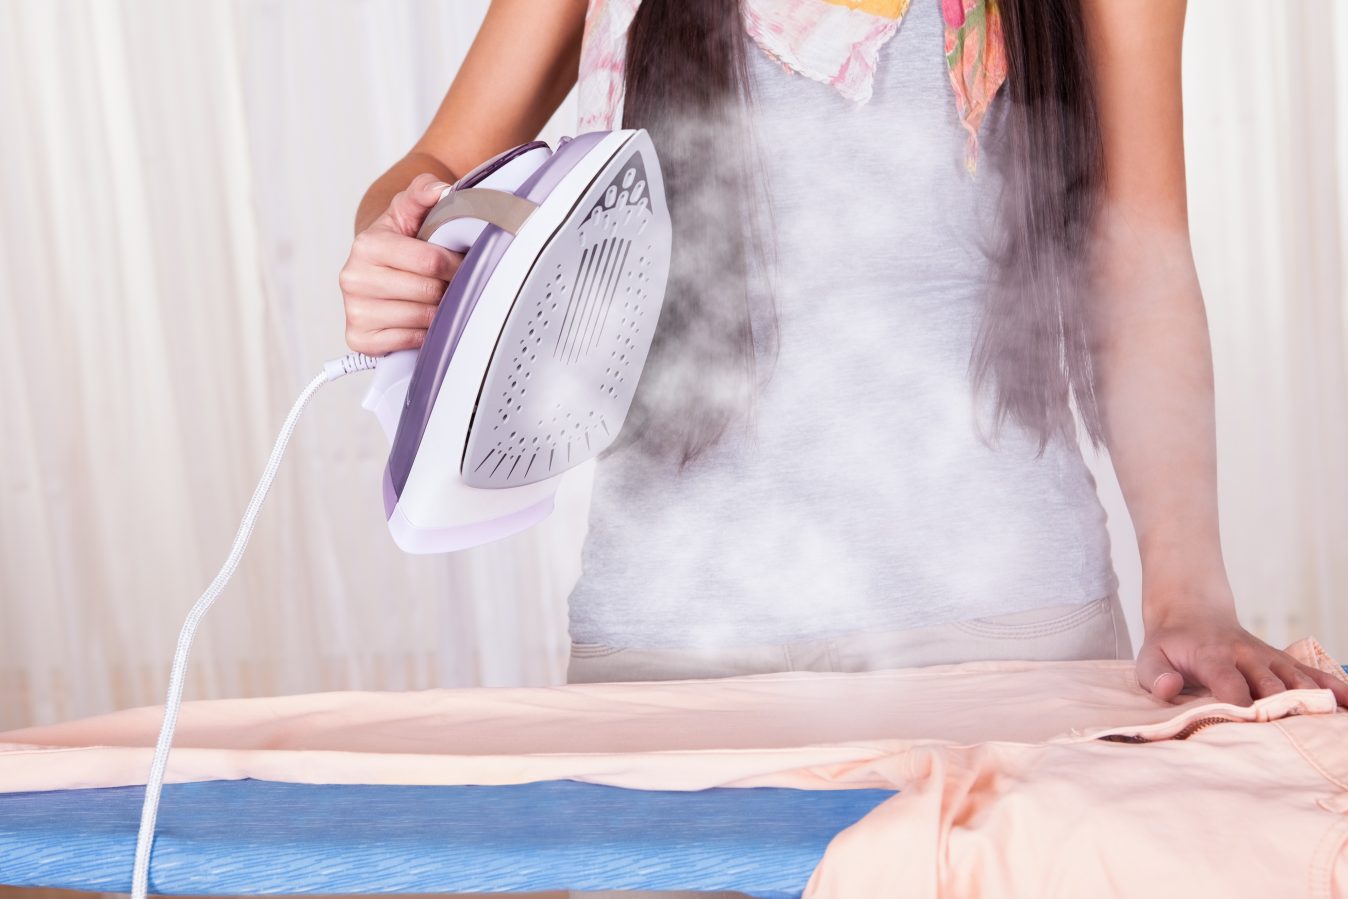
Welcome to the world of garment care with the Homedics Steamer! In this article, we will guide you on how to effectively and safely use the Homedics Steamer to steam your clothes, curtains, drapes, and upholstery. Steaming your garments not only helps to remove wrinkles but also refreshes the fabric and eliminates odors without the need for harsh chemicals.
The Homedics Steamer is a reliable and convenient solution for those who want to maintain a wrinkle-free and presentable appearance for their clothes and home furnishings. Whether you’re getting ready for an important business meeting or simply want to freshen up your living space, this versatile steamer offers a quick and efficient way to achieve professional results.
Before we dive into the detailed instructions on how to use the Homedics Steamer, it’s important to mention a few safety precautions to ensure your well-being and the longevity of the steamer. By following these precautions, you can have a hassle-free steaming experience.
Key Takeaways:
- Safety First!
Prioritize safety when using the Homedics Steamer by following essential precautions, such as checking the power cord, using clean water, and handling the steamer with care to ensure a worry-free steaming experience. - Versatile Steaming Techniques
Master the art of steaming garments, curtains, drapes, and upholstery with the Homedics Steamer by selecting the right settings, using proper techniques, and achieving professional results for various fabric types.
Read more: How To Use A Steamer
Safety Precautions
When using the Homedics Steamer, it’s essential to prioritize safety to prevent accidents or damage to the steamer and your surroundings. Here are some important safety precautions to keep in mind:
- Read the User Manual: Before operating the Homedics Steamer, thoroughly read the user manual provided with the product. Familiarize yourself with the instructions, safety guidelines, and maintenance procedures to ensure safe and proper usage.
- Check the Power Cord: Before plugging in the steamer, inspect the power cord for any signs of damage such as fraying or exposed wires. If you notice any issues, do not use the steamer, and contact the manufacturer for assistance.
- Ensure Proper Voltage: Verify that the voltage in your area matches the voltage specified on the steamer. Using the wrong voltage can lead to equipment failure or electrical hazards.
- Place on Stable Surface: Always place the Homedics Steamer on a stable and level surface to prevent it from accidentally tipping over during use. Avoid placing it on fabric or flimsy surfaces that may be damaged by heat or moisture.
- Keep Children and Pets Away: When operating the steamer, ensure that children and pets are kept at a safe distance to prevent accidental contact with the hot steam or the steamer itself.
- Use Appropriate Water: Only use clean water in the Homedics Steamer. Avoid using any additives, such as fragrance oils or fabric softeners, which can damage the steamer or cause it to emit unpleasant odors.
- Allow Cooling Before Refilling: Before refilling the water tank, make sure to turn off and unplug the steamer. Allow it to cool down for a few minutes to avoid burns or scalds when handling hot components.
- Handle with Care: Always handle the steamer with caution and avoid touching the hot plate or steam nozzle during or immediately after use. Use the provided handle or grip to prevent accidental burns.
By following these safety precautions, you can ensure a safe and worry-free steaming experience with the Homedics Steamer. Now that we have covered the essential safety guidelines, let’s move on to unpacking the steamer and getting it ready for use.
Unpacking the Homedics Steamer
Congratulations on your purchase of the Homedics Steamer! Now, let’s begin by unpacking the steamer and familiarizing ourselves with its components:
- Remove Packaging Materials: Carefully remove the outer packaging materials, such as cardboard or plastic, from the Homedics Steamer. Take care not to use any sharp objects that could damage the steamer.
- Inspect the Steamer: Once the packaging is removed, visually inspect the steamer for any visible damage. Check for any signs of dents, cracks, or loose parts. If you notice any issues, contact the retailer or manufacturer for assistance.
- Check the Accessories: The Homedics Steamer usually comes with a few accessories to enhance your steaming experience. These accessories may include a fabric brush attachment, a crease tool, or a lint pad. Ensure that all the accessories are included in the package.
- Read the User Manual: Take a few minutes to read through the user manual that accompanies the Homedics Steamer. The manual will provide detailed instructions on how to assemble, operate, clean, and maintain the steamer.
- Assemble the Steamer: Depending on the model of the Homedics Steamer you have, there may be some assembly required. Follow the instructions in the user manual to correctly assemble the handle and any attachments that come with the steamer.
- Prepare a Steaming Area: Before you start using the Homedics Steamer, choose a suitable location with enough space to safely operate the steamer. Ensure that the area is well-ventilated and away from any flammable materials.
- Inspect the Power Cord: Check the power cord for any damage or tangling. Ensure that the power cord is long enough to reach a nearby power outlet without stretching or straining.
Once you have successfully unpacked the Homedics Steamer and completed the necessary checks, you are now ready to move on to the next step: filling the water tank. Properly filling the water tank is crucial for achieving optimal steaming results. We will cover this in detail in the next section.
Filling the Water Tank
Now that you have unpacked the Homedics Steamer and completed the necessary checks, it’s time to fill the water tank. Follow these steps to ensure a smooth and effective steaming experience:
- Prepare Clean Water: Use clean, cold tap water to fill the water tank. Avoid using hot or distilled water, as they may affect the steaming performance or cause damage to the steamer.
- Locate the Water Tank: The water tank is typically located at the base of the Homedics Steamer. Check the user manual or the visual instructions on the steamer to identify the water tank.
- Remove the Water Tank Cap: Gently twist or lift the water tank cap to remove it. Set the cap aside in a safe place to prevent misplacing it.
- Add Water to the Tank: Slowly pour the clean water into the water tank. Be mindful of the maximum fill line indicated on the tank, as overfilling may cause water to leak or affect the steaming performance. Use a measuring cup or the provided fill cup, if available, to ensure accurate measurement.
- Replace the Water Tank Cap: Once the water tank is filled, securely reattach the water tank cap to prevent any leakage during operation.
- Allow the Water to Settle: Before powering on the Homedics Steamer, allow the water to settle in the tank for a few minutes. This allows the water to reach room temperature and ensures optimal steaming performance.
- Optional: Add Fragrance or Fabric Softener: If desired, you can add a small amount of fragrance or fabric softener to the water tank. However, always check the user manual to ensure that adding any additives will not affect the steamer’s functionality.
Once you have successfully filled the water tank, the Homedics Steamer is now ready to be powered on. In the next section, we will guide you on how to effectively power on and operate the steamer to achieve wrinkle-free garments.
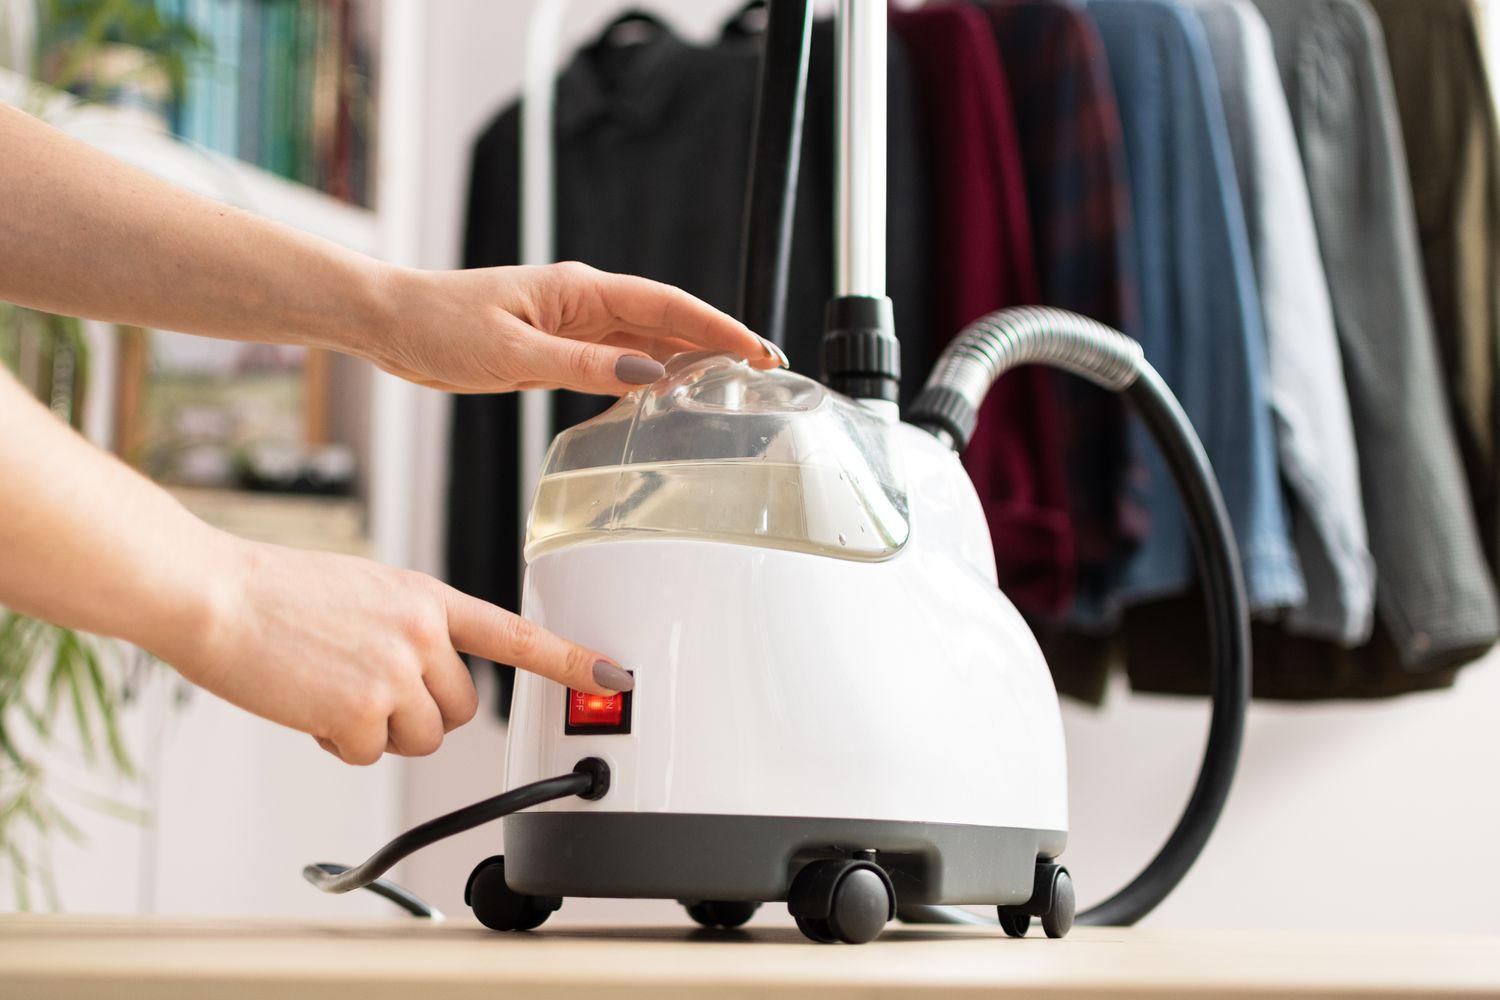
Powering On the Steamer
After filling the water tank, it’s time to power on the Homedics Steamer and prepare it for steaming. Follow these steps to ensure a safe and efficient steaming experience:
- Place the Steamer on a Stable Surface: Find a stable and level surface to place the Homedics Steamer. Ensure that it is away from any flammable materials or objects that may obstruct the steam.
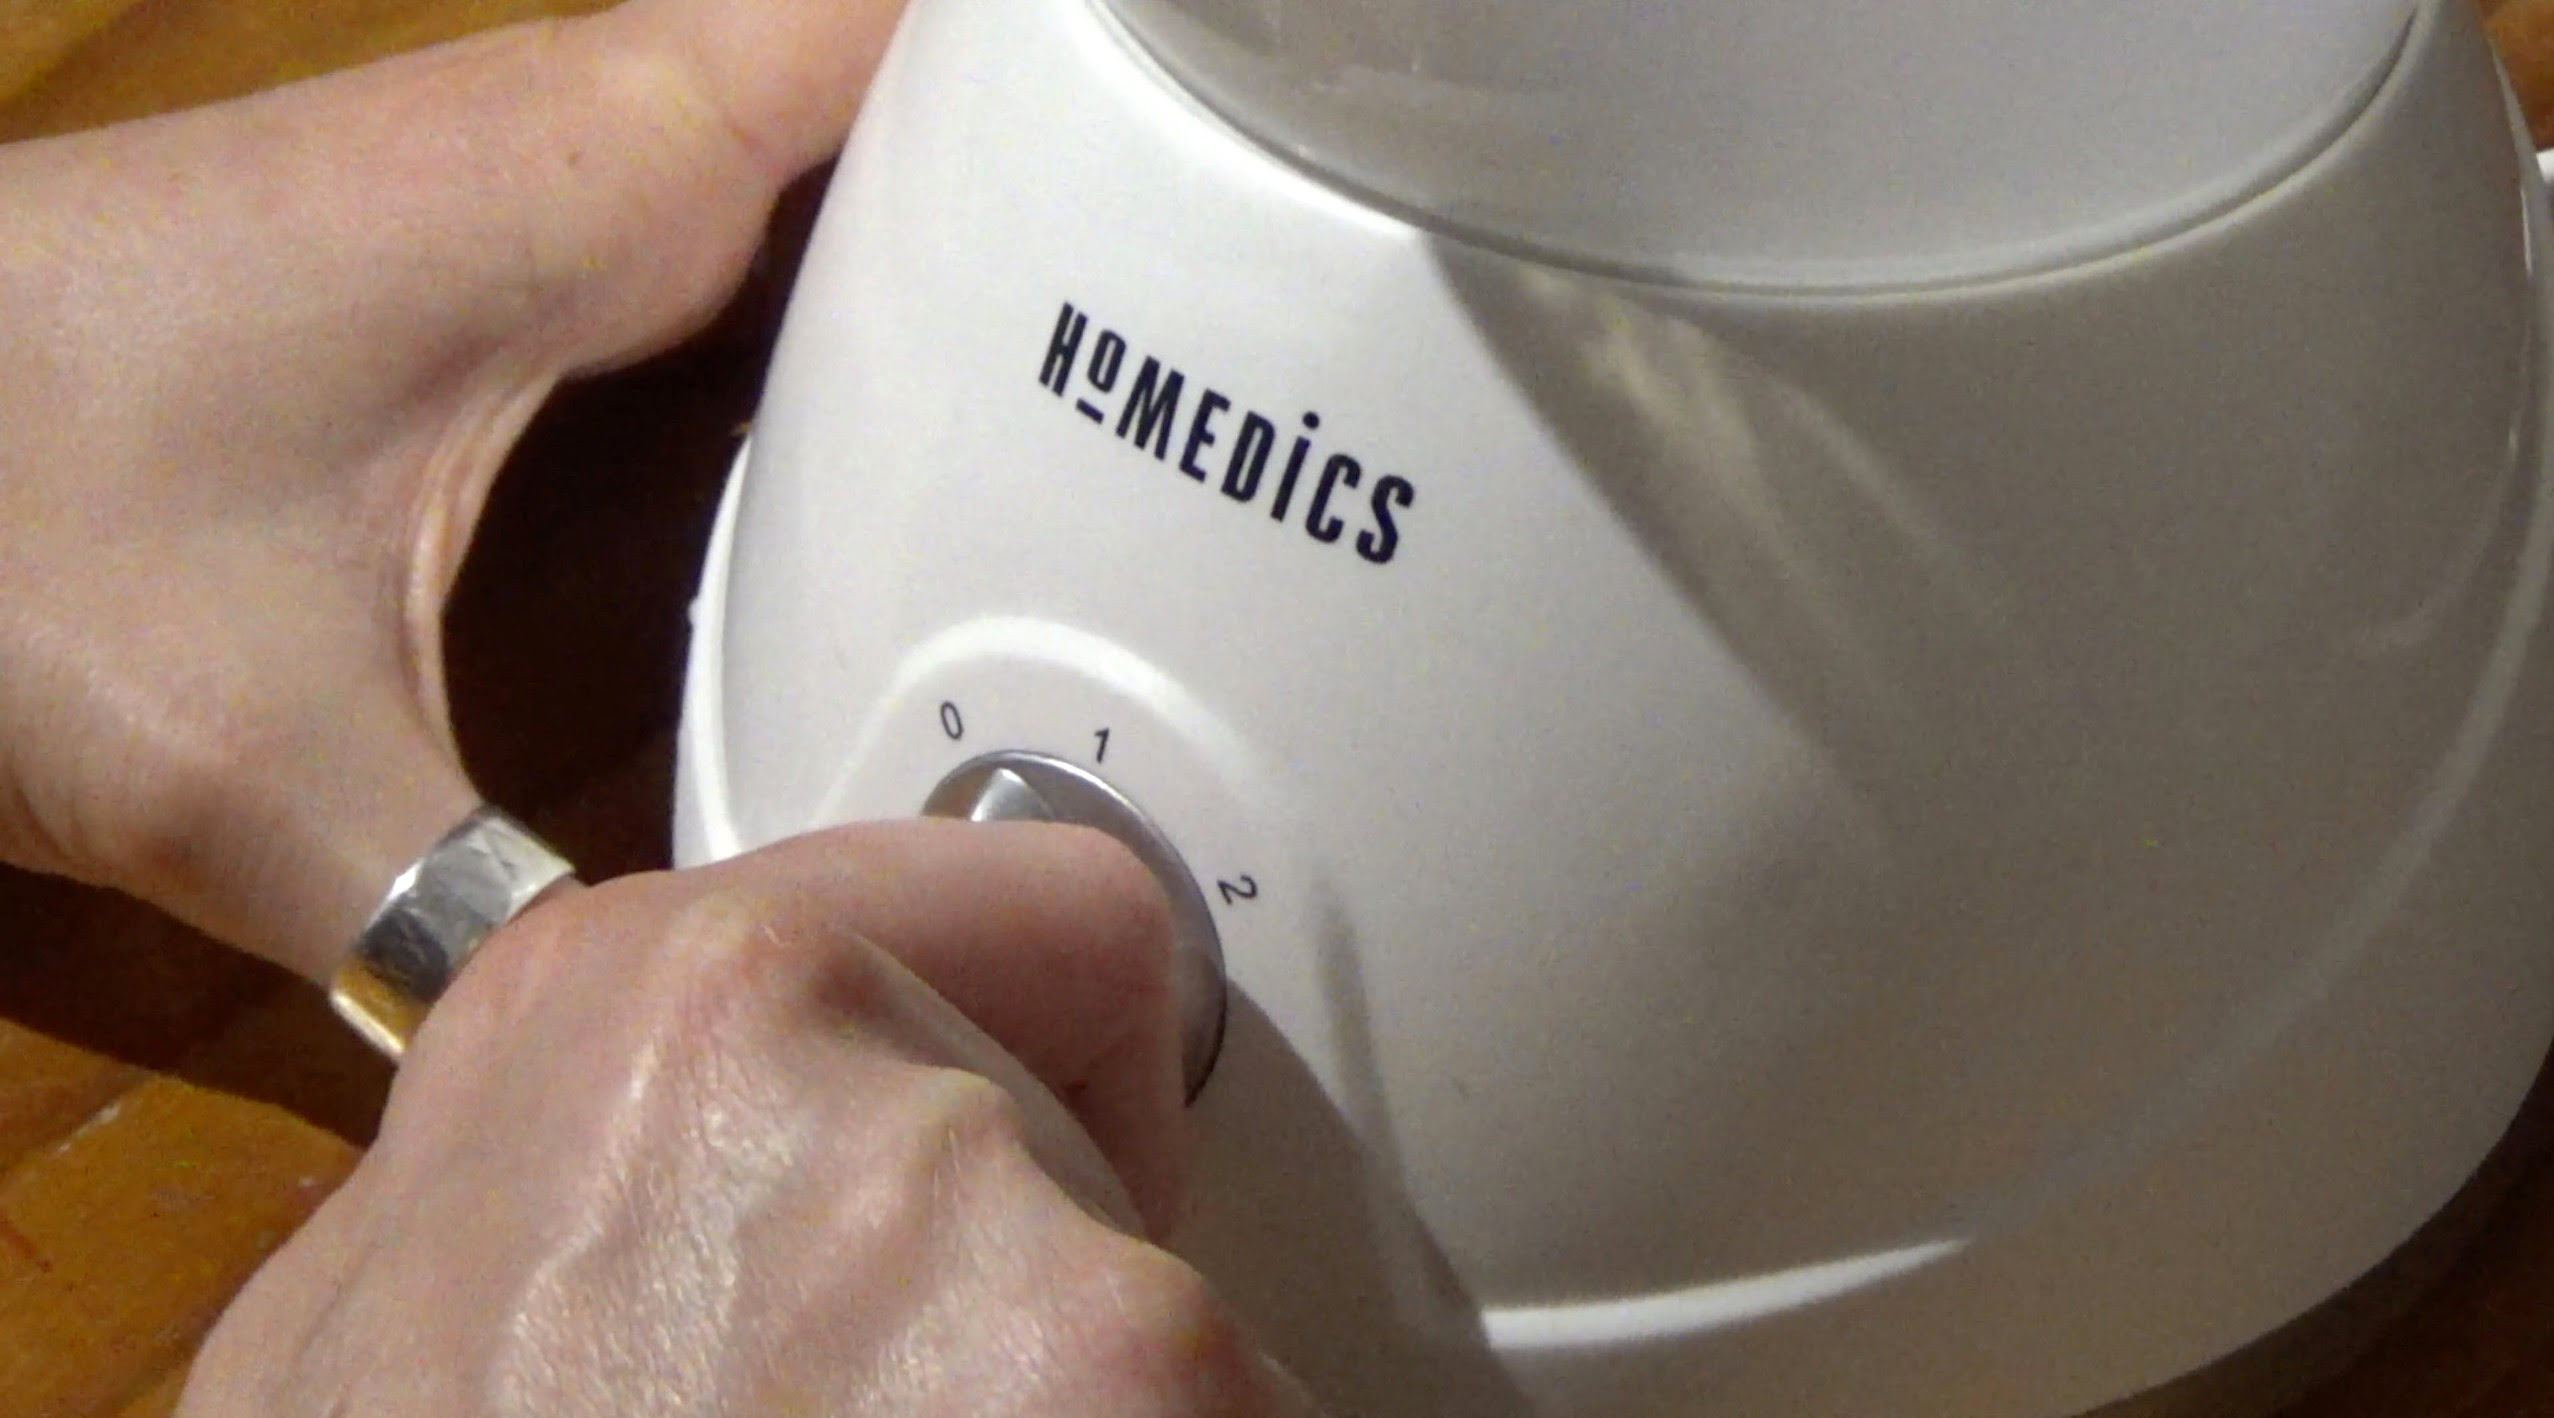
- Locate the Power Button: The power button is typically located on the main body of the Homedics Steamer. Look for the button marked with a power symbol or labeled “On/Off”.
- Connect the Power Cord: Plug the power cord into a nearby electrical outlet. Make sure the cord is connected properly and is not tangled or stretched.
- Turn On the Steamer: Press the power button to turn on the Homedics Steamer. Some models may have a power indicator light that turns on when the steamer is powered up.
- Allow the Steamer to Heat Up: After turning on the steamer, give it a few minutes to heat up. The steamer will typically emit a sound or have an indicator light to signal that it is ready for use.
- Check the Steamer’s Settings: Depending on the model, the Homedics Steamer may have different steam settings such as high or low steam intensity. Adjust the settings according to your preference and the fabric type you are steaming. Refer to the user manual for specific instructions on adjusting the settings.
- Start Steaming: Once the Homedics Steamer is heated up and the desired settings are adjusted, you are ready to start steaming. Hold the steamer securely by the handle, point the steam nozzle towards the garment, and move it in an up and down or side to side motion to effectively remove wrinkles.
- Refill the Water Tank when Needed: As you steam, keep an eye on the water level in the tank. If the water starts to run low, power off the steamer, allow it to cool down, and refill the water tank following the previous instructions.
Remember to always follow the safety precautions mentioned earlier and to read the user manual for specific instructions on operating your Homedics Steamer model. In the next sections, we will guide you on steaming different types of garments, curtains, and upholstery.
Read more: How To Use A Hand Steamer
Steaming Garments
Steaming garments with the Homedics Steamer is a convenient and effective way to remove wrinkles and refresh your clothes. Follow these steps to achieve wrinkle-free garments:
- Select the Right Setting: Check the fabric care label on your garment to determine the appropriate steam setting on the Homedics Steamer. Different fabrics may require different steam intensities.
- Hang the Garment: Hang the garment on a hanger, making sure it is free from any clips or hanger marks. This allows the steam to penetrate the fabric evenly and effectively.
- Position the Steamer: Hold the Homedics Steamer by the handle and position the steam nozzle a few inches away from the garment. Make sure to maintain a safe distance to prevent any accidental burns.
- Steam from Top to Bottom: Starting from the top of the garment, move the steam nozzle down slowly, allowing the steam to penetrate the fabric. Repeat this motion until you have steamed the entire garment.
- Pay Attention to Troublesome Areas: For stubborn wrinkles or areas that require extra attention, hold the steam nozzle directly onto the fabric for a few seconds. Be cautious not to keep the steamer in one spot for too long, as it may cause moisture buildup or damage the fabric.
- Allow the Garment to Dry: After steaming, allow the garment to dry for a few minutes before wearing or storing. Avoid touching the fabric when it is still damp to prevent any transfer of moisture or potential damage.
- Repeat as Needed: If there are still wrinkles remaining after the first steaming, repeat the process until the garment is wrinkle-free. Be patient and thorough in your steaming technique.
Steaming garments is a quick and efficient way to refresh your clothing without the need for an ironing board or excessive heat. The Homedics Steamer provides a gentle and effective steam that can help you achieve a polished and professional look. In the next sections, we will guide you on steaming curtains, drapes, and upholstery.
When using the Homedics Steamer, make sure to fill the water tank with distilled water to prevent mineral buildup and ensure a longer lifespan for the steamer.
Steaming Curtains and Drapes
Steaming curtains and drapes with the Homedics Steamer is an excellent way to remove wrinkles and freshen up your window treatments. Follow these steps to effectively steam your curtains and drapes:
- Prepare the Curtain or Drape: Start by ensuring that your curtains or drapes are properly hung on the curtain rod or hooks. Smooth out any major wrinkles or folds by hand before steaming.
- Adjust the Steamer Settings: Set the Homedics Steamer to the appropriate steam intensity for your curtains or drapes. Always check the fabric care label to ensure compatibility with steam.
- Start at the Top: Begin steaming at the top of the curtains or drapes. Hold the steam nozzle a few inches away from the fabric and move it down in a steady motion.
- Cover the Entire Surface: Ensure that you steam the entire surface area of each panel, working your way from top to bottom. Pay extra attention to any wrinkled areas or pleats.
- Smooth Out with Your Hands: After steaming, use your hands to gently smooth out any remaining wrinkles or creases. The steam will have loosened the fabric, making it easier to manipulate.
- Allow the Curtains or Drapes to Dry: It’s important to allow the curtains or drapes to dry fully before closing them or touching them. This ensures that the fabric retains its shape and prevents any moisture transfer to surrounding surfaces.
- Repeat for Additional Panels: If you have multiple panels, repeat the steaming process for each one. Take your time to ensure that each panel is adequately steamed and free from wrinkles.
Steaming curtains and drapes is a gentle and effective method that maintains the fabric’s quality and prevents potential damage from excessive heat. The Homedics Steamer offers the convenience and precision needed to achieve wrinkle-free window treatments. In the next section, we will guide you on how to steam upholstery.
Steaming Upholstery
Steaming upholstery with the Homedics Steamer is a great way to remove wrinkles and refresh the fabric of your furniture. Follow these steps to effectively steam your upholstery:
- Prep the Upholstery: Remove any loose cushions or pillows from the furniture. Smooth out any major wrinkles or folds by hand before steaming.
- Adjust the Steamer Settings: Set the Homedics Steamer to the appropriate steam intensity for your upholstery fabric. Check the care label or perform a spot test in an inconspicuous area to ensure compatibility with steam.
- Test the Steam: Before you begin steaming the upholstery, test the steam on a small, inconspicuous area of the fabric to ensure that it does not cause any discoloration or damage.
- Steam in Sections: Divide the upholstery into manageable sections and steam one section at a time. Start from the top and work your way down.
- Hold the Steam Nozzle: Hold the steam nozzle a few inches away from the upholstery and move it in a slow, sweeping motion. Avoid concentrating the steam in one spot for too long to prevent moisture buildup.
- Smooth the Fabric: After steaming each section, use your hands or a soft brush to gently smooth the fabric. This helps to remove any remaining wrinkles and improve the overall appearance.
- Allow the Upholstery to Dry: Give the upholstery sufficient time to dry before using the furniture or placing the cushions back. This ensures that the fabric is fully dry and prevents any moisture from transferring to other surfaces.
- Repeat for Stubborn Wrinkles: For upholstery with stubborn wrinkles or creases, you may need to repeat the steaming process or concentrate the steam on the affected areas.
Steaming upholstery is a gentle and effective method that helps to revive the fabric and remove wrinkles. The Homedics Steamer provides the convenience and precision required to achieve professional-looking results. In the next section, we will explore the cleaning and maintenance guidelines for the steamer.
Cleaning and Maintenance
To ensure the longevity and optimal performance of your Homedics Steamer, regular cleaning and maintenance are essential. Follow these guidelines to keep your steamer in excellent condition:
- Power Off and Unplug: Before performing any cleaning or maintenance tasks, ensure that the steamer is turned off and unplugged to prevent any accidents.
- Emptying the Water Tank: After each use, empty any remaining water from the water tank. This prevents the buildup of mineral deposits and ensures clean steaming in subsequent sessions.
- Cleaning the Water Tank: Regularly clean the water tank to remove any mineral deposits or impurities. Follow the manufacturer’s instructions for the best cleaning method, which may involve using vinegar or a cleaning solution recommended for steamers.
- Wipe the Exterior: Use a soft, damp cloth to wipe the exterior of the steamer to remove any dust or residue. Take care not to get water inside the steamer or near the electrical components.
- Cleaning the Steam Nozzle: Over time, the steam nozzle may accumulate mineral deposits. Use a small brush or a cotton swab dipped in vinegar to gently clean the nozzle and remove any clogs or residue.
- Store the Steamer Properly: When not in use, store the Homedics Steamer in a safe and dry place. Ensure that the power cord is neatly wrapped and that the steamer is protected from dust and other environmental factors.
- Follow Maintenance Schedule: Refer to the user manual for a recommended maintenance schedule. This may include periodic descaling of the steamer, lubrication of moving parts, and other necessary tasks to keep the steamer in optimal condition.
By following these cleaning and maintenance guidelines, you can prolong the life of your Homedics Steamer and enjoy consistent, reliable performance. Regular upkeep ensures that the steamer operates efficiently and delivers excellent steaming results.
However, if you encounter any issues or have questions about maintaining your steamer, refer to the user manual or contact the Homedics customer support for assistance.
Read more: How To Use Steamfast Steamer
Troubleshooting Common Issues
Despite proper maintenance, you may encounter some common issues while using the Homedics Steamer. Here are a few possible problems and their solutions:
- No Steam: If the steamer is not producing steam, check the water level in the tank and ensure that the unit is properly plugged in and turned on. If the problem persists, consult the troubleshooting section in the user manual or contact customer support.
- Leaking Water: If water is leaking from the steamer, check if the water tank cap is securely tightened. Inspect the tank for any cracks or damage that may be causing the leakage. If necessary, replace any faulty parts or contact customer support for assistance.
- Low Steam Pressure: If the steam pressure seems low, check the water tank for sufficient water and ensure that the steamer is heated up properly. If the issue persists, refer to the user manual for instructions on adjusting the settings or contact customer support.
- Strange Odors: If the steamer emits unusual odors, it may be due to mineral deposits or contaminants in the water tank. Clean the water tank thoroughly using the recommended method and ensure that only clean water is used for steaming.
Remember, troubleshooting steps may vary depending on the specific model of your Homedics Steamer. Always consult the user manual or contact customer support for accurate and model-specific troubleshooting guidance.
With proper cleaning, maintenance, and troubleshooting procedures, you can ensure that your Homedics Steamer stays in optimal condition, providing you with wrinkle-free garments, curtains, and upholstery for years to come.
Read more: How To Use Steamfast Steamer
Troubleshooting Common Issues
Despite its reliable performance, the Homedics Steamer may encounter a few common issues during use. Here are some troubleshooting tips to help you address and resolve these issues:
- No Steam: If the steamer is not producing steam, first check that the water tank is filled to the appropriate level. Inspect the power connection to ensure that the steamer is properly plugged in. If these elements are in order, check if the steamer is turned on and heated up. If there is still no steam, refer to the user manual for model-specific troubleshooting steps or contact the manufacturer’s customer support for assistance.
- Low Steam Pressure: If you notice a decrease in steam pressure, ensure that the water tank is adequately filled. If the tank level is sufficient, try increasing the steam intensity setting. If the issue persists, it may be due to a clogged steam nozzle or mineral deposits in the steamer. Consult the user manual for instructions on cleaning the nozzle or descaling the steamer to restore optimal steam pressure.
- Leaking Water: If water is leaking from the steamer, there may be a few possible causes. First, check if the water tank cap is tightly secured. A loose cap can cause water to leak during operation. If the cap is secure and the leaking persists, inspect the tank for any cracks or damage. A damaged tank may need to be replaced. Avoid overfilling the water tank, as excessive water can result in leaks. If the issue continues, reach out to the manufacturer’s customer support for further assistance.
- Strange Odors: If you notice unusual odors coming from the steamer, it may be due to mineral deposits or other impurities in the water. Empty the water tank and clean it thoroughly with a mixture of vinegar and water or a recommended descaling solution. Rinse the tank well before refilling it with clean water. Using distilled or filtered water can also help prevent odors caused by impurities. If the odors persist, consult the user manual or contact the manufacturer for additional guidance.
- Electrical Issues: In the event of any electrical issues, such as the steamer not turning on or sudden power loss, first check the power cord and ensure that it is securely connected to both the steamer and the power outlet. Verify that the power outlet is functioning properly by plugging in another device. If the steamer still does not work, there may be an internal electrical problem. Discontinue use and seek assistance from the manufacturer’s customer support for guidance on repairs or a possible replacement.
Remember, troubleshooting steps may vary depending on the specific model of your Homedics Steamer. Always refer to the user manual for accurate and model-specific troubleshooting guidance. If the issue persists or if you are unsure about performing any troubleshooting steps, it is advisable to contact the manufacturer’s customer support for further assistance.
By following these troubleshooting tips, you can effectively address common issues and continue enjoying the convenience and efficiency of using the Homedics Steamer.
Conclusion
Congratulations on becoming familiar with the Homedics Steamer and learning how to use it effectively and safely to steam your garments, curtains, drapes, and upholstery. With this versatile steamer, you can achieve wrinkle-free results, refresh fabrics, and eliminate odors without the need for harsh chemicals or excessive heat.
We began with a comprehensive introduction to the Homedics Steamer, highlighting its benefits and versatility. We then discussed important safety precautions to follow while using the steamer to ensure your well-being and the longevity of the appliance.
Next, we guided you through the process of unpacking the Homedics Steamer, filling the water tank, and powering it on. These foundational steps prepared you to move on to specific steaming techniques for garments, curtains, drapes, and upholstery.
We emphasized the importance of selecting the appropriate steaming settings, using proper techniques, and providing tips for achieving the best results for each type of fabric and surface you wish to steam.
Additionally, we covered the crucial topics of cleaning and maintenance, which are vital for keeping your Homedics Steamer in optimal condition. We discussed how to properly clean the water tank, maintain the exterior of the steamer, and store it safely when not in use.
We also provided troubleshooting tips for common issues you may encounter while using the steamer. From addressing no steam or low steam pressure to handling water leaks and unpleasant odors, we offered guidance to help you overcome these challenges.
In conclusion, the Homedics Steamer is a reliable and efficient tool that simplifies your garment care routine and enhances the appearance of your curtains, drapes, and upholstery. By following the instructions and taking proper care of your steamer, you can enjoy wrinkle-free fabrics and a fresh and clean living environment.
Remember to always refer to the user manual and contact the manufacturer’s customer support for any specific concerns or questions you may have. Happy steaming!
Frequently Asked Questions about Homedics Steamer How To Use
Was this page helpful?
At Storables.com, we guarantee accurate and reliable information. Our content, validated by Expert Board Contributors, is crafted following stringent Editorial Policies. We're committed to providing you with well-researched, expert-backed insights for all your informational needs.


0 thoughts on “Homedics Steamer How To Use”