Articles
How To Wash Hats In Sink
Modified: August 25, 2024
Learn the best way to wash your hats in the sink with these helpful articles. Keep your hats looking fresh and clean with these tips and tricks.
(Many of the links in this article redirect to a specific reviewed product. Your purchase of these products through affiliate links helps to generate commission for Storables.com, at no extra cost. Learn more)
Introduction
Washing hats in a sink can be a simple and effective way to keep them clean and looking their best. Whether you have a favorite baseball cap, a trendy fedora, or a stylish sun hat, following the proper washing techniques can help you maintain their shape, color, and overall condition.
While some hats may be labeled as “hand wash only,” others may not come with specific washing instructions. Washing your hats in a sink allows you to have more control over the cleaning process, reducing the risk of damage compared to machine washing. Additionally, this method allows you to tackle specific stains or spot clean certain areas, ensuring your hats remain fresh and presentable.
In this article, we will guide you through the step-by-step process of washing hats in a sink. From preparing the sink to spot cleaning stains, we will cover everything you need to know to successfully clean and maintain your hats. So, let’s get started!
Key Takeaways:
- Properly preparing the sink, using warm water, and gentle scrubbing can effectively clean hats without damaging their shape or material, ensuring they remain fresh and presentable.
- Reshaping and air drying hats in a well-ventilated area after washing helps maintain their original structure and fit, while spot cleaning can target stubborn stains for long-lasting hat durability.
Read more: How To Shrink A Hat In The Washing Machine
Step 1: Prepare the sink
Before you begin washing your hats, it’s essential to prepare the sink properly. This will ensure a clean and suitable environment for the cleaning process. Here’s what you need to do:
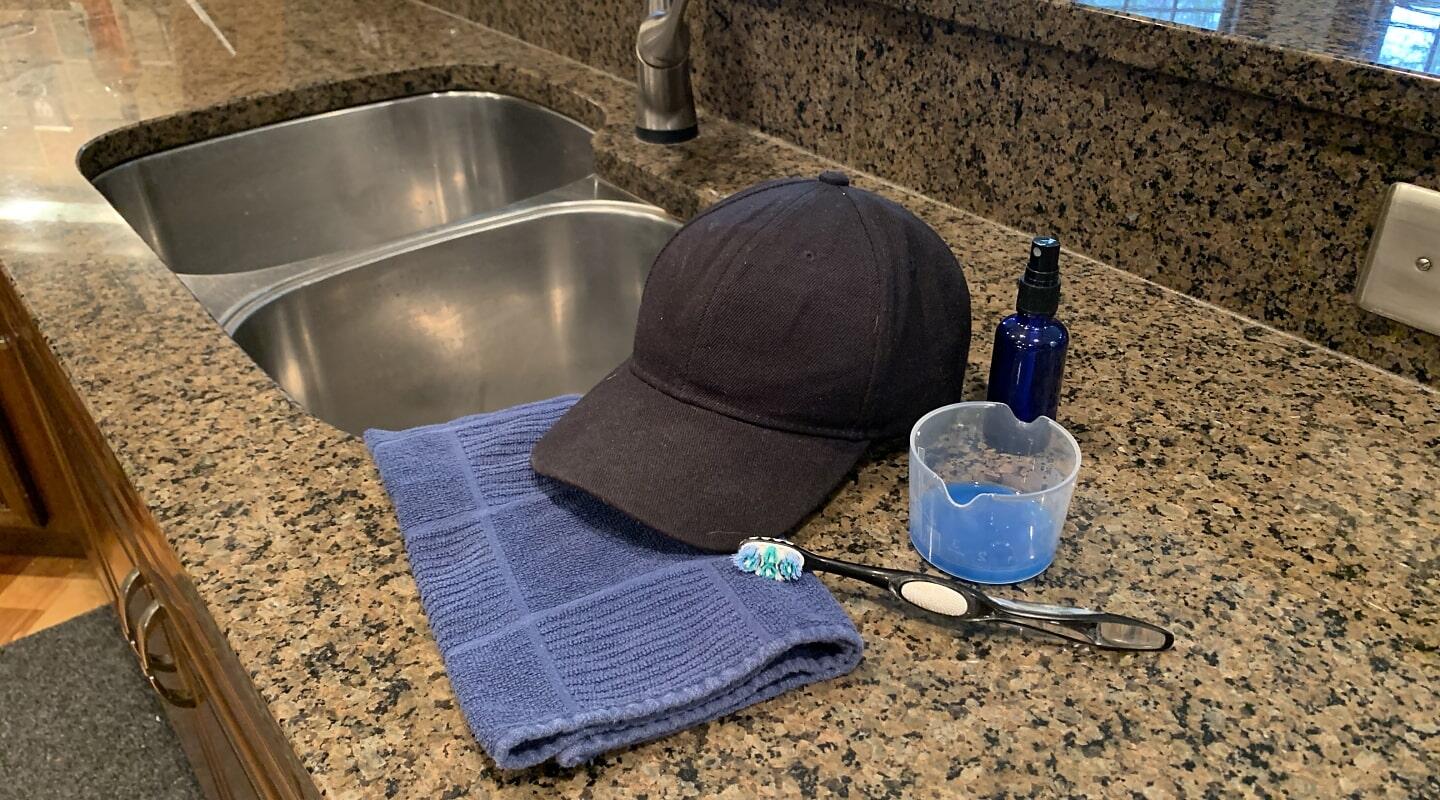
- Gather your supplies: Start by collecting all the necessary supplies for washing your hats in the sink. This includes mild detergent or a hat cleaner, a soft brush or sponge, a towel or drying rack, and warm water.
- Clean the sink: Make sure the sink is clean and free of any dirt or debris. Use a mild cleaning solution and a sponge to wipe down the sink’s surface. Rinse thoroughly to remove any residues.
- Clear the sink: Remove any dishes, utensils, or other items from the sink to make room for the hat washing process. It’s essential to have a clutter-free space to prevent any accidental damage to your hats.
- Adjust the water temperature: Fill the sink with warm water. The water should be comfortably warm to the touch, but not too hot, as extreme temperatures can damage certain hat materials. Aim for a temperature that is safe for both you and your hats.
By taking the time to properly prepare your sink, you create a clean and controlled environment for washing your hats. This sets the stage for a successful cleaning process and ensures the best possible results.
Step 2: Fill the sink with warm water
Now that you have prepared the sink, it’s time to fill it with warm water. The temperature of the water is important as it helps to effectively loosen and remove dirt, sweat, and other residues from your hats. Follow these steps:
- Adjust the water temperature: Make sure the water is warm, but not too hot. Hot water can cause certain hat materials to shrink or lose their shape. Aim for a temperature that is comfortable to the touch.
- Fill the sink: Turn on the faucet and allow the warm water to flow into the sink. Fill it enough to fully submerge your hats without overflowing. Be mindful not to overfill the sink, as it may make it more challenging to handle and clean the hats.
- Add detergent or hat cleaner (optional): Depending on the type of hats and the level of dirt, you may choose to add a mild detergent or a hat cleaner to the water. This can help to remove stubborn stains and odors. Follow the instructions on the product’s packaging for the proper amount to add.
By filling the sink with warm water, you create an ideal environment for effectively cleaning your hats. The warmth of the water helps to loosen dirt and grime, making it easier to remove during the scrubbing process.
Step 3: Add mild detergent or hat cleaner
Once the sink is filled with warm water, you have the option to add a mild detergent or hat cleaner. This step can help to enhance the cleaning power and remove any stubborn stains or odors from your hats. Follow these guidelines:
- Choose the right product: Select a mild detergent or hat cleaner specifically formulated for delicate fabrics. Avoid using harsh chemicals or bleach, as they can damage the materials of your hats.
- Read the instructions: Before adding the detergent or hat cleaner, read the instructions on the packaging carefully. This will provide you with important information regarding the proper dosage, soaking time, and any additional steps to take.
- Add the detergent or hat cleaner: If using a liquid detergent, pour the recommended amount into the warm water in the sink. For a powdered detergent, dissolve it in a small amount of warm water before adding it to the sink.
- Stir the water: Use your hand or a spoon to gently stir the water, ensuring that the detergent or hat cleaner is evenly distributed.
Adding a mild detergent or hat cleaner can help to effectively remove dirt, sweat, and other residues from your hats. Be sure to follow the instructions provided by the manufacturer to achieve the best cleaning results without damaging the materials of your hats.
Step 4: Gently scrub the hats
Now that the sink is ready, it’s time to start cleaning your hats. This step involves gently scrubbing the hats to remove dirt, stains, and odors. Follow these instructions to ensure a thorough yet gentle cleaning process:
- Submerge the hats: Carefully place the hats into the sink, ensuring that they are fully submerged in the warm water and detergent mixture. Allow them to soak for a few minutes to loosen any dirt or grime.
- Use a soft brush or sponge: Select a soft brush or sponge that is gentle on the hat’s material. Avoid using abrasive brushes or harsh scrubbing tools, as they can damage the surface of the hats.
- Gently scrub: With the brush or sponge, start gently scrubbing the hats in a circular motion. Focus on areas that are particularly dirty or stained. Be careful not to apply too much pressure, as this can distort the shape of the hats.
- Pay attention to sweatbands and brims: Give extra attention to the sweatbands and brims of the hats, as these areas tend to accumulate the most sweat and oils. Ensure that you thoroughly clean and scrub these areas to remove any build-up.
- Repeat if necessary: If there are stubborn stains or lingering odors, you may need to repeat the scrubbing process. Continue gently scrubbing until you are satisfied with the cleanliness of the hats.
Remember, the key to scrubbing your hats is to be gentle yet thorough. By using a soft brush or sponge and taking your time, you can effectively remove dirt and stains without causing any damage to the hats.
Read more: How To Store Hats
Step 5: Rinse the hats thoroughly
After successfully scrubbing your hats, it’s important to rinse them thoroughly to remove any leftover detergent or cleaning residue. This step ensures that your hats are clean and free from any soapy residue that could potentially damage the fabric or cause skin irritation. Follow these steps to rinse your hats properly:
- Drain the soapy water: Carefully pull the sink plug or drain the water to get rid of the soapy water.
- Rinse with warm water: Turn on the faucet and fill the sink with warm water again. Submerge the hats, one by one, and agitate them gently to rinse off any remaining detergent.
- Repeat if necessary: If you notice any suds or foamy residue, repeat the rinsing process until the water runs clear and there are no traces of detergent left. Proper rinsing is crucial to ensure that no residue remains on the hats.
By thoroughly rinsing your hats, you remove any lingering detergent or cleaning solution, leaving them clean, fresh, and ready for the next step in the washing process.
Fill the sink with lukewarm water and a small amount of mild detergent. Gently scrub the hat with a soft brush, focusing on any stained areas. Rinse thoroughly and reshape the hat before allowing it to air dry. Avoid using hot water or putting the hat in the dryer to prevent shrinking.
Step 6: Remove excess water from the hats
After rinsing your hats, the next step is to remove the excess water before letting them air dry. This helps to prevent the hats from becoming too heavy or misshapen during the drying process. Follow these steps to remove the excess water from your hats:
- Gently squeeze: Starting from the crown of the hat, gently squeeze the fabric to remove excess water. Be careful not to twist or wring the hat, as this can distort its shape.
- Blot with a towel: Place a clean towel or absorbent cloth on a flat surface. Lay the hat on top of the towel and gently press down to absorb the remaining moisture. You can also fold the towel over the hat and gently press on it to extract more water.
- Avoid vigorous rubbing: While using a towel, avoid rubbing the hat vigorously. This can lead to fabric pilling or stretching. Instead, focus on gently patting and pressing the hat to absorb the moisture.
It’s important to note that the goal is to remove excess water without altering the shape or structure of the hat. By gently squeezing and blotting, you can effectively remove excess water and pave the way for successful drying.
Step 7: Reshape the hats
After removing the excess water, it’s crucial to reshape your hats to ensure they maintain their original structure and fit. Reshaping helps prevent any potential shrinkage or deformation that may occur during the drying process. Follow these steps to reshape your hats:
- Identify the hat’s original shape: Take a close look at your hat and familiarize yourself with its original shape and structure. This will help you reshape it properly.
- Adjust the crown: For hats with a crown, use your hands to gently reshape it back to its original form. Gently push and squeeze the crown to recreate its desired shape.
- Fix the brim: If your hat has a brim, carefully shape it by using your hands to gently bend and mould it back into place. Pay attention to any specific curves or angles that the brim originally had.
- Reposition any decorative elements: If your hat has decorative elements like bows or ribbons, ensure they are placed correctly and tidy them up if needed.
Reshaping your hats is a crucial step in the washing process as it helps maintain their original look and fit. By taking the time to reshape them properly, you ensure that they retain their structural integrity and continue to look their best.
Step 8: Let the hats air dry
After reshaping your hats, it’s time to let them air dry. Air drying is the safest and most effective method for drying hats, as it minimizes the risk of shrinkage or damage that could be caused by heat or excessive moisture. Here’s how to proceed:
- Choose a well-ventilated area: Find a well-ventilated spot in your home to place your hats for drying. Avoid direct sunlight or heat sources, as they can fade colors or distort the shape of the hats.
- Use a drying rack: If you have one, a drying rack is an excellent option for placing your hats. It helps maintain their shape and allows air to circulate freely around them.
- Prop up the hats: If you don’t have a drying rack, you can prop up your hats on a clean towel or an empty container, such as a bowl or can. This helps keep the shape intact while allowing air to circulate and accelerate the drying process.
- Patience is key: Be patient and let your hats air dry naturally. Depending on the material, humidity, and airflow, it may take several hours or even overnight for the hats to completely dry.
It’s important to resist the temptation to use any artificial heat sources, such as a hairdryer or a heater, as this can lead to damage. Allowing your hats to air dry ensures that they dry gently and retain their shape and integrity.
Read more: How To Connect A Washing Machine To A Sink
Step 9: Spot clean any stains (optional)
If your hats have stubborn stains that were not completely removed during the washing process, you can opt to spot clean them. Spot cleaning allows you to target specific areas without subjecting the entire hat to the cleaning process. Here’s how to spot clean your hats:
- Identify the stains: Take a close look at your hat and identify any remaining stains that you would like to spot clean. Common stains may include sweat marks, makeup, or food stains.
- Pre-treat the stains: Apply a small amount of mild detergent or a stain remover directly onto the stained area. Gently rub the detergent into the stain using a soft brush or cloth. Alternatively, you can create a paste using baking soda and water and apply it to the stain.
- Gently scrub: Using the soft brush or cloth, gently scrub the stain in a circular motion. Be careful not to apply too much pressure, as this can damage the fabric or material of the hat.
- Rinse and repeat if necessary: After scrubbing, rinse the spot under running water to remove any detergent or stain remover. If the stain is still visible, repeat the spot cleaning process until the stain is completely removed.
Spot cleaning is an optional step that allows you to target specific stains and ensure your hats are free from any noticeable blemishes. It’s important to remember to test any cleaning solutions or products on a small, inconspicuous area of the hat first to ensure they do not cause any damage or discoloration.
Step 10: Final tips for hat maintenance
Now that you have successfully washed and dried your hats, it’s important to maintain their cleanliness and condition for long-lasting wear. Here are some final tips for hat maintenance:
- Store your hats properly: When not in use, store your hats in a cool, dry place away from direct sunlight. Consider using a hat rack or a hat box to help retain their shape.
- Avoid unnecessary handling: Minimize handling your hats too frequently, as excessive touching can transfer oils from your hands, leading to stains or discoloration on the hat’s surface.
- Keep hats away from moisture: Avoid exposing your hats to excessive moisture or humidity, as this can lead to mold or mildew growth. If your hat gets wet, let it dry completely before storing it.
- Spot clean as needed: Whenever you notice a stain or dirt on your hat, spot clean it immediately using the gentle cleaning method mentioned earlier.
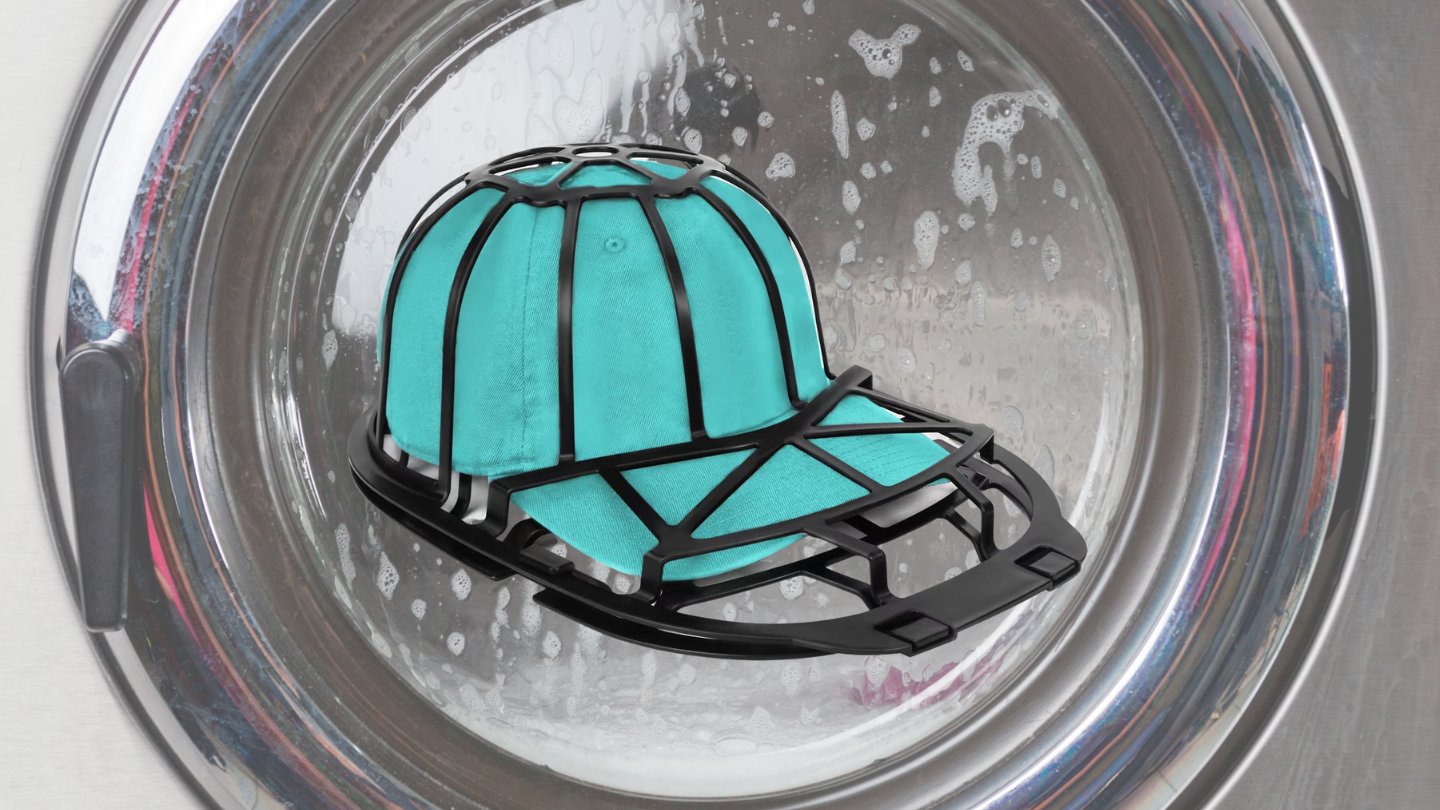
- Avoid machine washing: Unless the hat’s care instructions specifically mention machine washing, it’s best to avoid it. Machine washing can cause the hat to lose its shape or become damaged.
- Consider hat protectors: If you frequently wear your hats outdoors, consider using hat protectors or sprays designed to repel dirt, water, and UV rays. These can help prolong the life and appearance of your hats.
- Regularly inspect and maintain: Take the time to inspect your hats regularly for any signs of wear, loose threads, or damage. Promptly address any issues to prevent further damage.
By following these maintenance tips, you can keep your hats looking clean, presentable, and in great condition. Proper care and storage will ensure that your hats remain fashionable accessories for years to come.
Conclusion
Washing hats in a sink can be a practical and effective way to keep them clean and fresh. By following the step-by-step process outlined in this article, you can ensure that your hats maintain their shape, color, and overall quality. Whether you have a beloved baseball cap, a fashionable fedora, or a stylish sun hat, proper washing techniques can help extend their lifespan and keep them looking their best.
Preparing the sink, filling it with warm water, and adding a mild detergent or hat cleaner create an ideal environment for cleaning your hats. Gently scrubbing the hats, paying extra attention to stains and sweatbands, helps remove dirt and stains for a thorough cleanse. Rinse the hats thoroughly and remove excess water by careful squeezing and blotting. Reshaping the hats ensures they maintain their original structure and fit, while allowing them to air dry in a well-ventilated area protects their integrity.
Spot cleaning can be used to target stubborn stains, although it is optional and should be approached with caution to prevent any damage to the hats. Finally, following proper hat maintenance tips, such as storing them properly, avoiding unnecessary handling, and regularly inspecting and maintaining them, can help ensure their long-lasting durability.
Remember, each hat may have specific care instructions, so it’s always wise to check the manufacturer’s recommendations before proceeding with the washing process. By taking the time to properly care for your hats, you can enjoy their style and functionality for years to come.
Frequently Asked Questions about How To Wash Hats In Sink
Was this page helpful?
At Storables.com, we guarantee accurate and reliable information. Our content, validated by Expert Board Contributors, is crafted following stringent Editorial Policies. We're committed to providing you with well-researched, expert-backed insights for all your informational needs.


0 thoughts on “How To Wash Hats In Sink”