Articles
How To Cut A Sink Hole In A Countertop
Modified: August 16, 2024
Learn how to cut a sink hole in a countertop with these informative articles. Find step-by-step guides and expert tips to complete your project successfully.
(Many of the links in this article redirect to a specific reviewed product. Your purchase of these products through affiliate links helps to generate commission for Storables.com, at no extra cost. Learn more)
Introduction
Having a sink in your countertop can be both functional and aesthetically pleasing. It provides a convenient space to wash dishes, prepare food, and perform various kitchen tasks. However, if you don’t have a sink hole in your countertop, you may be wondering how to go about adding one. While it may seem like a daunting task, with the right tools and a little bit of know-how, you can easily cut a sink hole in your countertop.
In this article, we will guide you through the step-by-step process of cutting a sink hole in a countertop. Whether you are installing a new sink or replacing an old one, this guide will help you ensure a precise and professional-looking installation.
Before we dive into the process, it’s important to note that this article assumes you already have a countertop in place. If you are starting from scratch, you will need to first install a countertop before following these steps. Additionally, every countertop material may have specific considerations and techniques, so be sure to consult the manufacturer’s instructions or seek professional advice if needed.
Now, let’s gather the tools and materials you’ll need for this project.
Key Takeaways:
- Easily cut a sink hole in your countertop by following precise measurements, drilling pilot holes, and using a jigsaw with a fine-toothed blade. Finish with construction adhesive and caulk for a professional installation.
- Ensure a watertight and polished sink installation by smoothing edges, applying construction adhesive, and sealing with caulk. Achieve a professional look with the right tools and step-by-step process.
Read more: How To Cut Sink Hole In Granite
Tools and Materials Needed
Before you begin cutting a sink hole in your countertop, it’s essential to gather all the necessary tools and materials. Here’s a list of what you’ll need:
- Measuring tape
- Pencil or marker
- Drill with a hole saw attachment
- Jigsaw with a fine-toothed blade
- File or sandpaper
- Masking tape
- Protective goggles
- Ear protection
- Dust mask
You’ll also need the following materials:
- Countertop material (laminate, wood, granite, etc.)
- Sink template
- Construction adhesive
- Caulk
Make sure you have all these tools and materials ready before you begin the process. It’s essential to use the right tools for each step to ensure precision and safety.
Now that you have everything you need let’s move on to the first step: Measuring and marking the sink hole.
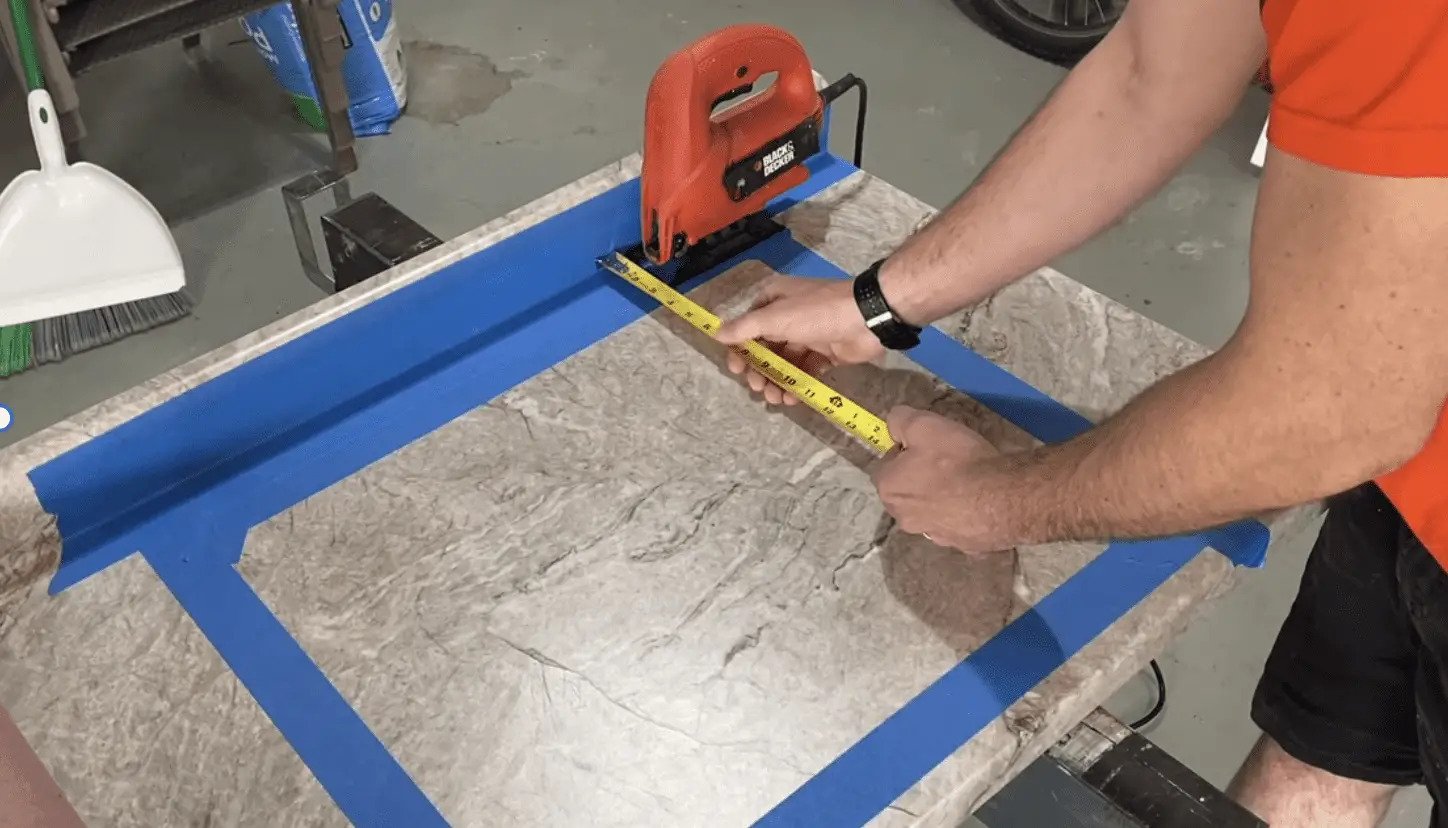
Step 1: Measuring and Marking the Sink Hole
The first step in cutting a sink hole in your countertop is to accurately measure and mark the dimensions of the hole. This step is crucial to ensure that the sink fits perfectly and aligns with your plumbing.
Here’s how to do it:
- Start by placing your sink template on the countertop in the desired location. Ensure it’s centered and properly aligned with the surrounding cabinets and walls.
- Use a measuring tape to measure the dimensions of the sink opening on the template. Take note of the length, width, and depth of the opening.
- Transfer these measurements to the countertop. Use a pencil or marker to mark the outline of the sink hole directly on the surface of the countertop.
- Double-check your measurements and ensure that the marked outline aligns with the sink template.
- Next, use a straight edge or ruler to draw cut lines within the marked outline. These lines will guide the cutting process and help prevent any mistakes or uneven cuts. Make sure the cut lines are clearly visible.
Once you have accurately measured and marked the sink hole, you’re ready to move on to the next step: drilling pilot holes.
Step 2: Drilling Pilot Holes
After measuring and marking the sink hole on your countertop, the next step is to drill pilot holes. These holes will provide an entry point for the jigsaw blade and make the cutting process easier and more precise.
Here’s a step-by-step guide on how to drill pilot holes:
- Put on protective goggles, ear protection, and a dust mask to ensure your safety.
- Choose a drill bit that is smaller than the width of the jigsaw blade. Ideally, a 1/4-inch or 1/2-inch drill bit will work well.
- Using the marked cut lines as a guide, position the drill bit on the inside edge of the cut lines.
- Gently drill pilot holes on the inside corners of the marked outline. These holes will allow you to make curved cuts with the jigsaw.
- Continue drilling additional pilot holes along the cut lines, spacing them evenly apart. The number of pilot holes you need will depend on the size and shape of the sink hole.
- Once all the pilot holes are drilled, remove any debris or sawdust from the countertop surface.
Drilling pilot holes will help prevent any splintering or cracking of the countertop material during the cutting process. With the pilot holes in place, you’re now ready to move on to the next step: cutting the sink hole.
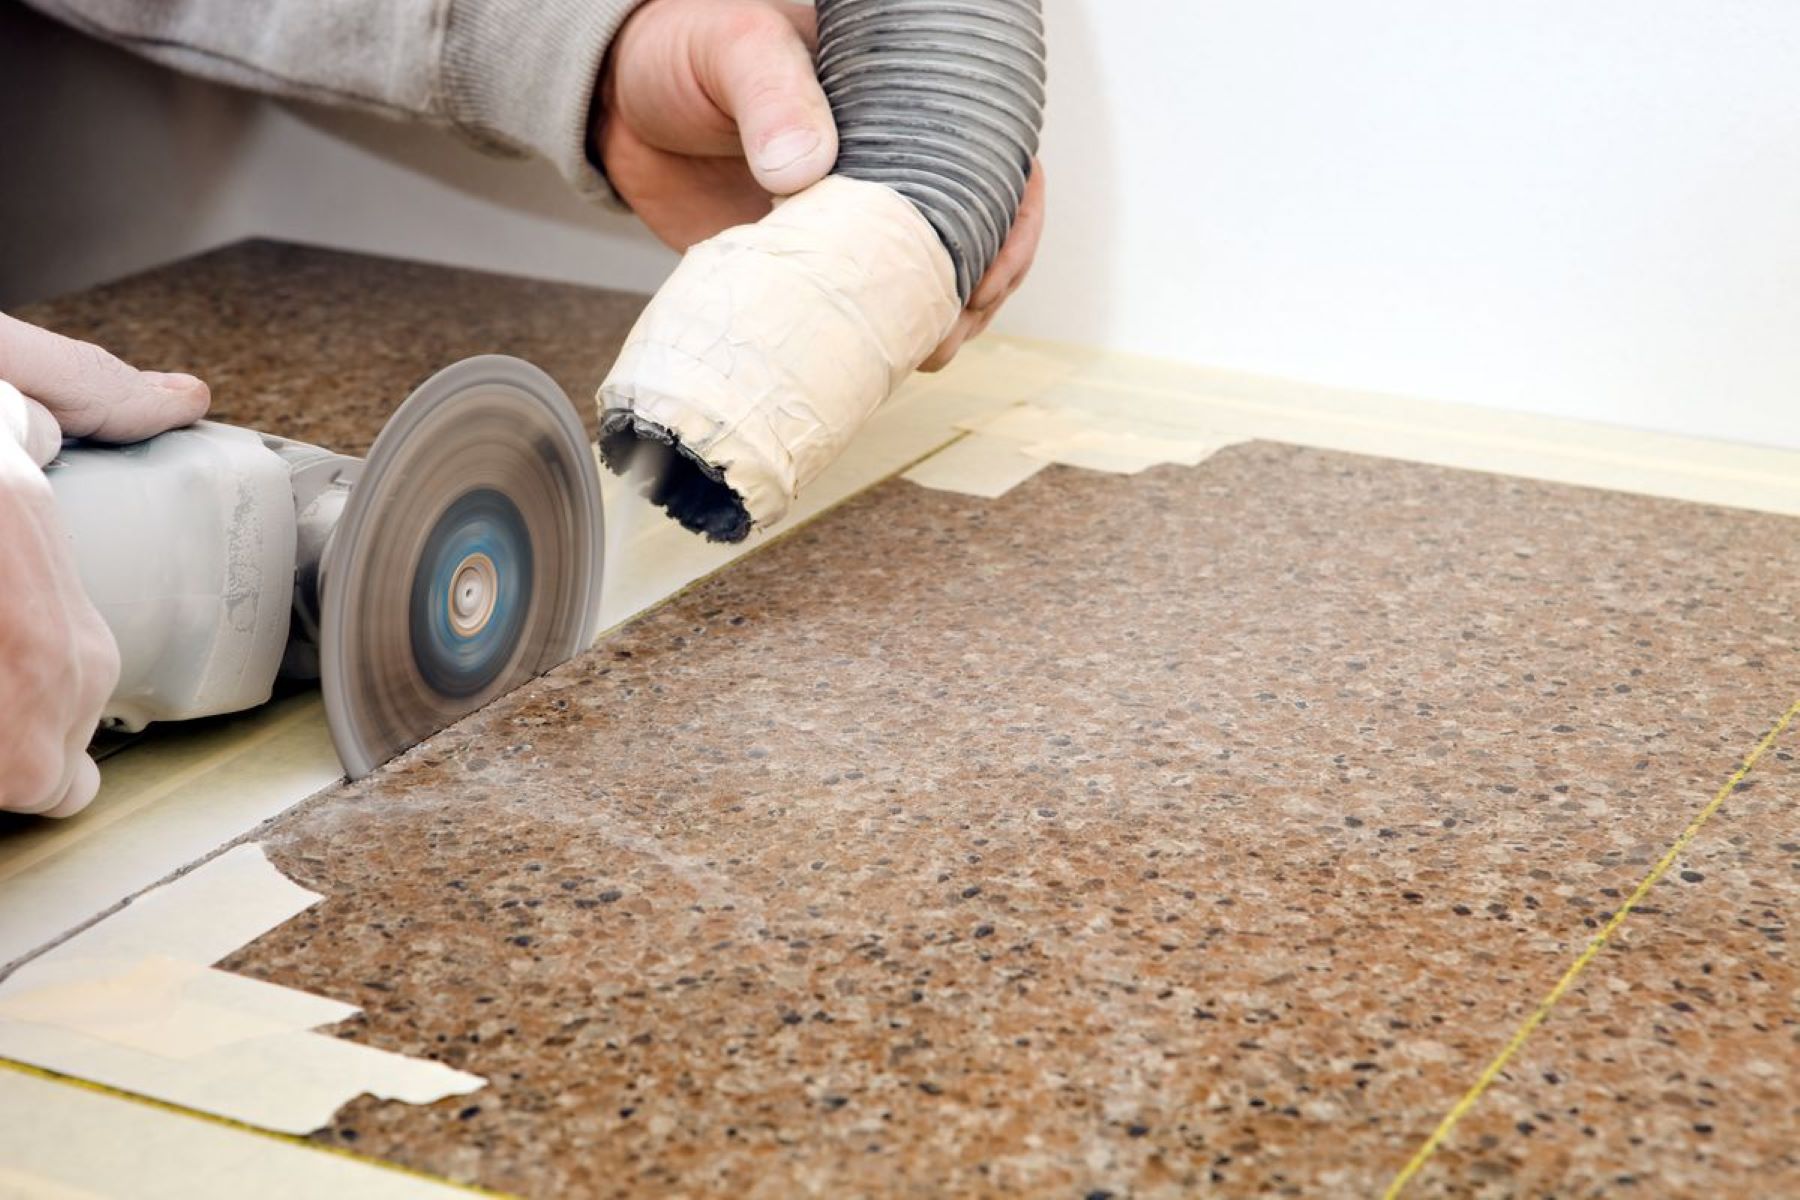
When cutting a sink hole in a countertop, use a jigsaw with a fine-toothed blade to make precise and clean cuts. Be sure to measure and mark the hole carefully before cutting.
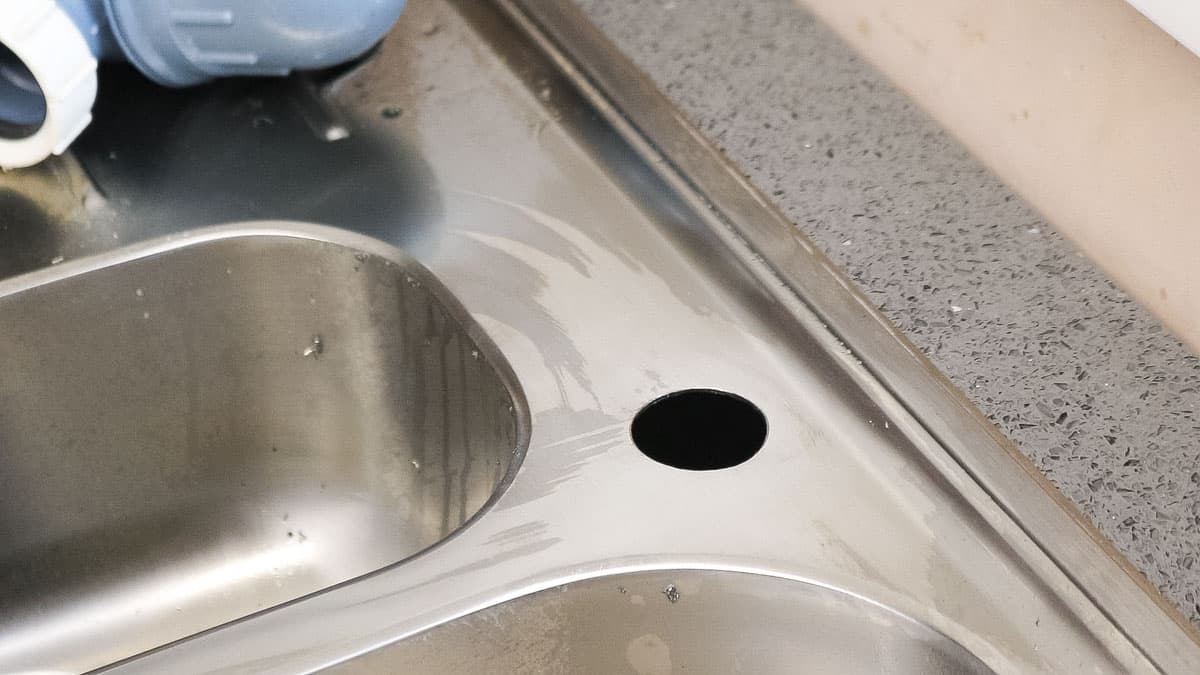
Step 3: Cutting the Sink Hole
With the pilot holes drilled, it’s time to cut the sink hole in your countertop. This step requires the use of a jigsaw with a fine-toothed blade, which will allow you to make precise and smooth cuts.
Follow these steps to cut the sink hole:
- Attach the appropriate jigsaw blade to your jigsaw. Ensure that it’s a fine-toothed blade suitable for cutting through the countertop material.
- Insert the jigsaw blade into one of the pilot holes you drilled in the previous step.
- Turn on the jigsaw and begin cutting along the marked cut lines on the countertop. Follow the curvature of the lines as accurately as possible.
- Use even, steady motions to guide the jigsaw along the cut lines. Take your time to ensure precise and smooth cuts.
- Continue cutting along the entire length of the marked cut lines, maintaining a steady pace and applying gentle pressure as needed.
- When you reach the corners of the sink hole, gently pivot the jigsaw to navigate the turns. Take extra care to maintain the accuracy of the shape.
- Once you have cut along all the marked cut lines, turn off the jigsaw and set it aside.
After completing the cutting process, you will have a rough sink hole in your countertop. Don’t worry about the edges or finish just yet – we’ll address those in the next step.
Now that the sink hole is cut, let’s move on to the next step: smoothing the edges and adding finishing touches.
Read more: How To Cut Laminate Countertop For Sink
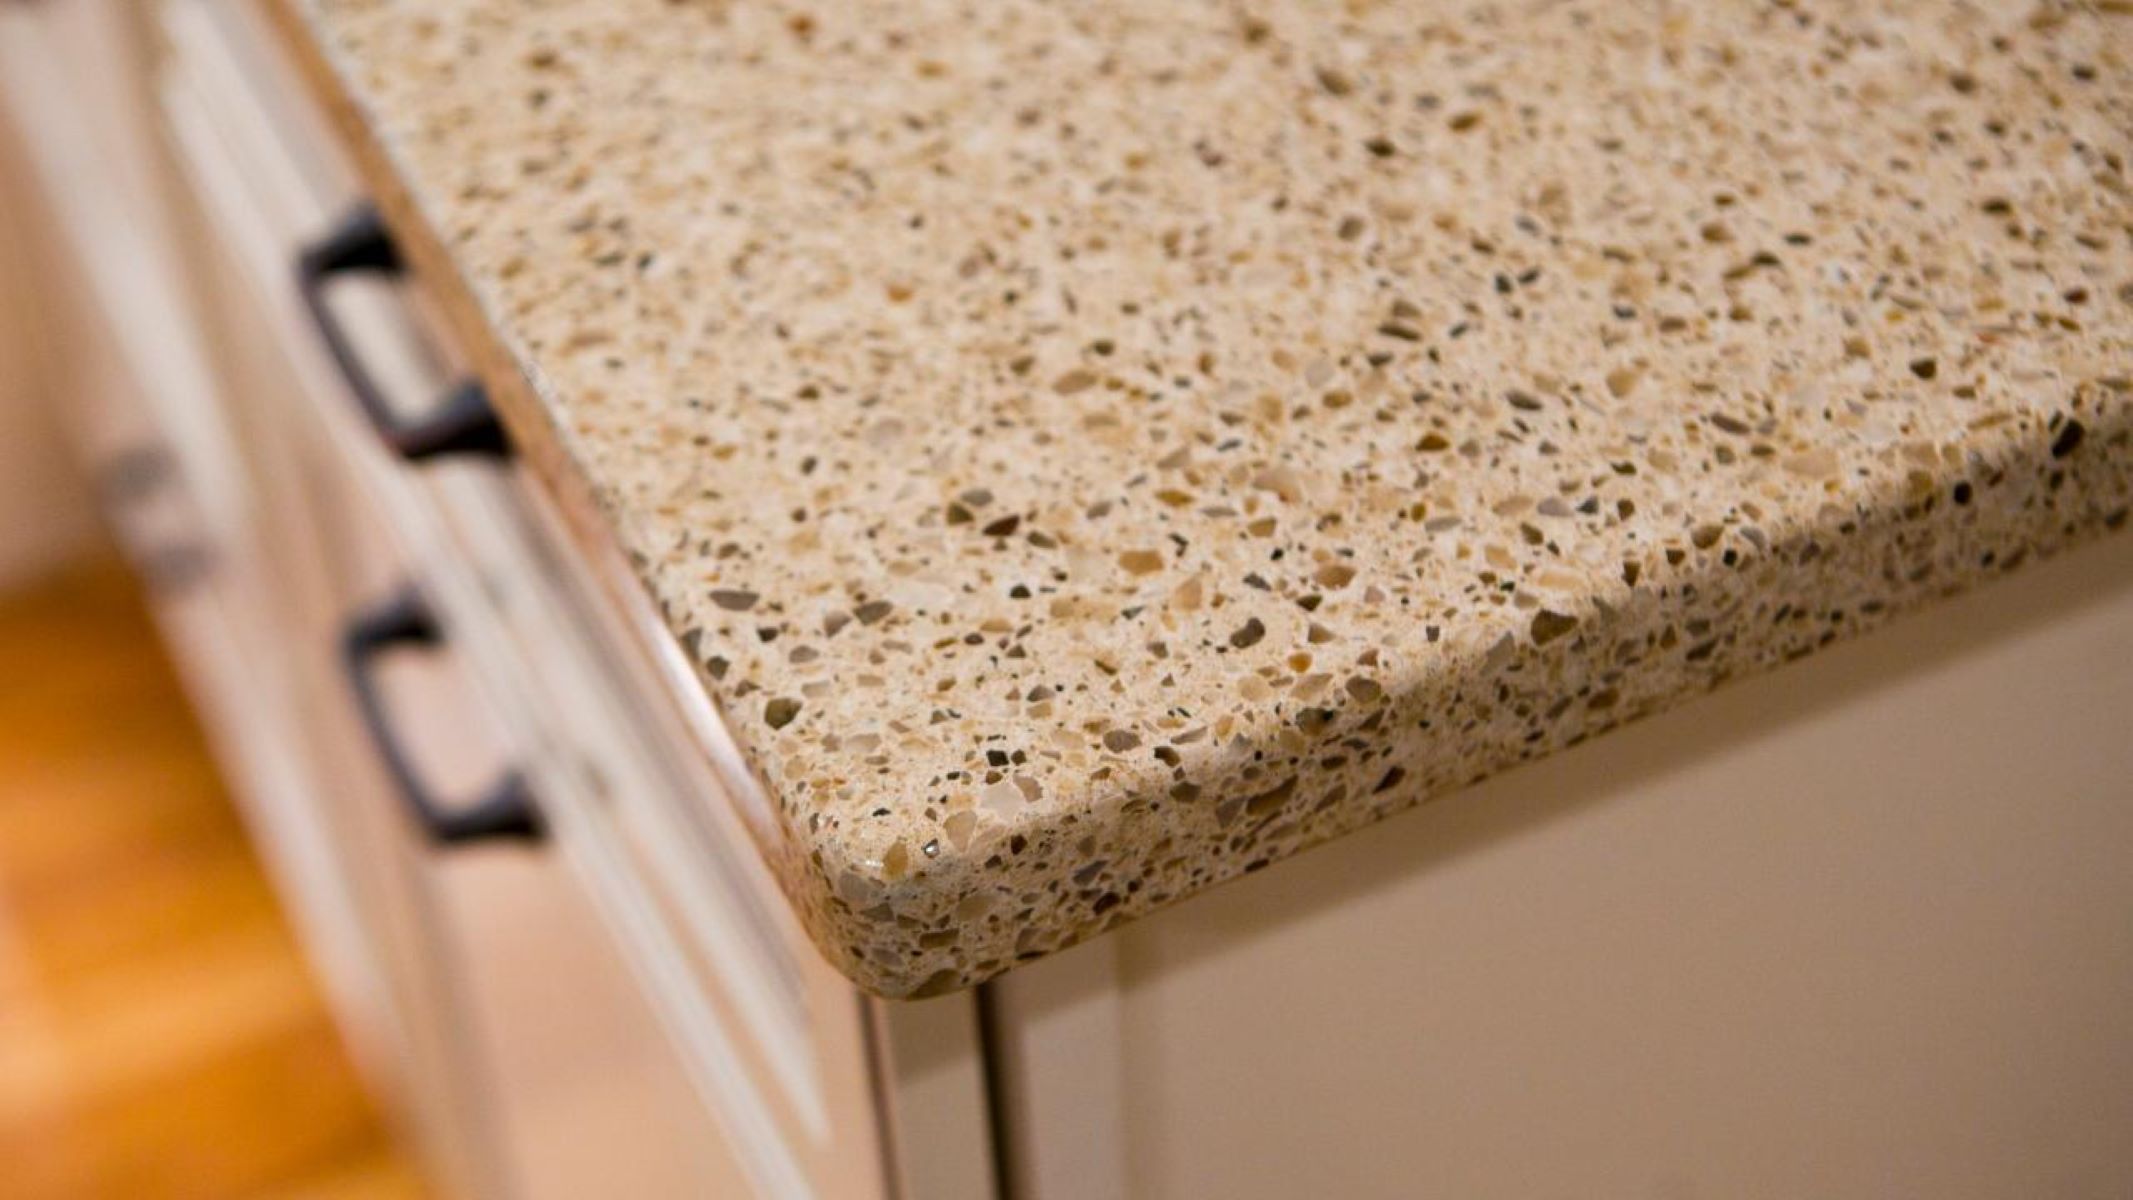
Step 4: Smoothing the Edges and Finishing Touches
Now that the sink hole is cut in your countertop, it’s time to focus on smoothing the edges and adding finishing touches. This step will help create a professional and polished look for your sink installation.
Follow these steps to smooth the edges and add finishing touches:
- Begin by using a file or sandpaper to smooth the rough edges of the sink hole. Start with a coarse-grit file or sandpaper and gradually switch to a finer grit to achieve a smooth finish.
- Work your way around the entire perimeter of the sink hole, applying light pressure as you file or sand to avoid damaging the countertop material.
- After smoothing the edges, use a damp cloth or sponge to remove any dust or debris from the countertop surface. This will ensure a clean and polished look.
- Once the edges are smoothed, dry the countertop surface thoroughly before moving on to the next step.
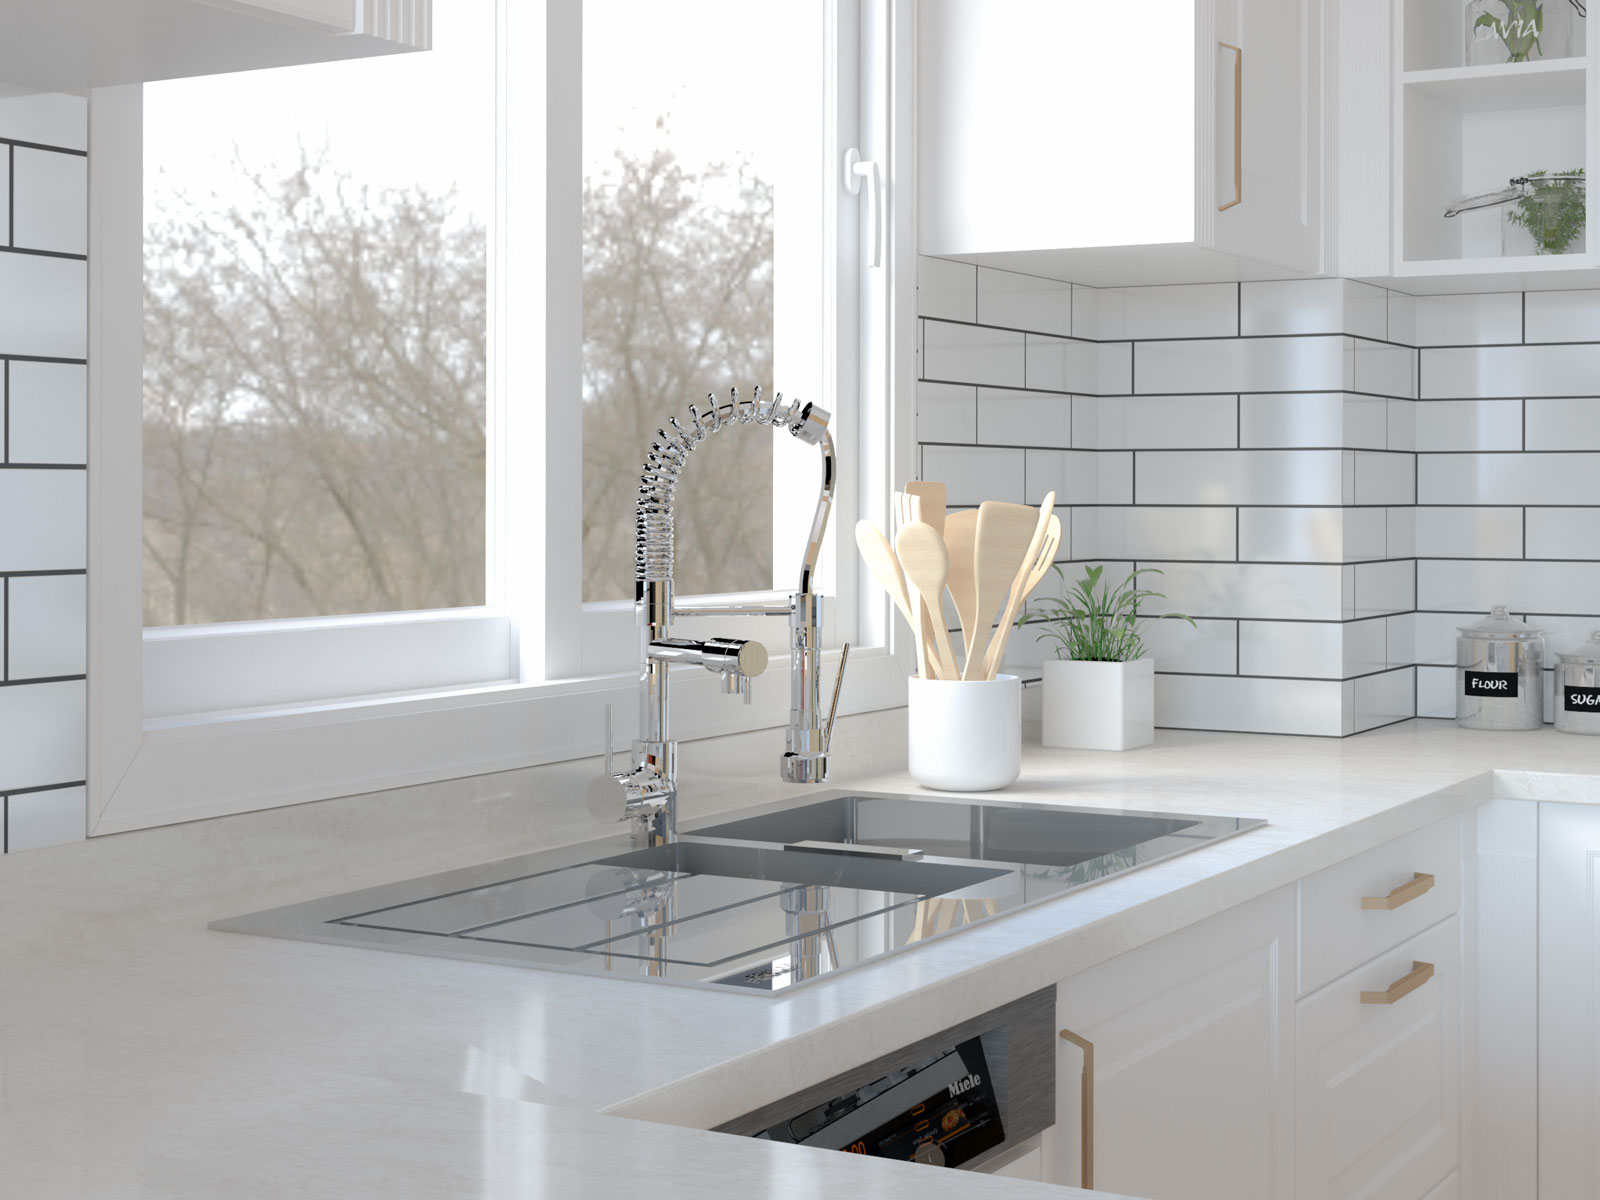
- Apply a bead of construction adhesive along the underside edge of the sink rim. Make sure to follow the manufacturer’s instructions for the specific adhesive you are using.
- Place the sink into the prepared sink hole, aligning it carefully with the cutout. Press down firmly to ensure a secure bond between the sink and the countertop.
- Finally, use caulk to seal the gap between the sink rim and the countertop. This will help prevent water seepage and ensure a watertight installation.
With the edges smoothed, the sink installed, and the caulk applied, you have successfully cut a sink hole in your countertop! Take a moment to admire your work and ensure everything is in its proper place.
Remember to follow the specific instructions provided by the sink and countertop manufacturer for any additional installation or finishing steps.
Congratulations! You have accomplished the task of cutting a sink hole in your countertop. With this newfound knowledge, you can confidently tackle sink installations or replacements in the future.
Finally, don’t forget to clean up the work area and properly dispose of any waste or debris generated during the process.
That concludes our guide on how to cut a sink hole in a countertop. We hope you found this information helpful and that your countertop project is a success!
Conclusion
Cutting a sink hole in a countertop may seem like a daunting task, but with the right tools and a step-by-step approach, it can be accomplished successfully. By following the instructions outlined in this guide, you will be able to add or replace a sink in your countertop and achieve a professional and polished look.
Remember to start by accurately measuring and marking the sink hole, ensuring its alignment with the surrounding elements in your kitchen. Drilling pilot holes will make the cutting process easier, preventing any damage to the countertop material.
When it comes to cutting the sink hole, using a jigsaw with a fine-toothed blade is crucial for achieving precise and smooth cuts. Take your time and follow the marked cut lines, focusing on maintaining accuracy, especially in the corners.
Once the sink hole is cut, it’s important to smooth the edges using a file or sandpaper, giving the countertop a polished and professional finish. Remember to remove any dust or debris before proceeding with the installation.
Finally, by using construction adhesive and caulk, you can securely install the sink and ensure a watertight seal. These finishing touches will not only enhance the functionality of your sink but also contribute to the overall aesthetic appeal of your countertop.
With this comprehensive guide, you now have the knowledge and confidence to cut a sink hole in your countertop. Whether you are embarking on a DIY project or working with a professional, this step-by-step process will help you achieve the desired results.
Remember to consult the manufacturer’s instructions for your specific countertop material and sink type, as they may have specific recommendations or considerations.
We hope this article has been informative and helpful. Enjoy your newly cut sink hole and the enhanced functionality it brings to your kitchen countertop!
Frequently Asked Questions about How To Cut A Sink Hole In A Countertop
Was this page helpful?
At Storables.com, we guarantee accurate and reliable information. Our content, validated by Expert Board Contributors, is crafted following stringent Editorial Policies. We're committed to providing you with well-researched, expert-backed insights for all your informational needs.


0 thoughts on “How To Cut A Sink Hole In A Countertop”