Home>Articles>Why Does A Microwave Oven Suddenly Stopped Working
Articles
Why Does A Microwave Oven Suddenly Stopped Working
Modified: October 28, 2024
Discover why your microwave oven suddenly stopped working and learn essential articles to troubleshoot and fix the issue.
(Many of the links in this article redirect to a specific reviewed product. Your purchase of these products through affiliate links helps to generate commission for Storables.com, at no extra cost. Learn more)
Introduction
A microwave oven is a common household appliance that has revolutionized the way we cook and reheat food. With its convenience and speed, it has become an essential tool in many kitchens. However, there may come a time when your trusty microwave suddenly stops working, leaving you perplexed and frustrated.
There can be several reasons why a microwave oven may fail to function properly. From power supply issues to faulty components, understanding the common causes of microwave oven failure can help you troubleshoot the problem and potentially save you from costly repairs or replacements.
In this article, we will explore the most frequent culprits behind a microwave oven suddenly stopping working. We will also provide troubleshooting steps to help you diagnose and fix the issue.
Key Takeaways:
- Troubleshooting power supply, door switch, fuse, control panel, and critical components like magnetron and capacitor can help diagnose and potentially resolve a malfunctioning microwave, saving time and money on unnecessary repairs or replacements.
- Prioritizing safety and seeking professional assistance when unsure or uncomfortable with troubleshooting electrical components is crucial to ensure the proper functioning and safety of the microwave oven.
Common Causes of Microwave Oven Failure
A microwave oven is a complex appliance with various components working together to heat and cook our food. When any of these components fail, it can result in the sudden malfunctioning of the microwave oven. Here are some common causes of microwave oven failure:
- Power Supply Issues: One of the most common reasons for a microwave oven to stop working is a power supply problem. This could be due to a tripped circuit breaker, a blown fuse, or a faulty electrical outlet. It’s important to check the power supply before assuming there is a major issue with the microwave.
- Faulty Door Switch: Microwaves have multiple door switches that serve as safety mechanisms to prevent the oven from operating with an open door. If any of these switches become faulty or misaligned, it can cause the microwave to stop working.
- Blown Fuse: Just like any other electrical appliance, a microwave oven has a fuse that protects it from power surges. If the fuse blows, usually due to a power overload, it will need to be replaced in order for the microwave to function again.
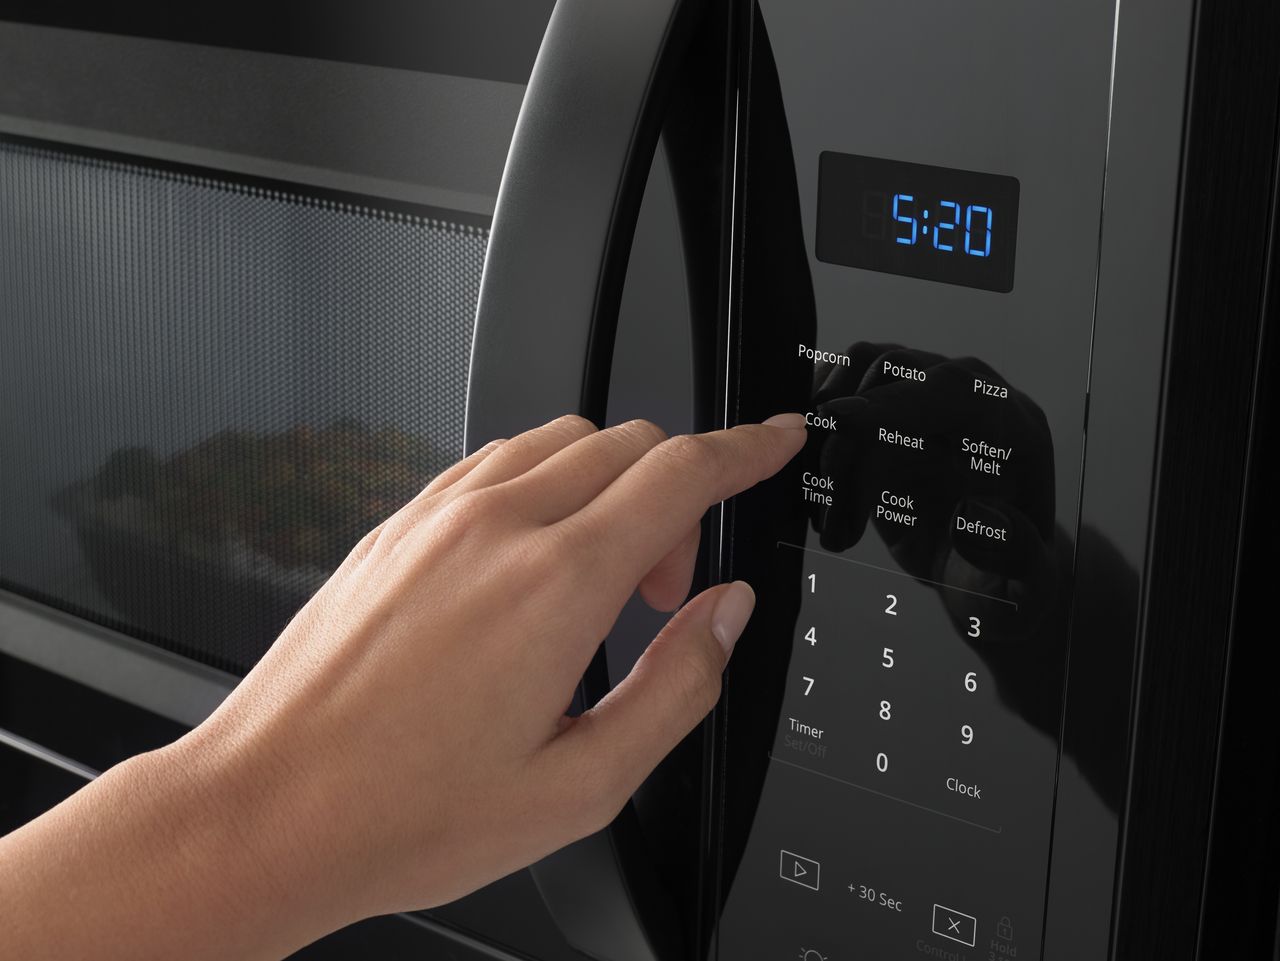
- Malfunctioning Control Panel: The control panel is the interface through which we set the time, temperature, and other cooking settings. A malfunctioning control panel can prevent the microwave from working properly, as it may not respond to commands or display incorrect information.
- Overheated Magnetron: The magnetron is responsible for generating the microwaves that cook the food. If the magnetron overheats, it can cause the microwave to shut down as a safety precaution. This usually happens when the ventilation system is blocked or when the magnetron itself is faulty.
- Defective Capacitor: The capacitor in a microwave oven stores energy to power the magnetron. If the capacitor becomes faulty, it can cause the microwave to stop working or produce uneven heating.
- Faulty Thermal Cut-off: The thermal cut-off is a safety device that shuts off the microwave if it detects excessive heat. If the thermal cut-off is faulty or has been activated, the microwave will not function until the issue is resolved.
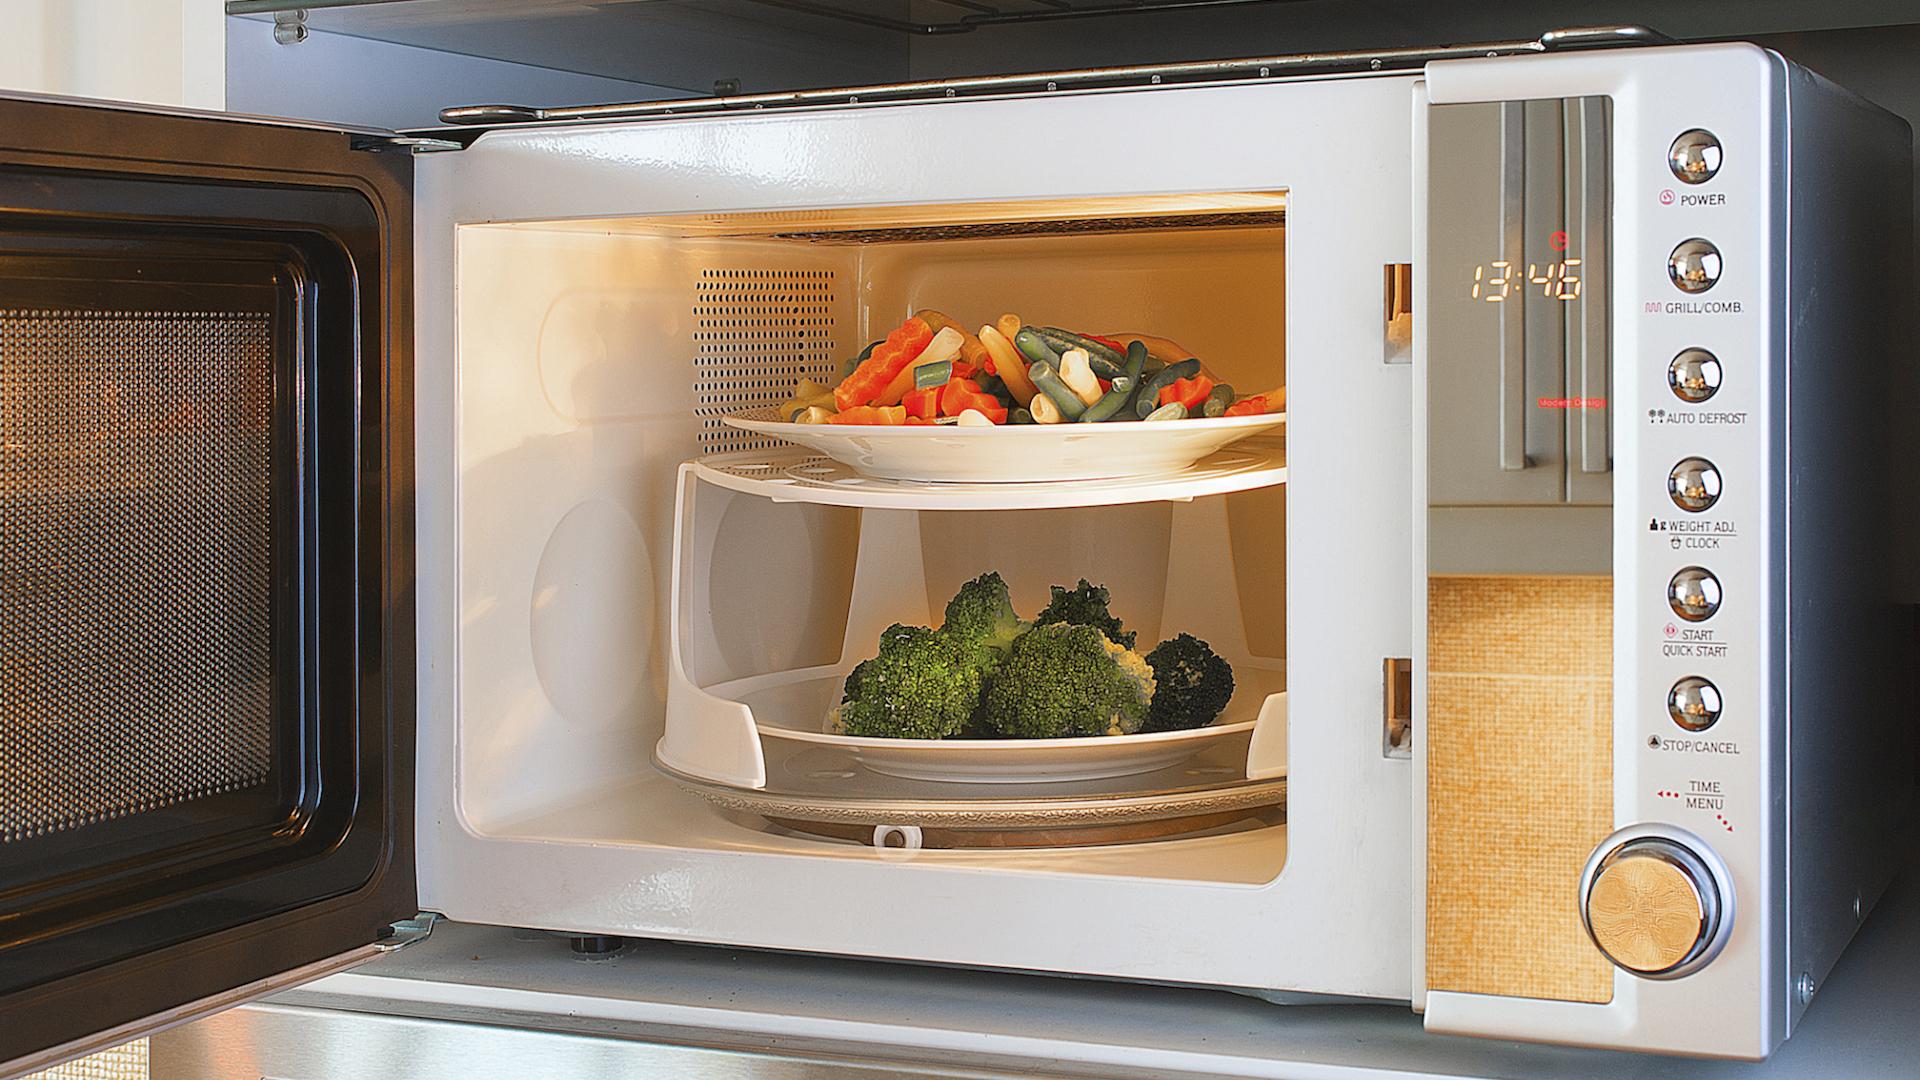
- Broken Turntable Motor: The turntable motor rotates the glass plate inside the microwave to ensure even cooking. A broken turntable motor can lead to uneven heating or cause the microwave to stop working altogether.
These are just a few of the common causes of microwave oven failure. It’s important to note that diagnosing the specific issue may require the assistance of a professional technician, especially if you are not familiar with the inner workings of the appliance. In the following sections, we will discuss troubleshooting steps that can help identify and resolve these problems.
Power Supply Issues
Power supply issues are one of the most common causes of a microwave oven suddenly stopping working. Before assuming there is a major problem with the appliance, it’s essential to check the power supply. Here are some steps you can take to troubleshoot power supply issues:
- Check the Circuit Breaker: Start by ensuring that the circuit breaker connected to your microwave is not tripped. Locate the electrical panel in your home and look for a tripped breaker. If you find one, flip it back to the “On” position and try using the microwave again.
- Inspect the Electrical Outlet: Plug another appliance into the same electrical outlet to check if it is functioning properly. If the other appliance doesn’t work either, the problem may be with the outlet itself. In that case, you may need to call a qualified electrician to fix the outlet.
- Try a Different Outlet: If the microwave is plugged into a power strip or extension cord, unplug it and connect it directly into a wall outlet. Sometimes, power strips or extension cords can cause issues with power supply, so eliminating them as a potential problem can help determine if the microwave itself is at fault.
- Inspect the Power Cord: Examine the power cord for any signs of damage, such as cuts, frays, or exposed wires. If you notice any damage, do not attempt to use the microwave, as it can pose a safety hazard. In such cases, consult a professional technician or replace the power cord following the manufacturer’s instructions.
- Reset the Microwave: Some microwaves have a built-in reset button or option to reset the unit. Refer to the microwave’s user manual to find out if there is a reset feature and how to use it. Resetting the microwave can sometimes resolve minor power supply issues.
If none of these steps resolve the power supply issue and your microwave oven still does not work, it may be necessary to seek professional assistance. A qualified technician will have the expertise to diagnose and repair any underlying electrical problems.
Remember, dealing with electrical components can be dangerous, so always prioritize your safety by disconnecting the microwave from the power source before attempting any troubleshooting or repair.
Faulty Door Switch
A faulty door switch is another common cause of a microwave oven suddenly stopping working. The door switches in a microwave oven act as safety mechanisms to prevent the microwave from operating with an open door. If any of these switches become faulty or misaligned, it can interrupt the power supply and cause the microwave to stop functioning. Here are some troubleshooting steps to check for faulty door switches:
- Inspect the Door Latch: Start by examining the door latch or hooks to ensure they are intact and properly aligned. If the door does not close securely or if any part of the latch is damaged, it may not engage the door switches properly, leading to the microwave not working.
- Clean the Door Area: Sometimes, dirt, grease, or debris can accumulate around the door switches, preventing them from making proper contact. Use a clean, damp cloth to wipe down the area around the door switches and remove any buildup that may be causing the issue.
- Listen for Clicking Sounds: When the door is closed, you should hear a distinct clicking sound indicating that the door switches are engaging. Open and close the door while listening for this clicking sound. If you do not hear it, there may be a problem with one or more of the door switches.
- Test the Door Switches: Some microwaves have multiple door switches, so it’s important to test each one individually. Use a multimeter set to the continuity or ohms function to test the continuity of each door switch. When the switch button is pressed, the multimeter should indicate continuity, and when the button is released, it should show no continuity. If any of the switches fail this test, they need to be replaced.
- Replace Faulty Door Switches: If you have determined that one or more door switches are faulty, you will need to replace them. Consult the microwave’s user manual or seek the assistance of a professional technician to ensure you choose the correct replacement switches and properly install them.
It’s important to note that working on the door switches of a microwave oven requires careful handling and knowledge of electrical components. If you are not comfortable with DIY repairs or unable to diagnose the problem, it is recommended to seek the help of a professional technician to avoid any accidents or further damage to the microwave.
By following these troubleshooting steps and addressing any faulty door switches, you can potentially resolve the issue and restore your microwave oven’s functionality.
Blown Fuse
A blown fuse is a common cause of a microwave oven suddenly stopping working. The fuse acts as a safety device that helps protect the microwave from power surges and electrical malfunctions. When a power surge occurs or there is a malfunction within the microwave, the fuse can blow, cutting off the power supply to the appliance. Here are some steps to check for a blown fuse:
- Unplug the Microwave: Before checking the fuse, ensure that the microwave is completely disconnected from the power source to avoid any potential electrical hazards.
- Locate the Fuse: The fuse is typically located near the power cord and is housed in a cylindrical-shaped holder. Refer to the microwave’s user manual or consult the manufacturer’s instructions to locate the fuse.
- Inspect the Fuse: Carefully remove the fuse from the holder and visually inspect it for any signs of damage, such as a broken filament or discoloration. If the fuse appears damaged or blown, it will need to be replaced.
- Replace the Fuse: To replace the blown fuse, ensure that you use the same type and rating as the original one. The fuse’s rating information is typically printed on the metal ends. Insert the new fuse into the holder and securely reattach it to the microwave.
- Test the Microwave: After replacing the fuse, plug the microwave back into the power source and test its functionality. If the microwave powers on and operates normally, the blown fuse was likely the cause of the problem. However, if the fuse blows again or the microwave still doesn’t work, there may be another underlying issue that requires further attention.
It’s important to note that while replacing the fuse may resolve the issue temporarily, a blown fuse is often a symptom of an underlying problem. If the fuse blows repeatedly, it may indicate a more significant electrical issue within the microwave. In such cases, it is advisable to consult a professional technician for a thorough diagnosis and repair.
Remember, working with electrical components can be hazardous, so if you are unsure or uncomfortable performing these troubleshooting steps, it is best to seek professional assistance to ensure your safety and the proper functioning of your microwave oven.
Read more: Why Would Ceiling Fan Stop Working
Malfunctioning Control Panel
A malfunctioning control panel is another common cause of a microwave oven suddenly stopping working. The control panel serves as the interface through which we set the time, temperature, and other cooking settings. If the control panel malfunctions, it can prevent the microwave from operating properly. Here are some steps to troubleshoot a malfunctioning control panel:
- Power Cycle the Microwave: Sometimes, a simple power cycle can resolve minor glitches in the control panel. Unplug the microwave from the power source and wait for a few minutes. Then, plug it back in and try using the microwave again. This process can refresh the control panel and resolve temporary issues.
- Check for Error Codes: Some microwaves display error codes on the control panel when there is a malfunction. Consult the microwave’s user manual or search for the specific error code online to identify the problem. Error codes can provide insight into the type of control panel malfunction and may require further troubleshooting or professional assistance.
- Perform a Control Panel Reset: Some microwave models have a reset option for the control panel. Refer to the user manual to find out if your microwave has a reset function and how to perform it. A control panel reset can help resolve software glitches or settings that may be causing the malfunction.
- Inspect for Physical Damage: Carefully examine the control panel for any signs of physical damage, such as cracks, moisture, or loose connections. Physical damage can affect the proper functioning of the control panel. If you notice any damage, it may require professional repair or replacement.
- Test the Control Panel Buttons: Press each control panel button and observe if they respond appropriately. If any buttons do not register or if they register incorrectly, it indicates a problem with the control panel. In such cases, the control panel may need to be repaired or replaced by a professional technician.
If your troubleshooting efforts do not resolve the control panel issue and your microwave still does not work, it is recommended to seek professional assistance. They can diagnose the problem accurately and recommend the appropriate solutions, which may include repairing or replacing the control panel.
When working on the control panel or any electrical components, it’s essential to prioritize safety. Always disconnect the microwave from the power source before attempting any troubleshooting or repair. If you are unfamiliar or uncomfortable with handling electrical components, it is best to seek professional help to avoid any accidents or further damage to the microwave.
Overheated Magnetron
The magnetron is a crucial component in a microwave oven that generates the microwaves used for cooking food. In some cases, the magnetron can overheat, triggering a safety feature that shuts down the microwave. An overheated magnetron can be caused by several factors, such as blocked ventilation or a faulty magnetron itself. Here are some steps to troubleshoot an overheated magnetron:
- Allow for Cool Down Time: If the microwave suddenly stops working during use, it may be due to an overheated magnetron. In such cases, it’s important to turn off the microwave and allow it to cool down for at least 10-15 minutes. This will give the magnetron time to cool off and reset.
- Check for Ventilation Blockages: Inspect the vents on the microwave for any blockages, such as accumulated debris or obstruction from nearby objects. Blocked vents can restrict airflow, leading to overheating of the magnetron. Clear any blockages to ensure proper ventilation.
- Ensure Proper Placement: Microwaves require adequate space around them to allow for proper ventilation. Ensure that the microwave is placed in a well-ventilated area and not crowded against walls or other appliances. This will help prevent the magnetron from overheating.
- Verify Fan Functionality: Most microwaves have a cooling fan that helps dissipate heat from the magnetron. Listen for the sound of the fan running when the microwave is in use. If the fan does not operate or sounds unusual, it may be a sign of a malfunctioning fan. In such cases, it is advisable to seek professional repairs or replacement of the fan.
- Professional Assessment: If the magnetron continues to overheat despite troubleshooting efforts, it may be a sign of a faulty magnetron. In this situation, it is best to consult a professional technician who can assess the magnetron and determine whether it needs to be repaired or replaced.
It’s important to note that handling the magnetron or any internal components of a microwave oven can be hazardous. If you are not experienced or comfortable with such repairs, it is recommended to seek professional assistance. Professionals have the necessary knowledge and tools to safely diagnose and address magnetron-related issues.
By taking these troubleshooting steps and ensuring proper ventilation and functioning of the cooling system, you can help prevent the magnetron from overheating and potentially restore your microwave oven’s functionality.
Defective Capacitor
The capacitor in a microwave oven is responsible for storing and releasing electrical energy to power the magnetron, which generates the microwaves used for cooking. If the capacitor becomes defective or fails to function properly, it can impact the overall performance of the microwave. Here are some steps to troubleshoot a defective capacitor:
- Power Discharge: Before inspecting or working with the capacitor, it is essential to discharge any stored electrical energy to prevent the risk of electric shock. Follow the manufacturer’s instructions or seek professional assistance to safely discharge the capacitor.
- Visually Inspect the Capacitor: Carefully examine the capacitor for any visible signs of damage, such as bulging, leakage, or burnt marks. These are indications of a defective capacitor and it should be replaced.
- Test the Capacitor: Using a multimeter, select the capacitance setting and test the capacitor for proper functionality. Follow the instructions provided with the multimeter to accurately measure the capacitance. If the measured capacitance deviates significantly from the manufacturer’s specified value, it is a clear indication of a defective capacitor.
- Replace the Defective Capacitor: If the capacitor is found to be defective or not functioning as per the specifications, it needs to be replaced. Consult the microwave’s user manual or seek professional assistance to ensure you choose the correct replacement capacitor and properly install it.
It is important to note that capacitors can store a high amount of electrical energy, even when the microwave is disconnected from the power source. Therefore, it is crucial to exercise caution and follow proper safety protocols when handling capacitors.
If you are not familiar with diagnosing or working with electrical components, it is recommended to seek the assistance of a professional technician. They have the expertise and knowledge to safely handle capacitors and provide the necessary repairs or replacements.
By addressing a defective capacitor promptly, you can restore proper functionality to your microwave oven and ensure it operates efficiently and safely.
Faulty Thermal Cut-off
The thermal cut-off is a safety device in a microwave oven that automatically shuts off the microwave if it detects excessive heat. It serves as a protection mechanism to prevent overheating and potential damage to the appliance. If the thermal cut-off becomes faulty or is triggered, it can cause the microwave to stop working. Here are some troubleshooting steps to check for a faulty thermal cut-off:
- Allow Cool Down Time: If the thermal cut-off has been activated due to excessive heat, it’s essential to turn off the microwave and allow it to cool down completely. This cooling period will give the thermal cut-off time to reset.
- Check for Blockages: Blocked vents or obstructed airflow can cause the microwave to overheat, triggering the thermal cut-off. Inspect the vents and ensure they are clear of any debris, grease, or other obstructions. Clean the vents if necessary to facilitate proper airflow.
- Inspect and Reset the Thermal Cut-off: Locate the thermal cut-off, usually mounted on or near the magnetron. Carefully examine it for any signs of damage or triggered state. If the thermal cut-off has been triggered, it will need to be manually reset. Refer to the manufacturer’s instructions or consult a professional technician to ensure proper resetting of the thermal cut-off.
- Test the Thermal Cut-off: Using a multimeter set to the continuity or ohms function, test the thermal cut-off for continuity. Place one probe on each terminal of the thermal cut-off and check if the multimeter indicates continuity. If there is no continuity, it means the thermal cut-off is faulty and needs to be replaced.
- Replace the Faulty Thermal Cut-off: If the thermal cut-off is found to be faulty and unable to perform its safety function, it is important to replace it. Contact the manufacturer for the correct replacement part or seek professional assistance to ensure proper installation.
Remember, dealing with electrical components can be dangerous, especially when it comes to safety devices like the thermal cut-off. If you are not comfortable or experienced in handling these repairs, it is best to seek the help of a professional technician. They have the knowledge and expertise to safely diagnose and resolve issues with the thermal cut-off.
By addressing any issues with the thermal cut-off promptly, you can ensure the safety and proper functioning of your microwave oven for continued use.
Read more: Why Did My Blender Stop Working
Broken Turntable Motor
The turntable motor in a microwave oven is responsible for rotating the glass plate or turntable, ensuring even cooking and heating of food. If the turntable motor becomes broken or fails to function properly, it can result in the microwave suddenly stopping working. Here are some troubleshooting steps to check for a broken turntable motor:
- Inspect the Glass Plate: Start by removing the glass plate or turntable from the microwave. Inspect it for any visible damage or cracks. If the glass plate is broken or damaged, it may impede the movement of the turntable and cause the microwave to stop working.
- Ensure Proper Positioning: Place the glass plate back into the microwave, ensuring it sits properly on the turntable support. Improper positioning or misalignment can prevent the turntable motor from engaging and functioning correctly.
- Test the Turntable Motor: With the microwave turned on, manually rotate the glass plate to see if the turntable motor engages and starts rotating it automatically. If the motor does not engage or if it makes unusual sounds, it is likely broken and needs to be replaced.
- Check for Power Supply: Confirm that the turntable motor is receiving power. Disconnect the microwave from the power source and remove the cover to access the motor. Check the wiring connections to ensure they are secure and not damaged. Use a multimeter to test the voltage at the motor’s wiring connections. If there is no power supply, the issue may be related to the motor or the microwave’s electrical system.
- Replace the Broken Turntable Motor: If the turntable motor is confirmed to be broken or non-functional, it will need to be replaced. Consult the microwave’s user manual or seek the assistance of a professional technician to ensure you select the correct replacement motor and safely install it.
If you are unsure or uncomfortable with conducting these troubleshooting steps or if you are unable to determine the issue with the turntable motor, it is recommended to seek professional assistance. They have the expertise and resources to properly diagnose and resolve problems related to the turntable motor.
By addressing a broken turntable motor promptly, you can restore the functionality of your microwave oven and ensure even cooking and heating of your food.
Check the power supply and the fuse of the microwave oven. If the power supply is working and the fuse is intact, the issue may be with the door switch, thermal cutoff, or the magnetron. It’s best to consult a professional for further diagnosis and repair.
Troubleshooting Steps for a Microwave Oven That Suddenly Stopped Working
If your microwave oven has suddenly stopped working, it can be frustrating and inconvenient. However, before panicking or rushing to replace the appliance, it’s important to perform some troubleshooting steps to identify and potentially resolve the issue. Here are some troubleshooting steps you can take when your microwave oven stops working:
- Checking the Power Supply: Start by ensuring that the microwave is properly plugged into a functioning electrical outlet. Also, check the circuit breaker to make sure it hasn’t been tripped. If the microwave is plugged into a power strip or extension cord, try plugging it directly into a wall outlet to eliminate any potential power supply issues.
- Inspecting the Door Switch: The door switch is a safety mechanism that prevents the microwave from operating with an open door. If the door switches become faulty or misaligned, it can disrupt the power supply and cause the microwave to stop working. Inspect the door latch and check for any signs of damage or misalignment. Clean the area around the door switches and ensure they are engaging properly when the door is closed.
- Testing the Fuse: A blown fuse can cause the microwave to stop functioning. Locate the fuse, which is usually near the power cord, and visually inspect it for any signs of damage. Use a multimeter to test the continuity of the fuse. If it’s blown or lacks continuity, it will need to be replaced with the appropriate rating.
- Assessing the Control Panel: A malfunctioning control panel can prevent the microwave from operating correctly. Power cycle the microwave by unplugging it and waiting a few minutes before plugging it back in. Check for any error codes displayed on the control panel and consult the user manual for troubleshooting guidance. If physical damage or malfunction is evident on the control panel, it may require professional repair or replacement.
- Examining the Magnetron: The magnetron is responsible for generating the microwaves that cook the food. If it overheats or malfunctions, the microwave may shut down. Inspect the magnetron for any signs of damage or overheating, such as burning or discoloration. Ensure that the ventilation system is clear of any obstructions that may cause overheating. If the magnetron is faulty, it will require professional repair or replacement.
- Verifying the Capacitor’s Functionality: The capacitor stores electrical energy for powering the magnetron. A defective capacitor can impact the functionality of the microwave. Visually inspect the capacitor for any signs of damage or leakage. Use a multimeter to test the capacitance and make sure it matches the manufacturer’s specifications. If the capacitor is faulty, it needs to be replaced.
- Checking the Thermal Cut-off: The thermal cut-off is a safety device that shuts off the microwave if it detects excessive heat. Inspect the thermal cut-off for any signs of activation or damage. Reset the thermal cut-off if necessary, following the manufacturer’s instructions. If the thermal cut-off continues to trigger or is faulty, it may need to be replaced.
- Inspecting the Turntable Motor: The turntable motor rotates the glass plate inside the microwave for even cooking. Check the glass plate for any damage or misalignment. Test the turntable motor to ensure it is functioning properly and engaging when the microwave is in use. If the turntable motor is broken, it will need to be replaced.
It’s important to note that these troubleshooting steps may require some technical knowledge and understanding of electrical components. If you’re not comfortable or confident in performing these steps yourself, it’s advisable to seek the assistance of a professional technician to diagnose and repair the issue.
By following these troubleshooting steps, you can potentially identify and resolve the problem that is causing your microwave oven to stop working. However, if the issue persists or you are unsure of the problem, it is always best to consult a professional for further guidance.
Checking the Power Supply
When your microwave suddenly stops working, one of the first things you should check is the power supply. Power supply issues are a common cause of a malfunctioning microwave. Here are a few steps to check the power supply:
- Verify Electrical Connection: Ensure that your microwave is properly plugged into a functioning electrical outlet. Sometimes, the plug may become loose or dislodged, causing the power to be cut off. Double-check the connection to make sure it is secure.
- Check Circuit Breaker: If your microwave is plugged in and there’s no power, it’s possible that the circuit breaker has tripped. Go to your electrical panel and locate the circuit breaker that corresponds to the microwave. If it has tripped, switch it off and then back on to reset it. Try turning on the microwave again to see if it powers up.
- Test Outlet with Another Appliance: Plug another functioning appliance into the same outlet to determine if the issue is with the microwave itself or the electrical outlet. If the other appliance also doesn’t work, then there may be a problem with the outlet or the circuit it is connected to. In such cases, it’s best to contact a qualified electrician to inspect and repair the outlet.
- Plug Directly into Wall Outlet: Sometimes, power strips or extension cords can cause issues with the power supply. If your microwave is plugged into a power strip or extension cord, try plugging it directly into a wall outlet. This will bypass any potential issues with the power strip or extension cord and give you a clear picture of whether the problem lies with the power supply or elsewhere.
- Check Power Cord and Fuse: Inspect the power cord for any visible damage, such as cuts or frayed wires. If you notice any damage, it’s crucial to unplug the microwave and replace the power cord following the manufacturer’s instructions or seeking professional assistance. Additionally, some microwaves have a built-in fuse that can blow due to power surges or electrical issues. Check the fuse and replace it if necessary.
By following these steps, you can quickly determine if the power supply is the culprit behind your microwave’s sudden shutdown. If none of these steps resolve the power supply issue and your microwave still doesn’t work, it may be time to seek professional assistance or consider replacing the appliance.
Remember to prioritize your safety by disconnecting the microwave from the power source before inspecting the power supply or attempting any troubleshooting steps. If you are unsure or uncomfortable handling electrical components, it’s best to consult a qualified technician to ensure a proper diagnosis and resolution of the problem.
Inspecting the Door Switch
Another common cause of a microwave oven suddenly stopping working is a faulty door switch. The door switch serves as a safety mechanism that prevents the microwave from operating with an open door. If any of the door switches become faulty or misaligned, it can disrupt the power supply and cause the microwave to stop functioning. Here are the steps to inspect the door switch:
- Turn Off and Unplug the Microwave: Before inspecting the door switch, ensure that the microwave is completely turned off and unplugged from the power source. This step is crucial to avoid any potential electrical hazards.
- Locate the Door Switch Assembly: The door switches are usually located behind the control panel or around the door latch area. Consult the microwave’s user manual or search for the specific model online to locate the door switch assembly.
- Visually Inspect the Door Latch and Hooks: Carefully examine the door latch and hooks for any signs of damage or misalignment. If the door latch is broken, bent, or out of place, it may not engage the door switches properly, leading to the microwave not working.
- Clean the Door Area: Dirt, grease, or debris can accumulate around the door switches, preventing them from making proper contact. Use a clean, damp cloth to wipe down the area around the door switches and remove any buildup that may be causing the issue.
- Listen for Clicking Sounds: When the door is closed, you should hear a distinct clicking sound indicating that the door switches are engaging. Open and close the door while listening for this clicking sound. If you do not hear it or if it sounds muffled or inconsistent, there may be a problem with one or more of the door switches.
- Test the Door Switches: Some microwaves have multiple door switches, so it’s important to test each one individually. Use a multimeter set to the continuity or ohms function to test the continuity of each door switch. When the switch button is pressed, the multimeter should indicate continuity, and when the button is released, it should show no continuity. If any of the switches fail this test, they need to be replaced.
- Replace Faulty Door Switches: If you have determined that one or more door switches are faulty, it is essential to replace them. Consult the microwave’s user manual or seek the assistance of a professional technician to ensure you choose the correct replacement switches and properly install them.
It’s important to note that working on the door switches of a microwave oven requires careful handling and knowledge of electrical components. If you are not comfortable with DIY repairs or unable to diagnose the problem, it is recommended to seek the help of a professional technician to avoid any accidents or further damage to the microwave.
By inspecting and ensuring the proper functioning of the door switch, you can potentially resolve the issue and restore your microwave oven’s functionality.
Read more: Why Do Luminara Candles Stop Working
Testing the Fuse
If your microwave suddenly stops working, one possible culprit could be a blown fuse. The fuse in a microwave acts as a safety device to protect the appliance from power surges or electrical malfunctions. When the fuse blows, it cuts off the power supply to the microwave, causing it to cease operating. Here are the steps to test the fuse:
- Disconnect the Microwave: Before dealing with any electrical components, it is essential to unplug the microwave from the power source. This step ensures your safety during the testing process.
- Locate the Fuse: The fuse is typically located near the power cord, either inside the microwave or on the back panel. Consult the microwave’s user manual or search online for the specific location of the fuse in your model.
- Remove the Fuse: Once you have located the fuse, gently remove it from its holder using a pair of needle-nose pliers. Take care not to damage or break the fuse during the removal process.
- Inspect the Fuse: Examine the fuse visually to check for any signs of damage. Look for a broken filament or discoloration, which indicate a blown fuse.
- Test the Fuse: Using a multimeter set to the continuity or ohms function, test the fuse for continuity. Place the probes of the multimeter on either end of the fuse and check for a reading. A fuse with continuity means it is intact and functional, while no continuity indicates a blown fuse.
- Replace the Fuse: If the fuse is blown or lacks continuity, it needs to be replaced. Note down the specifications of the blown fuse (amperage and voltage rating) and purchase a new fuse with identical ratings. Insert the new fuse into the holder and ensure it is securely in place.
- Test the Microwave: After replacing the fuse, plug the microwave back into the power source and turn it on. If the microwave powers up and functions correctly, the blown fuse was the cause of the issue. However, if the fuse blows again or the microwave still doesn’t work, there may be another underlying problem that requires further investigation.
If the fuse continues to blow after replacing it, or if you are unsure of how to test or replace the fuse, it is recommended to consult a professional technician. They have the expertise to diagnose and troubleshoot electrical issues in microwaves accurately.
Remember, working with electrical components can be hazardous, so always prioritize safety by disconnecting the microwave from the power source and following proper handling procedures. If you are unsure or uncomfortable performing these steps, it’s best to seek professional help to ensure a safe and effective resolution to the problem.
Assessing the Control Panel
If your microwave suddenly stops working, a malfunctioning control panel could be the culprit. The control panel is the interface through which you set the cooking time, temperature, and other settings. If the control panel malfunctions, it may prevent the microwave from operating correctly. Follow these steps to assess the control panel:
- Power Cycle the Microwave: Start by power cycling the microwave. Turn it off and unplug it from the power source. Leave it unplugged for a few minutes to allow any temporary glitches to reset. Then, plug it back in and turn it on to see if the control panel responds.
- Check for Error Codes or Messages: Some microwave models display error codes or error messages on the control panel when there is a malfunction. Consult the microwave’s user manual or search online for the specific error code or message displayed. This information can provide insights into the specific problem and potential troubleshooting steps.
- Inspect for Physical Damage: Carefully examine the control panel for any signs of physical damage, such as cracks, moisture, or loose connections. Physical damage can disrupt the proper functioning of the control panel. If you notice any damage, it may require professional repair or replacement.
- Test the Control Panel Buttons: Press each button on the control panel and observe if they respond properly. If any buttons don’t register when pressed, or if they register incorrectly, it may indicate a problem with the control panel. In such cases, the control panel may need to be repaired or replaced.
- Perform a Control Panel Reset: Some microwave models have a specific reset option for the control panel. Refer to the user manual to find out if your microwave has a reset feature and how to perform it. Performing a control panel reset can help resolve software glitches or settings that may be causing the malfunction.
If none of these steps resolve the issue with the control panel and your microwave still doesn’t work, it’s recommended to consult a professional technician. They have the expertise and knowledge to diagnose and repair control panel malfunctions accurately.
Remember to prioritize your safety when troubleshooting or handling electrical components. Always disconnect the microwave from the power source before inspecting or working on the control panel. If you are unsure or uncomfortable with the troubleshooting steps, it’s best to seek the assistance of a professional technician for proper diagnosis and resolution of the control panel problem.
Examining the Magnetron
If your microwave suddenly stops working, one of the components you should examine is the magnetron. The magnetron is responsible for generating the microwaves that cook the food. If the magnetron becomes faulty or overheats, it can cause the microwave to shut down. Follow these steps to examine the magnetron:
- Turn Off and Unplug the Microwave: Before examining the magnetron, ensure that the microwave is completely turned off and unplugged from the power source. This step is crucial to avoid any potential electrical hazards.
- Locate the Magnetron: The magnetron is typically located near the top or rear of the microwave, behind the control panel or a protective cover. Consult the microwave’s user manual or search online for the specific location of the magnetron in your model.
- Visually Inspect the Magnetron: Carefully examine the magnetron for any signs of damage or overheating. Look for any visible cracks, burnt spots, or discolored areas. These can indicate a faulty or damaged magnetron.
- Check the Ventilation System: Inspect the ventilation system around the magnetron for any blockages. Blocked vents can restrict the airflow, leading to overheating of the magnetron. Clear any obstructions such as accumulated dust or debris to ensure proper ventilation.
- Listen for Unusual Noises: Start the microwave and listen for any unusual noises coming from the area around the magnetron. Grinding, buzzing, or clicking sounds can indicate a malfunctioning magnetron that needs to be addressed.
- Professional Assessment: If you suspect that the magnetron is faulty or malfunctioning, it is advisable to seek the help of a professional technician. They have the expertise and equipment to perform more in-depth examinations and can accurately determine whether the magnetron needs to be repaired or replaced.
It’s important to note that working on the magnetron or other internal components of a microwave oven should be done by trained professionals or qualified technicians. These components involve high voltage and can be hazardous if mishandled.
If you are unsure or uncomfortable examining the magnetron yourself, it’s best to seek professional assistance for a proper diagnosis and resolution of any magnetron-related issues.
By examining the magnetron and ensuring proper ventilation, you can potentially identify and address any problems related to this critical component of your microwave oven.
Verifying the Capacitor’s Functionality
If your microwave suddenly stops functioning, a defective capacitor could be the cause. The capacitor in a microwave oven stores and releases electrical energy to power the magnetron, which generates the microwaves used for heating food. If the capacitor becomes defective or fails to function properly, it can impact the overall performance of the microwave. Here are the steps to verify the capacitor’s functionality:
- Ensure Safety Measures: Before working on the capacitor, prioritize your safety by disconnecting the microwave from the power source and discharging any stored electrical energy. Follow the manufacturer’s instructions or consult a professional technician to safely discharge the capacitor.
- Locate the Capacitor: The capacitor is typically located near the magnetron or behind the control panel. Consult the microwave’s user manual or search online for the specific location of the capacitor in your model.
- Inspect the Capacitor: Visually inspect the capacitor for any visible signs of damage, such as swelling, leakage, or burnt marks. If you notice any of these signs, it indicates a defective capacitor that needs to be replaced.
- Test the Capacitor: Use a multimeter to test the capacitance of the capacitor. Set the multimeter to the appropriate capacitance measurement range and touch the leads to the corresponding terminals of the capacitor. Compare the measured capacitance with the manufacturer’s specified capacitance value. If there is a significant deviation, it indicates a defective capacitor.
- Check for Discharge: After testing the capacitance, verify that the capacitor is discharged completely before further handling. Use an appropriate resistor or discharge tool recommended by professionals to ensure safety.
- Replace the Defective Capacitor: If the capacitor is found to be defective or not functioning as intended, it needs to be replaced. Note down the capacitor’s specifications (voltage and capacitance values) and purchase a replacement capacitor that matches these specifications. Follow the manufacturer’s instructions or seek professional assistance to ensure proper installation of the new capacitor.
It is important to note that dealing with capacitors can be dangerous, as they can store a significant amount of electrical energy even when the microwave is disconnected from the power source. If you are unsure or uncomfortable working with capacitors, it is advisable to seek the help of a professional technician who has the knowledge and expertise to handle these components safely.
By verifying and, if necessary, replacing a defective capacitor, you can potentially restore your microwave oven’s functionality and ensure that it operates efficiently.
Read more: How Long Does A Microwave Oven Last
Checking the Thermal Cut-off
If your microwave suddenly stops working, one of the components to check is the thermal cut-off. The thermal cut-off is a safety device designed to shut off the microwave if it detects excessive heat. Checking the thermal cut-off is crucial to ensure it is functioning correctly. Here are the steps to check the thermal cut-off:
- Safety First: Prioritize your safety by turning off the microwave and unplugging it from the power source. This step will prevent any potential electric shocks during the inspection process.
- Locate the Thermal Cut-off: Typically, the thermal cut-off is positioned near the magnetron, in the vicinity of the microwave’s ventilation system. Consult the user manual or search online for the specific location of the thermal cut-off in your microwave model.
- Inspect the Thermal Cut-off: Examine the thermal cut-off for visible signs of activation or damage. Sometimes, when the thermal cut-off has tripped due to excessive heat, it will need to be manually reset. Look for a reset button or a small lever near the thermal cut-off. If it has been triggered, reset it according to the manufacturer’s instructions.
- Test the Thermal Cut-off: Using a multimeter set to the continuity or ohms function, test the thermal cut-off for continuity. Carefully touch one probe of the multimeter to each terminal of the thermal cut-off. If the multimeter displays continuity (a continuous tone or a zero resistance reading), it means the thermal cut-off is functioning properly. If there is no continuity, it indicates that the thermal cut-off has blown and needs to be replaced.
- Replace the Faulty Thermal Cut-off: If the thermal cut-off fails the continuity test or if you suspect it is still malfunctioning even after resetting, it will need to be replaced. Contact the manufacturer or consult a professional technician to obtain the correct replacement part. Follow the appropriate guidelines to safely install the new thermal cut-off.
Keep in mind that the thermal cut-off is an essential safety device, and tampering with it should be handled cautiously. If you are unsure about any of the steps or lack experience in dealing with electrical components, it is recommended to seek the assistance of a professional technician.
By checking and potentially replacing a faulty thermal cut-off, you can ensure the safety and proper functioning of your microwave oven.
Inspecting the Turntable Motor
If your microwave suddenly stops working, a broken turntable motor may be the cause. The turntable motor is responsible for rotating the glass plate inside the microwave, ensuring even heating and cooking of the food. Here are the steps to inspect the turntable motor:
- Turn Off and Unplug the Microwave: Prioritize safety by turning off the microwave and unplugging it from the power source before inspecting the turntable motor. This step ensures that there is no risk of electrical shock.
- Access the Turntable Motor: Depending on the design of your microwave, accessing the turntable motor may require the removal of the glass plate and the support underneath it. Consult the user manual or search online for specific instructions related to your microwave model.
- Inspect the Turntable Motor: Carefully examine the turntable motor for any visible signs of damage or obstruction. Look for any visible cracks, burnt marks, or loose connections. Additionally, check if the motor is securely attached to its mounting bracket.
- Manually Rotate the Motor Shaft: Using your hand or a tool, try to manually rotate the motor shaft. The motor should rotate smoothly without any excessive resistance or noise. If the motor doesn’t move or exhibits grinding or unusual sounds, it indicates a faulty turntable motor.
- Check the Power Supply: Verify that the turntable motor is receiving the necessary power supply by checking the wiring connections. Ensure that the motor’s electrical connections are secure and not damaged. You can use a multimeter to test for voltage at the motor’s wiring connections to confirm the power supply.
- Replace the Turntable Motor: If the turntable motor is found to be defective or malfunctioning, it will need to be replaced. Contact the manufacturer for the correct replacement part and follow the provided instructions or seek the assistance of a professional technician for proper installation.
Remember, working on electrical components can be hazardous. If you are unsure or uncomfortable with the inspection or replacement process, it is recommended to seek professional assistance from a qualified technician who can accurately diagnose and repair the turntable motor issue.
By inspecting and, if necessary, replacing the turntable motor, you can restore the proper functioning of your microwave’s turntable and ensure even cooking and heating of your food.
Conclusion
When your microwave suddenly stops working, it can be frustrating and inconvenient. However, by following the troubleshooting steps outlined in this article, you have the potential to diagnose and resolve the issue, saving you time and money on unnecessary repairs or replacements.
Checking the power supply is often the first step in determining the cause of your microwave’s malfunction. Verifying that it is properly plugged in, checking the circuit breaker, and testing the outlet can help identify any power supply issues.
Inspecting the door switch is essential because a faulty or misaligned switch can disrupt the power supply and prevent the microwave from operating. Ensuring the door latch and hooks are in good condition, cleaning the door area, and checking for a clicking sound when the door is closed are important steps in troubleshooting the door switch.
Testing the fuse is crucial in identifying a blown fuse as a potential cause of the microwave’s failure. By visually inspecting the fuse for damage and using a multimeter to test its continuity, you can determine if a blown fuse is the problem and replace it if necessary.
The control panel is the interface through which you interact with your microwave, so any malfunctioning buttons or unresponsive controls can hinder its operation. Power cycling the microwave, checking for error codes, inspecting the control panel for physical damage, and performing a control panel reset are important steps to diagnose and resolve issues with the control panel.
The magnetron, capacitor, thermal cut-off, and turntable motor are critical components within the microwave that require proper functioning for optimal performance. Examining the magnetron for damage or overheating, verifying the capacitance of the capacitor, checking the thermal cut-off for activation or damage, and inspecting the turntable motor are essential steps in troubleshooting these components.
It’s important to remember that handling electrical components can be dangerous, and if you are unsure or uncomfortable with the troubleshooting steps, it is always best to seek professional assistance.
In conclusion, by following the outlined troubleshooting steps for a microwave oven that suddenly stops working, you can identify and potentially resolve the issue. However, if the problem persists or if you are uncertain about the next steps, it is advisable to consult a professional technician who can provide expert guidance and assistance. With proper care and maintenance, your microwave can continue to serve you efficiently in the kitchen.
Frequently Asked Questions about Why Does A Microwave Oven Suddenly Stopped Working
Was this page helpful?
At Storables.com, we guarantee accurate and reliable information. Our content, validated by Expert Board Contributors, is crafted following stringent Editorial Policies. We're committed to providing you with well-researched, expert-backed insights for all your informational needs.


0 thoughts on “Why Does A Microwave Oven Suddenly Stopped Working”