Home>Construction & Tools>Building Materials>How To Stick Things On Brick

Building Materials
How To Stick Things On Brick
Modified: March 9, 2024
Discover the best methods for sticking items to brick surfaces with our comprehensive guide. Find the right building materials and techniques for a secure attachment.
(Many of the links in this article redirect to a specific reviewed product. Your purchase of these products through affiliate links helps to generate commission for Storables.com, at no extra cost. Learn more)
Introduction
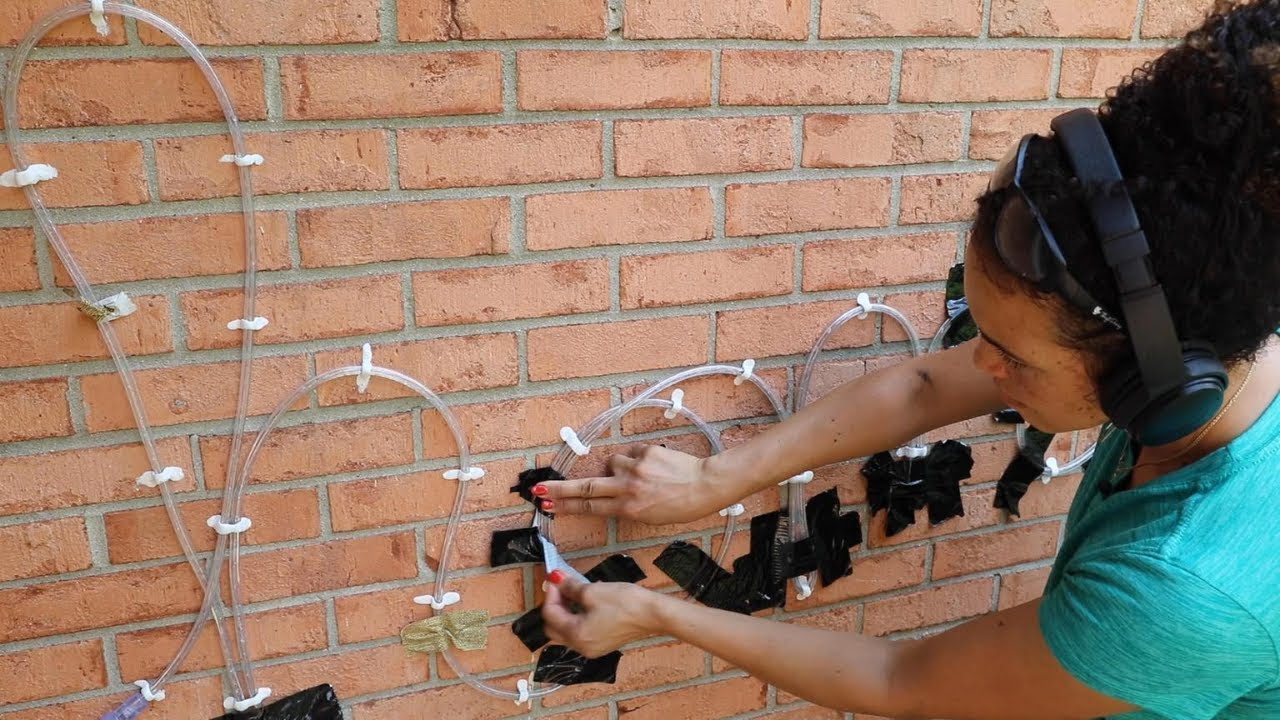
So, you've got a beautiful brick wall or fireplace, and you're eager to hang a new piece of artwork, a mirror, or maybe even a shelf. But there's one problem: how do you stick things on brick? The rough and porous nature of brick surfaces can make traditional adhesion methods challenging, but fear not! With the right knowledge and tools, you can securely attach items to brick without causing damage or creating an eyesore.
In this comprehensive guide, we'll delve into the world of adhesives and surface preparation to equip you with the skills needed to conquer the task at hand. Whether you're a seasoned DIY enthusiast or a newcomer to the world of home improvement, this article will provide valuable insights and practical tips for successfully sticking things on brick surfaces.
Let's embark on this adhesive adventure together, as we explore the nuances of brick surfaces and discover the secrets of effective adhesion. By the end of this journey, you'll be well-versed in the art of affixing items to brick, opening up a world of creative possibilities for enhancing your living space.
Key Takeaways:
- Securely attach items to brick surfaces by choosing the right adhesive, preparing the surface meticulously, and following manufacturer’s recommendations for a long-lasting and reliable bond.
- Consider weight, environmental conditions, and regular maintenance to ensure successful adhesion, allowing you to personalize and elevate your living space with confidence and creativity.
Read more: How To Hang Things On Brick
Understanding the Surface
Before diving into the realm of adhesives and application techniques, it’s crucial to grasp the unique characteristics of a brick surface. Unlike smooth and non-porous materials, such as drywall or glass, brick poses distinct challenges due to its rough texture and porous composition.
Brick surfaces are renowned for their irregularities, nooks, and crannies, which can hinder the adhesion of traditional mounting methods. The presence of mortar joints further complicates the task, as these recessed areas can impact the stability and evenness of the attached object.
Moreover, the porous nature of brick allows moisture to permeate its structure, potentially affecting the performance of certain adhesives over time. Understanding these attributes is vital for selecting the appropriate adhesive and implementing the correct surface preparation techniques.
When confronted with a brick surface, it’s essential to approach it with a keen eye for detail. Assess the texture, composition, and condition of the brick, taking note of any irregularities or damage that may impact adhesion. By familiarizing yourself with the intricacies of the surface, you’ll be better equipped to choose the right adhesive and execute the subsequent steps with precision.
With a solid understanding of the unique characteristics of brick surfaces, you’re ready to embark on the next phase of our adhesive journey: selecting the right adhesive for the job.
Choosing the Right Adhesive
When it comes to sticking items on brick, selecting the appropriate adhesive is paramount to achieving a secure and long-lasting bond. With a myriad of adhesive options available, it’s essential to choose a product specifically designed to adhere to porous and rough surfaces like brick.
One of the most versatile and reliable adhesives for brick surfaces is construction adhesive. This powerful bonding agent is formulated to create a strong and durable bond with various materials, including brick, concrete, and masonry. Look for a construction adhesive that is labeled as suitable for both indoor and outdoor use, ensuring its resilience in different environmental conditions.
For lightweight items such as decorations or small mirrors, an adhesive putty or adhesive strips designed for rough surfaces can be effective. These products offer a temporary yet secure attachment, allowing for easy removal without causing damage to the brick surface.
Another crucial consideration when choosing an adhesive is its compatibility with the material of the item you intend to attach. For example, if you’re mounting a metal hook or bracket, ensure that the adhesive is suitable for bonding metal to brick. Similarly, if the item is made of glass or plastic, verify that the adhesive is compatible with these materials.
Before making a final decision, it’s advisable to read product reviews and seek recommendations from professionals or experienced DIY enthusiasts. Understanding the experiences of others who have used the adhesive for similar applications can provide valuable insights and help you make an informed choice.
By selecting the right adhesive for your specific needs and carefully considering factors such as material compatibility and application environment, you’ll set the stage for successful adhesion. With the adhesive in hand, it’s time to prepare the brick surface to ensure optimal bonding performance.
Preparing the Brick Surface
Before applying any adhesive to the brick surface, it’s crucial to prepare the area to promote optimal adhesion and long-term stability. The following steps will guide you through the essential preparation process:
Clean the Surface:
Begin by thoroughly cleaning the brick surface to remove any dirt, dust, or debris that could hinder the adhesive’s effectiveness. A stiff-bristled brush or a vacuum with a brush attachment can be used to dislodge and eliminate particles from the surface and mortar joints. For stubborn stains or residues, a mild detergent solution and a scrub brush can be employed to ensure a clean and debris-free surface.
Read more: How To Mount Things To Brick
Remove Excess Moisture:
Brick surfaces can retain moisture, which may compromise the adhesive’s ability to form a strong bond. If the surface is damp or has been exposed to moisture, allow it to dry completely before proceeding with the adhesive application. This can be achieved by allowing the surface to air dry over a period of time, typically 24 to 48 hours, depending on the humidity levels and airflow in the area.
Smooth Out Irregularities:
Inspect the brick surface for any protruding mortar or irregularities that could impede the flush attachment of the item. Use a small chisel or file to gently smooth out any prominent mortar or uneven areas, ensuring a relatively flat and uniform surface for the adhesive to bond effectively.
Prime the Surface (Optional):
For particularly challenging adhesion scenarios or when dealing with highly porous or weathered bricks, applying a masonry primer can enhance the surface’s bondability. A high-quality masonry primer can help seal the pores and create a more uniform substrate for the adhesive, ultimately improving its grip and longevity.
By meticulously preparing the brick surface through cleaning, moisture management, and addressing irregularities, you’ll create an optimal foundation for the adhesive application. With the surface primed and ready, it’s time to delve into the art of applying the chosen adhesive for secure and reliable attachment.
Applying the Adhesive
With the brick surface meticulously prepared, it’s time to apply the chosen adhesive methodically and effectively. Whether you’re using construction adhesive, adhesive putty, or adhesive strips, the following steps will guide you through the application process:
Read more: How To Stick Plastic To Brick
Adhesive Application Technique:
For construction adhesive, apply a generous but controlled amount directly onto the back of the item to be attached. If the item has a larger surface area, consider applying the adhesive in a zigzag or wavy pattern to ensure comprehensive coverage. Avoid applying adhesive too close to the edges to prevent excess from oozing out when the item is pressed onto the surface.
If using adhesive putty or strips, follow the manufacturer’s instructions for the recommended quantity and application technique. Knead the putty to activate its adhesive properties and press it firmly onto the back of the item, or apply the adhesive strips according to the provided guidelines.
Positioning and Pressing:
Once the adhesive is applied, carefully position the item at the desired location on the brick surface. Take time to align it accurately, ensuring that it sits flush and level. When satisfied with the positioning, apply firm and even pressure to the item, pressing it against the brick surface to facilitate optimal contact and adhesion.
Support and Cure Time:
Depending on the type of adhesive used, the item may require additional support or bracing during the initial curing phase. Follow the manufacturer’s recommendations regarding the required curing time and any support mechanisms, such as temporary braces or clamps, to maintain pressure on the attached item until the adhesive sets firmly.
With the adhesive successfully applied and the item securely attached to the brick surface, you’re one step closer to achieving your vision for the space. However, to ensure a truly successful outcome, it’s essential to consider additional tips and best practices for maintaining the integrity of the adhesion and the brick surface.
Tips for Successful Adhesion
As you embark on your journey of sticking items to brick surfaces, consider the following tips to enhance the adhesion’s effectiveness and longevity:
Read more: What Will Stick To Brick
Weight Considerations:
When selecting items to attach to a brick surface, be mindful of their weight and dimensions. Heavier items may require a more robust adhesive and, in some cases, additional mechanical support such as brackets or anchors to ensure secure attachment.
Temperature and Moisture Management:
Consider the environmental conditions to which the attached item will be exposed. Extreme temperature variations and prolonged exposure to moisture can impact the adhesive’s performance. Choose an adhesive rated for the intended environmental conditions to maintain a strong and reliable bond over time.
Surface Compatibility:
Ensure that the adhesive is compatible with both the brick surface and the material of the item being attached. Some adhesives may not bond effectively with certain types of brick or specific materials, potentially leading to adhesion failure or surface damage.
Follow Manufacturer’s Recommendations:
Adhere to the manufacturer’s guidelines regarding the application, curing time, and any specific precautions or recommendations for the chosen adhesive. Deviating from these instructions can compromise the adhesion’s integrity and long-term stability.
Read more: What Glue Sticks To Brick
Regular Inspection and Maintenance:
Periodically inspect the attached items to ensure that they remain securely affixed to the brick surface. Additionally, monitor the condition of the brick surface around the attachment points to detect any signs of degradation or adhesion compromise.
Consider Professional Assistance:
For complex or heavy-duty attachment projects, or if you’re uncertain about the best adhesive and application method, consider consulting with a professional contractor or adhesive specialist. Their expertise can provide invaluable insights and ensure the success of your adhesion endeavors.
By incorporating these tips into your adhesion strategy, you’ll bolster the reliability and durability of the attachment, allowing you to enjoy your adorned brick surface with confidence and peace of mind.
Conclusion
As we conclude our exploration of sticking items on brick surfaces, you’ve gained a wealth of knowledge and practical insights to tackle this seemingly challenging task with confidence and finesse. By understanding the unique characteristics of brick surfaces, selecting the right adhesive, and executing meticulous surface preparation and application techniques, you’ve unlocked the potential to enhance your living space with creativity and functionality.
Brick surfaces, with their rugged charm and timeless appeal, present an opportunity for creative expression and practical utility. Whether you’re adorning a brick fireplace with a cherished artwork, organizing your outdoor space with mounted shelves, or adding decorative elements to an interior brick wall, the ability to securely attach items opens a realm of possibilities for personalizing and elevating your surroundings.
Armed with the knowledge gained from this guide, you’re poised to embark on your adhesive adventures, confidently transforming brick surfaces into showcases of your style and ingenuity. Remember to consider the weight and environmental factors, adhere to manufacturer’s recommendations, and periodically inspect the attachments to maintain their integrity.
As you venture forth, may your adhesive endeavors yield not only steadfast attachments but also moments of satisfaction and pride in your ability to enhance your living environment. Embrace the creative potential of brick surfaces, and let your imagination soar as you bring your vision to life, one securely attached item at a time.
With the right adhesive and a touch of creativity, you can stick virtually anything on brick surfaces, turning them into captivating focal points that reflect your unique personality and style.
Frequently Asked Questions about How To Stick Things On Brick
Was this page helpful?
At Storables.com, we guarantee accurate and reliable information. Our content, validated by Expert Board Contributors, is crafted following stringent Editorial Policies. We're committed to providing you with well-researched, expert-backed insights for all your informational needs.









0 thoughts on “How To Stick Things On Brick”