Home>Dining>Table Decor>How To Do A Chevron Style Table Top
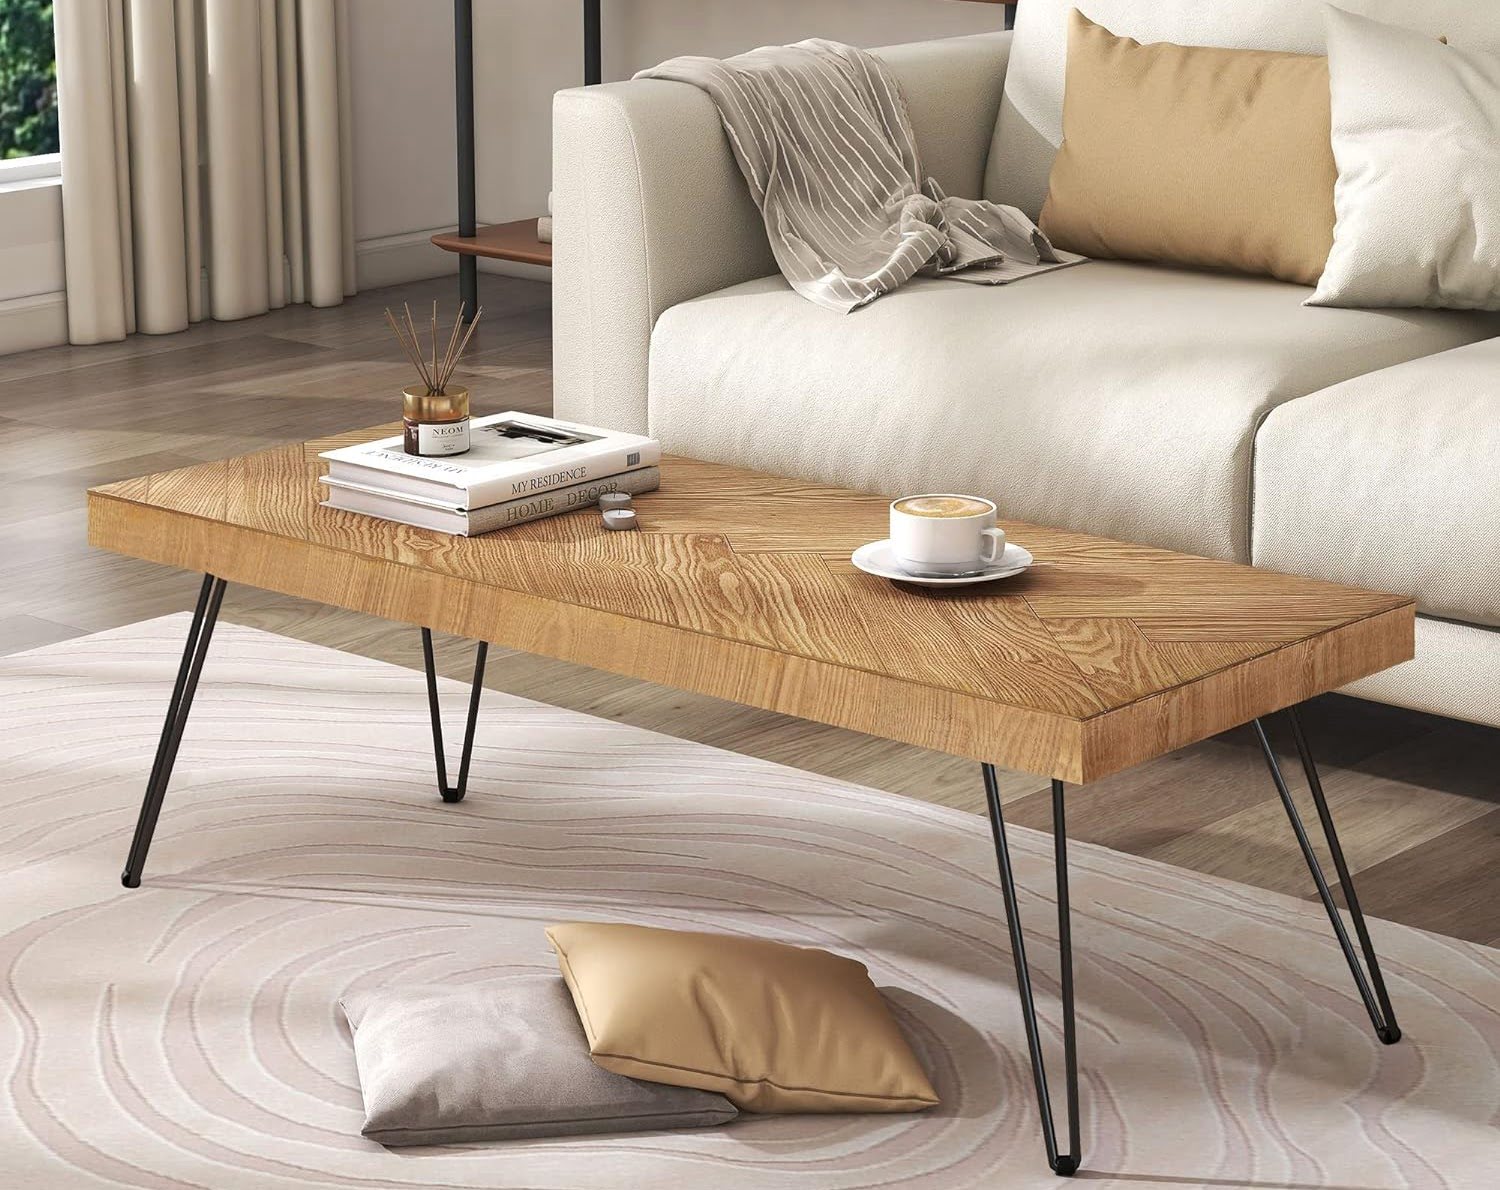

Table Decor
How To Do A Chevron Style Table Top
Modified: December 7, 2023
Enhance your table decor with a striking chevron style table top. Learn how to easily create this trendy design and elevate your dining experience.
(Many of the links in this article redirect to a specific reviewed product. Your purchase of these products through affiliate links helps to generate commission for Storables.com, at no extra cost. Learn more)
Introduction
Welcome to the world of table decor! If you’re looking to add a touch of elegance and style to your dining room or any other space, creating a chevron style table top can be a fantastic option. Chevron patterns have become increasingly popular in recent years due to their modern yet timeless appeal. With their sleek lines and dynamic symmetry, chevron designs can instantly elevate the look of any table.
In this article, we will guide you through the process of creating a stunning chevron style table top. You don’t need to be an expert in DIY projects or have advanced woodworking skills to achieve this impressive look. With just a few materials and some creativity, you can transform an ordinary table into a focal point that will enhance the overall aesthetic of your room.
Before we dive into the steps, let’s take a look at the materials you’ll need for this project.
Key Takeaways:
- Elevate your table decor with a stunning chevron style table top using just a few materials and some creativity. Follow the step-by-step guide to achieve a professional-looking finish and add a touch of elegance to any space.
- Transform an ordinary table into a stylish centerpiece that reflects your personal taste. Enjoy the rewarding and creative process of creating a unique and eye-catching chevron style table top that will enhance the beauty of your home.
Read more: How To Style A Table Top With Photos
Materials Needed
Before you start your chevron table top project, gather the following materials:
- Wooden table top
- Sandpaper
- Primer
- Paint in base color and chevron pattern color
- Paintbrushes
- Painters tape
- Craft knife or scissors
- Measuring tape
- Ruler or straight edge
- Sealant or varnish
- Drop cloth or newspaper
Make sure you have all of these materials on hand before you begin. Preparation is key to ensuring a smooth and successful project.
Step 1: Prep the Table Top
The first step in creating your chevron style table top is to prepare the surface. Start by removing any dust or dirt from the table top using a soft cloth. If there are any rough areas or imperfections on the wood, lightly sand them with sandpaper to create a smooth surface for the paint to adhere to.
Once the surface is clean and smooth, apply a layer of primer to the table top. Primer helps create a consistent base and improves the durability of the paint. Use a paintbrush to apply the primer evenly across the entire surface of the table top. Allow the primer to dry completely before moving on to the next step.
Prepping the table top ensures that the paint will adhere properly and helps to achieve a professional-looking finish. Take your time with this step to ensure the best results.
Step 2: Create Guidelines
Creating guidelines is an essential step to ensure that your chevron pattern is symmetrical and accurately aligned. Begin by measuring the width of your table top and divide it by the desired number of chevron peaks. This will determine the spacing between each chevron on your table top.
Using a ruler or straight edge, mark the starting point of your chevron pattern at one end of the table top. Measure and mark the desired spacing along the entire length of the table top. This will serve as your guideline for positioning the painter’s tape later in the process.
When marking the guidelines, it’s important to use a pencil that contrasts with the wood color to ensure visibility. Take the time to measure and mark accurately to achieve a visually pleasing and balanced chevron pattern.
Once you have marked the guidelines, double-check their alignment to ensure they are straight and evenly spaced. This will help you achieve a precise and professional-looking chevron pattern on your table top.
Step 3: Apply Tape
Now that you have created your guidelines, it’s time to apply painter’s tape to define the chevron pattern on your table top. Begin by carefully placing the tape along the marked guidelines, making sure it adheres firmly to the surface.
To create the chevron pattern, you will need to angle the tape at 45-degree angles. Start at one end of the table top and position the tape diagonally across to the opposite corner, creating a V shape. Continue this pattern along the entire length of the table top, ensuring that each tape strip is parallel to the guidelines.
Make sure that the tape is pressed firmly against the table top to prevent any paint from bleeding underneath. Smooth out any bubbles or wrinkles in the tape to achieve clean and crisp lines for your chevron design.
Take your time during this step, as the precision of the tape application will determine the final look of your chevron pattern. Use a craft knife or scissors to trim any excess tape at the edges of the table top for a neat finish.
Once the tape is applied, step back and double-check its alignment and overall appearance. Making any adjustments at this stage will ensure that your chevron pattern is visually pleasing and symmetrical.
Read more: How To Style A Granite Table Top
Step 4: Paint the Base Color
With the tape in place, it’s time to start painting your table top. Begin by applying the base color, which will serve as the background for your chevron pattern. Choose a paint color that complements your room’s décor and creates a striking contrast with your chevron pattern color.
Using a paintbrush, carefully apply an even coat of paint over the exposed areas of the table top, taking care to avoid the tape. Make sure to cover the entire surface thoroughly. Allow the paint to dry completely according to the manufacturer’s instructions.
If necessary, apply a second coat of paint to achieve a solid and uniform base color. Always ensure that each layer is completely dry before applying additional coats to prevent smudging or uneven coverage.
Painting the base color first provides a canvas for your chevron pattern to stand out and adds depth to the overall design. Take your time during this step to ensure thorough coverage and a smooth finish.
Step 5: Remove Tape
Once the base color is completely dry, it’s time to remove the painter’s tape. This step requires a delicate touch to prevent any damage or smudging of the painted surface.
Carefully peel the tape off the table top, starting from one corner and pulling it back at a 45-degree angle. Take your time and ensure that the tape is being removed smoothly without pulling or tearing the paint.
Removing the tape will reveal crisp, clean lines where the base color meets the wood. If there are any minor imperfections or bleed-through, you can touch up those areas with a small paintbrush and the base color paint.
As you remove the tape, step back and admire the transformed table top. The clean lines and contrasting colors will start to showcase the stunning chevron pattern.
Set the tape aside for now, as you will need it again in the next steps to create the chevron design on the table top.
Take a moment to appreciate the progress you’ve made so far and get ready for the next exciting step in the process.
When creating a chevron style table top, be sure to measure and mark the center of the table before laying out the pattern to ensure a symmetrical and balanced design.
Step 6: Measure and Mark Chevron Pattern
Before you can start applying the tape for the chevron design, you need to measure and mark the pattern on your table top. The precise measurements and markings will ensure that your chevron pattern is uniform and visually appealing.
Start by determining the desired width of each chevron. Measure the width at the base of the V-shaped tape from the previous step. This measurement will determine the spacing between each chevron pattern on your table top.
Using a measuring tape and a pencil, mark the center point of each chevron along the length of the table top. This will be the starting point for placing the tape in the next step.
Continue marking the center points for each chevron, ensuring that they are evenly spaced along the entire length of the table top. Take your time and double-check the accuracy of your measurements and markings to achieve a balanced chevron pattern.
Creating precise guidelines at this stage will make it easier to apply the tape and ensure that your chevron design is symmetrical and well-proportioned.
Once you have completed marking the center points, step back and visually inspect the markings to ensure they align with your vision for the chevron pattern.
With the measurements and markings in place, you’re now ready to move on to the next step of this exciting project: applying the tape to create the chevron design.
Step 7: Apply Tape for Chevron Design
Now that you have measured and marked the center points for each chevron, it’s time to apply the painter’s tape to create the chevron pattern on your table top. This step requires precision and careful placement of the tape to achieve a clean and symmetrical design.
Starting at one end of the table top, align the painter’s tape vertically with the marked center point. Press it firmly onto the surface, ensuring that it follows the angle of the chevron pattern. Continue applying the tape along the length of the table top, using the marked center points as a guide.
As you position the tape, ensure that it is parallel to the edges of the table top. Smooth out any wrinkles or bubbles to maintain clean lines for your chevron pattern.
Repeat this process for each chevron, aligning the tape with the marked center points and maintaining the same angle for each strip. Take your time to make sure the tape is securely adhered and the chevron pattern is visually pleasing.
Once all the tape is applied, double-check its alignment and overall appearance. This is your last opportunity to make any adjustments before moving on to the next step.
With the tape now in place, your table top is starting to take shape with its distinct chevron design. The next step is where the magic happens: painting the chevron pattern.
Read more: How To Style A Vintage Glass Top Side Table
Step 8: Paint Chevron Pattern
With the tape securely in place, it’s time to bring your chevron pattern to life by painting it with your chosen color. Select a paint color that contrasts beautifully with the base color and complements your overall interior design.
Using a small paintbrush, carefully apply an even coat of paint to the exposed areas of the table top between the tape strips. Take your time to ensure that the paint is applied smoothly and covers the surface evenly.
Painting the chevron pattern requires attention to detail and a steady hand. Focus on maintaining clean lines and preventing any paint from bleeding under the tape. If necessary, use a smaller brush or a fine-tip brush to reach narrow areas.
Once you have finished painting the chevron pattern, allow the paint to dry completely according to the manufacturer’s instructions. Depending on the type of paint you use, this may take several hours or overnight.
If needed, apply a second coat of paint to achieve a more vibrant and opaque color. Ensure that each layer is completely dry before applying additional coats to avoid smudging or uneven coverage.
As you paint, keep in mind that the chevron pattern will be the focal point of your table top. Take your time and pay attention to detail to create a visually stunning and professional-looking design.
Once the paint is dry, you’re ready for the exciting next step: removing the tape to reveal your beautiful chevron pattern!
Step 9: Remove Tape
After the paint has fully dried, it’s time to remove the painter’s tape and unveil your exquisite chevron pattern. Removing the tape requires a careful and steady hand to ensure clean lines and prevent any accidental smudging or damage to the painted surface.
Begin by gently and slowly peeling back the tape at a 45-degree angle, starting from one corner and working your way across the table top. Take your time and make sure to pull the tape back evenly and smoothly.
As you remove the tape, you’ll reveal the crisp, sharp lines of your chevron pattern. It’s an exciting moment to see the transformation take place and the intricate design come to life.
If you notice any areas where the paint has bled under the tape, you can use a small paintbrush and some touch-up paint to correct them. Carefully apply the touch-up paint, making sure to blend it seamlessly with the surrounding area.
Once the tape is completely removed, step back and admire your beautifully painted chevron pattern. Take a moment to appreciate the time and effort you’ve invested in creating a stunning table top.
Remember to discard the used tape and properly clean your workspace before moving on to the final step.
Now that the tape is gone, you’re almost done! It’s time to add the finishing touches and protect your newly painted chevron table top.
Step 10: Finish and Seal the Table Top
To ensure that your chevron table top stands the test of time and remains protected, it’s important to apply a sealant or varnish as the final step. This will not only enhance the durability of the paint but also add a glossy finish to the surface.
Before applying the sealant, make sure the painted surface is clean and free of any dust or debris. Use a soft cloth or a gentle brush to remove any particles from the table top.
Next, select a clear, water-based polyurethane sealant or varnish suitable for wooden surfaces. Using a clean brush, apply a thin, even layer of the sealant to the entire table top. Make sure to follow the manufacturer’s instructions for application and drying times.
Allow the sealant to dry completely before applying additional coats. Depending on the desired level of protection, you may choose to apply multiple coats of sealant. Just be sure to leave adequate drying time between each layer.
After the final coat of sealant has dried, gently run your hand across the table top to ensure a smooth and even finish. The sealant will provide a protective barrier and make cleaning your table top easier.
Once the sealant is dry, your chevron style table top is complete and ready to be enjoyed! The sealant will enhance the vibrancy of the colors and protect the surface from everyday wear and tear.
Remember to follow any specific care instructions provided by the sealant manufacturer to ensure the longevity of your beautifully decorated table top.
Congratulations! You have successfully completed all the steps to create a stunning chevron style table top. Sit back, relax, and admire your handiwork – you now have a unique and eye-catching piece that will enhance the beauty of any space.
Happy decorating!
Conclusion
Creating a chevron style table top is a rewarding and creative project that can instantly elevate the look of any space. With just a few materials and some patience, you can transform an ordinary table into a stylish centerpiece that reflects your personal taste and adds a touch of elegance to your home.
Throughout the process, we’ve walked you through each step, from prepping the table top to removing the tape and applying the final sealant. Following these steps and paying attention to detail will ensure that your chevron pattern is precise, symmetrical, and visually appealing.
Remember, the key to achieving a professional-looking finish is taking your time, properly measuring and marking, and ensuring clean lines. From selecting the base and chevron colors to removing the tape and adding the final protective layer, every step contributes to the overall success of your project.
Once your chevron style table top is complete, it’s time to showcase your creativity and enjoy the stylish addition to your space. Gather friends and family around your table and bask in the compliments you’ll receive on your beautiful and unique piece of furniture.
Keep in mind, table decor is a versatile and ever-evolving art form. You can experiment with different colors, patterns, and techniques to create variations of the chevron design or explore other exciting table top decorations.
So, grab your materials, unleash your creativity, and embark on the journey of transforming your table into a stunning showcase of your personal style. With the knowledge and skills gained from this guide, you’re well-equipped to tackle your next table decor project with confidence.
Have fun and happy decorating!
Frequently Asked Questions about How To Do A Chevron Style Table Top
Was this page helpful?
At Storables.com, we guarantee accurate and reliable information. Our content, validated by Expert Board Contributors, is crafted following stringent Editorial Policies. We're committed to providing you with well-researched, expert-backed insights for all your informational needs.



0 thoughts on “How To Do A Chevron Style Table Top”