Home>Dining>Table Decor>How To Build A Bar-Style Table

Table Decor
How To Build A Bar-Style Table
Modified: December 7, 2023
Learn how to build a stylish bar-style table for your home with our step-by-step guide. Perfect for table-decor enthusiasts!
(Many of the links in this article redirect to a specific reviewed product. Your purchase of these products through affiliate links helps to generate commission for Storables.com, at no extra cost. Learn more)
Introduction
Welcome to the exciting world of table decor! If you’re looking to add a touch of elegance and functionality to your home, a bar-style table can be the perfect addition. Whether you want to create a cozy spot for enjoying a cup of coffee or a stylish space for entertaining guests, building your own bar-style table is a rewarding and customizable project.
In this article, we will guide you through the step-by-step process of building a bar-style table. From selecting the right materials and tools to adding finishing touches, you’ll learn everything you need to know to create a beautiful and functional piece of furniture. So, grab your apron and let’s get started!
Before we dive into the nitty-gritty, it’s important to note that building a bar-style table takes time, patience, and a little bit of woodworking know-how. But don’t worry if you’re a beginner – we’ll break down each step into easy-to-follow instructions. Just take it one step at a time, and soon you’ll have a stunning table that will be the envy of all your friends and family.
Not only is building your own table a fun and rewarding project, but it also allows you to customize the design to fit your specific style and needs. Whether you prefer a rustic farmhouse look or a sleek and modern design, the possibilities are endless.
Before we dive into the step-by-step process, let’s gather the materials and tools you’ll need for this project.
Key Takeaways:
- Building a bar-style table is a rewarding DIY project that allows for customization to fit your style and needs. It requires time, patience, and attention to detail, but the end result is a beautiful and functional piece of furniture.
- From selecting materials and tools to planning, constructing, and finishing, building a bar-style table is a creative and fulfilling journey. It’s a practical and cost-effective way to add elegance and versatility to your home.
Read more: How To Build A Picnic Style Dining Table
Materials and Tools
Before you start building your bar-style table, it’s important to gather all the necessary materials and tools. Here’s a list of what you’ll need:
- Wood: Choose a sturdy and durable wood that fits your desired style. Common options include oak, pine, or cedar.
- Screws or nails: Depending on your preference and the type of wood you’re using, choose the appropriate fasteners to securely join the pieces together.
- Saw: A saw will be necessary for cutting the wood to the desired dimensions. A circular saw or a miter saw will work well for this project.
- Drill: A drill is essential for creating pilot holes and securing the fasteners. Make sure you have drill bits that correspond to the size of your screws or nails.
- Measuring tape: Accurate measurements are crucial for a properly sized and balanced table. A measuring tape will help ensure precision throughout the construction process.
- Sandpaper or sander: To achieve a smooth and polished surface, you’ll need sandpaper or a sander. Choose a variety of grits to gradually smooth out the wood.
- Wood stain or paint: Adding a finish to your table not only protects the wood but also enhances its appearance. Whether you prefer a natural wood stain or a vibrant paint color, choose a product that suits your style.
- Brushes or rollers: Depending on the finish you choose, you’ll need brushes or rollers to apply the stain or paint evenly.
- Protective gloves and goggles: Safety should always be a priority when working with tools and chemicals. Be sure to wear protective gloves and goggles to protect your hands and eyes.
Now that you have all your materials and tools ready, it’s time to move on to the planning and design phase.
Planning and Design
Before you start cutting or assembling any wood, it’s important to have a well-thought-out plan and design for your bar-style table. Here are some key considerations:
- Size: Determine the ideal dimensions for your table based on the available space in your home and how many people you want to accommodate. Consider both the length and width of the tabletop as well as the height.
- Style: Decide on the overall style and aesthetic you want to achieve. Do you prefer a sleek and minimalist design or a more rustic and farmhouse-inspired look? Consider the existing decor in your home and choose a style that complements it.
- Functionality: Think about how you plan to use the table. Will it primarily be used for dining, working, or entertaining? Consider any additional features you might want to include, such as drawers or a built-in wine rack.
- Proportions: Pay attention to the proportions of the table to ensure it looks balanced and visually appealing. For example, if you have a longer tabletop, consider adding additional supports or legs in the center to prevent sagging.
- Maintenance: Consider the level of maintenance you’re willing to commit to. If you prefer a low-maintenance option, choose a wood species that is more resistant to scratches and stains.
Once you have a clear plan in mind, you can move on to the construction phase. Remember, it’s always a good idea to sketch out your design before starting any cuts or assembly. This will help you visualize the final product and make any necessary adjustments.
Next, we’ll dive into the construction process, starting with building the frame of the table.
Building the Frame
Now that you have your design plan in place, it’s time to start building the frame of your bar-style table. The frame provides support and stability to the table, so it’s crucial to ensure its construction is strong and secure. Follow these steps:
- Measure and mark the dimensions of the frame on the wood pieces. Use a measuring tape and a pencil to accurately mark the lengths and widths.
- Cut the wood pieces according to your measurements using a saw. Make sure to use a miter saw or a circular saw for clean and precise cuts.
- Assemble the frame by attaching the pieces together. Use screws or nails to secure the joints, making sure to pre-drill pilot holes to prevent the wood from splitting.
- Double-check the squareness of the frame by measuring the diagonals. If the measurements are equal, your frame is square. If not, adjust the joints until it is.
- Install additional support beams if necessary. Depending on the size and design of your table, you may need to add extra beams in the center or along the sides to provide additional stability.
Once the frame is constructed and secure, you can move on to attaching the tabletop.
Note: It’s important to follow proper safety precautions when using power tools and handling sharp objects. Always wear protective gloves and goggles, and work in a well-ventilated area.
Now let’s move on to the next step, which is attaching the tabletop to the frame.
When building a bar-style table, make sure to use sturdy and durable materials such as hardwood or metal to ensure the table can support the weight of items placed on it and withstand regular use.
Attaching the Tabletop
With the frame of your bar-style table in place, it’s time to attach the tabletop. This step requires precision and attention to detail to ensure a secure and stable surface for your table. Follow these steps:
- Measure and mark the dimensions of the tabletop on a sturdy piece of wood. Make sure the dimensions match the frame and the desired size of the tabletop.
- Cut the wood for the tabletop using a saw, making clean and straight cuts.
- Place the tabletop onto the frame, ensuring it is centered and aligned properly.
- Secure the tabletop to the frame using screws or nails, making sure to evenly distribute the fasteners across the surface. Pre-drill pilot holes to prevent the wood from splitting.
- Double-check the stability and levelness of the tabletop. If needed, adjust and tighten the fasteners or make any necessary modifications.
Once the tabletop is securely attached to the frame, it’s time to add the final touch to your bar-style table – the bar-style footrest.
Next, we’ll explore how to incorporate a bar-style footrest into your table design.
Read more: How To Build A Parson-Style Sofa Table
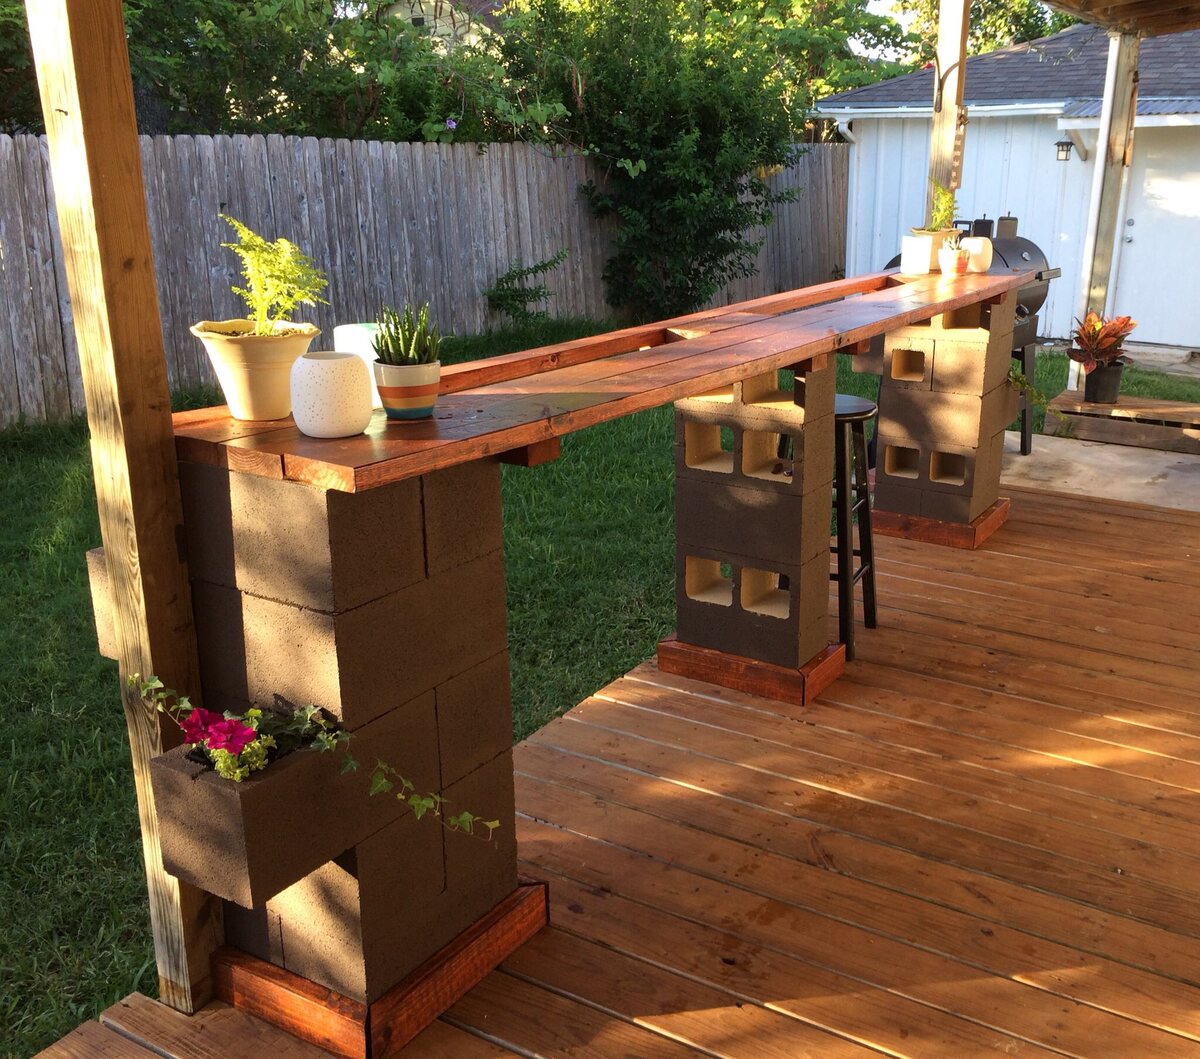
Adding the Bar-Style Footrest
A bar-style footrest not only adds comfort to your bar-style table but also enhances its overall design. Follow these steps to incorporate a footrest into your table:
- Measure and mark the desired height for the footrest on the table legs. The footrest should be positioned at a comfortable height for people to rest their feet.
- Cut wooden pieces to the appropriate length for the footrest. These pieces should be parallel to each other and attach to the table legs.
- Attach the footrest pieces to the table legs using screws or nails. Make sure they are securely fastened and aligned at the marked height.
- If desired, add additional support braces between the footrest pieces and the table legs for extra stability.
- Sand down any rough edges or surfaces of the footrest to achieve a smooth finish.
By adding a bar-style footrest, you not only improve the comfort of your bar-style table but also create an inviting and stylish space for guests to sit and relax.
With the footrest in place, it’s time to move on to the next step – sanding and finishing.
Sanding and Finishing
Once the structure of your bar-style table is complete, it’s time to focus on the finer details. Sanding and finishing are important steps that will give your table a polished and professional look. Follow these steps to achieve a smooth and attractive finish:
- Start by using coarse-grit sandpaper to remove any rough edges or imperfections on the surface of the table. Sand in the direction of the wood grain to prevent scratching.
- Gradually transition to finer-grit sandpaper to achieve a smoother surface. This will help to remove any remaining roughness and prepare the wood for finishing.
- After sanding, wipe down the table with a clean, damp cloth to remove any dust or debris. Allow it to dry completely before proceeding.
- Apply your chosen wood stain or paint evenly over the surface of the table, following the manufacturer’s instructions. Use a brush or roller for a smooth application.
- Allow the stain or paint to dry completely. Depending on the product, this may take a few hours or overnight. Follow the recommended drying time to ensure the best results.
- If desired, apply a second coat of stain or paint for a deeper and more vibrant color. Allow each coat to dry completely before applying the next.
- Once the final coat is dry, apply a clear varnish or sealer to protect the wood and enhance the finish. Follow the manufacturer’s instructions for application and drying time.
When the varnish or sealer is dry, give your table a final inspection. Ensure that all surfaces are smooth and free of imperfections. Make any necessary touch-ups or adjustments before proceeding to the next step – enjoying your beautifully finished bar-style table!
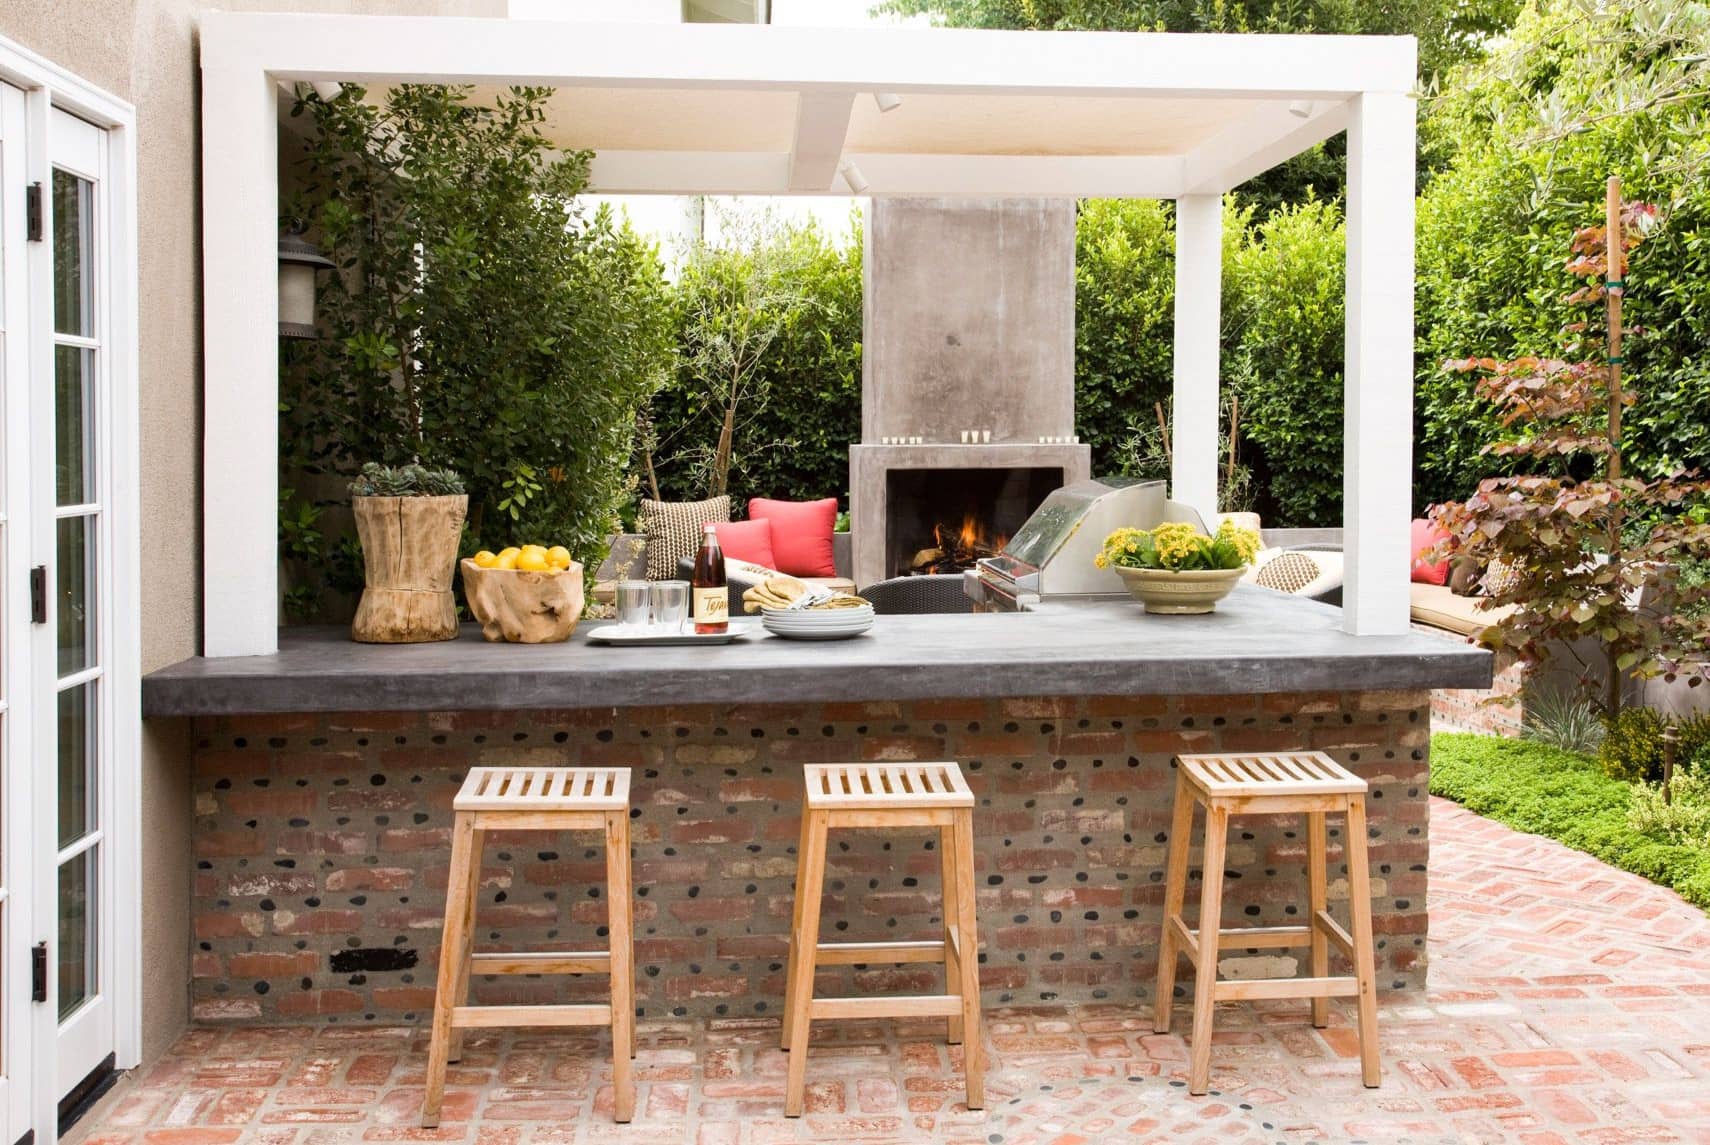
With the sanding and finishing complete, your bar-style table is ready to take center stage in your home. Whether it’s for dining, entertaining, or simply enjoying a cup of coffee, this piece of furniture will surely impress your guests and provide you with years of enjoyment.
Now that you’ve completed the construction and finishing of your bar-style table, take a moment to appreciate your hard work and craftsmanship. Remember, building a table is not only a practical endeavor, but also a creative expression of your personal style and taste. Congratulations on a job well done!
Conclusion
Building a bar-style table can be a fun and rewarding DIY project that allows you to showcase your creativity and craftsmanship. By following the steps outlined in this article, you have learned how to select the right materials and tools, plan and design your table, build the frame, attach the tabletop, add a bar-style footrest, and finish the table with sanding and staining or painting. The end result is a beautiful and functional piece of furniture that adds style and versatility to your home.
Remember, building a bar-style table requires time, patience, and attention to detail. Take your time, double-check measurements, and follow safety precautions when handling tools and chemicals. Don’t be afraid to make modifications or adjustments along the way to ensure that your table perfectly fits your vision and needs.
Not only does building your own table save you money compared to purchasing a pre-made one, but it also allows you to customize the design to match your personal style and the existing decor in your home. Whether you prefer a rustic farmhouse look, a sleek and modern aesthetic, or something in between, your bar-style table can be a reflection of your unique taste.
Now that you have the knowledge and skills to build your own bar-style table, it’s time to put your newfound expertise to use. Gather your materials, set aside some time, and get ready to embark on a fulfilling and creative journey. Whether you’re a beginner or an experienced DIY enthusiast, building a bar-style table is a project that anyone can tackle.
So, what are you waiting for? Get started on your bar-style table project today, and soon you’ll have a stunning piece of furniture that will be the focal point of your home and a source of pride for years to come.
Frequently Asked Questions about How To Build A Bar-Style Table
Was this page helpful?
At Storables.com, we guarantee accurate and reliable information. Our content, validated by Expert Board Contributors, is crafted following stringent Editorial Policies. We're committed to providing you with well-researched, expert-backed insights for all your informational needs.


0 thoughts on “How To Build A Bar-Style Table”