Home>Dining>Table Decor>How To Make A Tulip Style Table Pedestal
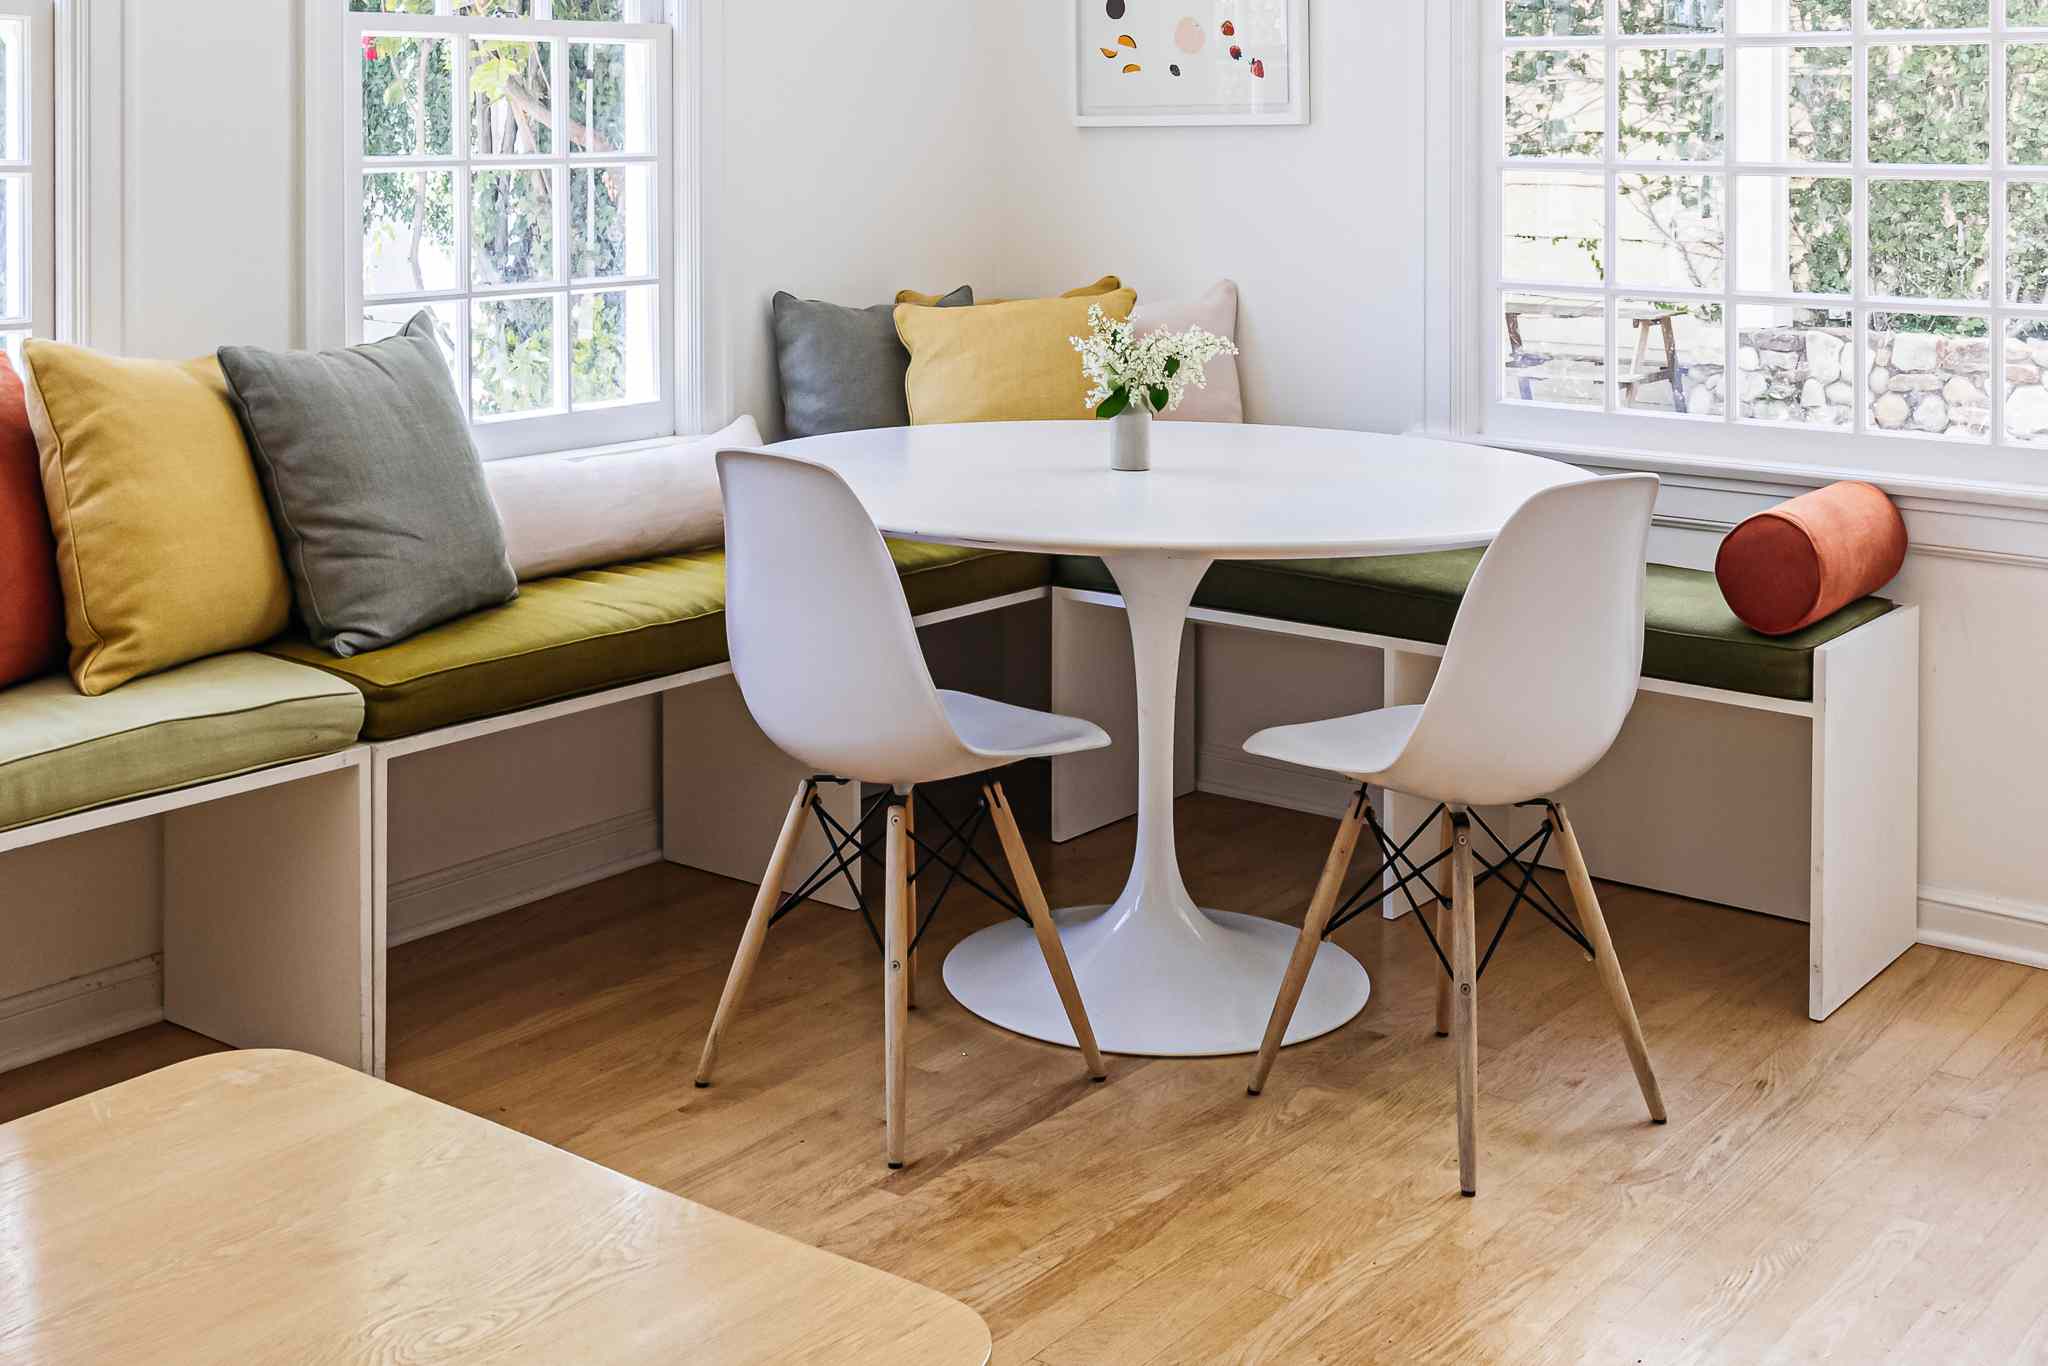
Table Decor
How To Make A Tulip Style Table Pedestal
Modified: August 28, 2024
Discover how to create a stunning Tulip Style table pedestal to elevate your table decor. Step-by-step instructions and expert tips.
(Many of the links in this article redirect to a specific reviewed product. Your purchase of these products through affiliate links helps to generate commission for Storables.com, at no extra cost. Learn more)
Introduction
Welcome to our comprehensive guide on how to make a tulip-style table pedestal! If you’re looking to add a touch of elegance and sophistication to your table decor, a tulip-style pedestal is an excellent choice. This classic design not only provides stability and support to your table but also adds a stylish and visually appealing element to your space.
In this article, we will walk you through the step-by-step process of creating a stunning tulip-style table pedestal from scratch. Whether you’re a seasoned DIY enthusiast or a beginner, our guide is designed to help you achieve professional results.
Before we dive into the practical details, let’s take a moment to discuss the materials you’ll need for this project. Having everything prepared and organized will streamline the process and make it even more enjoyable.
Key Takeaways:
- Elevate your table decor with a DIY tulip-style pedestal. Follow our guide for a sophisticated and stable centerpiece that adds elegance to any space.
- Attention to detail is key in creating a stunning tulip-style table pedestal. From precise wood cutting to seamless assembly, achieve professional results with our step-by-step guide.
Read more: How To Make A Country-Style Table
Materials Needed
Before getting started, gather the following materials:
- Wood of your choice (we recommend using a hardwood like oak or maple for durability)
- Tabletop (pre-cut or custom-made to your desired dimensions)
- Measuring tape
- Pencil
- Saw (such as a circular saw or jigsaw)
- Drill
- Screws
- Sandpaper (various grits, ranging from coarse to fine)
- Wood glue
- Paint or wood stain
- Paintbrush or stain applicator
Make sure to gather all the necessary tools and materials before starting the project. This will ensure a smooth and uninterrupted process.
Step 1: Cutting the Wood
The first step in creating the tulip-style table pedestal is to cut the wood into the appropriate pieces. Measure and mark the dimensions for each piece on the wood using a measuring tape and pencil.
For the base of the pedestal, you will need a circular piece of wood that is slightly larger than the tabletop diameter. Use a saw, such as a circular saw or jigsaw, to cut out the circular shape.
Next, you will need to cut the pieces for the central support column and the curved petals. The central support column should be a long rectangular piece that is thick and sturdy enough to support the weight of the tabletop. Cut the column to your desired height.
For the curved petals, the number of pieces will depend on the design and size of your table. Typically, there are three to four pieces that create the tulip shape. Measure and cut these pieces accordingly.
Ensure that all the wood pieces are cut precisely and have smooth edges. This will make the assembly process easier and result in a professional-looking finished product.
Pro Tip: If you don’t have the necessary tools or woodworking skills to cut the wood yourself, consider reaching out to a local carpenter or wood shop to assist you with this step.
Step 2: Assembling the Base
Once you have cut all the necessary wood pieces, it’s time to assemble the base of the tulip-style table pedestal. This step requires precision and attention to detail to ensure stability and balance.
Start by positioning the circular base on a flat surface. Place the central support column in the center of the base and align it vertically. Make sure it is straight and perpendicular to the base.
Using a drill and screws, attach the central support column to the base. Make sure to countersink the screws to create a flush surface. This will prevent any obstructions or wobbling once the table is complete.
Double-check the stability of the base by giving it a slight shake. If it feels wobbly, adjust the screws or reposition the column until it is sturdy.
Once the base is securely assembled, apply a layer of wood glue to the top of the central support column. This will provide additional strength and stability when attaching the tabletop.
Pro Tip: To further enhance the stability and prevent any future warping or sagging, consider reinforcing the base with additional support braces or brackets. This will ensure that your tulip-style table pedestal remains strong and durable over time.
When making a tulip style table pedestal, ensure that the base is sturdy and well-balanced to support the weight of the table. Use strong, durable materials for longevity.
Step 3: Creating the Tulip Shape
Now that the base is assembled, it’s time to bring the tulip shape to life. This step involves attaching the curved petals to the central support column, creating the iconic tulip silhouette.
Begin by positioning the first curved petal around the central support column, ensuring that it aligns with the base. Use wood glue and screws to attach the petal to both the column and the base. Repeat this process for the remaining curved petals, evenly spacing them around the column.
For a secure and seamless attachment, make sure the petals are tightly aligned and flush with the central support column. Use clamps to hold the petals in place while the glue dries.
Once all the petals are attached and the glue is dry, check the stability of the tulip shape. Gently shake the petals to see if there is any wobbling or movement. If needed, reinforce the attachment points with additional screws or wood glue.
Pro Tip: To create a more visually appealing effect, consider shaping the edges of the petals. You can use a router or sandpaper to round off the edges, giving them a smooth and softer appearance.
Read more: How To Make Chippendale-Style Table Legs
Step 4: Sanding and Finishing
After assembling the tulip shape, it’s time to sand and finish the table pedestal. This step will not only enhance the appearance of the wood but also provide a smooth and polished surface.
Start by sanding the entire surface of the pedestal, including the base and the petals. Begin with a coarse-grit sandpaper to remove any rough edges or imperfections. Gradually move to finer grit sandpapers, creating a smooth and even finish.
Pay extra attention to the edges and corners of the tulip shape, ensuring they are rounded and free of splinters. Sand in circular motions to maintain the curved silhouette, being careful not to flatten or distort the shape.
Once the sanding is complete, wipe away any dust and debris with a clean cloth. This will prepare the wood for the finishing process.
Now it’s time to choose the desired finish for your tulip-style table pedestal. You can opt for a natural wood finish by applying a clear varnish or wood stain. This will preserve the beauty of the wood grain and provide protection against wear and tear.
If you prefer a painted finish, select a high-quality wood paint in the color of your choice. Apply multiple thin coats of paint, allowing each layer to dry before applying the next. This will create a smooth and durable surface.
Once the finishing is complete, allow the pedestal to dry fully according to the product instructions.
Pro Tip: Before applying the finish, consider sealing the wood with a wood conditioner or sanding sealer. This will help the wood absorb the finish more evenly and result in a smoother and more professional-looking surface.
Step 5: Mounting the Tabletop
Now that you have successfully completed the construction and finishing of the tulip-style table pedestal, it’s time to mount the tabletop. This step will finalize the creation of your elegant and stylish table.
Begin by measuring the diameter of the tabletop. Position the tabletop centrally over the tulip-shaped pedestal, ensuring that it is aligned and balanced.
Using a pencil, mark the position of the screw holes on the underside of the tabletop where it will attach to the pedestal. This step is crucial for accurate placement and stability.
Pre-drill the marked spots on the tabletop to prevent any splintering or damage. Then, use screws to attach the tabletop securely to the tulip-style pedestal. Make sure the screws are long enough to penetrate the wood but not so long that they disrupt the tabletop’s surface.
Check the stability of the tabletop by gently shaking it. If it feels secure and there is no wobbling, congratulations! You have successfully mounted the tabletop to the tulip-style table pedestal.
Take a moment to step back and admire your handiwork. The tulip-style pedestal combined with the tabletop creates a stunning centerpiece for your dining room or any other space.
Pro Tip: If desired, you can further enhance the stability and aesthetic appeal by adding small rubber feet or furniture glides to the base of the table pedestal. This will protect your floors and add a touch of elegance.
Conclusion
Congratulations on completing your journey to create a beautiful tulip-style table pedestal! By following the step-by-step guide outlined in this article, you have transformed raw materials into a stunning piece of furniture that adds elegance and charm to any space.
Remember, attention to detail and precision are key when cutting and assembling the wood pieces. Taking the time to sand and finish the pedestal properly will result in a smooth and polished surface.
Whether you choose a natural wood finish or opt for a painted look, the final result will be a table that stands as an eye-catching centerpiece in your home or office.
Feel free to customize your tulip-style table pedestal by experimenting with different wood types, sizes, and finishing techniques. This will allow you to create a unique piece that complements your personal style and existing décor.
Now, it’s time to gather around your newly built table, share conversations and meals with family and friends, and enjoy the fruits of your labor.
Remember, you can always refer back to this guide for future projects or share your newfound knowledge with others who are interested in creating their own tulip-style table pedestal.
We hope you found this guide informative and inspiring. Happy crafting!
Frequently Asked Questions about How To Make A Tulip Style Table Pedestal
Was this page helpful?
At Storables.com, we guarantee accurate and reliable information. Our content, validated by Expert Board Contributors, is crafted following stringent Editorial Policies. We're committed to providing you with well-researched, expert-backed insights for all your informational needs.


0 thoughts on “How To Make A Tulip Style Table Pedestal”