Home>Furniture & Design>Interior Design Trends>How To Clean A Glass Nectar Collector
Interior Design Trends
How To Clean A Glass Nectar Collector
Published: February 5, 2024
Learn how to properly clean a glass nectar collector and keep it in top condition. Discover the latest interior design trends for a stylish and functional space.
(Many of the links in this article redirect to a specific reviewed product. Your purchase of these products through affiliate links helps to generate commission for Storables.com, at no extra cost. Learn more)
Introduction
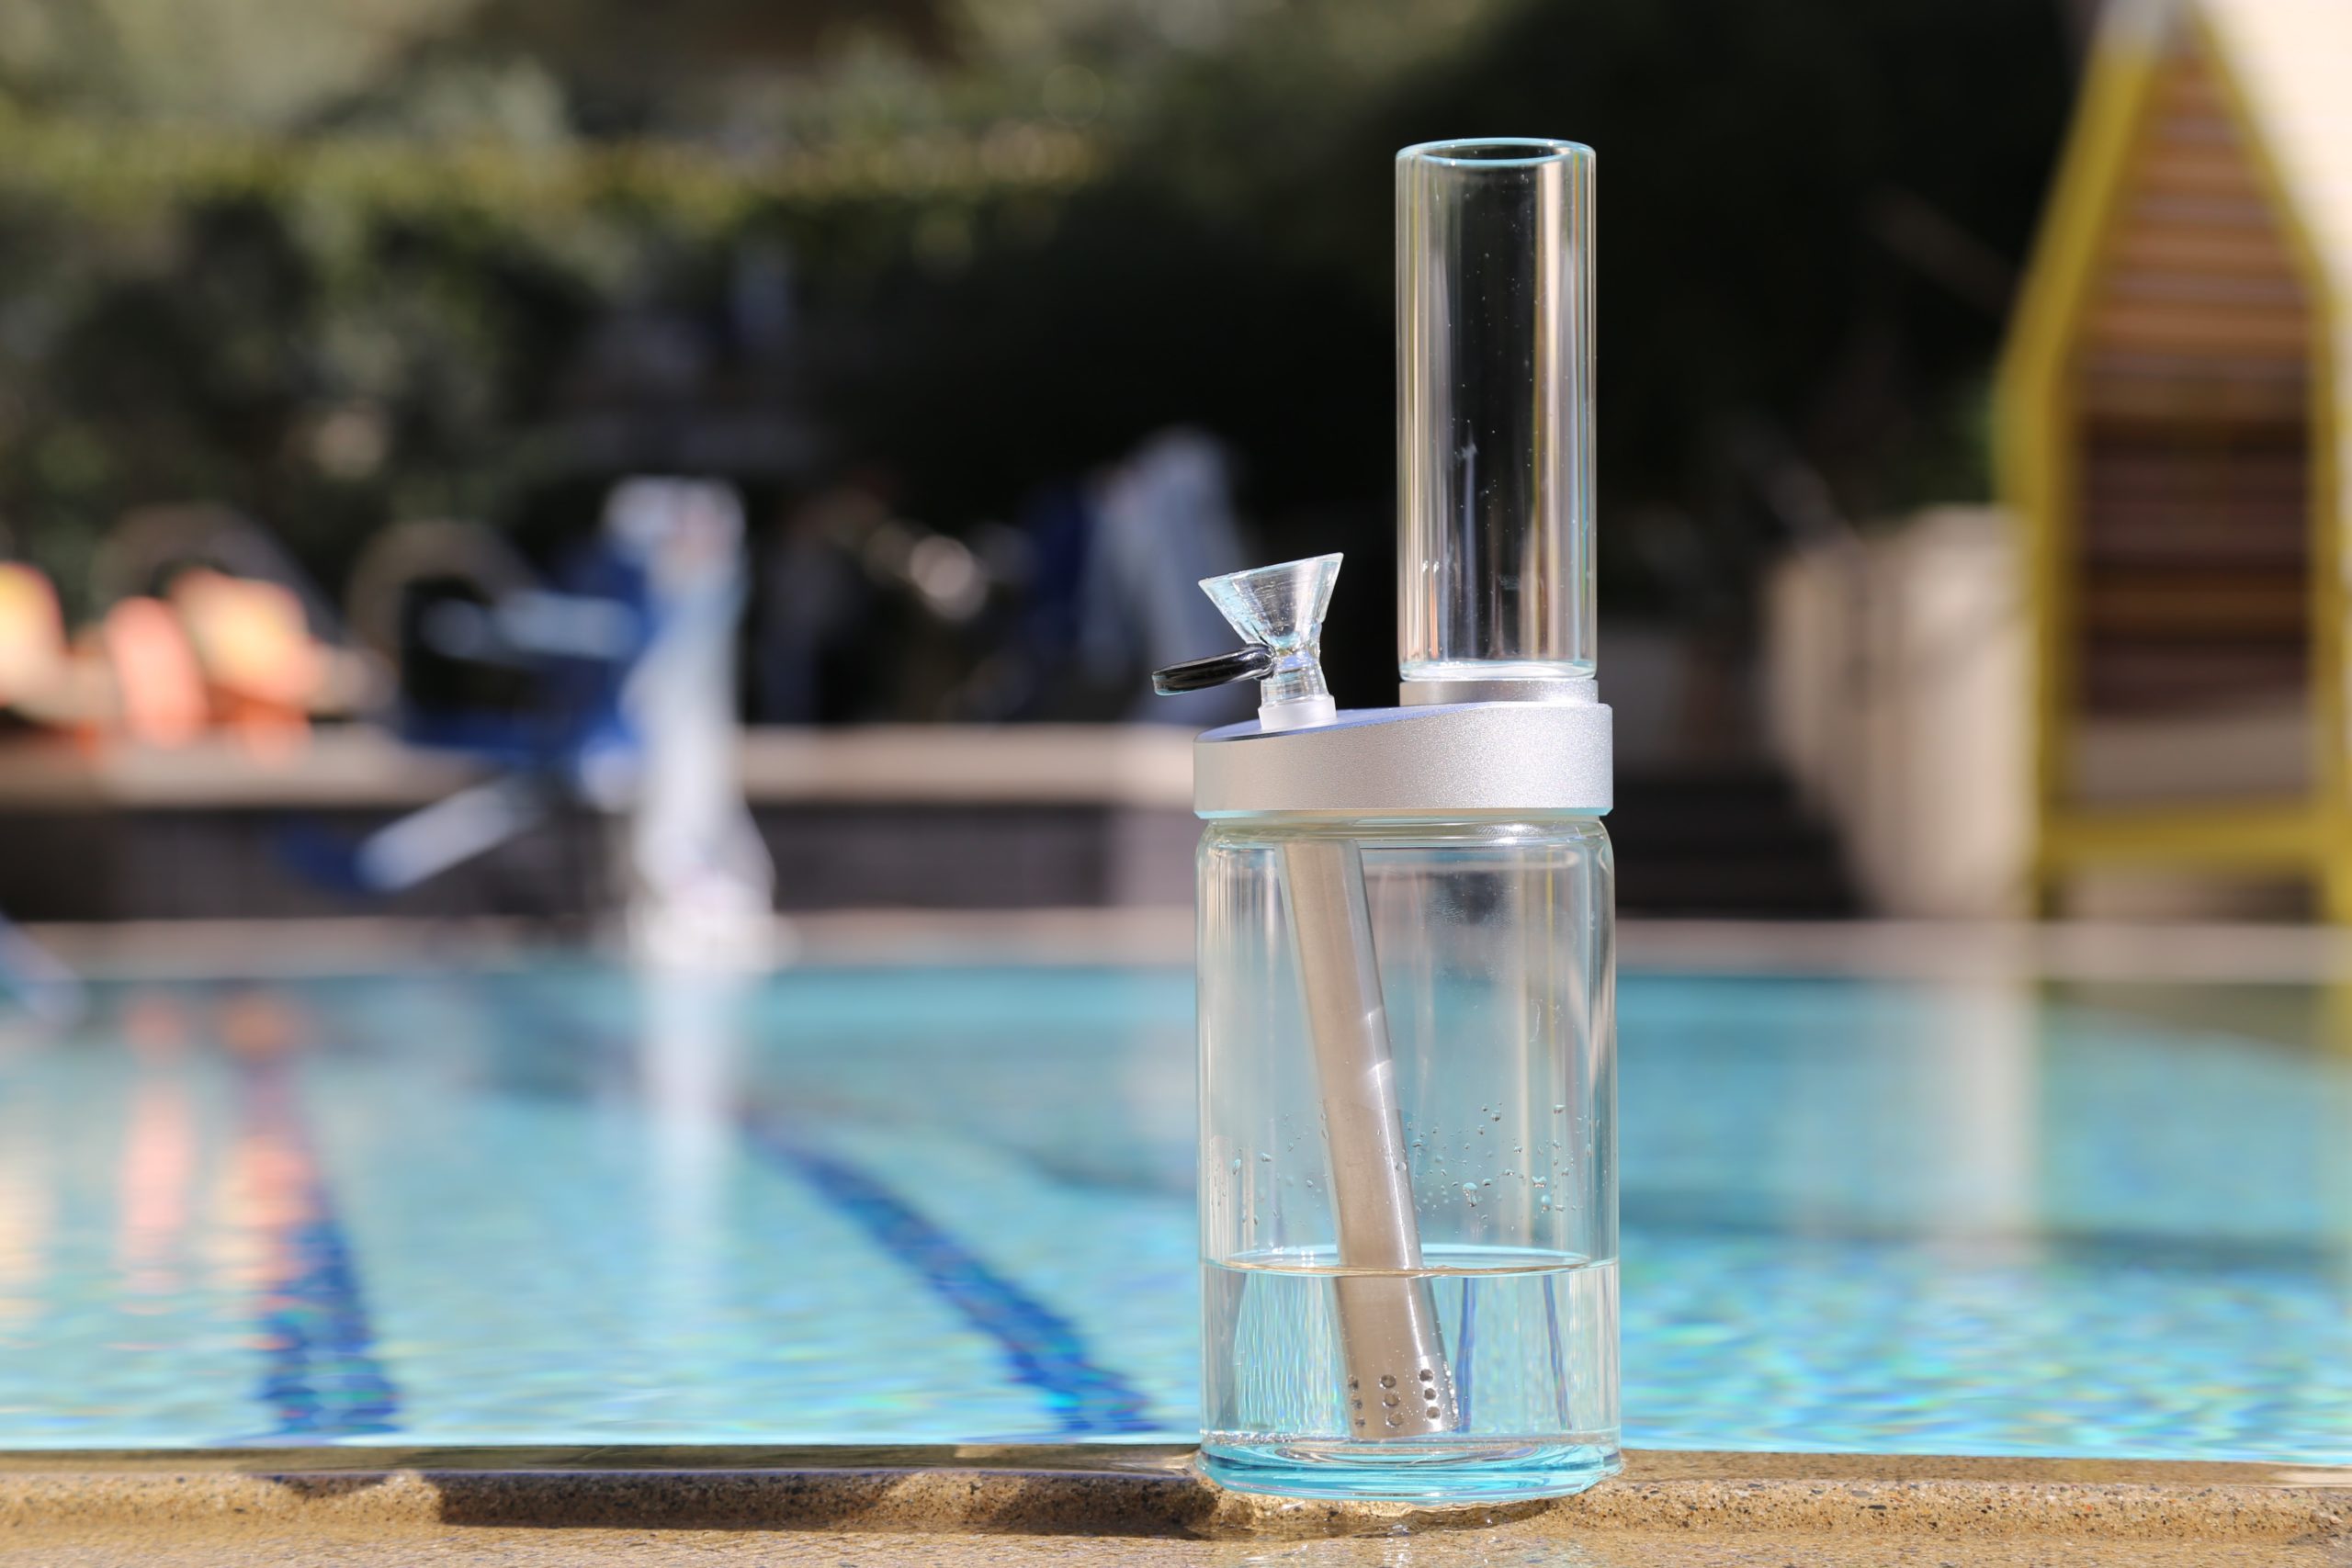
Cleaning a glass nectar collector is an essential part of maintaining its functionality and ensuring a pleasant experience with every use. Over time, residue and impurities can accumulate within the intricate components of the nectar collector, affecting its performance and flavor delivery. By following a few simple steps, you can effectively clean your glass nectar collector, restoring it to its pristine condition and preserving its longevity.
Proper maintenance not only enhances the aesthetic appeal of your nectar collector but also contributes to the purity of your vaping experience. Whether you are a seasoned enthusiast or a newcomer to the world of nectar collectors, understanding the cleaning process is crucial for maximizing the enjoyment and benefits of this unique smoking device.
In the following sections, we will delve into a comprehensive guide on how to clean a glass nectar collector, providing detailed steps and valuable insights to ensure that your cleaning process is thorough and effective. By following these instructions, you can maintain the pristine condition of your nectar collector, allowing you to savor the full flavor and potency of your concentrates with every use.
Key Takeaways:
- Keep your glass nectar collector clean by disassembling, soaking in isopropyl alcohol, and scrubbing the diffuser and mouthpiece. This ensures a pure and flavorful vaping experience every time.
- Thoroughly rinse and dry the glass parts before reassembling your nectar collector. This meticulous cleaning process maintains its functionality and hygiene, allowing for optimal performance and enjoyment.
Read more: How To Use A Glass Nectar Collector
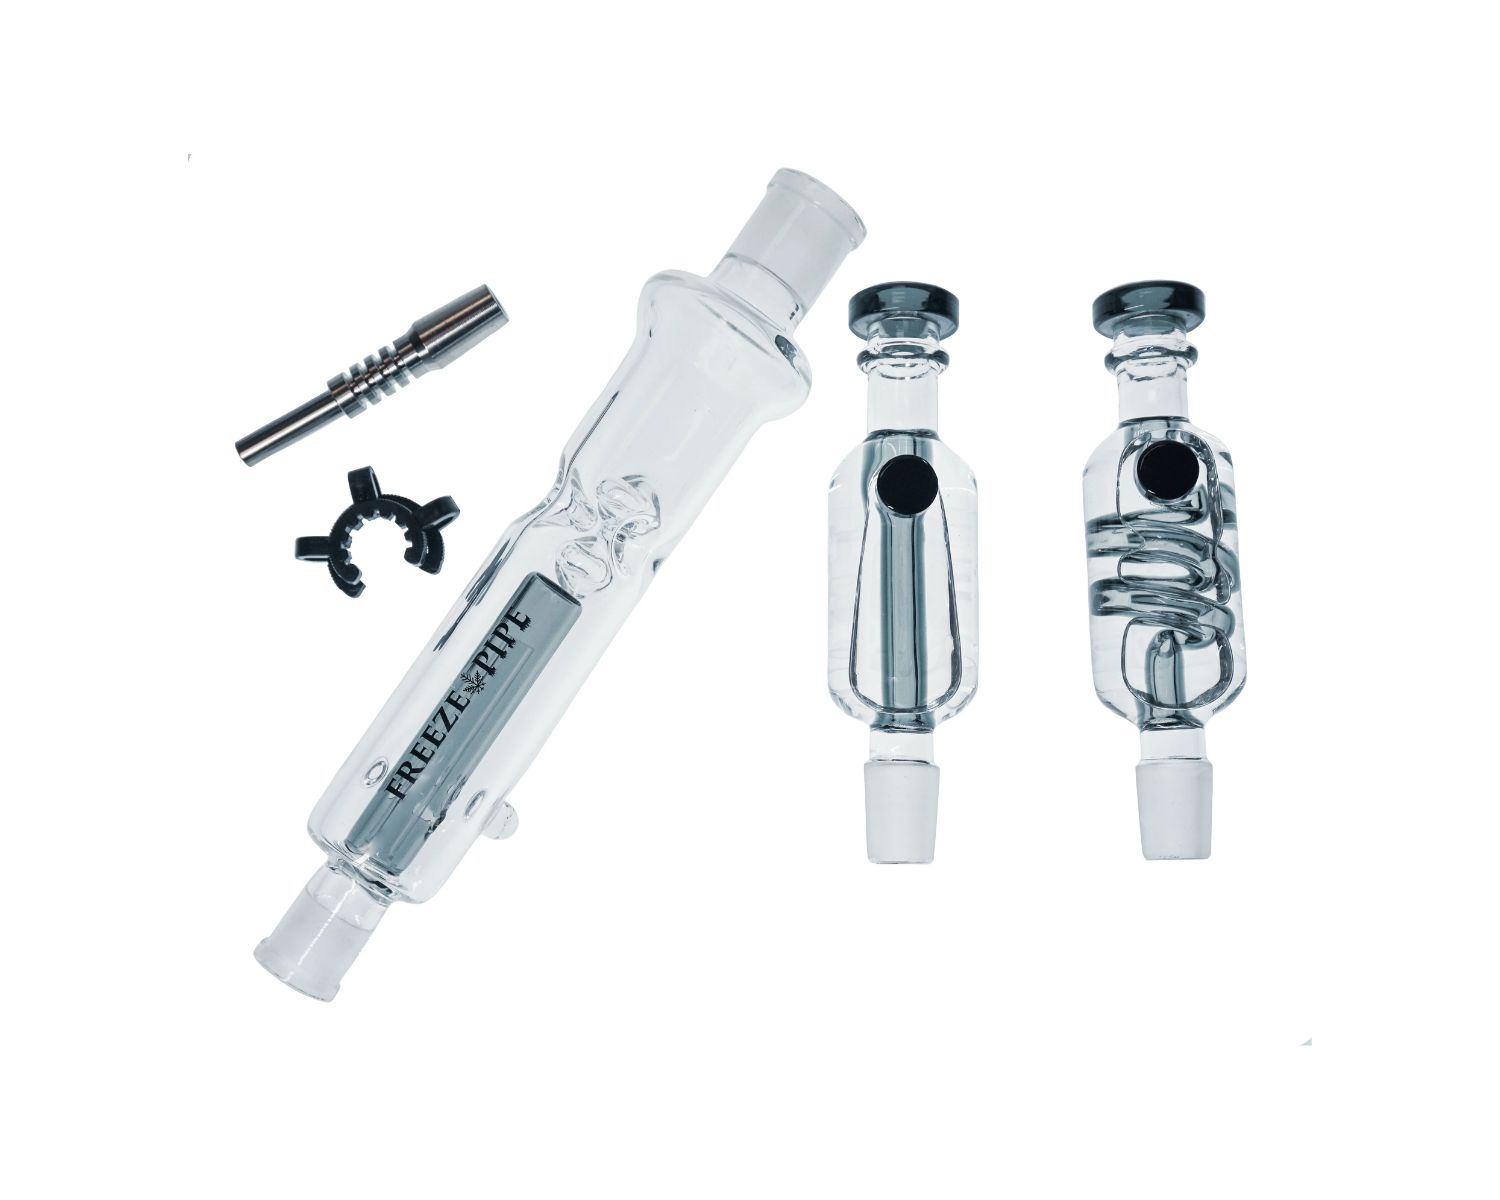
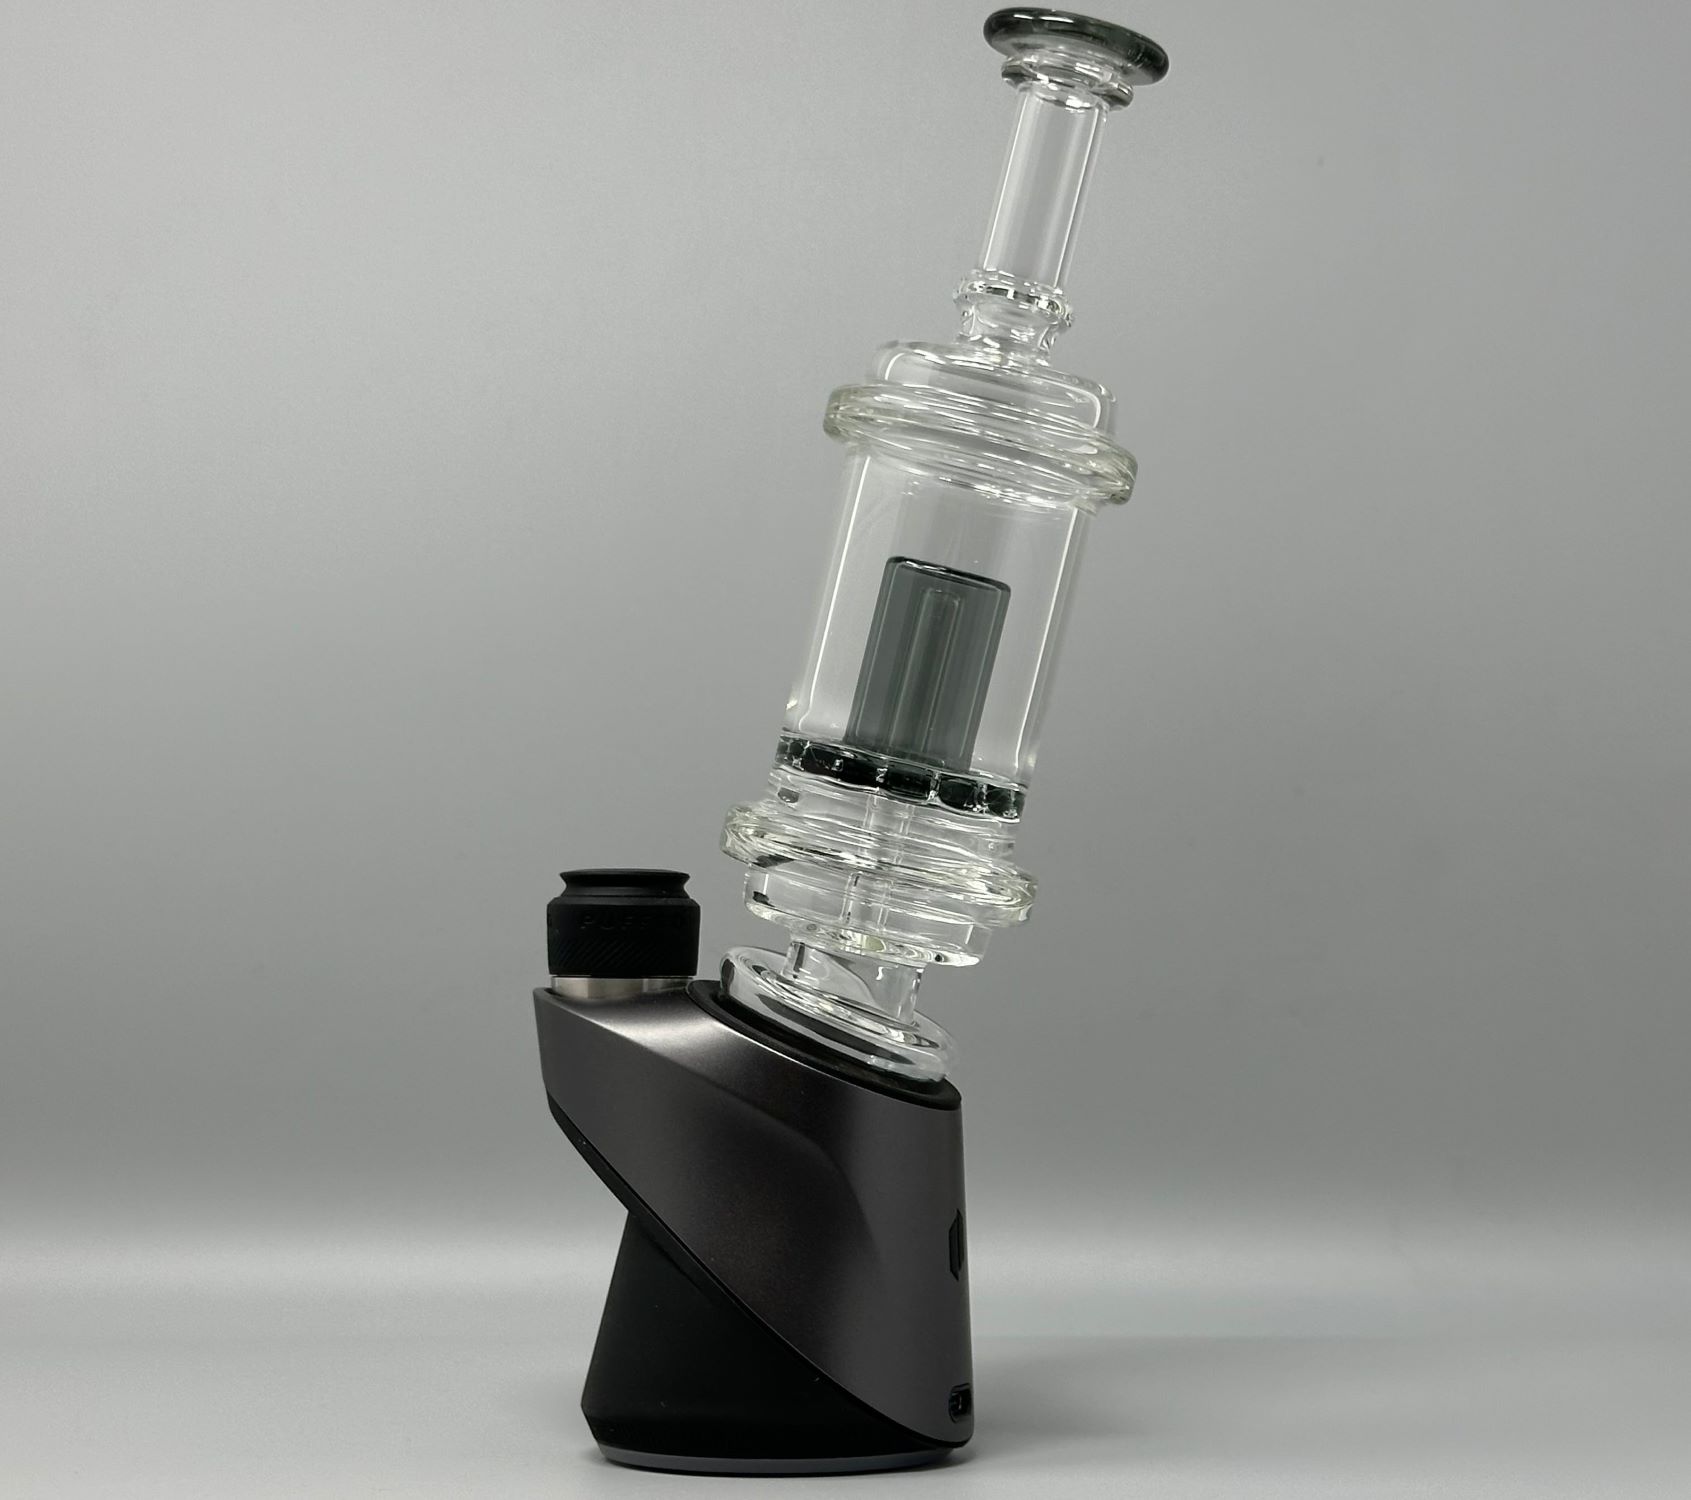
Step 1: Disassemble the Nectar Collector
To initiate the cleaning process, the first step is to disassemble the nectar collector carefully. This involves separating the various components to ensure thorough cleaning and removal of any residue or impurities that may have accumulated. Disassembling the nectar collector allows for better access to its intricate parts, enabling a more comprehensive cleaning process.
Begin by gently removing the tip or mouthpiece from the main body of the nectar collector. Depending on the design, this may involve unscrewing or carefully pulling apart the components. Exercise caution to avoid any damage to the delicate glass parts during this disassembly process.
Once the mouthpiece is detached, proceed to separate the body of the nectar collector from the percolator or diffuser. This step is crucial as it allows for individual cleaning of each component, ensuring that no residue is left behind. Carefully inspect each part as you disassemble the nectar collector, noting any areas that may require special attention during the cleaning process.
In some nectar collector designs, the percolator may consist of multiple interconnected chambers. Take care to disassemble these components, paying close attention to any intricate details or removable parts. By disassembling the nectar collector completely, you can effectively clean each element, promoting optimal hygiene and performance.
As you disassemble the nectar collector, it is advisable to work on a clean and stable surface to prevent any accidental breakage or loss of components. Additionally, keep track of the disassembled parts to ensure that they can be easily reassembled after the cleaning process is complete.
By meticulously disassembling the nectar collector, you set the stage for a thorough and effective cleaning process. This initial step lays the foundation for the subsequent cleaning procedures, allowing you to address each component with precision and care. With the nectar collector disassembled, you are ready to proceed to the next step of the cleaning process, ensuring that every part is restored to its pristine condition.
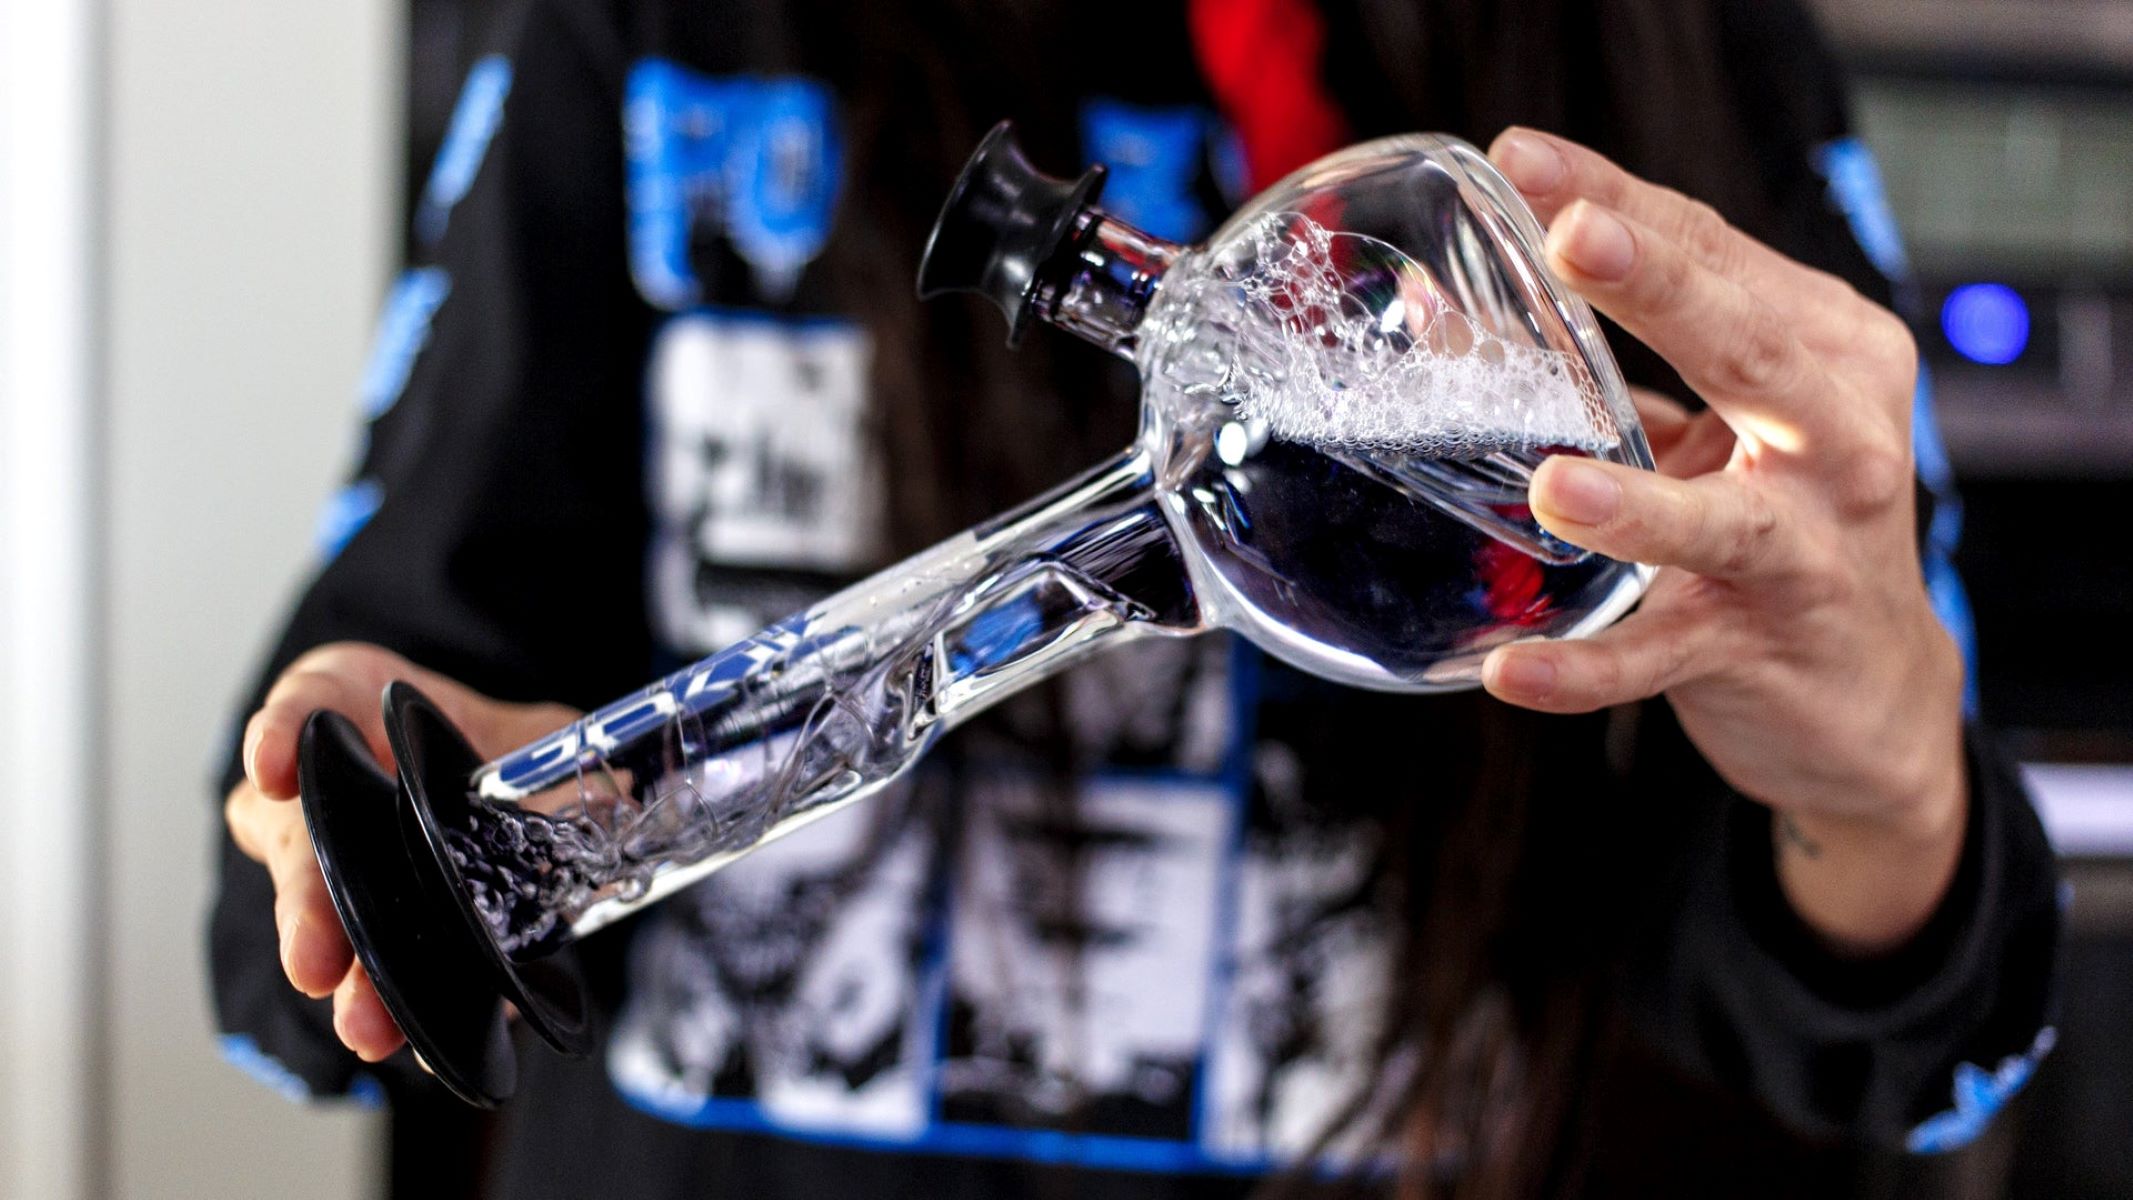
Step 2: Soak the Glass Parts in Isopropyl Alcohol
Once the glass nectar collector is disassembled, the next crucial step in the cleaning process involves soaking the glass parts in isopropyl alcohol. This method is highly effective in dissolving and loosening stubborn residue, such as concentrated oils and impurities that may have adhered to the glass surfaces over time. Isopropyl alcohol, also known as rubbing alcohol, is a potent solvent that facilitates the removal of residue without leaving behind any harmful byproducts.
To begin, prepare a container or a sealable plastic bag that is large enough to accommodate the glass components of the nectar collector. Pour a sufficient amount of isopropyl alcohol into the container, ensuring that the glass parts can be fully submerged. The concentration of isopropyl alcohol should ideally be 90% or higher to maximize its cleaning efficacy.
Carefully place the disassembled glass parts into the container, ensuring that each component is fully immersed in the isopropyl alcohol. It is essential to handle the glass parts with care to prevent any accidental breakage or damage during this process. Once the glass parts are submerged, securely seal the container or plastic bag to prevent any spillage and to contain the potent cleaning solution.
Allow the glass parts to soak in the isopropyl alcohol for an adequate duration to facilitate the dissolution of residue and impurities. The recommended soaking time may vary depending on the extent of buildup and the type of residue present. Typically, allowing the glass parts to soak for 30 minutes to an hour is sufficient to loosen and dissolve the residue effectively.
During the soaking process, it is advisable to gently agitate the container or plastic bag at regular intervals to enhance the cleaning action of the isopropyl alcohol. This agitation helps to dislodge stubborn residue and ensures that the solvent reaches all areas of the glass components, promoting thorough and comprehensive cleaning.
After the designated soaking period, carefully remove the glass parts from the isopropyl alcohol solution. Inspect each component to ensure that the residue has been effectively loosened and dissolved. Any remaining residue can be gently scrubbed using a soft-bristled brush or pipe cleaner to facilitate its removal.
By soaking the glass parts in isopropyl alcohol, you can effectively dissolve and remove stubborn residue, restoring the pristine condition of the nectar collector components. This meticulous cleaning process sets the stage for the subsequent steps, ensuring that the glass parts are thoroughly cleansed and prepared for reassembly.
Step 3: Clean the Diffuser and Mouthpiece
After soaking the glass parts in isopropyl alcohol, the next critical step in the cleaning process involves focusing on the diffuser and mouthpiece. These components play a pivotal role in the functionality and overall vaping experience of the nectar collector, making thorough cleaning essential for optimal performance.
Begin by carefully inspecting the diffuser and mouthpiece to assess the effectiveness of the isopropyl alcohol soaking process. Any residual residue or impurities should be gently scrubbed using a soft-bristled brush or pipe cleaner. Pay close attention to intricate details and hard-to-reach areas, ensuring that all surfaces are thoroughly cleansed.
For the diffuser, a small brush or pipe cleaner can be inserted into the openings to dislodge any remaining residue. Gentle scrubbing and rinsing under warm water can effectively remove any stubborn buildup, restoring the diffuser to its pristine condition. It is important to exercise caution and patience during this process to avoid damaging the delicate components.
Similarly, the mouthpiece should be meticulously cleaned to ensure a hygienic and enjoyable vaping experience. Using a soft brush or pipe cleaner, carefully remove any residue or impurities from the interior and exterior surfaces of the mouthpiece. Pay attention to crevices and grooves, as these areas may harbor residual buildup that requires thorough cleaning.
Once the diffuser and mouthpiece have been scrubbed and rinsed, it is essential to ensure that all traces of isopropyl alcohol are thoroughly removed. Rinse the components under warm running water, taking care to eliminate any lingering solvent and residue. This step is crucial for guaranteeing the purity and safety of the nectar collector during subsequent use.
After rinsing, allow the diffuser and mouthpiece to air dry completely before reassembling the nectar collector. Placing the components on a clean, lint-free cloth or paper towel facilitates the drying process, ensuring that no moisture or residue remains. Once dry, carefully inspect the diffuser and mouthpiece to confirm that they are free from any residual impurities.
By meticulously cleaning the diffuser and mouthpiece, you can uphold the hygiene and functionality of your glass nectar collector, ensuring a pristine vaping experience with every use. This thorough cleaning process prepares the components for reassembly, allowing you to enjoy the full flavor and potency of your concentrates without any lingering residue or impurities.
To clean a glass nectar collector, soak it in isopropyl alcohol for 30 minutes, then rinse with hot water and let it air dry. Use a pipe cleaner to remove any stubborn residue.
Step 4: Rinse and Dry the Glass Parts
After the glass parts of the nectar collector have undergone the soaking process in isopropyl alcohol and meticulous cleaning of the diffuser and mouthpiece, the next crucial step is to rinse and dry the glass components thoroughly. This step is essential for removing any remaining residue or solvent, ensuring that the glass parts are pristine and free from impurities before reassembly.
To begin the rinsing process, carefully place the glass components under warm running water. The gentle flow of warm water helps to flush out any residual isopropyl alcohol and dislodged residue, promoting a thorough cleansing of the glass surfaces. It is important to ensure that all areas of the glass parts are rinsed, including intricate details and hard-to-reach areas where residue may accumulate.
As the glass parts are rinsed, visually inspect each component to confirm that all traces of isopropyl alcohol and residual impurities have been effectively removed. This visual inspection allows for a meticulous assessment of the cleanliness of the glass parts, ensuring that they are prepared for the subsequent drying process.
Once the rinsing process is complete, carefully pat the glass components dry using a clean, lint-free cloth or paper towel. Gently blot the surfaces to absorb any moisture, taking care to avoid any abrasive or rough materials that may scratch the glass. It is essential to ensure that the glass parts are completely dry before reassembly to prevent any potential residue or impurities from adhering to the surfaces.
To facilitate thorough drying, allow the glass components to air dry in a clean and well-ventilated area. Placing the components on a clean cloth or paper towel allows for proper air circulation around the glass surfaces, expediting the drying process. It is advisable to position the glass parts in a manner that promotes even drying and prevents any moisture from accumulating in crevices or recessed areas.
During the drying process, it is important to exercise patience and allow the glass components sufficient time to air dry completely. This ensures that no residual moisture or impurities remain, guaranteeing the pristine condition of the glass parts before reassembly. Once the glass components are thoroughly dry, visually inspect them to confirm that they are free from any lingering residue or moisture.
By meticulously rinsing and drying the glass parts, you can ensure that your nectar collector components are pristine and free from impurities, setting the stage for seamless reassembly and a delightful vaping experience. This thorough cleaning process upholds the hygiene and functionality of the glass nectar collector, allowing you to savor the full flavor and potency of your concentrates without any residual impurities.
Read more: What Is A Nectar Mattress
Step 5: Reassemble the Nectar Collector
With the glass parts of the nectar collector thoroughly cleaned, dried, and free from any residual impurities, the final step in the cleaning process involves reassembling the components to restore the nectar collector to its functional state. This critical step requires precision and care to ensure that each part is securely and seamlessly integrated, allowing for a seamless vaping experience with optimal performance and flavor delivery.
Begin by carefully inspecting each glass component to confirm that it is completely dry and free from any lingering residue. This visual assessment allows for a meticulous evaluation of the cleanliness of the glass parts, ensuring that they are ready for reassembly. It is essential to handle the glass components with care to prevent any accidental breakage or damage during the reassembly process.
To reassemble the nectar collector, start by connecting the percolator or diffuser to the main body of the device. Depending on the design, this may involve aligning and gently twisting the components to ensure a secure fit. Exercise caution and patience during this process to avoid any undue pressure or force that may compromise the integrity of the glass parts.
Once the percolator is securely attached to the main body, proceed to reattach the mouthpiece or tip to complete the reassembly of the nectar collector. Carefully align the threads or connection points, ensuring a snug and secure fit to prevent any potential leaks or instability during use. It is important to handle the glass components delicately and avoid overtightening to prevent damage.
As the nectar collector is reassembled, visually inspect each connection to confirm that the components are securely integrated and aligned. This visual assessment allows for a final check to ensure that the glass parts are properly assembled, promoting the functionality and safety of the nectar collector during use. Any adjustments can be made as needed to achieve a seamless and secure fit.
Once the nectar collector is fully reassembled, take a moment to appreciate the pristine condition of the glass components and the meticulous care taken in the cleaning and reassembly process. This attention to detail ensures that the nectar collector is ready to deliver a delightful vaping experience, allowing you to savor the full flavor and potency of your concentrates without any residual impurities.
By reassembling the nectar collector with precision and care, you can enjoy the assurance of a thoroughly cleaned and functional smoking device, ready to elevate your vaping experience with every use. This final step completes the comprehensive cleaning process, ensuring that your glass nectar collector is primed for optimal performance and enjoyment.
Conclusion
In conclusion, the process of cleaning a glass nectar collector is an essential aspect of maintaining its functionality, hygiene, and overall vaping experience. By following the comprehensive steps outlined in this guide, you can ensure that your nectar collector remains in pristine condition, free from residue and impurities that may compromise its performance.
The meticulous disassembly of the nectar collector sets the stage for a thorough cleaning process, allowing for individual attention to each glass component. The soaking of the glass parts in isopropyl alcohol serves as a potent method for dissolving and loosening stubborn residue, facilitating a comprehensive cleansing of the intricate surfaces.
Focusing on the diffuser and mouthpiece enables the removal of any residual impurities, ensuring that these pivotal components are free from buildup and ready to deliver a delightful vaping experience. The rinsing and drying of the glass parts further guarantee the elimination of any lingering residue or solvent, promoting the pristine condition of the nectar collector.
The final step of reassembling the nectar collector with precision and care completes the cleaning process, allowing for a seamless integration of the components and ensuring that the device is ready for optimal performance.
By adhering to these cleaning guidelines, you can prolong the longevity of your glass nectar collector and enjoy the full flavor and potency of your concentrates with confidence. Regular maintenance and cleaning will not only enhance the aesthetic appeal of your nectar collector but also contribute to the purity and enjoyment of your vaping experience.
Incorporating these cleaning practices into your nectar collector maintenance routine will allow you to savor the unique flavors and aromas of your concentrates without any interference from residual impurities. With a clean and well-maintained nectar collector, you can indulge in a delightful vaping experience, appreciating the purity and potency of your favorite concentrates with every use.
Frequently Asked Questions about How To Clean A Glass Nectar Collector
Was this page helpful?
At Storables.com, we guarantee accurate and reliable information. Our content, validated by Expert Board Contributors, is crafted following stringent Editorial Policies. We're committed to providing you with well-researched, expert-backed insights for all your informational needs.


0 thoughts on “How To Clean A Glass Nectar Collector”