Home>Furniture & Design>Interior Design Trends>How To Get Bubbles Out Of Glass Screen Protector
Interior Design Trends
How To Get Bubbles Out Of Glass Screen Protector
Modified: August 16, 2024
Learn how to remove bubbles from a glass screen protector with our expert tips. Stay updated on the latest interior design trends.
(Many of the links in this article redirect to a specific reviewed product. Your purchase of these products through affiliate links helps to generate commission for Storables.com, at no extra cost. Learn more)
Introduction
Installing a glass screen protector on your device is a smart move to safeguard its delicate screen from scratches, cracks, and smudges. However, the frustration of encountering bubbles during the installation process can be disheartening. These unsightly air pockets not only compromise the aesthetics of your device but also hinder the functionality of the screen protector. Fortunately, with the right techniques and a bit of patience, you can effectively eliminate these bubbles and achieve a flawless, bubble-free finish.
In this comprehensive guide, we will delve into the step-by-step process of removing bubbles from a glass screen protector. By understanding the root causes of this issue and employing the appropriate materials and methods, you can restore the pristine appearance of your device's screen. Whether you are a tech enthusiast, a meticulous gadget owner, or someone who simply values a crystal-clear display, mastering the art of bubble removal will undoubtedly elevate your device maintenance skills.
Let's embark on this journey to conquer the pesky bubbles and elevate the visual appeal and functionality of your device's screen protector. With a few simple tools and a clear understanding of the process, you'll soon be able to enjoy a seamless, bubble-free screen protector that enhances the overall user experience of your device.
Key Takeaways:
- Say goodbye to bubbles! Clean your device’s screen thoroughly, align the glass screen protector with precision, and use gentle pressure to achieve a flawless, bubble-free finish. Enjoy a crystal-clear display and enhanced protection.
- Patience is key! Take your time to align and apply the screen protector accurately, address bubbles with precision, and follow the manufacturer’s recommendations. Embrace natural light and regular maintenance for a seamless, durable finish.
Read more: How To Get Rid Of Bubbles On Glass Stove Top
Understanding the Issue
The presence of bubbles in a glass screen protector can be attributed to various factors, each contributing to the frustrating and unsightly appearance that detracts from the functionality and aesthetic appeal of the device's screen. Understanding the root causes of this issue is crucial in devising an effective strategy to eliminate the bubbles and achieve a flawless finish.
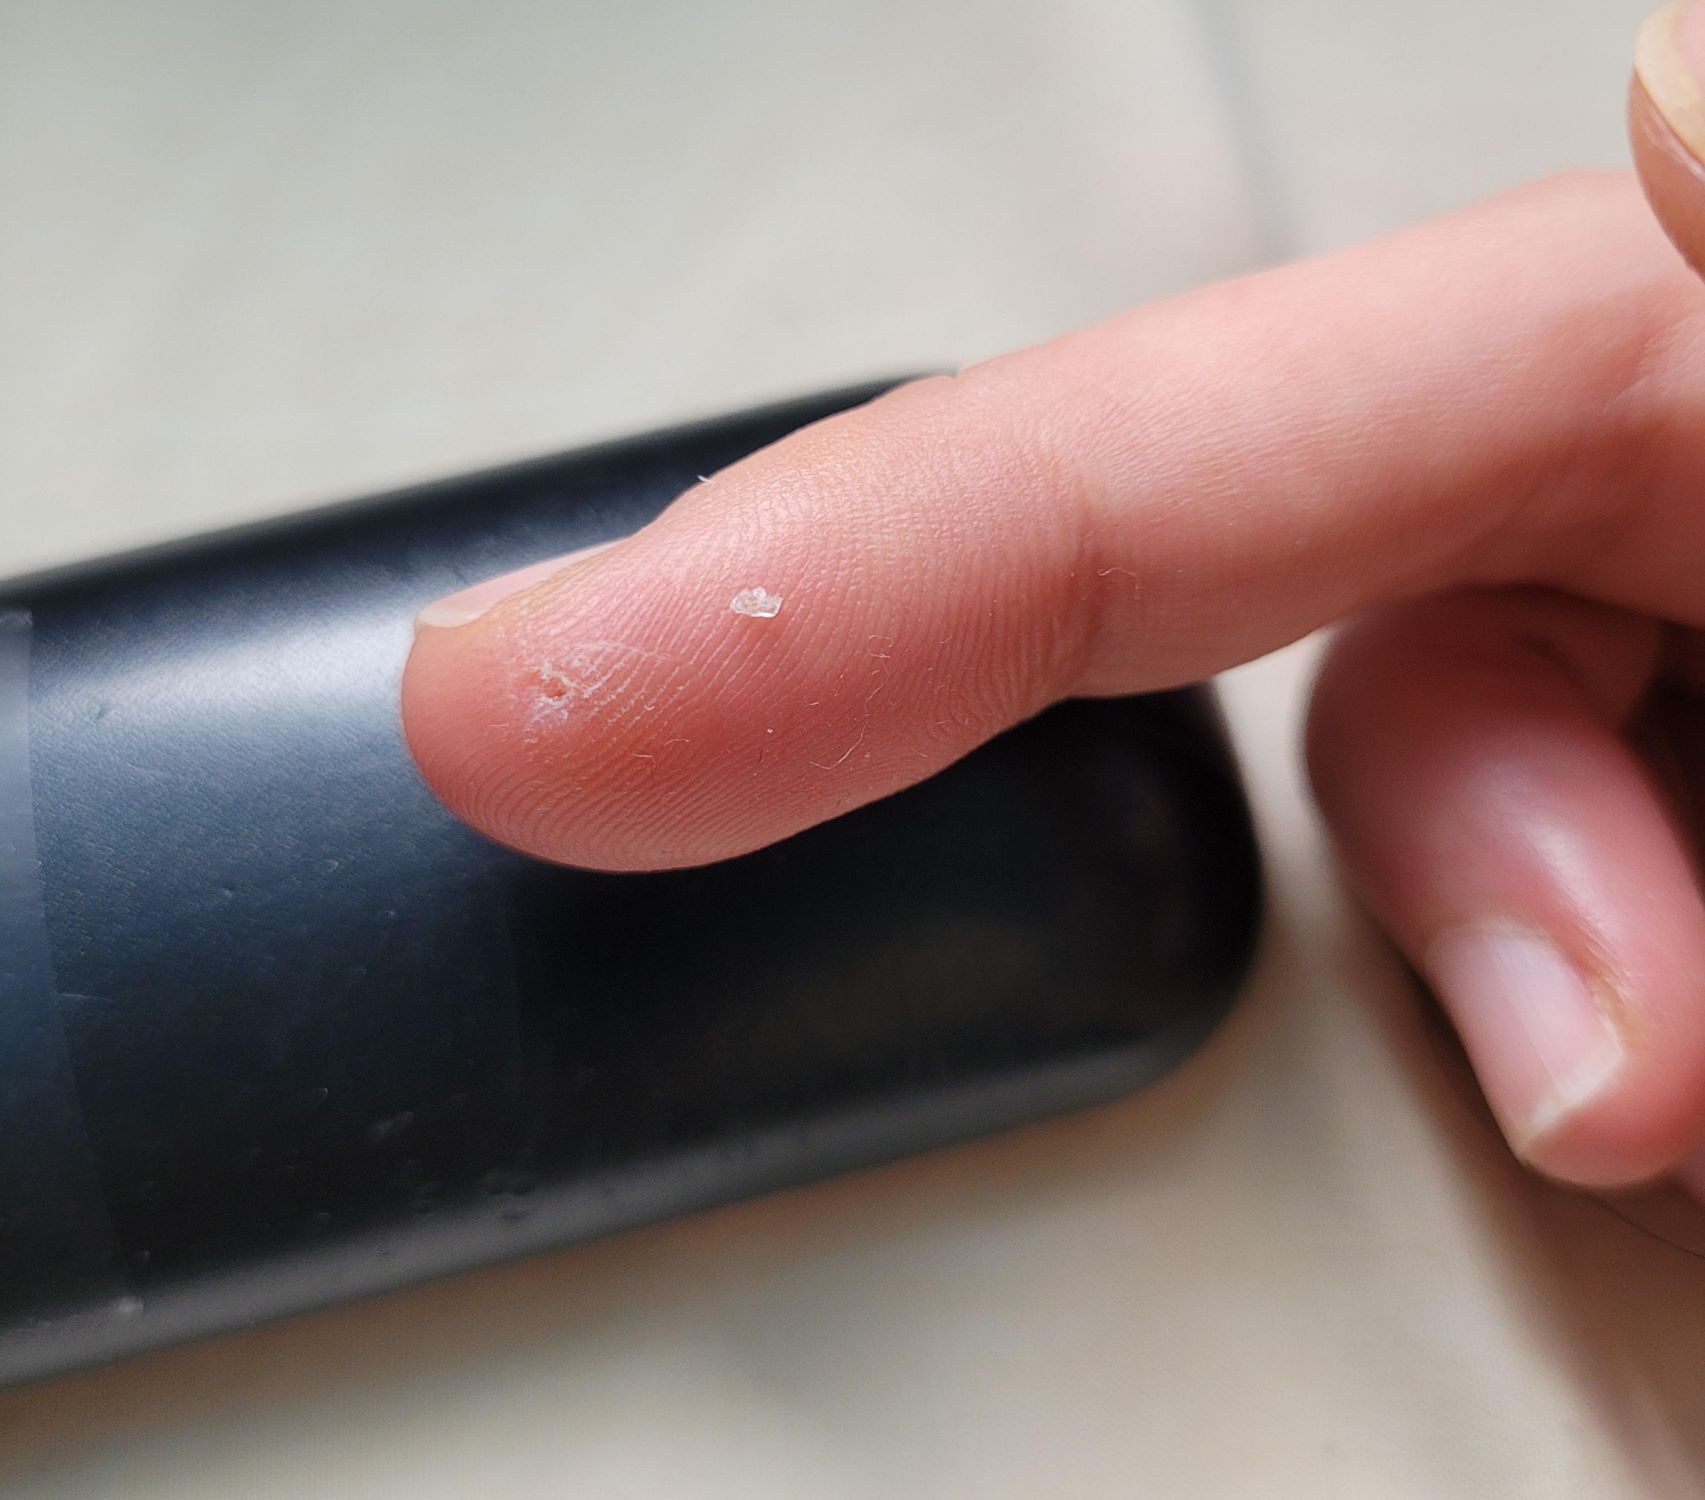
One of the primary culprits behind the formation of bubbles is inadequate cleaning of the device's screen prior to the installation of the screen protector. Dust particles, fingerprints, and other forms of debris can create air pockets when trapped beneath the protector, leading to the formation of bubbles. Additionally, failure to remove existing dust and debris from the screen protector itself can also contribute to this problem.
Furthermore, the application process plays a significant role in the formation of bubbles. If the screen protector is not aligned and applied smoothly, air can become trapped between the protector and the device's screen, resulting in the formation of bubbles. Additionally, excessive pressure during the installation process can force air beneath the protector, leading to the emergence of bubbles.
Temperature and environmental factors can also impact the installation process. Extreme temperatures, high humidity, or dusty environments can exacerbate the likelihood of encountering bubbles during the installation of a glass screen protector. These conditions can affect the adhesive properties of the protector and hinder the smooth application process, ultimately leading to the formation of bubbles.
Moreover, the quality of the screen protector and its adhesive properties can significantly influence the occurrence of bubbles. Low-quality protectors with subpar adhesive may be more prone to trapping air and forming bubbles during installation. Understanding these factors is essential in addressing the issue effectively and implementing the appropriate measures to achieve a bubble-free finish.
By comprehending the multifaceted nature of the problem, you can approach the bubble removal process with a clear understanding of the underlying causes. This knowledge will empower you to take targeted actions to eliminate the bubbles and restore the pristine appearance of your device's screen protector.
Materials Needed
To effectively address the issue of bubbles in a glass screen protector, you will need a few essential materials to facilitate the bubble removal process. These items are instrumental in ensuring a successful outcome and achieving a flawless, bubble-free finish. By assembling the following materials, you can embark on the journey to restore the pristine appearance of your device's screen protector.
-
Microfiber Cloth: A high-quality microfiber cloth is indispensable for thoroughly cleaning the device's screen before the installation of the screen protector. This soft and lint-free cloth is designed to remove dust, fingerprints, and smudges without leaving behind any residue or scratches, ensuring a pristine surface for the screen protector.
-
Screen Cleaning Solution: Utilizing a specialized screen cleaning solution can enhance the cleaning process by effectively dissolving and removing stubborn smudges and grime from the device's screen. Opt for a non-abrasive and streak-free formula to ensure a crystal-clear surface for the screen protector.
-
Glass Screen Protector: Select a premium-quality glass screen protector that is specifically designed for your device model. Ensure that the protector is free from defects and is equipped with a reliable adhesive layer to facilitate a smooth and bubble-free installation.
-
Scotch Tape: A small piece of scotch tape can serve as a handy tool for lifting and removing stubborn bubbles from beneath the screen protector. This simple yet effective technique can help achieve a seamless and bubble-free finish.
-
Soft Card or Squeegee: A soft card or squeegee is essential for smoothing out the screen protector during the installation process. This tool aids in removing air pockets and ensuring a secure and uniform adhesion to the device's screen.
-
Dust Removal Sticker: A dust removal sticker or adhesive tape is invaluable for eliminating any residual dust particles or debris from the device's screen and the underside of the screen protector. This step is crucial in preventing the formation of bubbles during the installation process.
-
Hairdryer (Optional): In cases where stubborn bubbles persist, a hairdryer can be used to gently warm the screen protector, allowing the adhesive to settle and the bubbles to dissipate. Exercise caution and use the lowest heat setting to avoid damaging the device or the screen protector.
By gathering these essential materials, you can equip yourself with the necessary tools to effectively address the issue of bubbles in a glass screen protector. With meticulous attention to detail and the appropriate materials at your disposal, you can embark on the bubble removal process with confidence and precision, ultimately achieving a flawless and bubble-free finish.
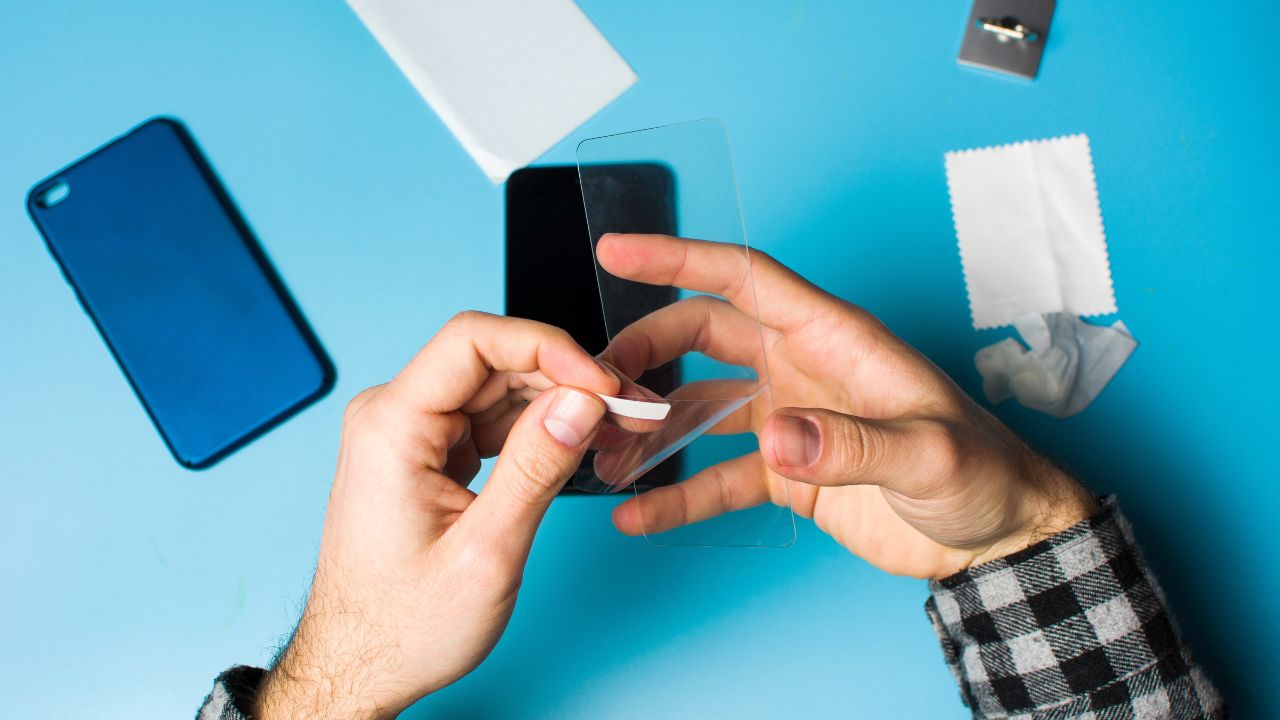
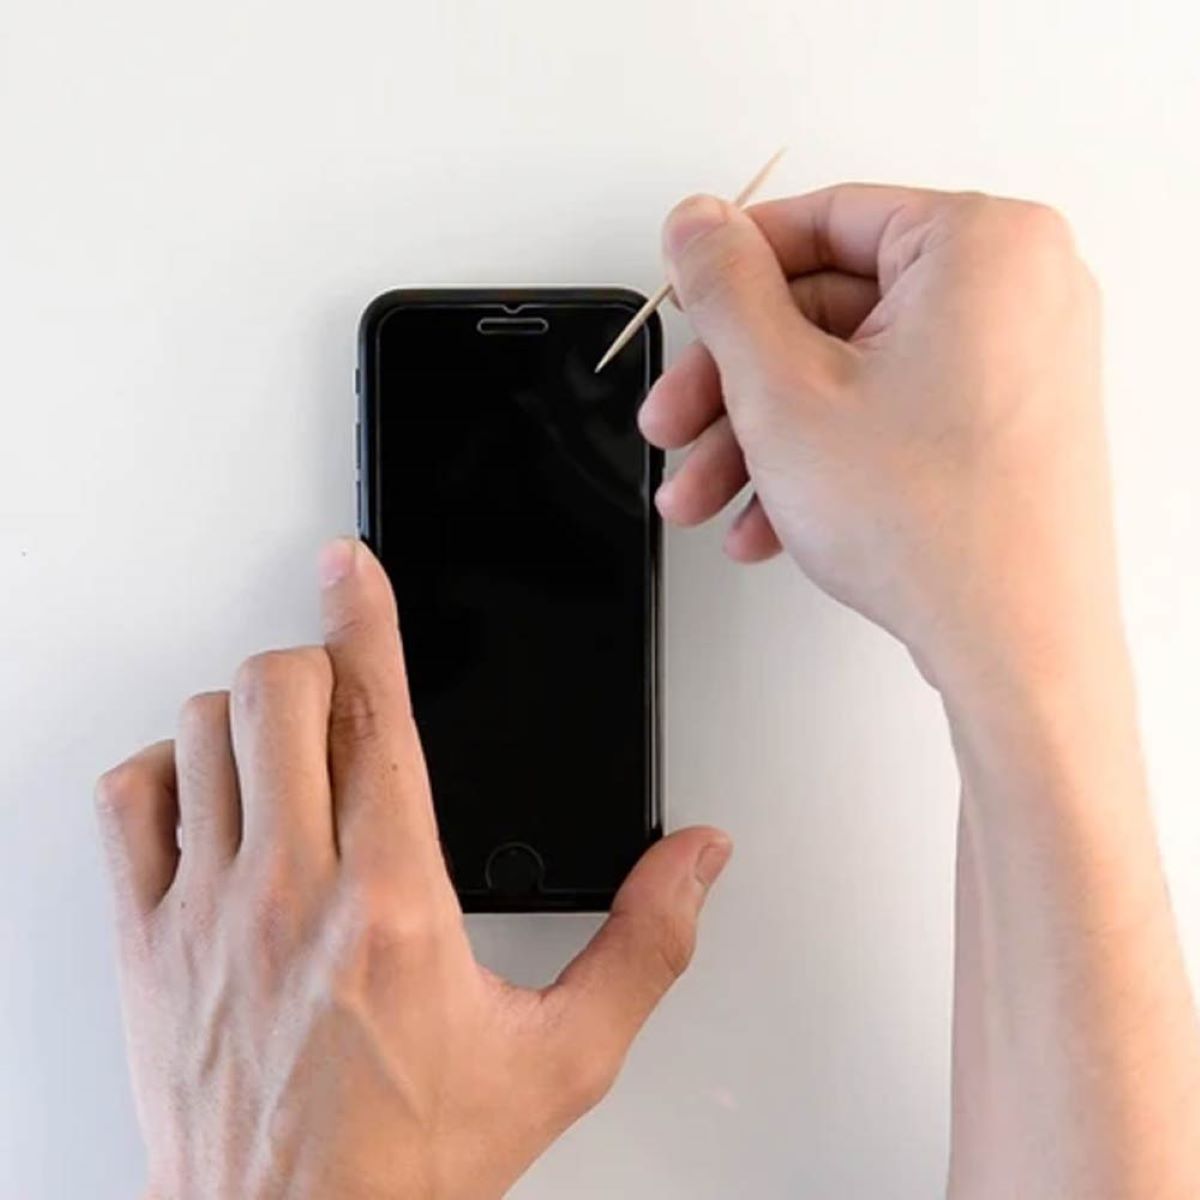
Use a credit card or a soft cloth to press out bubbles from the center to the edges of the screen protector. If bubbles persist, try lifting the edge of the protector and reapplying it.
Step-by-Step Guide
-
Prepare the Work Area: Begin by selecting a clean and well-lit workspace to facilitate the bubble removal process. Ensure that the device, the glass screen protector, and all necessary materials are readily accessible.
-
Clean the Device's Screen: Using a microfiber cloth and a non-abrasive screen cleaning solution, meticulously clean the device's screen to remove any dust, fingerprints, or smudges. Thoroughly wipe the surface in a gentle, circular motion to achieve a pristine and debris-free screen.
-
Inspect the Screen Protector: Carefully examine the glass screen protector for any defects, dust particles, or imperfections. If present, utilize a dust removal sticker or adhesive tape to eliminate these blemishes and ensure a smooth installation.
-
Align and Apply the Screen Protector: Align the glass screen protector with precision, ensuring an accurate fit with the device's screen. Gently place the protector onto the screen, allowing the adhesive to make initial contact without applying excessive pressure.
-
Smooth Out the Protector: Using a soft card or squeegee, carefully smooth out the screen protector from the center towards the edges. This technique helps expel any trapped air and facilitates a secure and uniform adhesion to the device's screen.
-
Address Stubborn Bubbles: If bubbles persist, employ a small piece of scotch tape to lift the edge of the screen protector and gently reapply it, smoothing out any remaining air pockets. Exercise patience and precision to achieve a bubble-free finish.
-
Utilize a Hairdryer (Optional): In cases where stubborn bubbles persist, use a hairdryer on the lowest heat setting to gently warm the screen protector. This aids in allowing the adhesive to settle and the bubbles to dissipate, ultimately achieving a seamless finish.
-
Final Inspection: Carefully examine the screen protector for any remaining bubbles or imperfections. If necessary, repeat the smoothing process and utilize the scotch tape to address any lingering air pockets.
-
Allow for Adhesion: Once the bubbles are successfully removed, allow the screen protector to adhere to the device's screen as per the manufacturer's instructions. Avoid handling the device during this period to ensure a secure and durable bond.
-
Enjoy a Flawless Finish: With the bubbles effectively removed and the screen protector securely in place, revel in the crystal-clear display and enhanced protection provided by the bubble-free glass screen protector.
By following this comprehensive step-by-step guide, you can navigate the process of removing bubbles from a glass screen protector with precision and confidence. With meticulous attention to detail and the utilization of the appropriate materials and techniques, you can achieve a flawless and bubble-free finish, elevating the visual appeal and functionality of your device's screen.
Additional Tips
In addition to the step-by-step guide for removing bubbles from a glass screen protector, several additional tips can further enhance the effectiveness of the bubble removal process and contribute to achieving a flawless and bubble-free finish. These supplementary insights and techniques are instrumental in addressing potential challenges and ensuring a seamless installation, ultimately elevating the visual clarity and functionality of the screen protector.
-
Patience and Precision: Exercise patience and precision throughout the installation process. Rushing the application of the screen protector can lead to misalignment and the entrapment of air, resulting in the formation of bubbles. Take your time to align and apply the protector accurately, and address any bubbles with meticulous attention to detail.
-
Environmental Considerations: Choose a controlled and dust-free environment for the installation of the screen protector. Minimizing exposure to airborne particles and ensuring moderate temperature and humidity levels can significantly reduce the likelihood of encountering bubbles during the application process.
-
Avoid Excessive Pressure: When smoothing out the screen protector, avoid applying excessive pressure, as this can force air beneath the protector and contribute to the formation of bubbles. Utilize gentle and consistent pressure to expel air pockets and achieve a uniform adhesion to the device's screen.
-
Utilize Natural Light: Natural light can be invaluable for detecting and addressing any remaining bubbles or imperfections in the screen protector. Positioning the device in natural light facilitates a clear visual inspection, enabling you to identify and eliminate any lingering air pockets.
-
Manufacturer's Recommendations: Adhere to the manufacturer's instructions and recommendations for the specific screen protector being installed. Following the prescribed guidelines for application, adhesion, and curing duration ensures optimal performance and longevity of the screen protector.
-
Post-Installation Care: After successfully removing the bubbles and securing the screen protector, avoid exposing the device to extreme temperatures or moisture during the initial curing period. Allow the adhesive to set and the protector to bond securely to the screen as per the manufacturer's guidelines.
-
Regular Maintenance: Once the screen protector is in place, incorporate regular maintenance practices to preserve its clarity and functionality. Periodically clean the protector and the device's screen using a microfiber cloth and a non-abrasive cleaning solution to prevent the accumulation of debris and smudges.
By integrating these additional tips into the bubble removal process, you can optimize the installation of the glass screen protector and mitigate the likelihood of encountering bubbles. Embracing patience, precision, and environmental considerations, while adhering to manufacturer recommendations, empowers you to achieve a flawless and durable finish, enhancing the overall user experience and visual appeal of the device's screen.
Read more: How To Get Glass Out Of Carpet
Conclusion
In conclusion, the successful removal of bubbles from a glass screen protector is a testament to the meticulous attention to detail, the utilization of appropriate materials, and the implementation of precise techniques. By understanding the underlying causes of bubble formation, addressing environmental considerations, and embracing patience and precision throughout the installation process, you can achieve a flawless and bubble-free finish that enhances the visual clarity and functionality of your device's screen.
The comprehensive step-by-step guide provides a structured approach to navigating the bubble removal process, empowering individuals to address this common issue with confidence and precision. From the initial preparation of the work area to the final inspection and adhesion of the screen protector, each step is instrumental in ensuring a seamless and durable installation.
Furthermore, the incorporation of additional tips serves to enhance the effectiveness of the bubble removal process, offering valuable insights and techniques to mitigate potential challenges and optimize the installation of the screen protector. By exercising patience, adhering to environmental considerations, and embracing post-installation care practices, individuals can elevate the longevity and performance of the screen protector, ultimately enhancing the overall user experience.
Ultimately, the successful removal of bubbles from a glass screen protector culminates in the enjoyment of a crystal-clear display, enhanced protection, and an aesthetically pleasing device. By following the guidance outlined in this comprehensive guide and integrating the additional tips, individuals can navigate the bubble removal process with confidence, achieving a flawless and bubble-free finish that elevates the visual appeal and functionality of their device's screen.
With a clear understanding of the root causes of bubble formation and the utilization of the appropriate materials and techniques, individuals can embark on the journey to conquer the pesky bubbles and elevate the visual clarity and functionality of their device's screen. The successful removal of bubbles from a glass screen protector is a testament to precision, patience, and the commitment to achieving a flawless and durable finish, ultimately enhancing the overall user experience and satisfaction.
Frequently Asked Questions about How To Get Bubbles Out Of Glass Screen Protector
Was this page helpful?
At Storables.com, we guarantee accurate and reliable information. Our content, validated by Expert Board Contributors, is crafted following stringent Editorial Policies. We're committed to providing you with well-researched, expert-backed insights for all your informational needs.


0 thoughts on “How To Get Bubbles Out Of Glass Screen Protector”