Home>Furniture & Design>Interior Design Trends>How To Remove Glass Screen Protector
Interior Design Trends
How To Remove Glass Screen Protector
Published: February 2, 2024
Learn how to safely remove a glass screen protector with our expert tips. Stay updated on the latest interior design trends and techniques.
(Many of the links in this article redirect to a specific reviewed product. Your purchase of these products through affiliate links helps to generate commission for Storables.com, at no extra cost. Learn more)
Introduction
Removing a glass screen protector from your device can be a daunting task, especially if you're concerned about damaging the screen underneath. Whether you're replacing the old protector with a new one or opting to go without, it's essential to approach the removal process with care and precision. By following the right steps and using the appropriate tools, you can safely remove the glass screen protector without leaving behind any residue or causing any harm to your device's screen.
In this guide, we'll walk you through the step-by-step process of removing a glass screen protector from your device. From gathering the necessary materials to cleaning the screen after removal, we'll cover everything you need to know to ensure a smooth and successful removal process. So, if you're ready to bid farewell to your old screen protector and give your device a fresh start, let's dive into the essential steps for safe and effective removal.
Key Takeaways:
- Safely remove a glass screen protector by gathering materials, preparing the screen, lifting the edges with a credit card, and cleaning the screen for a fresh start.
- Apply a new screen protector for continued protection or leave the screen bare for a clear display, ensuring the longevity and visual clarity of your device.
Read more: How To Remove A Glass Screen Protector
Step 1: Gather the necessary materials
Before you begin the process of removing a glass screen protector from your device, it's crucial to gather the essential materials to ensure a smooth and successful removal. Having the right tools at your disposal will not only make the removal process easier but also minimize the risk of damaging your device's screen. Here's a comprehensive list of the necessary materials you'll need:
-
Microfiber Cloth: A soft and lint-free microfiber cloth is essential for cleaning the screen before and after the removal process. This cloth will help remove any dust, fingerprints, or smudges that may have accumulated on the screen or the protector.
-
Isopropyl Alcohol: Isopropyl alcohol, commonly known as rubbing alcohol, is an effective solution for cleaning the screen and removing any adhesive residue left behind by the screen protector. Make sure to use a high-quality, pure isopropyl alcohol for best results.
-
Adhesive Tape: A piece of adhesive tape, such as duct tape or packing tape, can be used to lift the screen protector off the device. The tape provides a non-abrasive way to create a separation between the protector and the screen.
-
Credit Card or Plastic Scraper: A credit card or a plastic scraper can be used to gently lift the edges of the screen protector. These tools provide a safe and effective way to create leverage without scratching or damaging the screen.
-
New Screen Protector (Optional): If you plan to replace the old screen protector with a new one, make sure to have the new protector ready for application. This step is optional, but if you prefer to maintain the protection of your device's screen, having a new protector on hand is advisable.
By ensuring that you have these materials readily available, you'll be well-prepared to tackle the process of removing the glass screen protector from your device. With the right tools in hand, you can proceed with confidence, knowing that you have everything you need to complete the removal process safely and effectively.
Step 2: Prepare the screen protector for removal
Before diving into the actual removal process, it's crucial to prepare the screen protector and the device to ensure a smooth and damage-free removal. Taking the time to prepare the protector and the screen will not only make the removal process easier but also reduce the risk of leaving behind any residue or causing damage to the device's screen.
Clean the Screen
Start by thoroughly cleaning the device's screen using a microfiber cloth and isopropyl alcohol. Gently wipe the screen with the microfiber cloth to remove any dust, fingerprints, or smudges that may have accumulated. Next, dampen a corner of the cloth with isopropyl alcohol and carefully wipe the screen to ensure it's free of any oils or residues. This step is essential as it prepares the screen for the removal process and ensures that the adhesive residue from the protector can be effectively cleaned off later.
Remove the Device Case
If your device is housed in a protective case, it's advisable to remove the case before proceeding with the removal of the screen protector. Removing the case provides better access to the edges of the screen protector and reduces the risk of accidentally damaging the case during the removal process.
Read more: How To Put A Screen In A Glass Pipe
Find a Well-Lit and Stable Workspace
Identify a well-lit and stable workspace where you can comfortably work on removing the screen protector. Adequate lighting is essential for clearly seeing the edges of the protector and ensuring precision during the removal process. Additionally, a stable workspace minimizes the risk of accidentally dropping or damaging the device during the removal process.
Prepare the Necessary Tools
Ensure that you have the necessary tools, such as a credit card or plastic scraper, and adhesive tape, within reach. Having these tools readily available will streamline the removal process and prevent any delays or interruptions once you begin lifting the edges of the screen protector.
By meticulously preparing the screen protector and the device for removal, you set the stage for a successful and hassle-free removal process. Taking the time to clean the screen, remove the device case, set up a suitable workspace, and gather the essential tools demonstrates a proactive approach to ensuring a smooth and damage-free removal experience. With the screen protector and the device adequately prepared, you're now ready to proceed with the next steps of the removal process.
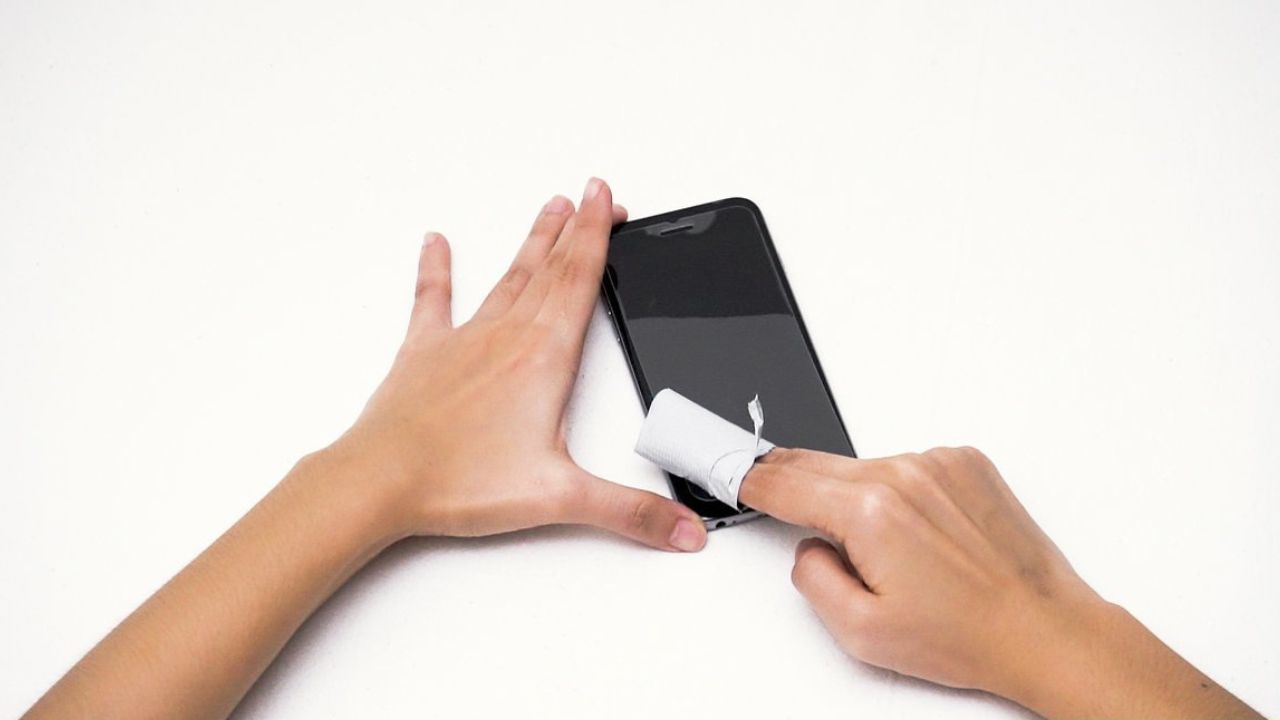
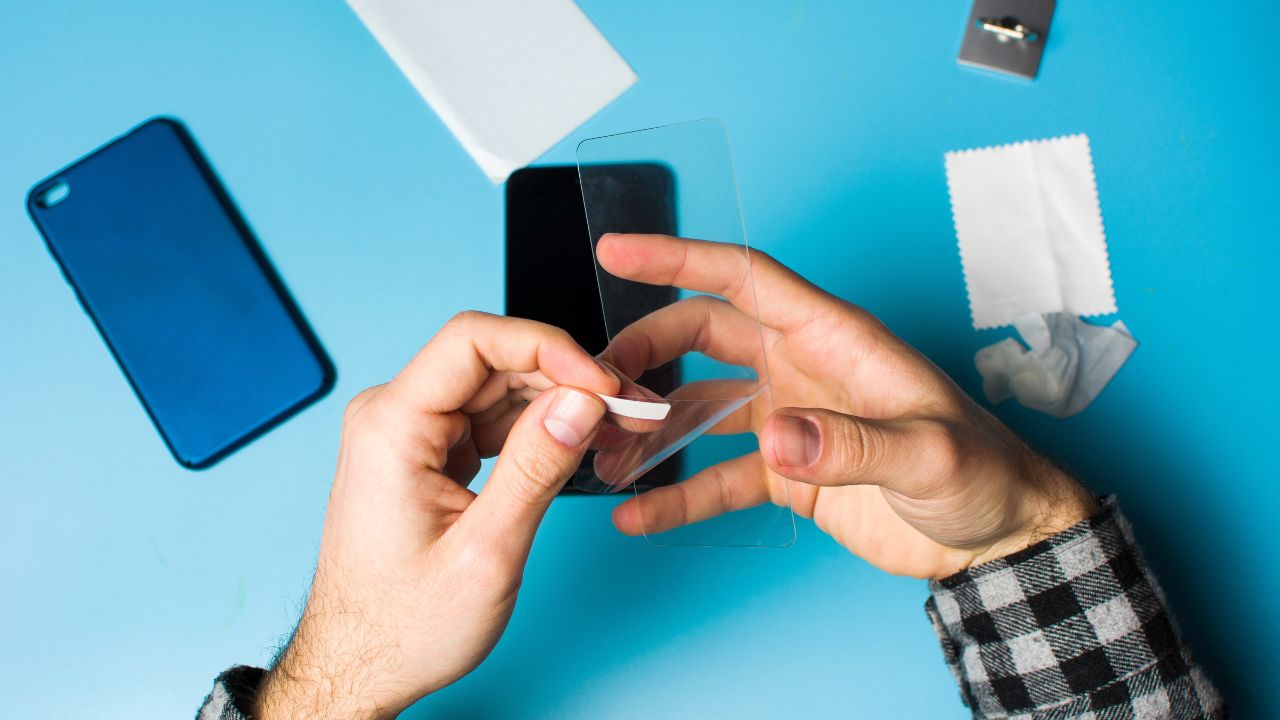
Step 3: Use a credit card or plastic scraper to lift the screen protector
With the screen and workspace prepared, it's time to carefully lift the edges of the screen protector using a credit card or plastic scraper. This step requires patience and precision to avoid damaging the device's screen while effectively separating the protector from the surface.
Begin by identifying a corner of the screen protector and gently sliding the edge of a credit card or plastic scraper underneath. It's essential to use a non-metallic tool to prevent scratches or damage to the screen. Once the tool is inserted, apply gentle pressure to create a slight separation between the protector and the screen. Avoid using excessive force, as this can increase the risk of screen damage.
As you gradually lift the edges of the protector, continue sliding the credit card or scraper along the perimeter of the device to create separation. Take your time and work methodically to ensure that the protector is evenly lifted from all sides. If the protector is particularly stubborn, you can use a piece of adhesive tape to create additional leverage by attaching it to the lifted edge and gently pulling it away from the screen.
Throughout this process, maintain a steady hand and pay close attention to any resistance or adhesion that may require extra care. If the protector is heavily adhered to the screen, consider applying a small amount of heat using a hairdryer on a low setting to soften the adhesive, making it easier to lift the protector without causing damage.
Once the edges of the protector are lifted, carefully peel it away from the screen, ensuring that no residue is left behind. If any adhesive remains on the screen, use isopropyl alcohol and a clean microfiber cloth to gently remove it, taking care to avoid excessive moisture that could seep into the device.
By using a credit card or plastic scraper to lift the screen protector, you can effectively and safely separate it from the device's screen. This method allows for precise control and minimizes the risk of damage, ensuring that the screen remains intact throughout the removal process. With the protector successfully lifted, you're now ready to proceed to the next step of cleaning the screen and preparing it for a new protector, if desired.
Step 4: Clean the screen after removing the protector
After successfully removing the screen protector, it's essential to thoroughly clean the device's screen to ensure a pristine and clear surface. This step is crucial for removing any remaining adhesive residue and ensuring that the screen is free from dust, smudges, or streaks. By following the proper cleaning process, you can restore the screen to its original state and prepare it for further use or the application of a new screen protector.
Read more: How To Remove A Patio Screen Door
Use Isopropyl Alcohol and Microfiber Cloth
Begin by dampening a corner of a clean microfiber cloth with isopropyl alcohol. The alcohol acts as a solvent, effectively breaking down any adhesive residue left behind by the screen protector. Gently wipe the screen in a circular motion, focusing on areas where the protector was previously attached. Take care to avoid excessive moisture, as this can potentially seep into the device and cause damage.
Remove Stubborn Residue
If there are stubborn adhesive remnants that do not easily come off, you can use the adhesive side of a piece of tape to lift them from the screen. Press the tape against the residue and lift it away, repeating the process until the screen is free from any remaining adhesive. Be cautious not to apply excessive force that could scratch or damage the screen.
Final Cleaning and Inspection
Once the adhesive residue is removed, use a dry section of the microfiber cloth to gently wipe the screen, ensuring that it is free from any remaining particles or streaks. Inspect the screen under adequate lighting to verify that it is entirely clean and free from any blemishes. If necessary, repeat the cleaning process to achieve a spotless and clear screen.
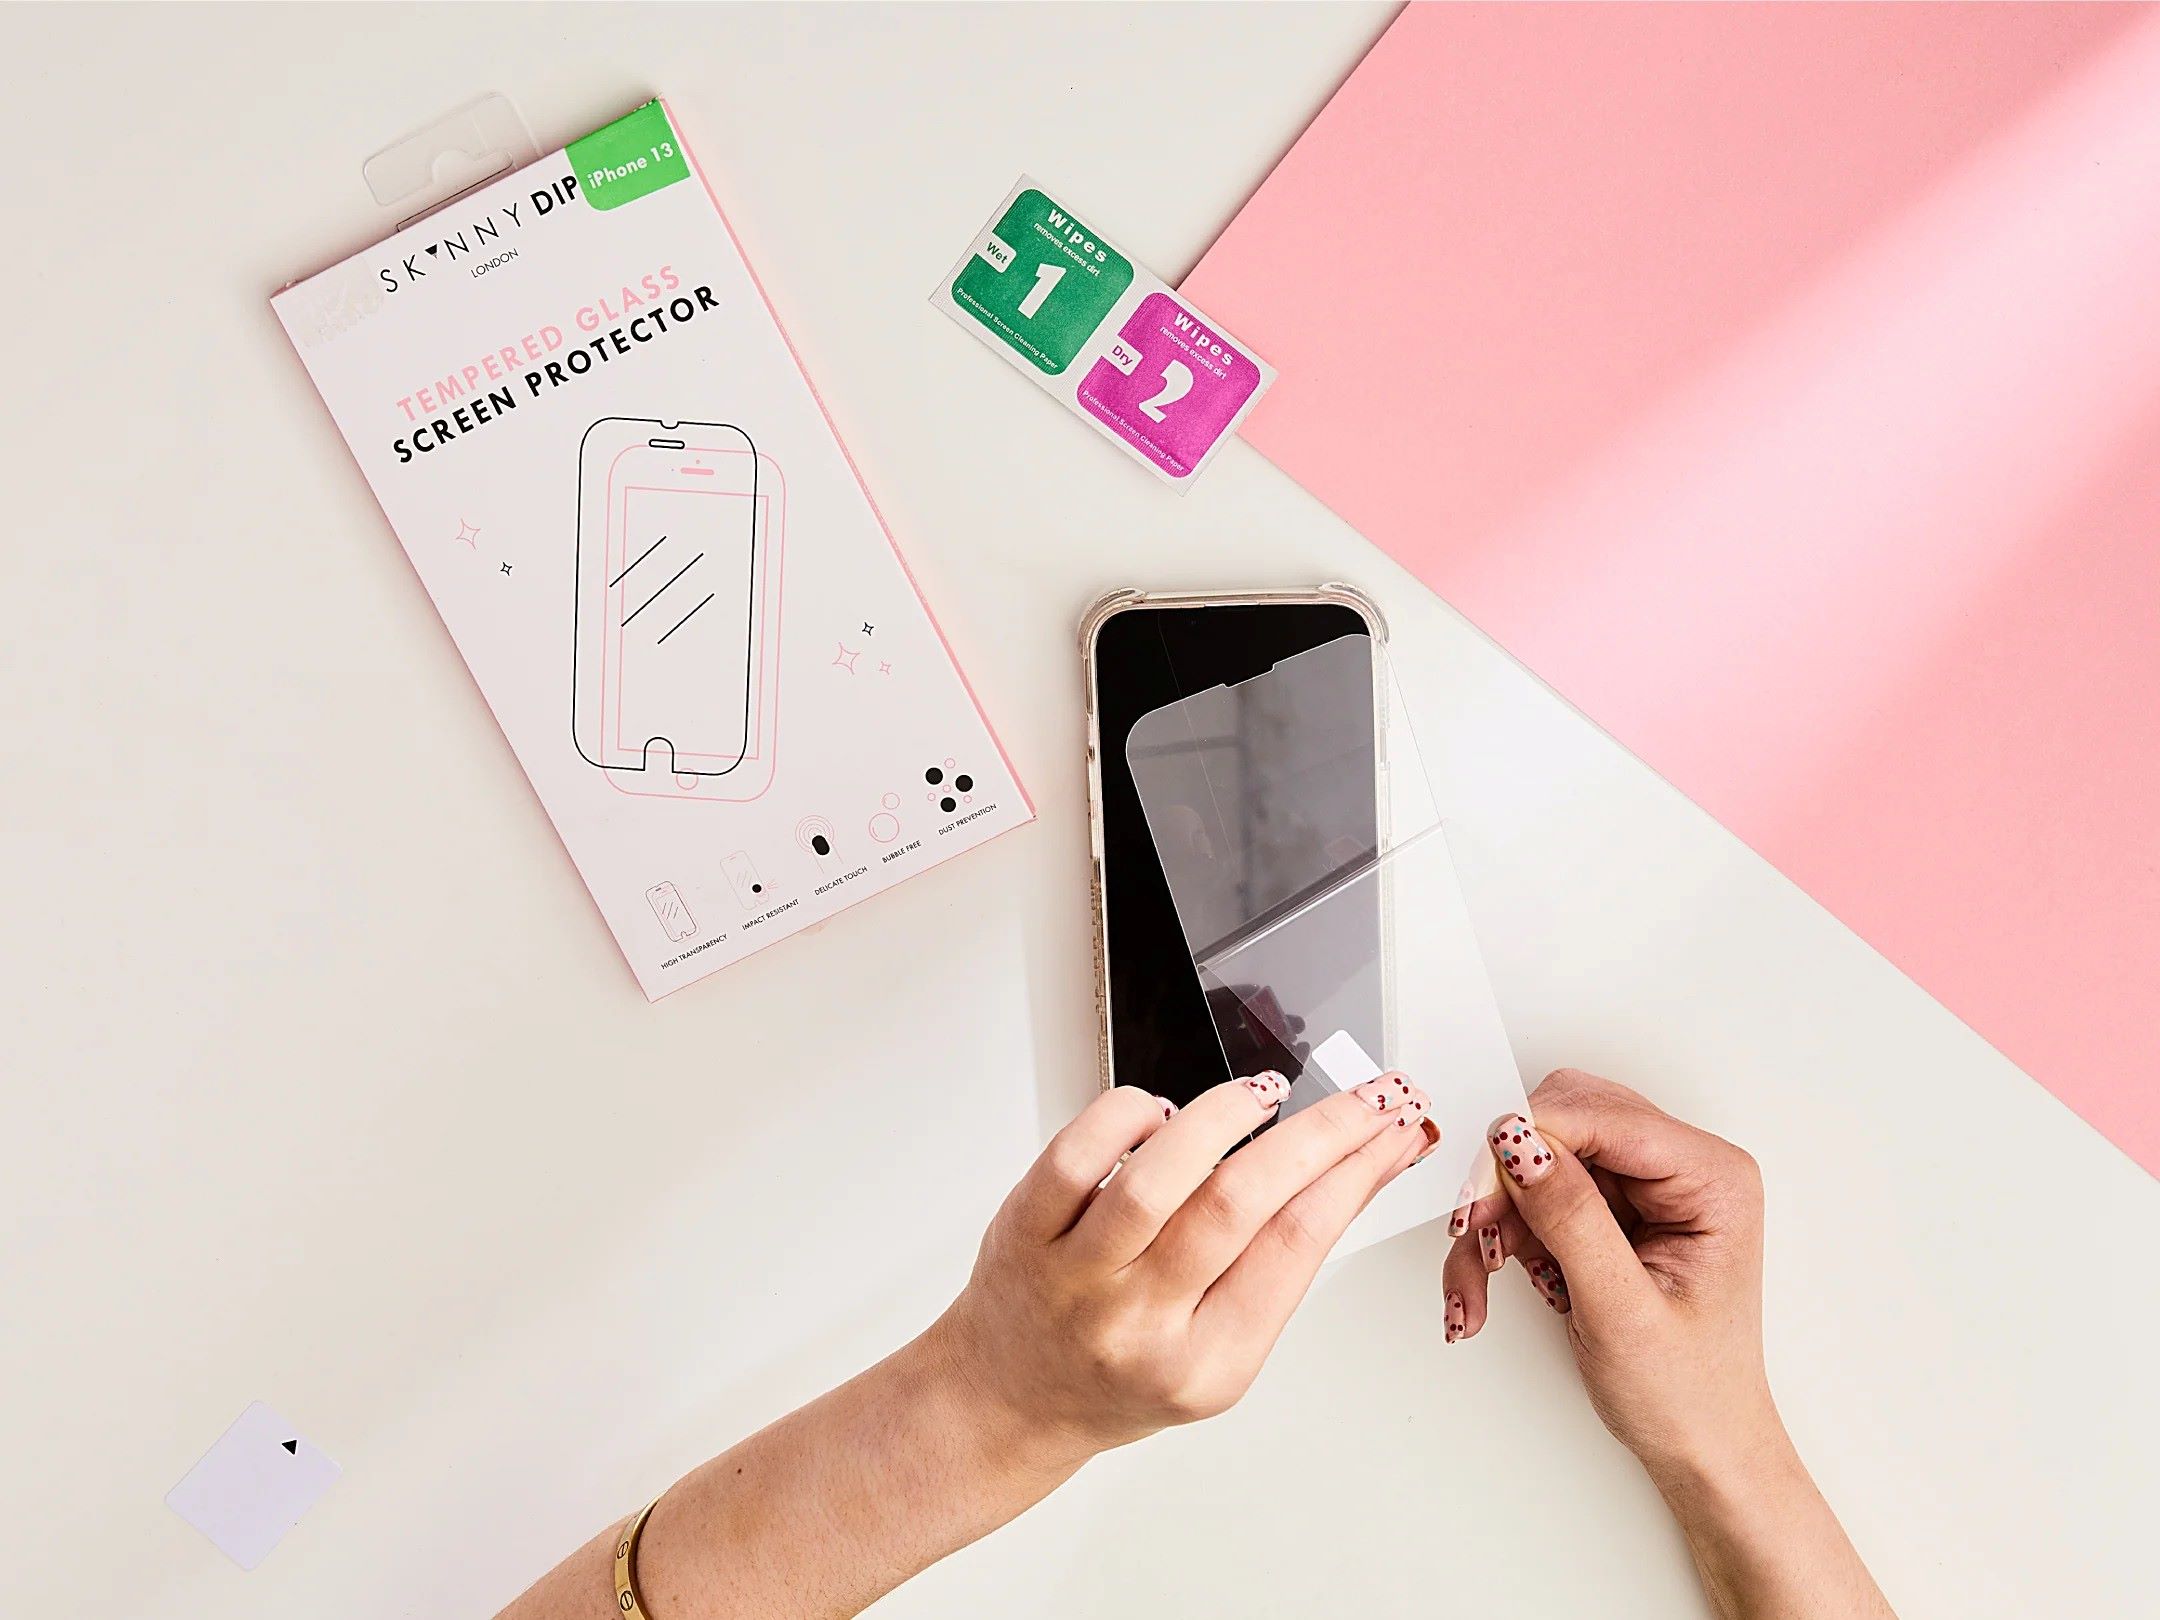
Optional: Applying a New Screen Protector
If you intend to replace the old screen protector with a new one, this is the ideal time to apply it. Ensure that the screen is completely dry and free from any residue before carefully aligning and applying the new protector. Follow the manufacturer's instructions for a precise and bubble-free application, taking care to avoid trapping any dust or particles underneath the new protector.
By meticulously cleaning the screen after removing the protector, you can ensure that the device's screen is in optimal condition, free from any residue or imperfections. Whether you choose to apply a new screen protector or leave the screen bare, a thorough cleaning process sets the stage for a pristine and clear display, ready for further use.
Read more: How To Remove Window Screen Plunger Pins
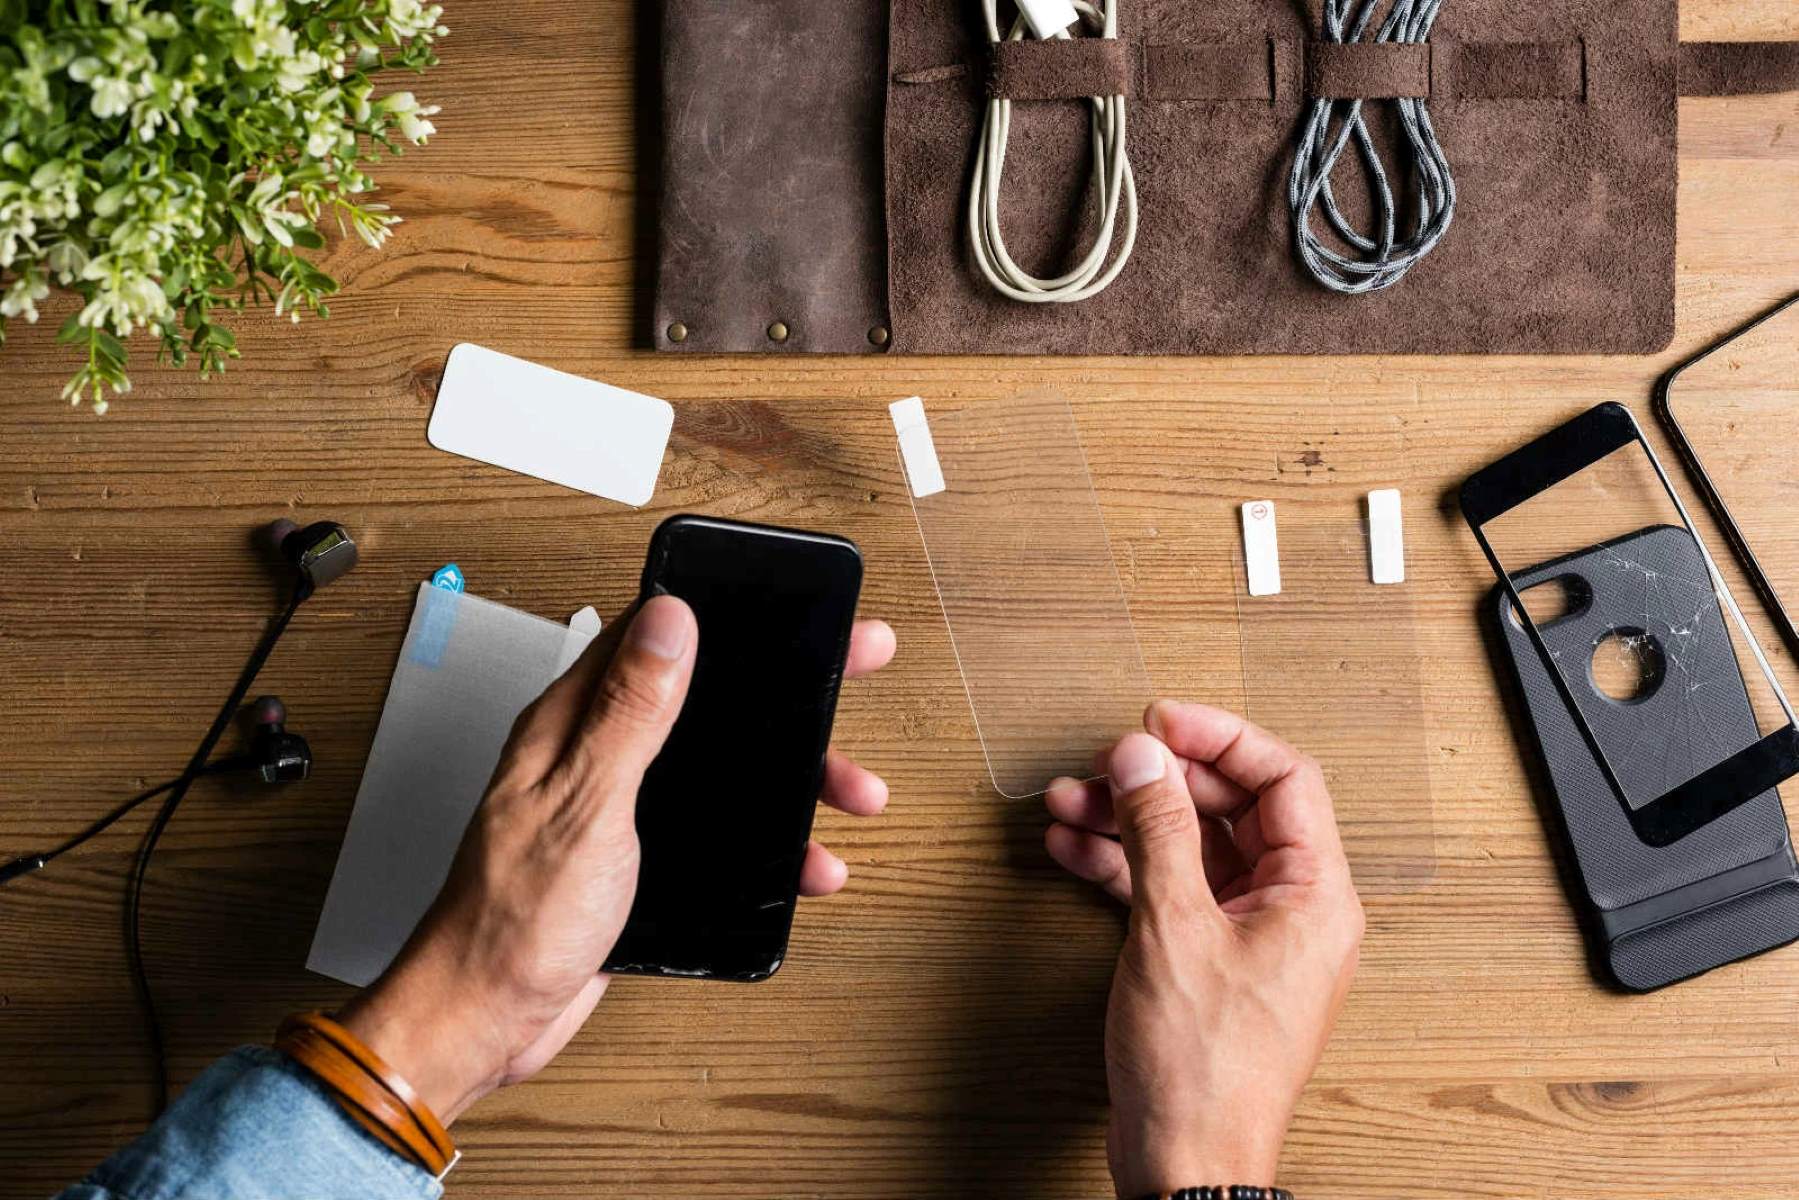
Step 5: Apply a new screen protector if desired
If you've decided to maintain the protection of your device's screen, applying a new screen protector is a proactive step to safeguard against scratches, smudges, and potential damage. A new screen protector not only offers a fresh layer of defense but also ensures a clear and pristine display for optimal viewing and interaction with your device.
Before applying the new screen protector, it's essential to ensure that the device's screen is completely clean and free from any residue or particles. Following the thorough cleaning process outlined in the previous step, verify that the screen is dry and devoid of any streaks or blemishes. Adequate lighting is crucial for inspecting the screen and identifying any remaining imperfections that may affect the application of the new protector.
Once the screen is confirmed to be in optimal condition, carefully align the new screen protector with the device's screen, taking care to position it accurately and avoid trapping any dust or air bubbles underneath. Most screen protectors come with alignment guides or tabs to facilitate precise placement, ensuring a seamless and bubble-free application.
Gently remove the protective film from the adhesive side of the screen protector, exposing the sticky surface that will adhere to the device's screen. Align the protector with the edges of the screen, using the provided guides or tabs to maintain accuracy. Once aligned, slowly lower the protector onto the screen, allowing the adhesive to make contact and gradually adhere to the surface.
Using a soft, clean cloth or a squeegee, carefully smooth out any air bubbles or imperfections that may appear during the application process. Start from the center of the screen and work outward, applying gentle pressure to ensure that the protector adheres uniformly without trapping any air pockets.
After the new screen protector is successfully applied, inspect the screen under adequate lighting to verify that it is free from any bubbles, misalignments, or imperfections. If necessary, gently lift the edges of the protector and reapply it to achieve a flawless and secure fit.
By applying a new screen protector, you not only maintain the integrity of your device's screen but also prolong its longevity and visual clarity. A properly installed screen protector acts as a reliable shield against everyday wear and tear, preserving the pristine condition of the screen and enhancing the overall user experience.
Conclusion
In conclusion, the process of removing a glass screen protector from your device requires careful preparation, precision, and the right tools to ensure a smooth and damage-free experience. By following the step-by-step guide outlined in this article, you can confidently navigate the removal process and restore your device's screen to its original state.
From gathering the necessary materials to meticulously preparing the screen and lifting the edges of the protector, each step plays a crucial role in ensuring a successful removal. The use of a credit card or plastic scraper to lift the protector allows for precise control and minimizes the risk of damage to the screen, while the thorough cleaning process post-removal ensures that the screen is free from any residue or imperfections.
Whether you choose to apply a new screen protector or leave the screen bare, the final step of the process allows you to make an informed decision based on your preferences for screen protection. Applying a new screen protector offers a proactive approach to safeguarding your device's screen, while opting for a bare screen allows for a clear and pristine display.
Ultimately, the successful removal of a glass screen protector not only rejuvenates the appearance of your device but also sets the stage for continued protection and optimal viewing experience. By carefully following the outlined steps and exercising patience and precision, you can confidently remove the old screen protector and prepare your device for further use or the application of a new protector.
In essence, the removal of a glass screen protector is a meticulous process that, when approached with care and attention to detail, can yield a rewarding outcome. With the right tools, preparation, and methodical approach, you can bid farewell to the old protector and welcome a fresh start for your device's screen, ensuring its longevity and visual clarity for continued enjoyment and functionality.
Frequently Asked Questions about How To Remove Glass Screen Protector
Was this page helpful?
At Storables.com, we guarantee accurate and reliable information. Our content, validated by Expert Board Contributors, is crafted following stringent Editorial Policies. We're committed to providing you with well-researched, expert-backed insights for all your informational needs.


0 thoughts on “How To Remove Glass Screen Protector”