Home>Furniture & Design>Interior Design Trends>How To Make A Glass Marble
Interior Design Trends
How To Make A Glass Marble
Modified: October 19, 2024
Discover the latest interior design trends for creating stunning glass marble accents in your home. Learn how to incorporate this timeless element into your decor. Elevate your space with these innovative design ideas!
(Many of the links in this article redirect to a specific reviewed product. Your purchase of these products through affiliate links helps to generate commission for Storables.com, at no extra cost. Learn more)
Introduction
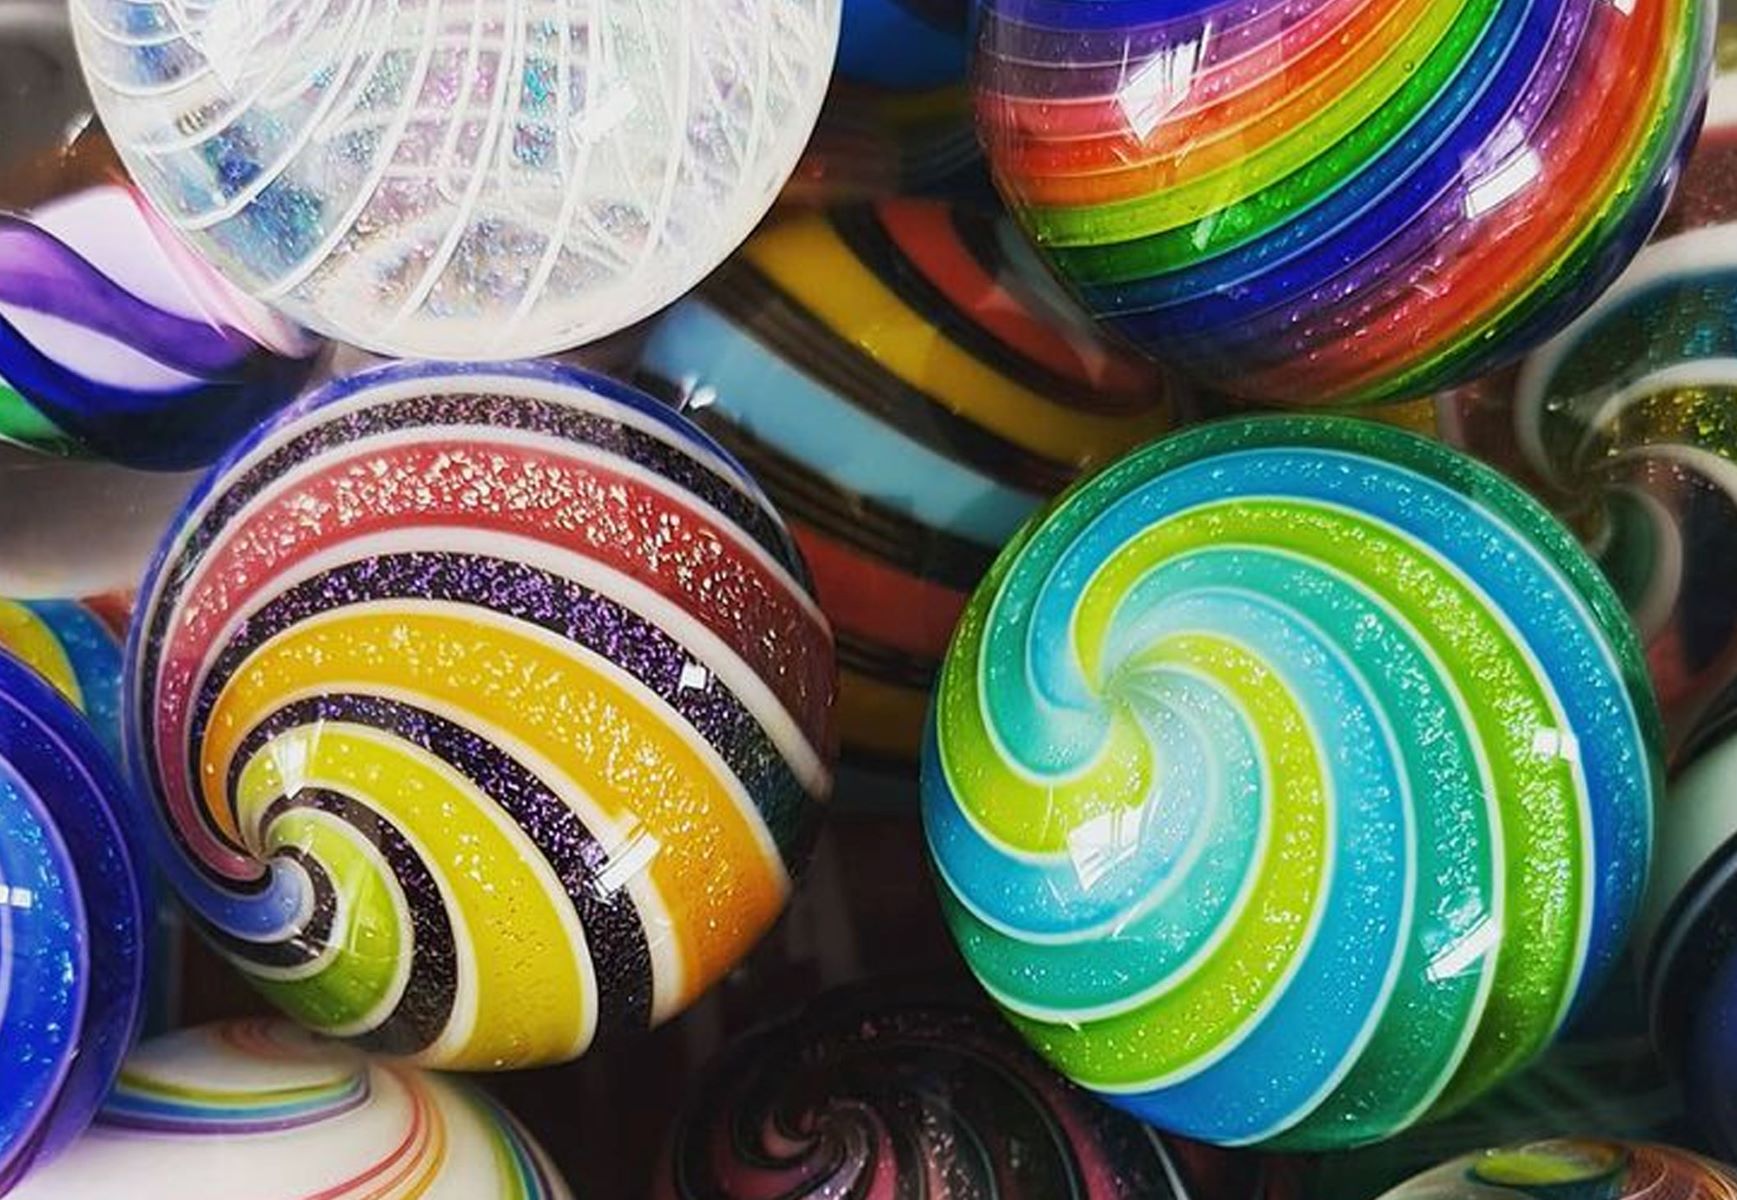
Creating glass marbles is a fascinating and rewarding craft that allows you to unleash your creativity while producing beautiful, one-of-a-kind pieces. Whether you're a seasoned glass artist or a novice looking to explore the art of glasswork, making your own glass marbles can be an immensely satisfying endeavor. The process involves a delicate balance of precision, artistry, and technique, resulting in mesmerizing marbles that can serve as decorative pieces, gifts, or even cherished collector's items.
Crafting glass marbles is an art form that dates back centuries, with a rich history rooted in ancient glassblowing traditions. Today, modern artisans continue to push the boundaries of marble-making, experimenting with innovative techniques and designs to produce marbles that are both visually stunning and technically impressive. The allure of creating glass marbles lies in the ability to transform molten glass into miniature works of art, each with its own unique patterns, colors, and textures.
In this comprehensive guide, we will delve into the intricate process of making glass marbles, from gathering the necessary materials to shaping and polishing the glass to perfection. Whether you're drawn to the meditative nature of glasswork or simply eager to try your hand at a new creative pursuit, this step-by-step tutorial will equip you with the knowledge and skills needed to embark on your marble-making journey. So, roll up your sleeves, ignite your passion for craftsmanship, and let's dive into the enchanting world of creating glass marbles.
Key Takeaways:
- Crafting glass marbles is a captivating blend of art and technique, where molten glass is transformed into radiant, one-of-a-kind masterpieces through meticulous shaping, color infusion, and polishing.
- The art of crafting glass marbles is a celebration of creativity and skill, allowing artisans to unleash their passion and produce captivating, timeless works of art that captivate the eye and stir the imagination.
Read more: How To Make Glass Marbles
Materials Needed
To embark on the captivating process of making glass marbles, you'll need a selection of essential materials and tools to facilitate each step of the intricate craft. From gathering the raw materials to shaping and polishing the glass, here's a comprehensive list of what you'll need to get started:
-
Glass Rods or Tubes: The foundation of any glass marble creation, glass rods or tubes serve as the raw material for crafting marbles. These can be sourced in an array of colors and transparencies, allowing you to unleash your creativity and experiment with diverse visual effects.
-
Glassblowing Torch: A high-quality, reliable glassblowing torch is indispensable for heating and shaping the glass rods. Look for a torch that offers precise control over the flame and temperature, enabling you to manipulate the glass with accuracy and finesse.
-
Mandrels: These stainless steel rods provide a stable base for forming the glass into spherical shapes. Select mandrels of varying diameters to accommodate different marble sizes and designs.
-
Graphite Paddle: A graphite paddle is an invaluable tool for shaping and smoothing the molten glass. Its non-stick surface and heat-resistant properties make it ideal for manipulating the glass without causing damage or impurities.
-
Safety Glasses: Protecting your eyes is paramount when working with hot glass and open flames. Invest in a pair of safety glasses designed specifically for glassblowing to shield your eyes from potential hazards.
-
Kiln: A kiln is essential for annealing the glass marbles, gradually cooling them to relieve internal stresses and enhance their durability. Ensure your kiln is equipped with precise temperature controls to achieve optimal annealing results.
-
Glass Cutting Tools: Depending on your preferred marble designs, glass cutting tools such as nippers or cutters may be necessary for shaping the glass rods before they are heated and formed.
-
Colorants (Optional): If you desire to infuse your marbles with vibrant hues, an assortment of glass colorants or frits can be employed to add captivating patterns and colors to the molten glass.
-
Polishing Equipment: To achieve a flawless finish, polishing equipment such as diamond sanding pads or a lapidary machine can be utilized to refine the surface of the glass marbles, ensuring they gleam with a lustrous sheen.
-
Ventilation System: Given the nature of glassblowing, a well-ventilated workspace is crucial to dissipate fumes and maintain a safe working environment. Consider installing a ventilation system or working in an area with ample airflow.
Equipped with these essential materials and tools, you'll be primed to embark on your glass marble-making journey, ready to transform molten glass into captivating, handcrafted marbles that showcase your artistic vision and technical prowess.
Step 1: Gather Your Supplies
Before delving into the mesmerizing art of crafting glass marbles, it's crucial to gather all the necessary supplies and tools to ensure a seamless and enjoyable marble-making experience. The process of creating glass marbles demands precision, creativity, and attention to detail, and having the right materials at your disposal is essential for achieving optimal results.
To begin, procure a selection of high-quality glass rods or tubes in an assortment of colors and transparencies. These will serve as the primary raw material for your marble-making endeavor, allowing you to experiment with captivating visual effects and intricate designs. Whether you opt for vibrant, translucent hues or subtle, opaque tones, the diversity of glass rods available empowers you to infuse your marbles with a personalized touch.
Next, invest in a reliable glassblowing torch that offers precise flame control and consistent heat output. The torch will serve as your primary tool for heating and shaping the glass, enabling you to manipulate the molten material with finesse and accuracy. Look for a torch that aligns with your skill level and provides the flexibility to accommodate various glassworking techniques, from delicate detail work to larger-scale marble production.
In addition to glass rods and a glassblowing torch, ensure you have a selection of stainless steel mandrels in different diameters. These mandrels will provide a stable foundation for shaping the molten glass into spherical forms, allowing you to create marbles of varying sizes and designs. A graphite paddle is also essential for shaping and smoothing the glass, boasting a non-stick surface and heat-resistant properties that facilitate precise manipulation without compromising the glass's integrity.
Furthermore, prioritize safety by acquiring a pair of specialized safety glasses designed for glassblowing. These glasses will shield your eyes from potential hazards associated with working with hot glass and open flames, ensuring a secure and protected working environment. Additionally, invest in a kiln equipped with precise temperature controls to facilitate the annealing process, enhancing the durability and strength of your finished glass marbles.
By assembling these fundamental supplies, including glass rods, a glassblowing torch, mandrels, a graphite paddle, safety glasses, and a kiln, you'll lay the groundwork for a fulfilling and rewarding glass marble-making journey. With the right tools at your disposal, you'll be well-equipped to unleash your creativity and embark on the intricate process of transforming molten glass into captivating, handcrafted marbles that reflect your artistic vision and technical expertise.
Step 2: Prepare the Glass
Preparing the glass is a critical step in the intricate process of crafting glass marbles. This phase involves meticulously shaping and heating the glass rods to achieve the desired consistency and form before they are transformed into mesmerizing marbles. The preparation of the glass sets the stage for the subsequent stages of marble-making, laying the foundation for the intricate artistry and technical precision that characterize this captivating craft.
To commence the preparation process, carefully select the glass rods or tubes that align with your creative vision. Whether you aim to create marbles infused with vibrant, swirling colors or opt for a more subdued, translucent aesthetic, the choice of glass rods will significantly influence the visual impact of your finished marbles. Once you have curated a selection of glass rods, it's time to begin the meticulous process of shaping and heating the glass to prepare it for transformation.
Using a high-quality glassblowing torch, gradually heat the glass rod, ensuring that the flame is applied evenly to facilitate uniform heating. As the glass begins to soften and reach a malleable state, employ a steady, rotating motion to promote even distribution of heat and prevent the formation of hot spots. This controlled heating process is essential for achieving the optimal viscosity and workability of the glass, laying the groundwork for precise manipulation and shaping.
Once the glass reaches the desired temperature and consistency, it's time to employ the stainless steel mandrels to shape the molten glass into spherical forms. By carefully rotating the mandrel while applying gentle pressure, you can coax the glass into taking on a spherical shape, a fundamental characteristic of glass marbles. This shaping process demands a delicate balance of finesse and control, as you work to achieve symmetrical, well-proportioned spheres that serve as the canvas for your artistic expression.
Throughout the glass preparation phase, it's crucial to maintain a keen focus on the temperature and viscosity of the glass, adjusting the heat application and rotation as needed to ensure optimal workability. Additionally, the use of a graphite paddle can aid in refining the shape and surface of the glass, allowing you to smooth out imperfections and achieve a flawless, spherical form.
By meticulously preparing the glass with precision and care, you set the stage for the subsequent stages of marble-making, laying the groundwork for the infusion of color, shaping, and polishing that will bring your glass marbles to life. The glass preparation phase exemplifies the delicate balance of artistry and technique that defines the craft of glass marble-making, serving as a testament to the meticulous attention to detail and creative vision that underpin this captivating art form.
To make a glass marble, start by heating glass rods in a torch flame until they become molten. Then, shape the glass with tools and add colors if desired. Finally, let the marble cool slowly to avoid cracking.
Step 3: Shape the Glass
Shaping the glass is a pivotal stage in the intricate process of crafting mesmerizing glass marbles. This phase marks the transformation of molten glass into distinctive, spherical forms, each poised to become a captivating work of art. The shaping process demands a delicate balance of precision, creativity, and technical expertise, as artisans work to coax the molten glass into symmetrical, well-proportioned spheres that serve as the canvas for their artistic vision.
As the prepared glass reaches the optimal temperature and viscosity, it becomes malleable and responsive to manipulation. This pivotal moment sets the stage for the shaping process, where artisans employ stainless steel mandrels to guide the molten glass into spherical forms. The selection of mandrels of varying diameters allows for the creation of marbles in different sizes, empowering artisans to explore diverse design possibilities and aesthetic expressions.
With a steady hand and a keen eye for detail, artisans carefully rotate the mandrel while applying gentle pressure, coaxing the molten glass into taking on a spherical shape. This delicate maneuvering demands finesse and control, as artisans strive to achieve symmetrical, well-defined spheres that serve as the foundation for their glass marble creations. The shaping process is a testament to the artisan's mastery of technique and their ability to imbue the glass with a sense of harmony and balance.
Throughout the shaping process, artisans maintain a meticulous focus on achieving uniformity and precision, ensuring that each marble embodies a flawless, spherical form. This dedication to perfection is underscored by the artisan's commitment to refining the shape and surface of the glass, using a graphite paddle to smooth out imperfections and enhance the visual appeal of the marbles. The use of the graphite paddle allows artisans to impart a sense of fluidity and grace to the glass, elevating each marble to a state of refined elegance.
As the shaping process unfolds, artisans infuse the glass with their creative vision, imbuing each marble with a sense of individuality and character. The shaping of the glass marbles exemplifies the seamless fusion of artistry and technique, showcasing the artisan's ability to transform molten glass into captivating, handcrafted masterpieces. This pivotal stage sets the stage for the infusion of color and the subsequent polishing, bringing the glass marbles one step closer to their final, resplendent form.
Read more: How Are Glass Marbles Made
Step 4: Add Color (Optional)
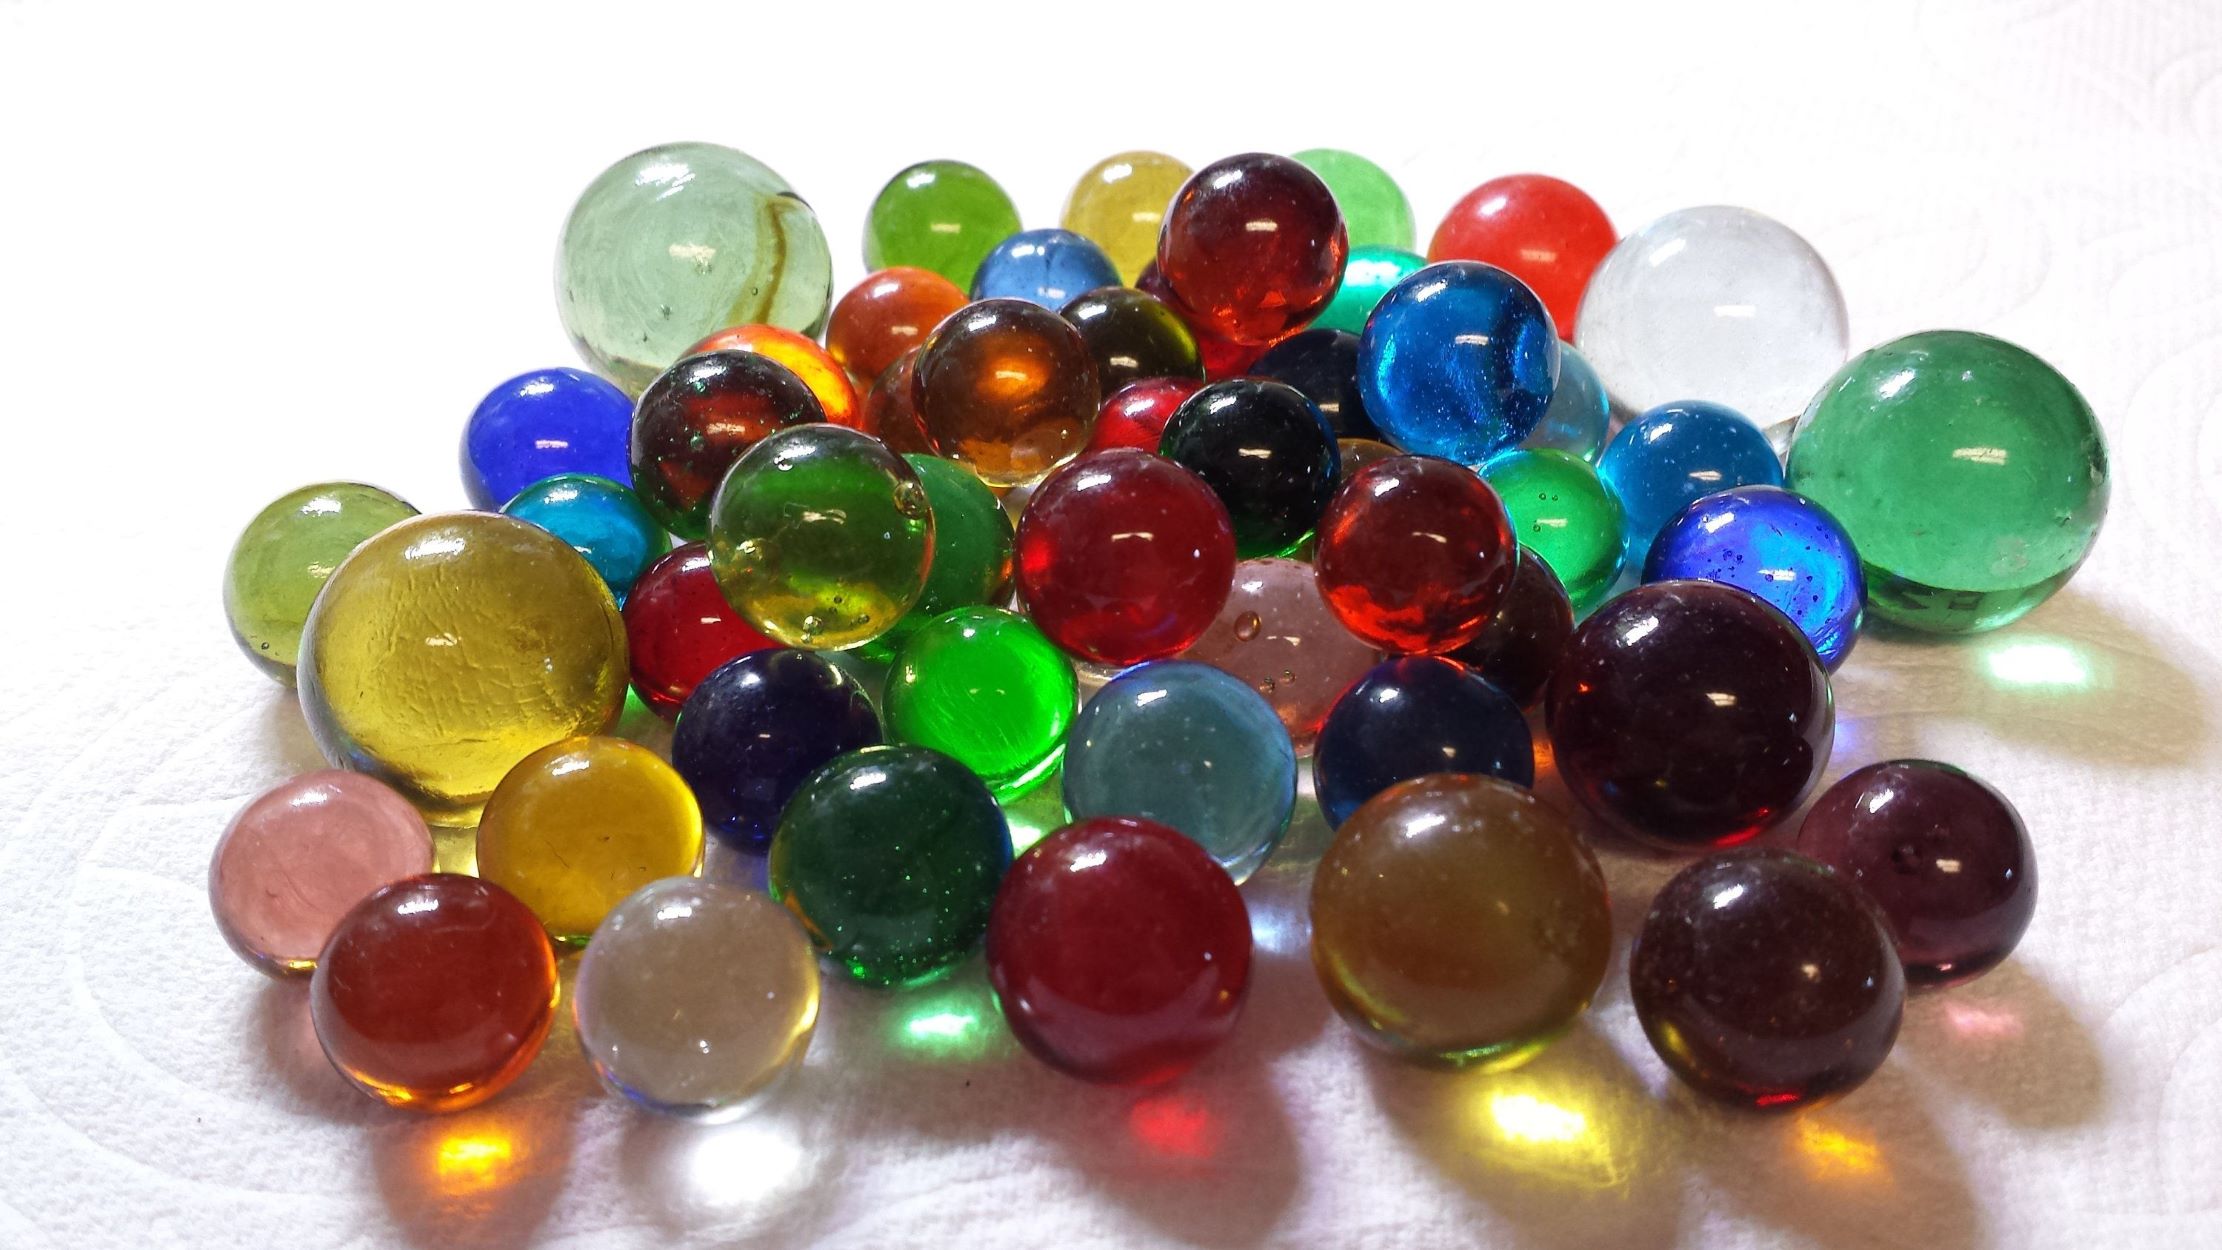
In the captivating art of crafting glass marbles, the optional yet enthralling step of adding color serves as a gateway to boundless creative expression. Infusing molten glass with vibrant hues and captivating patterns elevates the marbles to new heights of visual splendor, transforming them into miniature works of art that captivate the eye and stir the imagination.
The process of adding color to glass marbles begins with the selection of glass colorants or frits, offering a diverse palette of hues and textures to inspire artistic exploration. Whether artisans seek to imbue their marbles with bold, swirling patterns or subtle, iridescent tones, the choice of colorants provides a canvas for endless creative possibilities. With a delicate touch and a keen eye for composition, artisans can introduce captivating designs and motifs that imbue the marbles with a sense of individuality and character.
As the molten glass reaches the optimal temperature for color infusion, artisans carefully apply the selected colorants to the glass, employing a deft hand to achieve precise patterns and gradients. The interplay of colors and textures unfolds as the glass is shaped and manipulated, resulting in marbles that boast a symphony of hues and visual depth. This infusion of color breathes life into the marbles, imbuing them with a sense of dynamism and vibrancy that captivates the beholder.
The addition of color to glass marbles exemplifies the seamless fusion of artistry and technical skill, as artisans harness the transformative power of color to elevate their creations to new heights of visual allure. Each marble becomes a testament to the artisan's creative vision and mastery of technique, showcasing a harmonious blend of form and color that mesmerizes and enchants.
The optional step of adding color to glass marbles invites artisans to embark on a journey of artistic exploration, where the fusion of molten glass and vibrant hues gives rise to captivating, one-of-a-kind creations. This pivotal stage sets the stage for the subsequent polishing, bringing the glass marbles one step closer to their final, resplendent form.
Step 5: Polish the Marble
The final step in the captivating process of crafting glass marbles involves the meticulous art of polishing, a transformative stage that bestows a radiant luster upon the marbles, elevating them to a state of resplendent beauty. The polishing phase represents the culmination of the artisan's dedication to precision and artistry, as they refine the surface of the marbles to achieve a flawless, gleaming finish that captivates the eye and evokes a sense of timeless elegance.
To commence the polishing process, artisans employ a range of specialized equipment designed to refine the surface of the glass marbles with finesse and precision. Diamond sanding pads, lapidary machines, and polishing compounds serve as invaluable tools, allowing artisans to meticulously smooth and buff the surface of the marbles, imparting a lustrous sheen that accentuates their inherent beauty. The use of these precision tools enables artisans to achieve a flawless finish, ensuring that each marble gleams with a radiant allure that showcases the artisan's commitment to excellence.
As artisans guide the glass marbles through the polishing process, they exercise a keen eye for detail, meticulously refining the surface to eliminate imperfections and enhance the visual appeal of the marbles. The transformative power of polishing unfolds as the marbles undergo a gradual metamorphosis, evolving from raw, unrefined forms into radiant, polished masterpieces that exude a captivating brilliance. This meticulous attention to detail and dedication to perfection exemplifies the artisan's unwavering commitment to elevating their creations to the pinnacle of visual splendor.
Throughout the polishing phase, artisans navigate the delicate balance of technique and artistry, infusing each marble with a sense of timeless elegance and refinement. The surface of the marbles becomes a canvas for the artisan's skillful hands, as they coax forth a lustrous sheen that reflects the light with a captivating brilliance. The culmination of the polishing process heralds the emergence of glass marbles that stand as testaments to the artisan's mastery of the craft, each bearing the hallmark of meticulous precision and artistic vision.
As the polishing phase draws to a close, the glass marbles emerge as radiant, polished masterpieces, each embodying a sense of enduring beauty and captivating allure. The transformative journey from raw glass to polished marble stands as a testament to the artisan's unwavering dedication to excellence, showcasing the seamless fusion of artistry and technique that defines the captivating art of crafting glass marbles.
Conclusion
In conclusion, the art of crafting glass marbles is a mesmerizing journey that seamlessly blends artistry, precision, and technical expertise. From the meticulous preparation of the glass to the transformative stages of shaping, color infusion, and polishing, the process of creating glass marbles is a testament to the artisan's unwavering dedication to excellence and creative vision.
Throughout this comprehensive guide, we have delved into the intricate steps involved in making glass marbles, from gathering the essential materials to shaping and polishing the glass to perfection. The art of crafting glass marbles is steeped in a rich history that spans centuries, rooted in ancient glassblowing traditions and perpetuated by modern artisans who continue to push the boundaries of marble-making with innovative techniques and designs.
The journey of creating glass marbles is a captivating fusion of art and technique, where molten glass is transformed into miniature works of art, each bearing the unique imprint of the artisan's creativity and skill. The optional step of adding color infuses the marbles with vibrant hues and captivating patterns, elevating them to new heights of visual splendor. The final stage of polishing bestows a radiant luster upon the marbles, culminating in flawless, gleaming masterpieces that evoke a sense of timeless elegance.
Crafting glass marbles is not merely a technical pursuit but a deeply rewarding and meditative art form that allows artisans to unleash their creativity and produce captivating, one-of-a-kind pieces. Whether used as decorative accents, cherished collector's items, or thoughtful gifts, glass marbles stand as testaments to the artisan's mastery of the craft and their ability to transform molten glass into captivating works of art.
Aspiring glass artists and seasoned artisans alike can embark on their marble-making journey with a newfound appreciation for the intricate artistry and technical precision that define this captivating craft. The allure of creating glass marbles lies in the ability to infuse molten glass with individuality, character, and visual splendor, resulting in marbles that captivate the eye and stir the imagination.
In essence, the art of crafting glass marbles is a celebration of creativity, skill, and the transformative power of glass, culminating in captivating works of art that stand as timeless testaments to the artisan's dedication and passion for their craft. So, roll up your sleeves, ignite your passion for craftsmanship, and let's continue to explore the enchanting world of creating glass marbles.
Frequently Asked Questions about How To Make A Glass Marble
Was this page helpful?
At Storables.com, we guarantee accurate and reliable information. Our content, validated by Expert Board Contributors, is crafted following stringent Editorial Policies. We're committed to providing you with well-researched, expert-backed insights for all your informational needs.


0 thoughts on “How To Make A Glass Marble”