Home>Furniture & Design>Interior Design Trends>How To Remove Soap Scum From Glass
Interior Design Trends
How To Remove Soap Scum From Glass
Modified: August 20, 2024
Learn effective interior design trends for removing soap scum from glass. Discover expert tips and tricks for a sparkling, streak-free finish.
(Many of the links in this article redirect to a specific reviewed product. Your purchase of these products through affiliate links helps to generate commission for Storables.com, at no extra cost. Learn more)
Introduction
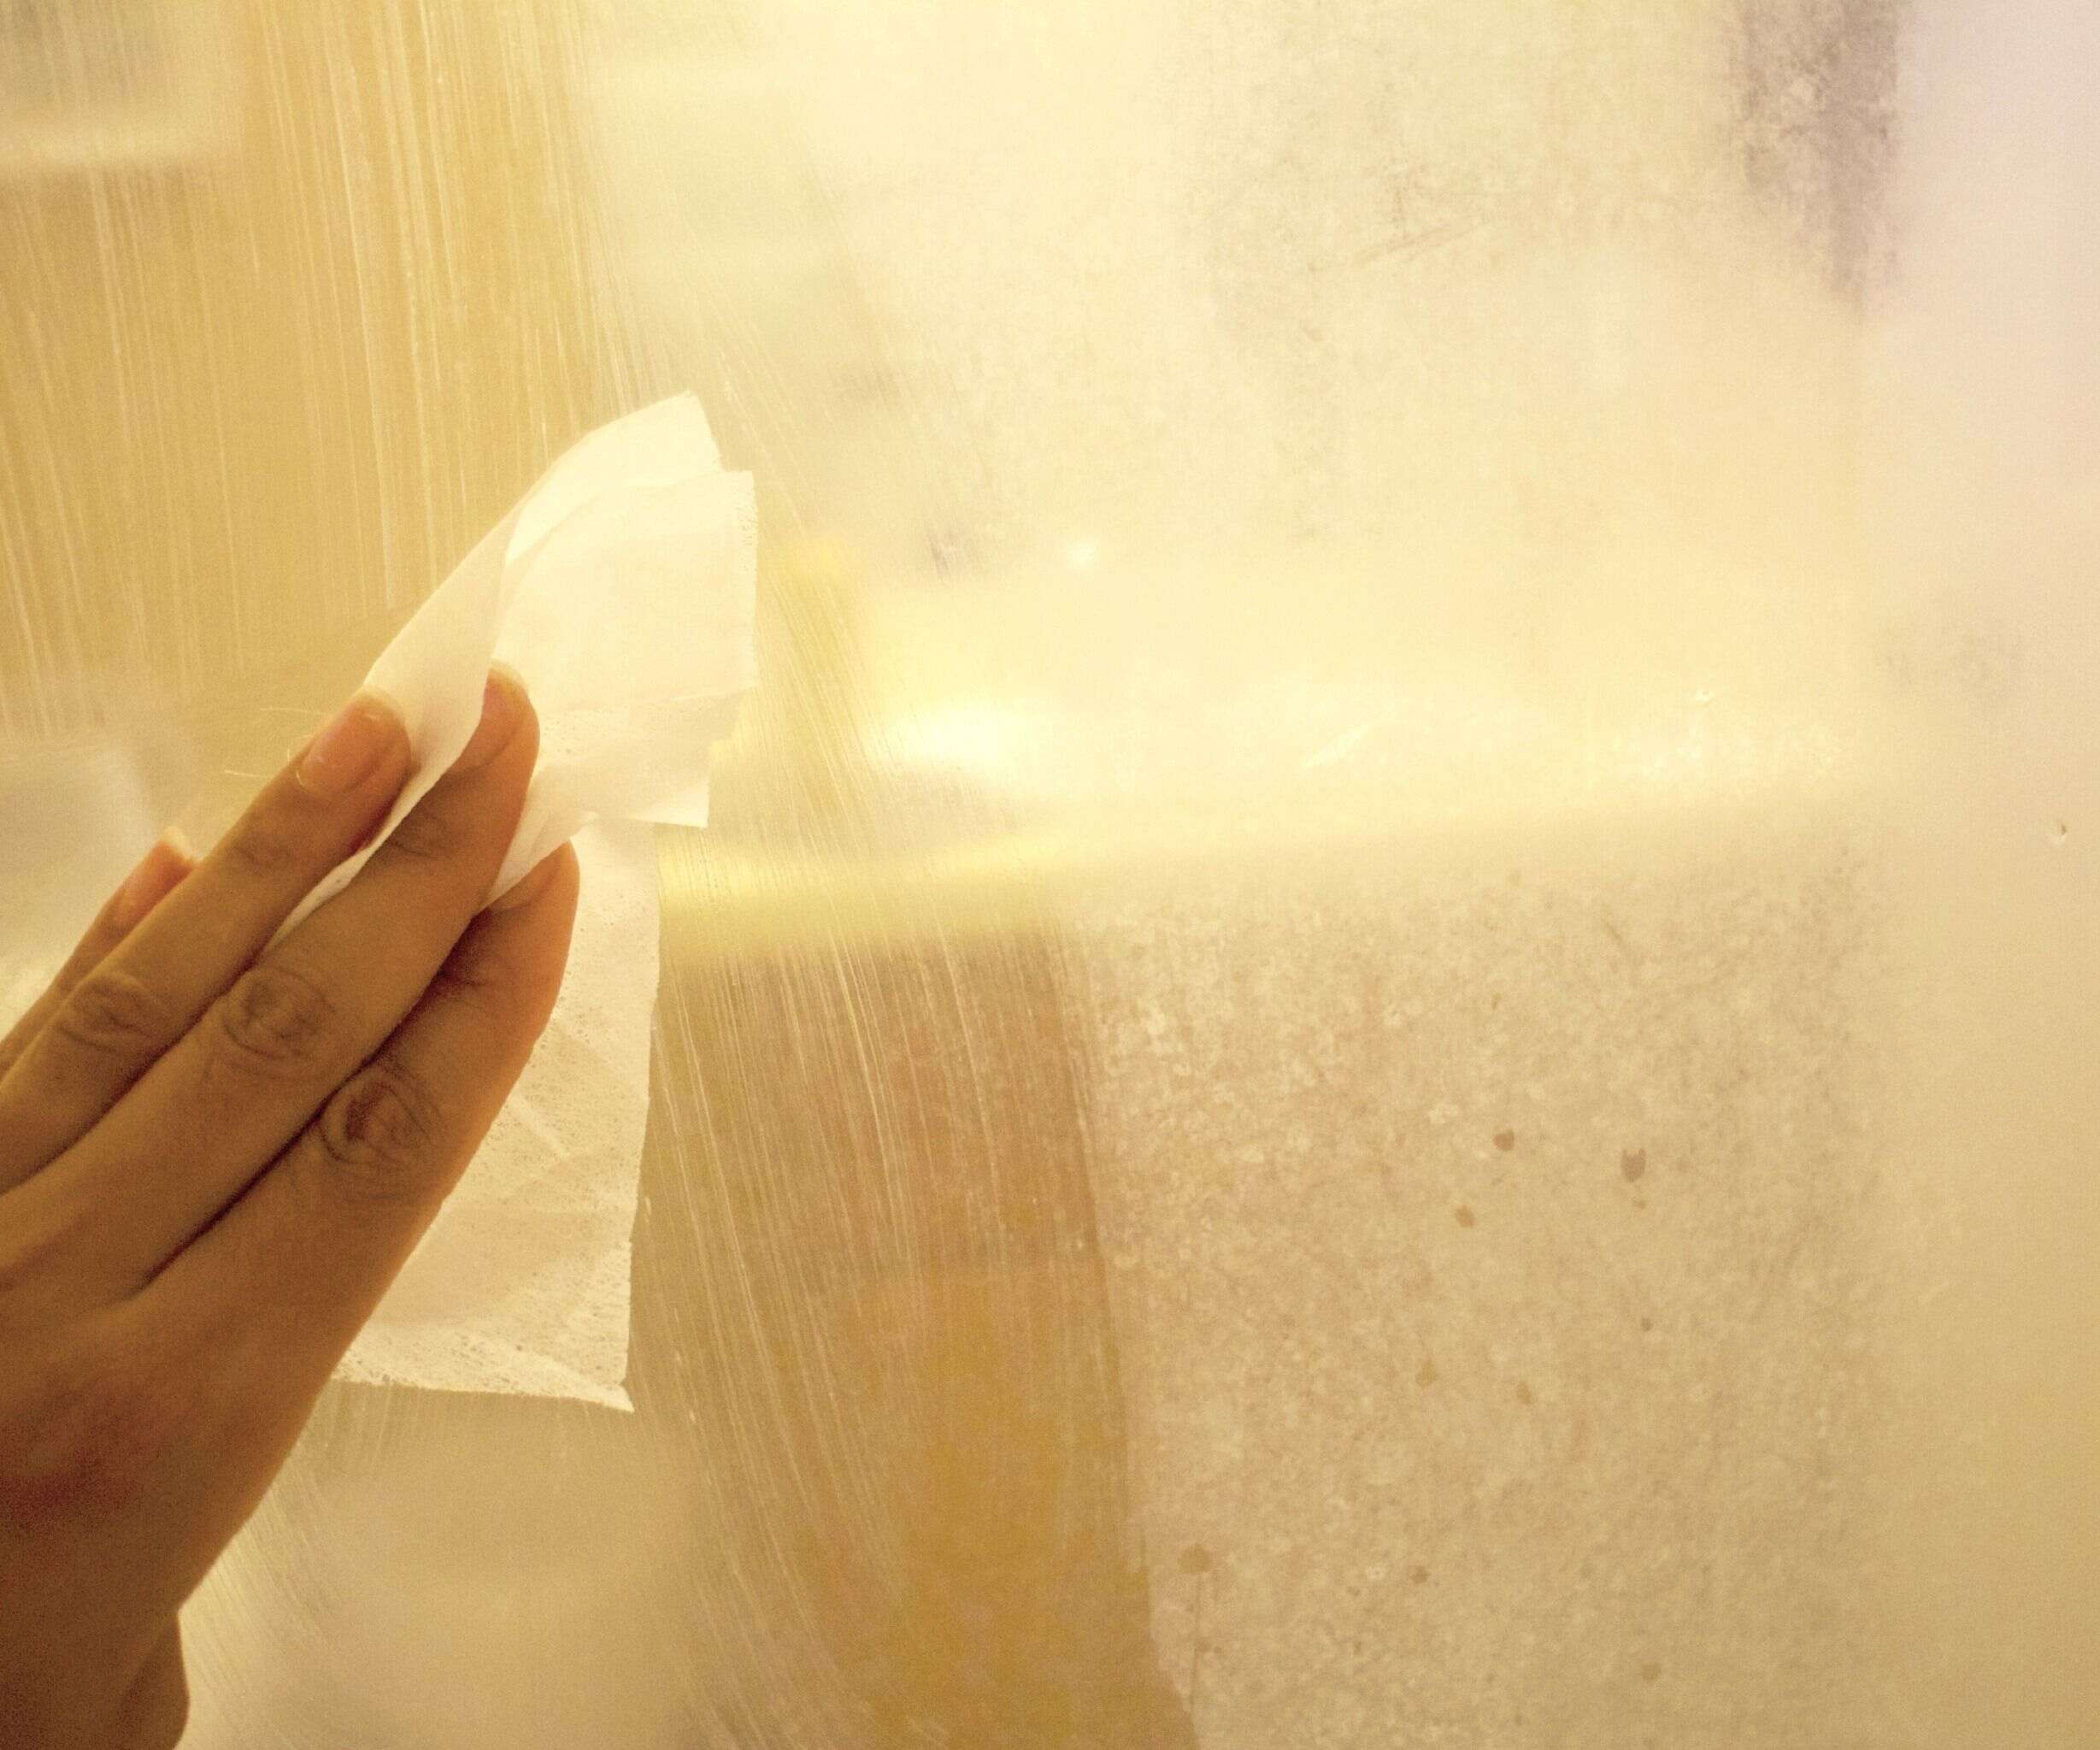
Soap scum can be a persistent nuisance in bathrooms, leaving unsightly residue on glass surfaces and diminishing the overall aesthetic appeal of the space. Whether it's the shower doors or glass partitions, the accumulation of soap scum can be frustrating to deal with. However, with the right approach and tools, you can effectively remove soap scum from glass and restore its clarity and shine.
In this comprehensive guide, we will delve into the intricacies of tackling soap scum on glass surfaces. From understanding the nature of soap scum to identifying the essential tools and materials needed, we will walk you through a step-by-step process to achieve sparkling, soap scum-free glass. Additionally, we will share valuable tips and tricks to ensure that your glass surfaces remain pristine for an extended period.
By the end of this guide, you will be equipped with the knowledge and techniques to conquer soap scum and maintain the brilliance of your glass surfaces. Let's embark on this journey to reclaim the clarity and beauty of your glass, elevating the ambiance of your bathroom and enhancing the overall allure of your living space.
Key Takeaways:
- Say goodbye to soap scum on glass surfaces by using a vinegar and dish soap solution, gentle scrubbing, and thorough rinsing. Keep your bathroom sparkling and free from unsightly residue!
- Equip yourself with the right tools and materials, and follow a step-by-step process to effectively remove soap scum from glass surfaces. Achieve sparkling, soap scum-free glass with ease and confidence.
Read more: How To Get Rid Of Soap Scum On Glass
Understanding Soap Scum
Soap scum is a stubborn and unsightly residue that forms on glass surfaces in bathrooms, particularly in areas regularly exposed to water and soap. It is a result of the interaction between soap, hard water minerals, body oils, and dirt. When soapy water comes into contact with glass, the water evaporates, leaving behind a thin film of soap residue. Over time, this residue accumulates and hardens, creating the notorious soap scum.
The composition of soap scum consists of various components, including fatty acids from soap, minerals from hard water, and organic matter from body oils and dirt. When these elements combine and adhere to the glass surface, they form a stubborn, opaque layer that can be challenging to remove.
The appearance of soap scum can range from a hazy film to a thick, crusty layer, depending on the frequency of use and the effectiveness of cleaning routines. In addition to its visual impact, soap scum can also harbor bacteria and mold, compromising the cleanliness and hygiene of the bathroom environment.
Understanding the nature of soap scum is crucial in devising an effective cleaning strategy. By comprehending its composition and the factors contributing to its formation, you can tailor your approach to effectively eliminate soap scum from glass surfaces. With this knowledge as a foundation, you can proceed with confidence, knowing that you are equipped to combat this common bathroom nuisance.
Tools and Materials Needed
To embark on the mission of removing soap scum from glass surfaces, you will need a selection of tools and materials to facilitate the cleaning process effectively. Equipping yourself with the right items will streamline the task and ensure that you can tackle soap scum with precision and efficiency. Here's a comprehensive list of the essential tools and materials required for this undertaking:
1. White Vinegar
White vinegar is a versatile and potent cleaning agent that is highly effective in combating soap scum. Its acidic nature enables it to break down the mineral deposits and dissolve the fatty acids present in soap scum, facilitating its removal from glass surfaces.
2. Dish Soap
A mild dish soap serves as an excellent complement to white vinegar, aiding in the emulsification of oils and grime within the soap scum. Opt for a gentle, non-abrasive dish soap to prevent any potential damage to the glass surface.
Read more: How To Prevent Soap Scum On Shower Glass
3. Spray Bottle
A spray bottle is an indispensable tool for dispensing the cleaning solution onto the glass surface evenly. It allows for targeted application and ensures thorough coverage, optimizing the effectiveness of the cleaning process.
4. Microfiber Cloth or Sponge
Utilizing a microfiber cloth or sponge is essential for agitating and scrubbing the soap scum. These soft, non-abrasive materials are gentle on glass surfaces while effectively dislodging the stubborn residue.
5. Plastic Scraper or Squeegee
A plastic scraper or squeegee can aid in the removal of particularly stubborn or thick layers of soap scum. It provides a gentle means of loosening the residue without causing damage to the glass.
6. Rubber Gloves
Protecting your hands with rubber gloves is advisable, especially when working with cleaning solutions and potentially abrasive materials. This precautionary measure ensures your skin remains shielded from any harsh chemicals and maintains your comfort during the cleaning process.
Read more: How To Get Soap Scum Off Glass
7. Water
Having access to clean water is essential for rinsing the glass surface after the soap scum removal process. It allows for the complete removal of cleaning residues and ensures a pristine, streak-free finish.
By assembling these tools and materials, you will be well-prepared to tackle the task of removing soap scum from glass surfaces with confidence and efficiency. With the right arsenal at your disposal, you can proceed to the next steps of the cleaning process, poised to restore the clarity and brilliance of your glass surfaces.
Step 1: Preparing the Glass Surface
Before diving into the process of removing soap scum from glass, it is crucial to prepare the glass surface adequately. This preparatory phase sets the stage for the subsequent cleaning steps, ensuring optimal results and minimizing the effort required to achieve a sparkling, soap scum-free finish.
Clearing the Area
Begin by clearing the surrounding area to create a conducive and unobstructed workspace. Remove any toiletries, bath accessories, or decorative items near the glass surface to prevent interference during the cleaning process. This step not only facilitates unrestricted access to the glass but also minimizes the risk of accidental spills or damage to nearby objects.
Ventilation
Proper ventilation is essential when working with cleaning solutions, particularly those with potent odors or fumes. Open windows and doors to promote air circulation, allowing any lingering odors from the cleaning agents to dissipate effectively. Adequate ventilation also contributes to a more comfortable and pleasant environment during the cleaning endeavor.
Read more: How To Clean Soap Scum Off Glass
Protective Measures
Prioritize your safety by donning rubber gloves to shield your hands from the cleaning solutions and potential skin irritation. Additionally, consider wearing protective eyewear if there is a risk of splashing during the cleaning process. These precautionary measures safeguard your well-being and ensure a secure and comfortable experience as you prepare the glass surface for cleaning.
Testing the Cleaning Solution
If you are using a new or unfamiliar cleaning solution, it is advisable to perform a small patch test on a discreet area of the glass surface. This test allows you to assess the compatibility of the cleaning solution with the glass and ensures that it does not cause any adverse reactions or damage. By conducting this preliminary evaluation, you can proceed with confidence, knowing that the cleaning solution is suitable for the glass surface.
By meticulously preparing the glass surface through these essential steps, you establish a solid foundation for the subsequent phases of the soap scum removal process. This proactive approach sets the stage for a smooth and effective cleaning experience, laying the groundwork for achieving pristine, soap scum-free glass surfaces.
Step 2: Applying the Cleaning Solution
With the glass surface adequately prepared, the next pivotal step in the process of removing soap scum involves the strategic application of the cleaning solution. This phase is instrumental in initiating the breakdown and dissolution of the stubborn residue, paving the way for its subsequent removal. The careful and methodical application of the cleaning solution sets the stage for a thorough and effective cleansing of the glass surface.
Creating the Cleaning Solution
To commence this step, prepare the cleaning solution by combining white vinegar and a small amount of mild dish soap in a spray bottle. The vinegar's acidic properties work to dissolve the mineral deposits and fatty acids present in the soap scum, while the dish soap aids in emulsifying oils and grime, enhancing the overall efficacy of the solution. The precise measurements may vary based on the size of the spray bottle, but a common ratio is one part vinegar to one part water, with a small squirt of dish soap.
Even Application
Once the cleaning solution is meticulously prepared, proceed to spray it generously onto the affected glass surface. Ensure comprehensive coverage, targeting areas where soap scum is prevalent. The spray bottle facilitates a controlled and even distribution of the solution, allowing it to penetrate the residue and initiate the process of disintegration. The application of the cleaning solution sets in motion the chemical reaction necessary to weaken the bond between the soap scum and the glass surface, priming it for the subsequent cleaning actions.
Dwell Time
After applying the cleaning solution, allow it to dwell on the glass surface for a brief period. This dwell time is crucial as it grants the solution the opportunity to penetrate and loosen the soap scum, facilitating its eventual removal. The duration of the dwell time may vary based on the severity of the soap scum buildup, but allowing the solution to remain undisturbed for approximately 5-10 minutes is typically sufficient to initiate the desired chemical reactions.
With the cleaning solution expertly applied and given adequate dwell time, the stage is set for the next phase of the soap scum removal process. This meticulous application marks a pivotal juncture in the endeavor to restore the glass surface to its pristine state, laying the groundwork for the subsequent steps that will culminate in the complete eradication of soap scum and the revitalization of the glass's clarity and luster.
Step 3: Scrubbing and Removing the Soap Scum
Armed with a meticulously prepared glass surface and a potent cleaning solution, the next critical phase in the quest to banish soap scum entails the deliberate and methodical process of scrubbing and removing the stubborn residue. This pivotal step involves the strategic application of gentle yet effective techniques to dislodge and eliminate the accumulated soap scum, paving the way for the restoration of pristine, crystal-clear glass surfaces.
Read more: How To Remove Rust From Soap Dispenser
Gentle Agitation
Commence the scrubbing process by employing a soft microfiber cloth or sponge to gently agitate the glass surface. Begin with broad, circular motions, focusing on areas where the soap scum is most prevalent. The goal is to dislodge the residue without causing abrasion or damage to the glass. The combination of the cleaning solution and the gentle agitation works to weaken the bond between the soap scum and the glass, facilitating its gradual detachment from the surface.
Targeted Attention
Pay particular attention to areas where the soap scum has accumulated in thicker layers or has hardened over time. In such instances, a plastic scraper or squeegee can be utilized to delicately loosen the stubborn residue. Exercise caution and restraint to avoid applying excessive force, ensuring that the glass surface remains unscathed throughout the process. The strategic application of targeted attention to these trouble spots sets the stage for comprehensive soap scum removal, leaving behind a revitalized and gleaming glass surface.
Persistence and Precision
Approach the scrubbing process with a combination of persistence and precision, systematically addressing the entire glass surface to ensure uniform cleansing. Continuously assess the progress, focusing on areas that may require additional attention. The persistent and meticulous application of scrubbing techniques, coupled with the potent cleaning solution, gradually dislodges and lifts the soap scum, revealing the inherent brilliance of the glass beneath the accumulated residue.
Thorough Rinsing
Following the successful dislodgment of the soap scum, proceed to thoroughly rinse the glass surface with clean water. This rinsing action serves to remove any residual cleaning solution and dislodged soap scum, ensuring a pristine and streak-free finish. Utilize a clean, damp microfiber cloth to gently wipe the glass, eliminating any remaining traces of the cleaning solution and soap scum. The thorough rinsing and drying process culminates in the unveiling of impeccably clear and revitalized glass surfaces, free from the encumbrance of soap scum.
By meticulously executing the scrubbing and removal phase, you pave the way for the triumphant eradication of soap scum, unveiling the inherent brilliance and clarity of the glass surfaces. This transformative process rejuvenates the ambiance of your bathroom, elevating the aesthetic allure and fostering a renewed appreciation for the pristine, soap scum-free glass.
Read more: How To Get Soap Scum Off A Shower Curtain
Step 4: Rinsing and Drying the Glass
With the successful removal of soap scum from the glass surface, the final phase of the comprehensive cleaning process involves the critical steps of rinsing and drying. These essential actions are pivotal in ensuring the complete eradication of residual cleaning solution and dislodged soap scum, culminating in the revelation of impeccably clear and revitalized glass surfaces.
Thorough Rinsing
Commence the rinsing process by thoroughly wetting the glass surface with clean water. Utilize a handheld showerhead or a clean, dampened microfiber cloth to gently rinse the entire area, ensuring the removal of any lingering traces of the cleaning solution and dislodged soap scum. Pay particular attention to corners and crevices, where residues may accumulate, to achieve a comprehensive and uniform rinsing outcome.
Inspection and Touch-Up
Following the initial rinsing, conduct a meticulous inspection of the glass surface to identify any remaining traces of soap scum or cleaning solution. If any areas require additional attention, repeat the rinsing process to ensure the complete elimination of residues. This meticulous inspection and touch-up phase guarantee that the glass surface attains a pristine, streak-free finish, devoid of any remnants from the cleaning process.
Drying for Brilliance
Once the rinsing process is satisfactorily completed, proceed to dry the glass surface thoroughly. Utilize a clean, dry microfiber cloth to gently and methodically dry the glass, ensuring the removal of any residual moisture and achieving a brilliant, crystal-clear finish. Employing a systematic approach, focus on eliminating any water droplets or streaks, leaving the glass surface immaculately dry and gleaming.
Read more: How To Clean Soap Scum Off A Shower Tile
Final Assessment
Conduct a final assessment of the glass surface to confirm the successful completion of the rinsing and drying process. Inspect the glass from various angles and under different lighting conditions to ascertain its pristine clarity and luster. This comprehensive evaluation ensures that the glass surfaces are devoid of any residual soap scum, cleaning solution, or streaks, culminating in a visually stunning and revitalized outcome.
By meticulously executing the rinsing and drying phase, you elevate the glass surfaces to a state of unparalleled brilliance and clarity. This transformative process not only eradicates the remnants of soap scum and cleaning solution but also accentuates the inherent allure of the glass, fostering an environment of pristine elegance and visual splendor.
Additional Tips and Tricks
In addition to the systematic approach outlined for removing soap scum from glass surfaces, incorporating additional tips and tricks can further enhance the efficacy and longevity of the cleaning process. These supplementary insights and strategies serve to optimize the outcome, ensuring that the glass surfaces remain impeccably clear and resistant to the reformation of soap scum. Here are valuable tips and tricks to elevate your cleaning endeavors:
-
Regular Maintenance: Implement a consistent cleaning schedule to proactively address soap scum buildup. Regularly wiping down the glass surfaces with a squeegee or microfiber cloth after each use can prevent the accumulation of soap scum, minimizing the need for intensive cleaning sessions.
-
Preventative Coating: Consider applying a protective coating or sealant specifically designed for glass surfaces. These products create a barrier that repels soap scum and water, reducing the adhesion of residues and simplifying the cleaning process.
-
Hard Water Management: Address hard water issues by installing a water softening system or utilizing distilled water for cleaning. By mitigating the impact of hard water minerals, you can minimize the formation of soap scum on glass surfaces.
-
Natural Alternatives: Explore natural cleaning alternatives such as lemon juice or baking soda, which can effectively combat soap scum. These eco-friendly options provide a gentle yet potent approach to maintaining pristine glass surfaces.
-
Avoid Abrasive Tools: Refrain from using abrasive tools or harsh chemicals that can scratch or etch the glass surface. Opt for non-abrasive cleaning implements and mild, non-toxic cleaning solutions to preserve the integrity of the glass.
-
Drying Techniques: Emphasize thorough drying of the glass surfaces after each use or cleaning session. Utilize a squeegee or microfiber cloth to remove excess water, minimizing the opportunity for soap scum to form.
-
Ventilation Optimization: Enhance ventilation in the bathroom to reduce humidity and moisture, which can contribute to the formation of soap scum. Proper airflow aids in maintaining a drier environment, mitigating the conditions conducive to soap scum accumulation.
By integrating these additional tips and tricks into your cleaning regimen, you can fortify your efforts in combatting soap scum and preserving the pristine clarity of glass surfaces. These proactive measures and strategic approaches contribute to a sustained and elevated standard of cleanliness, ensuring that your glass surfaces exude enduring brilliance and allure.
Conclusion
In conclusion, the successful removal of soap scum from glass surfaces represents a triumph of diligence, strategy, and precision. By embarking on this transformative journey, you have not only revitalized the clarity and brilliance of your glass but also elevated the ambiance and allure of your bathroom environment. The meticulous execution of the cleaning process, from the preparatory stages to the final rinsing and drying, has culminated in the restoration of pristine, soap scum-free glass surfaces.
As you stand amidst the revitalized elegance of your bathroom, it is essential to recognize the enduring impact of this endeavor. The eradication of soap scum extends beyond mere cleanliness; it embodies a commitment to maintaining a space of unparalleled beauty and sophistication. The revitalized glass surfaces serve as a testament to your dedication to preserving the aesthetic allure of your living environment, fostering an atmosphere of refined elegance and visual splendor.
Furthermore, the integration of additional tips and tricks serves to fortify your cleaning regimen, empowering you to proactively combat soap scum and uphold the enduring brilliance of your glass surfaces. By embracing preventative measures, natural alternatives, and diligent maintenance, you establish a foundation for sustained clarity and elegance, ensuring that your glass surfaces remain resilient against the encroachment of soap scum.
As you reflect on the journey undertaken to banish soap scum, take pride in the transformation achieved and the enduring impact it bestows upon your living space. The revitalized glass surfaces stand as a testament to your unwavering commitment to excellence, elevating the aesthetic allure and fostering an environment of pristine elegance and sophistication.
In essence, the removal of soap scum from glass surfaces transcends the realm of mere cleaning; it embodies a dedication to preserving the inherent beauty and clarity of your living environment. With this triumph over soap scum, you have not only revitalized your glass surfaces but also elevated the ambiance and allure of your living space, fostering an environment of enduring elegance and visual splendor.
Frequently Asked Questions about How To Remove Soap Scum From Glass
Was this page helpful?
At Storables.com, we guarantee accurate and reliable information. Our content, validated by Expert Board Contributors, is crafted following stringent Editorial Policies. We're committed to providing you with well-researched, expert-backed insights for all your informational needs.


0 thoughts on “How To Remove Soap Scum From Glass”