Home>Furniture & Design>Outdoor Furniture>How Do You Build An Outdoor Kitchen
Outdoor Furniture
How Do You Build An Outdoor Kitchen
Modified: August 29, 2024
Discover how to build an outdoor kitchen with our expert tips and ideas for outdoor furniture, design, and more. Transform your outdoor space today!
(Many of the links in this article redirect to a specific reviewed product. Your purchase of these products through affiliate links helps to generate commission for Storables.com, at no extra cost. Learn more)
Introduction
Welcome to the world of outdoor living, where the joy of cooking mingles with the pleasure of nature. An outdoor kitchen is not just a culinary space; it's a hub for creating unforgettable memories with family and friends. Whether you're a seasoned grill master or a novice outdoor entertainer, building an outdoor kitchen can elevate your outdoor experience to new heights.
Imagine sizzling steaks, the aroma of freshly grilled vegetables, and the sound of laughter under the open sky. With careful planning and the right design, you can transform your backyard into a chef's paradise and a welcoming gathering spot. From selecting the perfect location to choosing the right appliances and materials, each step in the process is an opportunity to infuse your personality and style into this al fresco oasis.
In this guide, we'll explore the essential steps to help you bring your dream outdoor kitchen to life. Whether you're envisioning a sleek modern design or a cozy rustic retreat, we'll cover everything from the initial planning stages to the finishing touches. By the end of this journey, you'll be well-equipped to embark on this exciting project and create an outdoor kitchen that reflects your lifestyle and culinary aspirations. So, let's roll up our sleeves and dive into the art of building an outdoor kitchen.
Key Takeaways:
- Planning and designing your outdoor kitchen is crucial. Consider your needs, budget, climate, space, and seek inspiration to create a space that reflects your lifestyle and culinary aspirations.
- Choosing the right location, appliances, materials, and adding finishing touches are essential for a functional and visually appealing outdoor kitchen. Careful consideration ensures a harmonious blend of culinary creativity and outdoor leisure.
Read more: How Do You Build An Outdoor Fireplace
Step 1: Planning and Designing Your Outdoor Kitchen
Before you start building your outdoor kitchen, it’s crucial to lay a solid foundation through meticulous planning and thoughtful design. This initial phase sets the stage for a seamless and enjoyable outdoor cooking and dining experience. Here are the key considerations to guide you through this crucial step:
- Assess Your Needs and Lifestyle: Begin by assessing how you envision using your outdoor kitchen. Are you a barbecue enthusiast, a wood-fired pizza aficionado, or a cocktail connoisseur? Understanding your cooking and entertaining preferences will help you tailor the design to suit your lifestyle.
- Set a Realistic Budget: Determine a realistic budget for your outdoor kitchen project. This will influence the scale of the design, the choice of materials, and the selection of appliances. By establishing a clear budget from the outset, you can make informed decisions throughout the planning process.
- Consider the Local Climate: Take into account the climate of your region when planning your outdoor kitchen. If you experience extreme heat, cold, or precipitation, you’ll need to incorporate features that can withstand these conditions. Additionally, consider elements such as shade, wind direction, and the position of the sun to optimize comfort and functionality.
- Work with the Available Space: Evaluate the available space in your backyard and consider how it can best accommodate your outdoor kitchen. Whether you have a compact patio or a sprawling lawn, maximizing the use of space is essential. The layout should promote a smooth flow between cooking, dining, and relaxation areas.
- Seek Inspiration: Gather inspiration from various sources such as design magazines, online platforms, and outdoor living exhibitions. Explore different styles, materials, and layouts to spark your creativity and refine your vision for the outdoor kitchen.
By dedicating time to the planning and design phase, you’ll establish a clear direction for your outdoor kitchen project. This foundation will serve as a guiding light as you progress to the subsequent steps, ensuring that the end result aligns with your culinary passions and outdoor lifestyle.
Step 2: Choosing the Right Location
Once you’ve envisioned the layout and design of your outdoor kitchen, the next crucial step is choosing the perfect location within your outdoor space. The location not only impacts the functionality and accessibility of your kitchen but also plays a significant role in creating a harmonious outdoor environment. Here’s how to select the optimal location for your outdoor culinary haven:
- Proximity to the Indoor Kitchen: Consider the convenience of having your outdoor kitchen in close proximity to your indoor kitchen. This facilitates easy access to utensils, ingredients, and other essentials, streamlining the cooking process and enhancing the overall culinary experience.
- Integration with Outdoor Living Areas: Integrate the outdoor kitchen with existing outdoor living areas such as patios, decks, or poolside spaces. This seamless integration encourages interaction between guests and hosts, creating a cohesive and inviting outdoor entertainment zone.
- Embrace Natural Elements: Embrace natural elements such as trees, shrubbery, or scenic views when choosing the location for your outdoor kitchen. Capitalize on natural beauty and incorporate it into the backdrop of your culinary oasis, enhancing the overall ambiance and visual appeal.
- Consider Wind and Sun Exposure: Evaluate the prevailing wind direction and sun exposure in your outdoor space. Position your outdoor kitchen to minimize exposure to strong winds and maximize shade during peak sun hours, ensuring comfort for both cooks and guests.
- Evaluate Privacy and Noise Levels: Assess the level of privacy and noise in different areas of your outdoor space. Choose a location that offers a balance of privacy and connectivity with the surrounding environment, creating a tranquil yet sociable setting for outdoor dining and gatherings.
By carefully selecting the location for your outdoor kitchen, you can optimize functionality, aesthetics, and the overall outdoor living experience. This strategic placement sets the stage for a harmonious blend of culinary creativity and outdoor leisure, ensuring that your outdoor kitchen becomes a focal point of enjoyment and relaxation in your home.
Step 3: Selecting the Right Appliances and Materials
Choosing the appropriate appliances and materials is a pivotal aspect of building an outdoor kitchen. This step involves selecting durable and weather-resistant equipment and materials that not only complement your design but also withstand the outdoor elements. Here’s a comprehensive guide to help you make informed choices:
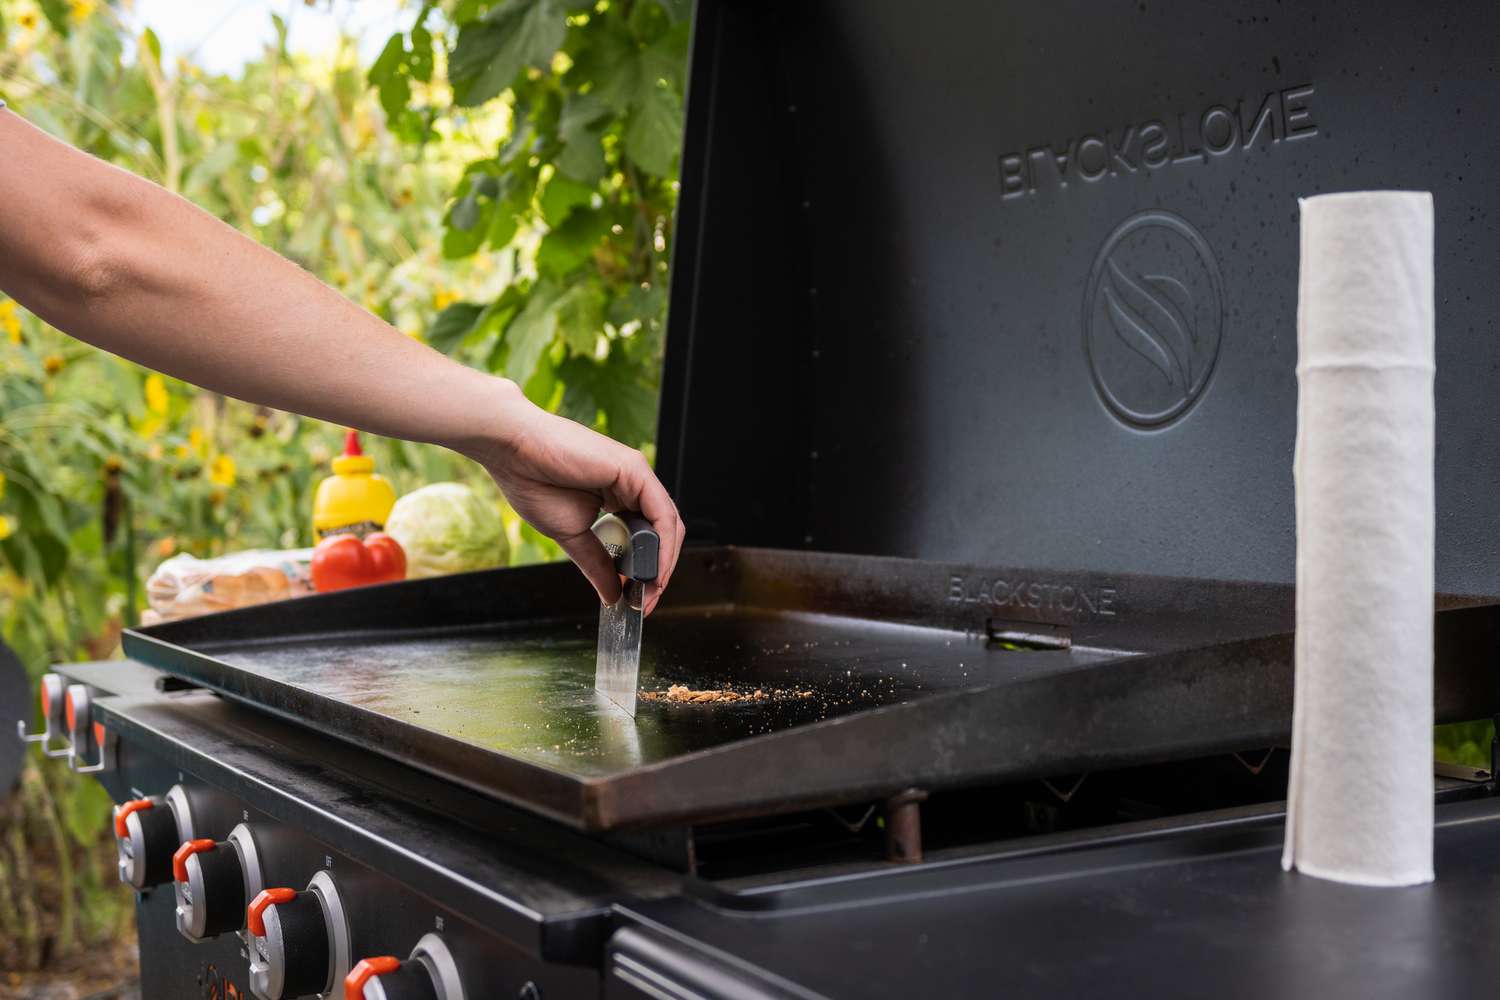
- Weather-Resistant Appliances: Opt for outdoor-rated appliances designed to withstand varying weather conditions. From grills and smokers to refrigerators and sinks, ensure that all appliances are built to endure exposure to heat, moisture, and temperature fluctuations.
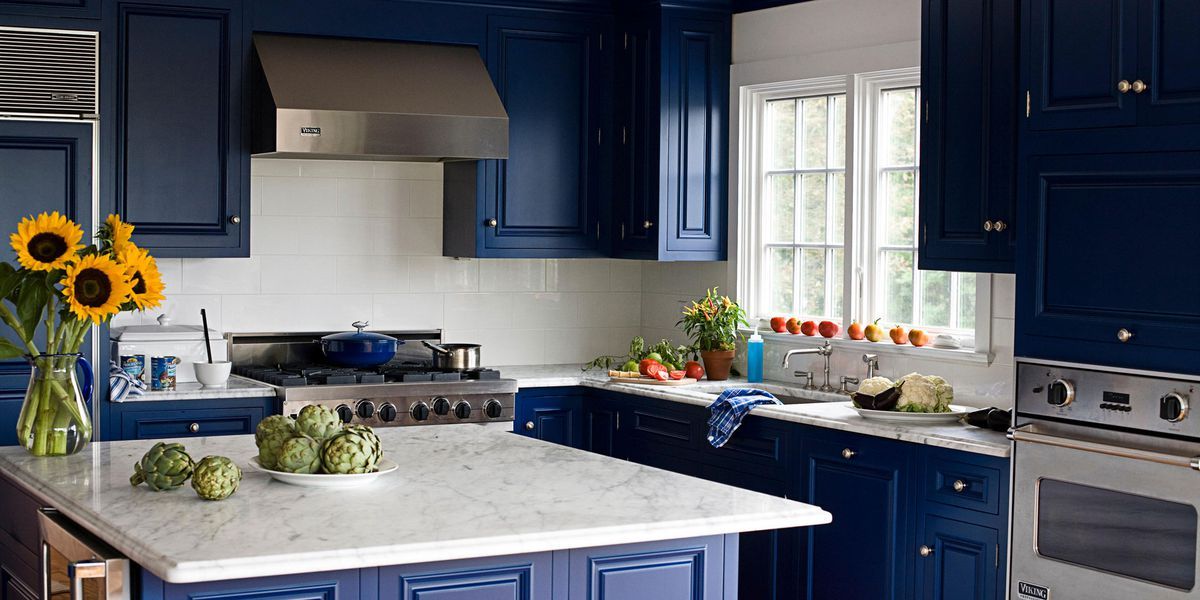
- Durable Countertop Materials: Select countertop materials that are both aesthetically pleasing and capable of withstanding outdoor exposure. Popular choices include granite, stainless steel, concrete, and natural stone, each offering a blend of durability, visual appeal, and ease of maintenance.
- Quality Cabinetry and Storage: Invest in high-quality cabinetry and storage solutions specifically engineered for outdoor use. Look for materials such as stainless steel, marine-grade polymer, or teak, which are resistant to moisture, pests, and UV rays, ensuring longevity and functionality.
- Outdoor-Friendly Flooring: Choose flooring materials that are slip-resistant and impervious to moisture, such as porcelain tile, natural stone, or composite decking. The flooring should be durable, easy to clean, and capable of withstanding outdoor foot traffic and exposure to the elements.
- Functional and Stylish Lighting: Incorporate a well-designed lighting scheme that combines functionality with aesthetic appeal. Utilize weather-resistant fixtures such as LED lights, sconces, and pendant lighting to create an inviting and safe environment for evening gatherings and culinary activities.
By carefully selecting weather-resistant appliances and durable materials, you can ensure that your outdoor kitchen is equipped to withstand the rigors of outdoor living while exuding style and functionality. This thoughtful selection process sets the stage for a resilient and visually captivating outdoor culinary space that will serve as the heart of your outdoor entertaining endeavors.
Step 4: Designing the Layout
The layout of your outdoor kitchen plays a pivotal role in creating a functional, efficient, and visually appealing culinary space. A well-considered layout ensures that the various elements of your outdoor kitchen harmonize seamlessly, promoting a smooth workflow and an enjoyable cooking experience. Here are key considerations for designing an effective layout:
- Zoning for Functionality: Divide the outdoor kitchen into zones based on functionality, such as cooking, prepping, serving, and dining. This zoning approach ensures that each area serves its purpose efficiently, allowing for a logical and organized workflow.
- Work Triangle Configuration: Embrace the concept of the kitchen work triangle, which connects the cooktop, sink, and refrigerator in a triangular layout. This design principle minimizes unnecessary movement and optimizes efficiency, creating a practical and ergonomic cooking environment.
- Integration of Appliances: Strategically position appliances to facilitate a seamless cooking process. Place the grill, cooktop, and other cooking appliances in close proximity to the prep and serving areas, ensuring a smooth transition from food preparation to presentation.
- Ample Counter and Storage Space: Ensure an adequate amount of counter space for food preparation and serving. Additionally, incorporate ample storage for utensils, cookware, and outdoor dining essentials, optimizing functionality and maintaining a clutter-free environment.
- Seating and Socializing Areas: Integrate seating and socializing areas into the layout to foster interaction and engagement. Whether it’s a bar counter, dining table, or cozy lounge area, create spaces that encourage guests to gather, converse, and partake in the outdoor culinary experience.
By thoughtfully designing the layout of your outdoor kitchen, you can create a cohesive and efficient space that enhances the joy of outdoor cooking and entertaining. This strategic approach ensures that every element of the outdoor kitchen contributes to a harmonious and enjoyable culinary experience, enriching the outdoor living lifestyle.
When building an outdoor kitchen, make sure to choose durable and weather-resistant materials for countertops and cabinets to withstand outdoor elements.
Read more: How Do You Build A Fence
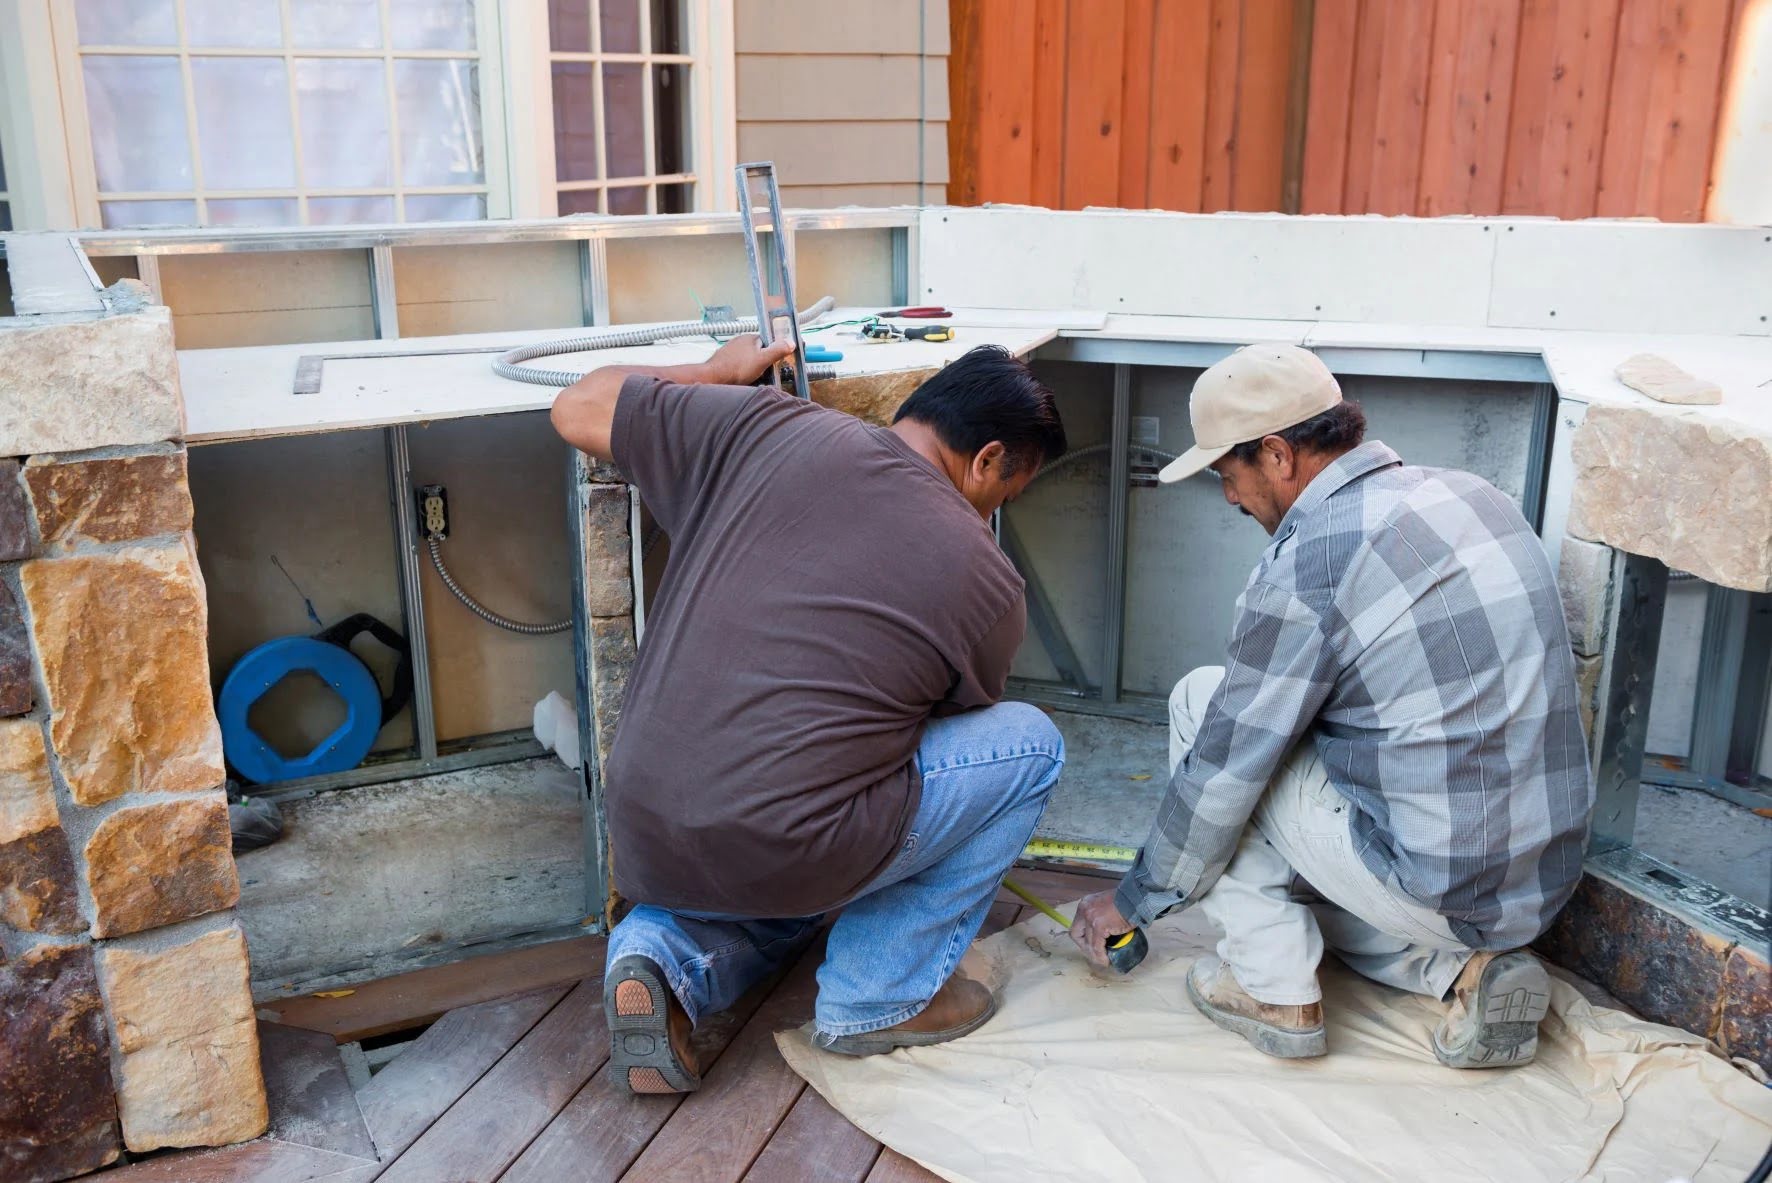
Step 5: Building the Structure
As you progress in the construction of your outdoor kitchen, the process of building the structure forms a critical phase that sets the foundation for the functional and aesthetic aspects of the space. From the foundation to the framework, each element contributes to the durability and visual appeal of your outdoor culinary oasis. Here’s a comprehensive guide to building the structure of your outdoor kitchen:
- Foundation and Flooring: Ensure a solid and level foundation for your outdoor kitchen, whether it’s a concrete slab, pavers, or a raised deck. The flooring should be durable, weather-resistant, and capable of supporting the weight of the kitchen structure and appliances.
- Framework and Supports: Construct a sturdy framework for the kitchen, utilizing materials such as steel, aluminum, or weather-treated wood. The framework provides the structural support for countertops, appliances, and overhead features, ensuring stability and longevity.
- Countertop Installation: Install the chosen countertop material with precision and care, ensuring a level surface that complements the design and accommodates the selected appliances and cooking fixtures.
- Integration of Utilities: Incorporate utility lines for gas, water, and electricity as per the requirements of your chosen appliances. Ensure that the installation complies with safety standards and local building codes, prioritizing functionality and user safety.
- Roof or Shade Structure: Consider adding a roof or shade structure to protect the outdoor kitchen from the elements. Options include pergolas, awnings, or solid roofs, providing shelter from sun, rain, and inclement weather, thus extending the utility and comfort of the space.
By meticulously executing the construction of the structure, you lay the groundwork for a resilient and visually striking outdoor kitchen. This phase not only ensures the structural integrity of the space but also paves the way for the integration of utilities and the installation of functional and aesthetic features, bringing your outdoor kitchen one step closer to realization.
Step 6: Installing Utilities
Installing utilities is a pivotal phase in the construction of your outdoor kitchen, as it empowers the space with essential amenities and functionality. From gas lines for grills to water lines for sinks, each utility contributes to the convenience and efficiency of the outdoor culinary environment. Here’s a comprehensive overview of installing utilities for your outdoor kitchen:
- Gas Lines for Cooking Appliances: If your outdoor kitchen includes a gas grill, cooktop, or pizza oven, professional installation of gas lines is essential. This ensures safe and reliable fuel supply to your cooking appliances, allowing you to unleash your culinary creativity with confidence.
- Water Lines for Sinks and Beverage Stations: Incorporate water lines for sinks, outdoor faucets, and beverage stations. This facilitates food preparation, dishwashing, and the convenience of having a water source for various culinary and beverage-related activities.
- Electrical Wiring for Lighting and Appliances: Engage a qualified electrician to install electrical wiring for lighting, refrigeration, and other electrical appliances. Adhere to safety standards and regulations to ensure a secure and functional electrical system for your outdoor kitchen.
- Consideration for Outdoor Heating and Cooling: Evaluate the potential need for outdoor heating or cooling elements, such as radiant heaters, ceiling fans, or misting systems. These features enhance comfort and extend the seasonal utility of your outdoor kitchen, allowing for year-round enjoyment.
- Integration of Smart Technology: Explore the integration of smart technology for outdoor kitchen utilities, such as programmable lighting, weather-resistant speakers, or automated irrigation systems for surrounding greenery. Smart technology enhances convenience and adds a modern touch to your outdoor culinary space.
By adeptly installing utilities, you equip your outdoor kitchen with the essential infrastructure to support a fully functional and versatile culinary environment. This phase not only enhances the practicality of the space but also sets the stage for a seamless and enjoyable outdoor cooking and dining experience, enriched by the convenience of modern amenities.
Step 7: Adding Finishing Touches
As you near the completion of your outdoor kitchen project, the addition of finishing touches brings personality, style, and functionality to the space. These final details elevate the ambiance and usability of your outdoor culinary oasis, transforming it into a captivating and inviting environment for cooking, dining, and entertaining. Here’s a comprehensive guide to adding the finishing touches to your outdoor kitchen:
- Outdoor-Friendly Decor and Accents: Infuse your outdoor kitchen with decorative elements and accents that complement the overall design. Weather-resistant artwork, potted plants, and outdoor rugs can add character and warmth to the space, creating a welcoming and visually appealing atmosphere.
- Comfortable and Stylish Seating: Select comfortable and stylish outdoor seating options for dining and relaxation. Whether it’s durable dining chairs, cushioned lounge furniture, or a cozy built-in bench, the seating should harmonize with the design while prioritizing comfort and durability.
- Enhanced Lighting and Ambiance: Integrate a well-considered lighting scheme that enhances safety, functionality, and ambiance. Incorporate task lighting for cooking areas, ambient lighting for dining and socializing spaces, and accent lighting to highlight architectural features and landscaping.
- Outdoor Kitchen Accessories: Invest in high-quality outdoor kitchen accessories such as utensil caddies, grilling tools, and serving platters. These functional and stylish accessories not only enhance the efficiency of the outdoor kitchen but also contribute to the overall aesthetic and organization of the space.
- Greenery and Landscaping: Integrate greenery and landscaping elements around the outdoor kitchen to soften the hardscape and create a seamless connection with nature. Consider planters, vertical gardens, or a herb garden, adding a touch of freshness and natural beauty to the culinary environment.
By adding these finishing touches, you infuse your outdoor kitchen with a sense of completeness, comfort, and style. These final details transform the space into a captivating and functional outdoor retreat, where culinary creativity converges with the pleasures of outdoor living, creating a truly immersive and memorable experience for you and your guests.
Conclusion
Congratulations on embarking on the journey of building your outdoor kitchen! As you’ve discovered through this comprehensive guide, the process of creating an outdoor culinary oasis is a multifaceted endeavor that blends creativity, practicality, and the joy of outdoor living. From the initial planning and design stages to the thoughtful selection of appliances, materials, and finishing touches, each step contributes to the realization of your vision for the perfect outdoor kitchen.
By carefully considering factors such as functionality, aesthetics, and integration with the surrounding environment, you’ve laid the groundwork for a space that not only serves as a hub for culinary creativity but also fosters memorable experiences and connections with nature and loved ones. Your outdoor kitchen is more than just a cooking space; it’s a stage for laughter, conversation, and the creation of lasting memories under the open sky.
As you move forward with the construction and transformation of your outdoor space, remember that every decision you make is an opportunity to infuse your personality and style into the design. Whether you’re drawn to sleek modern designs, rustic charm, or a fusion of styles, your outdoor kitchen is a reflection of your unique tastes and aspirations for outdoor living.
As the finishing touches are added and the space comes to life, envision the countless gatherings, culinary delights, and moments of relaxation that await in your outdoor kitchen. It’s a place where the sizzle of the grill, the aroma of delicious meals, and the warmth of shared experiences converge to create an environment that truly embodies the art of outdoor living.
So, as you take the final steps in bringing your outdoor kitchen to fruition, savor the anticipation of the delightful experiences that lie ahead. Whether it’s a casual family barbecue, an intimate gathering with friends, or a serene moment of solitude in your outdoor sanctuary, your outdoor kitchen is poised to become a cherished extension of your home and a testament to the beauty of al fresco living.
Frequently Asked Questions about How Do You Build An Outdoor Kitchen
Was this page helpful?
At Storables.com, we guarantee accurate and reliable information. Our content, validated by Expert Board Contributors, is crafted following stringent Editorial Policies. We're committed to providing you with well-researched, expert-backed insights for all your informational needs.


0 thoughts on “How Do You Build An Outdoor Kitchen”