Home>Furniture & Design>Outdoor Furniture>How To Build An Outdoor Shower
Outdoor Furniture
How To Build An Outdoor Shower
Modified: October 31, 2024
Learn how to build an outdoor shower with our expert tips and advice on outdoor furniture, design, and installation. Create a relaxing oasis in your backyard.
(Many of the links in this article redirect to a specific reviewed product. Your purchase of these products through affiliate links helps to generate commission for Storables.com, at no extra cost. Learn more)
Introduction
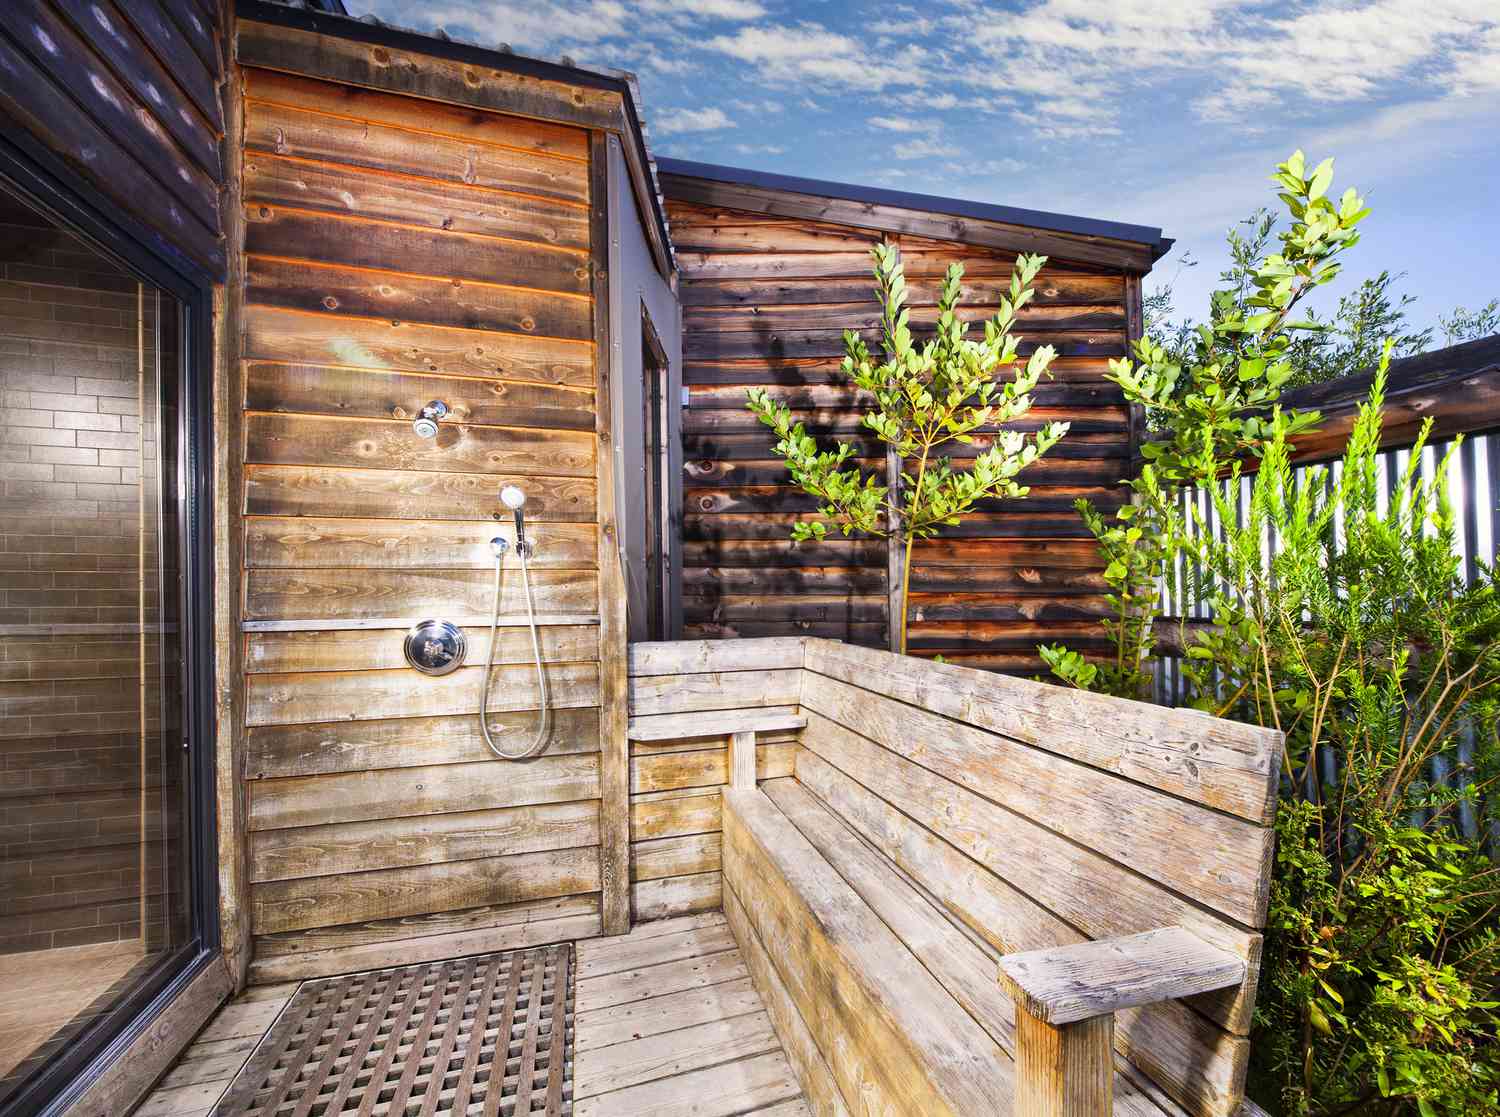
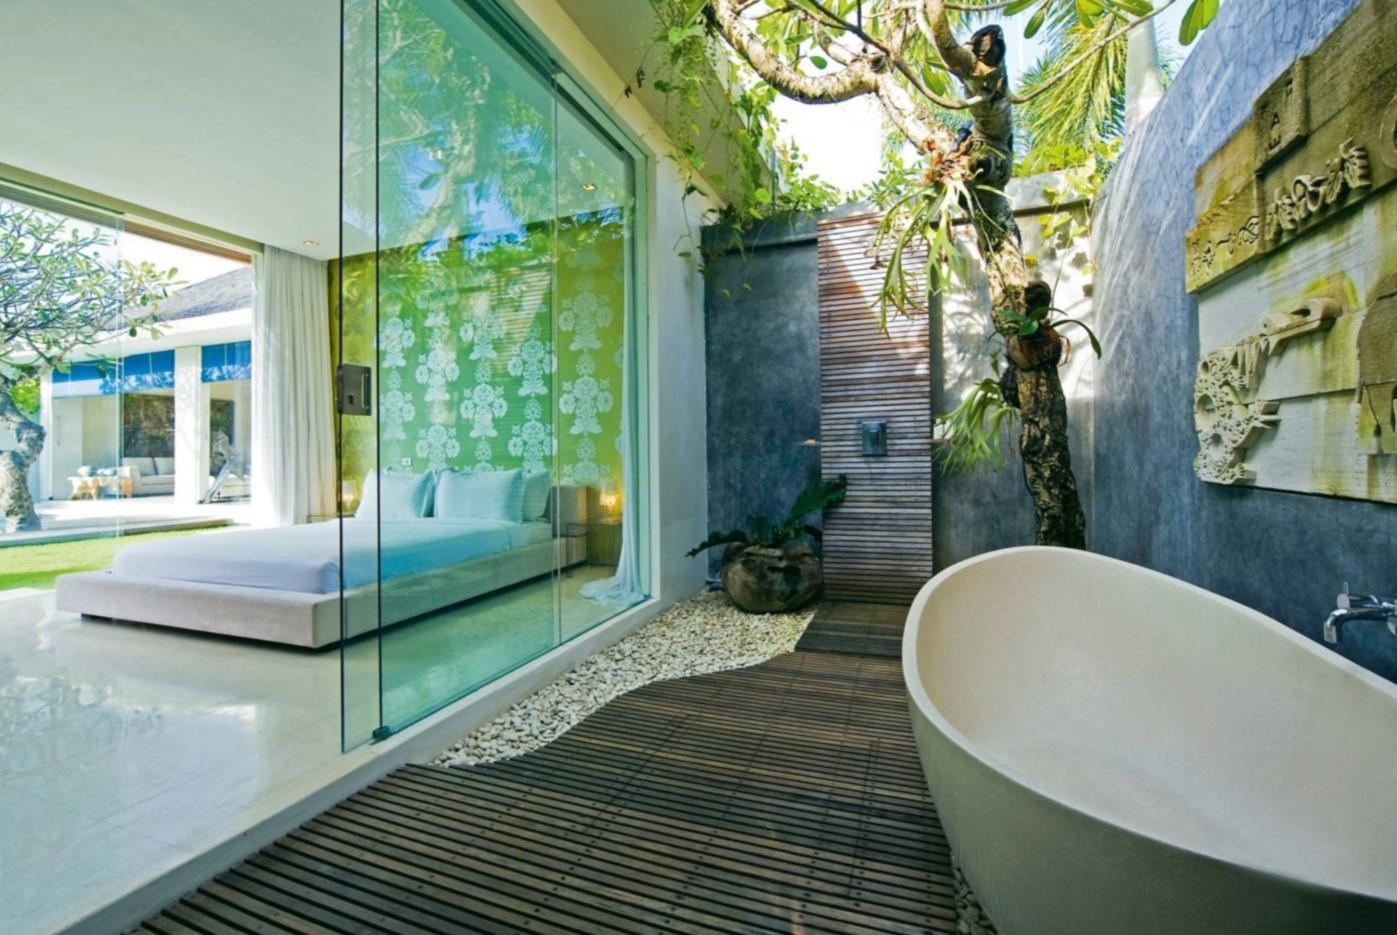
When the sun is shining, and the weather is warm, there's nothing quite like the luxury of an outdoor shower. Whether it's to rinse off after a swim, clean up after a day of gardening, or simply enjoy the fresh air while getting clean, an outdoor shower can be a delightful addition to any backyard or garden space.
In this comprehensive guide, we'll walk you through the step-by-step process of building your own outdoor shower. From selecting the perfect location to gathering materials and tools, constructing the shower base and walls, installing the plumbing, and adding those all-important finishing touches, we've got you covered. By the end of this journey, you'll be equipped with the knowledge and confidence to create a beautiful and functional outdoor shower that suits your style and needs.
So, roll up your sleeves, grab your tools, and get ready to embark on this rewarding DIY project. Whether you're a seasoned DIY enthusiast or a novice looking for a new challenge, building an outdoor shower is a gratifying endeavor that promises to elevate your outdoor living experience. Let's dive in and bring your outdoor shower dreams to life!
Key Takeaways:
- Building an outdoor shower involves careful planning, sturdy construction, and attention to detail. From choosing the right location to adding finishing touches, creating your own outdoor oasis is a rewarding and fulfilling DIY project.
- An outdoor shower not only adds practicality to your outdoor space but also embodies relaxation and rejuvenation. It’s a symbol of creativity and passion, offering a refreshing luxury and a gathering place for cherished memories.
Read more: How To Build Shower Floor
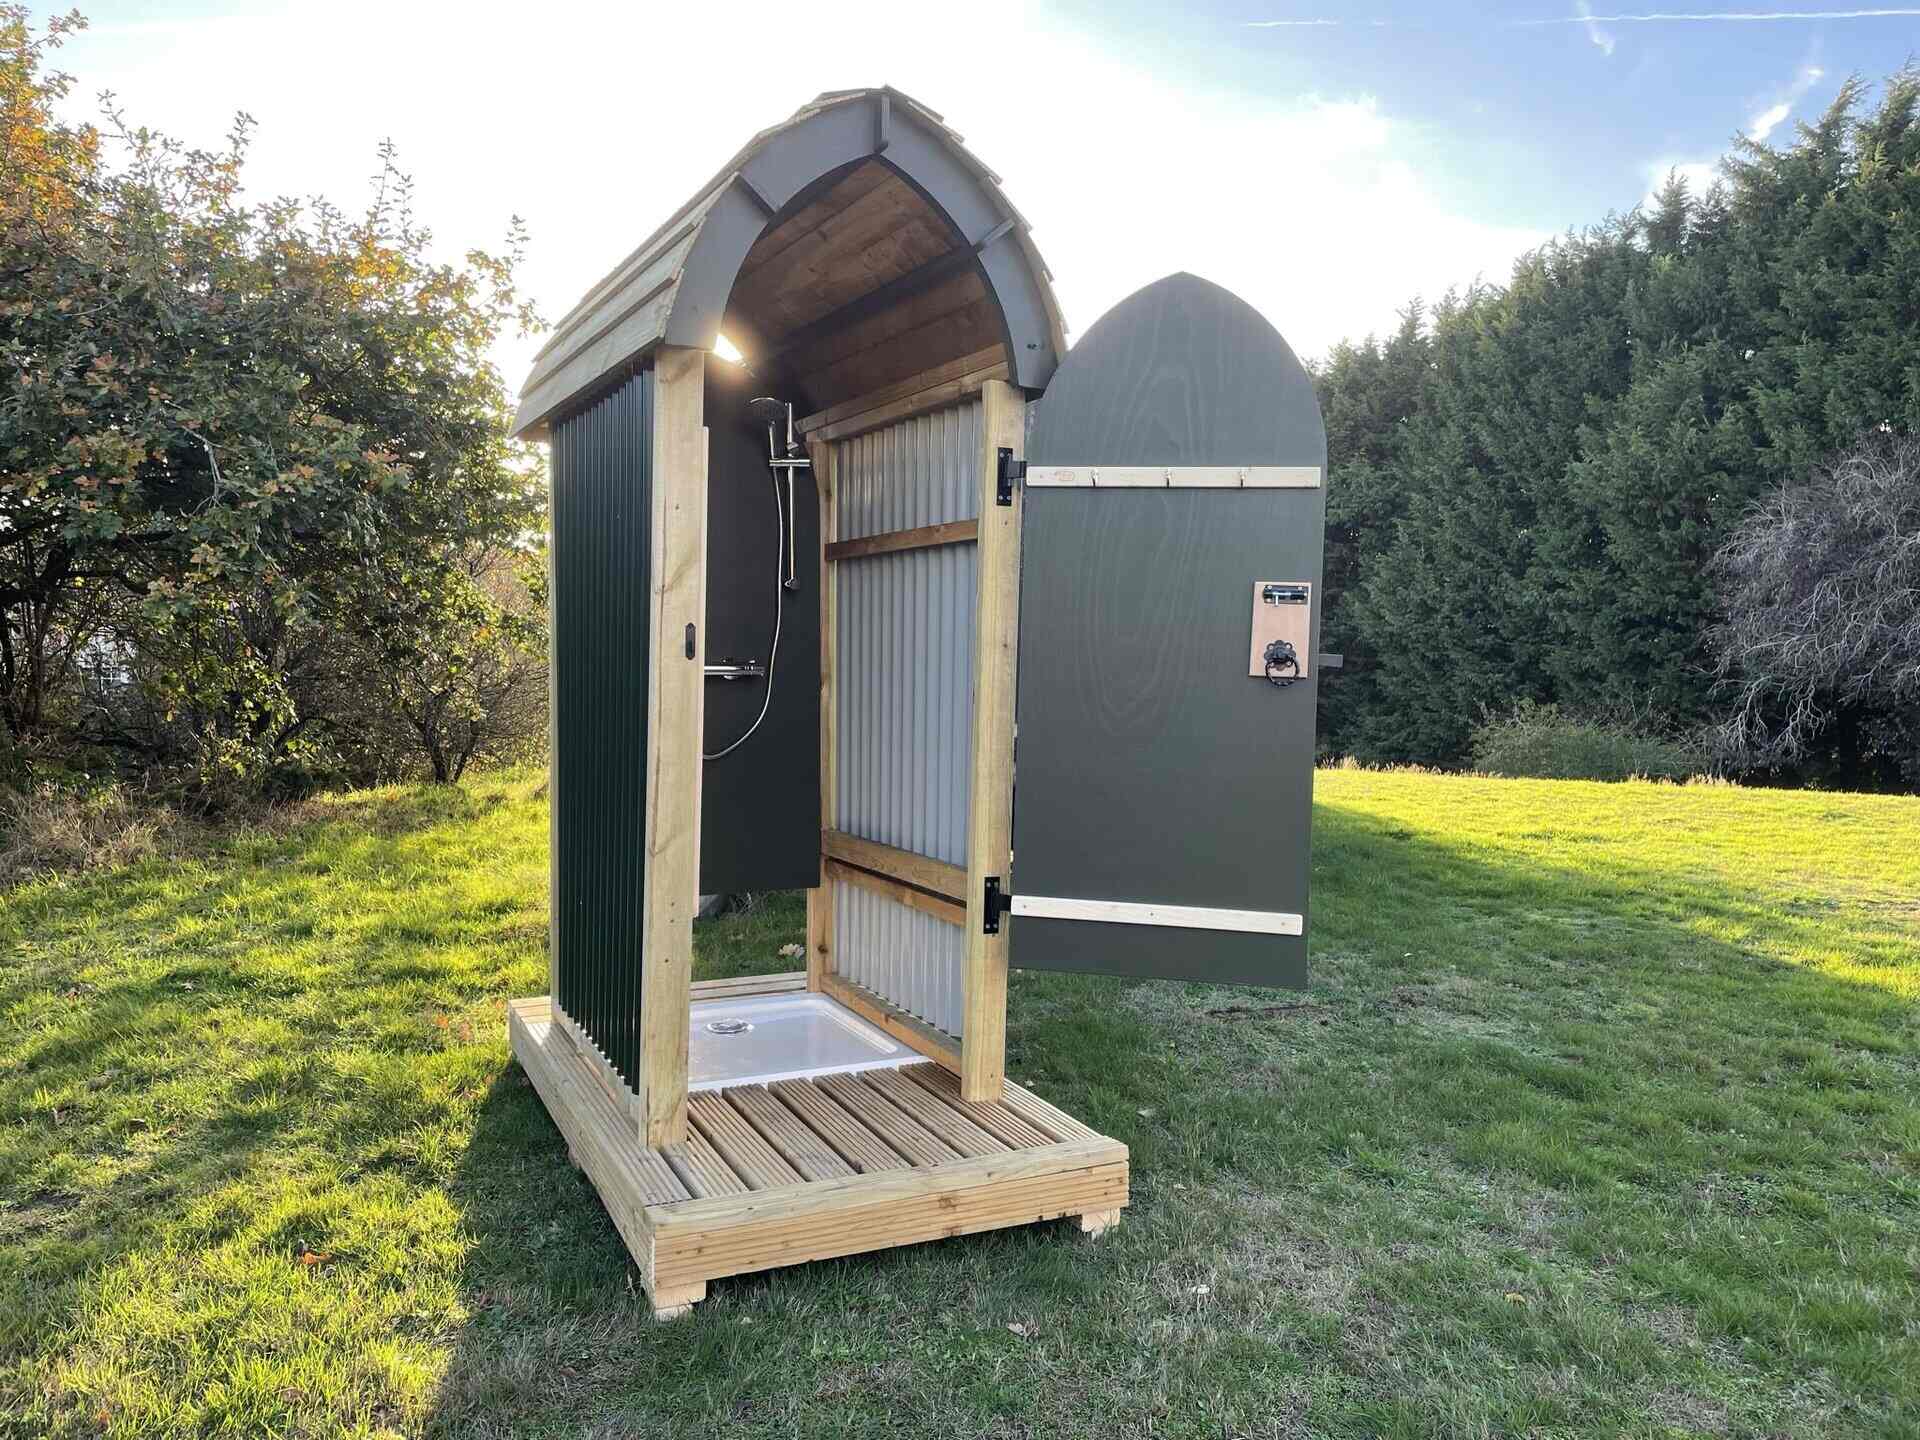
Choosing the Right Location
Before you start building your outdoor shower, it’s crucial to carefully consider the location. The ideal spot should offer a balance of privacy, convenience, and accessibility to water and drainage. Here are some key factors to keep in mind when selecting the perfect location for your outdoor shower:
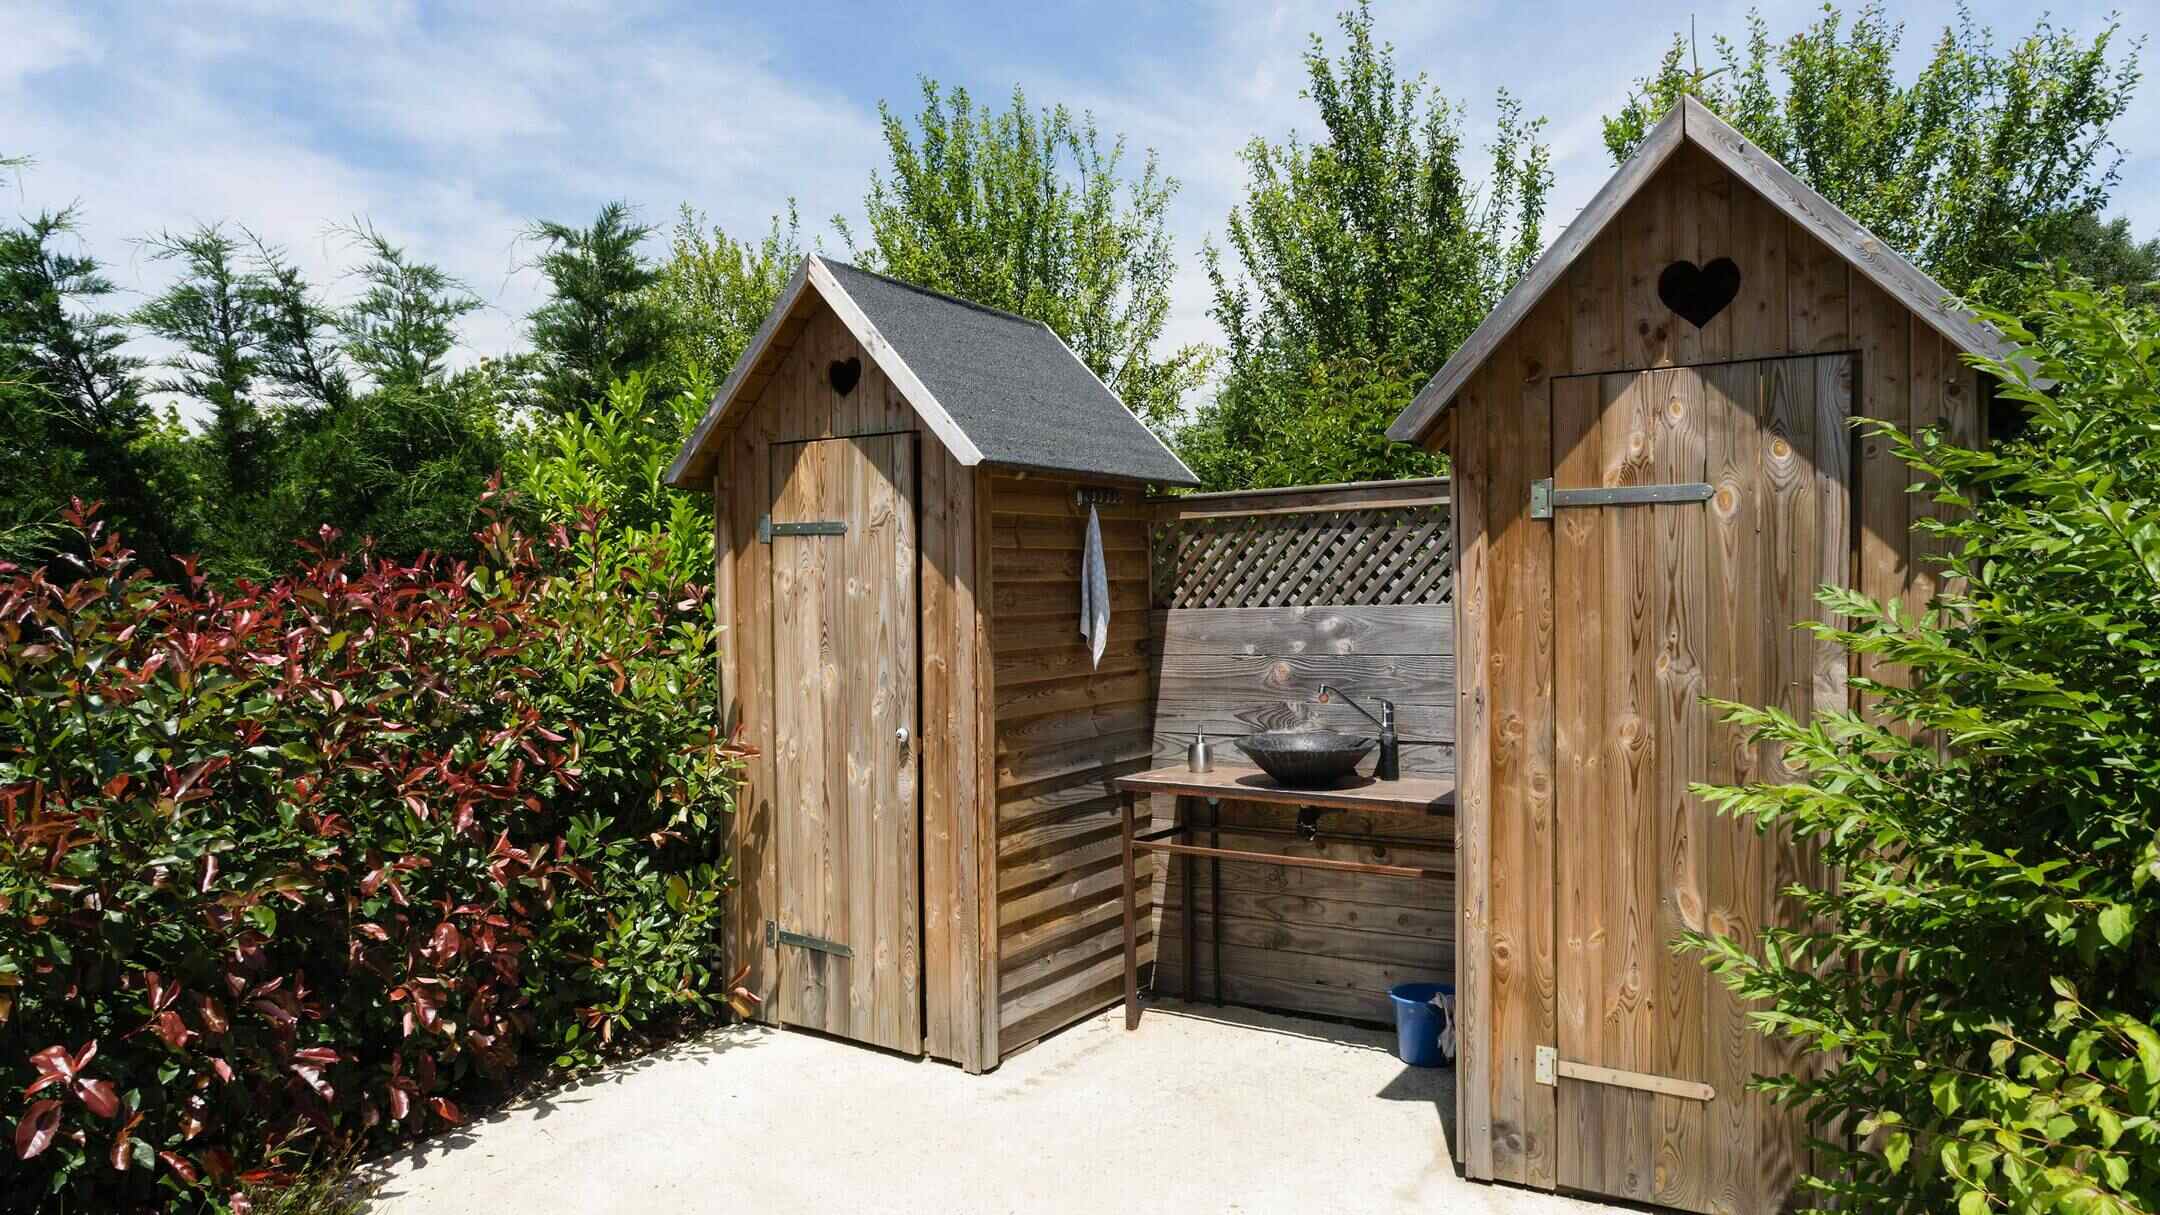
- Privacy: Look for an area that provides a sense of seclusion. Consider surrounding vegetation, fences, or the layout of your property to ensure that the shower offers a private and tranquil experience.
- Accessibility: Choose a location that is easily accessible from your house, pool, or garden. Convenience plays a significant role in the usability of your outdoor shower.
- Drainage: It’s essential to position the shower in an area where water can drain effectively without causing pooling or flooding. Consider the slope of the ground and the proximity to existing drainage systems.
- Sun and Wind Exposure: Think about the sun and wind patterns in your outdoor space. While some may prefer a sunny spot, others might opt for a more shaded area to avoid excessive heat or sunburn.
- Aesthetics: Take into account the overall aesthetics of your outdoor area. Your shower should complement the existing landscape and architecture, adding to the visual appeal of your outdoor space.
By carefully evaluating these factors, you can pinpoint the optimal location for your outdoor shower. Once you’ve identified the perfect spot, you’ll be ready to move on to the next steps in the exciting journey of creating your own outdoor oasis.
Gathering Materials and Tools
With the location chosen, it’s time to gather the necessary materials and tools to bring your outdoor shower to life. Here’s a comprehensive list to help you prepare for the construction process:
Materials:
- Pressure-Treated Lumber or Cedar: Select durable, weather-resistant wood for the frame and walls of the shower.
- Galvanized Screws and Nails: Choose corrosion-resistant fasteners to ensure the longevity of your outdoor shower.
- Shower Floor Material: Options include natural stone, concrete, or wooden slats. Consider the aesthetics, comfort, and drainage properties of each material.
- Shower Wall Material: Depending on your design preference, you can opt for wooden panels, bamboo screens, or weather-resistant outdoor fabric.
- Plumbing Fixtures: Purchase a quality outdoor showerhead, valves, and necessary piping components designed for outdoor use.
- Waterproofing and Sealant: Ensure the longevity of your outdoor shower by investing in high-quality waterproofing materials and sealants.
- Decorative Finishes: Consider adding decorative elements such as hooks for towels, a shelf for toiletries, or a mirror to enhance functionality and aesthetics.
Tools:
- Power Drill and Bits: Essential for drilling pilot holes and driving screws.
- Saw: Depending on your chosen materials, you may need a circular saw, miter saw, or hand saw for cutting lumber and other components.
- Level: Ensure the accuracy of your construction by using a reliable level to keep the structure plumb and level.
- Adjustable Wrench and Pliers: These tools will come in handy during the installation of plumbing fixtures.
- Tape Measure: Precise measurements are crucial in ensuring a well-constructed and functional outdoor shower.
- Work Gloves and Safety Glasses: Prioritize safety by wearing appropriate protective gear during construction.
By gathering these materials and tools, you’ll be well-prepared to embark on the construction of your outdoor shower. With careful planning and the right resources at your disposal, you’re one step closer to enjoying the refreshing luxury of an outdoor shower in your own backyard.
Read more: How To Drain Outdoor Shower
Building the Shower Base
Creating a solid and well-designed shower base is essential for the functionality and longevity of your outdoor shower. Follow these steps to build a sturdy and reliable base:
- Prepare the Foundation: Clear the chosen area and ensure a level surface for the shower base. If necessary, use a shovel to remove any debris and create a flat foundation.
- Frame the Base: Using pressure-treated lumber or cedar, construct a frame for the shower base according to your desired dimensions. Secure the frame in place, ensuring it is level and stable.
- Install the Drainage: Position a drain in the center of the shower base and connect it to the existing drainage system. Ensure proper slope for water drainage and use gravel or sand to create a stable base for the drain.
- Add the Flooring Material: Depending on your preference, install the chosen flooring material within the framed base. Whether it’s natural stone, concrete, or wooden slats, ensure a secure and level installation.
- Waterproofing: Apply a high-quality waterproofing membrane to the shower base and surrounding areas to prevent water damage and ensure a watertight seal.
By meticulously following these steps, you’ll establish a durable and well-constructed shower base that forms the foundation for the rest of your outdoor shower. With the base in place, you’re ready to move on to the exciting phase of constructing the shower walls.
Constructing the Shower Walls
Building the shower walls is a pivotal stage in the construction of your outdoor shower. The walls not only provide privacy and enclosure but also contribute to the overall aesthetic appeal. Here’s a step-by-step guide to help you construct sturdy and stylish shower walls:
- Choose Your Wall Material: Select the material for your shower walls based on your design preference and the durability required for outdoor use. Options include weather-resistant wood, bamboo screens, or outdoor fabric designed for privacy and weather protection.
- Frame the Walls: Using pressure-treated lumber or cedar, frame the walls according to the desired height and dimensions. Ensure the frames are securely anchored to the shower base and are plumb and level.
- Install the Wall Material: Affix the chosen wall material to the frames, ensuring a secure and stable attachment. Whether you opt for wooden panels, bamboo screens, or outdoor fabric, the installation should provide privacy and protection from the elements.
- Consider Ventilation: Incorporate ventilation options such as louvered panels or strategically placed gaps to promote air circulation and prevent moisture buildup within the shower enclosure.
- Waterproofing: Apply a weatherproof sealant to the exterior of the walls to enhance their resilience against the elements. This step is crucial in safeguarding the walls from moisture and extending their lifespan.
By following these steps, you’ll create robust and visually appealing shower walls that enhance the functionality and allure of your outdoor shower. With the walls in place, your outdoor shower will begin to take shape, bringing you one step closer to enjoying the ultimate outdoor oasis.
Consider using a solar shower bag to heat the water for your outdoor shower. This eco-friendly option uses the sun’s energy to warm up the water, saving you money and reducing your environmental impact.
Installing the Plumbing
Proper installation of the plumbing components is integral to the functionality and convenience of your outdoor shower. Whether you opt for a basic cold-water shower or a more elaborate setup with hot and cold water options, the following steps will guide you through the plumbing installation process:
- Locate the Water Source: Determine the nearest water source on your property, whether it’s a hose spigot, an existing outdoor faucet, or a dedicated water line.
- Plan the Plumbing Layout: Design the layout for the plumbing, considering the positioning of the showerhead, valves, and any additional features such as a hand-held sprayer or foot wash.
- Connect the Water Supply: If utilizing an existing water line, connect the necessary piping to the source, ensuring a secure and leak-free connection. For added convenience and versatility, consider installing a diverter valve to switch between the outdoor shower and other water outlets.
- Install the Showerhead and Valves: Mount the outdoor showerhead and valves according to the planned layout. Use thread seal tape to secure the connections and prevent leaks.
- Test the System: Turn on the water supply and test the functionality of the showerhead and valves. Check for any leaks or irregularities and make adjustments as needed.
- Consider Hot Water Options: If desired, explore options for incorporating hot water into your outdoor shower. This may involve extending an existing hot water line or installing a dedicated tankless water heater for the outdoor shower.
By meticulously following these steps and ensuring the integrity of the plumbing system, you’ll establish a reliable and efficient water supply for your outdoor shower. With the plumbing in place, you’re one step closer to experiencing the refreshing comfort of an outdoor shower right in your own backyard.
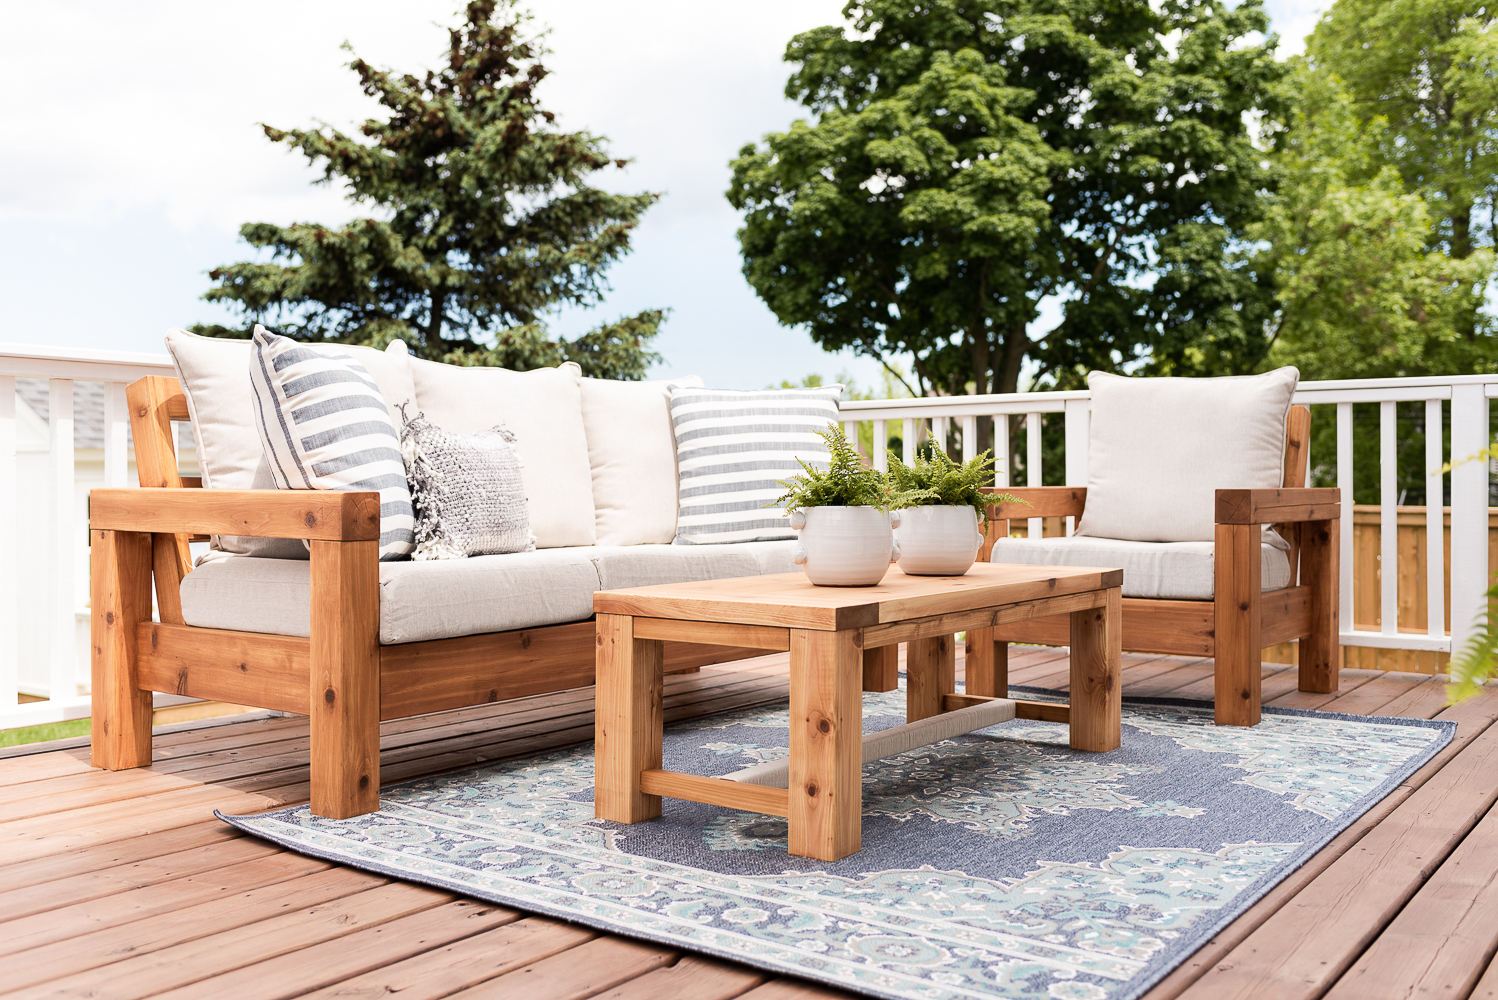
Adding Finishing Touches
As you near the completion of your outdoor shower project, it’s time to focus on the finishing touches that will elevate both the functionality and aesthetics of your creation. Here are the essential steps to add those final details that will make your outdoor shower truly shine:
- Accessorize for Convenience: Incorporate hooks or racks for hanging towels, robes, and bathing essentials. Consider adding a shelf or caddy to hold soaps, shampoos, and other shower necessities.
- Enhance Comfort: If space allows, consider placing a small bench or stool within the shower enclosure, providing a convenient spot for seating or placing personal items.
- Lighting: Install outdoor lighting near the shower area to ensure visibility and safety, especially for evening or nighttime use. Choose fixtures that are designed to withstand outdoor conditions.
- Greenery and Décor: Introduce potted plants, climbing vines, or other greenery to enhance the natural ambiance of the outdoor shower space. Additionally, decorative elements such as waterproof artwork or mirrors can add personality to the area.
- Privacy Screens: If desired, consider installing additional privacy screens or curtains around the shower area to offer further seclusion and create a spa-like atmosphere.
- Maintenance Considerations: Implement a regular maintenance routine to keep your outdoor shower in top condition. This may include periodic cleaning, sealing or staining wooden components, and inspecting plumbing connections for any signs of wear or damage.
By attending to these finishing touches, you’ll transform your outdoor shower into a functional, inviting, and visually appealing space that elevates your outdoor living experience. With careful attention to detail, your outdoor shower will not only serve as a practical amenity but also become a captivating focal point within your outdoor oasis.
Read more: How To Install An Outdoor Shower
Conclusion
Congratulations on successfully completing the journey of building your own outdoor shower! From selecting the perfect location to gathering materials, constructing the base and walls, installing plumbing, and adding those all-important finishing touches, you’ve embarked on a rewarding and fulfilling DIY project that promises to enhance your outdoor living space.
By creating an outdoor shower, you’ve not only added a practical and refreshing amenity to your property but also crafted a space that embodies relaxation, rejuvenation, and the joy of outdoor living. Whether it’s a quick rinse after a swim, a refreshing cooldown on a hot day, or a tranquil retreat for a moment of solitude, your outdoor shower stands as a testament to your creativity and craftsmanship.
As you revel in the pleasures of your outdoor shower, remember to cherish the moments of tranquility and connection with nature that it offers. Embrace the simplicity of outdoor living and the beauty of the natural world as you enjoy the refreshing luxury of your own outdoor oasis.
May your outdoor shower serve as a gathering place for cherished memories, a sanctuary for relaxation, and a testament to the joys of bringing your DIY dreams to life. With each use, may it remind you of the satisfaction that comes from creating something beautiful and functional with your own hands.
As you continue to explore the possibilities of outdoor living, may your outdoor shower stand as a symbol of your ingenuity and passion for turning outdoor spaces into havens of comfort and joy.
Frequently Asked Questions about How To Build An Outdoor Shower
Was this page helpful?
At Storables.com, we guarantee accurate and reliable information. Our content, validated by Expert Board Contributors, is crafted following stringent Editorial Policies. We're committed to providing you with well-researched, expert-backed insights for all your informational needs.


0 thoughts on “How To Build An Outdoor Shower”