Home>Furniture & Design>Outdoor Furniture>How To Repair Wicker Outdoor Furniture

Outdoor Furniture
How To Repair Wicker Outdoor Furniture
Modified: February 17, 2024
Learn how to easily repair your wicker outdoor furniture with our expert tips and tricks. Keep your outdoor furniture looking great and lasting longer. Ideal for outdoor-furniture-furniture-and-design enthusiasts.
(Many of the links in this article redirect to a specific reviewed product. Your purchase of these products through affiliate links helps to generate commission for Storables.com, at no extra cost. Learn more)
Introduction
Welcome to the world of outdoor furniture repair! Wicker furniture is a timeless and elegant addition to any outdoor space, offering both comfort and style. However, exposure to the elements and regular use can lead to wear and tear over time. Fear not, as this comprehensive guide will equip you with the knowledge and skills to breathe new life into your beloved wicker outdoor furniture.
Whether your wicker furniture has loose strands, broken sections, or simply needs a fresh coat of paint, this article will walk you through the step-by-step process of restoring it to its former glory. From assessing the damage to gathering the necessary materials and executing the repairs, we've got you covered.
By the end of this guide, you'll not only have the satisfaction of revitalizing your outdoor oasis but also the confidence to tackle future repair and maintenance tasks. So, roll up your sleeves, gather your tools, and let's dive into the art of repairing wicker outdoor furniture!
Key Takeaways:
- Revive your wicker outdoor furniture by assessing damage, gathering materials, and repairing loose strands and structural damage. Refinish and maintain to enjoy timeless elegance in your outdoor space.
- With patience and attention to detail, you can restore your wicker outdoor furniture to its former glory. Regular maintenance will ensure its enduring beauty and functionality for years to come.
Read more: How To Paint Wicker Outdoor Furniture
Assessing the Damage
Before embarking on any repair project, it’s crucial to assess the extent of the damage to your wicker outdoor furniture. Start by closely inspecting the entire piece, paying special attention to areas that are most susceptible to wear and tear, such as the arms, legs, and seat.
Look for loose or broken strands of wicker, signs of structural damage, and any areas that may require refinishing. Take note of the specific areas that need attention, as this will guide your repair process.
Additionally, consider the overall condition of the furniture. Is it simply in need of a few touch-ups, or does it require more extensive restoration? Understanding the scope of the damage will help you determine the time and resources needed to complete the repairs.
Assessing the damage also involves evaluating the type of wicker used in your furniture. Whether it’s natural rattan, synthetic resin, or bamboo, identifying the material will inform your approach to the repairs and refinishing.
Lastly, consider the environmental factors that may have contributed to the damage. Exposure to sunlight, humidity, and temperature fluctuations can all impact the condition of wicker furniture. By understanding these influences, you can take preventative measures to prolong the lifespan of your repaired furniture.
By thoroughly assessing the damage, you’ll be equipped with a clear understanding of the work that lies ahead, allowing you to plan and execute the necessary repairs with confidence.
Gathering the Necessary Materials
Before diving into the repair process, it’s essential to gather the right materials and tools to ensure a successful restoration of your wicker outdoor furniture. Here’s a comprehensive list of items you may need:
- Replacement Wicker Strands: If your furniture has loose or broken wicker strands, you’ll need to acquire matching replacement strands. These can often be found at craft stores or specialized wicker repair shops.
- Scissors or Clippers: For cutting and trimming the replacement wicker strands to the appropriate length.
- Glue or Adhesive: High-quality wood glue or specialized wicker adhesive will be necessary for securing loose strands and attaching replacement wicker.
- Sandpaper: To smooth out rough edges and prepare the surface for refinishing.
- Paint or Stain: If your furniture requires refinishing, choose a paint or stain that is suitable for outdoor use and complements the existing color scheme.
- Protective Finish: A clear protective finish, such as polyurethane, will help safeguard the newly refinished surfaces from the elements.
- Brushes and Rollers: High-quality brushes and rollers designed for outdoor use will ensure a smooth and even application of paint, stain, and protective finish.
- Protective Gear: Gloves, safety goggles, and a mask will help protect you from any fumes or particles generated during the repair and refinishing process.
- Cleaners and Sealants: Depending on the material and condition of your wicker furniture, you may need specialized cleaners and sealants to prepare the surface for refinishing.
- Repair Tools: Depending on the specific damage, you may require additional tools such as clamps, screws, or bracing materials for structural repairs.
By ensuring you have all the necessary materials and tools on hand, you’ll be well-prepared to tackle the repair and refinishing process efficiently and effectively. With these essentials at your disposal, you can proceed with confidence, knowing that you have everything you need to breathe new life into your wicker outdoor furniture.
Repairing Loose or Broken Strands
Loose or broken wicker strands are a common issue with wicker furniture, but fear not – repairing them is a manageable task that can significantly extend the lifespan of your beloved pieces. Here’s a step-by-step guide to addressing this common problem:
- Assess the Damage: Identify the loose or broken wicker strands that require attention. Take note of any specific patterns or weaves that need to be replicated with replacement strands.
- Prepare the Area: Clean the affected area to remove any dust, debris, or old adhesive. This will ensure a clean and secure bond for the repair.
- Cut Replacement Strands: Measure and cut replacement wicker strands to match the length and thickness of the existing strands. It’s essential to ensure a precise match to maintain the uniform appearance of the weave.
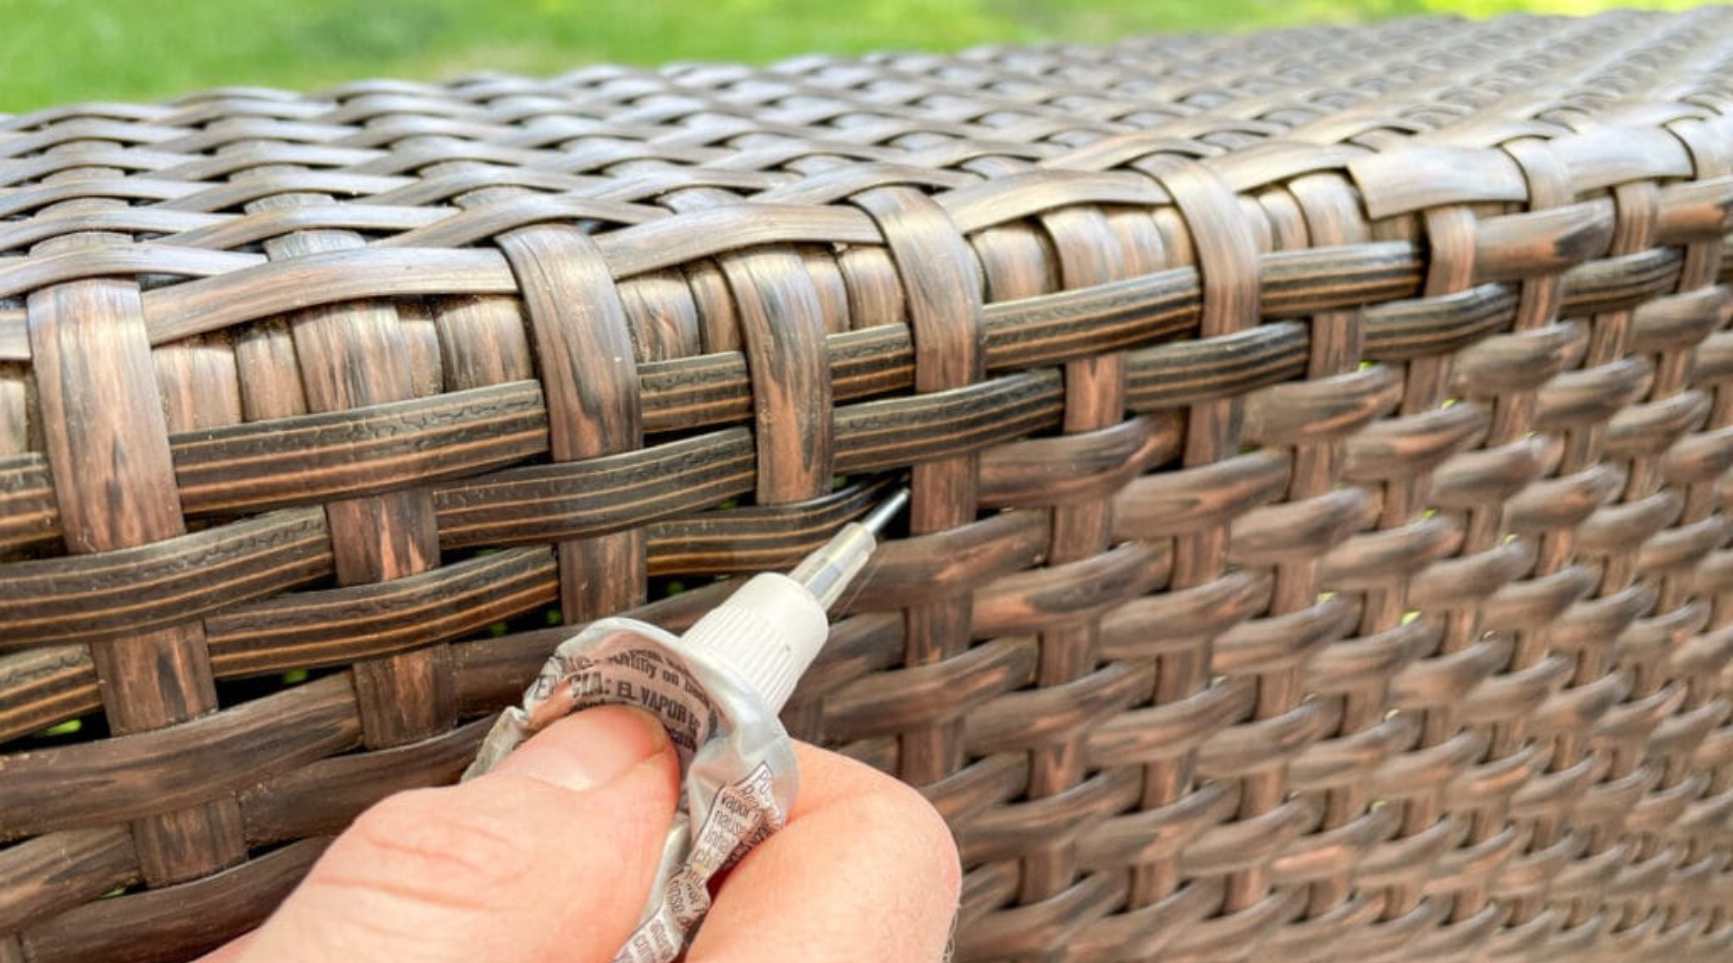
- Apply Adhesive: Using high-quality wood glue or specialized wicker adhesive, carefully apply a small amount to the end of the replacement strand and the area where it will be secured. Avoid using excessive adhesive, as it can create a messy finish and compromise the flexibility of the wicker.
- Weave and Secure: Gently weave the replacement strand into place, following the existing pattern and weave of the wicker. Secure the ends in place, ensuring a snug fit and seamless integration with the surrounding strands.
- Allow for Drying Time: Once the replacement strand is in position, allow ample time for the adhesive to fully dry and bond the new wicker to the furniture. Follow the manufacturer’s recommendations for the specific adhesive being used.
- Trim Excess: Carefully trim any excess length from the replacement strand, ensuring that it blends seamlessly with the surrounding wicker. Use sharp scissors or clippers for a clean and precise finish.
- Inspect and Refine: Once the repair is complete, inspect the area to ensure that the new strand is securely in place and visually consistent with the surrounding wicker. Make any necessary adjustments for a polished final result.
By following these steps, you can effectively address loose or broken wicker strands, restoring the structural integrity and aesthetic appeal of your outdoor furniture. With patience and attention to detail, your wicker furniture will soon be ready to grace your outdoor space once again.
To repair wicker outdoor furniture, soak the wicker in warm water for 30 minutes to make it more flexible, then use a damp cloth to gently mold and reshape the damaged area. Let it dry completely before using.
Fixing Structural Damage
Structural damage to wicker outdoor furniture, such as weakened joints or broken support elements, requires a thoughtful and thorough approach to ensure a durable and long-lasting repair. Here’s a comprehensive guide to addressing structural issues and restoring the stability of your furniture:
- Assess the Damage: Carefully examine the furniture to identify any areas of structural compromise. This may include loose joints, cracked supports, or weakened framework.
- Disassemble if Necessary: In cases where the damage is extensive, it may be necessary to partially disassemble the furniture to access and address the affected areas. Take care to document the disassembly process to aid in reassembly later.
- Reinforce Joints: For loose or weakened joints, apply high-quality wood glue to the mating surfaces and carefully reassemble the joint. Use clamps to hold the joint in place as the adhesive sets, ensuring a strong and secure bond.
- Replace or Repair Supports: If support elements such as crossbars or braces are damaged, consider replacing them with new, appropriately sized components. Alternatively, repair existing supports by reinforcing them with additional bracing or hardware.
- Address Cracks and Fractures: For wicker that has suffered structural fractures or cracks, carefully apply wood glue to the affected areas and use clamps to hold the pieces together while the adhesive sets. This will help restore the integrity of the wicker and prevent further damage.
- Allow for Proper Drying and Curing: After making structural repairs, allow ample time for adhesives and reinforcements to fully dry and cure. This will ensure that the repaired areas regain their strength and stability.
- Reassemble and Test: Once all repairs have been completed and the adhesives have fully cured, reassemble the furniture and conduct thorough stability tests. Ensure that all joints are secure, and the furniture maintains its structural integrity under normal use.
By addressing structural damage with precision and care, you can prolong the life of your wicker furniture and enjoy its enduring beauty for years to come. With a solid and stable structure, your outdoor furniture will continue to provide comfort and style in your outdoor sanctuary.
Read more: How To Build Outdoor Wicker Furniture
Refinishing the Furniture
Refinishing your wicker outdoor furniture is a transformative process that can breathe new life into weathered and worn pieces, revitalizing their appearance and ensuring their longevity. Whether you’re aiming to restore the original finish or introduce a fresh new look, the refinishing process requires attention to detail and a methodical approach. Here’s a comprehensive guide to refinishing your wicker furniture:
- Clean the Surface: Begin by thoroughly cleaning the furniture to remove dirt, grime, and any existing finishes. Use a mild detergent, warm water, and a soft brush or cloth to gently scrub the wicker. Allow the furniture to dry completely before proceeding.
- Prepare for Refinishing: If the existing finish is flaking or damaged, use fine-grit sandpaper to smooth the surface and remove any loose or chipped paint or stain. This will create a clean and even base for the new finish.
- Choose Your Finish: Select a high-quality outdoor paint or stain that is specifically formulated for wicker and suitable for exterior use. Consider the color and finish options that complement your outdoor space and personal style.
- Apply the Finish: Using high-quality brushes or rollers, apply the chosen paint or stain to the wicker, ensuring even coverage and paying attention to detail in intricate areas. Apply multiple thin coats for a smooth and durable finish, allowing proper drying time between coats.
- Protective Finish: Once the paint or stain has fully dried, apply a clear protective finish, such as polyurethane, to safeguard the newly refinished surfaces from the elements. This will enhance durability and resistance to moisture and UV exposure.
- Allow for Curing Time: After completing the refinishing process, allow ample time for the paint, stain, and protective finish to fully cure. This will ensure a resilient and long-lasting result that can withstand outdoor conditions.
- Inspect and Touch-Up: Once the refinishing process is complete, inspect the furniture for any areas that may require touch-ups or additional coats. Address any imperfections to achieve a flawless and professional finish.
By following these steps, you can effectively refinish your wicker outdoor furniture, breathing new life into each piece and enhancing the overall aesthetic of your outdoor space. With a fresh and durable finish, your furniture will be ready to withstand the elements and continue to be a cherished part of your outdoor oasis.
Maintaining Wicker Furniture
After investing time and effort into repairing and refinishing your wicker outdoor furniture, it’s essential to implement a maintenance routine that preserves its beauty and functionality for years to come. By incorporating simple yet effective maintenance practices, you can ensure that your wicker furniture remains a stunning and enduring feature of your outdoor space. Here are key maintenance tips to keep your wicker furniture in optimal condition:
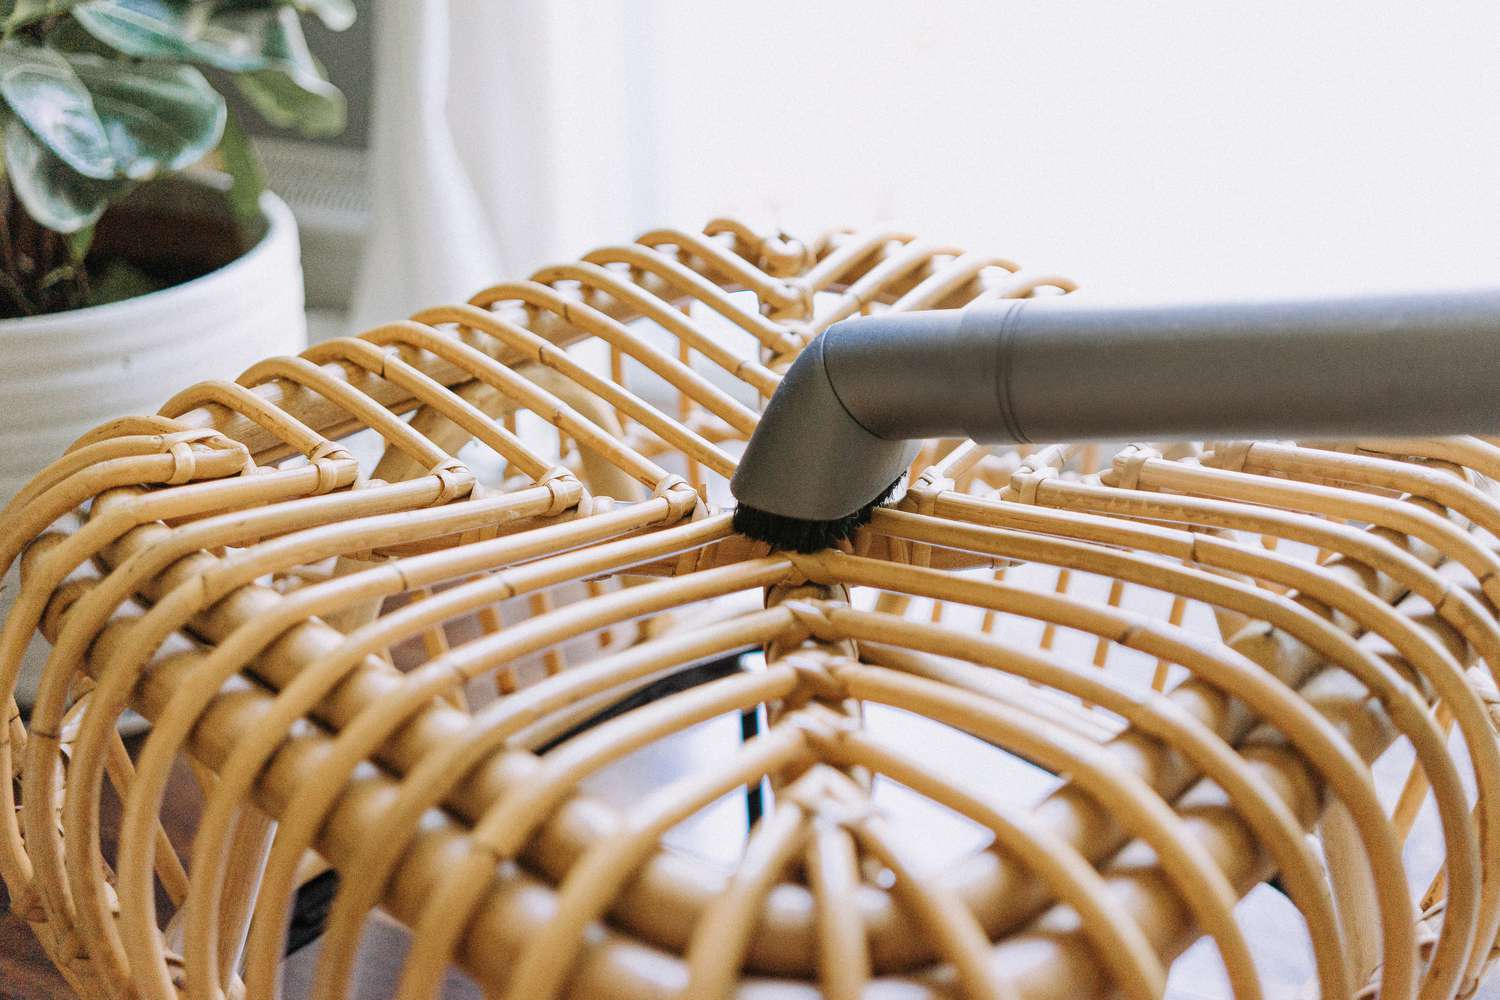
- Regular Cleaning: Schedule routine cleaning sessions to remove dust, pollen, and other debris from the wicker surfaces. Use a soft brush or vacuum with a brush attachment to gently remove particles from the intricate weave.
- Protect from the Elements: Whenever possible, shield your wicker furniture from prolonged exposure to direct sunlight and rain. Consider using protective covers or relocating the furniture to a covered area during inclement weather.
- Inspect for Wear: Periodically inspect the furniture for signs of wear, including loose strands, cracked paint, or structural issues. Address any minor issues promptly to prevent them from escalating into larger problems.
- Reapply Protective Finish: Over time, the protective finish applied during refinishing may wear down. Periodically assess the condition of the finish and reapply as needed to maintain optimal protection against moisture and UV exposure.
- Cushion Care: If your wicker furniture features cushions, attend to their maintenance as well. Clean or launder cushions according to the manufacturer’s instructions and store them in a dry, ventilated area when not in use.
- Seasonal Storage: Consider storing your wicker furniture indoors or in a covered area during the off-season to shield it from harsh winter conditions. Proper storage can significantly extend the lifespan of your furniture.
- Preventative Measures: Take proactive steps to prevent damage, such as using coasters under planters to avoid water stains and placing felt pads under furniture legs to protect the wicker and underlying surfaces.
- Professional Inspection: If you notice significant damage or structural concerns, consider seeking the expertise of a professional wicker furniture repair specialist to address the issues effectively.
By integrating these maintenance practices into your regular routine, you can safeguard the beauty and integrity of your wicker outdoor furniture, ensuring that it continues to enrich your outdoor space for years to come. With attentive care and maintenance, your wicker furniture will remain a cherished and enduring part of your outdoor sanctuary.
Frequently Asked Questions about How To Repair Wicker Outdoor Furniture
Was this page helpful?
At Storables.com, we guarantee accurate and reliable information. Our content, validated by Expert Board Contributors, is crafted following stringent Editorial Policies. We're committed to providing you with well-researched, expert-backed insights for all your informational needs.








0 thoughts on “How To Repair Wicker Outdoor Furniture”