Home>Furniture & Design>Outdoor Furniture>How To Sand Outdoor Furniture
Outdoor Furniture
How To Sand Outdoor Furniture
Modified: February 18, 2024
Learn how to sand outdoor furniture to give it a fresh look and protect it from the elements. Our expert tips will ensure your outdoor furniture stays beautiful and functional for years to come.
(Many of the links in this article redirect to a specific reviewed product. Your purchase of these products through affiliate links helps to generate commission for Storables.com, at no extra cost. Learn more)
Introduction
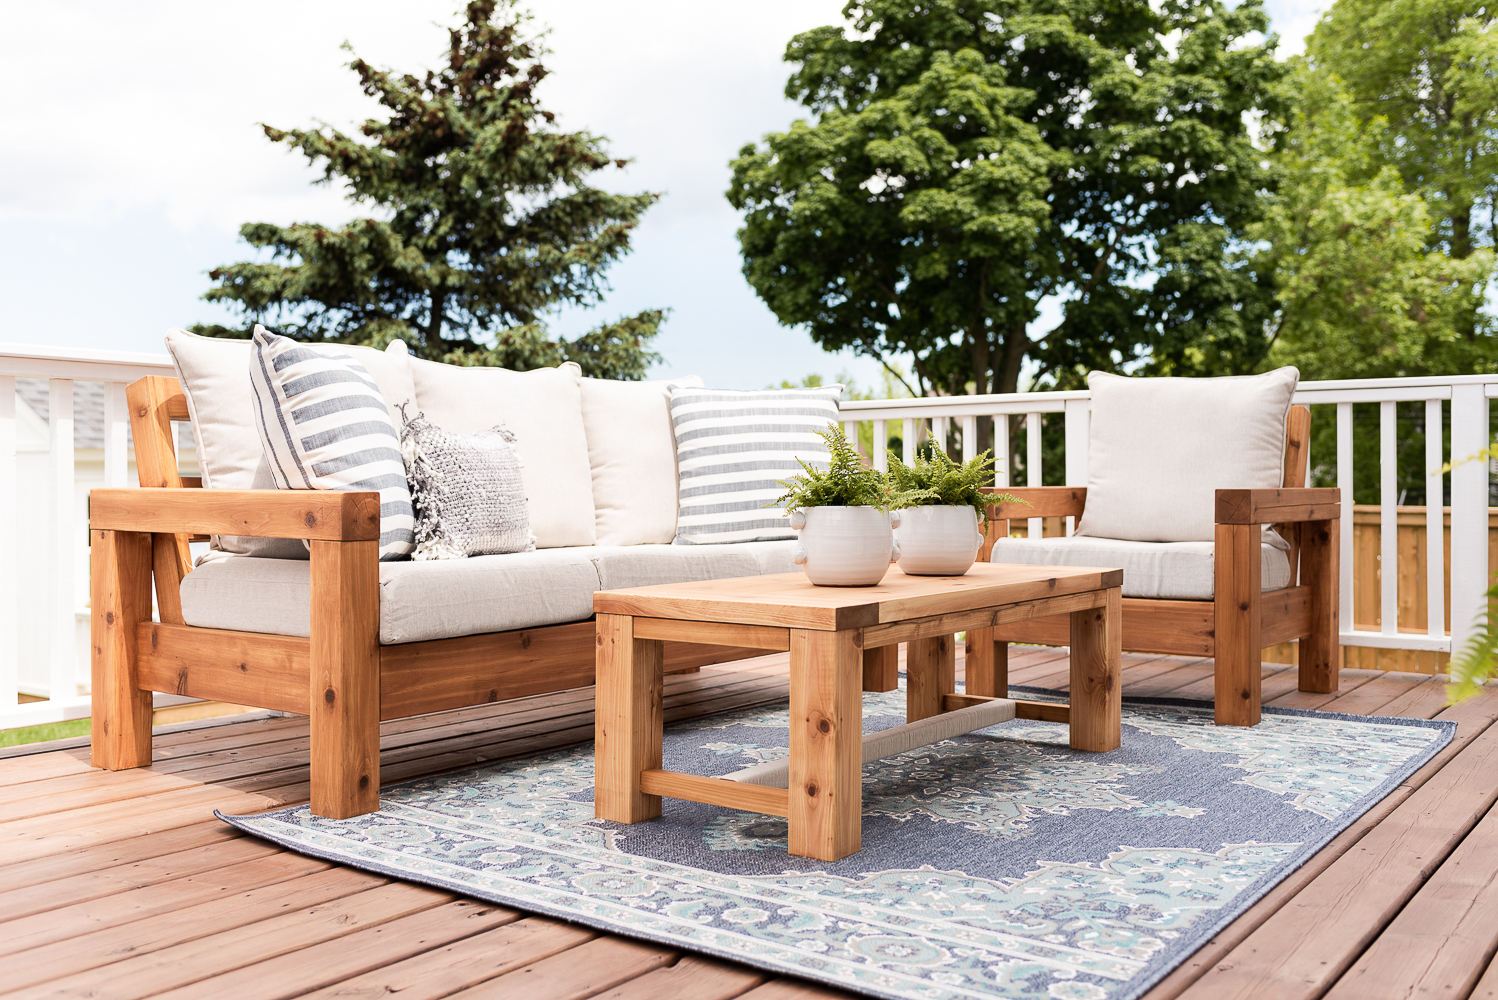
Welcome to the world of outdoor furniture restoration! Whether you have a weathered wooden bench, a tired teak table, or a faded Adirondack chair, giving your outdoor furniture a new lease on life is a satisfying and rewarding endeavor. Over time, exposure to the elements can take a toll on outdoor furniture, causing it to lose its luster and charm. However, with the right tools, techniques, and a bit of elbow grease, you can breathe new life into your outdoor oasis.
In this guide, we will walk you through the process of sanding outdoor furniture, a crucial step in the restoration process. Sanding not only smooths the surface of the furniture but also prepares it for a fresh finish, whether it be a coat of paint, stain, or sealant. By following these steps, you can revitalize your outdoor furniture and prolong its lifespan, all while adding a personal touch to your outdoor space.
So, roll up your sleeves, grab your sandpaper, and let's get started on transforming your weathered outdoor furniture into a stunning focal point for your outdoor sanctuary.
Key Takeaways:
- Revive your outdoor furniture with sanding and a fresh finish to enhance its beauty, protect it from the elements, and add a personal touch to your outdoor space.
- Enjoy the satisfaction of transforming worn-out furniture into a revitalized outdoor oasis, and share your newfound expertise to inspire others to embark on their own restoration adventures.
Read more: How To Sand Patio Furniture
Step 1: Gather Materials
Before embarking on the sanding process, it’s essential to gather all the necessary materials and tools. Having everything at hand will streamline the restoration process and ensure that you can work efficiently. Here’s what you’ll need:
- Sandpaper: Select a variety of sandpaper grits, including coarse, medium, and fine grits. The specific grits you’ll need depend on the condition of the furniture and the type of wood. Coarse grits (60-80) are ideal for removing old finishes and smoothing rough surfaces, while medium (100-150) and fine (180-220) grits are used for refining the surface.
- Sanding Block or Electric Sander: A sanding block provides a firm grip and even pressure, while an electric sander can expedite the process, especially for larger furniture pieces.
- Protective Gear: Safety first! Equip yourself with safety goggles, a dust mask, and gloves to shield yourself from dust and debris during the sanding process.
- Clean Cloth or Tack Cloth: After sanding, you’ll need a clean cloth to wipe away the sanding dust. A tack cloth, specifically designed to pick up fine particles, is highly effective for this purpose.
- Wood Filler (if needed): For furniture with minor imperfections or cracks, wood filler can be used to fill in these areas before sanding.
- Primer, Stain, or Paint: Depending on your desired finish, make sure you have the appropriate primer, wood stain, or outdoor paint ready for the next steps in the restoration process.
- Brushes or Rollers: If you plan to apply a new finish, have the necessary brushes or rollers on hand for a smooth application.
- Work Area Protection: To prevent damage to your surroundings, gather drop cloths or plastic sheeting to protect the area where you’ll be working.
By assembling these materials beforehand, you’ll be well-prepared to tackle the sanding process and set the stage for the subsequent steps in restoring your outdoor furniture to its former glory.
Step 2: Prepare the Area
Before diving into the sanding process, it’s crucial to prepare the work area to ensure a smooth and efficient restoration process. Here’s how to get the area ready for sanding:
- Clean the Furniture: Begin by thoroughly cleaning the outdoor furniture to remove any dirt, grime, or mildew. Use a mild detergent or specially formulated wood cleaner, along with a scrub brush or sponge, to clean the surfaces. Rinse the furniture with water and allow it to dry completely before proceeding.
- Choose the Right Location: Select a well-ventilated outdoor space for sanding, such as a patio, deck, or garage with open doors. Adequate ventilation will help disperse the sanding dust and fumes from any cleaning agents or solvents you may have used.
- Protect Surrounding Areas: Cover the ground and nearby objects with drop cloths or plastic sheeting to prevent dust and debris from settling on surfaces. This step is especially important if you’re working in a garage or any area with items you want to protect from dust.
- Set Up Your Workstation: Arrange your sanding materials, tools, and protective gear within easy reach. Having everything organized and accessible will streamline the sanding process and minimize interruptions.
- Ensure Adequate Lighting: Good lighting is essential for accurately assessing the condition of the furniture and identifying any areas that require extra attention during sanding. If natural light is insufficient, consider using portable work lights or lamps to illuminate the work area.
- Take Safety Precautions: Put on your safety goggles, dust mask, and gloves to protect yourself from airborne particles, especially during the sanding and cleaning stages. Safety should always be a top priority when working with wood and finishing products.
By taking the time to prepare the area and establish an organized workspace, you’ll create an optimal environment for sanding and ensure that the restoration process proceeds smoothly and safely.
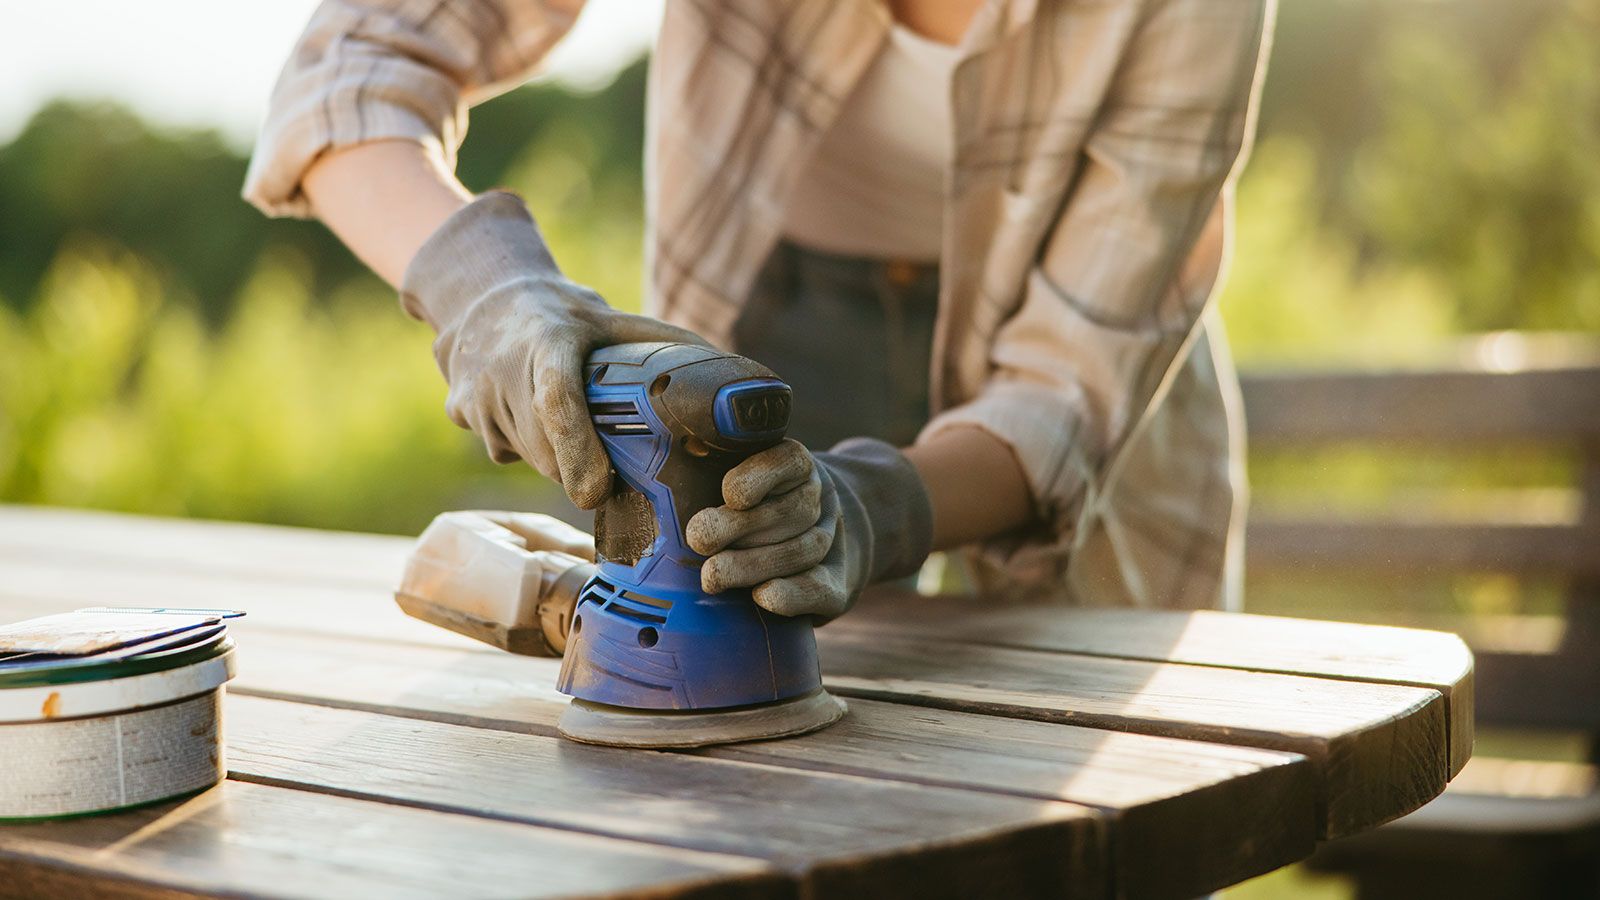
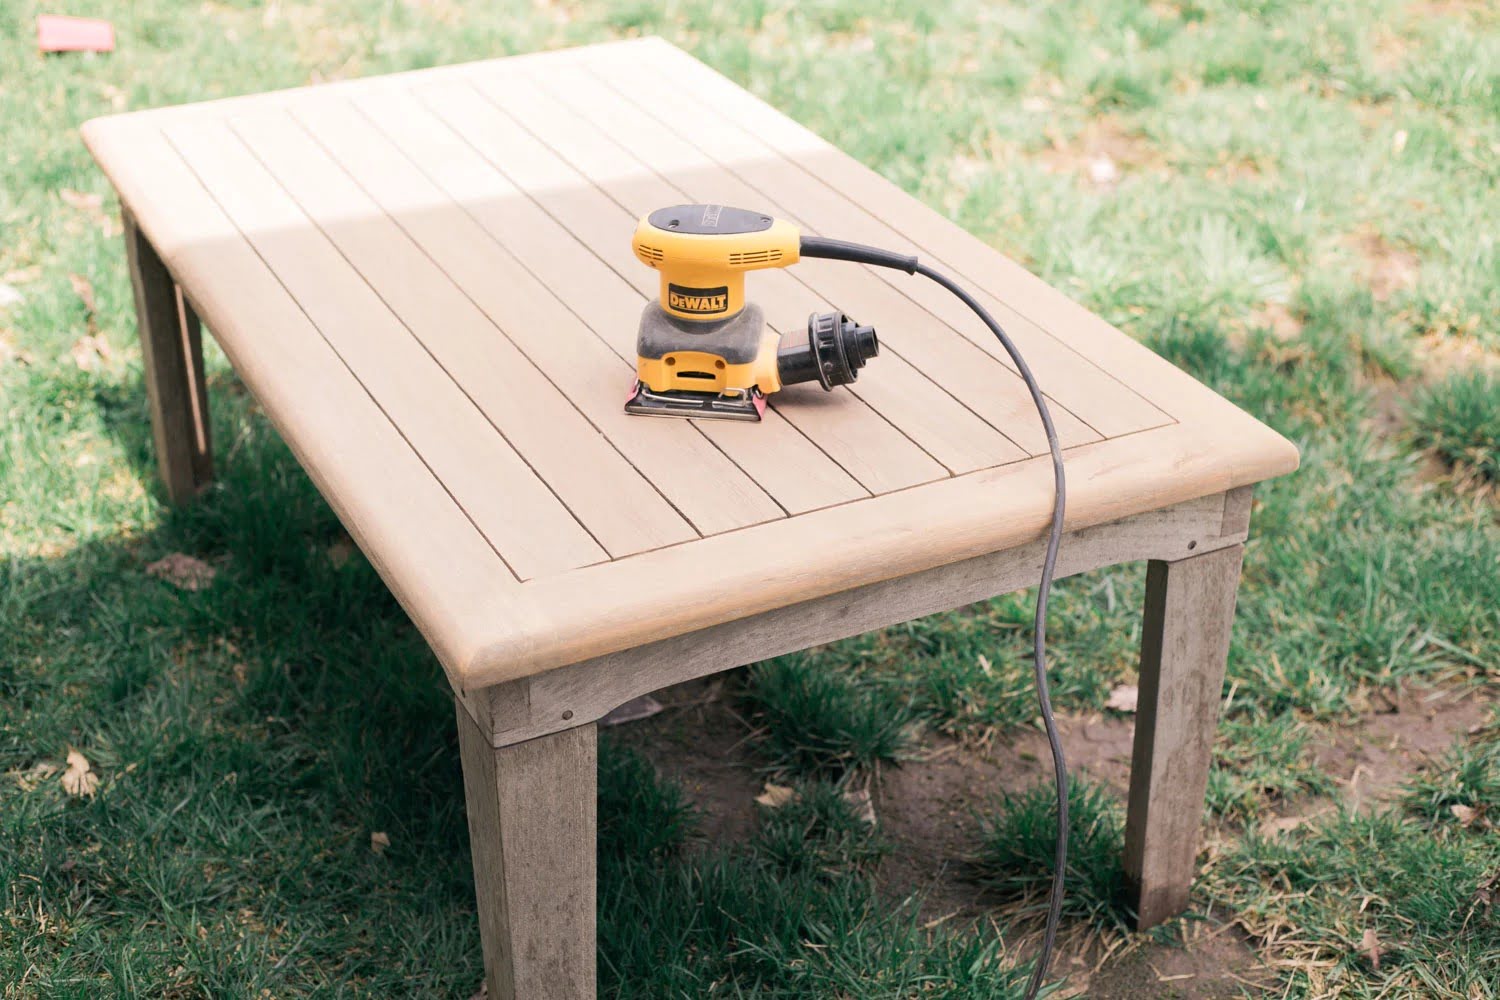
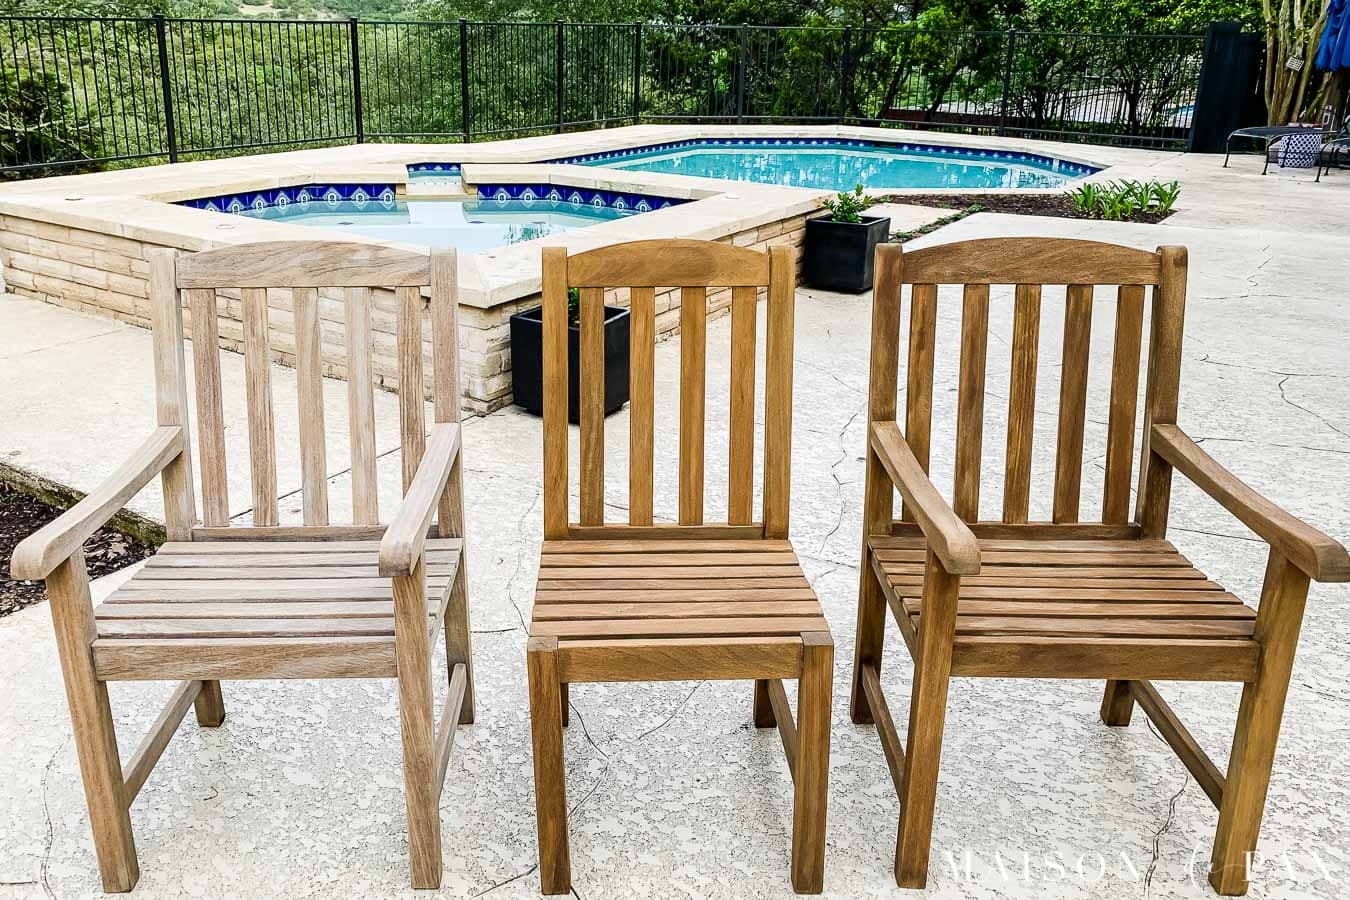
Step 3: Sanding Technique
Now that you’ve gathered your materials and prepared the work area, it’s time to delve into the art of sanding outdoor furniture. The sanding process is essential for smoothing the surface, removing old finishes, and preparing the furniture for a fresh new look. Here’s how to approach the sanding technique:
- Start with Coarse Grit: Begin the sanding process with coarse-grit sandpaper (60-80 grit) to remove any existing finish, paint, or stubborn blemishes. Work in the direction of the wood grain, applying even pressure to achieve consistent results. If you’re using an electric sander, start with a lower speed setting to prevent aggressive sanding.
- Progress to Medium Grit: Once the surface is free of the old finish and appears smooth, switch to medium-grit sandpaper (100-150 grit) to refine the surface further. This step helps to eliminate any remaining imperfections and smooth out the wood grain, preparing it for the final sanding stage.
- Finish with Fine Grit: Use fine-grit sandpaper (180-220 grit) to achieve a silky-smooth finish. This stage of sanding removes any fine scratches left by the previous grits and prepares the wood for the application of a new finish. Take your time and sand methodically to ensure a uniform surface appearance.
- Use a Sanding Block or Electric Sander: Whether you opt for a sanding block or an electric sander, maintain a steady hand and avoid applying excessive pressure. Let the sandpaper do the work, and focus on achieving consistent results across the entire surface of the furniture.
- Check for Uniformity: After each sanding stage, run your hand over the surface to check for any rough spots, uneven areas, or lingering imperfections. Address any discrepancies by revisiting those areas with the appropriate grit of sandpaper until the surface feels uniformly smooth.
- Be Mindful of Edges and Details: Pay special attention to intricate details, edges, and corners of the furniture. For these areas, you may need to switch to a smaller piece of sandpaper or use a sanding block to ensure thorough and precise sanding.
By following these sanding techniques and taking a meticulous approach, you’ll effectively prepare your outdoor furniture for the next steps in the restoration process, ultimately achieving a beautifully smooth and pristine surface.
When sanding outdoor furniture, start with a coarse grit sandpaper to remove old finish and rough spots. Then, switch to a finer grit for a smooth finish. Always sand in the direction of the wood grain to avoid scratches.
Step 4: Clean the Furniture
After completing the sanding process, it’s crucial to thoroughly clean the furniture to remove any residual dust and prepare the surface for the application of a new finish. Here’s how to effectively clean your outdoor furniture post-sanding:
- Remove Sanding Residue: Use a clean, dry cloth or a tack cloth to gently wipe away the sanding dust from the entire surface of the furniture. Ensure that all nooks, crannies, and intricate details are free of dust, as any remaining particles can affect the adhesion of the new finish.
- Utilize a Mild Cleaner: Prepare a solution of mild dish soap or wood cleaner and water. Dampen a clean cloth with the solution and gently wipe down the furniture to remove any lingering dust and to eliminate any traces of cleaning agents used prior to sanding. Avoid saturating the wood with excessive moisture.
- Rinse and Dry Thoroughly: After cleaning, rinse the furniture with clean water to remove any soapy residue. Use a separate cloth to dry the surfaces thoroughly, ensuring that no moisture remains. Proper drying is essential to prevent water damage and to prepare the wood for the application of the new finish.
- Inspect for Residual Dust: Take a close look at the furniture from various angles and under different lighting conditions to identify any remaining dust or particles. If necessary, lightly go over the surfaces with a tack cloth to pick up any stray particles and ensure a pristine foundation for the upcoming finish application.
- Allow Sufficient Drying Time: Before proceeding to the next step of applying a new finish, allow the furniture to air dry completely. Adequate drying time ensures that the wood is ready to receive the finish, promoting optimal adhesion and a flawless final result.
By meticulously cleaning the furniture post-sanding, you’ll create a clean and receptive canvas for the application of the desired finish, whether it be a protective sealant, vibrant paint, or rich wood stain. This step sets the stage for the transformative final touches of the restoration process.
Read more: How To Paint Wood Furniture Without Sanding
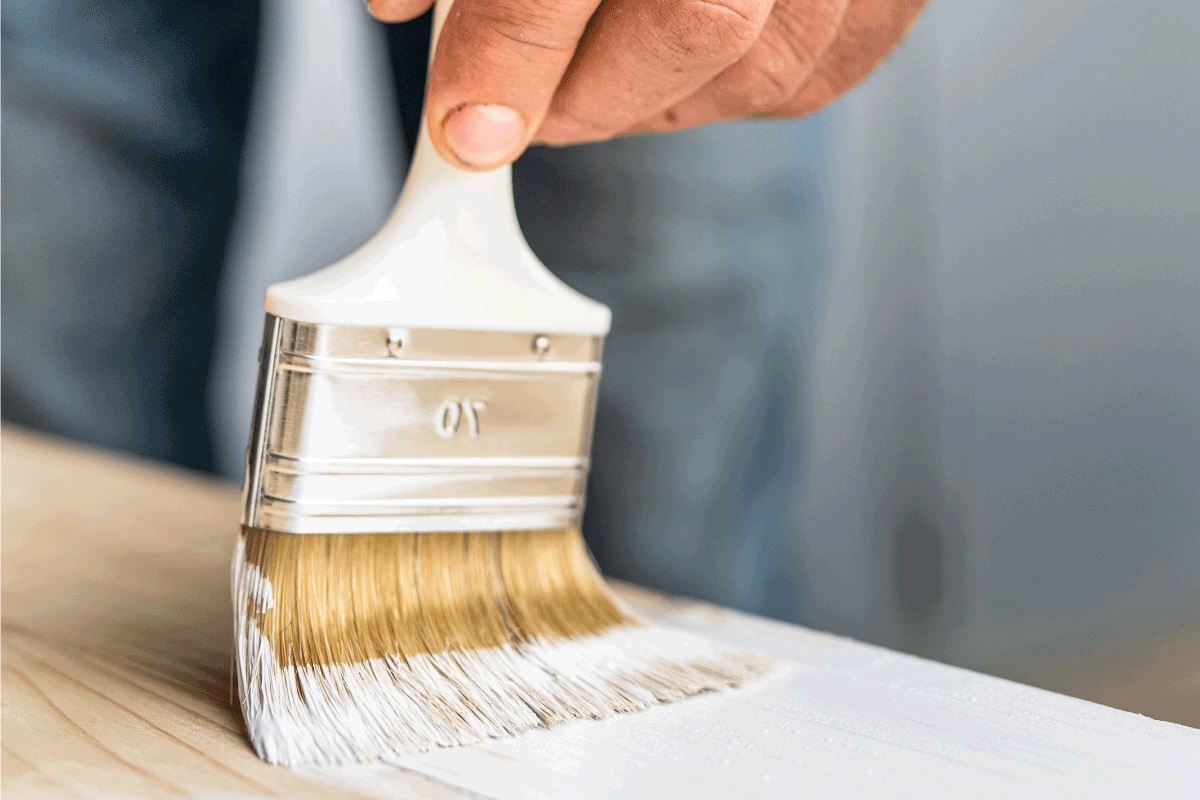
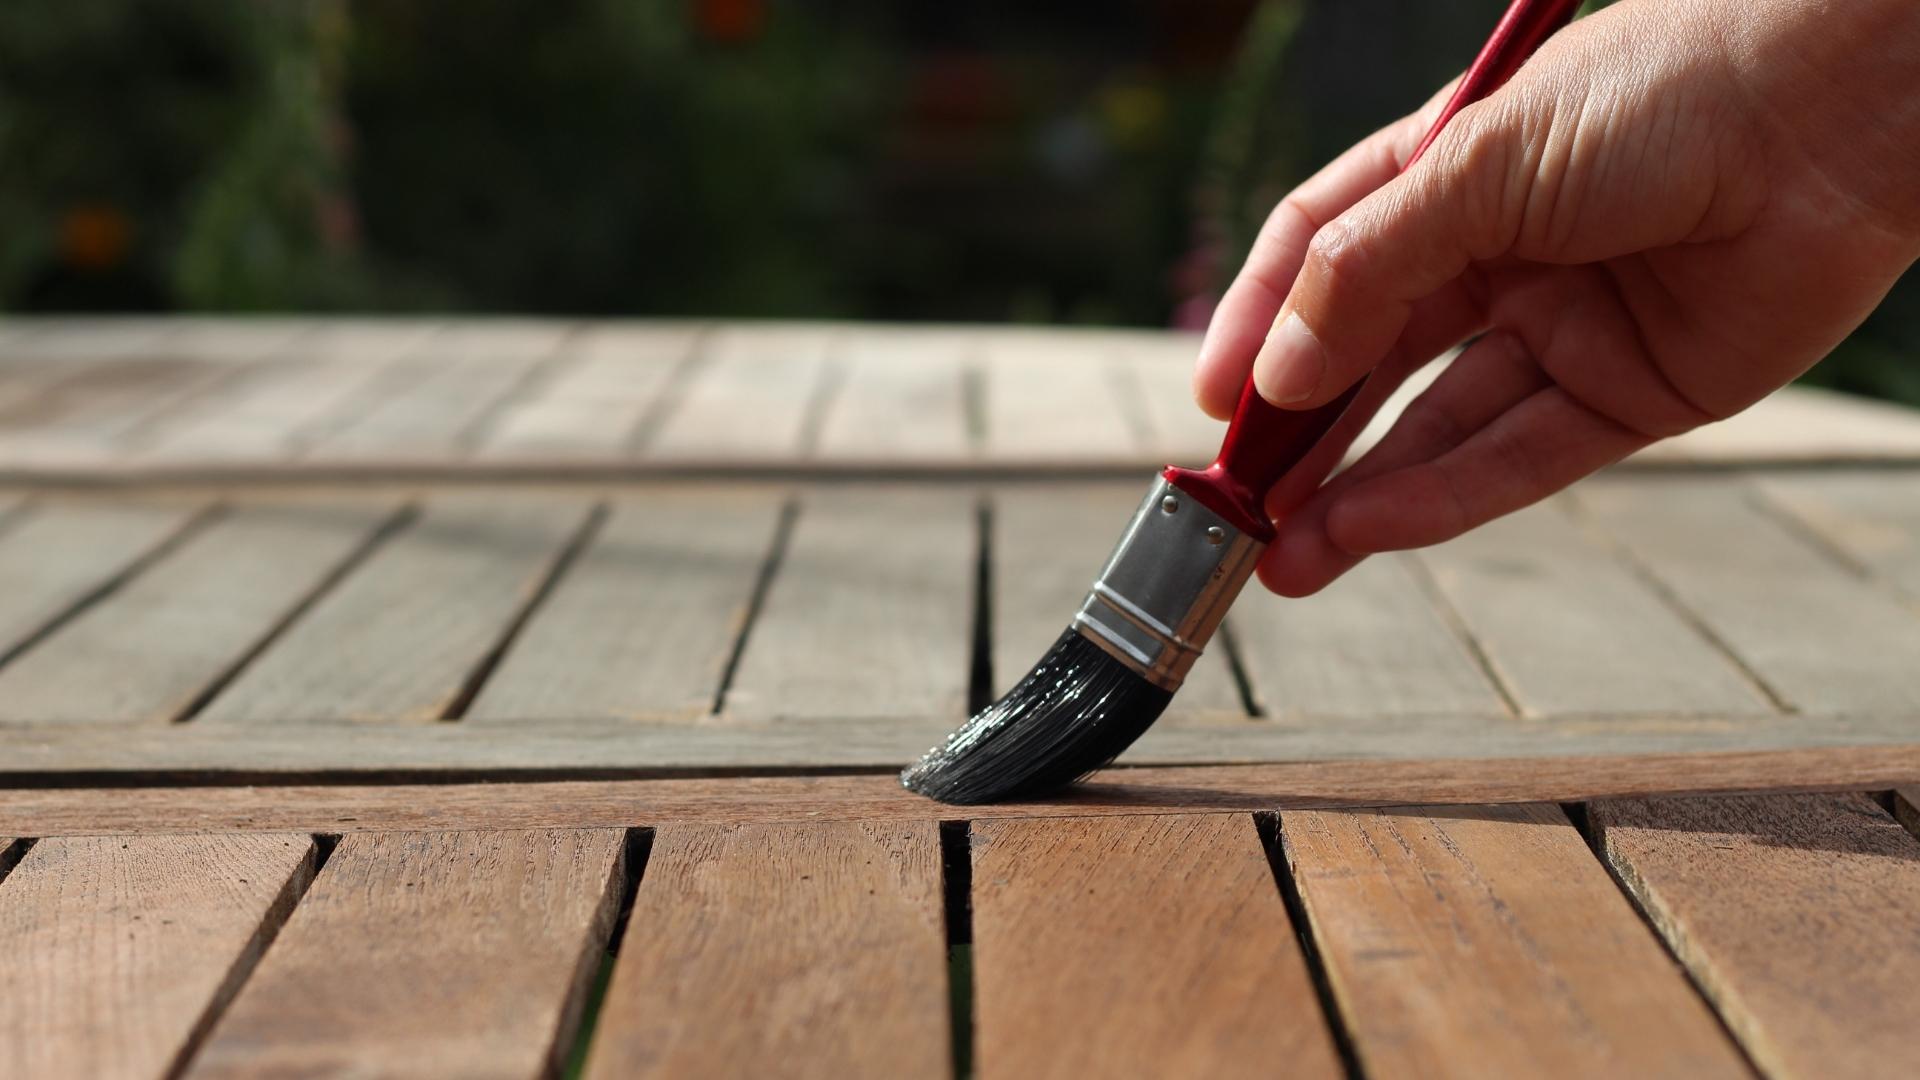
Step 5: Apply Finish
With the furniture meticulously sanded and cleaned, it’s time to apply the finishing touch that will not only enhance its appearance but also protect it from the elements. The choice of finish, whether it’s a protective sealant, wood stain, or vibrant paint, can breathe new life into your outdoor furniture. Here’s how to expertly apply the finish:
- Choose the Right Finish: Consider the specific needs of your outdoor furniture and the aesthetic you wish to achieve. A clear outdoor sealant offers protection against moisture and UV rays, while wood stains enhance the natural beauty of the grain. Alternatively, outdoor paint can introduce vibrant color and provide durable protection.
- Prepare the Finish: If you’re using a wood stain or paint, thoroughly stir or shake the product to ensure uniform consistency. For sealants, follow the manufacturer’s instructions for any required mixing or shaking. Properly preparing the finish is essential for achieving a consistent and professional-looking result.
- Apply the Finish Evenly: Use a high-quality brush, roller, or sprayer to apply the finish evenly across the entire surface of the furniture. Work in the direction of the wood grain to achieve a smooth and uniform appearance. Take care to avoid drips, runs, or pooling of the finish, especially on vertical surfaces.
- Follow Manufacturer’s Recommendations: Whether you’re applying a sealant, wood stain, or paint, adhere to the manufacturer’s guidelines regarding application temperature, drying times, and the number of coats required. Following these recommendations ensures optimal performance and longevity of the finish.
- Allow for Proper Drying and Curing: After applying the initial coat of finish, allow the furniture to dry and cure according to the product’s instructions. Depending on the type of finish, this may involve allowing sufficient drying time between coats and providing adequate curing time before using the furniture.
- Inspect and Touch Up as Needed: Once the finish has dried, inspect the furniture for any missed spots, uneven coverage, or imperfections. Touch up these areas as necessary, ensuring that the finish is consistent and provides comprehensive protection and visual appeal.
By expertly applying the finish, you’ll not only enhance the beauty of your outdoor furniture but also safeguard it against the rigors of outdoor exposure, ensuring that it remains a stunning and functional asset in your outdoor space for years to come.
Conclusion
Congratulations on successfully completing the sanding and finishing process for your outdoor furniture! By investing time and effort into this restoration project, you’ve not only revived the beauty of your outdoor pieces but also extended their lifespan, allowing you to continue enjoying them for years to come. As you step back and admire your handiwork, consider the following key takeaways from this rejuvenating journey:
- Enhanced Aesthetics: The meticulous sanding and application of a fresh finish have breathed new life into your outdoor furniture, elevating its visual appeal and restoring its original charm.
- Protection from the Elements: The chosen finish, whether it’s a sealant, stain, or paint, serves as a protective barrier, shielding the furniture from moisture, UV rays, and other outdoor hazards, thereby prolonging its durability.
- Personal Touch: Through this restoration process, you’ve infused your outdoor furniture with a personal touch, customizing its appearance to suit your style and preferences, creating a unique focal point in your outdoor space.
- Sense of Accomplishment: The satisfaction of witnessing the transformation of weathered, worn furniture into a revitalized and inviting ensemble adds a sense of accomplishment and pride to your outdoor oasis.
- Maintenance and Care: As you revel in the beauty of your restored outdoor furniture, remember to implement routine maintenance and care to preserve its newfound splendor, whether it’s occasional cleaning, reapplication of finish, or protective measures during inclement weather.
As you continue to enjoy the fruits of your labor, consider sharing your newfound expertise with friends and family, inspiring them to embark on their own outdoor furniture restoration adventures. Your knowledge and experience can serve as a guiding light for others seeking to breathe new life into their outdoor living spaces.
With your outdoor furniture now gleaming with renewed vitality, take a moment to bask in the satisfaction of a job well done and relish the inviting ambiance it brings to your outdoor sanctuary. Whether it’s a cozy corner for morning coffee or a gathering place for friends and family, your revitalized outdoor furniture stands as a testament to your dedication and creativity, enriching your outdoor lifestyle for years to come.
Frequently Asked Questions about How To Sand Outdoor Furniture
Was this page helpful?
At Storables.com, we guarantee accurate and reliable information. Our content, validated by Expert Board Contributors, is crafted following stringent Editorial Policies. We're committed to providing you with well-researched, expert-backed insights for all your informational needs.


0 thoughts on “How To Sand Outdoor Furniture”