Home>Furniture>Outdoor Furniture>How To Sand Patio Furniture
Outdoor Furniture
How To Sand Patio Furniture
Modified: August 28, 2024
Learn how to properly sand your outdoor furniture with our step-by-step guide, ensuring a smooth finish that will last for years. Enhance the beauty and longevity of your patio furniture with our expert tips.
(Many of the links in this article redirect to a specific reviewed product. Your purchase of these products through affiliate links helps to generate commission for Storables.com, at no extra cost. Learn more)
Introduction
Welcome to our comprehensive guide on how to sand patio furniture. If you have outdoor furniture that has seen better days, sanding and refinishing it can give it a new lease on life. Whether you have wooden, metal, or plastic furniture, sanding is a crucial step in the restoration process.
The outdoor elements can take a toll on your patio furniture, causing it to become worn, faded, and damaged. Over time, the protective finish may wear off, exposing the material to moisture, sunlight, and other weather conditions. By sanding your furniture, you can remove the old layers of finish, smooth out imperfections, and prepare the surface for a fresh new finish.
Not only does sanding revitalize the appearance of your patio furniture, but it also helps to prolong its lifespan. By taking the time to properly sand and refinish your furniture, you can protect it from further deterioration and ensure that it continues to look great for years to come.
Before jumping into the sanding process, it is important to gather the necessary supplies. This will ensure that you have everything you need to complete the task efficiently and effectively. Let’s take a look at the supplies you’ll need for sanding patio furniture.
Key Takeaways:
- Sanding and refinishing your patio furniture can give it a fresh new look and extend its lifespan, creating a beautiful outdoor space for relaxation and entertainment.
- Proper preparation, careful sanding, and applying a new finish or paint are essential steps in reviving worn-out patio furniture, ensuring professional-quality results and long-lasting durability.
Read more: How To Sand Outdoor Furniture
Supplies Needed
Before you begin sanding your patio furniture, gather the following supplies:
- Sandpaper in various grits (coarse, medium, and fine)
- Sanding block or sanding sponge
- Protective goggles or safety glasses
- Respirator mask
- Gloves
- Drop cloth or plastic sheeting
- Clean cloth or tack cloth
- Paint scraper or putty knife
- Optional: electric sander or palm sander
These supplies will help you achieve the best results when sanding your patio furniture. The sandpaper grits you choose will depend on the condition of the furniture and the level of sanding required. Coarse grits (around 80-100) are effective for removing old finish and heavily damaged surfaces. Medium grits (around 120-150) are ideal for smoothing and preparing the surface. Fine grits (around 220-400) are used for final smoothing before applying a new finish.
The protective goggles or safety glasses will shield your eyes from any dust or debris that may be generated during the sanding process. A respirator mask is important to protect your lungs from inhaling fine particles. Gloves will keep your hands safe from any sharp edges or chemicals used in the refinishing process.
A drop cloth or plastic sheeting will help protect the surrounding area from any dust or debris that may be produced while sanding. A clean cloth or tack cloth is essential for wiping down the furniture after sanding to remove any loose particles. A paint scraper or putty knife can be useful for removing any stubborn finish or paint.
While hand sanding is effective for small pieces of furniture or intricate details, an electric sander or palm sander can save you time and effort, especially for larger or more heavily damaged pieces.
With the necessary supplies assembled, you’re now ready to begin the sanding process. In the next section, we’ll discuss how to prepare the area before sanding your patio furniture.
Step 1: Prepare the Area
Before you start sanding your patio furniture, it’s essential to prepare the area for the task. This will help minimize mess and ensure a smooth sanding process.
Here’s how to prepare the area:
- Cover the surroundings: Lay down a drop cloth or plastic sheeting to protect the ground or any nearby surfaces. This will catch any dust or debris that may be generated during sanding. Make sure to secure the covering in place to avoid any accidental shifting.
- Clear the furniture: Remove any cushions or accessories from the furniture before beginning the sanding process. It’s easier to work with a clean and bare surface.
- Clean the furniture: Use a brush or cloth to remove any loose dirt or debris from the furniture. This will help prevent scratching the surface during sanding.
- Secure or disassemble loose parts: If there are any loose parts or components on your patio furniture, secure them or remove them if possible. This will prevent them from getting damaged or causing interference during the sanding process.
By taking these preparatory steps, you’ll create a clean and organized work area for sanding your patio furniture. This will ensure that you can focus on the task at hand without unnecessary distractions or obstacles.
Once the area is prepared, you’re ready to move on to the next step, which involves removing the old finish from your patio furniture. Check out our next section for detailed instructions on how to complete this step.
Step 2: Remove Old Finish
Now that your work area is prepared, it’s time to remove the old finish from your patio furniture. This step is crucial for creating a smooth and clean surface for sanding and refinishing.
Here’s how to remove the old finish:
- Test a small area: Before applying any chemicals or using abrasive tools, it’s important to test a small area of the furniture to make sure it doesn’t react negatively. Choose a discreet spot, such as the underside of a chair or table, and apply a small amount of your chosen finish remover or stripper. Follow the product’s instructions and check for any adverse reactions or discoloration.
- Apply the finish remover: If the test spot proves successful, apply the finish remover or stripper to the entire piece of furniture, following the manufacturer’s instructions. Use a brush or rag to spread the product evenly on the surface, ensuring full coverage.
- Wait for the finish to soften: Allow the finish remover to sit on the furniture for the recommended amount of time, usually around 15 to 30 minutes. This will soften the old finish and make it easier to remove.
- Scrape off the old finish: Use a paint scraper or putty knife to gently scrape off the softened finish. Work in the direction of the wood grain or the shape of the furniture to avoid damaging the surface. Be careful not to apply too much pressure or scrape too aggressively, as this can leave marks or scratches.
- Repeat if necessary: Depending on the thickness and type of finish, you may need to repeat the process of applying the finish remover and scraping off the old finish multiple times. This is especially true for furniture with multiple layers of paint or varnish.
- Clean the surface: Once all the old finish has been removed, use a clean cloth or rag dampened with mineral spirits or a similar cleaner to wipe down the surface. This will remove any residue or remaining traces of the finish remover.
Removing the old finish is an important step that paves the way for the sanding process. It helps to reveal the true condition of the furniture and prepares it for the next stages of restoration.
Now that the old finish has been removed, it’s time to move onto the next step: sanding the surface of your patio furniture. We’ll guide you through this process in detail in the following section.
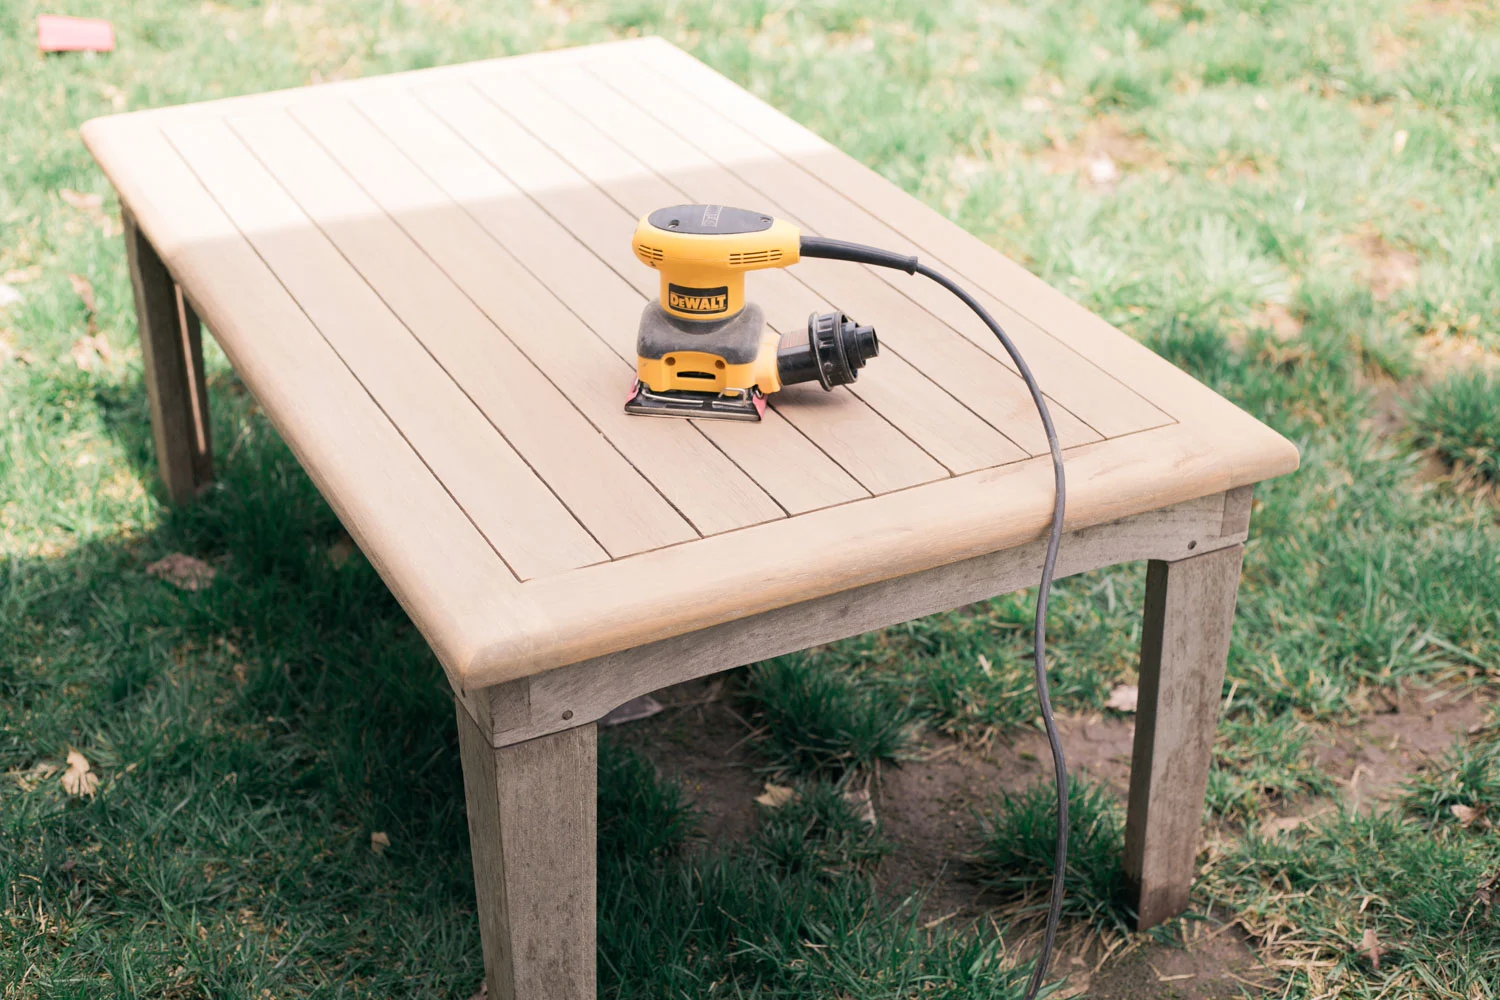
Step 3: Sanding the Surface
Once the old finish has been removed, it’s time to start sanding the surface of your patio furniture. Sanding helps to smooth out imperfections, remove any remaining traces of the old finish, and prepare the surface for a fresh new finish.
Follow these steps to sand the surface of your patio furniture:
- Select the appropriate sandpaper grit: Start with a coarse grit sandpaper, such as 80-100, to remove any remaining finish or rough spots. Then, progress to a medium grit sandpaper, around 120-150, to further smooth the surface. Finally, use a fine grit sandpaper, around 220-400, for a final smooth finish.
- Wrap the sandpaper around a sanding block or use a sanding sponge: This will provide a firm and even surface for sanding. Alternatively, you can use an electric sander or palm sander for larger or more challenging areas.
- Sand with the grain: Always sand in the direction of the wood grain or the shape of the furniture. This ensures a smooth and consistent result without causing any damage or unsightly scratches.
- Apply even pressure: Use consistent and even pressure as you sand. Avoid applying too much pressure as this could create uneven surfaces or gouge the wood. Let the sandpaper do the work and focus on maintaining a steady and controlled motion.
- Check your progress: Periodically check the surface to ensure that you’re achieving the desired results. Look for smoothness and uniformity while paying attention to any remaining imperfections that need further sanding.
- Switch to a finer grit: As you progress through the sanding process, switch to a finer grit sandpaper. This will help to further refine the surface and achieve a smoother finish.
- Use a sanding sponge for intricate areas: If your patio furniture has intricate details or hard-to-reach areas, switch to a sanding sponge. These flexible sponges can conform to different shapes and help you to achieve consistent sanding results.
Remember to take breaks and periodically clean or change the sandpaper to ensure optimal sanding results. It’s important to remove any sanding dust or debris from the surface, as well as periodically check your progress to ensure that you’re achieving the desired smoothness and texture.
Once you’re satisfied with the sanding results, it’s time to move on to the next step: smoothing the edges of your patio furniture. This step helps to create a refined and polished look. Read on for detailed instructions in the following section.
When sanding patio furniture, start with a coarse-grit sandpaper to remove old finish and smooth out any rough spots. Then, switch to a finer-grit sandpaper for a smooth finish. Always sand in the direction of the wood grain to avoid damaging the surface.
Read more: How To Sand Patio Pavers
Step 4: Smoothing the Edges
Now that the surface of your patio furniture has been sanded, it’s time to focus on smoothing the edges. This step helps to create clean lines and achieve a finished look for your furniture.
Follow these steps to smooth the edges of your patio furniture:
- Inspect the edges: Take a close look at the edges of your furniture, including corners, curves, and any decorative details. Note any rough or uneven areas that need to be addressed.
- Use sandpaper or a sanding block: Wrap a fine grit sandpaper around a sanding block or use a sanding sponge for better control. Focus on the rough or uneven edges, applying gentle pressure to smooth them out.
- Sand in a downward motion: For straight edges, sand in a downward motion along the length of the edge. This helps to create a cohesive and polished look. For curved or decorative edges, follow the shape of the edge while maintaining a gentle and even pressure.
- Check your progress: Regularly inspect the edges to ensure that you’re achieving the desired smoothness. Feel the edges with your fingertips to check for any remaining rough spots.
- Switch to a finer grit if needed: If the edges still feel rough or uneven after sanding, switch to a finer grit sandpaper to further refine and smooth them out.
- Remove any sanding residue: After smoothing the edges, use a clean cloth or tack cloth to remove any sanding residue from the furniture. This will ensure a clean and debris-free surface for the next steps of the refinishing process.
By taking the time to smooth the edges of your patio furniture, you’ll achieve a polished and professional result. This step adds a touch of refinement to your furniture and enhances its overall appearance.
With the edges smoothed, it’s time to move on to the next step: wiping down the furniture. This step removes any dust or debris left over from the sanding process and prepares the surface for the application of a new finish. Read on for detailed instructions in the following section.
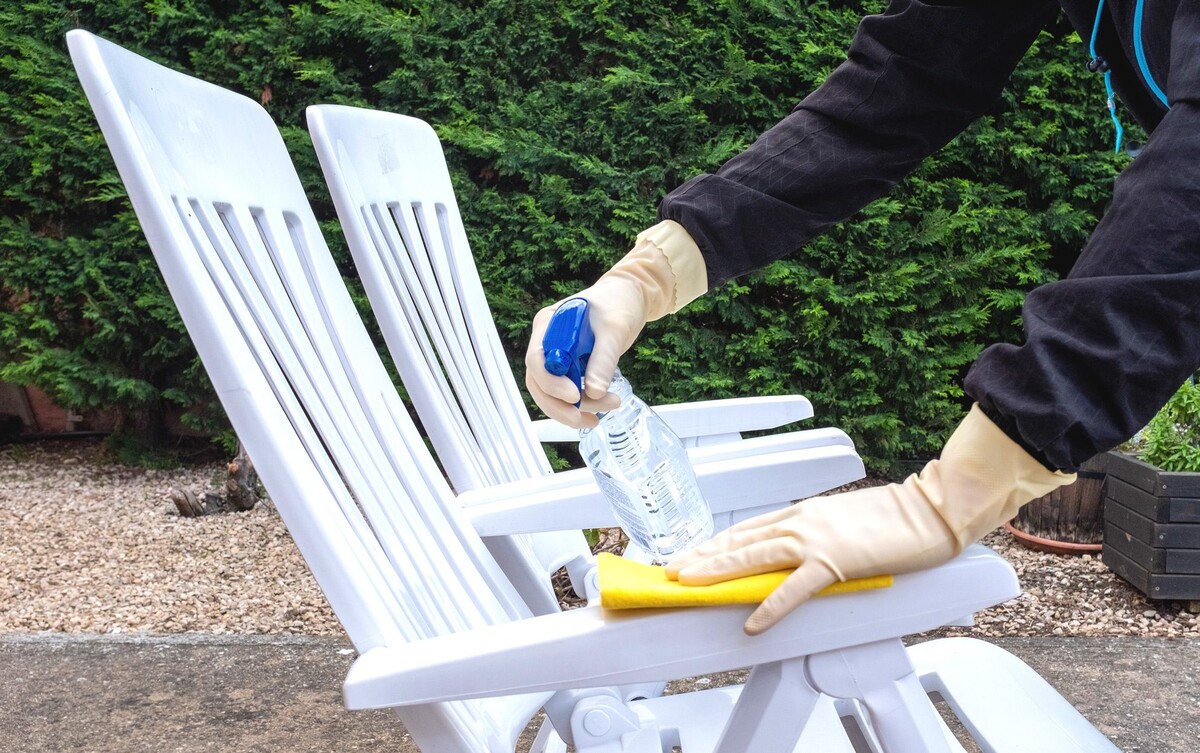
Step 5: Wipe Down the Furniture
After sanding and smoothing the surface and edges of your patio furniture, it’s crucial to remove any dust or debris that may have accumulated during the process. Wiping down the furniture ensures a clean surface for the next steps in the refinishing process.
Follow these steps to properly wipe down your patio furniture:
- Prepare a clean cloth or tack cloth: Choose a soft, lint-free cloth or a tack cloth specifically designed for removing dust and debris.
- Gently wipe the furniture: Starting from the top and working your way down, use the cloth to gently wipe the entire surface of the furniture. Pay close attention to the corners, crevices, and any hard-to-reach areas.
- Check for any remaining dust or debris: Inspect the surface of the furniture to ensure that you’ve removed all the dust and debris. If you spot any leftover particles, go over those areas again with the cloth until they are clean.
- Repeat if necessary: Depending on the complexity of your furniture and the amount of dust generated during sanding, you may need to wipe it down multiple times to ensure a thorough cleaning.
Wiping down your patio furniture after sanding helps to create a clean canvas for the next steps in the refinishing process. By removing all the dust and debris, you’ll ensure proper adherence of the new finish and achieve a smooth and professional-looking result.
Now that your furniture is clean and dust-free, it’s time to move on to the next step: applying the finish or paint. This step adds the final touch to your patio furniture, giving it a fresh and rejuvenated appearance. Continue reading for detailed instructions in the following section.
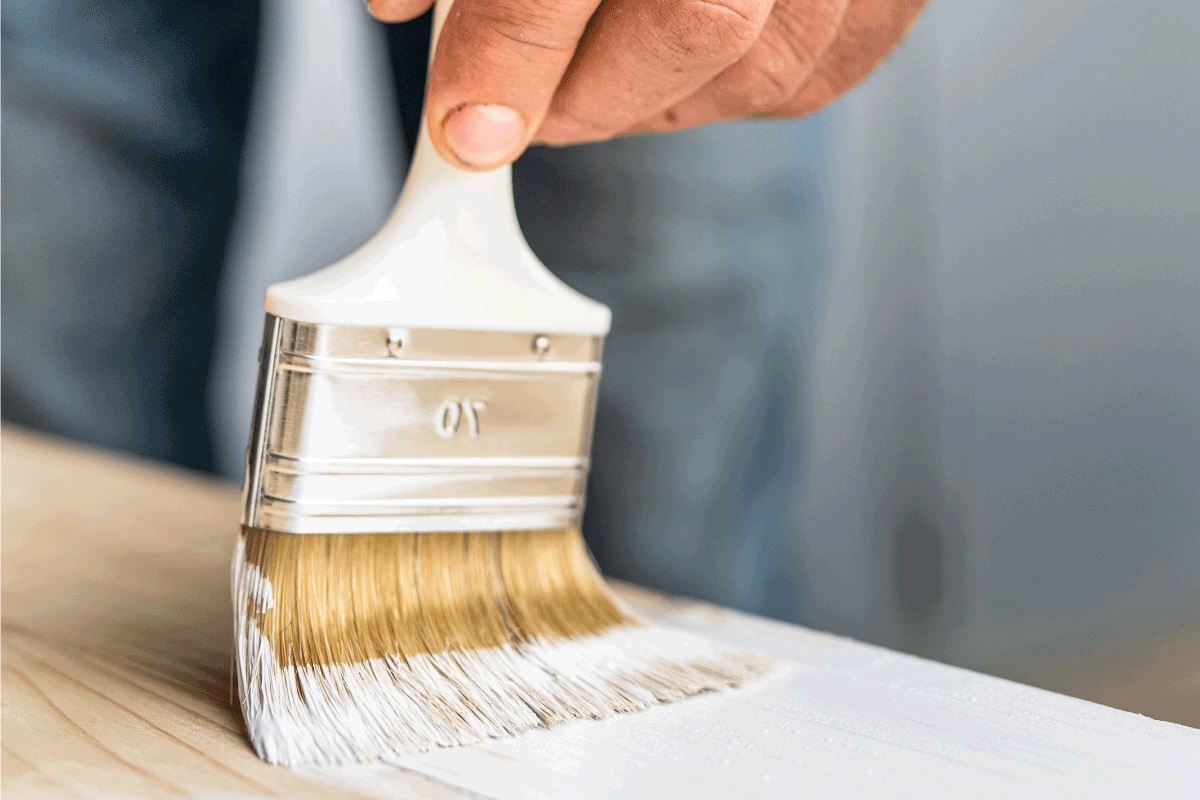
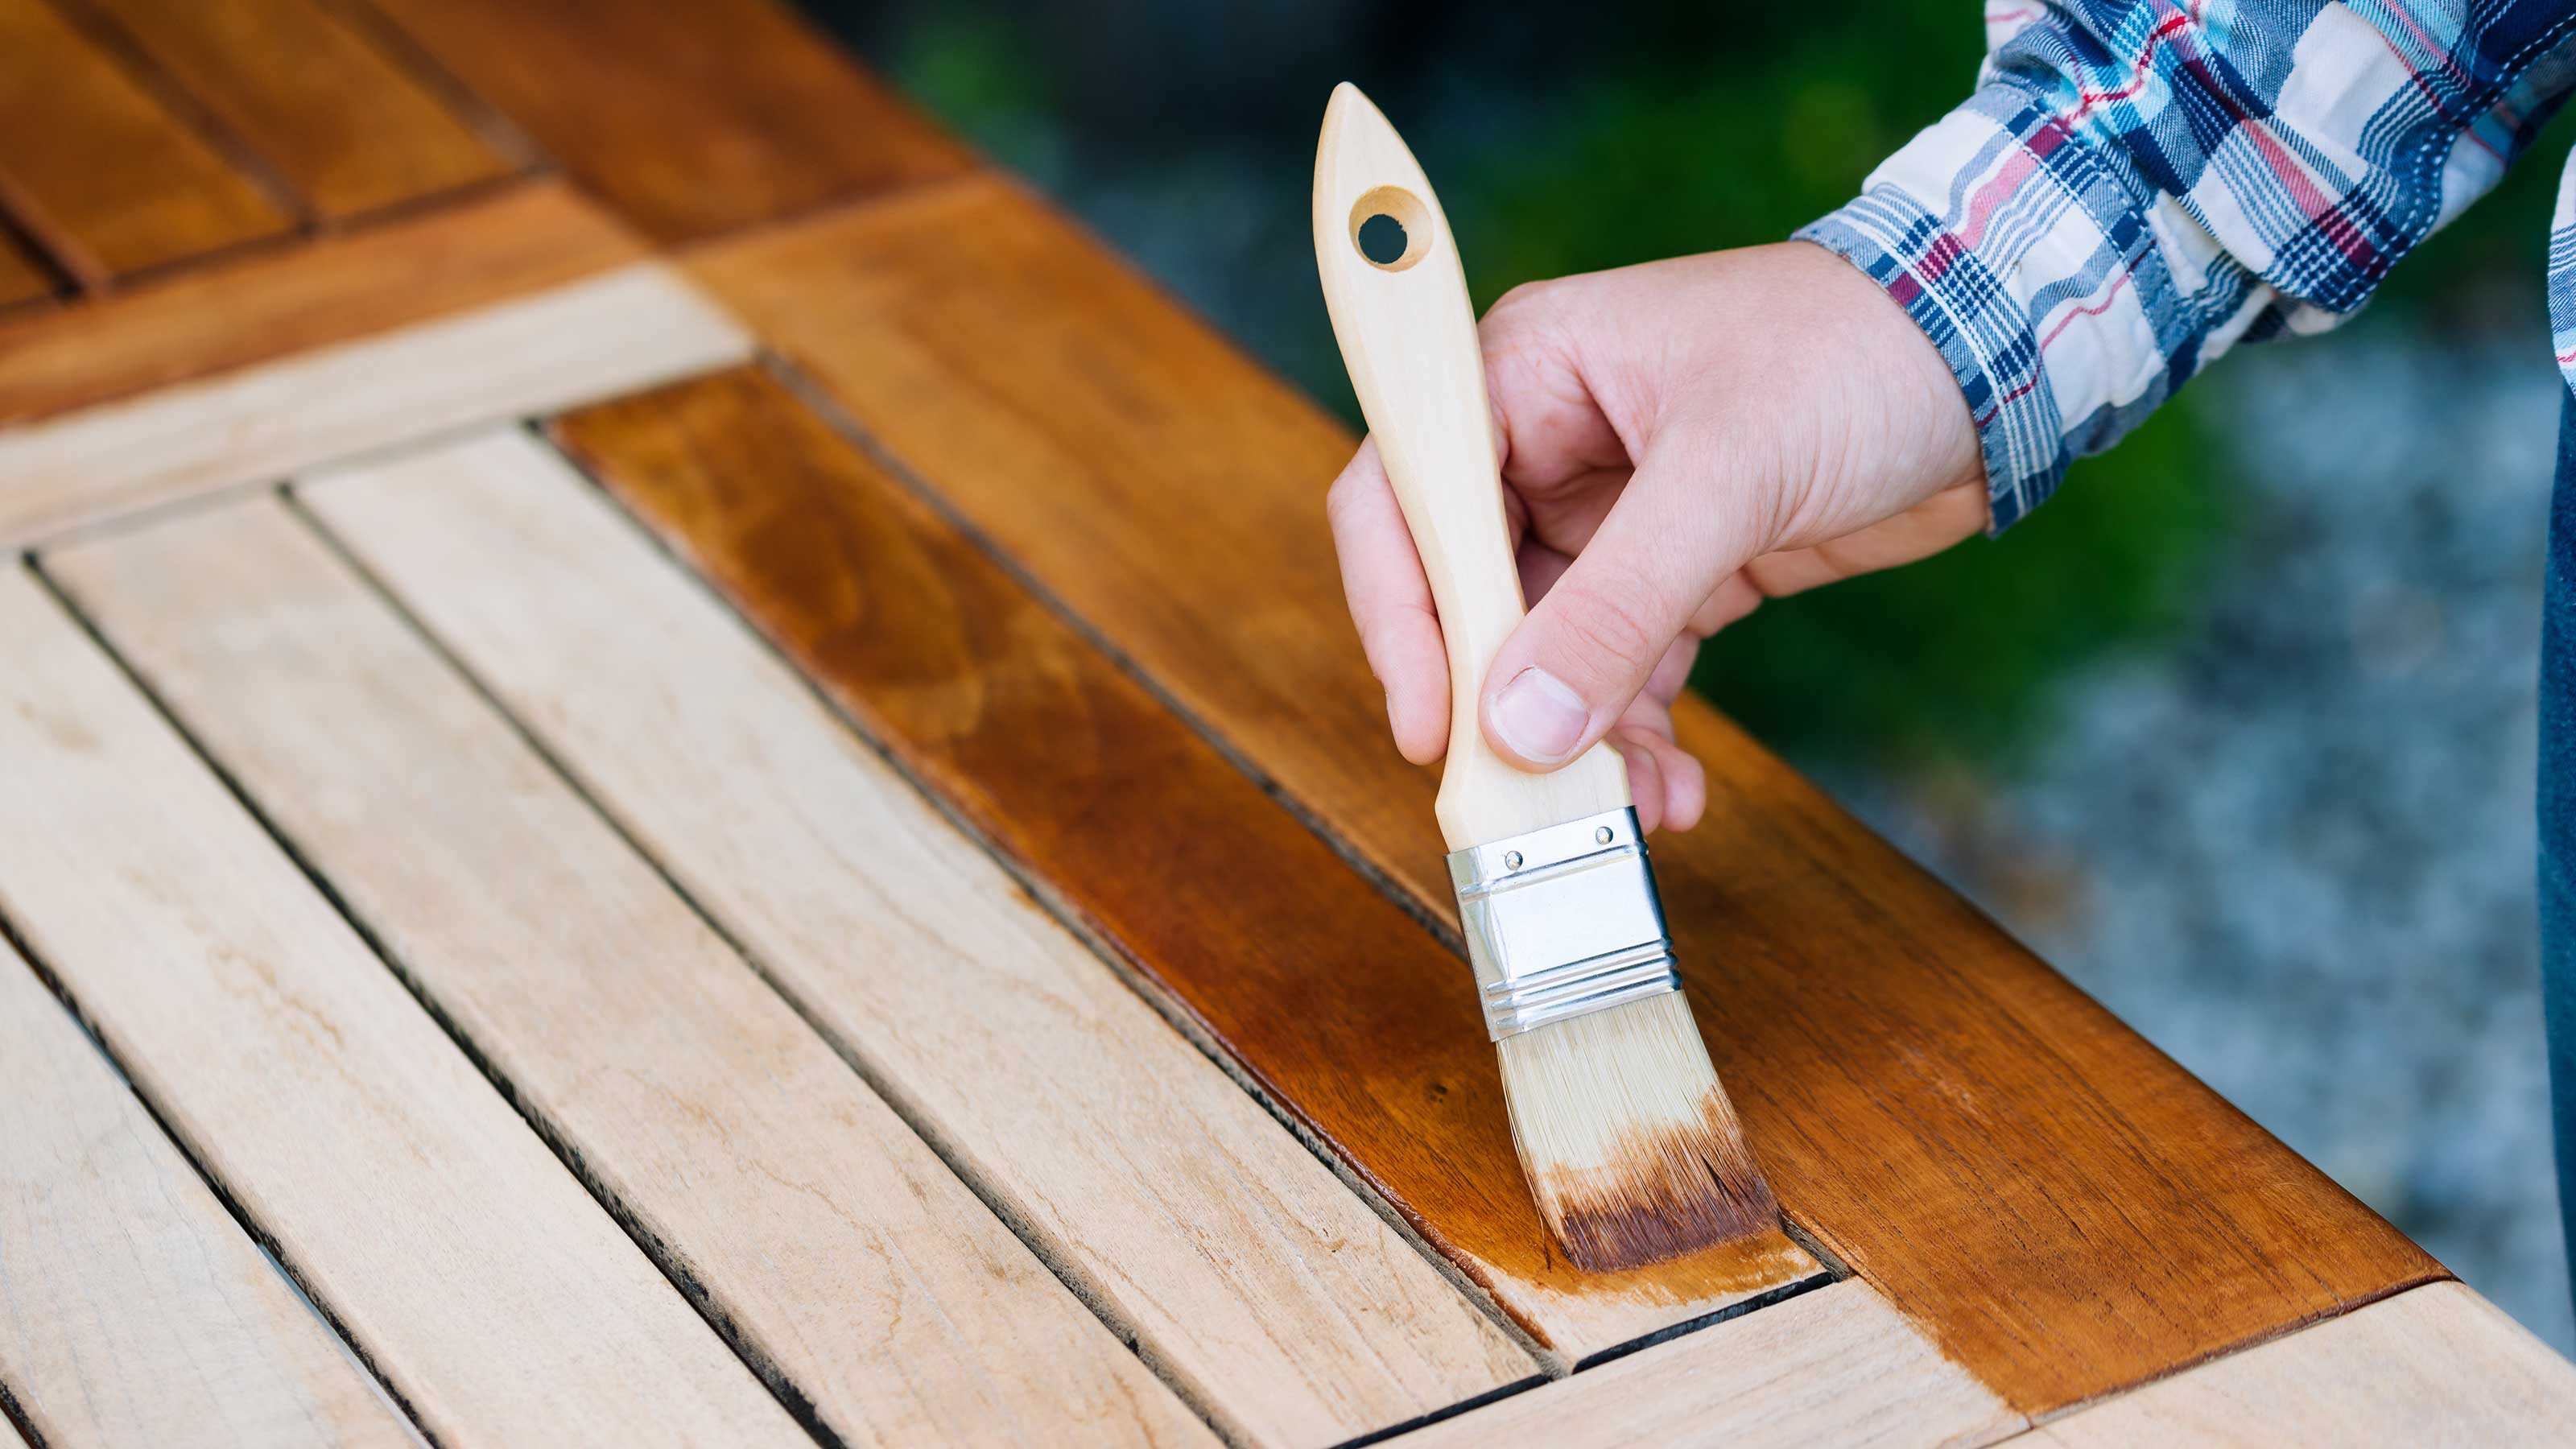
Step 6: Apply Finish or Paint
After preparing the surface of your patio furniture, it’s time to apply a new finish or paint to bring it back to life. The choice of finish or paint will depend on the material of your furniture and the desired look you want to achieve.
Follow these steps to apply the finish or paint to your patio furniture:
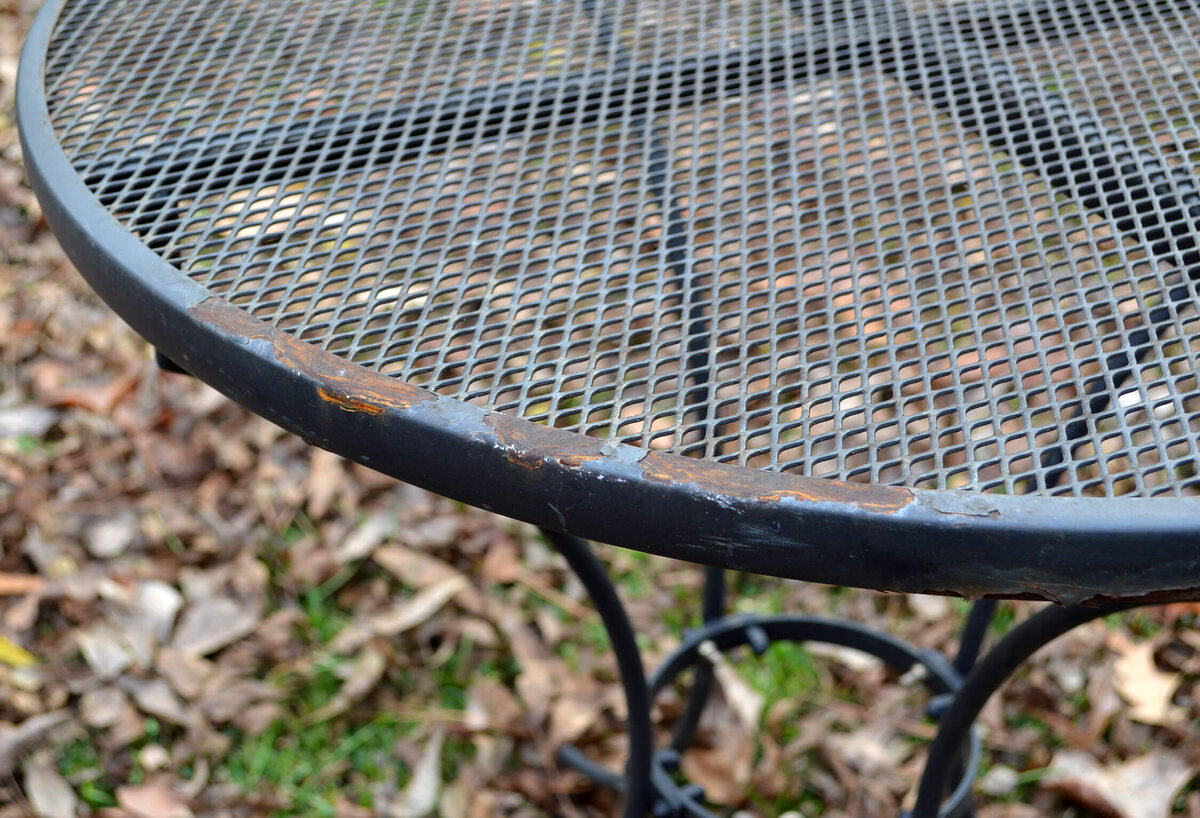
- Select the appropriate finish or paint: Consider the material of your furniture and the level of protection needed. For wooden furniture, you can choose between varnish, stain, or paint. Metal furniture may require a rust-resistant paint or an enamel finish, while plastic furniture may benefit from a spray paint designed specifically for plastics.
- Prepare the finish or paint: Follow the manufacturer’s instructions for preparing the chosen finish or paint. This may involve stirring, shaking, or thinning the product, depending on its formulation.
- Apply the finish or paint: Use a brush, roller, or spray gun suitable for the chosen product. Apply thin and even coats, working with the grain or shape of the furniture. Allow each coat to dry completely before applying the next one, following the recommended drying time specified by the manufacturer.
- Pay attention to detail: Make sure to cover all surfaces, including corners, crevices, and hard-to-reach areas. Take your time and apply the finish or paint evenly to achieve a smooth and consistent result.
- Allow for proper ventilation and curing time: Depending on the type of finish or paint used, it’s important to ensure proper ventilation during the drying process. This will help in achieving a durable and long-lasting finish.
- Clean up: Follow the manufacturer’s instructions for cleaning brushes, rollers, and any other tools used for applying the finish or paint. Proper cleanup will prolong the life of your tools and allow for future use.
Applying a new finish or paint is the final step in rejuvenating your patio furniture. It adds a protective layer and enhances the appearance, making it look like new again.
Once the finish or paint has dried and cured according to the manufacturer’s instructions, you’re almost done! The final step is to allow the furniture to fully dry before placing any accessories or seating cushions back on. This will ensure the longevity of the new finish and protect it from any potential damage.
Congratulations on successfully refinishing your patio furniture! By following these steps, you’ve revived your outdoor space and created a welcoming environment for relaxation and entertainment. Enjoy your newly refreshed patio furniture for many seasons to come!
Step 7: Allow to Dry
After applying the finish or paint to your newly sanded patio furniture, it’s crucial to allow it ample time to dry and cure. Proper drying ensures that the finish or paint sets and hardens, creating a durable and long-lasting surface.
Follow these steps to ensure proper drying of your patio furniture:
- Check the manufacturer’s instructions: Depending on the type of finish or paint used, the drying time may vary. Check the product label or the manufacturer’s instructions for the recommended drying time.
- Provide good ventilation: Make sure the area where the furniture is drying is well-ventilated. This will help speed up the drying process and prevent any potential build-up of fumes or odors.
- Avoid touching or moving the furniture: While the finish or paint is drying, it’s important to avoid touching or moving the furniture as much as possible. This prevents any smudging or damage to the freshly applied coating.
- Be patient: Allow the recommended drying time to fully elapse before using or placing any accessories on the furniture. Rushing the drying process can compromise the quality and durability of the finish or paint.
- Consider weather conditions: If you’re refinishing your patio furniture outdoors, pay attention to the weather conditions. Avoid exposing the furniture to rain or extreme temperatures during the drying process, as this can affect the finish or paint’s adhesion and drying time.
- Monitor the furniture: Keep an eye on the furniture as it dries, checking for any signs of uneven drying, bubbling, or other issues. If you notice any problems, consult the manufacturer’s instructions or seek professional advice.
- Complete the curing process: While many finishes or paints may dry to the touch relatively quickly, they may require additional time to fully cure and harden. Follow the manufacturer’s instructions for the recommended curing time before subjecting the furniture to full use.
Allowing your patio furniture to dry completely ensures that the finish or paint adheres properly and provides a long-lasting protective layer. It also ensures that you can fully enjoy and utilize your refurbished furniture without any compromises.
Once the furniture has dried and cured, you can confidently place cushions, accessories, and other elements back onto it. Sit back, relax, and enjoy your newly refinished patio furniture, knowing that you’ve successfully restored and enhanced your outdoor space.
Congratulations on completing the entire process of sanding and refinishing your patio furniture! By following these seven steps, you’ve given your outdoor furniture a new lease on life and created a beautiful and inviting space for relaxation and entertainment.
Read more: How To Paint Wood Furniture Without Sanding
Conclusion
Revitalizing your patio furniture through sanding and refinishing not only restores its appearance but also extends its lifespan. By following the step-by-step guide we’ve provided, you can achieve professional-quality results and enjoy the process of giving your outdoor furniture a fresh new look.
From preparing the area and removing the old finish to sanding the surface, smoothing the edges, and applying a new finish or paint, each step plays a crucial role in transforming your worn-out furniture into a stunning focal point for your outdoor space.
Remember to gather the necessary supplies, including sandpaper in various grits, protective gear, a sanding block or sponge, and a clean cloth. Properly prepare the area, ensure good ventilation, and take your time to achieve a thorough and even sanding process. Smoothing the edges adds a refined touch, while wiping down the furniture removes any residual dust and debris.
Finally, applying the finish or paint in a careful and controlled manner provides the finishing touch to your refinished furniture. Allow ample drying and curing time before using the furniture and placing accessories back on it.
By following these steps, you’ll not only enhance the aesthetic appeal of your outdoor furniture but also preserve its quality and durability. The investment of time and effort in sanding and refinishing will be well worth it as you enjoy a beautifully transformed outdoor space for years to come.
So, grab your supplies, put on your DIY hat, and get ready to breathe new life into your patio furniture. Embrace the satisfaction of taking something old and worn and turning it into a stunning piece that will bring joy and comfort to your outdoor activities.
Happy sanding and refinishing!
Frequently Asked Questions about How To Sand Patio Furniture
Was this page helpful?
At Storables.com, we guarantee accurate and reliable information. Our content, validated by Expert Board Contributors, is crafted following stringent Editorial Policies. We're committed to providing you with well-researched, expert-backed insights for all your informational needs.


0 thoughts on “How To Sand Patio Furniture”