Home>Furniture & Design>Outdoor Furniture>How To Stain An Outdoor Swing
Outdoor Furniture
How To Stain An Outdoor Swing
Published: January 13, 2024
Learn how to stain your outdoor swing to give it a fresh look and protect it from the elements. Follow our step-by-step guide for a beautiful finish. Perfect for outdoor furniture and design enthusiasts.
(Many of the links in this article redirect to a specific reviewed product. Your purchase of these products through affiliate links helps to generate commission for Storables.com, at no extra cost. Learn more)
Introduction
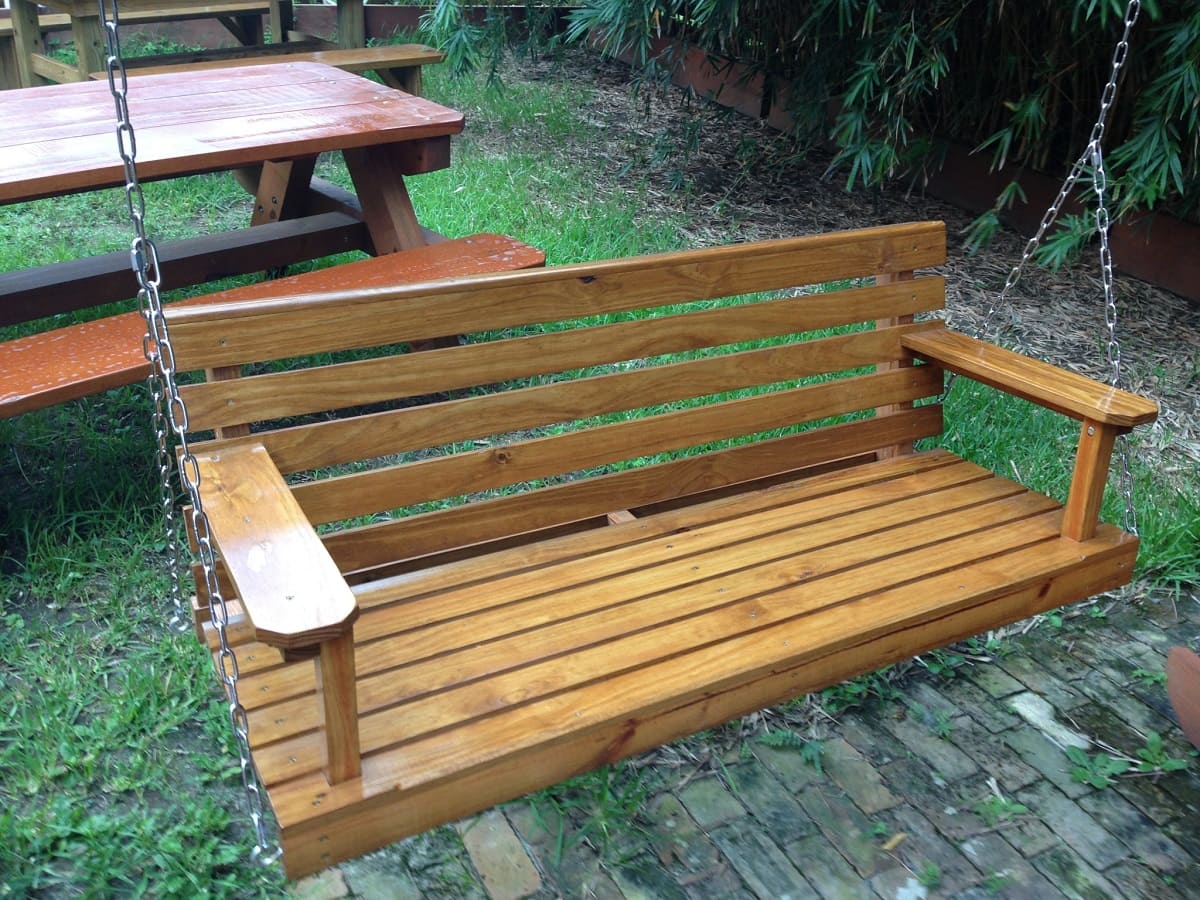
Welcome to the world of outdoor furniture care and maintenance! If you have an outdoor swing that's seen better days, staining it can breathe new life into the wood, enhancing its natural beauty while providing protection against the elements. Whether you're a seasoned DIY enthusiast or just embarking on your first outdoor furniture project, learning how to stain an outdoor swing can be a rewarding and relatively straightforward endeavor.
Staining an outdoor swing is not only a practical way to preserve its longevity but also an opportunity to showcase your personal style. The right stain can accentuate the wood's grain, add depth to its color, and complement the overall aesthetic of your outdoor space. In this guide, we'll explore the step-by-step process of staining an outdoor swing, from selecting the perfect stain to applying it with precision. By the end, you'll be equipped with the knowledge and confidence to revitalize your outdoor swing, creating a focal point that beckons relaxation and leisure.
So, roll up your sleeves, gather your materials, and let's delve into the art of transforming your outdoor swing from weathered to wonderful. Whether you envision a rich, mahogany finish or a subtle, natural hue, mastering the art of staining will empower you to infuse your outdoor sanctuary with enduring charm and character. Let's embark on this enriching journey of restoration and rejuvenation, where every brushstroke brings you closer to a beautifully stained outdoor swing that beckons you to unwind in style.
Key Takeaways:
- Choose the right stain by considering wood type, color, protection, and transparency. Balance aesthetics and functionality for a successful staining process.
- Prepare the swing by cleaning, removing previous finishes, and protecting non-staining areas. Thorough preparation sets the stage for a flawless staining process.
Read more: How To Build An Outdoor Swing
Choosing the Right Stain
Before embarking on the staining process, it’s essential to select the right stain for your outdoor swing. The ideal stain will not only enhance the natural beauty of the wood but also provide protection against the elements, ensuring longevity and durability.
When choosing a stain, consider the type of wood your swing is made of. Hardwoods such as teak, cedar, or oak may require a different type of stain compared to softwoods like pine or spruce. Additionally, take into account the desired color and finish. Stains are available in a spectrum of hues, from rich, dark tones to lighter, more natural shades. Consider the existing color scheme of your outdoor space and select a stain that complements or contrasts with it, depending on your design preferences.
Furthermore, assess the level of protection the stain offers. Look for a stain that provides UV protection and is resistant to mold, mildew, and moisture. This is particularly crucial for outdoor furniture, as it will be exposed to varying weather conditions. A high-quality, weather-resistant stain will ensure that your swing remains beautiful and resilient for years to come.
Another aspect to consider is the transparency of the stain. Transparent and semi-transparent stains allow the natural grain of the wood to show through, creating a more organic and rustic look. On the other hand, solid stains provide more coverage and can completely transform the color of the wood, offering a more uniform appearance. Your choice of transparency will depend on the current condition of the swing, the desired aesthetic, and the level of maintenance you’re willing to undertake in the future.
Ultimately, the right stain for your outdoor swing will strike a balance between aesthetics and functionality, elevating its visual appeal while safeguarding it from the elements. By carefully considering the type of wood, desired color, level of protection, and transparency, you can make an informed decision that sets the stage for a successful staining process.
Preparing the Swing for Staining
Proper preparation is key to achieving a flawless and long-lasting stain finish on your outdoor swing. Before diving into the staining process, it’s essential to ensure that the swing is clean, dry, and free of any previous finishes or contaminants that may hinder the absorption of the new stain.
Begin by thoroughly cleaning the swing to remove any dirt, grime, or mildew that may have accumulated over time. A gentle scrub with a mixture of mild soap and water, followed by a rinse with clean water, can effectively restore the swing’s surface to a clean and receptive state. For stubborn stains or discoloration, consider using a wood cleaner or brightener to revitalize the wood’s appearance.
Once the swing is clean and dry, inspect the surface for any existing finish, such as varnish or paint. If the swing has a previous coating, it’s crucial to remove it before applying the new stain. This can be accomplished through sanding or using a wood stripper, depending on the type of finish and the condition of the wood. Sanding not only removes the existing finish but also smoothens the wood surface, ensuring an even and uniform application of the new stain.
After removing any existing finish, it’s important to address any imperfections or rough areas on the swing. Sanding the wood with fine-grit sandpaper will help eliminate blemishes, scratches, and uneven spots, resulting in a polished and pristine surface that is ready to absorb the stain. Be sure to sand in the direction of the wood grain to preserve its natural texture and prevent unsightly marks.
Before proceeding with staining, take the time to protect any areas of the swing that you don’t want to be stained, such as metal hardware or fabric elements. Cover these areas with painter’s tape or plastic sheeting to prevent accidental staining and ensure a clean and professional outcome.
By meticulously preparing the swing for staining, you set the stage for a successful and visually stunning transformation. The thorough cleaning, removal of previous finishes, surface smoothening, and protection of non-staining areas are essential steps that lay the groundwork for a flawless staining process, allowing the natural beauty of the wood to shine through.
Before staining an outdoor swing, make sure to sand the surface to remove any existing finish and create a smooth surface for the stain to adhere to. Use a wood stain specifically designed for outdoor use to protect the swing from the elements. Apply the stain in thin, even coats and allow each coat to dry completely before applying the next. Finally, finish with a clear outdoor sealant to provide extra protection.
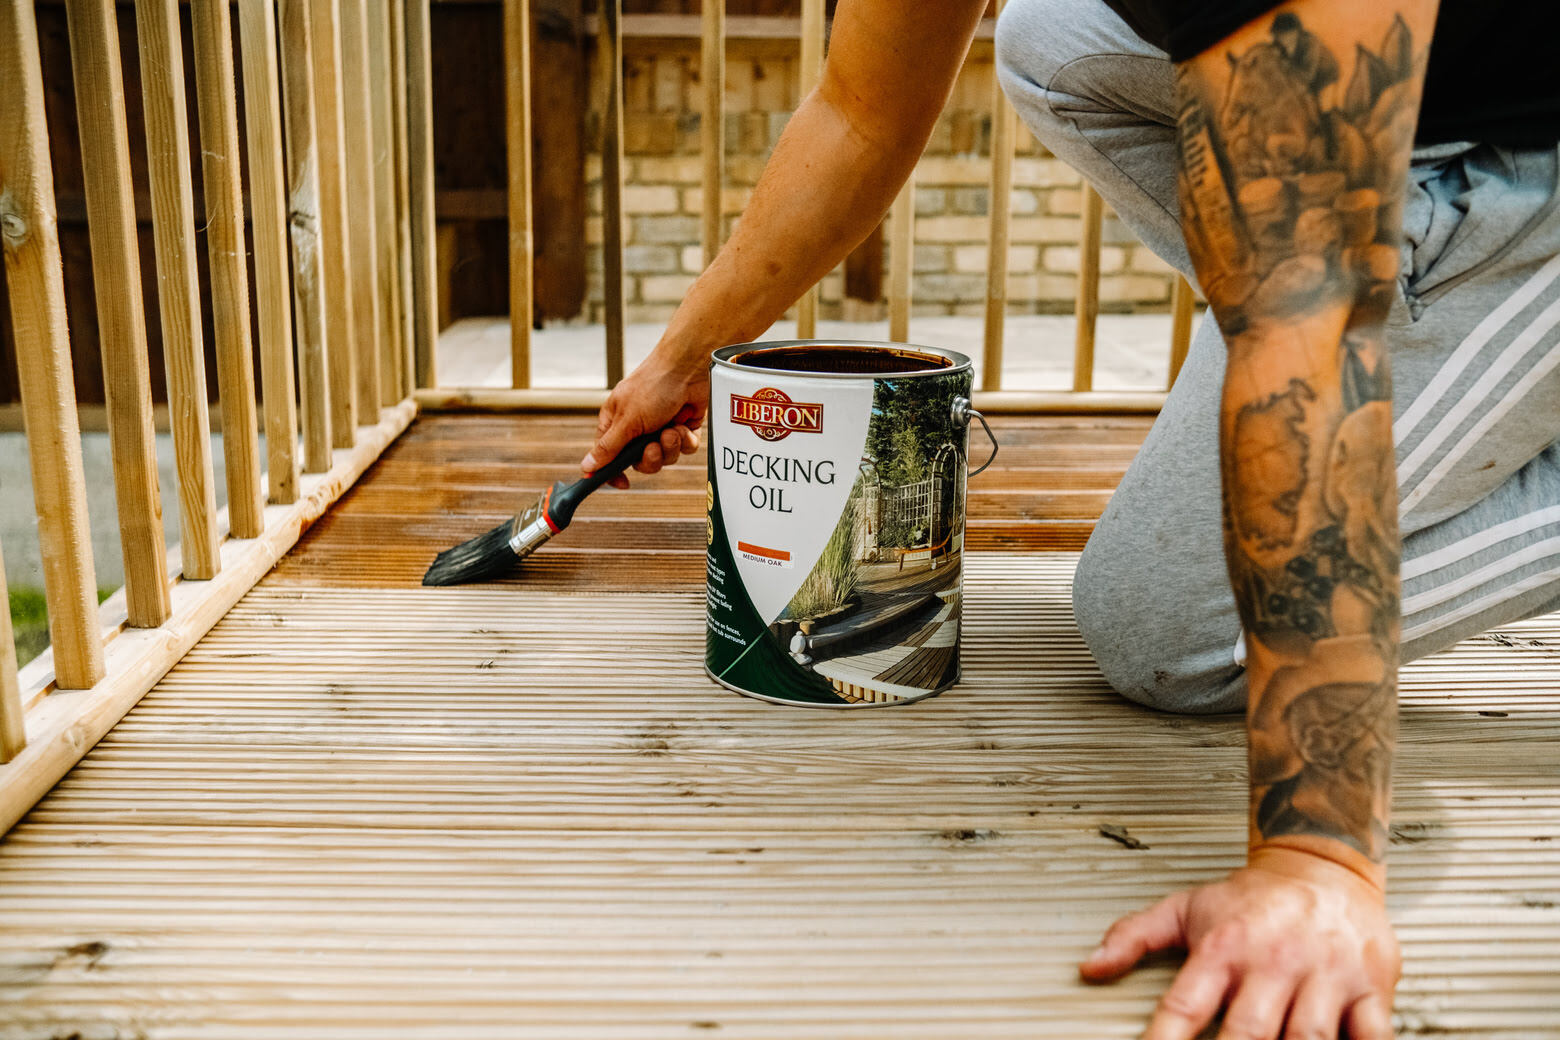
Applying the Stain
With the swing meticulously prepared, it’s time to embark on the transformative process of applying the stain. This step requires attention to detail and a methodical approach to ensure an even and lustrous finish that accentuates the wood’s natural characteristics.
Before applying the stain, thoroughly stir or shake the can to mix the contents, ensuring uniformity in color and consistency. It’s advisable to test the stain on a small, inconspicuous area of the swing to assess the color and absorption before proceeding with the entire surface. This test will also help you gauge the number of coats needed to achieve the desired hue and level of opacity.
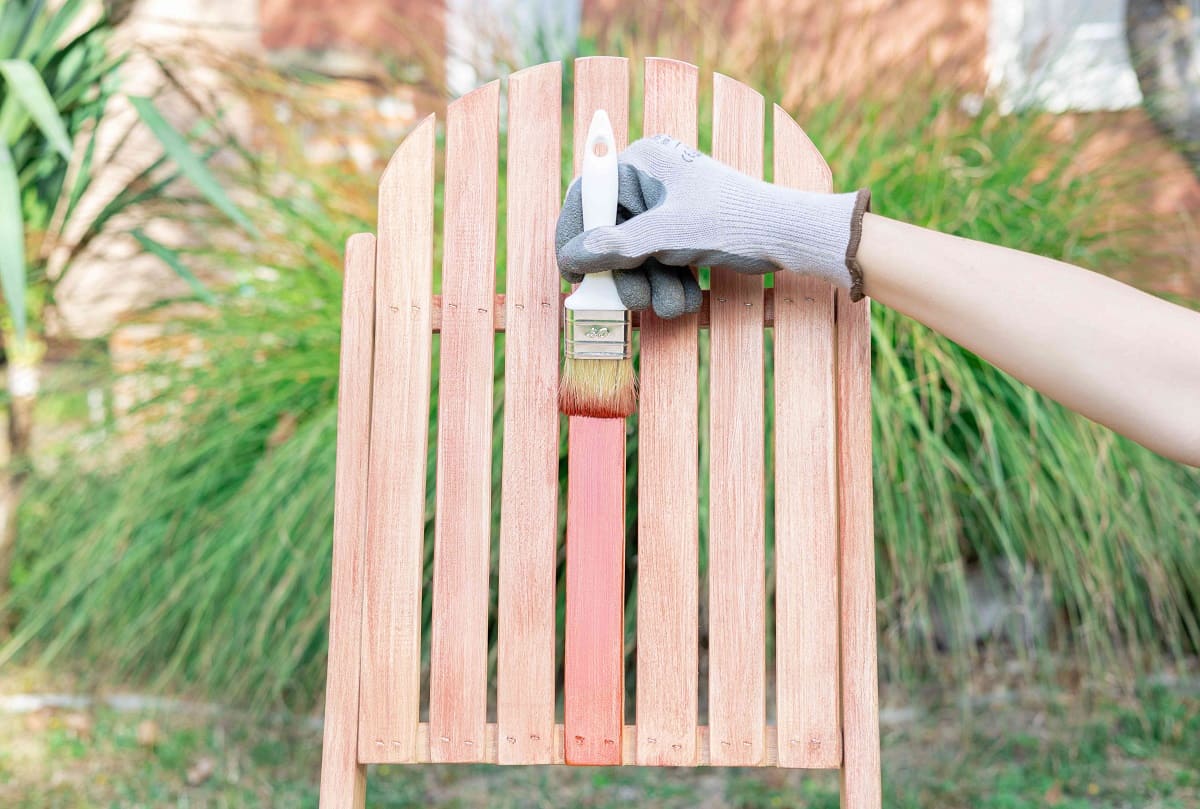
When applying the stain, use a high-quality brush, sponge, or cloth to ensure even coverage and penetration into the wood fibers. Work methodically in the direction of the wood grain, applying the stain in smooth, overlapping strokes to prevent streaks or uneven patches. Take care to maintain a wet edge to avoid lap marks and ensure a seamless finish.
Depending on the desired depth of color and the type of stain used, you may opt for a single coat or multiple coats to achieve the perfect intensity. Allow each coat to penetrate the wood for the recommended time specified by the manufacturer before wiping off any excess stain with a clean cloth. This process not only controls the depth of color but also prevents tackiness and uneven drying.
As you apply the stain, pay close attention to any drips, runs, or pooling of the product, ensuring that the stain is distributed evenly and excess is promptly removed. Be mindful of overlapping areas to maintain a consistent appearance across the entire surface of the swing.
After completing the staining process, allow the swing to dry thoroughly according to the manufacturer’s instructions. It’s crucial to provide adequate ventilation and protect the swing from dust, debris, and inclement weather during the drying period to achieve a flawless and enduring finish.
By approaching the staining process with precision and care, you can elevate the visual appeal of your outdoor swing, infusing it with a rich and enduring hue that celebrates the inherent beauty of the wood. The application of the stain is a transformative step that breathes new life into the swing, creating a captivating centerpiece for your outdoor sanctuary.
Drying and Sealing the Swing
After the stain has been meticulously applied, the next crucial step in the process of revitalizing your outdoor swing is ensuring thorough drying and sealing. Proper drying and sealing not only enhance the longevity of the stain but also fortify the wood, safeguarding it against environmental factors and ensuring enduring beauty.
Once the stain has been applied, allow the swing to dry completely according to the manufacturer’s recommendations. This typically involves providing adequate ventilation and allowing sufficient time for the stain to penetrate and cure, creating a resilient and vibrant finish. Avoid exposing the swing to excessive moisture or harsh weather conditions during the drying period to prevent any compromise in the quality of the stain.
Following the complete drying of the stain, it’s time to seal the wood to protect the newly stained surface and enhance its resilience. Consider using a high-quality outdoor wood sealant or polyurethane finish designed to withstand the rigors of outdoor exposure. The sealant not only shields the wood from UV rays, moisture, and temperature fluctuations but also adds a protective layer that prolongs the life of the stain and the wood itself.
Before applying the sealant, ensure that the swing’s surface is clean and free of any dust or debris that may have settled during the drying process. Use a clean, dry cloth to gently remove any particles that could mar the finish and compromise the effectiveness of the sealant.
When applying the sealant, follow the manufacturer’s instructions regarding the method of application, number of coats, and drying times. Similar to the staining process, work methodically in the direction of the wood grain, ensuring even coverage and allowing each coat to dry thoroughly before applying the next. This meticulous approach will result in a robust and enduring seal that protects the stained wood, preserving its luster and beauty for years to come.
Once the sealant has been applied and allowed to dry completely, your outdoor swing is ready to reclaim its place as a captivating and enduring centerpiece of your outdoor sanctuary. The combination of a rich, lustrous stain and a protective sealant not only enhances the aesthetic appeal of the swing but also fortifies it against the elements, ensuring that it remains a source of relaxation and enjoyment for years to come.
Read more: Creating A Cozy Outdoor Reading Swing
Conclusion
Congratulations on successfully completing the transformative journey of staining your outdoor swing! By infusing the wood with a rich and enduring hue, you have not only revitalized its appearance but also fortified it against the elements, ensuring lasting beauty and functionality.
The process of staining an outdoor swing is a testament to the art of preservation and enhancement. From selecting the perfect stain to meticulously preparing the swing, applying the stain with precision, and sealing the wood for enduring protection, each step contributes to the creation of a captivating and enduring centerpiece for your outdoor sanctuary.
As you admire the newly stained swing, take a moment to appreciate the seamless integration of nature’s beauty and human craftsmanship. The rich color and lustrous finish not only accentuate the natural grain of the wood but also reflect your personal style and dedication to maintaining a welcoming and aesthetically pleasing outdoor space.
With the swing now adorned in its resplendent new hue and fortified with a protective sealant, it stands ready to beckon moments of relaxation, leisure, and connection with nature. Whether it’s a quiet afternoon of reading, a lively gathering with loved ones, or simply a moment of respite amidst the beauty of the outdoors, your stained swing is poised to be a cherished and enduring element of your outdoor oasis.
As you continue to enjoy the fruits of your labor, remember that proper maintenance and care will further enhance the longevity of the stain and the wood, ensuring that your outdoor swing remains a source of joy and tranquility for years to come. Embrace the opportunity to bask in the beauty of your outdoor sanctuary, where the stained swing stands as a testament to your dedication to preserving and enhancing the elements that make your outdoor space a haven of comfort and serenity.
May your stained outdoor swing serve as a beacon of warmth and relaxation, inviting you to savor the simple pleasures of outdoor living and creating cherished memories in the embrace of nature’s timeless allure.
Frequently Asked Questions about How To Stain An Outdoor Swing
Was this page helpful?
At Storables.com, we guarantee accurate and reliable information. Our content, validated by Expert Board Contributors, is crafted following stringent Editorial Policies. We're committed to providing you with well-researched, expert-backed insights for all your informational needs.


0 thoughts on “How To Stain An Outdoor Swing”