Home>Furniture>Outdoor Furniture>How To Stain An Outdoor Concrete Patio

Outdoor Furniture
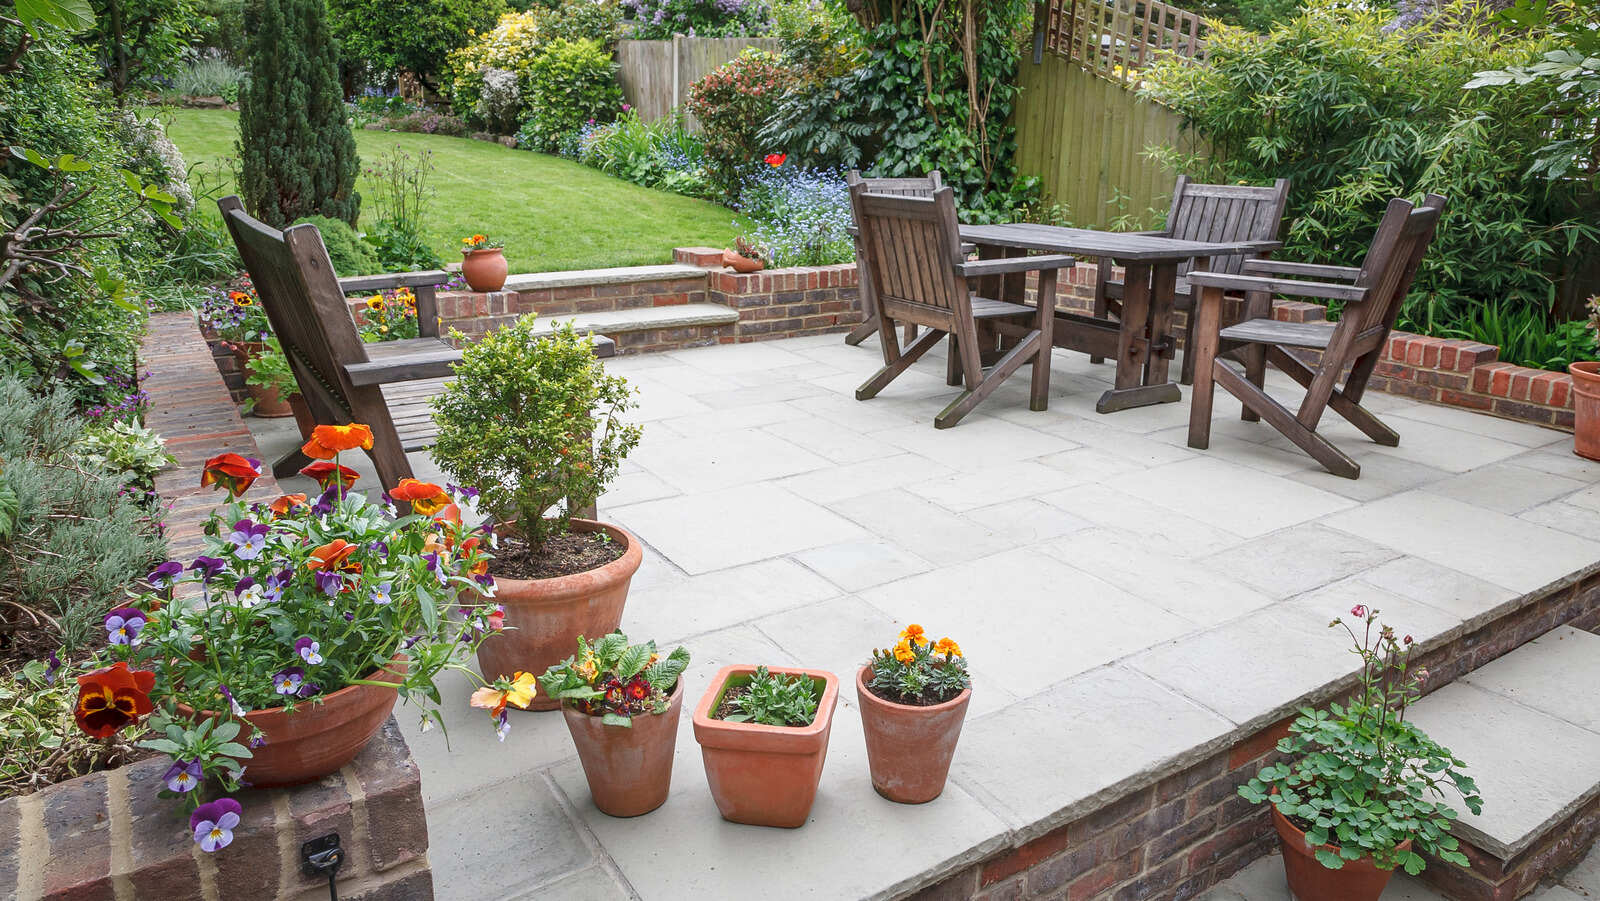
How To Stain An Outdoor Concrete Patio
Modified: March 7, 2024
Learn how to stain your outdoor concrete patio to enhance its appearance and protect it from the elements. Transform your outdoor furniture with this DIY project!
(Many of the links in this article redirect to a specific reviewed product. Your purchase of these products through affiliate links helps to generate commission for Storables.com, at no extra cost. Learn more)
Introduction
Welcome to our comprehensive guide on how to stain an outdoor concrete patio. If you want to revitalize the look of your patio and give it a fresh new appearance, staining the concrete can be a fantastic option. Not only does staining add color and character to your outdoor space, but it also helps protect the concrete from the elements and enhances its durability.
Staining a concrete patio is a relatively simple process that can be completed by homeowners with basic DIY skills. In this article, we will provide you with step-by-step instructions on how to stain your outdoor concrete patio, along with useful tips and insights to ensure a successful project. So, grab your materials and let’s get started on transforming your patio into a stunning oasis!
Key Takeaways:
- Revitalize your outdoor concrete patio by staining it with the right color and type of stain, enhancing its appearance and protecting it from the elements for a stunning and durable outdoor space.
- Properly prepare, apply, and seal the stain on your outdoor concrete patio, then follow curing and maintenance practices to ensure its longevity and visual appeal for years to come.
Read more: How To Acid Stain Outdoor Concrete Patio
Materials Needed
Before you begin staining your outdoor concrete patio, it’s essential to gather all the necessary materials. Here’s a breakdown of what you’ll need:
- Concrete stain: Choose a stain specifically formulated for exterior concrete. There are two main types of stains: acid-based stains and water-based stains. Acid stains provide a more natural, variegated look, while water-based stains offer a wider range of color options.
- Cleaner/degreaser: To prepare the concrete surface for staining, you’ll need a cleaner or degreaser to remove any dirt, grime, or oil stains. Choose a product that is compatible with the type of stain you’ll be using.
- Power washer: This tool will come in handy for thoroughly cleaning the concrete surface and removing any stubborn debris. If you don’t have a power washer, you can rent one from a local home improvement store.
- Broom and scrub brushes: These tools will help you in the cleaning process, ensuring that the concrete is free from any loose dirt or debris.
- Concrete crack filler: If your patio has any cracks or imperfections, you’ll need a suitable concrete crack filler to repair them before staining.
- Protective equipment: It’s crucial to protect yourself during the staining process. Wear safety goggles, gloves, and a respirator mask to prevent any harmful chemicals or debris from coming into contact with your eyes, skin, or respiratory system.
- Paint brushes or rollers: Depending on the size of your patio and the desired application method, you’ll need paint brushes or rollers to apply the stain evenly.
- Drop cloths or plastic sheets: It’s essential to protect any adjacent areas, such as furniture or plants, from accidental staining. Use drop cloths or plastic sheets to cover these areas.
- Concrete sealer: Once the stain has dried, you’ll need a concrete sealer to lock in the color and provide added protection to the surface.
- Stir stick and mixing container: If you’re using a water-based stain, you’ll need a stir stick and a mixing container to ensure proper color consistency.
Make sure you have all these materials ready before you begin the staining process. This will help streamline the project and ensure a smooth application of the stain.
Preparation
Proper preparation is key to achieve a successful and long-lasting stained concrete patio. Follow these steps to prepare the surface before applying the stain:
- Clean the concrete: Start by removing any loose dirt, debris, or vegetation from the patio surface. Use a broom to sweep away larger particles, and then use a power washer to thoroughly clean the concrete. Pay special attention to areas with stains or discoloration.
- Remove grease and oil stains: If there are any grease or oil stains on the concrete, use a suitable degreaser to remove them. Apply the degreaser according to the manufacturer’s instructions, scrubbing the stains with a scrub brush. Rinse the area thoroughly to ensure all residues are removed.
- Repair cracks and imperfections: Inspect the patio for any cracks, chips, or imperfections. Use a concrete crack filler to repair these areas. Follow the product instructions for the best results. Allow the filler to dry completely before continuing.
- Protect adjacent areas: Use drop cloths or plastic sheets to cover any adjacent areas, such as nearby plants, furniture, or walls. This will prevent accidental staining during the application process.
- Check the weather: Staining should be done when the weather conditions are optimal. Avoid staining on extremely hot or cold days, as it can affect the stain’s performance. Choose a day with moderate temperatures and low humidity for the best results.
By thoroughly cleaning the concrete, repairing any cracks, and protecting adjacent areas, you will create a clean and smooth surface ready for staining. Taking the time to prep the patio will ensure that the stain adheres properly and enhances the overall appearance of your outdoor space.
Cleaning the Concrete
Before you can apply the stain to your outdoor concrete patio, it’s crucial to clean the surface thoroughly. Cleaning not only removes dirt and debris but also helps the stain adhere better to the concrete. Follow these steps to properly clean your patio:
- Sweep: Start by sweeping the entire patio with a broom to remove any loose dirt, debris, or leaves. Collect and dispose of the swept material properly.
- Power washing: Use a power washer to clean the concrete surface. Start from one end of the patio and work your way to the other, making sure to cover the entire area. Hold the power washer nozzle at a 45-degree angle and maintain a consistent distance from the surface. This will help remove embedded dirt and grime effectively.
- Cleaning solution: If there are still stubborn stains or areas of heavy soiling, you can use a cleaner or degreaser specifically formulated for concrete. Dilute the cleaner according to the manufacturer’s instructions and apply it to the affected areas. Use a scrub brush or a broom with stiff bristles to agitate the cleaner and loosen the dirt. Rinse the area thoroughly with water to remove any residue.
- Rinse: Once you have finished power washing and applying any cleaners, it’s essential to rinse the entire patio with clean water. This will remove any remaining dirt or cleaning solution from the surface.
Allow the concrete to dry completely before proceeding to the next steps. Depending on the weather conditions, it may take a few hours or longer for the patio to dry completely. Be sure to check that the surface is dry to the touch before moving on to the next stages of the staining process.
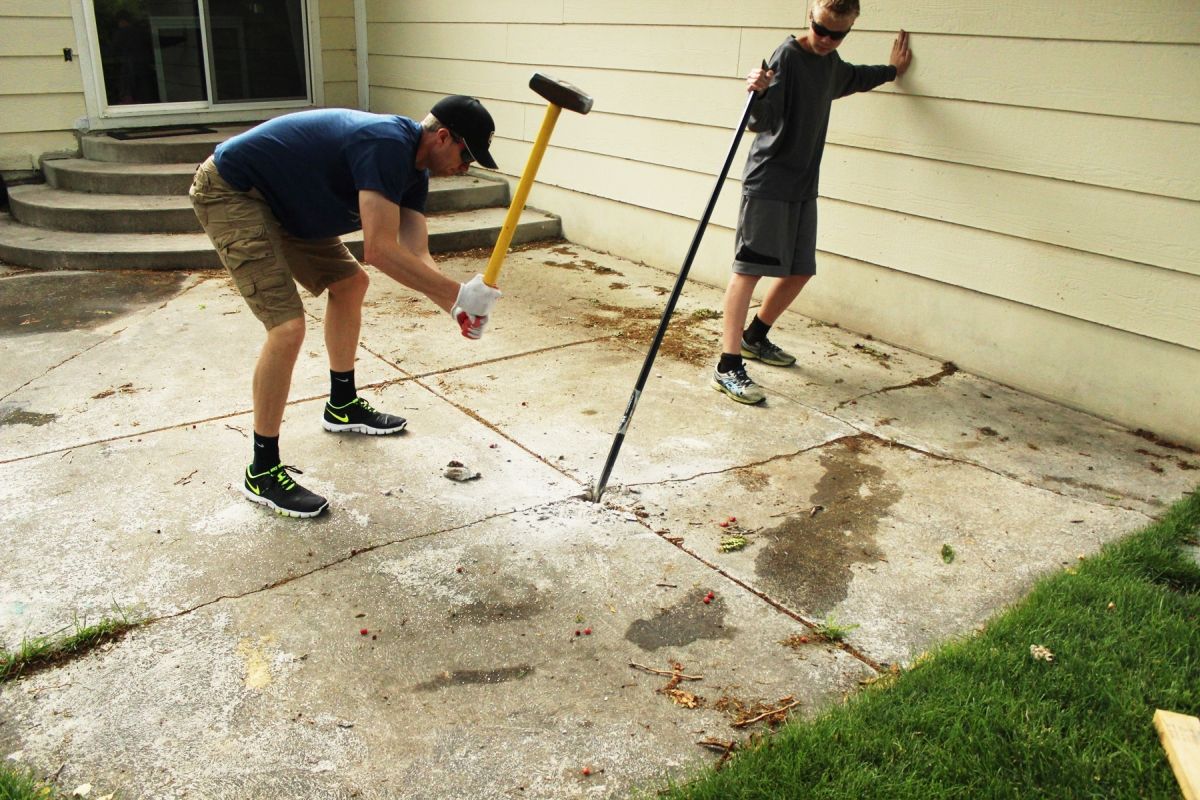
Repairing Cracks and Imperfections
Before staining your outdoor concrete patio, it’s important to address any cracks, chips, or imperfections on the surface. Repairing these issues will help ensure a smooth and flawless finished result. Follow these steps to repair cracks and imperfections:
- Clean the area: Begin by cleaning the cracked or damaged area with a broom or brush to remove any loose debris or dirt.
- Prepare the crack filler: Follow the instructions on the concrete crack filler product to prepare it for application. Depending on the type of crack filler, you may need to mix it with water or a bonding agent to achieve the desired consistency.
- Fill the cracks: Apply the crack filler to the cracks or imperfections using a putty knife or trowel. Press the filler into the cracks, ensuring it fills the entire depth of the crevice. Smooth the surface of the crack filler with the putty knife, removing any excess material.
- Allow the filler to dry: Give the crack filler ample time to dry and cure. The drying time will vary depending on the product, so consult the instructions on the packaging for specific guidance.
- Sand the filled area: Once the crack filler has dried, use sandpaper or a sanding block to create a smooth, even surface. Sanding helps blend the repaired area with the surrounding concrete, ensuring a seamless appearance.
- Clean up: After sanding, remove any dust or debris from the repaired area. Sweep or vacuum the surface to ensure it is clean and ready for staining.
Repairing cracks and imperfections before staining your patio will help improve the overall appearance and durability of the concrete. It’s important to follow the manufacturer’s instructions for the crack filler product and to allow sufficient drying time before proceeding to the next steps of the staining process.
Read more: How To Stamp And Stain A Concrete Patio
Choosing the Stain
When it comes to staining your outdoor concrete patio, choosing the right stain is crucial to achieving the desired look and long-term durability. Here are some factors to consider when selecting a stain:
- Color: Determine the color scheme you want for your patio. Concrete stains are available in a wide range of colors, from earthy tones to vibrant hues. Consider the existing color palette of your outdoor space and choose a stain that complements it or adds a contrasting pop.
- Type of stain: There are two main types of concrete stains: acid-based stains and water-based stains. Acid stains are known for their ability to create a variegated, natural-looking finish with rich tones. Water-based stains offer a wider variety of color options and are generally easier to use and clean up.
- Opacity: Stains can have varying levels of opacity, from translucent to more solid. Translucent stains allow some of the natural texture and color of the concrete to show through, while solid stains create a more uniform and opaque appearance.
- Desired effect: Consider the overall effect you want to achieve on your patio. Do you prefer a subtle, mottled look with hints of the concrete showing through? Or do you want a bold, solid color that completely transforms the surface? Keep your desired effect in mind when selecting a stain.
- Compatibility: Ensure that the stain you choose is compatible with outdoor use and suitable for concrete surfaces. Check the product label or consult with the manufacturer to ensure that the stain is specifically formulated for exterior applications.
- Sample testing: Before applying the stain to the entire patio, it’s recommended to test it on a small inconspicuous area. This will allow you to see how the stain interacts with your concrete and how the color develops. It’s important to be satisfied with the result before proceeding with the full application.
Take the time to research different stain options, consider your preferences and the look you want to achieve, and take into account factors such as color, opacity, and compatibility. By choosing the right stain, you can enhance the beauty of your outdoor concrete patio and create a stunning focal point for your outdoor space.
Before staining your outdoor concrete patio, make sure to thoroughly clean and etch the surface to ensure the stain adheres properly. Use a concrete cleaner and a pressure washer for best results.
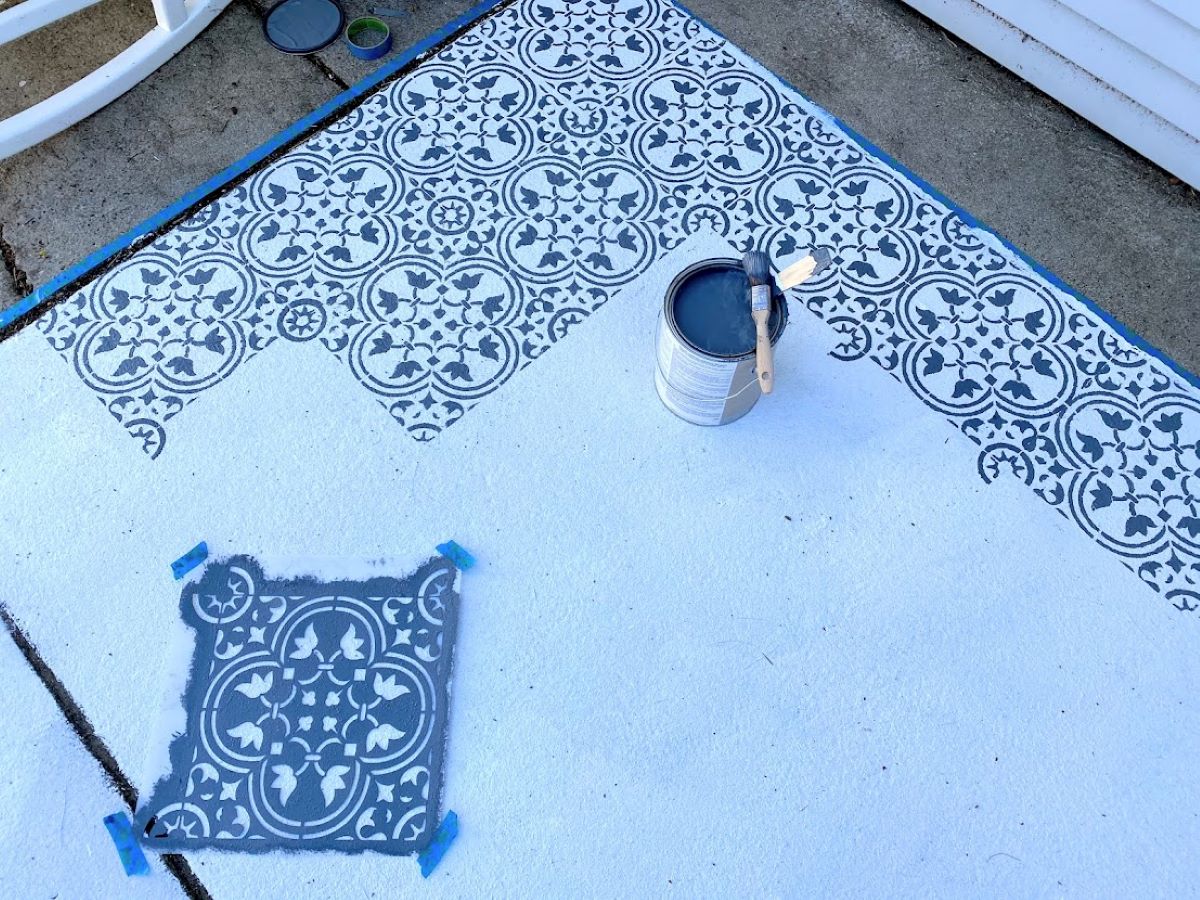
Applying the Stain
Once you have selected the perfect stain for your outdoor concrete patio, it’s time to apply it. Follow these steps to ensure a smooth and successful staining process:
- Prepare the stain: If you’re using an acid-based stain, make sure to mix it according to the manufacturer’s instructions. For water-based stains, stirring it well before applying is usually sufficient.
- Start with a small section: It’s recommended to start applying the stain in a small, inconspicuous area to familiarize yourself with the process and determine the ideal application technique.
- Apply the stain: Using a paintbrush or a roller, apply an even coat of stain to the clean and dry concrete surface. Work in manageable sections to ensure that the stain is applied uniformly.
- Blend and feather edges: To create a seamless transition between sections, blend and feather the edges of each applied area. This helps avoid visible lines and ensures a cohesive finish.
- Work in layers: For a more intense color or a specific effect, you can apply additional coats of stain once the first coat has dried. Follow the product instructions for the recommended drying time between coats.
- Allow the stain to dry: Give the stain ample time to dry and penetrate the concrete surface. The drying time will vary depending on the type of stain and the weather conditions. Refer to the product instructions for the suggested drying time.
- Inspect the outcome: Once the stain has dried, inspect the patio to ensure the desired color and effect have been achieved. If necessary, you can apply additional coats or touch-ups to areas that may require further enhancement.
Remember to work carefully and methodically during the application process to achieve an even and consistent finish. Pay attention to any guidelines or recommendations provided by the stain manufacturer to ensure the best results.
Keep in mind that the final result of the stain may take some time to fully develop, as the color may continue to deepen and evolve over the following days. Be patient and allow the stain to fully cure before proceeding with the next steps.
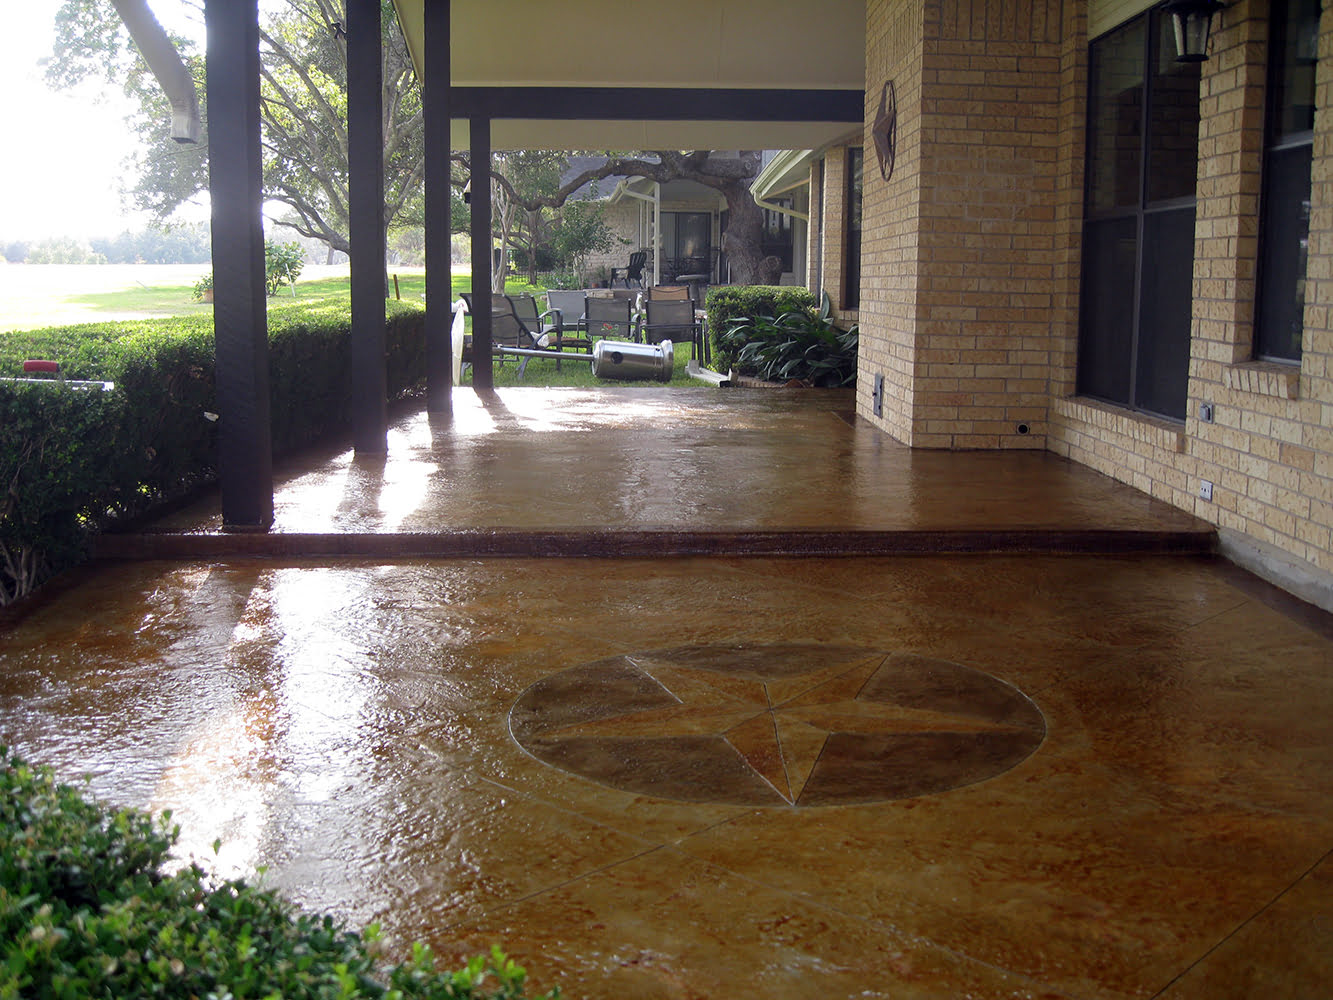
Sealing the Stained Concrete
After applying the stain to your outdoor concrete patio, it’s important to seal the surface to protect the color and enhance its longevity. Sealing the stained concrete provides an added layer of protection against UV rays, foot traffic, and the elements. Follow these steps to properly seal your stained concrete:
- Choose the appropriate sealer: There are various types of concrete sealers available, including acrylic sealers, polyurethane sealers, and epoxy coatings. Consider the level of protection and the desired finish when selecting a sealer. Read the product label carefully to ensure that the sealer is compatible with stained concrete.
- Prepare the surface: Clean the stained concrete surface and ensure it is free from any debris or contaminants. Sweep or vacuum the patio to remove any loose dirt or dust.
- Apply the sealer: Follow the manufacturer’s instructions for the specific sealer you have selected. Use a paintbrush or a roller to apply the sealer evenly to the stained concrete. Work in small sections to ensure thorough coverage.
- Allow drying time: Give the sealer sufficient time to dry and cure. The drying time will depend on the type of sealer and the weather conditions. It’s crucial to avoid foot traffic or any other activity on the sealed patio until the sealer is fully dry.
- Apply additional coats: Depending on the desired level of protection, you may need to apply multiple coats of sealer. Follow the product instructions for the recommended number of coats and drying time between each application.
- Inspect the results: Once the sealer has fully dried, inspect the patio to ensure the desired level of protection and appearance has been achieved. The sealer should give the stained concrete a beautiful, glossy finish.
Sealing the stained concrete will help maintain the color vibrancy and protect the patio from stains, fading, and wear. Be sure to reseal the concrete periodically as recommended by the sealer manufacturer to ensure long-lasting results.
Remember, proper ventilation is important during the sealing process, so be sure to work in a well-ventilated area or consider wearing a respirator mask. Additionally, follow all safety precautions indicated on the sealer product label.
Curing and Maintenance
Once you have stained and sealed your outdoor concrete patio, it’s important to follow proper curing and maintenance practices to ensure its longevity and visual appeal. Here are some guidelines to keep in mind:
Curing
Curing allows the stain and sealer to fully set and bond with the concrete. Follow these steps to properly cure your stained patio:
- Wait for optimal curing time: The curing time can vary depending on the type of stain and sealer used. Refer to the product instructions for specific guidance on the recommended curing time.
- Avoid heavy foot traffic: During the curing period, it’s best to avoid heavy foot traffic or placing any heavy objects on the patio. This will prevent potential damage to the freshly stained and sealed surface.
- Protect from moisture: Keep the freshly stained patio protected from excessive moisture during the curing period. Avoid exposing it to rain or excessive water for the recommended curing time.
Maintenance
Proper maintenance will help preserve the beauty and durability of your stained concrete patio. Follow these maintenance tips:
- Regular cleaning: Regularly sweep or rinse off the patio to remove dirt, leaves, or debris. Use a mild detergent and a soft-bristle brush for deeper cleaning when necessary.
- Avoid harsh chemicals: Avoid using harsh chemicals or abrasive cleaners that can damage the stain or sealer. Stick to mild cleaning solutions and tools to maintain the integrity of the surface.
- Protect from heavy objects: When moving heavy furniture or objects, use protective pads or mats to prevent scratches or gouges on the stained concrete surface.
- Inspect for stains or damage: Regularly inspect the stained patio for any stains or damage. Promptly treat any spills or stains to prevent them from setting into the concrete. If damage occurs, such as chipping or cracking, repair it as soon as possible to maintain the patio’s integrity.
- Reapply sealer: Over time, the sealer may wear off due to foot traffic and exposure to the elements. Periodically reapply sealer as recommended by the manufacturer to maintain the protection and appearance of the stained concrete.
By following proper curing and maintenance practices, you can prolong the lifespan and beauty of your stained concrete patio. Regular care and attention will ensure that your outdoor space remains an inviting and attractive area for years to come.
Conclusion
Transforming your outdoor concrete patio with a stain can breathe new life into your space. By carefully selecting the right stain, preparing the surface, applying the stain correctly, and sealing the concrete, you can create a stunning and durable patio that enhances the beauty of your outdoor area.
Remember to choose a stain that complements your existing color scheme and desired effect, whether it’s a natural variegated look or a bold, solid color. Take the time to prepare the patio by thoroughly cleaning the surface and repairing any cracks or imperfections. Applying the stain evenly and allowing it to fully dry is essential for achieving the desired color and effect.
Sealing the stained concrete provides an added layer of protection, helping to maintain the color vibrancy and durability of your patio. It’s important to follow proper curing and maintenance practices, including allowing the stain and sealer to fully cure, avoiding harsh chemicals, and regularly cleaning and inspecting the surface for any stains or damage.
With proper care and periodic maintenance, your stained concrete patio can continue to impress for years to come. So, gather your materials, follow the steps outlined in this guide, and enjoy the beauty and functionality of your newly stained outdoor concrete patio.
Frequently Asked Questions about How To Stain An Outdoor Concrete Patio
Was this page helpful?
At Storables.com, we guarantee accurate and reliable information. Our content, validated by Expert Board Contributors, is crafted following stringent Editorial Policies. We're committed to providing you with well-researched, expert-backed insights for all your informational needs.


0 thoughts on “How To Stain An Outdoor Concrete Patio”