Home>Furniture & Design>Outdoor Furniture>How To Acid Stain Outdoor Concrete Patio

Outdoor Furniture
How To Acid Stain Outdoor Concrete Patio
Modified: August 20, 2024
Learn how to acid stain your outdoor concrete patio to enhance the look of your outdoor furniture and design. Follow our step-by-step guide for stunning results.
(Many of the links in this article redirect to a specific reviewed product. Your purchase of these products through affiliate links helps to generate commission for Storables.com, at no extra cost. Learn more)
Introduction
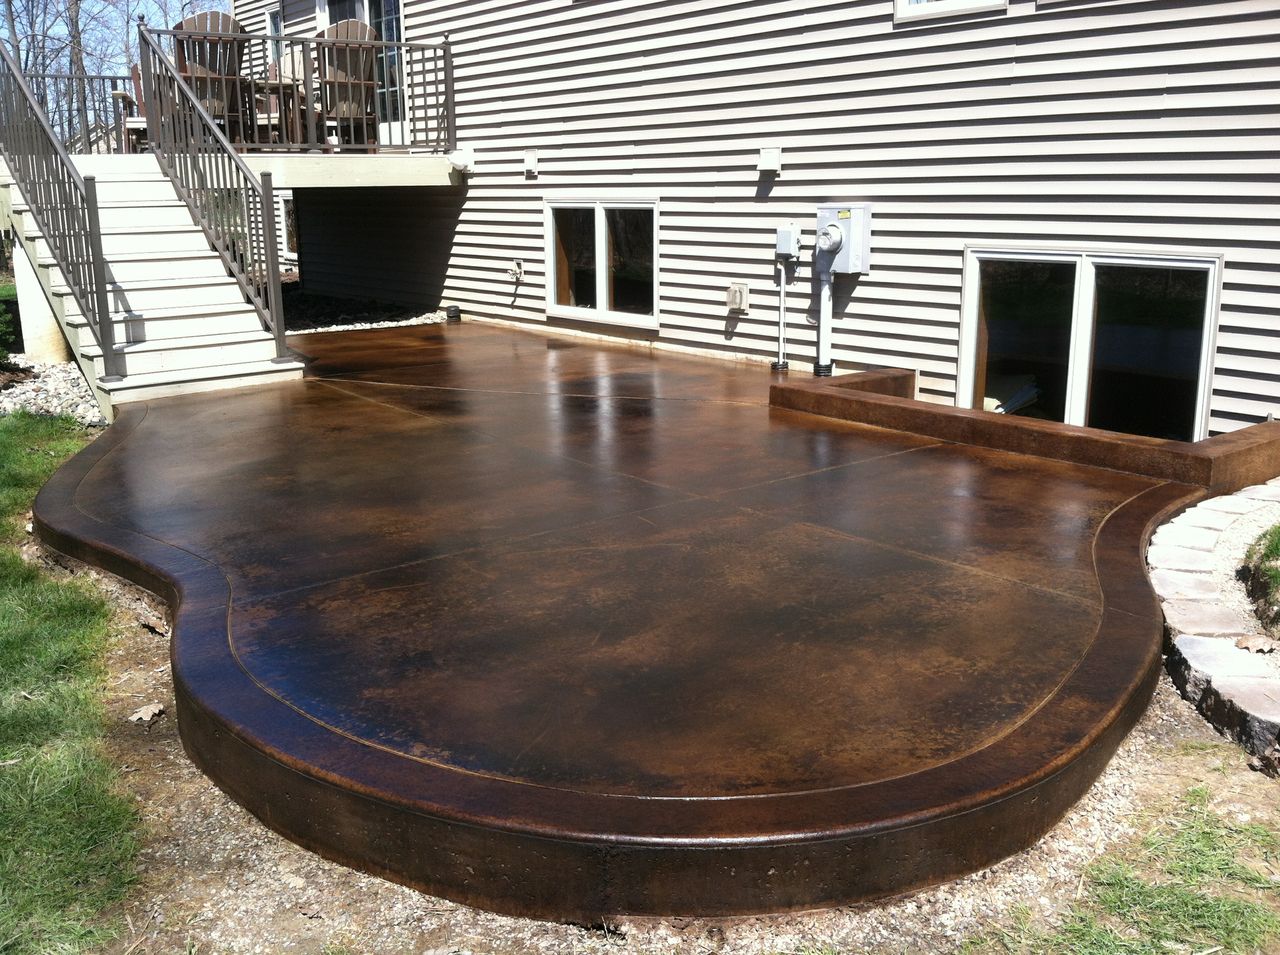
Creating a stunning outdoor living space begins with the foundation, and when it comes to outdoor patios, acid staining is a popular choice for transforming drab concrete into a work of art. Acid staining offers a unique way to add color and depth to your patio, enhancing its visual appeal while maintaining the natural texture of the concrete. This technique is not only aesthetically pleasing but also durable, making it an ideal solution for outdoor surfaces subjected to various weather conditions.
Acid staining outdoor concrete patios involves a multi-step process that requires careful preparation, application, and sealing. By following the proper techniques and using the right materials, you can achieve a beautiful, long-lasting finish that will elevate the look of your outdoor space.
In this comprehensive guide, we will walk you through the step-by-step process of acid staining an outdoor concrete patio. From the materials needed to the final touches, you will gain valuable insights into each stage of the staining process. Whether you are a seasoned DIY enthusiast or a homeowner looking to revamp your outdoor living area, this guide will equip you with the knowledge and confidence to tackle this rewarding project. Let's dive into the world of acid staining and unlock the potential of your outdoor patio.
Key Takeaways:
- Transform your outdoor concrete patio into a work of art with acid staining. Follow the step-by-step process to infuse vibrant colors and enhance the texture, creating a captivating focal point for your outdoor space.
- Maintain the beauty and durability of your acid-stained patio with regular cleaning, protective measures, and periodic resealing. Embrace the transformative experience and enjoy the enduring charm of your outdoor oasis.
Read more: How To Stain An Outdoor Concrete Patio
Materials Needed
Before embarking on your acid staining project, it’s essential to gather the necessary materials to ensure a smooth and successful process. Here’s a comprehensive list of the materials you’ll need:
- Acid Stain: Choose a high-quality acid stain in the color of your preference. Options range from earthy tones like terracotta and amber to more vibrant hues like azure and emerald.
- Cleaner or Degreaser: A concrete cleaner or degreaser will be essential for prepping the surface and removing any dirt, oil, or other contaminants.
- Neutralizing Agent: After applying the acid stain, you’ll need a neutralizing agent to halt the staining process and prepare the surface for sealing.
- Concrete Sealer: Choose a high-quality concrete sealer to protect the stained surface from moisture, UV rays, and general wear and tear.
- Protective Gear: Safety should always be a priority. Ensure you have gloves, safety goggles, and a mask to protect yourself during the staining process.
- Applicator Tools: Depending on your preference, you can use brushes, rollers, or sprayers for applying the stain and sealer.
- Pressure Washer: A pressure washer will be useful for thoroughly cleaning the concrete surface before applying the stain.
- Bucket and Mixing Tools: You’ll need a bucket for mixing the stain and a stir stick or drill attachment for thorough mixing.
- Protective Coverings: Consider using drop cloths, plastic sheeting, or masking tape to protect surrounding areas from accidental staining.
By ensuring you have all the necessary materials at your disposal, you’ll be well-prepared to commence the acid staining process with confidence. With these tools and supplies in hand, you’re one step closer to transforming your outdoor concrete patio into a captivating focal point of your outdoor space.
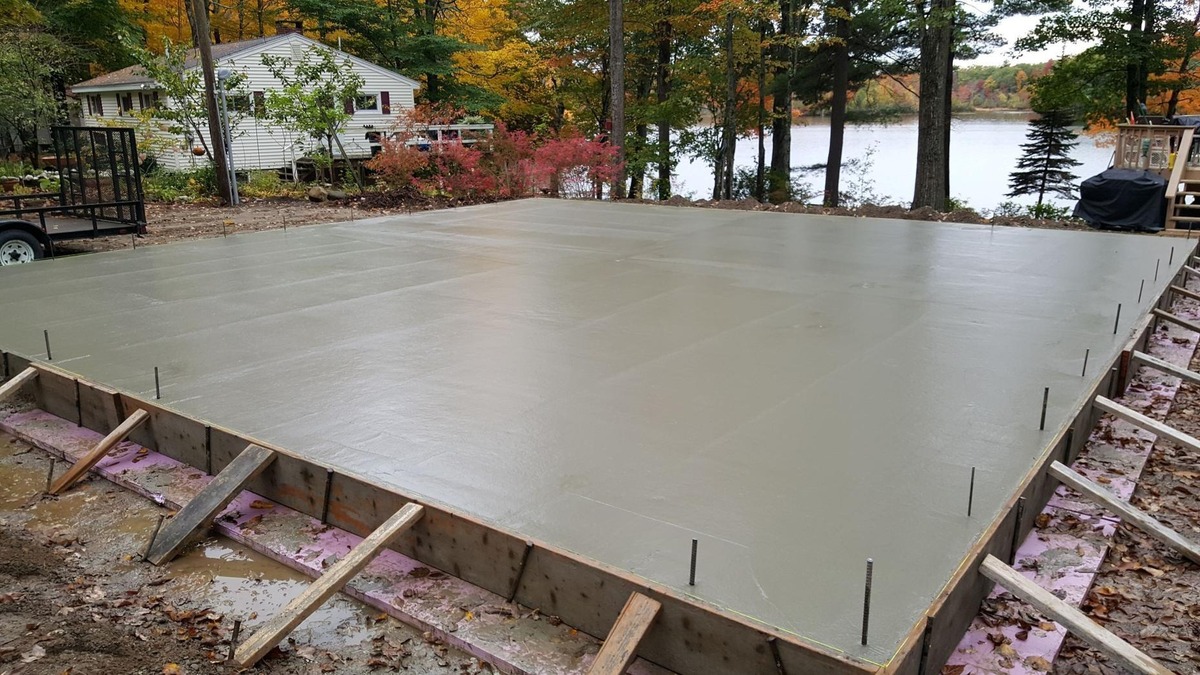
Preparing the Concrete Surface
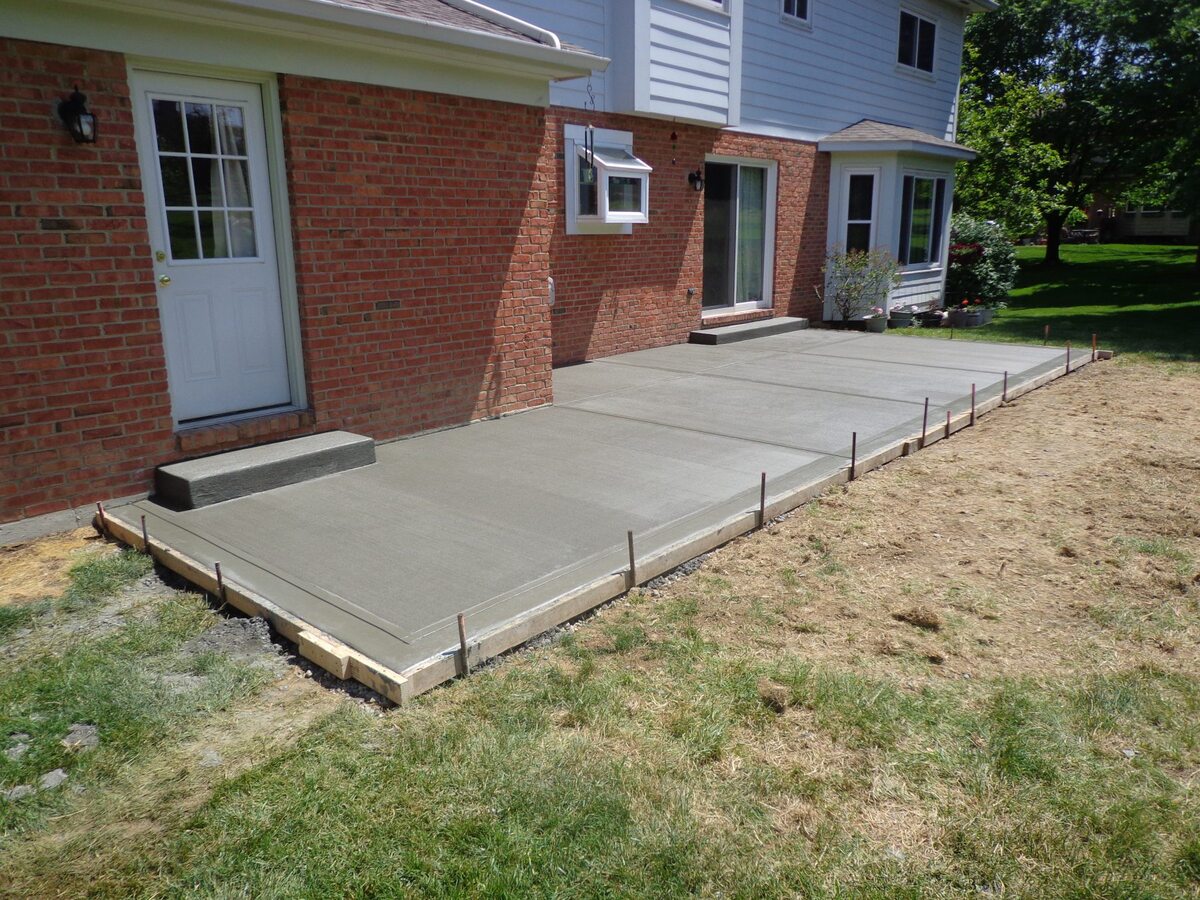
Properly preparing the concrete surface is crucial for achieving a successful acid-stained patio. This stage involves thorough cleaning and surface preparation to ensure that the acid stain adheres effectively and produces a consistent finish. Here’s a step-by-step guide to preparing the concrete surface:
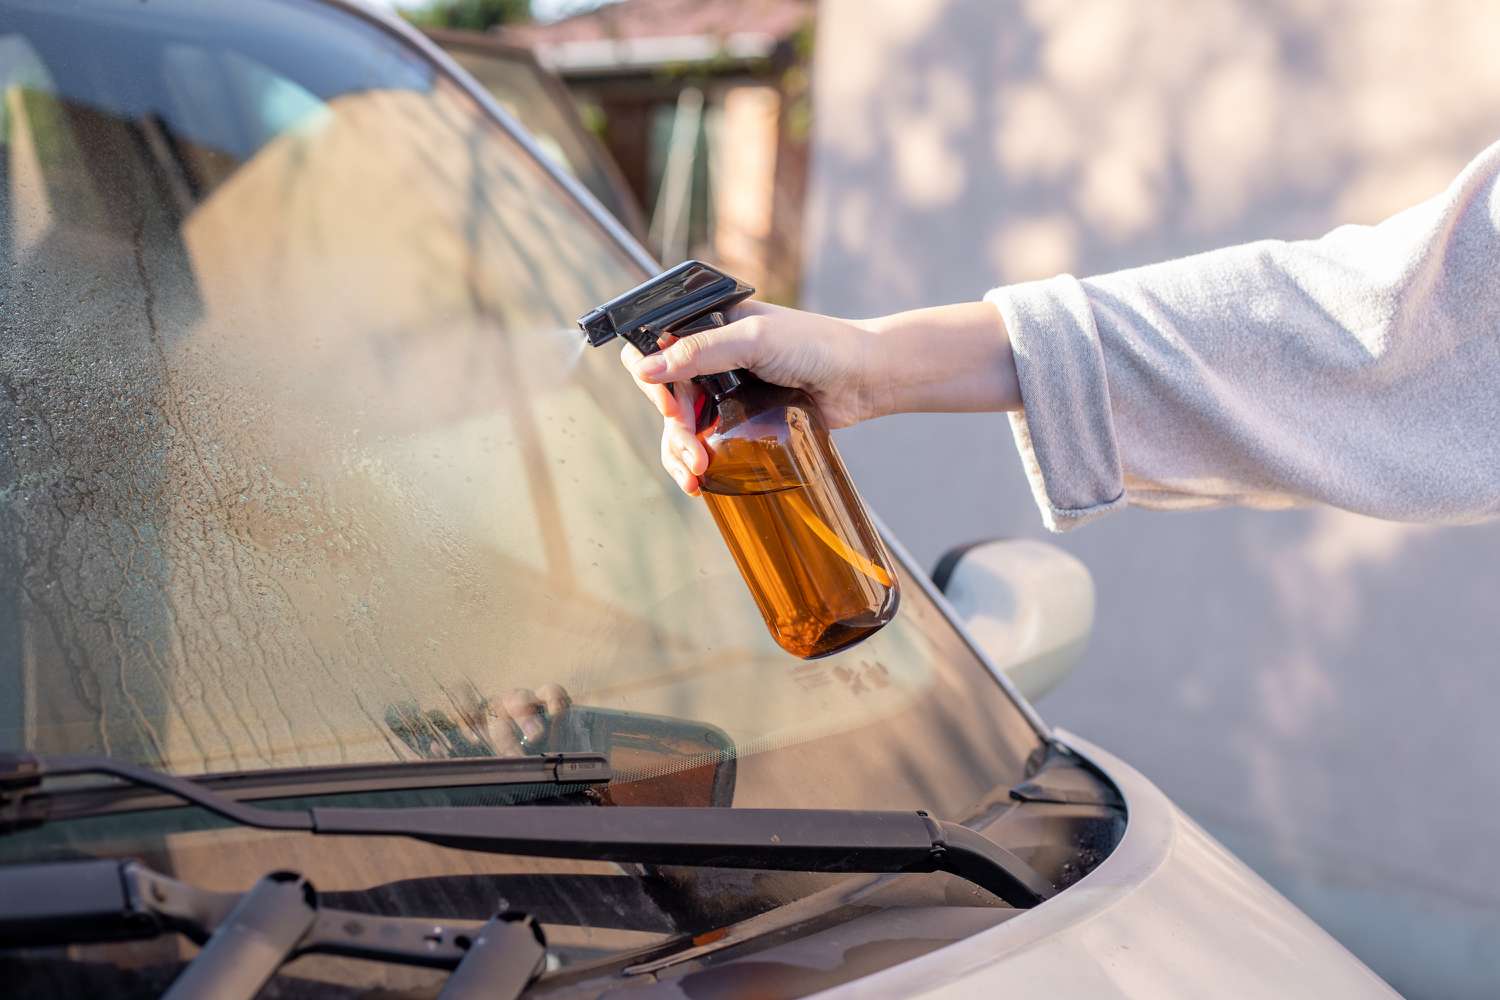
- Clean the Surface: Begin by thoroughly cleaning the concrete surface using a concrete cleaner or degreaser. Remove any dirt, oil, grease, or other contaminants using a stiff-bristled brush or a pressure washer. It’s essential to start with a clean and porous surface to allow the stain to penetrate evenly.
- Test for Porosity: Test the porosity of the concrete by sprinkling water on the surface. If the water is readily absorbed, the concrete is sufficiently porous for acid staining. If the water beads on the surface, additional surface preparation may be required.
- Repair Imperfections: Inspect the concrete for any cracks, spalling, or other imperfections. Repair any damaged areas using a suitable concrete patching compound and allow it to cure completely before proceeding.
- Protect Surrounding Areas: Use protective coverings such as drop cloths or plastic sheeting to shield surrounding surfaces, landscaping, and other elements from accidental staining or damage during the application process.
- Allow the Surface to Dry: After cleaning and any necessary repairs, allow the concrete surface to dry completely before proceeding with the acid staining process. Adequate drying time is essential to ensure optimal stain penetration and adhesion.
By meticulously preparing the concrete surface, you set the stage for a successful acid staining application. This crucial step lays the foundation for achieving a beautifully stained patio that enhances the aesthetic appeal of your outdoor living space.
Applying the Acid Stain
Once the concrete surface is meticulously prepared, it’s time to apply the acid stain, a transformative phase that infuses the concrete with rich, variegated hues. The application process requires precision and attention to detail to achieve the desired color intensity and marbled effect. Here’s a comprehensive guide to applying the acid stain to your outdoor concrete patio:
- Test the Stain: Before proceeding with the full application, it’s advisable to conduct a small test area to determine the ideal staining process and the resulting color on your specific concrete surface.
- Mix the Stain: Thoroughly mix the acid stain according to the manufacturer’s instructions. Use a bucket and a stir stick or drill attachment to ensure a uniform consistency.
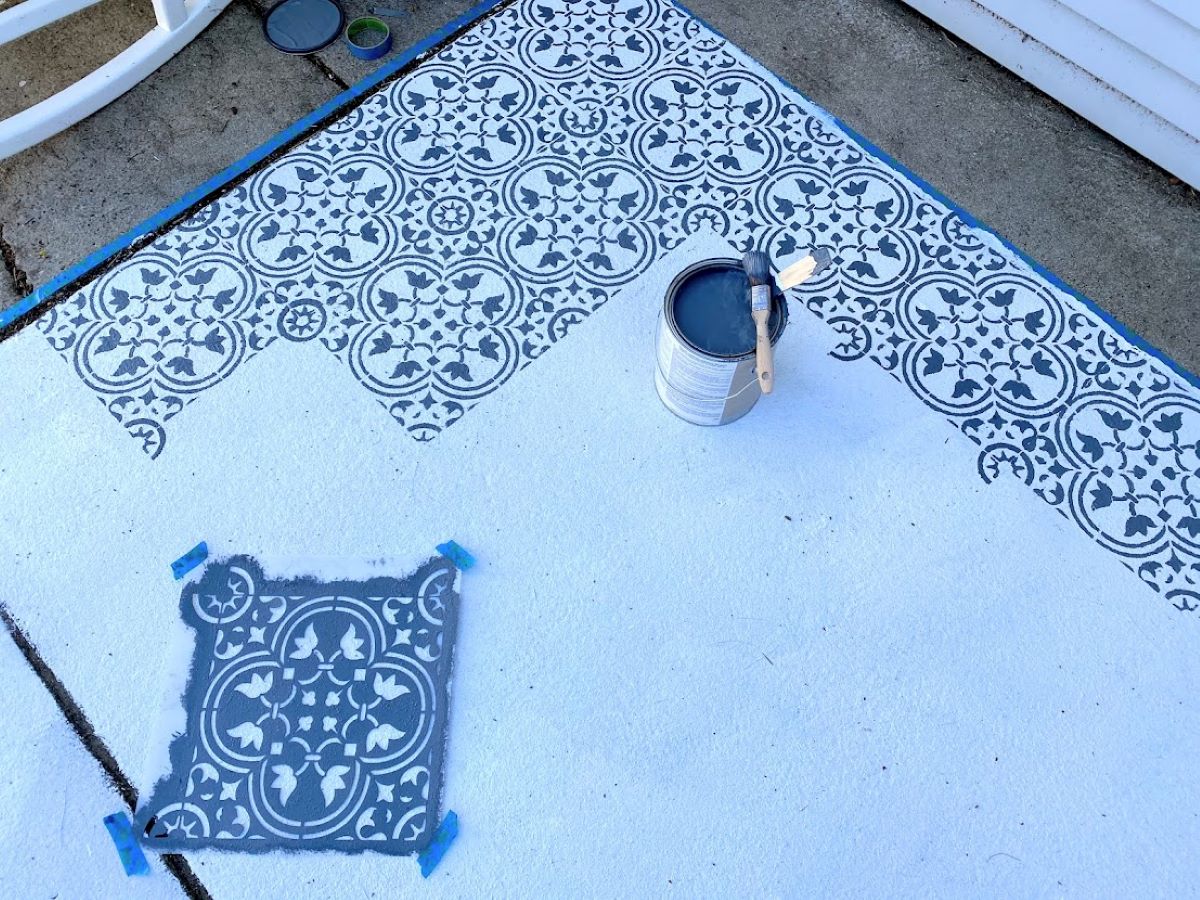
- Apply the Stain: Using an applicator of your choice—such as a brush, roller, or sprayer—apply the acid stain evenly across the concrete surface. Work in manageable sections to maintain a consistent application rate and avoid lap marks.
- Create Variegated Effects: To achieve a mottled or marbled appearance, consider using various application techniques, such as overlapping stain colors or applying additional layers to intensify certain areas.
- Allow for Penetration Time: After applying the stain, allow it to penetrate the concrete surface for the recommended time specified by the manufacturer. This penetration period is critical for the development of the desired color and texture.
- Neutralize the Surface: Once the staining process is complete, neutralize the surface using a neutralizing agent to halt the chemical reaction and stabilize the colors. Follow the manufacturer’s instructions for proper neutralization.
- Rinse and Clean: Thoroughly rinse the surface to remove any residual stain and neutralizing agent. Use a mop, wet vacuum, or pressure washer to ensure the complete removal of excess stain and neutralizer.
By following these steps, you’ll be well-equipped to apply the acid stain effectively, bringing your outdoor concrete patio to life with captivating colors and a distinctive, marbled appearance. The application process is a pivotal stage in the transformation of your patio, setting the stage for the subsequent sealing and protection of the stained surface.
Before applying acid stain to your outdoor concrete patio, make sure to thoroughly clean and etch the surface to ensure the stain can penetrate and adhere properly. This will help to achieve a more even and long-lasting finish.
Neutralizing and Cleaning the Stained Concrete
After applying the acid stain and allowing it to penetrate the concrete surface, the next crucial step involves neutralizing the chemical reaction and thoroughly cleaning the stained concrete. This process is essential for stabilizing the colors, removing any residual stain, and preparing the surface for the final sealing stage. Here’s a detailed guide to neutralizing and cleaning the stained concrete:
- Prepare the Neutralizing Solution: Follow the manufacturer’s instructions to prepare the neutralizing solution. Typically, this involves diluting the neutralizer with water in a suitable container.
- Apply the Neutralizer: Using a sprayer or watering can, evenly apply the neutralizing solution to the stained concrete surface. Ensure thorough coverage to halt the chemical reaction of the acid stain.
- Allow Dwell Time: Let the neutralizing solution dwell on the surface for the recommended duration specified by the manufacturer. This allows for complete neutralization and stabilization of the stained colors.
- Rinse and Clean: After the dwell time, thoroughly rinse the surface with water to remove the neutralizing solution and any residual stain. Use a mop, wet vacuum, or pressure washer to ensure the complete removal of the neutralizer and any remaining traces of the acid stain.
- Inspect for Residue: Carefully inspect the stained concrete to ensure that all residual stain and neutralizing agents have been effectively removed. Any leftover residue can impact the final appearance and adhesion of the concrete sealer.
- Allow for Drying: Once the surface is thoroughly cleaned, allow it to dry completely before proceeding with the sealing process. Adequate drying time is crucial to ensure optimal adhesion and performance of the concrete sealer.
By meticulously neutralizing and cleaning the stained concrete, you pave the way for the final sealing stage, which will protect and enhance the beauty of the acid-stained patio. This critical phase ensures that the stained surface is primed for the application of the concrete sealer, which will safeguard the colors and texture for years to come.
Read more: How To Stamp And Stain A Concrete Patio
Sealing the Acid-Stained Patio
Sealing the acid-stained patio is a pivotal step that not only enhances the visual impact of the stained concrete but also provides essential protection against moisture, UV rays, and everyday wear and tear. The sealing process ensures the longevity and durability of the stained surface while accentuating the depth and richness of the colors. Here’s a comprehensive guide to sealing your acid-stained patio:
- Choose the Right Sealer: Select a high-quality concrete sealer suitable for acid-stained surfaces. Opt for a sealer specifically designed to enhance the appearance of stained concrete while providing excellent protection.
- Test the Sealer: Before applying the sealer to the entire surface, conduct a small test area to assess the compatibility and the resulting appearance of the sealer on the stained concrete.
- Prepare the Surface: Ensure that the stained concrete surface is clean, dry, and free of any residual stain, neutralizer, or contaminants before proceeding with the sealing process.
- Apply the Sealer: Using an applicator appropriate for the sealer type—such as a brush, roller, or sprayer—apply the sealer evenly across the stained patio surface. Work in manageable sections to maintain a consistent application rate and avoid overlapping marks.
- Allow for Drying and Curing: After applying the sealer, allow it to dry and cure according to the manufacturer’s instructions. Adequate drying and curing time are essential to ensure optimal performance and longevity of the sealer.
- Apply Additional Coats (Optional): Depending on the desired level of protection and sheen, you may opt to apply multiple coats of sealer. Follow the manufacturer’s recommendations for the application of additional coats, allowing sufficient drying time between each coat.
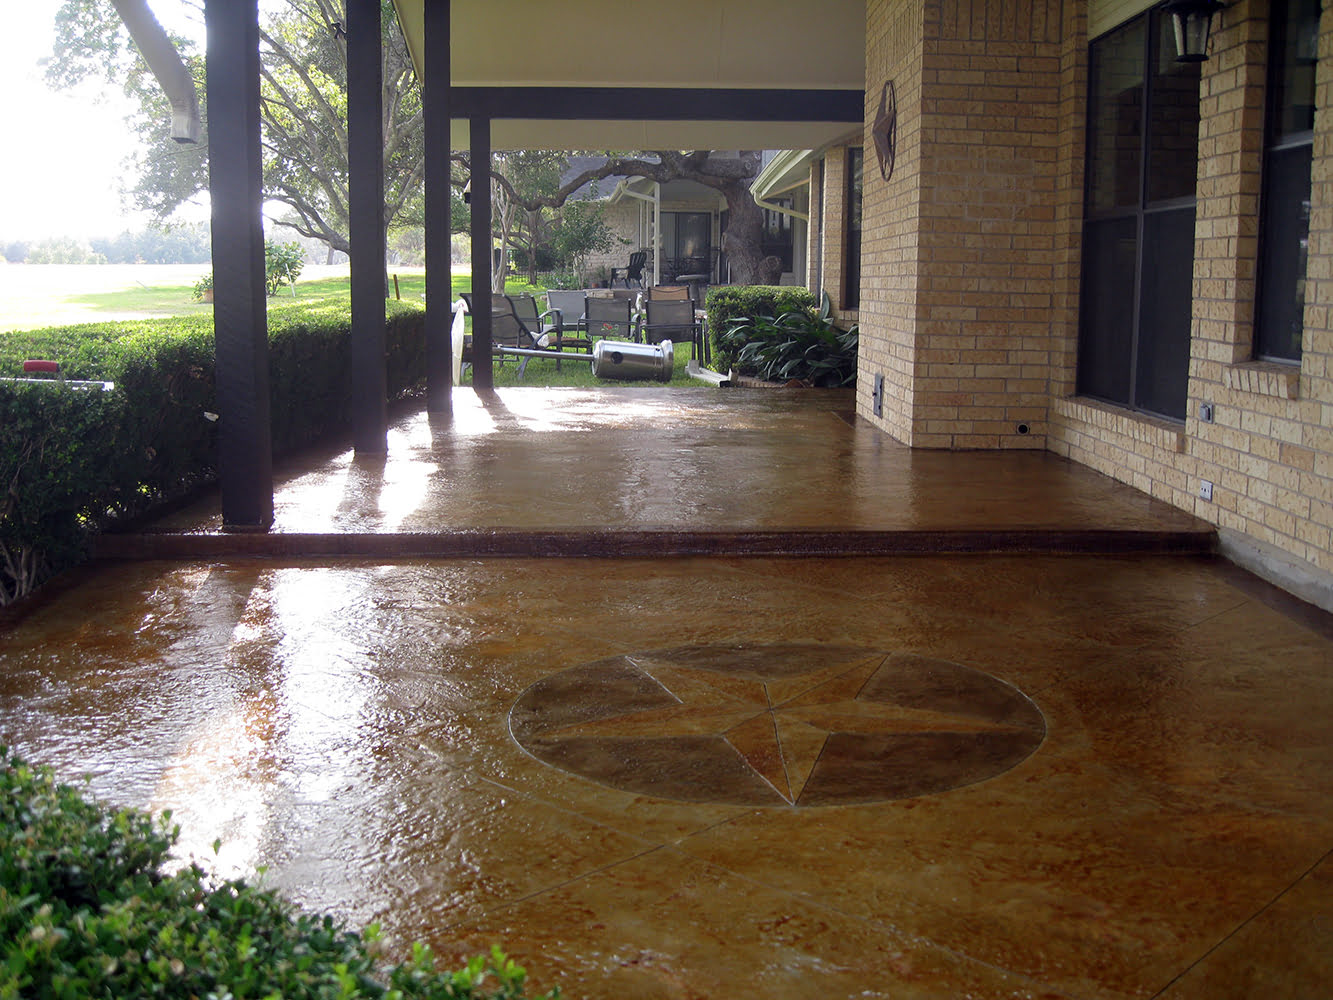
- Inspect the Finished Surface: Once the sealer has fully cured, inspect the finished surface to ensure even coverage and the desired enhancement of the stained concrete. The sealed surface should exhibit enhanced color depth and a subtle sheen, accentuating the beauty of the acid-stained patio.
By following these guidelines, you’ll effectively seal and protect the acid-stained patio, preserving its visual allure and safeguarding it against environmental elements. The sealing process not only enhances the aesthetic appeal of the stained concrete but also contributes to its long-term resilience and maintenance.
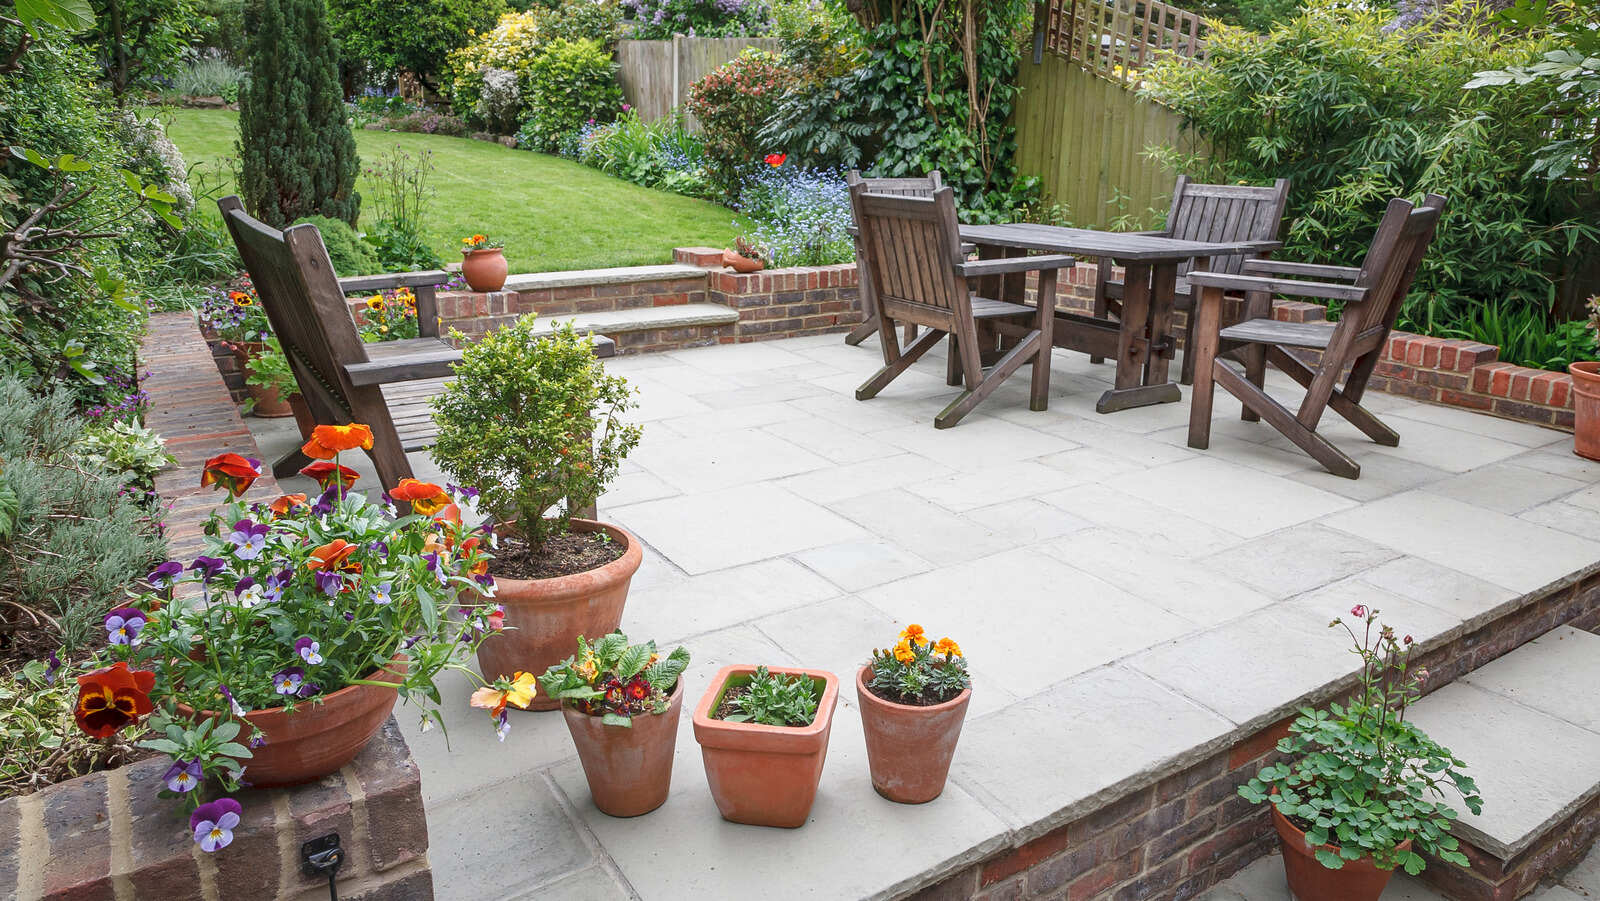
Maintaining the Acid-Stained Patio
Once you’ve transformed your outdoor concrete patio with an exquisite acid-stained finish, maintaining its beauty and durability becomes essential for long-term enjoyment. Proper maintenance practices will help preserve the vibrant colors and protect the stained surface from environmental factors and everyday use. Here are key maintenance tips to ensure the longevity and allure of your acid-stained patio:
- Regular Cleaning: Keep the stained patio surface clean by regularly sweeping away debris and dirt. Periodic mopping with a mild detergent and water can help remove surface grime and maintain the vibrancy of the stained colors.
- Protective Measures: Use furniture pads or protective coasters under outdoor furniture to prevent scratching or abrasion of the stained surface. Avoid dragging heavy items across the patio to minimize wear and tear.
- Reapply Sealer: Monitor the condition of the sealed surface and reapply the sealer as needed to maintain optimal protection. Periodic resealing helps guard against moisture intrusion and UV degradation, preserving the integrity of the stained concrete.
- Stain Touch-Ups: Address any minor stains or blemishes promptly to prevent them from becoming ingrained in the stained surface. Lightly sanding and reapplying the acid stain can help maintain the uniformity and beauty of the patio.
- Avoid Harsh Chemicals: Refrain from using harsh chemicals or acidic cleaners on the stained patio, as they can compromise the sealer and affect the color vibrancy. Opt for pH-neutral cleaners suitable for stained concrete surfaces.
- Regular Inspections: Periodically inspect the stained patio for any signs of wear, damage, or sealer degradation. Early detection of issues allows for timely maintenance and preservation of the stained surface.
- Professional Maintenance: Consider engaging professional concrete maintenance services for comprehensive cleaning, resealing, and restoration of the acid-stained patio at regular intervals. Professional expertise can ensure the longevity and pristine condition of the stained surface.
By incorporating these maintenance practices into your routine, you can uphold the enduring beauty and resilience of your acid-stained patio, allowing you to relish its captivating appeal for years to come. With proper care and attention, your outdoor living space will continue to exude charm and sophistication, becoming a cherished focal point of your home.
Conclusion
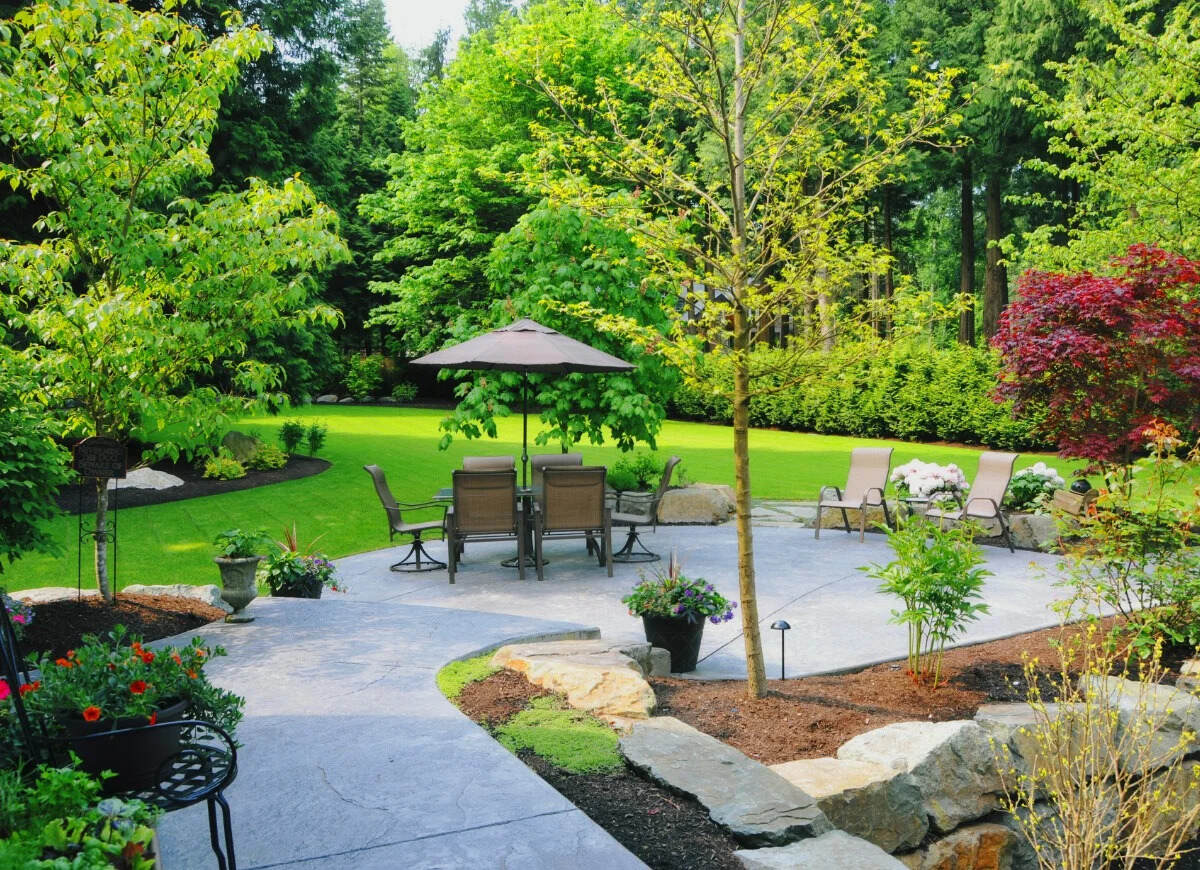
Embarking on the journey of acid staining your outdoor concrete patio is a transformative experience that allows you to unleash the full potential of your outdoor living space. From the initial preparation to the final sealing and maintenance, each step in the process contributes to the creation of a visually stunning and durable patio surface. By infusing the concrete with rich, variegated hues and enhancing its texture, acid staining elevates the aesthetic appeal of your outdoor environment, providing a captivating backdrop for relaxation, entertainment, and leisure.
Throughout this comprehensive guide, we’ve delved into the intricacies of acid staining, offering valuable insights into the materials, techniques, and maintenance practices essential for achieving a successful outcome. By meticulously preparing the concrete surface, applying the acid stain with precision, and sealing the stained patio for enduring protection, you’ve embarked on a journey of artistic expression and functional enhancement.
As you revel in the beauty of your acid-stained patio, remember that proper maintenance is the key to preserving its allure and integrity. By incorporating regular cleaning, protective measures, and periodic resealing into your maintenance routine, you can ensure that your stained patio remains a captivating focal point of your outdoor oasis.
Ultimately, the art of acid staining transcends mere surface enhancement—it embodies the fusion of creativity and practicality, elevating your outdoor space to new heights of beauty and functionality. Whether you’re hosting gatherings, basking in solitude, or simply admiring the natural splendor of your surroundings, your acid-stained patio stands as a testament to your vision and dedication to creating an inviting and enduring outdoor sanctuary.
So, as you savor the fruits of your labor and relish the enchanting ambiance of your revitalized outdoor patio, take pride in the transformation you’ve accomplished. Your acid-stained patio is more than just a surface; it’s a canvas of expression, a testament to craftsmanship, and a source of joy for years to come.
Frequently Asked Questions about How To Acid Stain Outdoor Concrete Patio
Was this page helpful?
At Storables.com, we guarantee accurate and reliable information. Our content, validated by Expert Board Contributors, is crafted following stringent Editorial Policies. We're committed to providing you with well-researched, expert-backed insights for all your informational needs.


0 thoughts on “How To Acid Stain Outdoor Concrete Patio”