Home>Furniture>Outdoor Furniture>How To Build A Hammock Swing Chair

Outdoor Furniture
How To Build A Hammock Swing Chair
Modified: March 16, 2024
Learn how to build a comfortable and stylish outdoor furniture piece with our step-by-step guide on constructing a hammock swing chair. Enhance your outdoor space with this DIY project!
(Many of the links in this article redirect to a specific reviewed product. Your purchase of these products through affiliate links helps to generate commission for Storables.com, at no extra cost. Learn more)
Introduction
Welcome to the world of outdoor relaxation and comfort! If you’re looking to upgrade your outdoor space with a stylish and cozy seating option, look no further than a hammock swing chair. This versatile and trendy piece not only adds a touch of elegance to your outdoor area but also provides a perfect spot to unwind and enjoy the serenity of nature.
In this article, we will guide you through the process of building a hammock swing chair from scratch. Whether you’re a DIY enthusiast or simply enjoy a weekend project, following these steps will help you create a custom-made hammock swing chair that suits your style and comfort preferences.
Before we dive into the step-by-step process, let’s take a moment to appreciate the benefits of a hammock swing chair. Unlike traditional hammocks, which require two anchor points, a swing chair only needs one sturdy support, making it easier to set up in various locations. The gentle motion of swinging back and forth can help reduce stress and promote relaxation, making it an ideal addition to your outdoor oasis.
Additionally, hammock swing chairs come in a wide array of designs and materials, allowing you to choose a style that complements your outdoor decor. Whether you prefer a boho-inspired macrame design or a sleek modern look, there’s a hammock swing chair out there to suit your taste.
Now that we’ve piqued your interest, let’s dive into the first step of building your very own hammock swing chair – gathering the necessary materials.
Key Takeaways:
- Building a hammock swing chair is a fun DIY project that adds style and comfort to your outdoor space. With the right materials and steps, you can create a cozy spot to relax and unwind.
- Testing and adjusting your hammock swing chair for comfort is crucial. By ensuring proper hanging and adding cushions, you can customize your swing chair for a perfect outdoor lounging experience.
Read more: How To Build A Hammock Chair Stand
Step 1: Gather Your Materials
Before you can start building your hammock swing chair, you’ll need to gather all the necessary materials. Here’s a list of items you’ll need:
- Strong and durable fabric: Look for heavy-duty canvas or outdoor fabric that can withstand the weight and weather conditions.
- Wooden dowels: These will serve as the side rails of your swing chair. Choose dowels that are thick enough to support your weight.
- Rope or chain: You’ll need strong and sturdy rope or chain to hang the swing chair securely.
- Carabiners or S-hooks: These will be used to attach the ropes or chains to the swing chair.
- Pillows and cushions: Optional, but highly recommended for added comfort.
- Scissors and measuring tape: Essential tools for cutting and measuring the fabric.
- Sewing machine or needle and thread: Depending on your sewing skills, you can choose to sew the fabric by hand or with a sewing machine.
Once you have gathered all the necessary materials, you’re ready to move on to the next step – measuring and cutting the fabric.
Step 2: Measure and Cut the Fabric
Now that you have all the materials ready, it’s time to measure and cut the fabric for your hammock swing chair. Follow these steps:
- Start by measuring the length and width of the area where you plan to hang your swing chair. This will determine the dimensions of your fabric.
- Add a few extra inches on each side to account for the seam allowance and the space needed for the swing to hang freely.
- Using the measurements, mark and cut the fabric accordingly. Remember to use sharp fabric scissors to ensure clean cuts.
- If you want to add extra comfort, consider cutting and sewing additional fabric pieces to act as a cushion for the seat and backrest.
- Once you have cut all the necessary pieces, it’s time to move on to the next step – sewing the fabric together.
Pro tip: If you are unsure about the measurements, it’s always better to cut the fabric slightly longer than needed. You can always trim off the excess fabric later.
With the fabric pieces ready, you’re one step closer to completing your hammock swing chair. Now, let’s move on to the next step – sewing the fabric together.
Step 3: Sew the Fabric Pieces Together
Now that you have all the fabric pieces cut to size, it’s time to sew them together to create your hammock swing chair. Follow these steps:
- First, lay out the fabric pieces on a flat surface, making sure they are aligned properly.
- Take one of the side panels and place it on top of the main panel, with the right sides facing each other.
- Pin the edges together to secure them in place before sewing.
- Using a sewing machine or a needle and thread, sew along the pinned edges, leaving one of the shorter sides open.
- Repeat the same process with the other side panel, attaching it to the opposite side of the main panel.
- Once both side panels are sewn in place, turn the fabric right side out through the open side.
- Press the seams with an iron to create a neat and professional finish.
- If you want to add additional cushioning, sew the cushion fabric onto the seat and backrest areas of the swing chair.
Pro tip: Reinforce the seams by sewing a second line of stitching parallel to the first one, especially if you plan on using the swing chair frequently or with heavier weight.
With the fabric pieces sewn together, your hammock swing chair is starting to take shape. In the next step, we will attach the wooden dowels to create the frame of the swing chair.
When building a hammock swing chair, make sure to use strong and durable materials like canvas or outdoor fabric. This will ensure that your chair is safe and long-lasting.
Step 4: Attach the Wooden Dowels
Now that you have the fabric pieces sewn together, it’s time to attach the wooden dowels to create the frame of your hammock swing chair. Follow these steps:
- Measure the length of the side panels on the fabric.
- Take the wooden dowels and cut them to match the measured length.
- Smooth the edges of the wooden dowels using sandpaper to prevent any splinters.
- Position the wooden dowels horizontally at each end of the fabric, aligning them with the open sides.
- Secure the wooden dowels in place by sewing them onto the fabric using a strong thread or rope.
- Make sure the dowels are evenly spaced and centered to ensure balance and stability.
- Double-check that the wooden dowels are securely attached by giving them a gentle tug.
Pro tip: To add an extra layer of security, you can reinforce the attachment points by sewing additional fabric or creating fabric loops through which the dowels can slide.
With the wooden dowels securely attached, your hammock swing chair is almost ready to be hung. In the next step, we will guide you on how to hang the swing chair properly.
Read more: How To Build A Pergola Swing
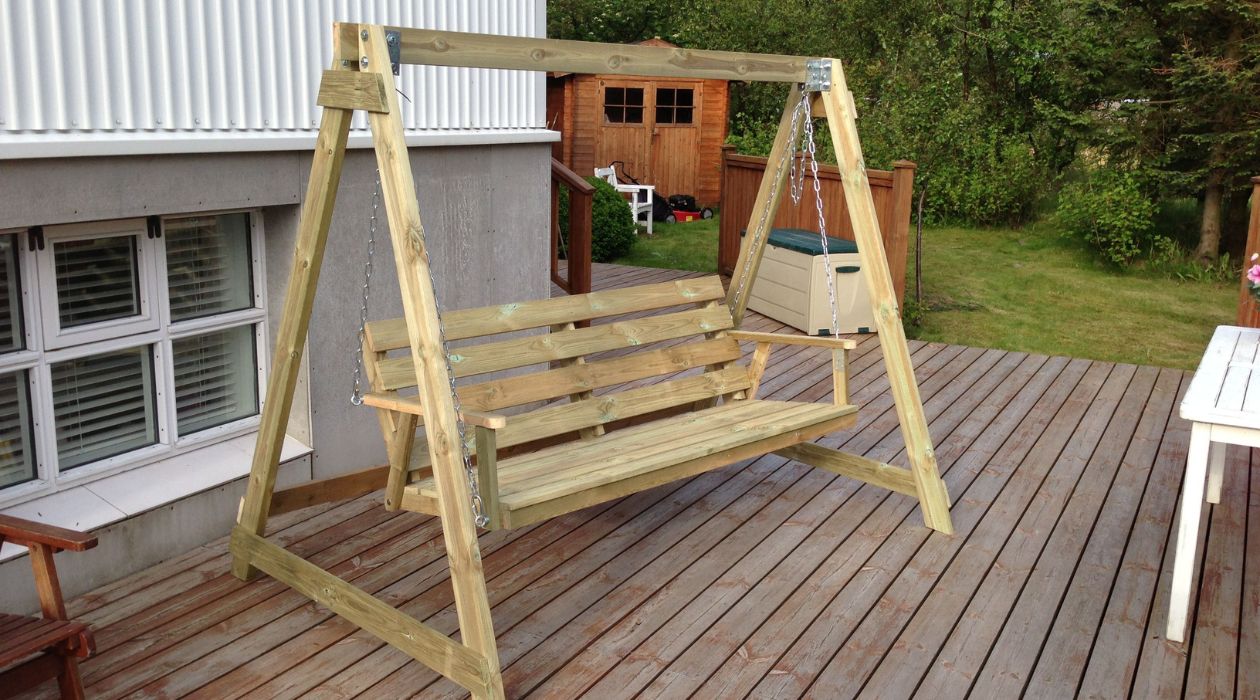
Step 5: Hang the Hammock Swing Chair
Now that you have completed the construction of your hammock swing chair, it’s time to hang it and start enjoying the comfort it offers. Follow these steps:
- Start by finding a suitable location to hang your swing chair. Look for a sturdy support structure such as a beam, tree branch, or ceiling joist.
- Ensure that the location you choose can bear the weight of the swing chair and any additional weight when someone is sitting in it.
- Measure the distance between the attachment points on the swing chair and the chosen support structure.
- Cut the rope or chain to the measured length, allowing for some extra length for adjustment.
- Attach one end of the rope or chain to the attachment point on the swing chair using a carabiner or S-hook.
- Securely anchor the other end of the rope or chain to the chosen support structure using a hanging kit or another appropriate method.
- Ensure that the swing chair hangs at a comfortable height, allowing for easy access and sufficient ground clearance.
Pro tip: Before fully committing to a location, it’s a good idea to test the stability and comfort of the swing chair by sitting in it and gently swinging back and forth.
With your hammock swing chair securely hung, you’re almost ready to kick back and relax. In the next step, we will discuss how to test and adjust for optimal comfort.
Step 6: Test and Adjust for Comfort
Now that your hammock swing chair is properly hung, it’s time to test it out and make any necessary adjustments for optimal comfort. Follow these steps:
- Carefully sit in the swing chair and get a feel for its comfort and stability.
- Adjust the tension of the ropes or chains to ensure that the swing chair is level and balanced.
- Check that the seat of the chair is at a comfortable height from the ground.
- Make any necessary adjustments to the height by adjusting the ropes or chains accordingly.
- Add pillows or cushions for extra support and comfort if desired.
- Take some time to swing gently and test the range of motion to ensure it feels comfortable and secure.
- Make any additional adjustments as needed to customize the swing chair to your preferences.
Pro tip: If you plan to use the swing chair for extended periods, consider adding a canopy or shade to protect yourself from the sun.
Once you are satisfied with the comfort and stability of your hammock swing chair, you can sit back, relax, and enjoy the peaceful serenity of your outdoor space.
Congratulations! You have successfully built your own hammock swing chair, customized to your style and comfort preferences. With proper care and maintenance, your swing chair will provide you with many hours of relaxation and enjoyment in the great outdoors.
We hope this guide has been helpful in guiding you through the process. Now, go ahead and embrace the joys of outdoor lounging with your newly constructed hammock swing chair!
Conclusion
Building your own hammock swing chair is a rewarding and enjoyable project that allows you to create a custom seating option for your outdoor space. By following the steps outlined in this guide, you can bring comfort and style to your backyard or patio.
Throughout the process, we covered gathering the necessary materials, measuring and cutting the fabric, sewing the fabric pieces together, attaching the wooden dowels, hanging the swing chair, and testing for comfort. Each step plays a vital role in creating a sturdy and comfortable swing chair that you can enjoy for years to come.
Remember to choose high-quality materials, take accurate measurements, and ensure secure attachments to guarantee the safety and longevity of your swing chair. Don’t be afraid to add personal touches, such as decorative pillows or cushions, to enhance the aesthetic appeal and comfort of your swing chair.
Whether you’re lounging with a book, enjoying a cup of coffee, or simply unwinding in the fresh air, your hammock swing chair will become your favorite spot for relaxation and rejuvenation.
Now that you have the knowledge and confidence to build your own hammock swing chair, it’s time to unleash your creativity and get started on this exciting DIY project. So grab your tools, gather your materials, and embark on the journey to create your perfect outdoor oasis.
Happy building and happy swinging!
Frequently Asked Questions about How To Build A Hammock Swing Chair
Was this page helpful?
At Storables.com, we guarantee accurate and reliable information. Our content, validated by Expert Board Contributors, is crafted following stringent Editorial Policies. We're committed to providing you with well-researched, expert-backed insights for all your informational needs.


0 thoughts on “How To Build A Hammock Swing Chair”