Home>Furniture & Design>Outdoor Furniture>How To Winterize Outdoor Bathroom

Outdoor Furniture
How To Winterize Outdoor Bathroom
Modified: January 22, 2024
Learn how to properly winterize your outdoor bathroom with our expert tips and advice. Keep your outdoor furniture and design protected during the colder months.
(Many of the links in this article redirect to a specific reviewed product. Your purchase of these products through affiliate links helps to generate commission for Storables.com, at no extra cost. Learn more)
Introduction
Winter brings a magical transformation to the outdoor landscape, blanketing everything in a serene layer of snow and ice. However, this seasonal shift also heralds the need for diligent preparation to safeguard outdoor spaces, including the often-overlooked outdoor bathroom. Whether you have a luxurious outdoor shower, a functional sink, or a full-fledged bathroom in your outdoor living area, it's crucial to winterize these features to prevent damage from freezing temperatures and harsh weather conditions.
Winterizing your outdoor bathroom not only protects your investment but also ensures that it remains functional and ready for use when warmer days return. From insulating pipes to safeguarding fixtures and appliances, a few simple steps can make a world of difference in preserving the integrity of your outdoor bathroom. In this comprehensive guide, we'll delve into the essential measures to winterize your outdoor bathroom effectively, allowing you to embrace the beauty of winter without worrying about potential damage. So, let's embark on this journey to safeguard your outdoor oasis and ensure that it remains a welcoming retreat throughout the winter season.
Key Takeaways:
- Protect your outdoor bathroom from winter damage by insulating pipes, sealing cracks, and draining water supply. Consider portable heating options for added comfort and flexibility.
- Safeguard fixtures and appliances from freezing temperatures. Install a reliable heating source and explore portable options to create a cozy and functional outdoor bathroom throughout winter.
Read more: How To Winterize An Outdoor Faucet
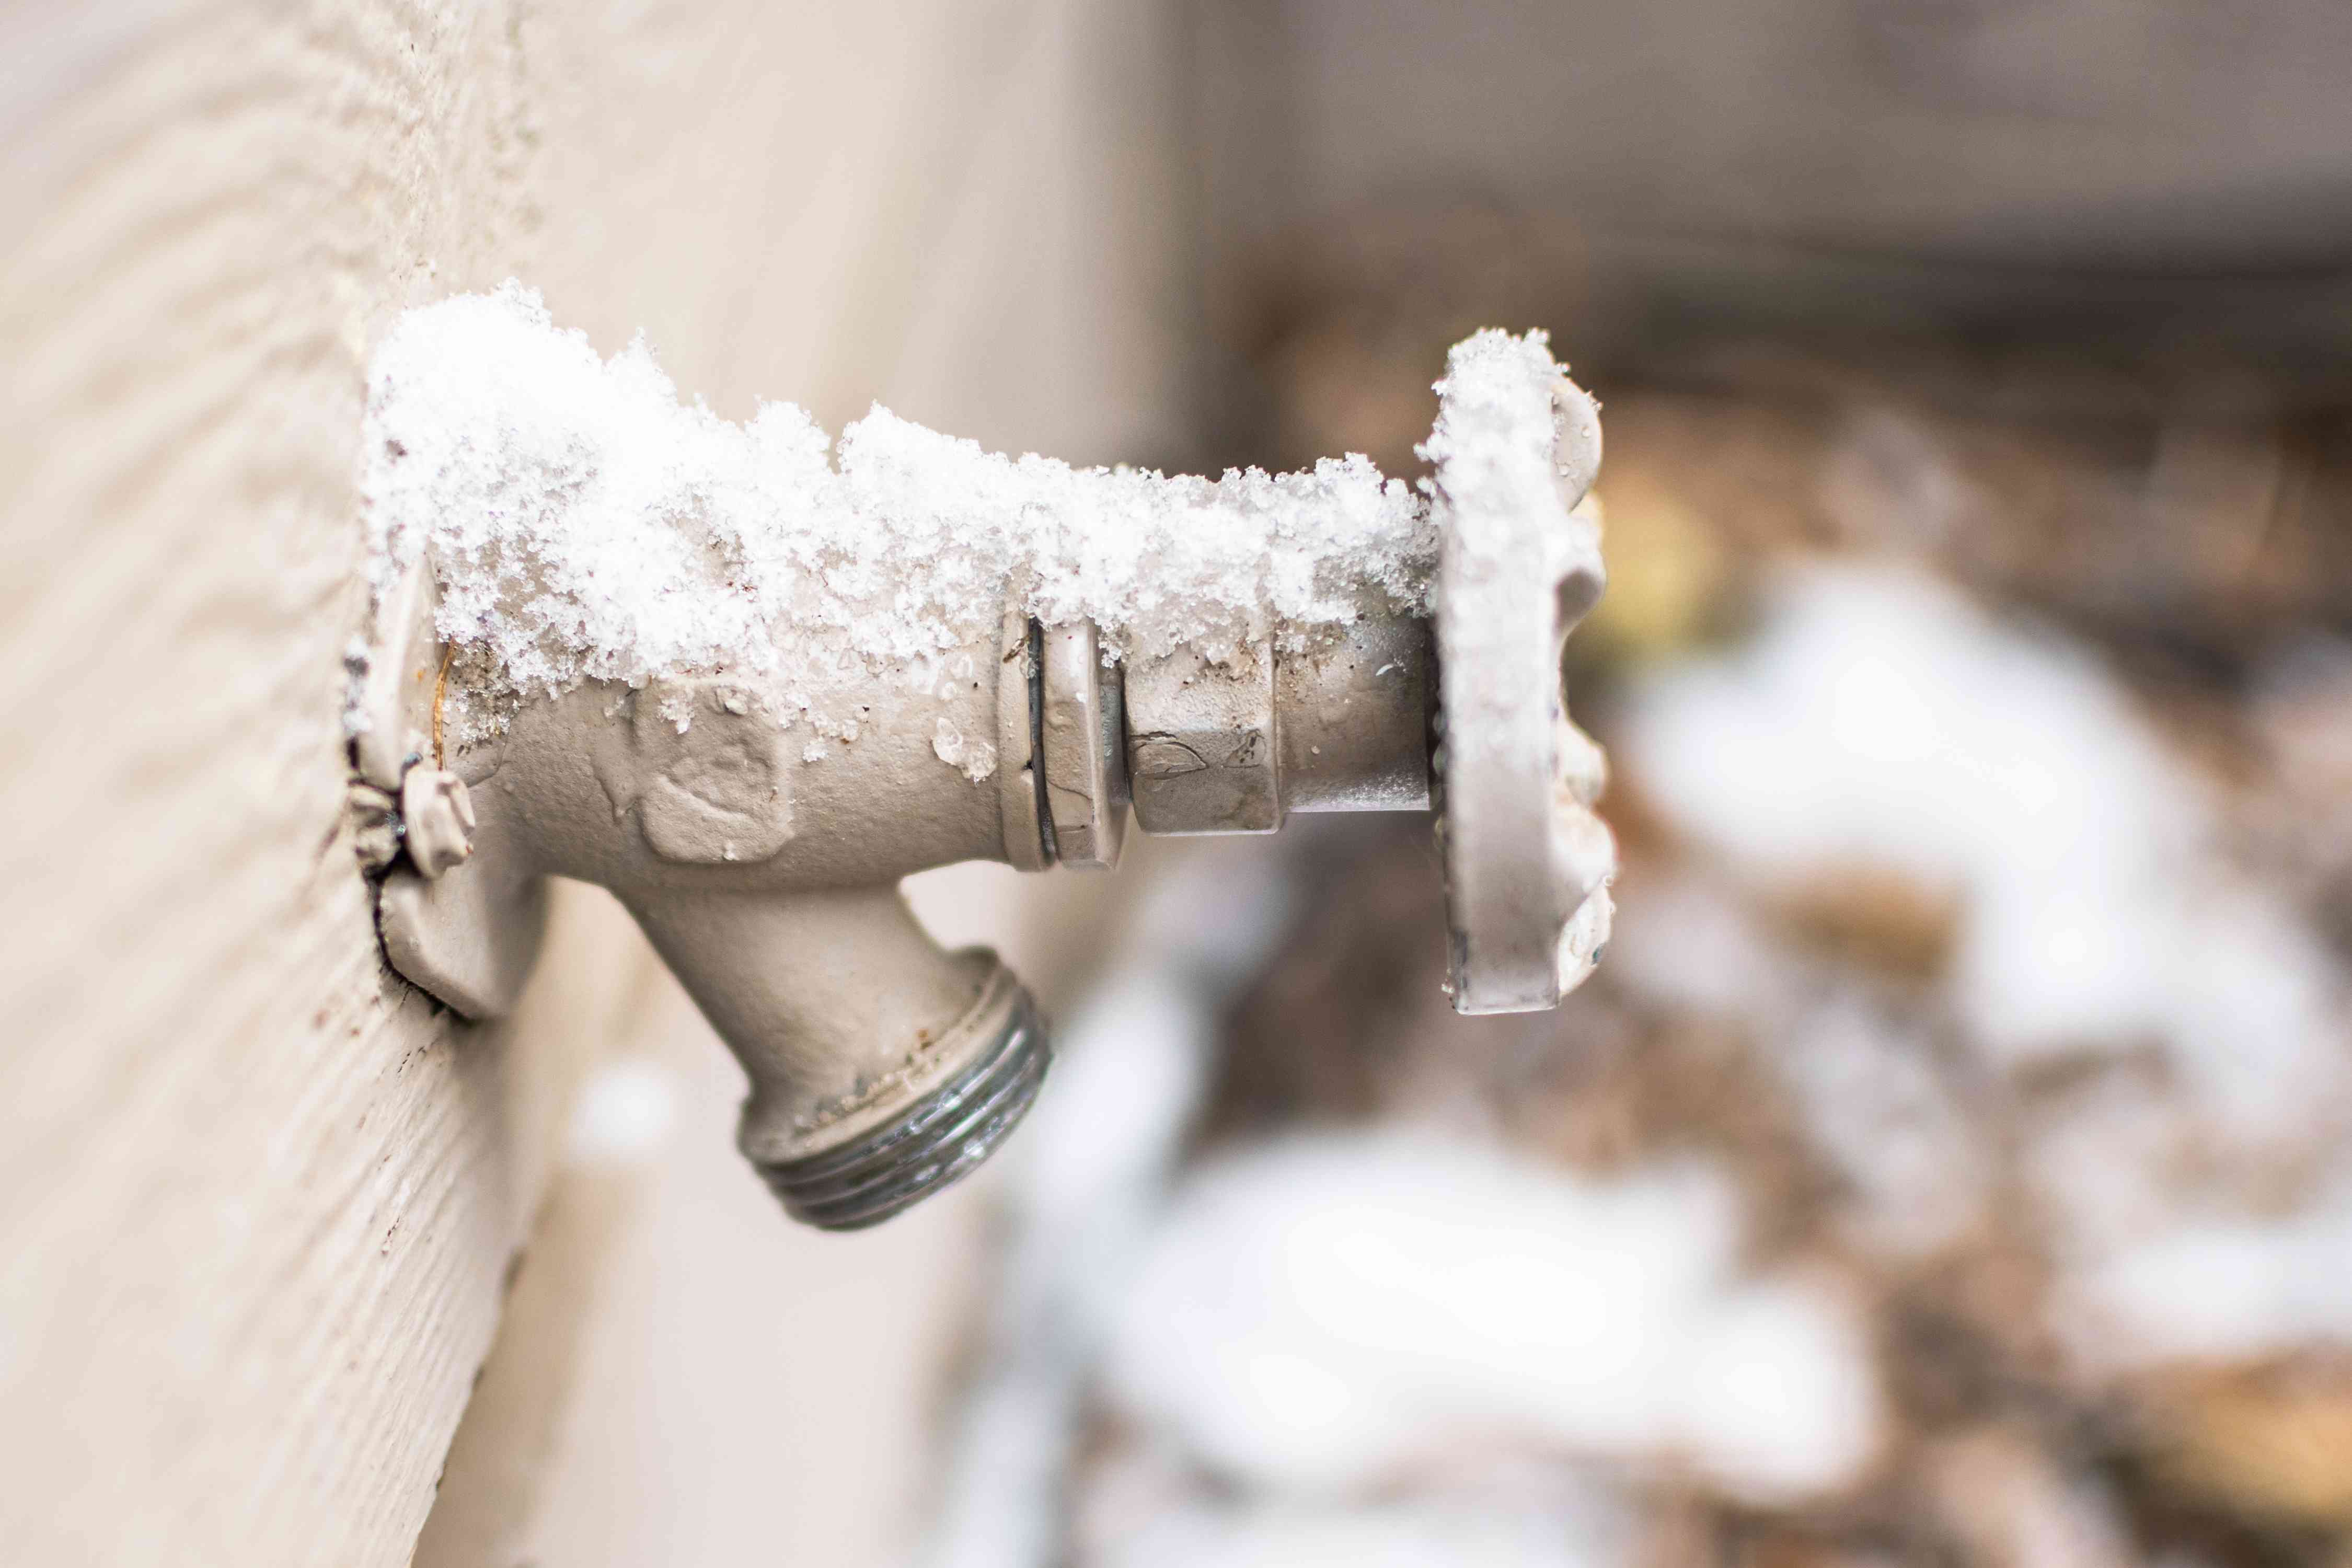
Insulate Pipes
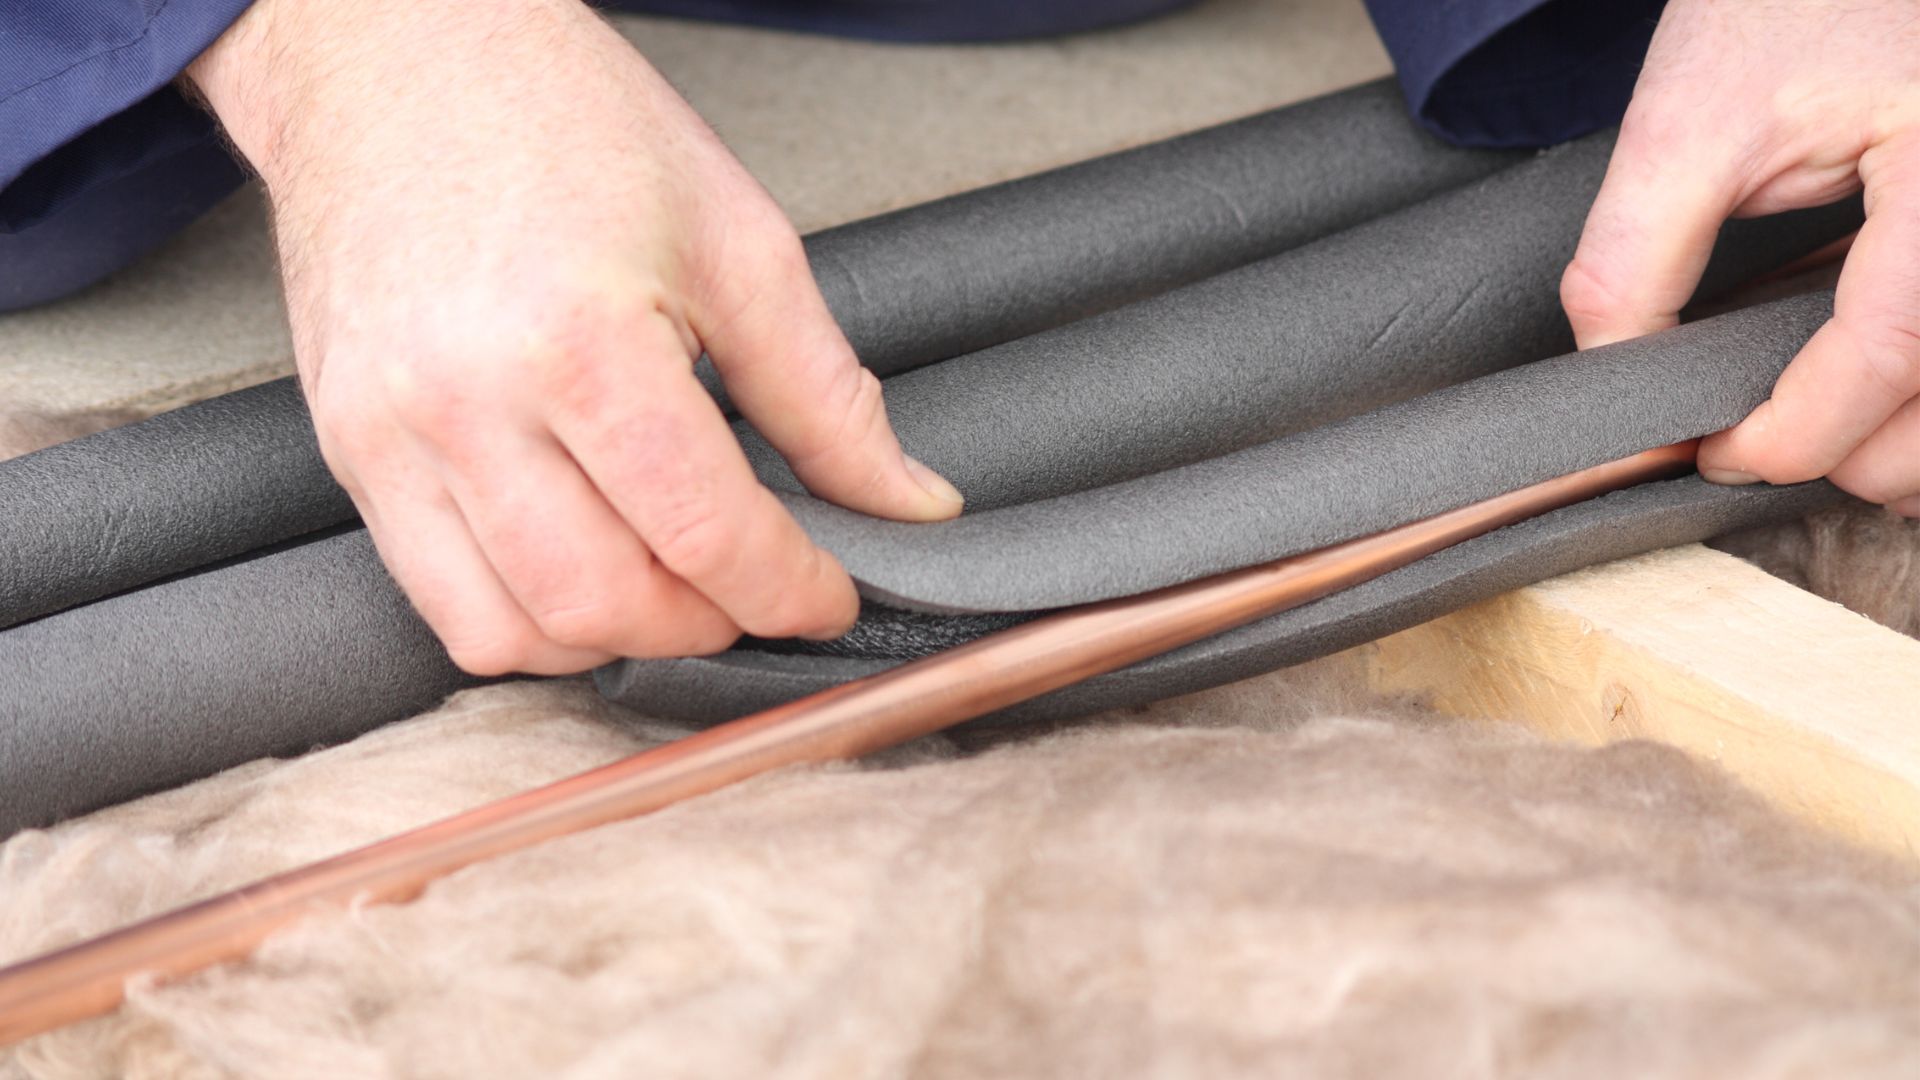
One of the most critical aspects of winterizing your outdoor bathroom is protecting the plumbing from freezing temperatures. Uninsulated pipes are highly susceptible to freezing, which can lead to costly damage and extensive repairs. To prevent this, start by identifying all the exposed pipes in your outdoor bathroom, including those leading to the sink, shower, or any other fixtures.
Once you've located the pipes, insulate them using pipe insulation sleeves or heat tape. These materials are readily available at hardware stores and are relatively easy to install. The insulation sleeves provide a protective barrier that helps retain heat within the pipes, preventing them from freezing. Similarly, heat tape can be wrapped around the pipes and activated when temperatures plummet, ensuring that the pipes remain at a safe operating temperature.
Additionally, consider using foam insulating covers for outdoor faucets to shield them from freezing temperatures. These covers are designed to fit over the faucets, providing an extra layer of insulation and protection. By insulating all exposed pipes and faucets in your outdoor bathroom, you can effectively mitigate the risk of frozen or burst pipes, safeguarding your plumbing system from winter-related damage.
Seal Cracks and Gaps
As the temperatures drop, it’s essential to fortify your outdoor bathroom against cold drafts and moisture infiltration by sealing any cracks and gaps in the structure. Inspect the walls, floors, and ceiling for any openings that could allow cold air or water to penetrate the space. Common areas of concern include around plumbing fixtures, electrical conduits, and where the bathroom structure meets the ground or adjoining walls.
Use a high-quality silicone caulk or weatherproof sealant to fill in these gaps and cracks, creating a tight seal that prevents drafts and moisture from entering the space. Pay close attention to areas where pipes enter or exit the building, as these are prime locations for air and water infiltration. By effectively sealing these openings, you not only enhance the thermal efficiency of the outdoor bathroom but also protect it from potential water damage caused by leaks or seepage.
Furthermore, inspect the windows and doors of the outdoor bathroom to ensure that they form a tight seal when closed. Apply weatherstripping as needed to eliminate drafts and maintain a comfortable interior environment. By addressing these areas of potential air and water intrusion, you can create a well-insulated and weather-resistant outdoor bathroom that is better equipped to withstand the rigors of winter.
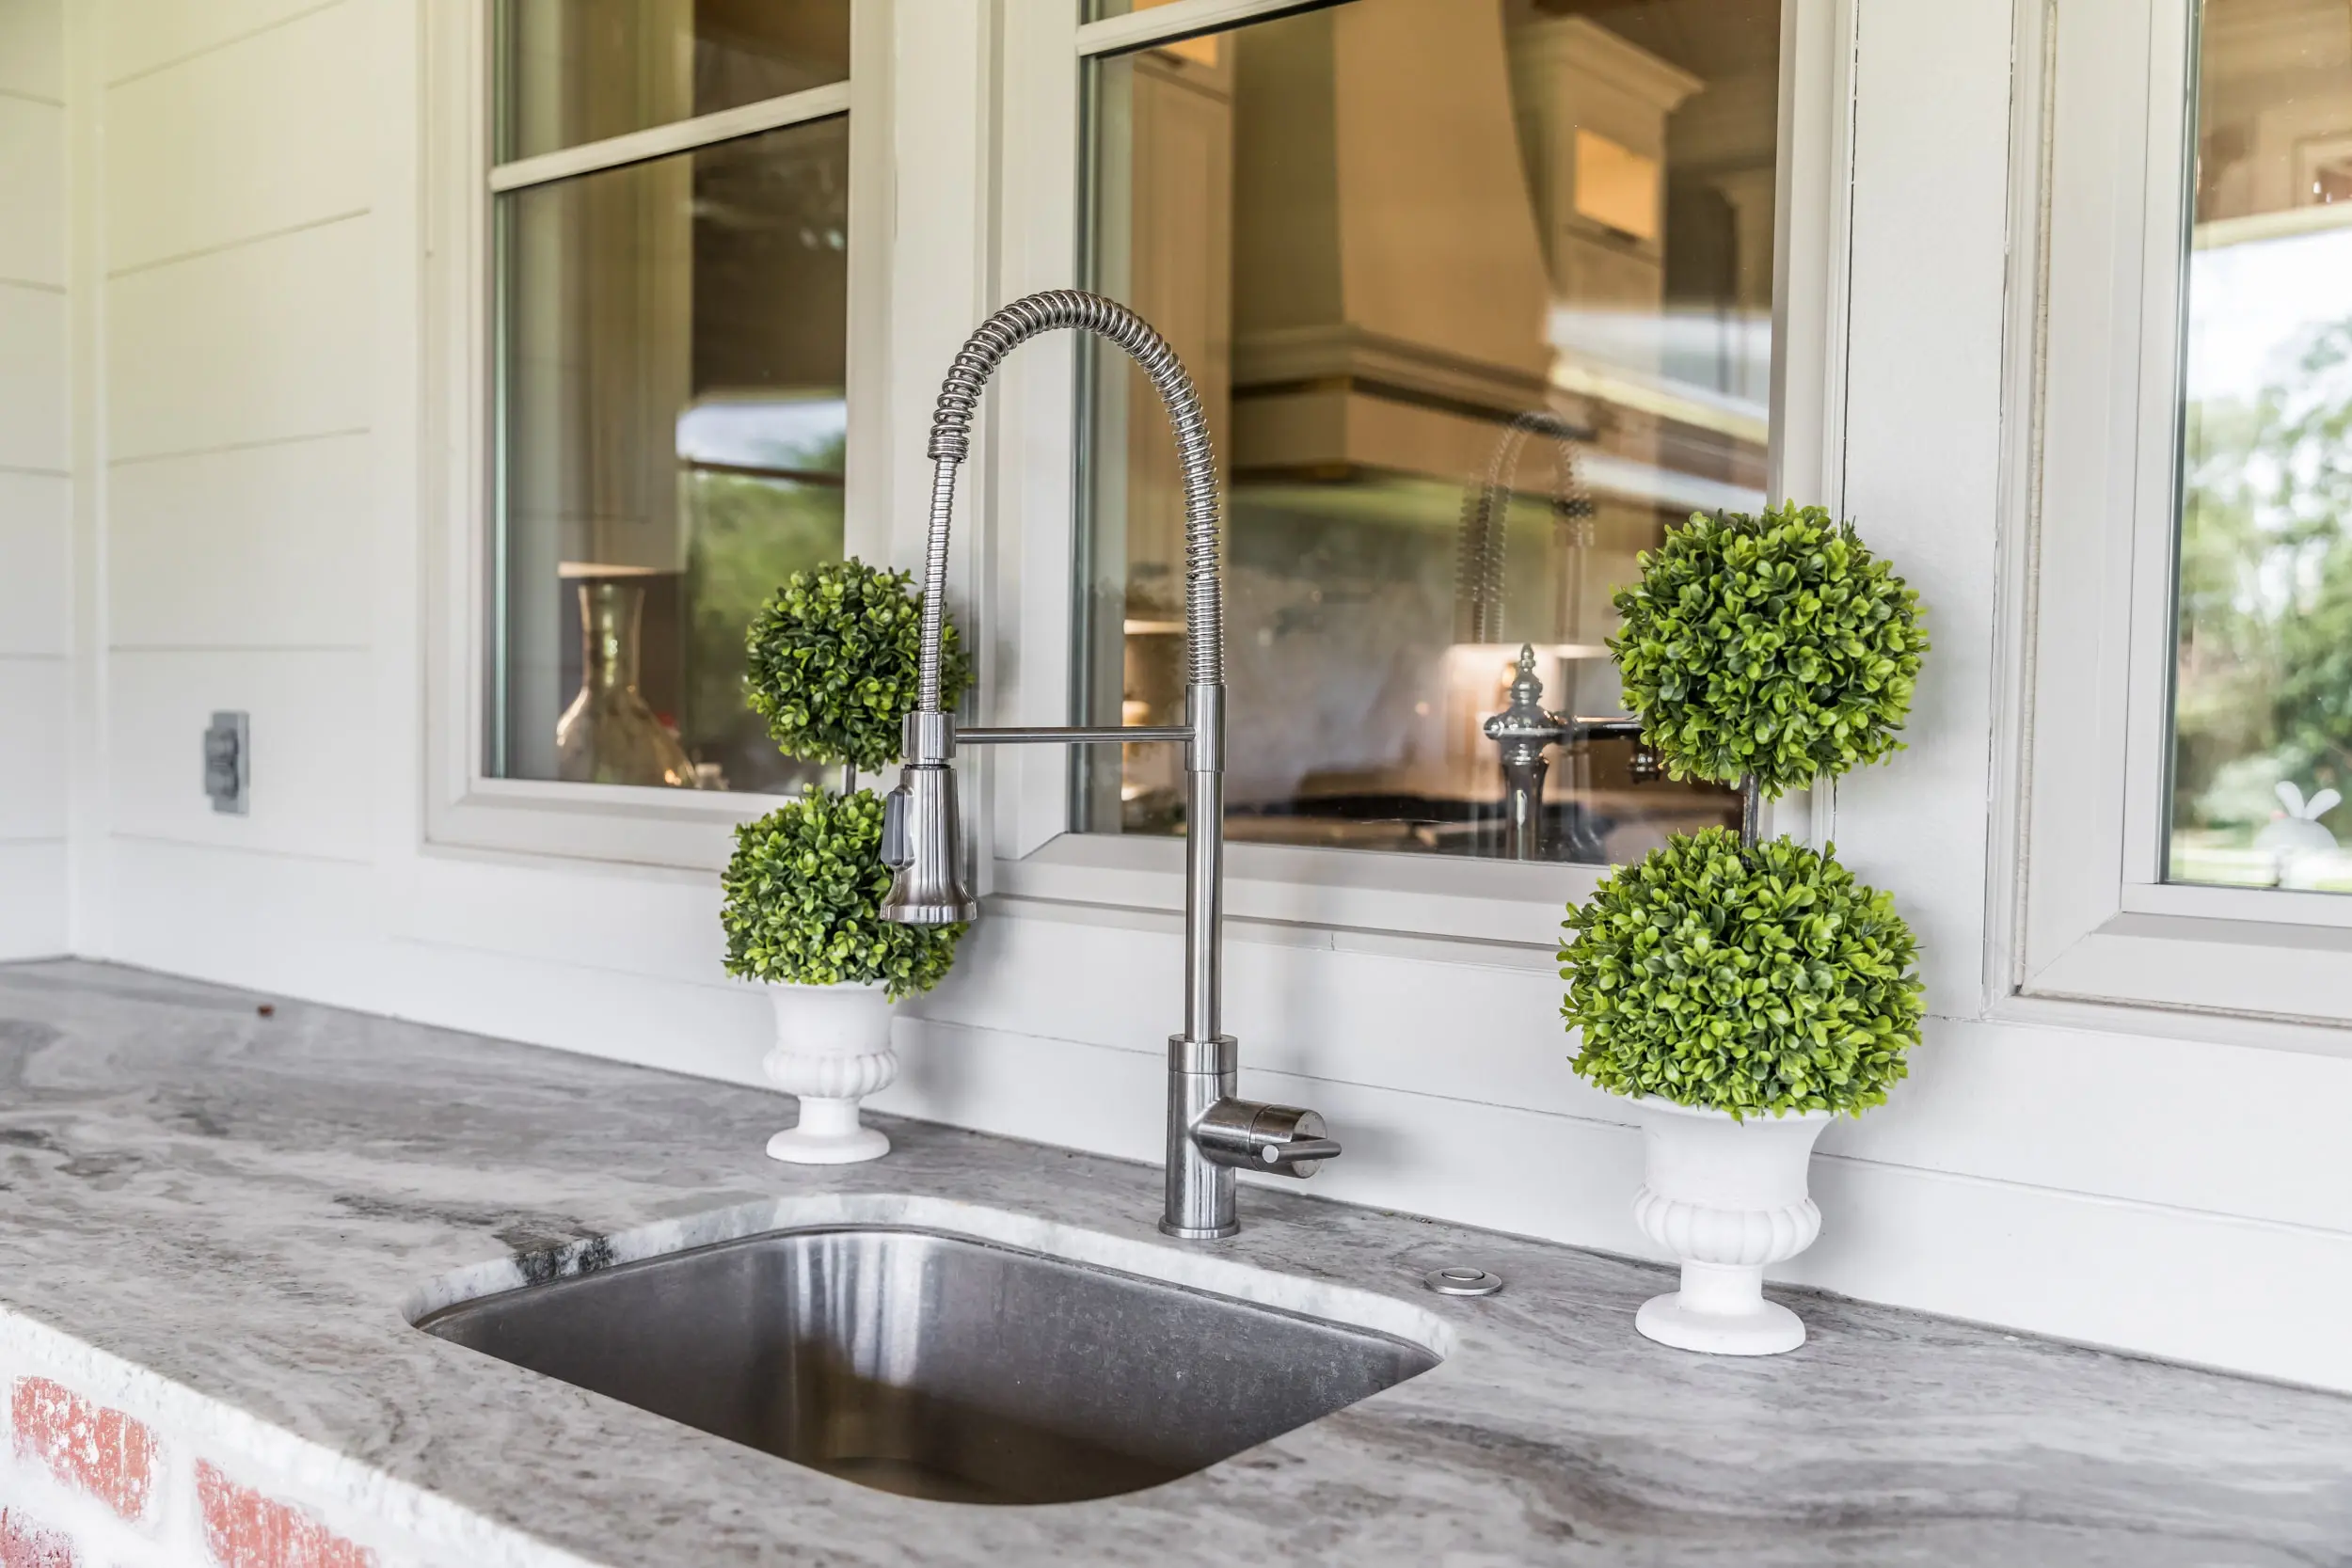
Protect Fixtures and Appliances
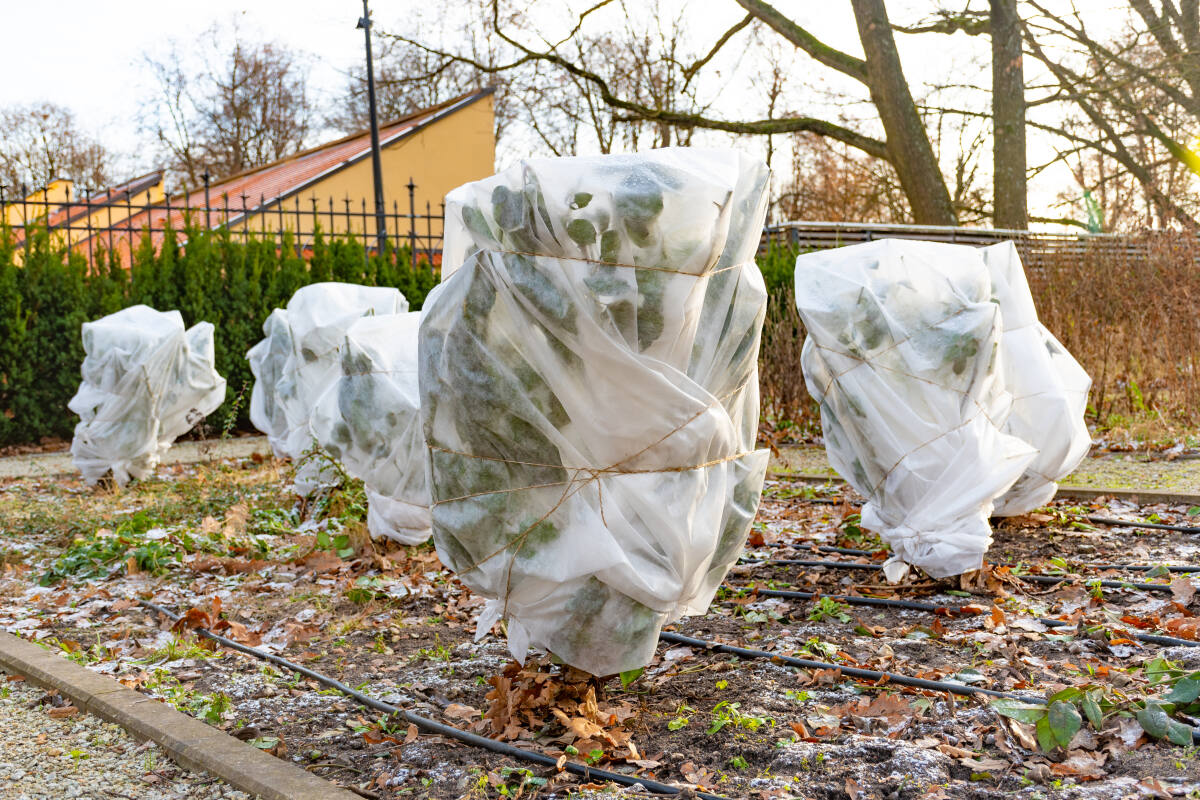
When winterizing your outdoor bathroom, it’s crucial to safeguard the fixtures and appliances from the potentially damaging effects of cold weather. Start by removing any detachable fixtures, such as showerheads or faucets, and store them in a climate-controlled environment for the winter. This prevents water from accumulating and freezing inside these components, which could cause cracks or other damage.
For fixtures that cannot be easily removed, such as sinks or built-in showers, consider covering them with insulated wraps or blankets specifically designed for outdoor use. These protective covers help retain heat and prevent freezing, preserving the integrity of the fixtures throughout the winter months. Additionally, if your outdoor bathroom is equipped with electrical appliances, such as lighting fixtures or heating elements, ensure that they are rated for outdoor use and are adequately protected from the elements.
For added protection, consider applying a waterproof sealant to the surfaces of fixtures and appliances to create an additional barrier against moisture and corrosion. This proactive measure can extend the lifespan of these components and minimize the risk of weather-related damage. By taking the time to protect your outdoor bathroom’s fixtures and appliances, you can enjoy peace of mind knowing that they are shielded from the harsh winter conditions.
To winterize an outdoor bathroom, make sure to drain all water from the pipes and fixtures to prevent freezing and potential damage. Disconnect hoses, insulate exposed pipes, and consider using a space heater to maintain a safe temperature.
Drain Water Supply
Before the arrival of freezing temperatures, it’s essential to thoroughly drain the water supply and plumbing system in your outdoor bathroom to prevent potential damage from ice formation. Start by shutting off the main water supply to the outdoor bathroom to halt the flow of water into the plumbing system. Next, open all the faucets and fixtures to allow any remaining water to drain out completely. This includes outdoor showers, sinks, and any other water outlets in the bathroom.
After draining the fixtures, consider using compressed air to blow out any residual water from the pipes. This process helps ensure that no water remains trapped within the plumbing system, reducing the risk of freezing and subsequent damage. If you’re unfamiliar with this procedure, consulting a professional plumber can provide valuable guidance on effectively clearing the water supply lines.
In addition to draining the water supply, it’s important to address any water storage tanks or reservoirs in the outdoor bathroom. If your bathroom features a water heater, be sure to follow the manufacturer’s guidelines for winterizing the unit to prevent damage from freezing. By thoroughly draining the water supply and plumbing system, you can protect your outdoor bathroom from the destructive impact of frozen water and avoid costly repairs in the spring.
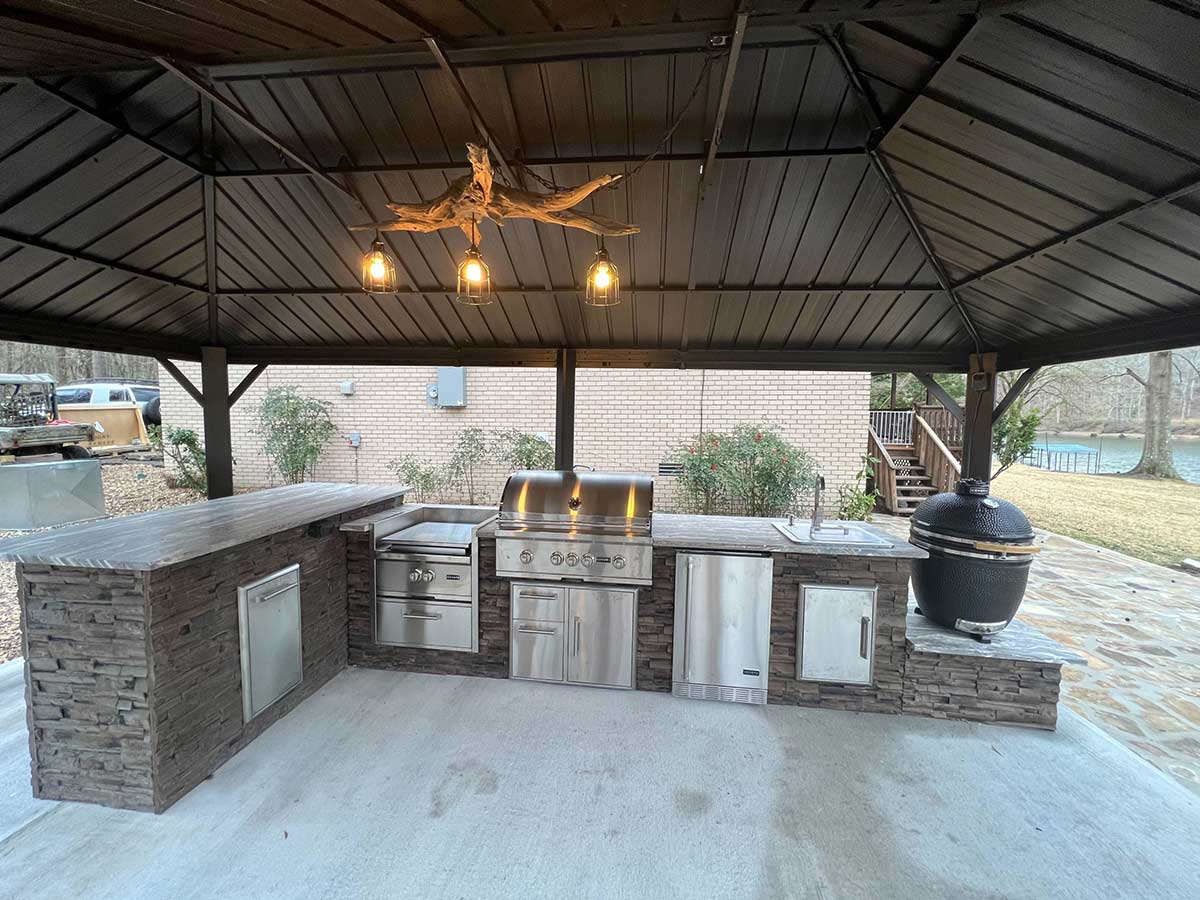
Install Heating Source
Introducing a reliable heating source to your outdoor bathroom can significantly mitigate the risk of freezing and ensure a comfortable environment during the winter months. Depending on your specific setup and preferences, there are several effective heating options to consider.
One popular choice is to install electric radiant heating systems beneath the flooring of the outdoor bathroom. This solution not only prevents the floor from becoming uncomfortably cold but also helps maintain a consistent temperature throughout the space. Electric radiant heating systems are designed to be energy-efficient and can be controlled with thermostats for optimal comfort.
If your outdoor bathroom is enclosed and well-ventilated, a small electric space heater may suffice to keep the area comfortably warm. Select a heater with built-in safety features, such as tip-over and overheat protection, and ensure that it is suitable for outdoor use. Position the heater away from flammable materials and follow the manufacturer’s recommendations for safe operation.
For more rustic or off-grid setups, wood-burning stoves or fireplaces can provide both warmth and ambiance to the outdoor bathroom. These traditional heating sources add a touch of charm and can effectively heat the space, creating a cozy retreat amid the winter chill. However, it’s crucial to install these heating appliances according to local building codes and safety standards to prevent fire hazards and ensure proper ventilation.
Regardless of the heating source you choose, prioritize safety and efficiency when integrating it into your outdoor bathroom. Regular maintenance and inspections of the heating system are essential to ensure trouble-free operation and safe use throughout the winter season.
Consider Portable Options
For added flexibility and convenience, exploring portable heating and insulation options can offer effective solutions for winterizing your outdoor bathroom. These versatile alternatives can be easily adjusted and relocated as needed, making them ideal for various outdoor setups and climates.
Portable electric space heaters are a popular choice for supplementing the heating of outdoor bathrooms. Look for models designed for outdoor use and equipped with weather-resistant features. These heaters can provide targeted warmth in specific areas of the bathroom, ensuring comfort without the need for extensive installation or modifications to the existing space.
Another portable option to consider is insulated curtains or room dividers, which can help contain heat within the bathroom and create a more comfortable environment. These versatile barriers can be quickly installed and removed as needed, allowing you to adapt the layout of the outdoor bathroom while enhancing its thermal efficiency.
If your outdoor bathroom features a shower area, portable shower enclosures with built-in heating elements can provide a luxurious and comfortable bathing experience during the winter. These units are designed to retain heat and create a cozy environment for showering, even in cold weather conditions. Additionally, portable insulation panels can be utilized to create temporary enclosures or windbreaks, effectively shielding the outdoor bathroom from harsh winds and low temperatures.
By exploring portable heating and insulation options, you can tailor the winterization of your outdoor bathroom to meet your specific needs and preferences. These versatile solutions offer a practical and adaptable approach to maintaining a comfortable and functional outdoor space throughout the winter season.
Conclusion
As the winter season approaches, taking proactive steps to winterize your outdoor bathroom is essential for preserving its functionality and structural integrity. By insulating pipes, sealing cracks and gaps, and protecting fixtures and appliances, you can safeguard your outdoor oasis from the potential hazards of freezing temperatures and harsh weather conditions.
Thoroughly draining the water supply and installing a reliable heating source are crucial measures that can prevent damage and ensure a comfortable environment within the outdoor bathroom. Whether you opt for permanent heating solutions or portable alternatives, prioritizing safety and efficiency is paramount in creating a winter-ready space that enhances your outdoor living experience.
As you embark on the journey of winterizing your outdoor bathroom, consider the unique characteristics of your outdoor space and tailor the winterization process to address its specific requirements. Whether you have a luxurious outdoor shower nestled in a serene garden or a functional sink and vanity on a spacious patio, implementing these winterization measures will help protect your investment and ensure that your outdoor bathroom remains a welcoming retreat throughout the winter months.
By embracing these essential steps and considering portable options, you can create a well-insulated, comfortable, and functional outdoor bathroom that withstands the challenges of winter while providing a tranquil and rejuvenating escape. With proper winterization, your outdoor bathroom can continue to be a cherished feature of your outdoor living area, offering a seamless blend of comfort and natural beauty, even in the midst of winter’s embrace.
Frequently Asked Questions about How To Winterize Outdoor Bathroom
Was this page helpful?
At Storables.com, we guarantee accurate and reliable information. Our content, validated by Expert Board Contributors, is crafted following stringent Editorial Policies. We're committed to providing you with well-researched, expert-backed insights for all your informational needs.


0 thoughts on “How To Winterize Outdoor Bathroom”