Articles
How To Winterize An Outdoor Faucet
Modified: October 19, 2024
Learn how to winterize an outdoor faucet with these helpful articles. Protect your pipes from freezing and avoid costly damage.
(Many of the links in this article redirect to a specific reviewed product. Your purchase of these products through affiliate links helps to generate commission for Storables.com, at no extra cost. Learn more)
Introduction
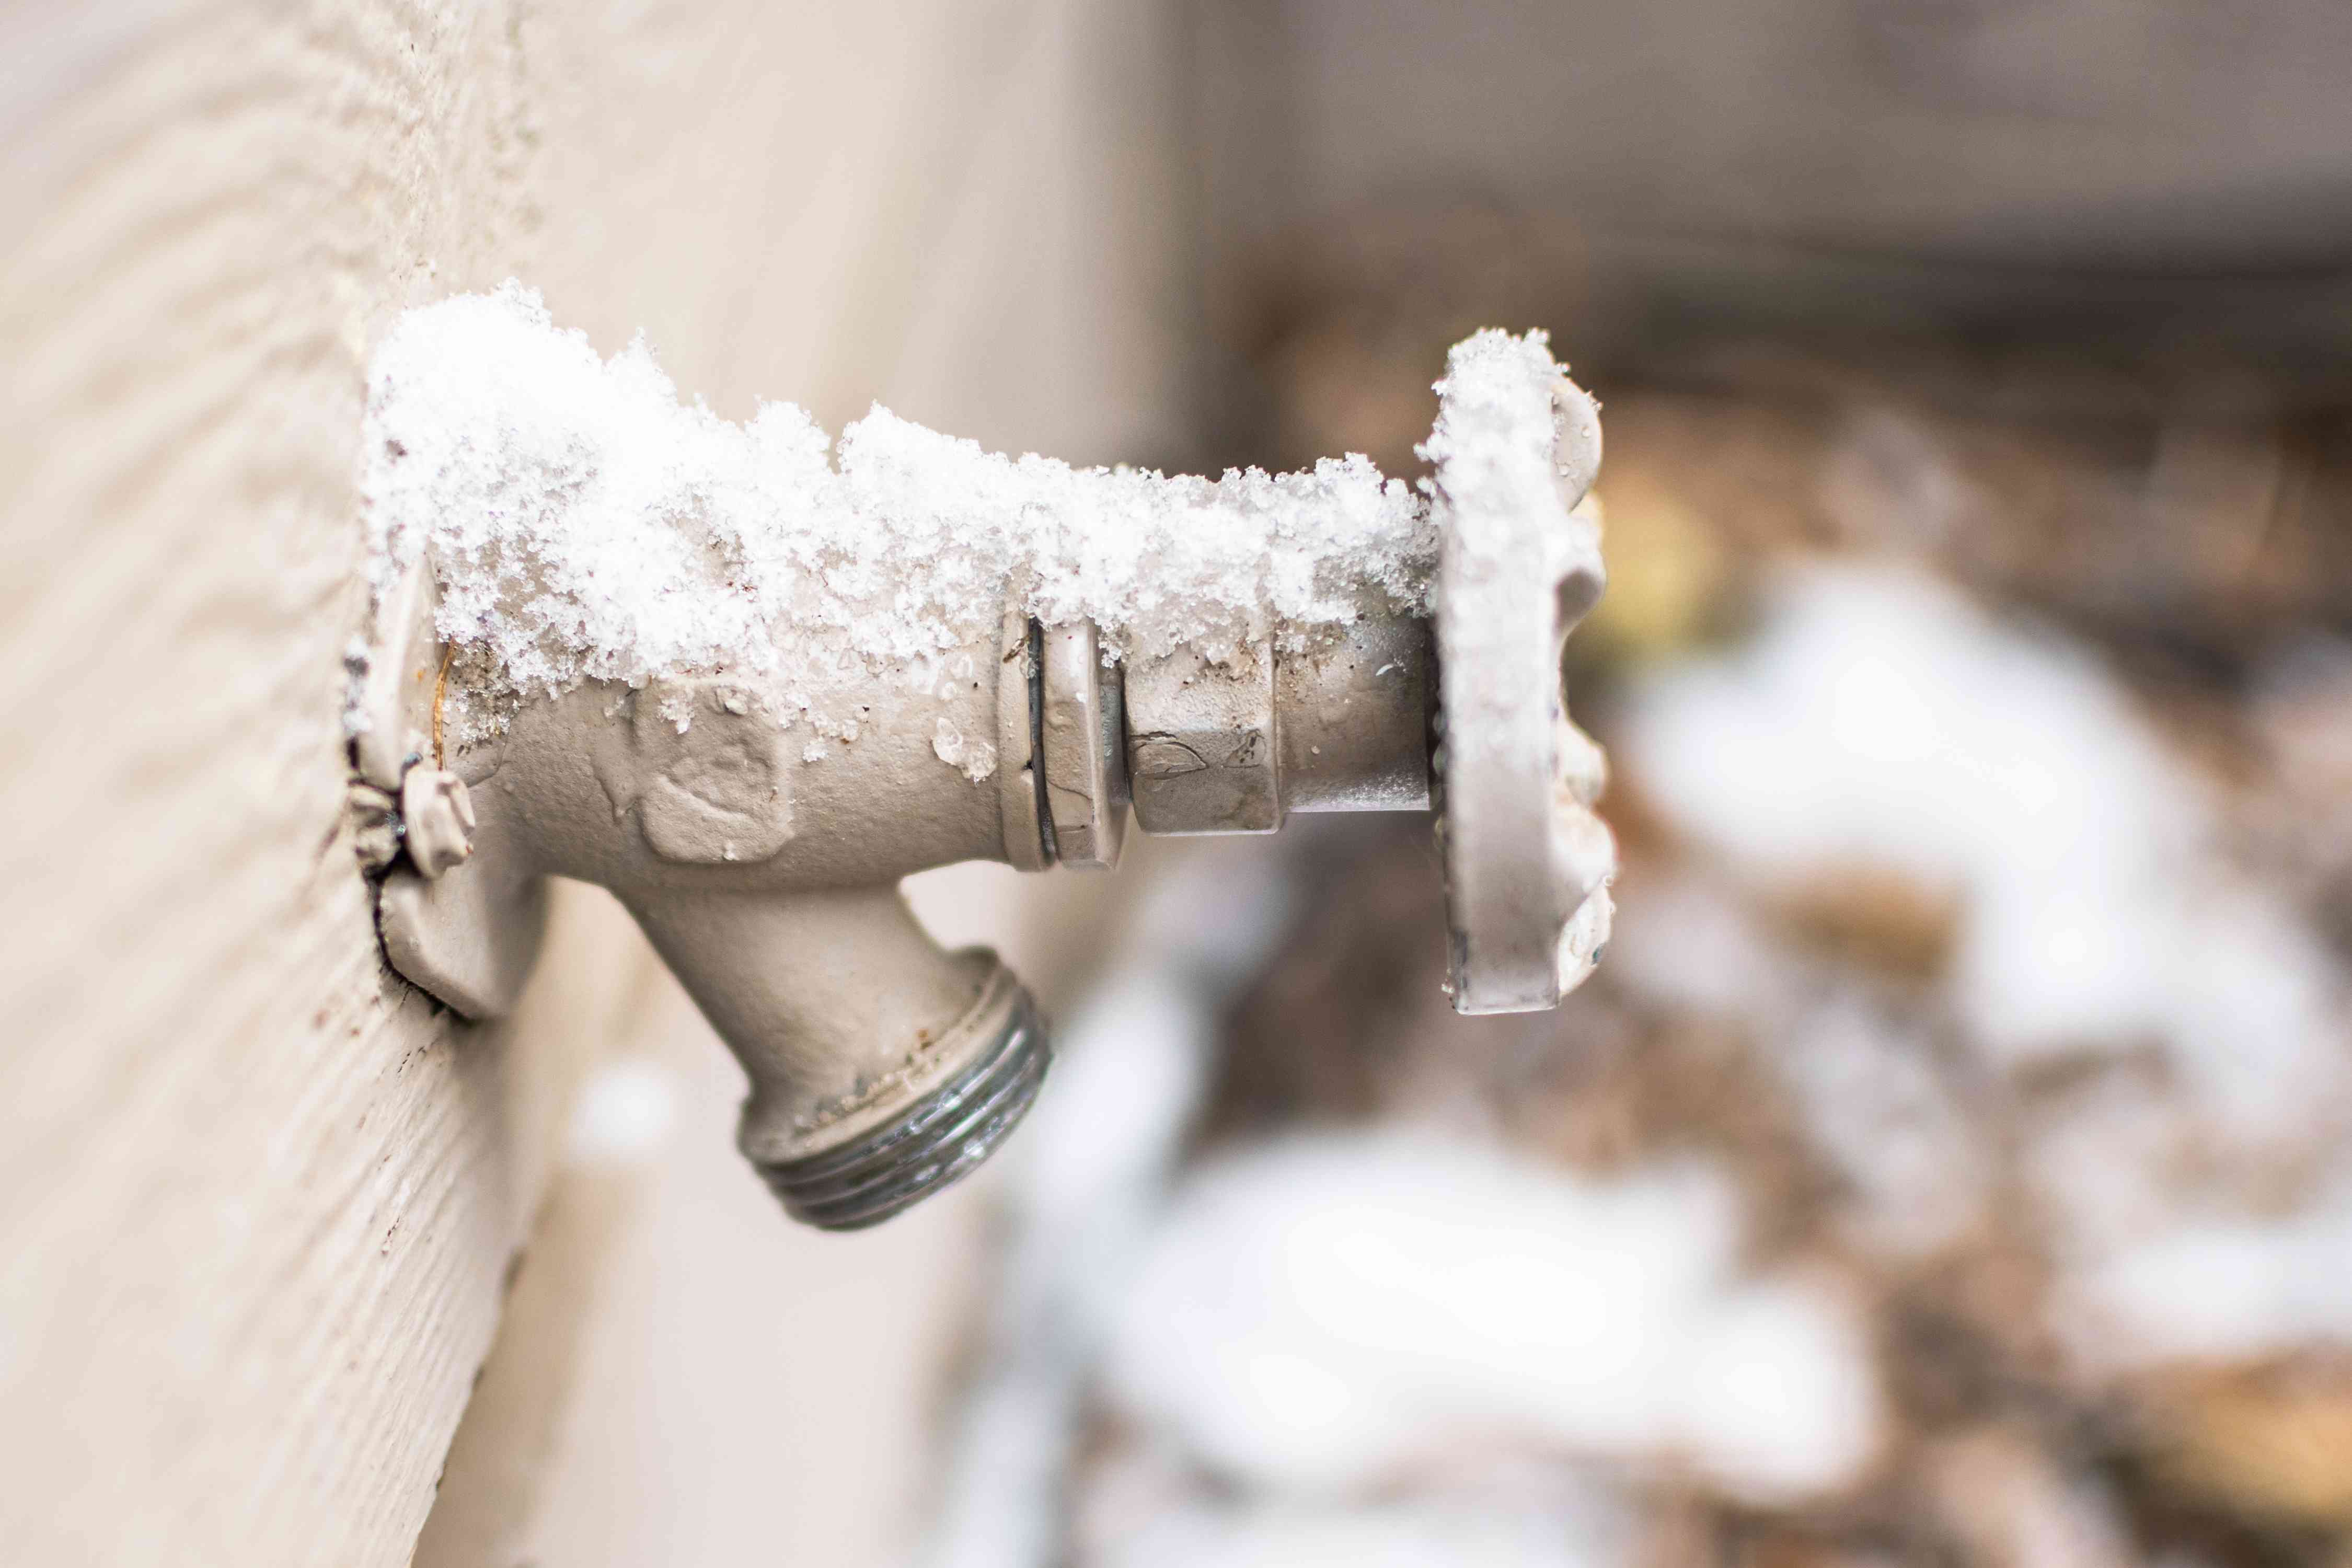
As the colder months approach, it is essential to take steps to protect your outdoor faucet from freezing temperatures. Winterizing your outdoor faucet is crucial to prevent damage and potential costly repairs. By following a few simple steps, you can ensure that your outdoor faucet remains in good condition throughout the winter season.
In this article, we will walk you through the process of winterizing an outdoor faucet, providing you with expert tips and guidance along the way. By taking the time to properly winterize your outdoor faucet, you can save yourself from the hassle and expense of dealing with a frozen or burst pipe.
So, let’s dive into the step-by-step process of winterizing an outdoor faucet.
Key Takeaways:
- Protect your outdoor faucet from freezing by turning off the water supply, draining the faucet, disconnecting and storing hoses, insulating the faucet, covering it, and checking for leaks. Proper winterization saves you from costly repairs and extends the faucet’s lifespan.
- Winterizing your outdoor faucet is essential to prevent damage during the colder months. By following the step-by-step process of turning off the water supply, draining the faucet, and insulating and covering it, you can ensure its longevity and functionality for years to come.
Step 1: Turn off the Water Supply
The first step in winterizing your outdoor faucet is to turn off the water supply. Locate the shutoff valve for your outdoor faucet, which is typically found inside your house near the area where the faucet is installed. It may be in the basement, crawl space, or utility room.
Once you have located the shutoff valve, rotate it clockwise to turn off the water supply to the outdoor faucet. This will prevent any water from flowing into the faucet and potentially freezing during the winter months.
After turning off the water supply, it is important to drain any remaining water from the faucet to prevent freezing. To do this, open the faucet by turning the handle to the “on” position and leave it open throughout the winterization process.
By turning off the water supply and allowing any remaining water to drain from the faucet, you are taking the necessary precautions to protect your outdoor faucet from freezing temperatures.
Step 2: Drain the Faucet
After turning off the water supply, the next step in winterizing your outdoor faucet is to drain any remaining water from the system. This is crucial to prevent any water from freezing and causing damage to the faucet or pipes.
To drain the faucet, start by attaching a hose to the drain valve, if available. Position the other end of the hose in a suitable drainage area, such as a garden or driveway. If your faucet does not have a drain valve, you can simply open the faucet and let the water flow out.
Once the drainage hose is properly set up, open the drain valve (if your faucet has one) or turn on the faucet to allow the water to flow out. It is important to ensure that all water is drained from the faucet, including any water that may be trapped in the pipes.
Allow the water to flow until it stops completely, indicating that the faucet is fully drained. This step may take a few minutes, so be patient and ensure that all water is removed from the system.
Once the faucet is drained, close the drain valve (if applicable) and turn off the faucet. This will prevent any water from re-entering the system and potentially freezing during the winter months.
By properly draining the faucet, you are eliminating any water that could potentially freeze and cause damage. This step is essential for effectively winterizing your outdoor faucet.
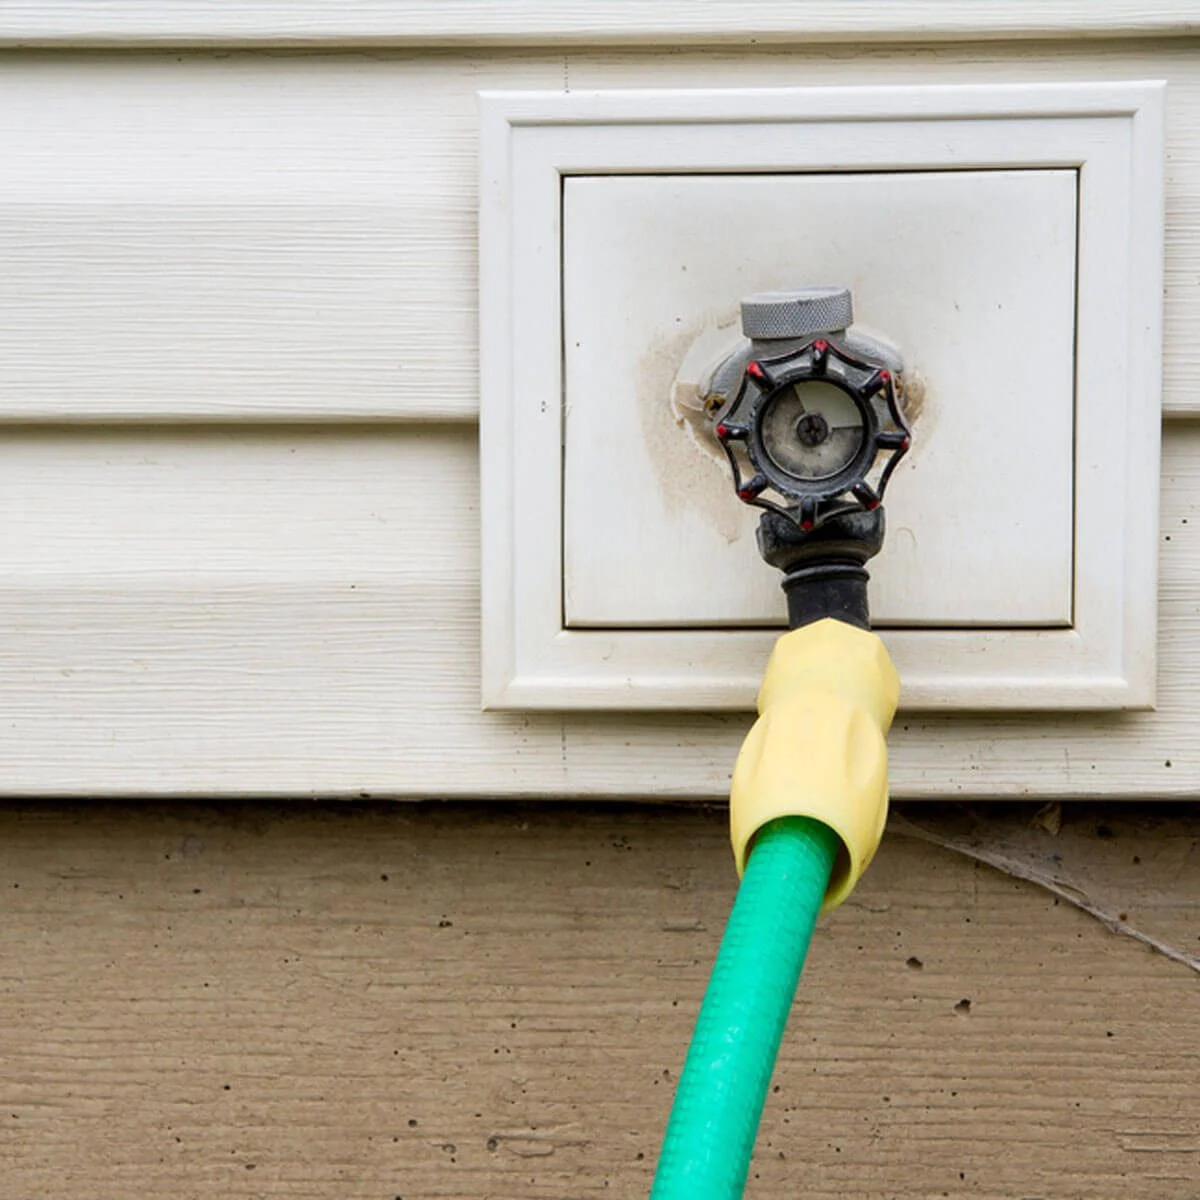
Step 3: Disconnect and Store Hoses
In order to fully protect your outdoor faucet during the winter months, it is important to disconnect and store any hoses that are connected to the faucet. Leaving hoses attached can trap water and cause damage if it freezes.
Start by turning off the water supply to the hose, whether it is connected to the outdoor faucet or a separate spigot. Once the water supply is turned off, disconnect the hose from the faucet by unscrewing it.
Next, thoroughly drain the hose by removing any excess water. One way to do this is by holding one end of the hose up high and allowing gravity to let the water flow out. You can also use a towel or sponge to remove any remaining water from inside the hose.
After the hose is completely drained, coil it up neatly to prevent tangling and store it in a dry, sheltered area, such as a garage or shed. Keeping the hose protected from the elements will help prolong its lifespan and prevent it from cracking or becoming damaged.
If your outdoor faucet has a built-in hose reel, retract the hose back into the reel and ensure it is properly secured. This will help protect the hose and prevent it from being exposed to extreme weather conditions.
By disconnecting and storing your hoses for the winter, you are safeguarding them from freezing and potential damage. This step is essential for maintaining the longevity of your hoses and ensuring they are in good condition for use in the following spring.
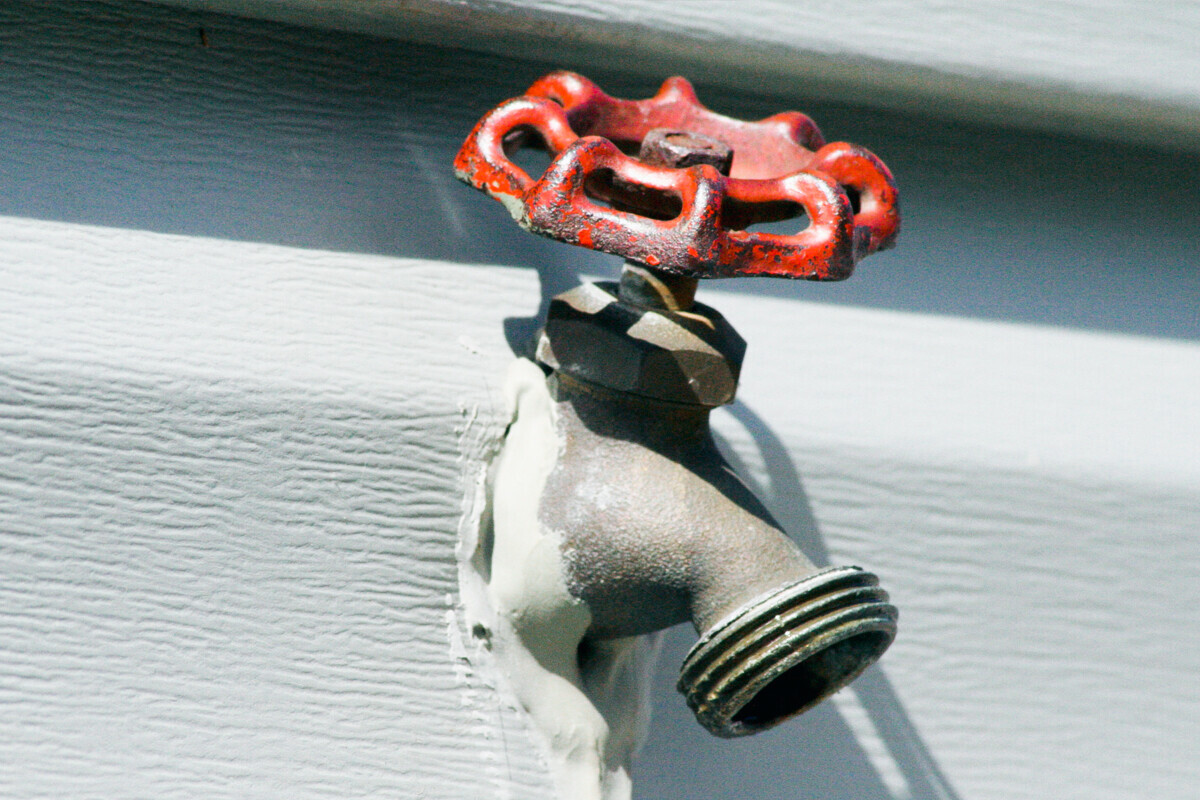
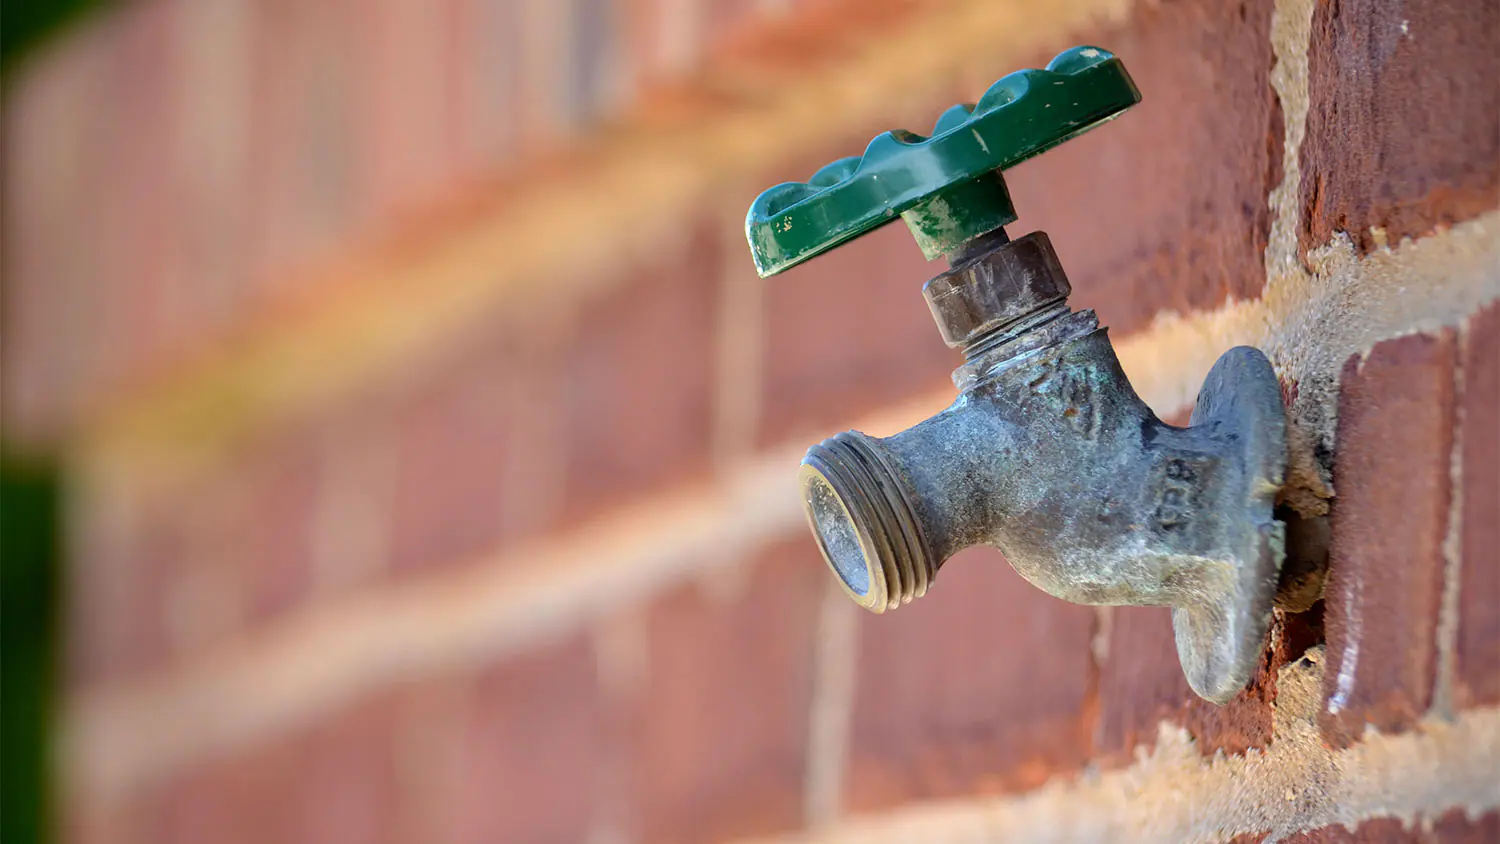
Disconnect and drain the outdoor faucet to prevent freezing and potential damage during the winter months. Use a hose bib cover for added protection.
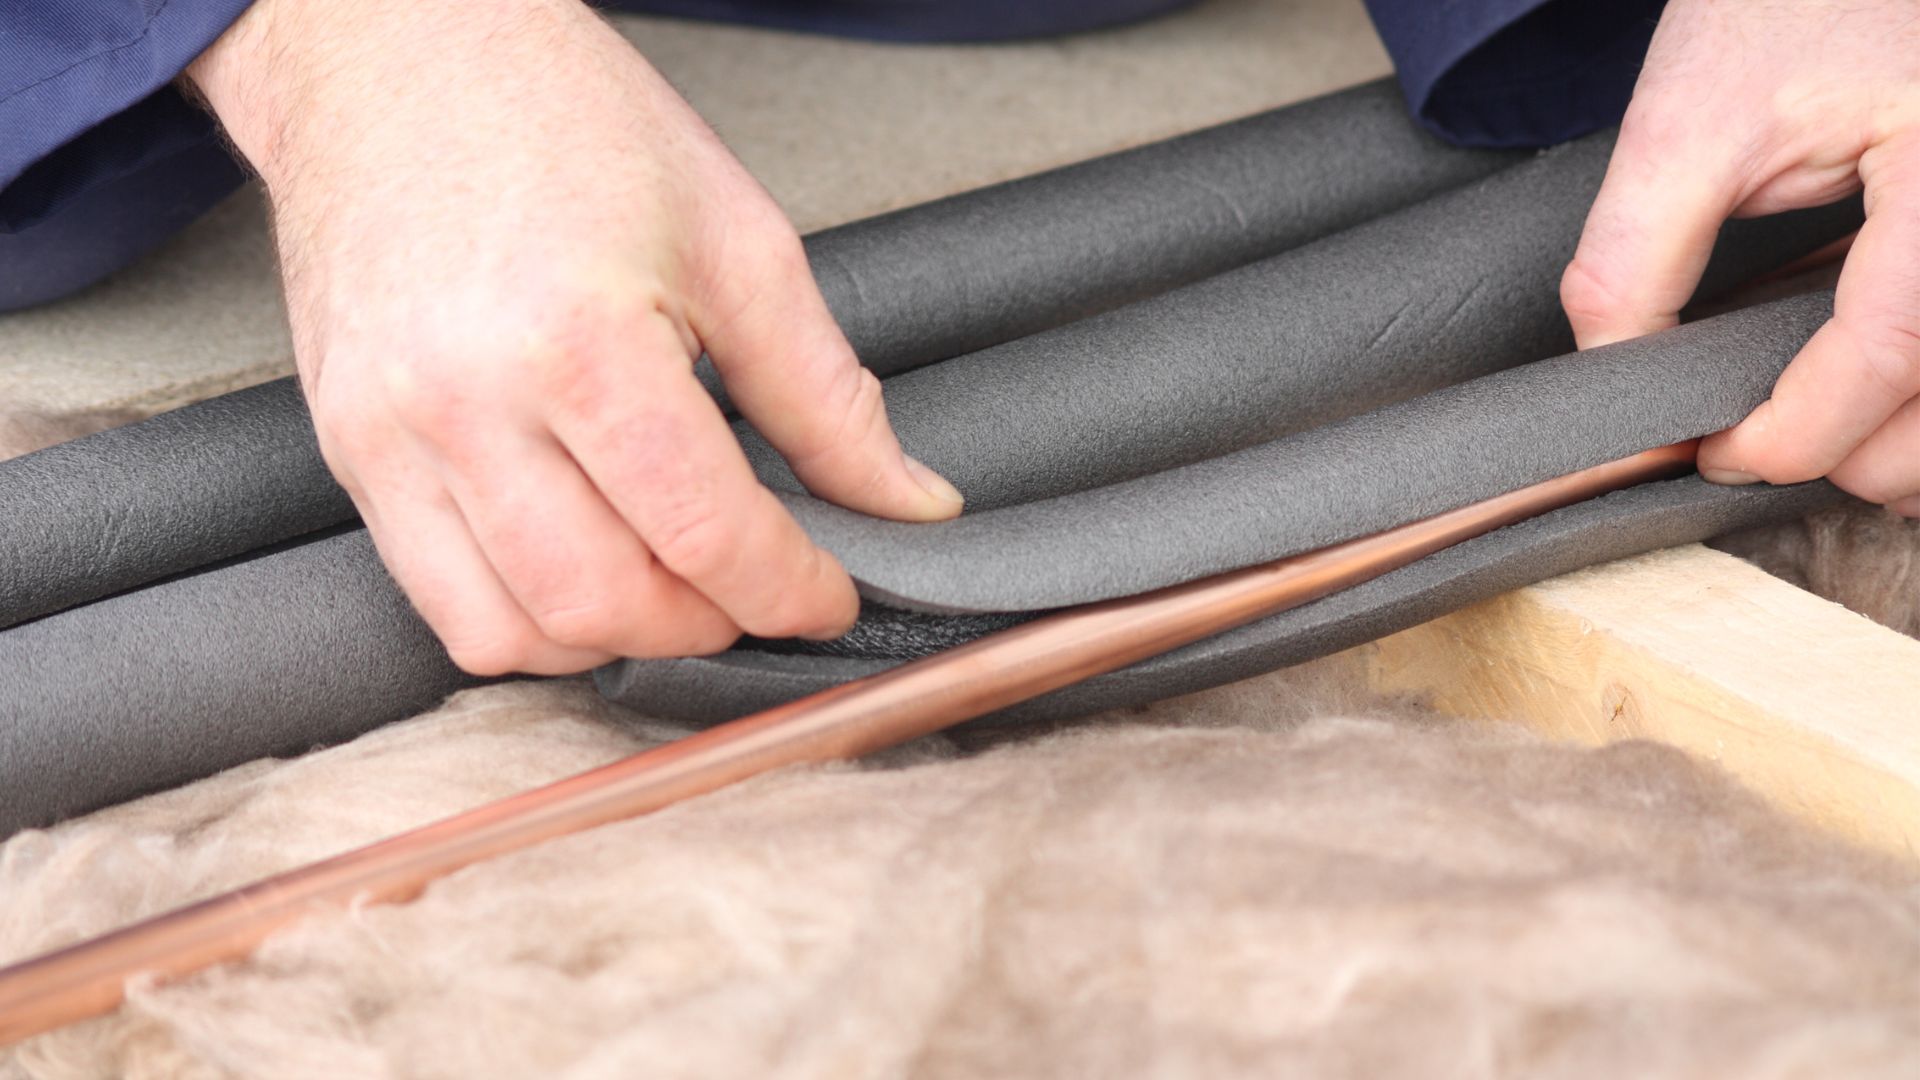
Step 4: Insulate the Faucet
To further protect your outdoor faucet from freezing temperatures, it is recommended to insulate it. Insulation helps to keep the faucet and associated pipes warm, preventing them from freezing and potential damage.
There are several methods you can use to insulate your outdoor faucet:
- Insulating Foam Covers: These foam covers are designed specifically for outdoor faucets and provide a layer of insulation around the faucet and pipes. Simply slip the cover over the faucet and secure it in place.
- Old Towels or Rags: If you don’t have foam covers, you can use old towels or rags to insulate the faucet. Wrap the towels or rags around the faucet and use zip ties or duct tape to secure them in place.
- Heat Tape: Heat tape is a type of electrical heating element that can be wrapped around the faucet and pipes to provide warmth. Make sure to follow the manufacturer’s instructions for proper installation and usage.
- Bubble Wrap: If you’re in a pinch, you can use bubble wrap as a makeshift insulation material. Wrap the faucet and pipes with bubble wrap, using tape to secure it in place.
Whichever method you choose, make sure that the insulation covers the entire faucet as well as any exposed pipes. This will help to keep the area warm and prevent freezing.
Additionally, if your outdoor faucet has a separate shut-off valve inside your house, consider insulating the pipe leading to the faucet. This can be done using pipe insulation foam or by wrapping the pipe with old towels or rags.
By properly insulating your outdoor faucet, you are adding an extra layer of protection against freezing temperatures. This step is crucial for preventing damage and ensuring the longevity of your faucet.
Read more: How To Winterize Outdoor Ferns
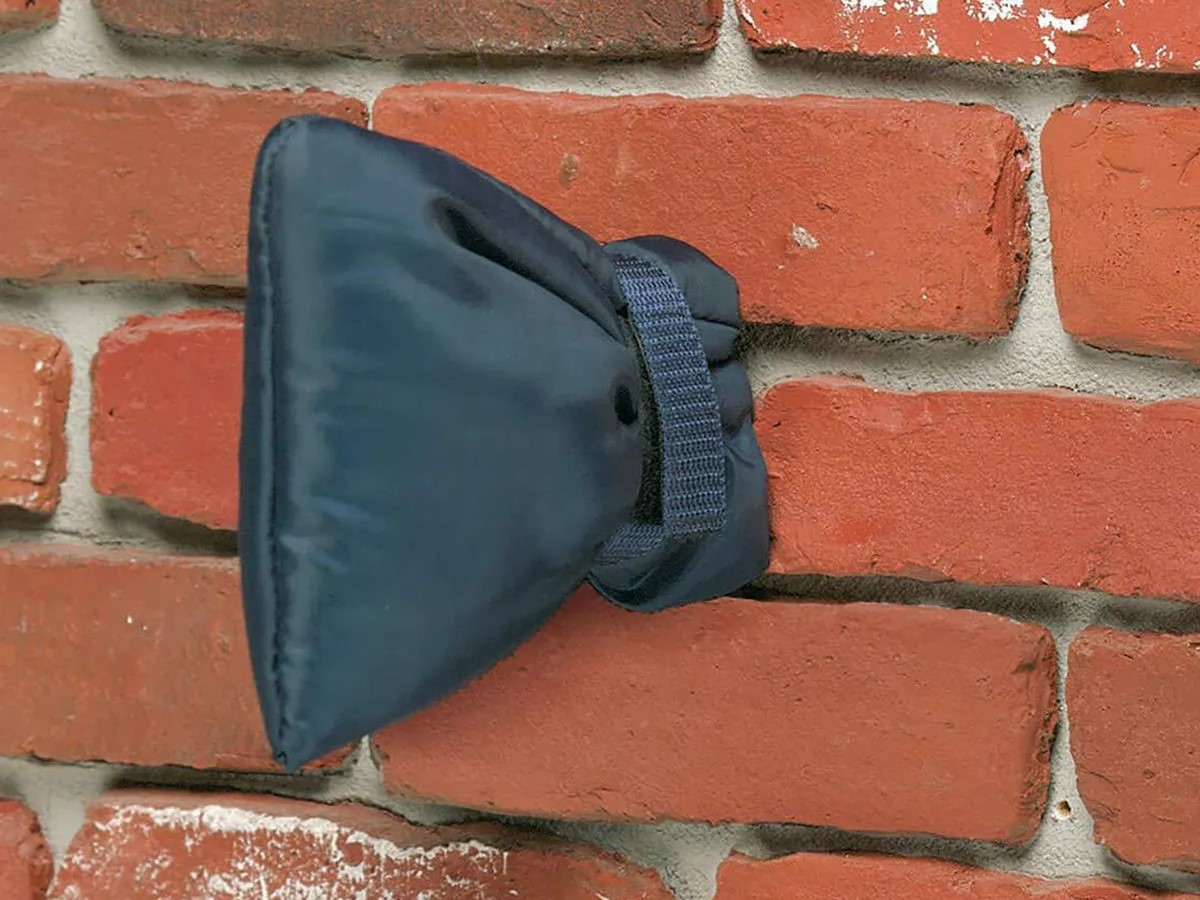
Step 5: Cover the Faucet
An additional measure to protect your outdoor faucet during the winter is to cover it. The cover acts as a barrier, shielding the faucet from harsh weather conditions, including freezing temperatures, ice, and snow.
There are various options you can choose from to cover your outdoor faucet:
- Faucet Cover: Specifically designed faucet covers are available in the market. These covers are made from durable materials and come in different sizes to fit various faucet types. Simply place the cover over the faucet and secure it using the attached straps or drawstrings.
- Bucket or Flowerpot: If you don’t have a faucet cover, you can use a bucket or large flowerpot to cover the faucet. Invert the bucket or flowerpot and place it over the faucet, ensuring it completely covers the entire faucet and part of the surrounding area.
- Plastic Bag and Tie: In a pinch, you can use a thick plastic bag to cover the faucet. Place the bag over the faucet and use a zip tie or strong string to tie it securely in place. Make sure the bag completely covers the faucet and is tightly sealed.
No matter which option you choose, ensure that the faucet is fully covered and protected from any potential exposure to cold temperatures and moisture. This will minimize the risk of freezing and damage to your faucet.
In addition to covering the faucet, it is also a good idea to cover any exposed pipes or valves leading to the faucet. You can use pipe insulation foam or wrap old towels or rags around the pipes to provide an extra layer of protection.
By covering your outdoor faucet, you are providing an added layer of defense against freezing temperatures, ice, and snow. This step will help to further safeguard your faucet and minimize the chances of damage during the winter season.
Step 6: Check for Leaks
After you have taken all the necessary steps to winterize your outdoor faucet, it is important to do a thorough check for any potential leaks. Identifying and addressing leaks before the winter sets in will ensure that your faucet remains in good condition and prevent any further damage.
Start by visually inspecting the faucet and surrounding area for any signs of water or moisture. Check for dripping or pooling water around the faucet, as well as any dampness on the ground or nearby surfaces. Leakage can indicate that there is still water in the system or that there may be a problem with the faucet or pipes.
If you notice any leaks, take immediate action to remedy the situation. You can try tightening any loose connections or replacing worn-out washers or seals. If you’re unsure about how to fix the issue, it is recommended to seek the assistance of a professional plumber.
In addition to visual inspection, you can also perform a simple test to check for leaks. Turn on the water supply to the outdoor faucet for a brief moment and then turn it back off. Wait for a few minutes and then inspect the faucet and surrounding area again for any signs of water or moisture. This can help you identify any hidden leaks that may not be immediately apparent.
By checking for leaks and addressing them promptly, you can ensure that your outdoor faucet is properly winterized and protected. Keeping your faucet leak-free will minimize the risk of frozen pipes, water damage, and costly repairs.
Conclusion
Winterizing your outdoor faucet is a crucial step to protect it from freezing temperatures and potential damage. By following the steps outlined in this article, you can ensure that your faucet remains in good condition throughout the winter months.
Remember to start by turning off the water supply to the faucet and draining any remaining water. Disconnect and store your hoses to prevent them from freezing. Insulate the faucet and any exposed pipes to provide an extra layer of protection. Cover the faucet with a faucet cover or improvised cover, and check for any leaks to address them before the winter season.
Properly winterizing your outdoor faucet will save you from the inconvenience and expense of dealing with frozen pipes or burst faucets. It will also prolong the life of your faucet, allowing you to enjoy its functionality for years to come.
We hope this article has provided you with valuable insights and guidance on how to winterize your outdoor faucet. By taking the necessary precautions, you can ensure that your faucet bravely weathers the cold months and is ready for use when spring arrives.
Stay proactive and take care of your outdoor faucet – it will thank you later!
Frequently Asked Questions about How To Winterize An Outdoor Faucet
Was this page helpful?
At Storables.com, we guarantee accurate and reliable information. Our content, validated by Expert Board Contributors, is crafted following stringent Editorial Policies. We're committed to providing you with well-researched, expert-backed insights for all your informational needs.


0 thoughts on “How To Winterize An Outdoor Faucet”