Home>Furniture>Bedroom Furniture>How To Move A Queen-Size Mattress

Bedroom Furniture
How To Move A Queen-Size Mattress
Modified: October 18, 2024
Looking for tips on how to move a queen-size mattress? Our expert guide covers all the essential steps for hassle-free relocation of your bedroom furniture.
(Many of the links in this article redirect to a specific reviewed product. Your purchase of these products through affiliate links helps to generate commission for Storables.com, at no extra cost. Learn more)
Introduction
Moving a queen-size mattress can be a challenging task, especially if you’re doing it on your own. The size and weight of the mattress make it difficult to maneuver through doorways and hallways, not to mention the risk of damaging it during the process. However, with the right preparation and techniques, you can safely move your queen-size mattress to a new location without any hassle.
In this article, we will guide you through the step-by-step process of moving a queen-size mattress. We will cover everything from preparing for the move to securing the mattress during transportation and placing it in its new location. So, let’s get started!
Key Takeaways:
- Moving a queen-size mattress requires careful preparation, proper protection, and secure transportation. Following step-by-step techniques and seeking assistance can ensure a smooth and successful move.
- Disassembling the bed frame, securing the mattress during transportation, and reassembling the bed frame are crucial steps in ensuring a safe and hassle-free move for your queen-size mattress.
Read more: What Size Is A Queen Mattress
Step 1: Prepare for the Move
Before you start moving the mattress, it’s important to gather the necessary supplies and clear the path for a smooth transition. Make sure you have the following items on hand:
– Mattress bag or cover: This will protect your mattress from dirt, dust, and damage during the move.
– Tape or ties: These will secure the mattress bag or cover in place.
– Dolly or furniture sliders: These will help you transport the mattress with ease.
– Straps or rope: These will be used to secure the mattress during transportation.
Additionally, clear the path from your bedroom to the moving vehicle. Remove any obstacles or furniture that might hinder the process.
Step 2: Remove Bedding and Accessories
Before you can move the mattress, it’s essential to strip the bed and remove all bedding and accessories. Begin by removing the sheets, blankets, and any mattress toppers. Don’t forget to take off the pillows and any other accessories that might be on the bed.
Step 3: Protect the Mattress
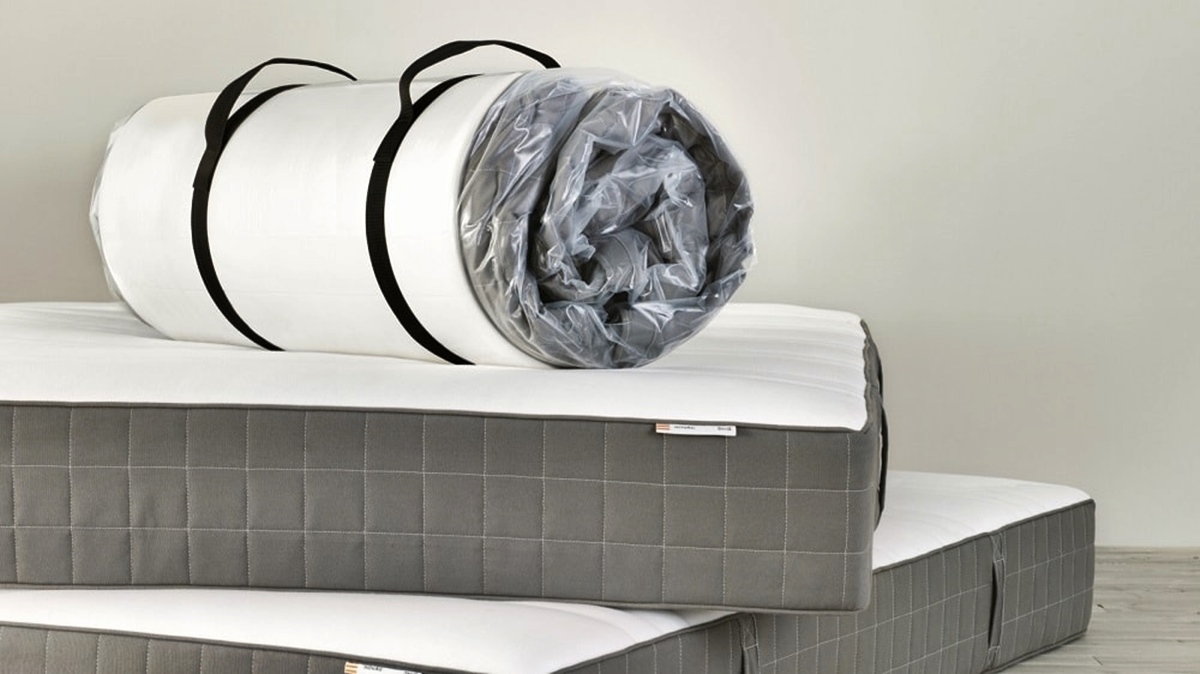
To ensure that your queen-size mattress stays clean and undamaged during the move, it’s important to properly protect it. Place the mattress inside a mattress bag or cover, making sure it’s completely covered. If you don’t have a dedicated mattress bag, you can use a large plastic sheet or even a tarp as a temporary measure.
Once the mattress is inside the bag or cover, use tape or ties to secure it tightly. This will prevent the cover from slipping off during the transportation process.
Step 4: Disassemble the Bed Frame (If Necessary)
If your queen-size mattress is on a bed frame, you might need to disassemble it before moving. Refer to the manufacturer’s instructions to properly dismantle the bed frame. Remember to keep all the hardware in a labeled bag to avoid losing any crucial pieces.
Read more: What Size Is An Olympic Queen Mattress
Step 5: Get Assistance
Moving a queen-size mattress on your own can be difficult and potentially dangerous. It’s always best to ask for help from a friend or family member. Having an extra pair of hands will make the process more manageable and safer.
Ensure that everyone involved is aware of safety precautions and lifting techniques to avoid any strain or injury.
Step 6: Lift and Maneuver the Mattress
When lifting and maneuvering the mattress, it’s important to prioritize your safety and the protection of the mattress. Here are a few key points to keep in mind:
– Lift with your legs, not your back, to avoid strain and injury.
– Use proper lifting technique by bending your knees and keeping your back straight.
– Be cautious while navigating through narrow doorways and hallways. Consider removing any obstacles or temporarily detaching doors if needed.
Step 7: Load the Mattress onto the Moving Vehicle
To make loading the mattress onto the moving vehicle easier, consider using a dolly or furniture sliders. These tools will help you slide the mattress smoothly without exerting too much effort. Position the mattress securely inside the vehicle, taking care not to damage it or allow it to shift during transit.
Step 8: Secure the Mattress during Transportation
Once the mattress is inside the vehicle, it’s crucial to secure it properly to prevent any shifting or damage. Use straps or rope to tightly secure the mattress to the anchor points of the vehicle. Alternatively, you can position the mattress against a wall or use bungee cords to keep it in place.
Read more: What Size Is RV Queen Mattress
Step 9: Unload and Place the Mattress in Its New Location
When you reach your destination, carefully remove the mattress from the vehicle. Avoid dragging it on the ground or any rough surfaces to prevent tears or damage. Position the mattress on the bed frame or foundation in its new location with the help of your assistant.
Step 10: Reassemble the Bed Frame (If Applicable)
If you had to disassemble the bed frame earlier, it’s now time to reassemble it. Refer to the manufacturer’s instructions and follow the steps carefully to ensure stability and a secure structure. Double-check that all screws and bolts are tightened properly.
Key Takeaways:
- Moving a queen-size mattress requires careful preparation, proper protection, and secure transportation. Following step-by-step techniques and seeking assistance can ensure a smooth and successful move.
- Disassembling the bed frame, securing the mattress during transportation, and reassembling the bed frame are crucial steps in ensuring a safe and hassle-free move for your queen-size mattress.
Read more: What Size Is A Queen Mattress
Step 1: Prepare for the Move
Before you begin the process of moving your queen-size mattress, it’s essential to prepare yourself by gathering the necessary supplies and clearing the path for a smooth and efficient move. By doing so, you will help reduce the risk of any damage to the mattress and ensure that the entire process goes as smoothly as possible.
The first step in preparing for the move is to gather all the necessary supplies. Some essential items you will need include:
– Mattress bag or cover: A mattress bag or cover is designed to protect your mattress from dirt, dust, and potential damage during transit. It is a good idea to invest in a high-quality mattress bag that is specifically designed for moving to ensure optimal protection.
– Tape or ties: Once you have placed the mattress in the bag or cover, you need to secure it in place. Use heavy-duty tape or ties to fasten the covering tightly, ensuring that it won’t come loose during the move.
– Dolly or furniture sliders: Moving a queen-size mattress on your own can be challenging due to its size and weight. To make the process easier, consider using a dolly or furniture sliders. These tools will allow you to slide the mattress instead of lifting it, reducing the risk of strain or injury.
– Straps or rope: To secure the mattress during transportation, you will need straps or rope. These will help keep the mattress in place and prevent it from shifting or sliding around in the moving vehicle.
Once you have gathered all the necessary supplies, it’s time to clear the path from your bedroom to the moving vehicle. Remove any obstacles, such as furniture, that may obstruct the path or make it difficult to navigate. By creating a clear and wide pathway, you will ensure that you can move the mattress safely and smoothly without any unnecessary obstacles getting in the way.
If you have any large or heavy furniture pieces that are in the way, consider temporarily moving them to another location or asking for assistance from a friend or family member. It’s important to create a clear and unobstructed path to prevent any accidents or damage to the mattress or other items in your home.
By taking the time to gather the necessary supplies and clear the path, you are setting yourself up for a successful and stress-free move of your queen-size mattress. These simple preparations will help ensure the safety of the mattress and make the entire process much more manageable. So, invest a little time and effort in this initial step, and you will be well-prepared to move your queen-size mattress to its new location.
Step 2: Remove Bedding and Accessories
Once you have prepared for the move by gathering the necessary supplies and clearing the path, it’s time to move on to the next step: removing the bedding and accessories from your queen-size mattress. This step is essential to ensure a smooth and hassle-free move while also protecting your mattress and ensuring its longevity.
Start by stripping the bed completely. Remove all the sheets, blankets, and any other linens that are on the mattress. Fold them neatly and set them aside for packing or cleaning later.
Next, remove any mattress toppers that you may have on top of your mattress. These can include memory foam toppers, mattress pads, or any additional layers that you use for comfort or support. Carefully lift and remove the topper, folding it if necessary, and set it aside.
Don’t forget to remove any pillows that are on the bed. This includes both sleeping pillows and decorative pillows. Stack them neatly or place them in a pillowcase for easy handling and storage.
In addition to bedding and pillows, make sure to remove any other accessories that may be on or around the bed. This could include decorative items such as throw blankets, stuffed animals, or bedside organizers.
By removing all the bedding and accessories from your queen-size mattress, you are not only lightening the load but also ensuring that these items don’t get damaged or lost during the move. It also allows you to clean them before placing them back on the bed in your new space, ensuring a fresh start.
Once you have cleared the bed of all bedding and accessories, take a moment to assess the condition of your mattress. Look for any stains, rips, or damage that may require attention or repair. Addressing these issues before the move will help maintain the longevity and quality of your mattress, ensuring a comfortable sleep experience in your new location.
Remember to keep all the bedding and accessories together and pack them separately for easy access and organization when you arrive at your new destination. By taking the time to properly remove and pack these items, you are minimizing the risk of damage and making the process of setting up your new bedroom much more efficient.
With Step 2 complete, you are now ready to move on to the next phase of the mattress moving process. Stay tuned for Step 3, where we will discuss how to protect the mattress during the move to ensure its safe arrival at the new location.
Step 3: Protect the Mattress
Once you have removed all the bedding and accessories from your queen-size mattress, it’s time to move on to the crucial step of protecting it during the move. By properly protecting your mattress, you can prevent any potential damage while ensuring its cleanliness and longevity. Here’s how you can protect your mattress effectively:
The first and most important step is to use a dedicated mattress bag or cover. A mattress bag is specially designed to fit over your queen-size mattress, providing a protective barrier against dirt, dust, moisture, and potential tears or scratches. These bags are made from durable materials such as heavy-duty polyethylene or woven plastic, ensuring the highest level of protection.
Carefully slide the mattress into the bag, making sure it fits snugly without any excess space. If you don’t have a mattress bag, you can use a large plastic sheet or even a tarp as a makeshift cover. Just ensure that it completely covers the mattress and can be tightly secured.
To secure the covering in place, use heavy-duty tape or ties. If your mattress bag or cover comes with built-in closures or adhesive strips, follow the instructions to seal it properly. If not, use strong packing tape or ties to secure the opening of the bag or cover tightly. This will prevent it from sliding or coming loose during transportation.
When taping or tying the covering, pay special attention to the corners and edges to ensure that they are securely sealed. It’s also a good idea to reinforce the tape or ties at regular intervals along the length of the mattress, providing added stability and protection.
By using a mattress bag or cover and securing it tightly with tape or ties, you are ensuring that your queen-size mattress is shielded from potential damage such as tears, stains, or moisture during the move. This protective layer will also safeguard the mattress against dust mites, allergens, and other particulates that can affect its cleanliness and integrity.
It’s important to note that a mattress bag or cover is not just beneficial during the move; it can also be valuable for long-term storage or temporary protection when remodeling or renovating your home. Investing in a high-quality mattress bag or cover is a wise choice that will help preserve the condition of your mattress for years to come.
With Step 3 complete, your queen-size mattress is now securely protected for the upcoming move. Stay tuned for Step 4, where we will discuss how to disassemble the bed frame (if necessary) to make the moving process even easier.
Step 4: Disassemble the Bed Frame (If Necessary)
If your queen-size mattress is currently on a bed frame, it may be necessary to disassemble it before moving. Disassembling the bed frame will not only make the mattress easier to handle but also minimize the risk of damage during the move. Here’s how you can disassemble the bed frame effectively:
The first and most important step is to refer to the manufacturer’s instructions for disassembling the bed frame. Different bed frames have various designs and constructions, so it’s crucial to follow the specific guidelines provided by the manufacturer. If you don’t have the instructions handy, you can often find them on the manufacturer’s website or by reaching out to their customer support.
Carefully follow the disassembly instructions and take your time to avoid any accidents or mistakes. Start by removing the mattress and any bedding that is still on the bed frame. Then, systematically disassemble the frame, taking note of the order of removal for each component.
As you disassemble the bed frame, it’s important to keep the hardware organized and secure. Store all the nuts, bolts, screws, and other small components in a labeled bag or container. This will ensure that you don’t lose any crucial pieces and make reassembly easier in your new location. It’s also a good idea to tape the labeled bag or container directly to one of the main pieces of the bed frame or store it in a separate box that is clearly marked.
If you encounter any difficulties or have trouble disassembling the bed frame on your own, don’t hesitate to seek assistance from a friend or family member. Moving a bed frame can be a challenging task, particularly if it’s larger or more complex in design. Having an extra set of hands can help make the process smoother, safer, and more efficient.
By disassembling the bed frame, you can significantly reduce the overall size and weight of the items you need to move. This will make it easier to navigate through doorways, hallways, and stairs, minimizing the risk of damage to both the bed frame and the surrounding walls or furniture.
With the bed frame disassembled and the hardware carefully stored, you’re one step closer to successfully moving your queen-size mattress. Stay tuned for Step 5, where we will discuss the importance of getting assistance and ensuring everyone is aware of safety precautions during the move.
Read more: What Size Is An Olympic Queen Mattress
Step 5: Get Assistance
Moving a queen-size mattress on your own can be a challenging and potentially hazardous task. To make the process safer and more manageable, it’s essential to ask for help from a friend or family member. By having an extra set of hands, you can distribute the weight and navigate through tight spaces more easily. Here’s how you can get assistance and ensure a smooth moving experience:
The first step is to reach out to a trusted friend or family member and ask for their help in moving the mattress. Choose someone who is physically capable and willing to assist you throughout the process. Let them know the date and time of the move well in advance so that they can plan accordingly.
Before you start moving, it’s important to gather everyone involved and ensure that they are aware of safety precautions. Moving a large mattress can put strain on your back and potentially lead to injuries if not done correctly. Make sure that everyone understands the following:
– Lifting techniques: Emphasize the importance of lifting with your legs, not your back. Bend your knees, keep your back straight, and use the strength of your legs to lift the mattress. Avoid twisting your body while carrying the mattress as it can strain your back and cause accidents.
– Communication: Establish clear and concise communication between the individuals involved in the move. Use verbal cues or hand signals to coordinate movements and ensure that everyone is on the same page.
– Stairs and doorways: Caution everyone about the challenges of maneuvering the mattress through narrow doorways and up or down stairs. Take extra care to avoid bumping the mattress against walls, furniture, or other objects that can cause damage.
– Safe transportation: Remind everyone of the importance of securely fastening the mattress in the moving vehicle. Use straps or rope to prevent it from shifting during transportation and potentially causing accidents or damage.
By ensuring that everyone is aware of these safety precautions, you can minimize the risk of injuries and accidents during the move.
During the actual moving process, designate specific roles and responsibilities to each person involved. This will help streamline the process and ensure that everyone is working together effectively. For example, one person can be in charge of directing the movement and ensuring the mattress is properly positioned, while the others assist with the lifting and navigating through tight spaces.
Remember to take breaks as needed and listen to your body. Moving a queen-size mattress can be physically demanding, so it’s crucial to rest if you feel fatigued or overwhelmed. Hydrate throughout the process and keep a first aid kit readily available in case of any minor injuries.
With extra assistance and everyone aware of safety precautions, moving your queen-size mattress becomes a more manageable task. Stay tuned for Step 6, where we will guide you through the proper lifting and maneuvering techniques to ensure the safety of both yourself and the mattress.
Step 6: Lift and Maneuver the Mattress
Lifting and maneuvering a queen-size mattress requires proper technique to ensure your safety and prevent damage to the mattress. By following the right lifting techniques and taking caution when navigating through doorways and hallways, you can make the process smoother and easier. Here’s how you can lift and maneuver the mattress effectively:
1. Lift with your legs, not your back: When lifting the mattress, it’s crucial to use your leg muscles instead of your back. Bend your knees while keeping your back straight, allowing your leg muscles to do the majority of the work. This technique helps minimize strain on your back and reduces the risk of injury.
2. Use proper lifting technique: While lifting the mattress, ensure that you have a firm grip on it. Position yourself close to the mattress, maintaining a balanced stance. As you lift, engage your leg muscles and use a smooth and controlled motion to avoid sudden jerks or movements. Keep the mattress close to your body to enhance stability.
3. Navigate through doorways and hallways with caution: Before moving the mattress through doorways or hallways, measure the dimensions to ensure a proper fit. Take note of any obstacles or tight spaces that might pose challenges. While moving, tilt the mattress vertically to make it easier to navigate narrow spaces. If necessary, temporarily remove doors or disassemble door frames to provide more clearance.
4. Communicate and work as a team: If you have assistance, establish clear communication and coordination strategies. Use verbal cues or hand signals to ensure everyone is moving in sync. Work together to guide the mattress through tight spots and communicate any obstacles or concerns to avoid accidents or damage.
5. Take breaks and rest as needed: Moving a queen-size mattress can be physically demanding. Listen to your body and take breaks as needed to avoid exhaustion. Hydrate regularly to stay refreshed and prevent dehydration. If you experience any pain or discomfort, stop and rest before continuing.
By following these lifting and maneuvering techniques, you can safely transport your queen-size mattress without straining your back or risking injury. Take your time and proceed with caution to ensure a successful and hassle-free move.
Next up is Step 7, where we will guide you on how to load the mattress onto the moving vehicle securely. Stay tuned for more tips and instructions to make your mattress moving journey a success.
Step 7: Load the Mattress onto the Moving Vehicle
Loading your queen-size mattress onto the moving vehicle requires careful handling to prevent damage and ensure a secure transport. By using a dolly or furniture sliders and positioning the mattress properly, you can make this step of the moving process easier and more efficient. Here’s how you can load your mattress onto the moving vehicle effectively:
1. Slide the mattress onto a dolly or furniture sliders: To minimize the physical strain of lifting, consider using a dolly or furniture sliders. These tools allow you to slide the mattress instead of lifting it entirely. Place the dolly or sliders near one end of the mattress and gently tilt the mattress onto it. Ensure that the mattress is centered and balanced on the dolly or sliders before proceeding.
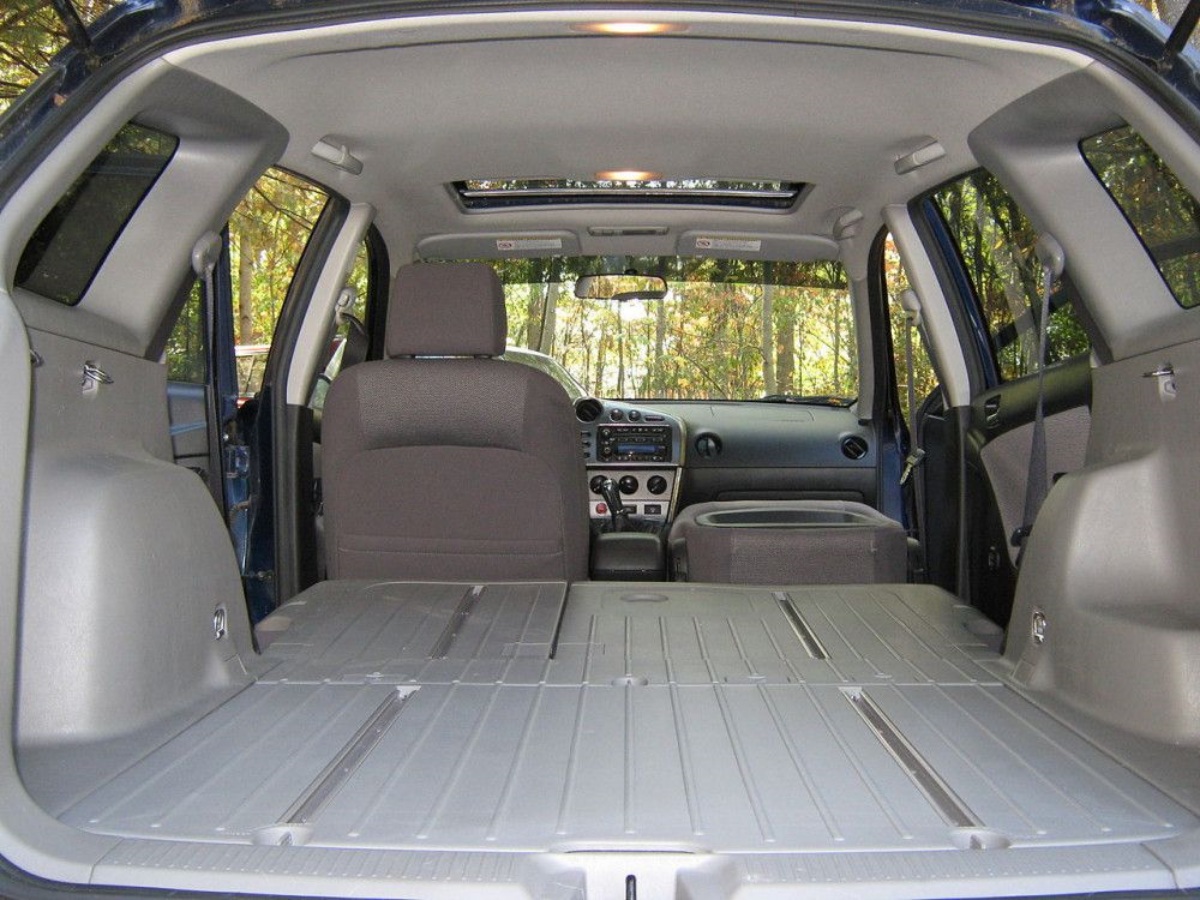
2. Position it securely in the vehicle: Once the mattress is on the dolly or sliders, carefully push it towards the moving vehicle. If using a dolly, wheel it to the vehicle’s cargo space. If using sliders, slide the mattress along the ground towards the vehicle’s entrance. Take care to avoid any obstacles or potential hazards along the way.
3. Lift the mattress into the vehicle: When positioning the mattress in the vehicle, prioritize safety and stability. If possible, have at least one person inside the vehicle to guide the mattress and ensure it is placed correctly. Lift the mattress carefully, making use of proper lifting techniques (as outlined in Step 6). Take your time and communicate effectively with your helpers to avoid accidents and maintain control.
4. Position the mattress securely: Once inside the vehicle, position the mattress securely to prevent unwanted shifting during transportation. Place it against a solid surface, such as the side wall of the vehicle, to provide stability. If necessary, use straps or rope to tie the mattress to the anchor points within the vehicle. This will further secure the mattress in place and reduce the risk of damage during transit.
Ensure that the mattress does not obstruct your view or impede your ability to drive safely. Make sure it is situated in a way that does not interfere with the operation of any vehicle systems or controls.
By utilizing a dolly or sliders and taking the necessary precautions to secure the mattress in the moving vehicle, you can load your queen-size mattress without straining your back or risking damage. With the mattress safely loaded, you’re one step closer to completing a successful mattress move.
Stay tuned for Step 8, where we will guide you on how to secure the mattress during transportation to ensure a smooth and secure journey.
Step 8: Secure the Mattress during Transportation
Securing your queen-size mattress during transportation is crucial to prevent shifting, damage, and ensure a smooth and safe journey. By using straps or rope to secure the mattress and positioning it properly within the vehicle, you can minimize the risk of any accidents or damage. Here’s how to secure your mattress effectively:
1. Use straps or rope to prevent shifting: It’s essential to secure the mattress in place to prevent it from shifting during transportation. Begin by fastening the straps or rope tightly around the mattress, making sure they are securely fastened. Position the straps or rope strategically to hold the mattress securely and prevent it from sliding or moving around in the vehicle. Make sure to distribute the tension evenly to keep the mattress stable.
2. Place the mattress against a wall or secure it with bungee cords: One effective way to prevent the mattress from shifting is to place it against a wall or another large, stable object within the vehicle. This provides additional support and stability during transit. Alternatively, you can use bungee cords to secure the mattress to anchor points within the vehicle, such as tie-down hooks or handles. This helps to immobilize the mattress and prevent it from moving during transport.
3. Ensure a clear and safe pathway around the mattress: When positioning the mattress within the vehicle, ensure that there is a clear and safe pathway for movement. Avoid placing other items or boxes on top of the mattress or directly beside it, as this can hinder access or potentially damage the mattress during transit. Keep the area around the mattress clear to provide easy entry and exit points.
4. Double-check the stability of the mattress: Before finalizing the loading and securing process, double-check the stability of the mattress. Gently push and wiggle the mattress to ensure it is securely in place and doesn’t shift or move excessively. Make any necessary adjustments or re-tighten the straps or ropes as needed to ensure a secure fit.
Remember that the goal is to keep the mattress stable and immobile during the transportation process. Taking the time to secure it properly will help prevent damage and maintain its integrity.
By utilizing straps or rope to prevent shifting and placing the mattress against a wall or securing it with bungee cords, you can transport your queen-size mattress safely and securely. With the mattress securely in place, you’re one step closer to successfully completing the move.
Stay tuned for Step 9, where we will guide you on how to unload and place the mattress in its new location with care and precision.
Read more: What Size Is RV Queen Mattress
Step 9: Unload and Place the Mattress in Its New Location
Here we are, at the final step of the process – unloading and placing your queen-size mattress in its new location. By carefully handling the mattress and positioning it correctly on the bed frame or foundation, you will ensure a smooth transition and a comfortable sleep setup. Let’s dive into the specifics of unloading and placing the mattress:
1. Carefully remove the mattress from the vehicle: Begin by opening the doors or unfastening any straps or cords that are securing the mattress inside the vehicle. Take caution when unloading, especially if the mattress is heavy or you have limited space to maneuver.
2. Lift the mattress with proper technique: When lifting the mattress out of the vehicle, remember to use proper lifting technique as outlined in Step 6. Lift with your legs, keep your back straight, and have a firm grip on the mattress. Communicate with your helpers, use teamwork, and take your time to ensure a safe and injury-free process.
3. Position it on the bed frame or foundation: Once the mattress is out of the vehicle, carefully carry it to its designated location – the bed frame or foundation. Clear the area of any potential obstacles to make the placement process smoother. When positioning the mattress, ensure that it is centered and aligned with the frame or foundation.
4. Take extra care on delicate surfaces: If you are placing the mattress on delicate flooring, such as hardwood or tile, consider using furniture sliders or a protective barrier to prevent any damage. Slowly lower the mattress onto the frame or foundation to avoid sudden impacts or potential damage to both the mattress and your flooring.
5. Level the mattress if necessary: If your bed frame or foundation allows for adjustability or leveling, take a moment to ensure that the mattress is level and even. Uneven placement can lead to discomfort and affect the quality of sleep. Make any necessary adjustments to ensure a balanced and comfortable sleeping surface.
With the mattress safely unloaded and placed in its new location, take a moment to appreciate the effort you’ve put into this process. You’ve successfully moved your queen-size mattress to its new home, and now you can look forward to enjoying a comfortable night’s sleep.
In the final step, Step 10, we will guide you on how to reassemble the bed frame (if applicable) to complete the setup of your bedroom. Stay tuned for more instructions to wrap up the moving process with finesse and ease.
Step 10: Reassemble the Bed Frame (If Applicable)
If you had to disassemble your bed frame in Step 4, it’s now time to reassemble it and complete the setup of your bedroom. Reassembling the bed frame requires attention to detail and ensuring its stability for a secure and comfortable sleep space. Here’s how to reassemble the bed frame effectively:
1. Refer to the manufacturer’s instructions: Locate the manufacturer’s instructions or assembly manual for your specific bed frame model. If you can’t find the physical copy, check the manufacturer’s website or contact their customer support for a digital version. Following the manufacturer’s instructions is important to ensure a proper and secure reassembly.
2. Lay out all the components: Before you begin reassembling the bed frame, lay out all the components in an organized manner. Take inventory to ensure that you have all the necessary pieces, including screws, bolts, and any other fittings required for assembly. This will help prevent any delays or missing elements during the reassembly process.
3. Follow the step-by-step instructions: Carefully follow the step-by-step instructions provided by the manufacturer. Pay attention to any specific hardware or tools required for each step. Take your time, and double-check each connection and joint as you progress through the assembly process.
4. Double-check stability and tighten any loose screws: Once you have reassembled the bed frame according to the instructions, it’s crucial to double-check its stability. Make sure all the connections are secure and tightened properly using the necessary tools. Inspect each joint and ensure there is no wobbling or movement when pressure is applied to the frame. Tighten any loose screws or fittings as needed to enhance stability.
5. Test the stability of the bed frame: After reassembling and tightening all the connections, give the bed frame a gentle shake to test its stability. If you feel any excessive movement or instability, re-evaluate the assembly and ensure all the connections are properly secured. This step is critical to ensure a strong and safe foundation for your mattress.
By following the manufacturer’s instructions, double-checking the stability of the frame, and tightening any loose screws, you will have a solid and secure bed frame for your queen-size mattress.
With the bed frame successfully reassembled, you have completed the final step of the moving process. Take a moment to appreciate your efforts and enjoy the satisfaction of a well-assembled sleep space.
Congratulations! You have successfully moved your queen-size mattress and set up your bedroom for a comfortable and restful night’s sleep in your new location.
Remember, proper care and maintenance of your mattress and bed frame are essential for their longevity and your comfort. Regularly inspect and clean them to ensure they remain in excellent condition for years to come.
Thank you for following our comprehensive guide on moving a queen-size mattress. We hope this information has been helpful in making your moving experience more seamless and stress-free.
Read more: How To Move A King-Size Mattress Up Stairs
Conclusion
Moving a queen-size mattress can be a daunting task, but with the right preparation and techniques, it can be a smooth and successful endeavor. By following the step-by-step guide provided in this article, you can ensure the safe transportation of your mattress to its new location without any hassle or damage.
Throughout the moving process, we discussed the importance of preparing for the move by gathering the necessary supplies and clearing the path for a smooth transition. We emphasized the need to remove bedding and accessories, as well as the significance of protecting the mattress with a dedicated mattress bag or cover.
Disassembling the bed frame, when necessary, was highlighted along with the importance of following the manufacturer’s instructions and keeping the hardware organized in labeled bags. We stressed the value of getting assistance, as well as ensuring that everyone involved is aware of safety precautions.
Proper lifting and maneuvering techniques were outlined to protect your back and prevent any strain or injury. We also discussed how to load the mattress onto the moving vehicle using a dolly or furniture sliders, as well as the importance of securing the mattress during transportation with straps or rope.
Once you reach your new location, unloading and placing the mattress on the bed frame or foundation requires careful handling and attention. Lastly, we covered the process of reassembling the bed frame, following manufacturer instructions, and ensuring the stability of the frame.
With these steps completed, you have successfully moved your queen-size mattress and set up your bedroom for a comfortable and restful sleep. It’s important to remember to maintain and care for your mattress and bed frame regularly to extend their lifespan and ensure optimal sleep quality.
We hope this comprehensive guide has provided you with the knowledge and confidence to tackle the moving process of your queen-size mattress with ease. By taking the time to prepare, protect, and safely transport your mattress, you can enjoy a seamless transition and a peaceful night’s sleep in your new space.
Good luck with your move, and may your queen-size mattress bring you many nights of comfortable rest and rejuvenation in your new home!
Frequently Asked Questions about How To Move A Queen-Size Mattress
Was this page helpful?
At Storables.com, we guarantee accurate and reliable information. Our content, validated by Expert Board Contributors, is crafted following stringent Editorial Policies. We're committed to providing you with well-researched, expert-backed insights for all your informational needs.