Home>Furniture>Bedroom Furniture>How To Prepare For Bed Bug Treatment
Bedroom Furniture
How To Prepare For Bed Bug Treatment
Modified: October 23, 2024
Learn how to prepare your bedroom furniture for an effective bed bug treatment. Safeguard your sleep by following these important steps.
(Many of the links in this article redirect to a specific reviewed product. Your purchase of these products through affiliate links helps to generate commission for Storables.com, at no extra cost. Learn more)
Introduction
Welcome to the ultimate guide on how to prepare for bed bug treatment. Dealing with a bed bug infestation can be a frustrating and stressful experience, but with the right preparation, you can help ensure a successful treatment and minimize the chances of a re-infestation. Bed bugs are small, nocturnal insects that feed on human blood and can cause bites, skin irritations, and sleep disturbances. They can easily travel and infest various areas of your home, including your bedroom and furniture.
In this comprehensive guide, we will take you through a step-by-step process to prepare your bedroom furniture and other areas for bed bug treatment. These steps are crucial in helping to eliminate existing bed bugs and prevent them from returning. So, let’s get started!
Key Takeaways:
- Don’t tackle a bed bug infestation alone. Professional exterminators have the expertise and tools to effectively eliminate bed bugs and prevent re-infestations. Contact them for a thorough treatment plan.
- Thoroughly clean, declutter, and prepare your bedroom furniture for bed bug treatment. Use mattress encasements and follow professional guidelines to ensure successful eradication and prevent future infestations.
Step 1: Understand the Bed Bug Problem
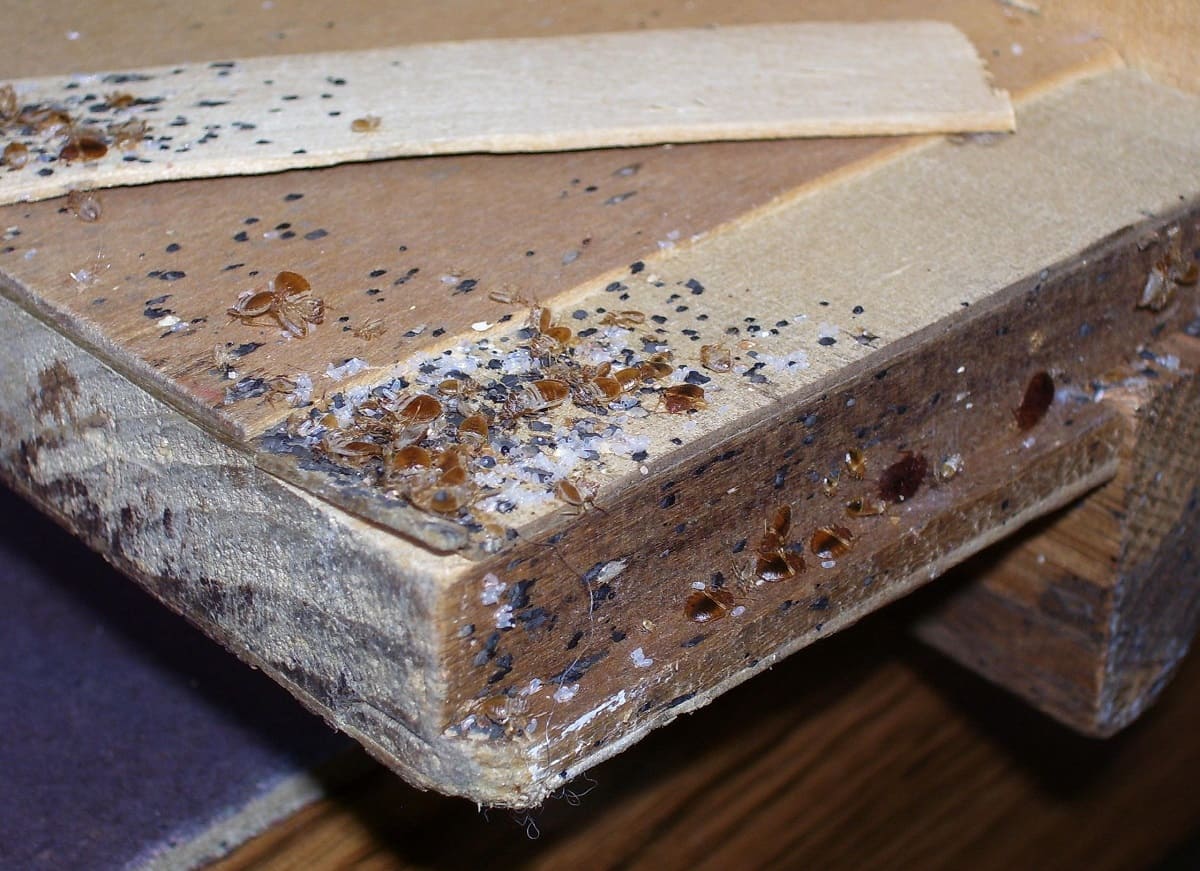
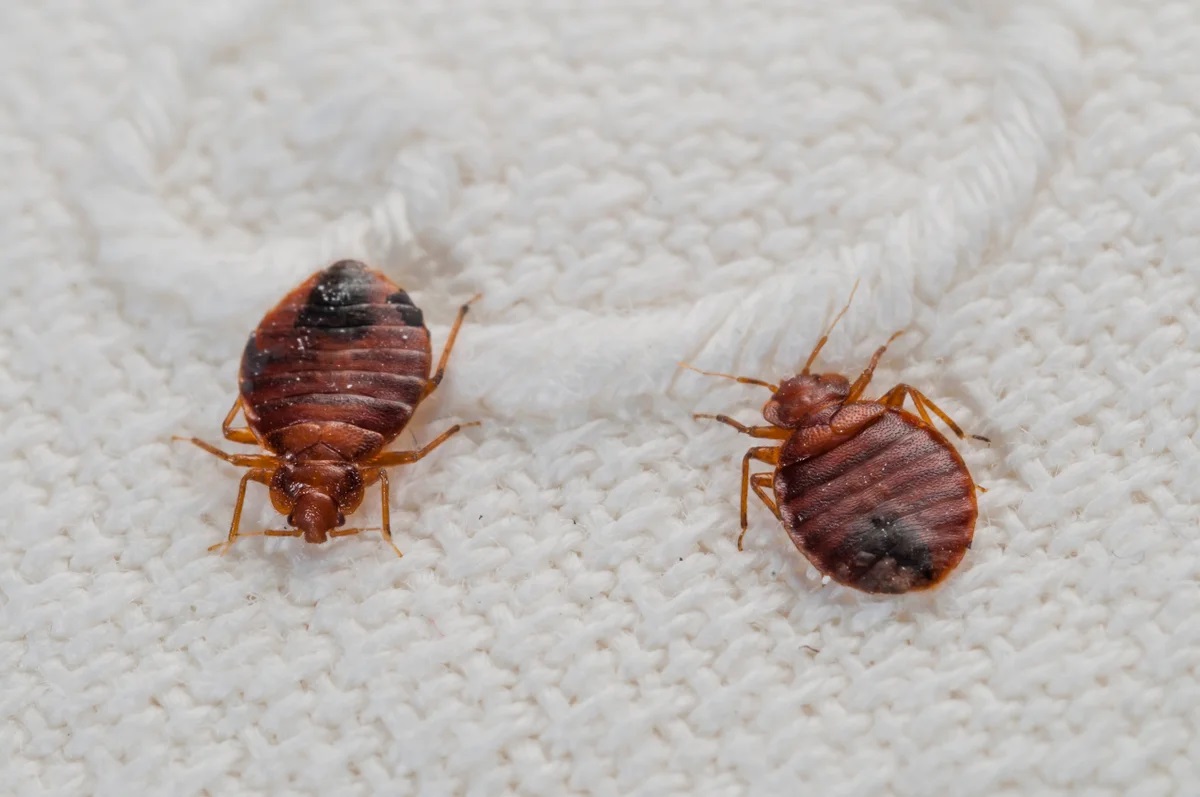
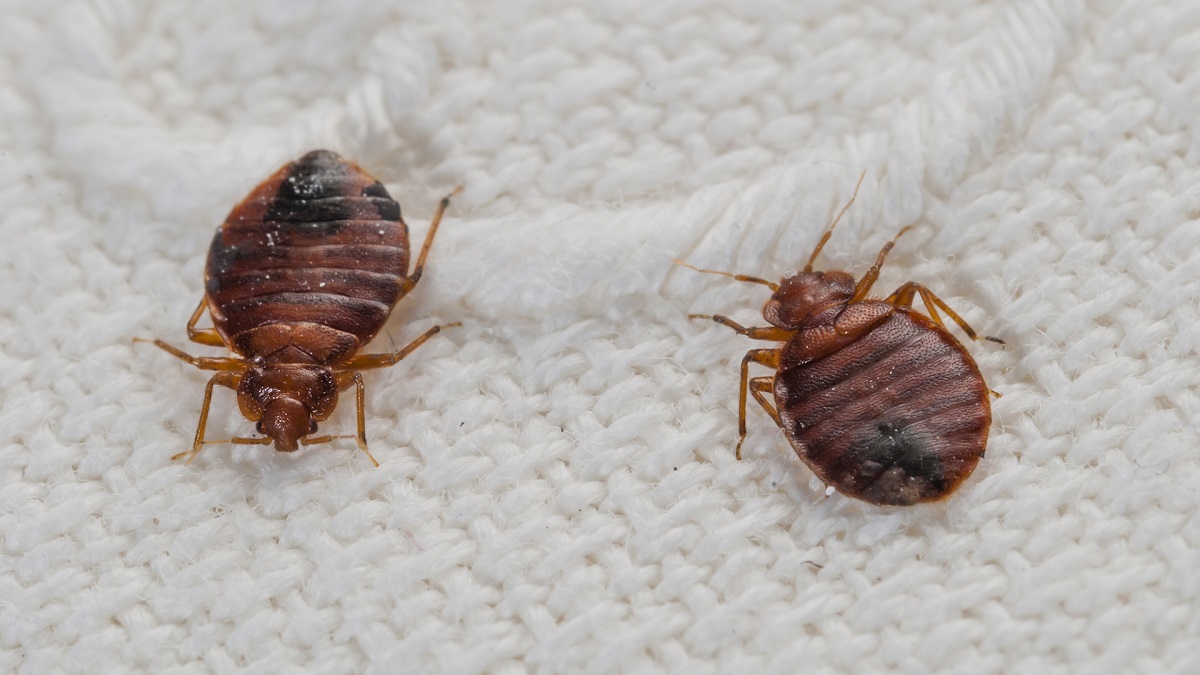
Before proceeding with any treatment, it is essential to have a clear understanding of the bed bug problem you are facing. Bed bugs are tiny, oval-shaped insects that hide in cracks, crevices, and furniture during the day and come out at night to feed on human blood. They can easily infest mattresses, box springs, bed frames, and other bedroom furniture.
Signs of a bed bug infestation may include:
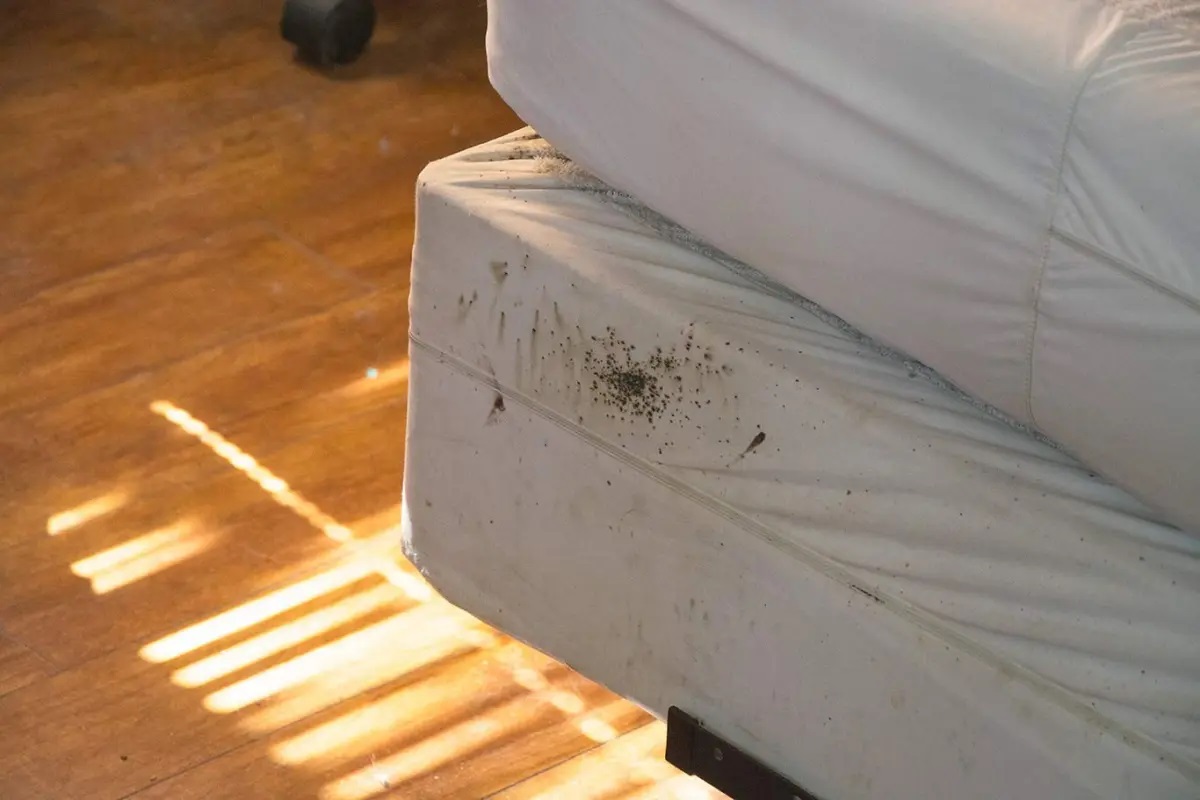
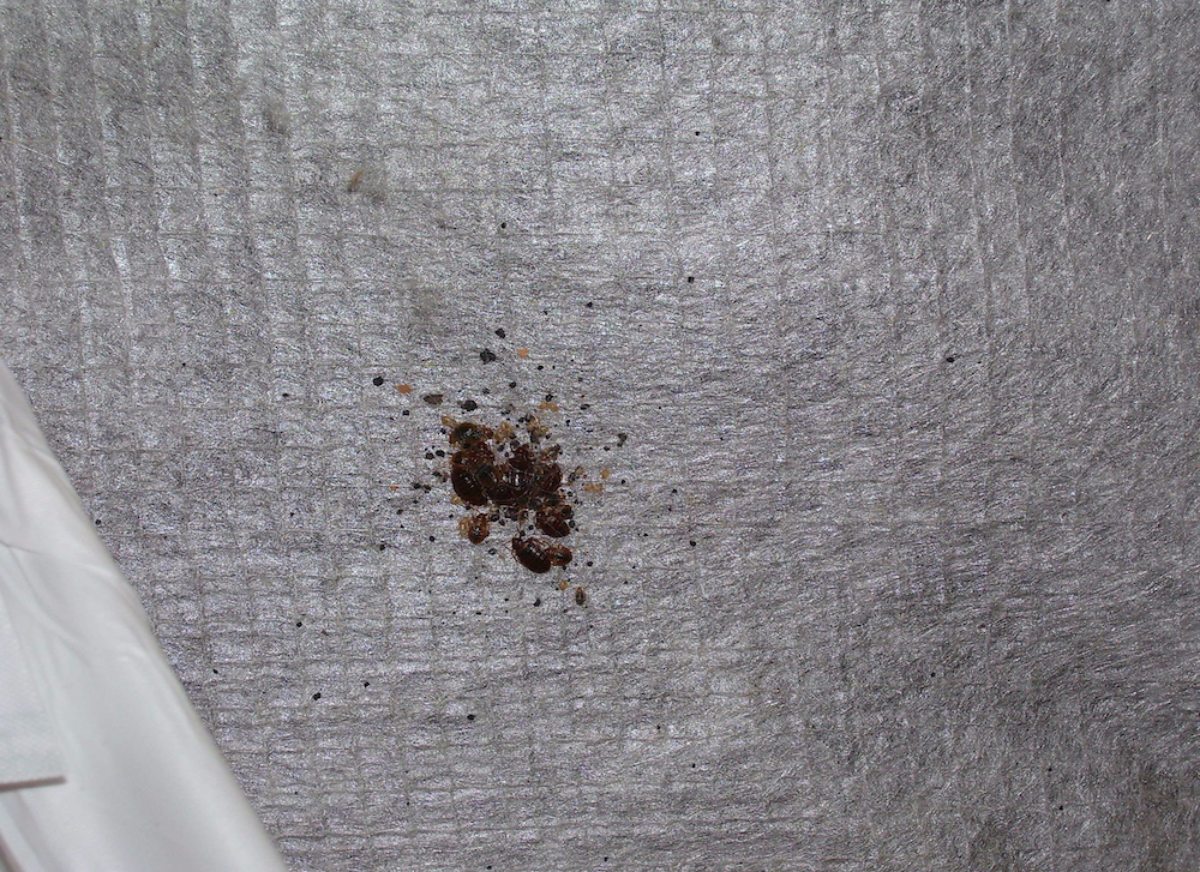
- Small, red or brown stains on your bedding or mattress
- Dark spots on walls, furniture, or upholstery (bed bug excrement)
- Clusters of tiny eggs or eggshells
- Musty odor, especially in heavily infested areas
- Red, itchy bites on your body, often in a line or cluster
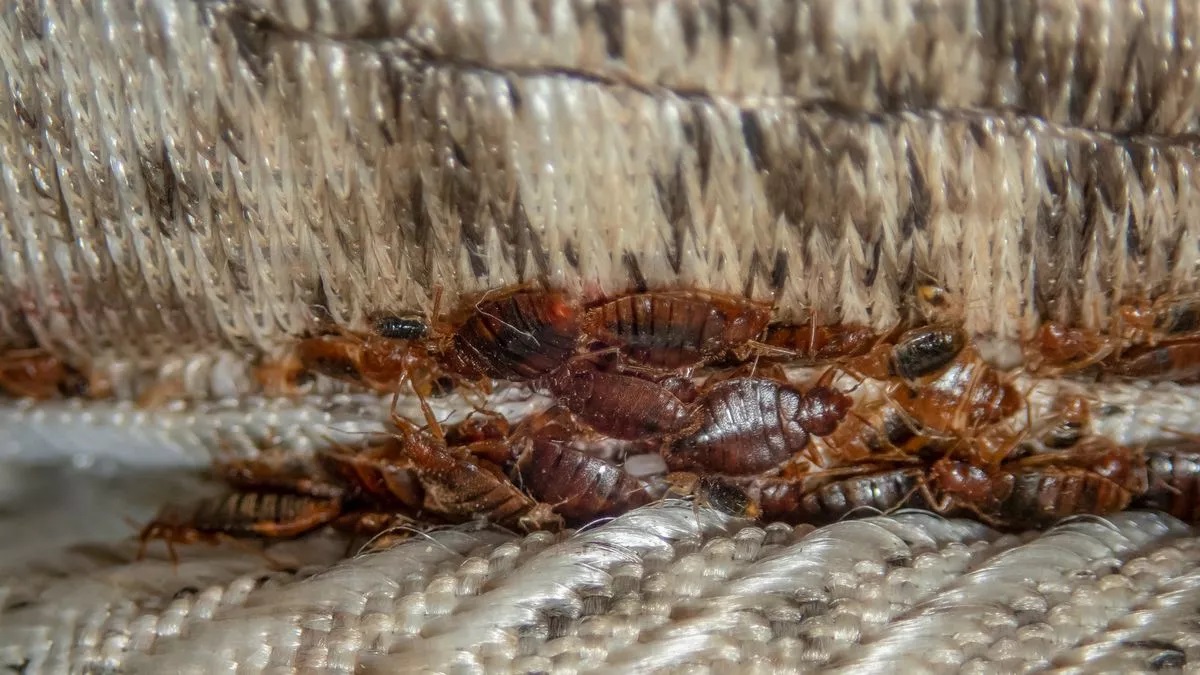
If you suspect a bed bug infestation, it is crucial to act quickly. Bed bugs reproduce rapidly, and a small infestation can quickly escalate into a major problem. Contact a professional exterminator to assess the situation and recommend a suitable treatment plan. They have the expertise and tools to effectively eliminate bed bugs.
Educating yourself about bed bug behavior, lifecycle, and hiding spots can also help you understand the treatment process better. This knowledge will enable you to take appropriate precautions and make informed decisions throughout the preparation and treatment stages.
Remember, attempting to treat a bed bug infestation on your own without professional help can be challenging and ineffective. Due to their resilience and ability to hide, bed bugs are notoriously difficult to eliminate completely. Consulting a professional is the best approach to ensure thorough treatment and prevent future infestations.
Step 2: Evaluate the Infestation
Once you have recognized the signs of a bed bug infestation, the next step is to evaluate the extent of the problem. Assessing the level of infestation will help you determine the appropriate treatment plan and identify the areas that require the most attention.
Here’s how to evaluate the infestation:
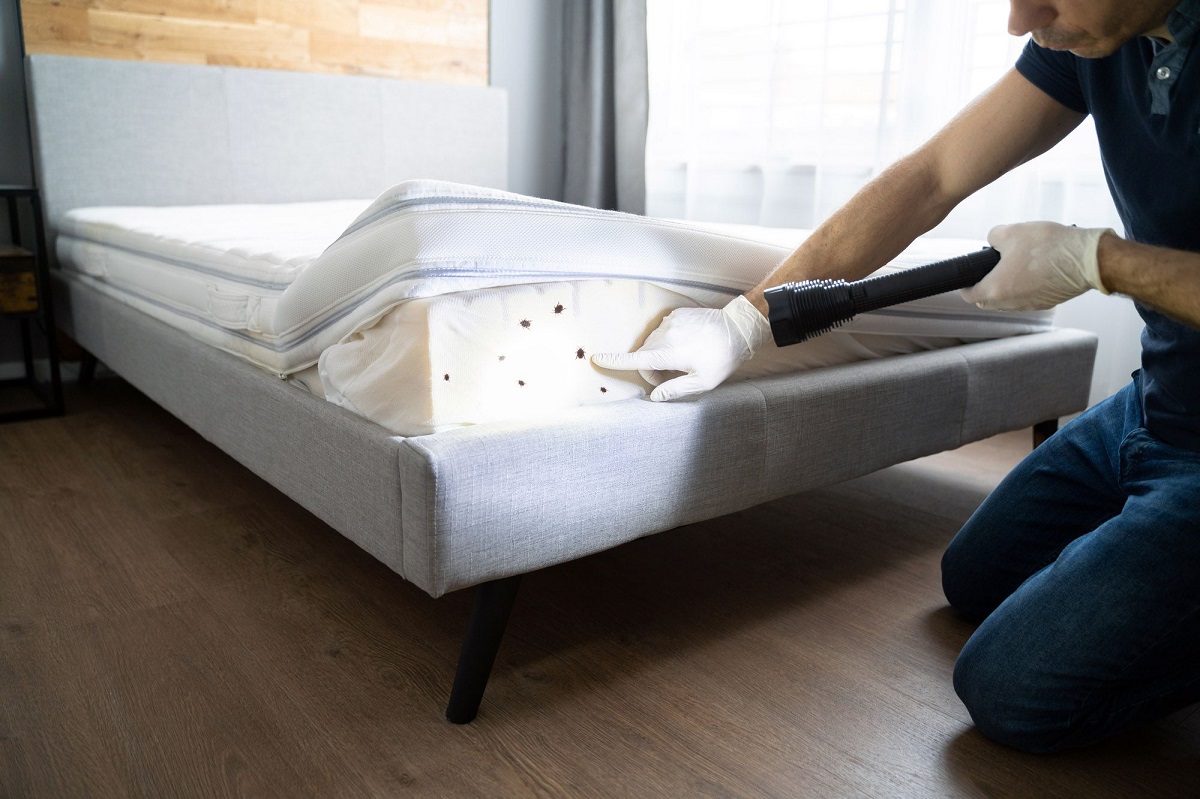
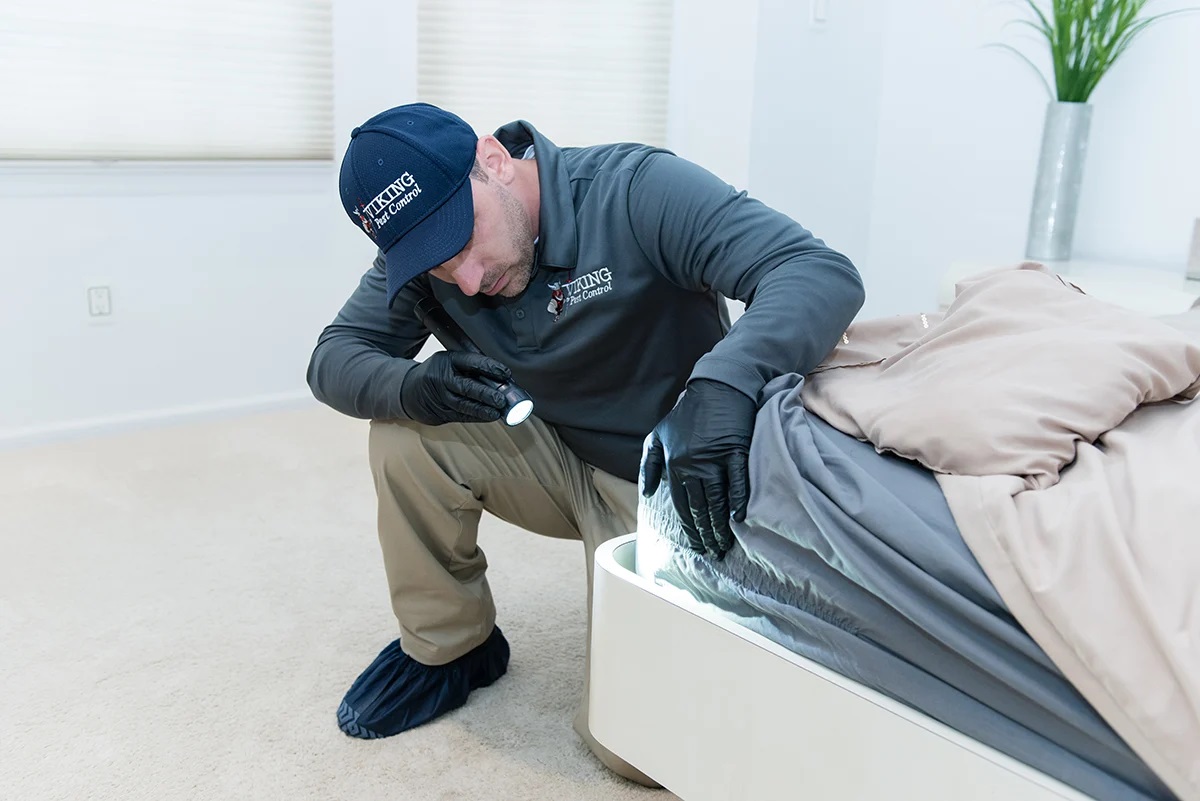
- Inspect the affected areas: Start by thoroughly examining your bedroom furniture, including your mattress, box spring, bed frame, nightstands, and any other potential hiding spots. Look for live bed bugs, eggs, shed skins, and dark spots (excrement).
- Check other areas: Bed bugs can quickly spread to nearby furniture, such as chairs, sofas, and dressers. Inspect these items as well to determine if the infestation has spread.
- Examine neighboring rooms: Bed bugs have the ability to crawl through walls and infest adjacent rooms. Check neighboring bedrooms, living rooms, and any shared areas to ensure the infestation has not spread beyond your bedroom.
If you have a severe infestation or are unsure about the extent of the problem, consider contacting a professional pest control company. They can conduct a thorough inspection and provide accurate information about the severity of the infestation.
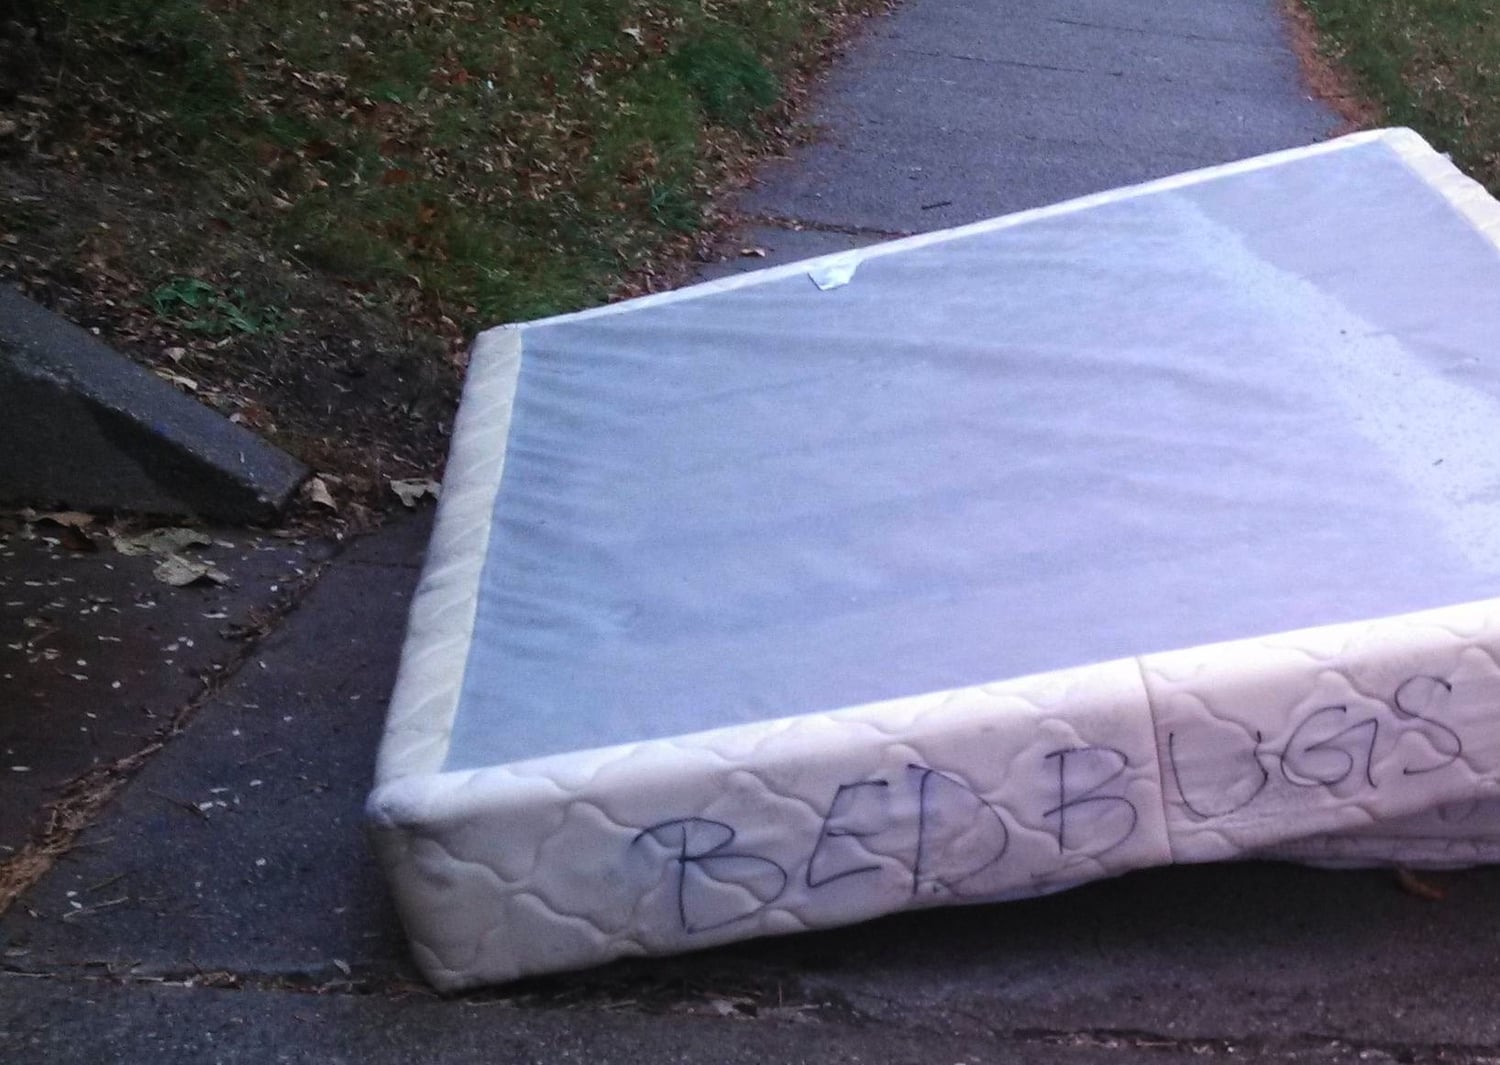
Remember, the evaluation stage is crucial in devising an effective treatment plan. The severity of the infestation will determine the intensity and duration of the treatment required. It will also help you determine whether you need to discard heavily infested furniture and belongings or if they can be treated.
By carefully assessing the infestation, you can take appropriate measures to eradicate the bed bugs and prevent them from spreading further.
Step 3: Clean and Declutter the Infested Areas
Once you have evaluated the infestation, it’s time to prepare the affected areas for treatment. Cleaning and decluttering play a vital role in bed bug elimination as it helps remove hiding places and reduces the number of bed bugs present.
Here’s how to clean and declutter the infested areas:
- Remove all items from the furniture: Empty all drawers, cabinets, and shelves of your bedroom furniture. Place the contents in sealed plastic bags or containers to prevent any bed bugs from spreading.
- Vacuum the furniture: Use a vacuum cleaner with a crevice attachment to thoroughly vacuum the inside and outside of the furniture. Pay special attention to seams, cracks, and crevices where bed bugs may be hiding. After vacuuming, empty the vacuum bag into a sealed plastic bag and dispose of it outside the house.
- Disassemble the furniture (if possible): If your furniture can be disassembled, take it apart to access hard-to-reach areas. This will make it easier to clean and treat all parts of the furniture.
- Scrub the surfaces: Mix a solution of warm water and mild detergent. Use a sponge or cloth to scrub the surfaces of the furniture, paying attention to cracks, crevices, and joints. This will help remove dirt, debris, eggs, and any remaining bed bugs.
- Wipe down with alcohol: After scrubbing, wipe down the furniture with rubbing alcohol. This will help kill any remaining bed bugs and their eggs.
- Declutter the area: Remove unnecessary items from the room and dispose of any clutter that may provide hiding spots for bed bugs. The fewer hiding places available, the more effective the treatment will be.
Remember to wear gloves and protective clothing while cleaning to avoid direct contact with bed bugs or their excrement. Ensure proper ventilation in the room during the cleaning process.
Cleaning and decluttering the infested areas not only helps eliminate bed bugs but also improves the effectiveness of subsequent treatment methods. Removing clutter and thoroughly cleaning the furniture create an environment where bed bugs have fewer places to hide, making the treatment process more successful.
Step 4: Remove Bedding and Clothing
As you continue to prepare for bed bug treatment, it’s crucial to remove all bedding and clothing from the infested areas. Bed bugs are notorious for hiding in mattresses, sheets, pillows, and clothing, so thorough cleaning and removal of these items are essential to eliminate the infestation.
Follow these steps to properly remove bedding and clothing:
- Strip the bed: Remove all bedding, including sheets, pillowcases, blankets, and mattress protectors. Place them directly into sealed plastic bags or laundry bins to prevent any bed bugs from spreading.
- Seal the bags: Once the bedding is removed, seal the bags tightly to prevent any bed bugs from escaping.
- Wash and dry on high heat: Take the sealed bags of bedding to the laundry room and wash them in hot water. Bed bugs cannot survive high temperatures, so using the hottest water setting available is crucial. Additionally, dry the bedding on high heat for at least 30 minutes to ensure any remaining bed bugs are exterminated.
- Inspect the mattress and box spring: Carefully examine the mattress and box spring for any signs of bed bugs. If you notice any infestation, consider investing in bed bug-proof encasements for added protection.
- Remove clothing from the room: Take all clothing items from drawers, closets, and hanging racks and place them in sealed plastic bags or laundry bins. Avoid moving the bags through other areas of the house to prevent the spread of bed bugs.
- Wash and dry clothing: Similar to the bedding, wash the clothing in hot water and dry them on high heat. This will help eliminate any bed bugs that may be hiding in the garments.
Ensure that you seal the bags or bins tightly after removing the bedding and clothing to keep any bed bugs contained. It’s crucial to handle the items carefully to prevent the infestation from spreading to other areas of your home.
Properly removing and treating bedding and clothing is an important step in the bed bug preparation process. It helps eliminate any potential hiding places and reduces the chances of a re-infestation after treatment.
Read more: How To Trap Bed Bugs
Step 5: Wash and Dry Infested Items
Now that you have removed the bedding and clothing from the infested area, it’s important to thoroughly clean and treat these items to eliminate any bed bugs present. Washing and drying infested items on high heat is an effective way to kill bed bugs and their eggs.
Follow these steps to properly wash and dry infested items:
- Sort the items: Separate the infested items into different categories, such as clothing, bedding, curtains, and stuffed animals. This will help you determine the appropriate washing and drying settings for each category.
- Place items in sealed bags: Before transporting the items to the laundry room, place them in sealed plastic bags to prevent any bed bugs from spreading to other areas of your home.
- Wash in hot water: Set the washing machine to the hottest water setting and add an appropriate amount of laundry detergent. Place the infested items into the machine and allow them to run through a full cycle.
- Dry on high heat: After washing, transfer the items to the dryer and dry them on high heat for at least 30 minutes. The high temperatures will help kill any remaining bed bugs and their eggs.
- Inspect and store: Once the items are dry, carefully inspect them for any signs of bed bugs. If you notice any remaining infestation, consider repeating the washing and drying process or discarding the items.
- Seal in new bags or containers: Once you are confident that the items are bed bug-free, place them in new sealed bags or containers to prevent re-infestation.
It’s important to note that not all items can be safely washed and dried at high temperatures. Delicate fabrics, electronics, and certain household items may require alternative treatment methods. Consult manufacturer guidelines or consider seeking professional advice for treating such items.
Washing and drying infested items is an effective way to kill bed bugs, nymphs, and their eggs. However, it’s crucial to handle these items carefully and contain them in sealed bags or containers until they are properly treated.
Before the bed bug treatment, remove all clutter from the infested area and wash all bedding and clothing in hot water to kill any bed bugs and their eggs.
Step 6: Vacuum Thoroughly
Vacuuming is an essential step in preparing for bed bug treatment as it helps remove bed bugs, their eggs, and any debris from the infested areas. It is a crucial part of the cleaning process and should be done meticulously to ensure effective bed bug elimination.
Follow these steps to thoroughly vacuum the infested areas:
- Choose a vacuum with a HEPA filter: Use a vacuum cleaner with a high-efficiency particulate air (HEPA) filter to ensure that the captured bed bugs and debris are properly contained and not released back into the air.
- Prepare the vacuum: Before you begin vacuuming, check that the vacuum cleaner bag or canister is empty or has enough space to accommodate the debris. If using a bagless vacuum, ensure that the dust container is empty and clean.
- Vacuum all surfaces: Start by vacuuming the infested mattress, paying close attention to seams, creases, and tufts. Move the vacuum slowly and methodically to ensure you cover every inch of the mattress. Repeat the process for the box springs, bed frame, headboard, and any other furniture in the affected area.
- Crevice tool attachment: Use a crevice tool attachment to reach into cracks, crevices, and tight spaces where bed bugs may be hiding. Vacuum along baseboards, floor and wall junctions, furniture joints, and any other potential hiding spots.
- Remove the vacuum bag or empty the canister: After vacuuming, carefully remove the vacuum bag or empty the canister into a sealed plastic bag. Dispose of the bag outside your home to prevent any remaining bed bugs from re-infesting.
- Clean and disinfect the vacuum: Thoroughly clean and disinfect the vacuum cleaner, including the bags, filters, hoses, and attachments. This will prevent any potential bed bugs or eggs from lingering inside the vacuum.
It’s important to note that vacuuming alone may not completely eliminate a bed bug infestation. It is a foundational step to remove visible bed bugs and reduce their population, but professional treatment is typically necessary to ensure complete eradication.
Regular vacuuming, both before and after treatment, can help prevent a re-infestation by capturing any newly hatched bed bugs and removing debris that may attract them. Combine vacuuming with other treatment methods for the best results.
Step 7: Treat Cracks and Crevices
One of the key areas where bed bugs like to hide and lay their eggs is in cracks and crevices. Treating these hiding spots is crucial to ensure effective bed bug elimination and prevent re-infestation. By targeting these areas, you can disrupt their hiding places and make it more difficult for them to survive the treatment process.
Follow these steps to properly treat cracks and crevices:
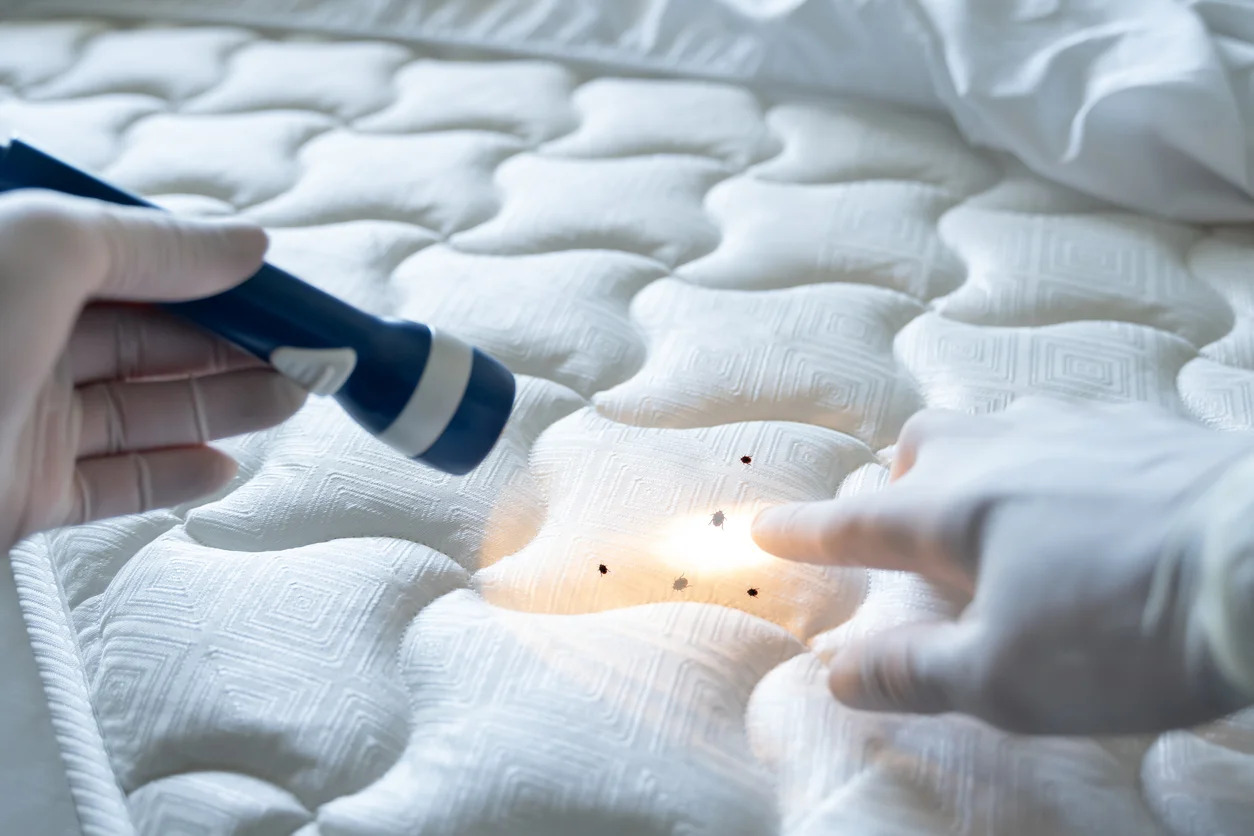
- Identify hiding spots: Inspect your bedroom furniture, including bed frames, headboards, nightstands, and baseboards, for cracks, crevices, and other potential hiding places. Use a flashlight and magnifying glass to aid in your examination.
- Use a chemical treatment: Apply an appropriate bed bug insecticide or dust to the identified cracks and crevices. Follow the product instructions carefully, including any safety precautions and recommended application techniques.
- Focus on high-risk areas: Pay close attention to areas where bed bugs are likely to hide, such as seams, joints, screw holes, and corners. Apply the treatment directly into these areas to ensure thorough coverage.
- Consider non-chemical options: If you prefer to avoid chemical treatments, you can use natural alternatives such as diatomaceous earth or steam treatment to target cracks and crevices. These methods can help dehydrate and kill bed bugs without the use of chemicals.
- Seal cracks and crevices: After treating the hiding spots, consider sealing any cracks and crevices with caulk or sealant. This will make it more difficult for bed bugs to access these areas in the future.
It’s important to remember that treating cracks and crevices alone may not eliminate a bed bug infestation entirely. Combination approaches, including professional treatment, are typically necessary to achieve full eradication and prevent future infestations.
Regular inspection and treatment of cracks and crevices can help maintain a bed bug-free environment. By reducing their hiding places, you can minimize the chances of a re-infestation and ensure a more successful treatment process.
Step 8: Use Bed Bug Mattress Encasements
Bed bug mattress encasements are a valuable tool in preventing infestations and protecting your mattress from future bed bug problems. These specialized encasements envelop your mattress, creating a barrier that prevents bed bugs from accessing or escaping the mattress.
Follow these steps to effectively use bed bug mattress encasements:
- Choose the right encasement: Look for encasements specifically designed for bed bug protection. They should be made of high-quality, tear-resistant material that bed bugs cannot penetrate.
- Measure your mattress: Determine the size and dimensions of your mattress to ensure a proper fit when selecting an encasement.
- Prepare your mattress: Thoroughly vacuum and clean your mattress to remove any existing bed bugs, eggs, or debris. Make sure it is completely dry before encasing it.
- Install the encasement: Carefully slide the encasement over the mattress, ensuring that it covers the entire mattress surface. Use the provided zipper closure to securely seal the encasement.
- Inspect for any gaps or tears: Check the encasement for any gaps, holes, or tears that could provide an entry point for bed bugs. If you notice any damage, repair or replace the encasement immediately.
- Encase box springs and pillows: Consider encasing your box springs and pillows as well. These areas are also vulnerable to bed bug infestations and can serve as harborage sites.
- Maintain the encasements: Regularly inspect the encasements for any signs of bed bugs or damage. If necessary, remove and wash the encasements according to the manufacturer’s instructions.
Bed bug mattress encasements create a protective barrier that makes it difficult for bed bugs to infest or escape from your mattress. They are an effective long-term solution for preventing bed bug problems and can provide peace of mind.
Remember, while encasements can help prevent bed bugs from reaching your mattress, they will not eliminate an existing infestation. It is important to combine encasements with treatment methods to effectively eradicate bed bugs from your home.
Read more: How To Kill A Bed Bug
Step 9: Prepare for Professional Treatment
Preparing for professional bed bug treatment is crucial to ensure that the extermination process is successful. By properly preparing your home, you can help the pest control professional access and target key areas, increasing the effectiveness of the treatment.
Follow these steps to prepare for professional bed bug treatment:
- Communicate with the pest control professional: Consult with the pest control company to understand their specific requirements for preparation. They may provide you with a checklist or instructions to follow.
- Clear the treatment area: Remove any clutter, furniture, and personal belongings from the treatment area. This will create an unobstructed space for the pest control professional to work and treat the infested areas more efficiently.
- Wash and dry infested items: Wash and dry all bedding, clothing, and fabric items as discussed in earlier steps. This will help eliminate any bed bugs hiding in these items and prevent re-infestation after the treatment.
- Vacuum thoroughly: Prior to the treatment, vacuum the entire area, including floors, furniture, and walls. Empty the vacuum bag or clean the canister, and discard the debris in sealed plastic bags outside your home.
- Move furniture away from walls: Create a gap between furniture and walls to allow the pest control professional to access and treat the baseboards and surrounding areas.
- Reschedule cleaning services: If you have scheduled any cleaning services, such as carpet cleaning or housekeeping, it’s best to reschedule them after the bed bug treatment. Cleaning activities can disturb the treatment and render it less effective.
- Follow safety guidelines: Be mindful of any safety guidelines provided by the pest control professional. This may include temporarily relocating pets, covering aquariums, or turning off certain electrical appliances during the treatment.
- Inform neighbors: If you live in a multi-unit building or share walls with neighbors, it is considerate to inform them about the upcoming treatment. This allows them to take any necessary precautions to prevent the spread of bed bugs.
Preparing for professional bed bug treatment not only helps ensure the best possible outcome but also creates a safer and more efficient environment for the pest control professional. Following the guidelines provided by the exterminator will contribute to the successful elimination of bed bugs from your home.
After the treatment, it is crucial to follow any post-treatment instructions provided by the pest control professional. This may include certain cleaning procedures or follow-up visits to monitor the situation and ensure the effectiveness of the treatment.
Conclusion
Dealing with a bed bug infestation can be a challenging and frustrating experience. However, by following the steps outlined in this guide, you can effectively prepare for bed bug treatment and increase the chances of successful eradication. Understanding the bed bug problem, evaluating the extent of the infestation, and cleaning and decluttering the affected areas are crucial initial steps. Removing bedding and clothing, washing and drying infested items, and vacuuming thoroughly help eliminate bed bugs and their eggs.
Treating cracks and crevices, using bed bug mattress encasements, and preparing for professional treatment add additional layers of protection to ensure the elimination of bed bugs and prevent re-infestation. It is important to follow professional guidelines and communicate effectively with pest control professionals to optimize the treatment process.
Remember, bed bug treatment may require a combination of DIY efforts and professional assistance. It is crucial to consult with a pest control professional for a comprehensive evaluation and appropriate treatment plan. They have the expertise and knowledge to effectively handle bed bug infestations and provide ongoing support and guidance.
Maintaining a clean and clutter-free environment, regular inspection, and early intervention are key to preventing future bed bug infestations. Taking preventive measures, such as using mattress encasements and practicing good hygiene habits, can go a long way in keeping your home bed bug-free.
By following these comprehensive steps and staying proactive, you can effectively prepare for bed bug treatment, protect your bedroom furniture, and create a safer and healthier living environment for you and your family.
Frequently Asked Questions about How To Prepare For Bed Bug Treatment
Was this page helpful?
At Storables.com, we guarantee accurate and reliable information. Our content, validated by Expert Board Contributors, is crafted following stringent Editorial Policies. We're committed to providing you with well-researched, expert-backed insights for all your informational needs.