Home>Garden Essentials>How Do You Germinate An Olive Pit?

Garden Essentials
How Do You Germinate An Olive Pit?
Modified: May 6, 2024
Learn how to germinate an olive pit in your garden and grow your own olive tree. Follow our step-by-step guide for successful olive pit germination.
(Many of the links in this article redirect to a specific reviewed product. Your purchase of these products through affiliate links helps to generate commission for Storables.com, at no extra cost. Learn more)
Introduction
Welcome to the wonderful world of gardening, where the power to grow new life rests in the palm of your hand…or should I say, the pit of an olive? Yes, you heard that right! In this article, we will explore the fascinating process of germinating an olive pit and transforming it into a thriving olive tree.
Olives, with their rich history and delicious fruit, have been cultivated for thousands of years. While it’s common to grow olive trees from cuttings or saplings, germinating an olive pit can be an exciting and rewarding experience for garden enthusiasts and curious minds alike.
Before we delve into the germination process, let’s take a moment to understand the olive pit itself. The pit, also known as the seed, is the protective outer layer that encloses the embryonic plant within. It acts as a safeguard, ensuring the seed’s survival and providing the necessary nutrients for germination.
Now that we have a basic understanding of the olive pit and its purpose, let’s move on to preparing the pit for germination. Proper preparation is crucial to maximize the chances of success and ensure healthy growth.
Key Takeaways:
- Germinating olive pits is an exciting journey that involves preparing the pits, choosing a germination method, and providing care for the sprouting seedlings. With patience and proper techniques, you can grow your own olive trees from pits!
- Once your olive pits have sprouted, it’s essential to provide them with the right environment, including light, water, and temperature. Caring for the germinating pits and eventually transplanting them into a suitable outdoor location will set the stage for their growth into mature olive trees.
Read more: How Do You Germinate A Peach Pit
Understanding the Olive Pit
To successfully germinate an olive pit, it’s essential to have a clear understanding of its structure and biology. The olive pit, or seed, is composed of several layers that protect the embryonic plant within. Let’s explore these layers in more detail:
- Seed Coat: The outermost layer of the olive pit is called the seed coat. It is a tough and protective layer that shields the embryo from external factors such as moisture loss and pathogens.
- Endosperm: Beneath the seed coat lies the endosperm, which is the primary source of nutrients for the developing embryo. The endosperm is rich in carbohydrates, proteins, and oils, providing energy for the germination process.
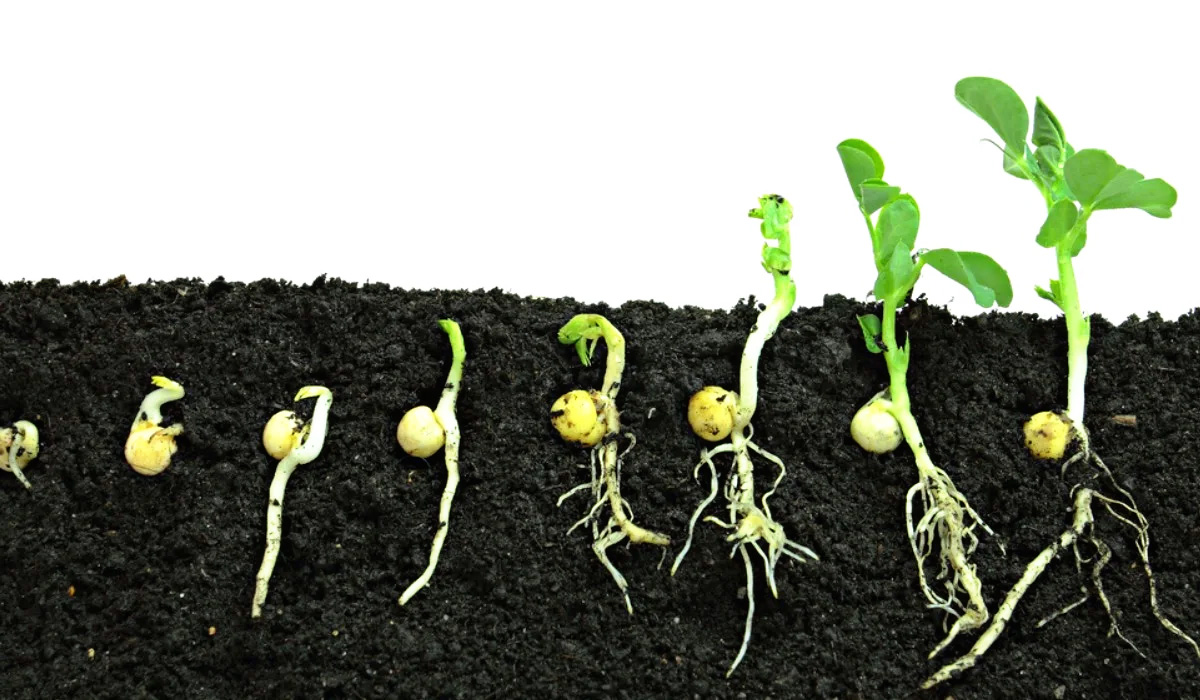
- Embryo: At the core of the olive pit is the embryo, the tiny plant waiting to sprout. The embryo consists of the epicotyl (stem tip), hypocotyl (stem base), and the radicle (embryonic root).
Understanding the anatomy of the olive pit helps us grasp the importance of each layer and how they work together during germination. The seed coat protects the embryo, while the endosperm nourishes it, enabling the embryo to grow and develop into a young olive tree.
Another crucial factor to consider when germinating olive pits is their dormancy. Olive pits have a natural dormancy period that prevents them from germinating immediately after harvest. This period allows the seed to undergo a series of physiological changes that break dormancy and prepare it for germination.
Dormancy can be overcome through a process called stratification, which involves subjecting the olive pits to specific conditions like cold temperatures and moisture. This helps simulate the natural conditions the seed would experience during winter, signaling that it’s time to break dormancy and begin germination.
Now that we have a better understanding of the olive pit and its dormant state, let’s move on to the preparation process to maximize our chances of successful germination.
Preparing the Olive Pit
Before embarking on the germination journey, it’s essential to properly prepare the olive pit. This step is crucial as it helps remove any potential barriers to germination and creates an optimal environment for the seed to sprout. Here are the steps to prepare the olive pit:
- Harvesting: Start by choosing ripe olives from a healthy and fully matured olive tree. Gently remove the flesh from the olive, being careful not to damage the pit.
- Cleaning: Rinse the olive pits under cool water to remove any remaining flesh or debris. Use your fingers or a soft brush to gently scrub the pits if necessary. Allow them to air dry completely.
- Softening the Seed Coat: To enhance germination rates, you can gently scarify the seed coat by carefully sanding or nicking it with a sharp knife. Be cautious not to damage the embryo inside.
- Stratification: To break the seed’s dormancy, stratification is necessary. Place the olive pits in a plastic bag or container with a moist medium such as vermiculite, peat moss, or damp paper towels. Seal the bag/container and refrigerate it for several weeks, mimicking the cold winter temperatures that occur naturally. This stratification process helps kickstart the germination process.
Remember, the stratification period varies depending on the olive variety, but a common timeframe is around four to eight weeks. During this time, periodically check the moisture level of the medium and ensure it remains damp but not overly wet.
By following these steps, you are setting the stage for successful olive pit germination. Once the stratification period is complete, it’s time to move ahead and explore different methods for germinating olive pits. Let’s dive into the various techniques you can use to bring your olive pits to life!
Germination Methods for Olive Pits
Now that your olive pits are prepared, it’s time to explore the different methods available for germinating them. There are several techniques you can choose from, each with its advantages and considerations. Here are three popular methods for germinating olive pits:
- Method 1: Water Soaking
- Fill a container with room temperature water.
- Submerge the olive pits in the water, ensuring they are fully covered.
- Let the olive pits soak for 24 to 48 hours, changing the water every 12 hours.
- After soaking, carefully remove the olive pits from the water and proceed to plant them in a suitable growing medium.
- Method 2: Paper Towel Technique
- Take a few damp paper towels and fold them to create a small stack.
- Place the olive pits in the folded paper towels, ensuring they are evenly spaced and not touching each other.
- Seal the paper towel and the olive pits together in a plastic bag to create a mini greenhouse effect.
- Store the bag in a warm and bright location, like a windowsill or a greenhouse.
- Check the paper towels regularly to ensure they remain moist but not waterlogged. Add water if needed.
- Method 3: Germination in Potting Mix
- Fill a small pot with a well-draining potting mix, leaving about an inch of space below the rim.
- Make a small indentation in the center of the potting mix using your finger or a pencil.
- Place the olive pit in the indentation and cover it with a thin layer of potting mix.
- Water the pot gently to moisten the soil, being careful not to displace the olive pit.
- Place the pot in a warm and well-lit area, avoiding direct sunlight.
- Keep the soil consistently moist but not saturated as the olive pit begins to germinate.
This method involves soaking the olive pits in water to encourage germination. Here are the steps:
Note that some pits may start to sprout during the soaking process, while others may take longer.
This method involves using damp paper towels as a germination medium to provide moisture and create an ideal environment for the olive pits to sprout. Here’s how to do it:
This method involves planting the prepared olive pits directly into a suitable potting mix. Here’s a step-by-step guide:
These germination methods provide you with options suited to different preferences and available resources. Choose the method that resonates with you and embark on your olive pit germination adventure. With patience, care, and a little bit of luck, you will soon witness the magic of new life sprouting from your olive pits.
Now that you know how to germinate olive pits, it’s crucial to understand how to care for the germinating pits to ensure their successful growth. Let’s continue our journey by exploring the essential care steps for germinating olive pits.
Method 1: Water Soaking
Water soaking is a simple and effective method for germinating olive pits. This method provides the right amount of moisture to kickstart germination and allows you to monitor the progress of your olive pits easily. Here is a step-by-step guide to using the water soaking method:
- Fill a container with room temperature water. Choose a container that is deep enough to fully submerge the olive pits.
- Take the prepared olive pits and gently place them in the container, ensuring they are fully covered by the water.
- Let the olive pits soak in the water for 24 to 48 hours. During this time, you may notice some pits sinking, while others may float. It’s essential to note that floating pits have a lower chance of germination, so it’s best to discard them.
- Periodically change the water every 12 hours to prevent any buildup of harmful bacteria or fungus. This step helps maintain optimal conditions for germination.
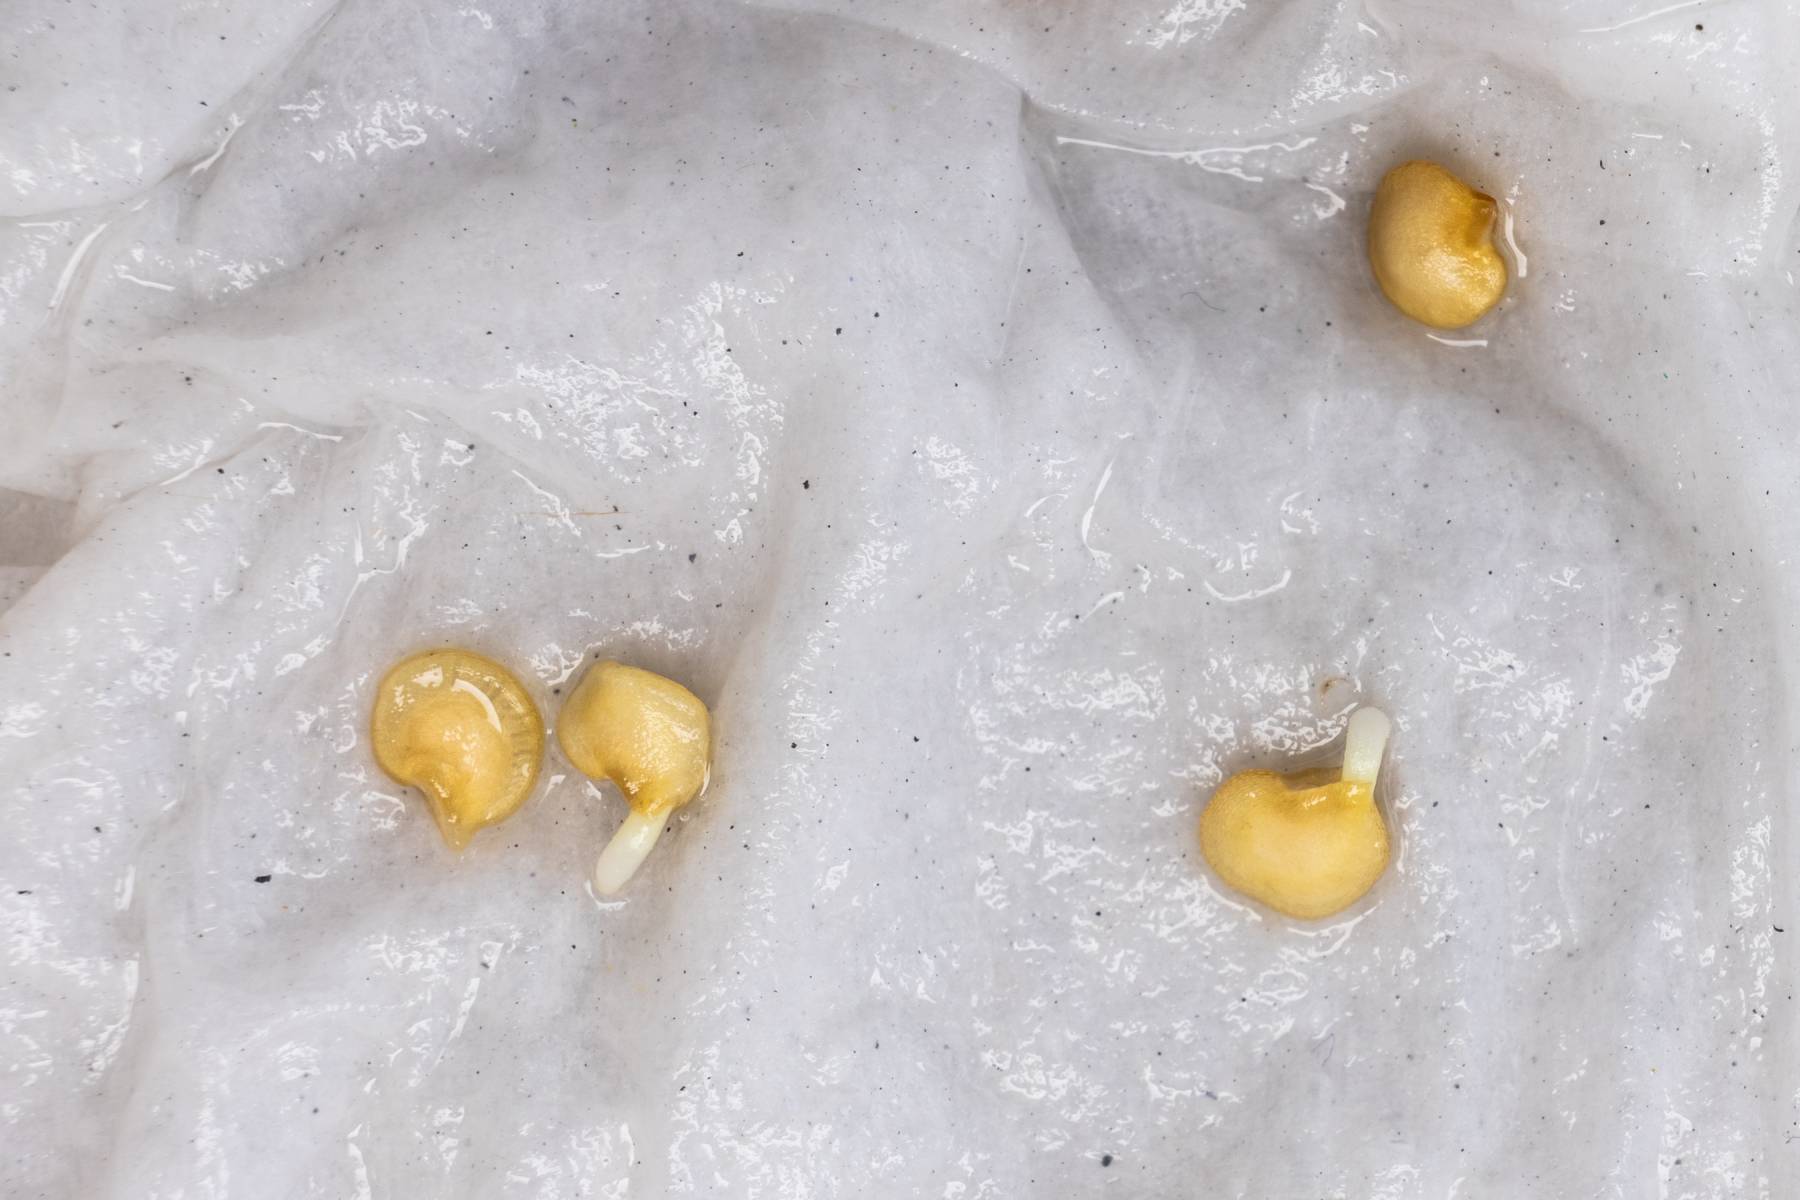
- After the soaking period, carefully remove the olive pits from the water. You may observe small cracks or splits in some pits, indicating that germination has started.
- At this point, you can choose to transfer the germinating pits to a suitable growing medium such as potting soil or continue monitoring them in the water for further growth.
Water soaking provides a controlled environment for the olive pits to absorb water, soften their seed coat, and trigger the germination process. It’s essential to maintain the right temperature and water quality during the soaking period. Room temperature water is preferable, as extreme temperatures can inhibit germination.
Remember to always handle the olive pits with care to avoid damaging the delicate embryonic plant inside. Patience is key during this process, as germination can take anywhere from a few days to several weeks. Keep a close eye on the progress of your olive pits and celebrate their growth as they transform into young olive trees.
Now that you are familiar with the water soaking method, it’s time to move on to the next technique: the paper towel technique. Let’s explore how this method can facilitate the germination of your olive pits.
To germinate an olive pit, soak it in water for 24 hours, then plant it in well-draining soil. Keep the soil moist and place the pot in a warm, sunny spot. Germination can take several weeks to a few months.
Read more: How To Germinate An Avocado Pit
Method 2: Paper Towel Technique
The paper towel technique is a popular and convenient method for germinating olive pits. By creating a controlled environment, this technique provides the optimal conditions necessary for germination to occur. Here’s a step-by-step guide on how to use the paper towel technique:
- Begin by gathering your prepared olive pits and some damp paper towels. Make sure the paper towels are moist but not dripping wet.
- Take a few damp paper towels and fold them into a small stack. This will serve as the germination medium for your olive pits.
- Place the olive pits on the folded paper towels, ensuring they are evenly spaced and not touching each other.
- Once the olive pits are in place, carefully seal the paper towels and olive pits inside a plastic bag. This creates a mini greenhouse effect, maintaining moisture levels and a stable environment for germination.
- Find a warm and well-lit location for the plastic bag, such as a windowsill or a greenhouse. Avoid placing it in direct sunlight, as excessive heat can harm the olive pits.
- Regularly check the paper towels to ensure they remain moist but not waterlogged. If they become too dry, lightly mist them with water or add a few drops to the bag.
- Monitor the progress of your olive pits by inspecting them regularly. You should begin to see signs of germination, such as small cracks or splits in the seed coat, within a few weeks.
The paper towel technique creates a favorable environment for the olive pits, allowing them to absorb moisture and oxygen necessary for germination. The plastic bag helps retain moisture and creates a humid environment, speeding up the germination process. Be sure to keep a close eye on the olive pits to ensure they don’t become moldy or rot due to excessive moisture.
Once the olive pits have germinated and sprouted tiny roots and shoots, it’s time to carefully transplant them into a suitable growing medium, such as potting soil. Gently handle the delicate seedlings to avoid damaging their fragile roots.
The paper towel technique offers a simple and effective way to monitor the progress of your olive pits and witness the exciting moment when they begin to sprout. Now that you’ve learned about this method, let’s move on to the final technique: germination in potting mix.
Method 3: Germination in Potting Mix
Germinating olive pits directly in potting mix is a straightforward and reliable method. This technique provides the olive pits with a suitable growing medium right from the start, allowing for seamless transition as they begin to sprout. Here’s how to germinate olive pits in potting mix:
- Start by filling a small pot with a well-draining potting mix. Leave approximately an inch of space below the rim of the pot.
- Using your finger or a pencil, make a small indentation in the center of the potting mix. This is where the olive pit will be placed.
- Take one of the prepared olive pits and gently place it in the indentation, ensuring it is positioned upright with the flat end facing down. Cover the pit with a thin layer of potting mix.
- Water the pot gently to moisten the potting mix, being careful not to displace the olive pit. Ensure that the soil is evenly moist but not overly saturated.
- Place the pot in a warm and well-lit location, preferably with indirect sunlight. Avoid exposing the pot to harsh sunlight or extreme temperatures.
- Monitor the soil moisture regularly and water as needed to maintain a consistent level of moisture. Avoid letting the potting mix dry out completely between waterings.
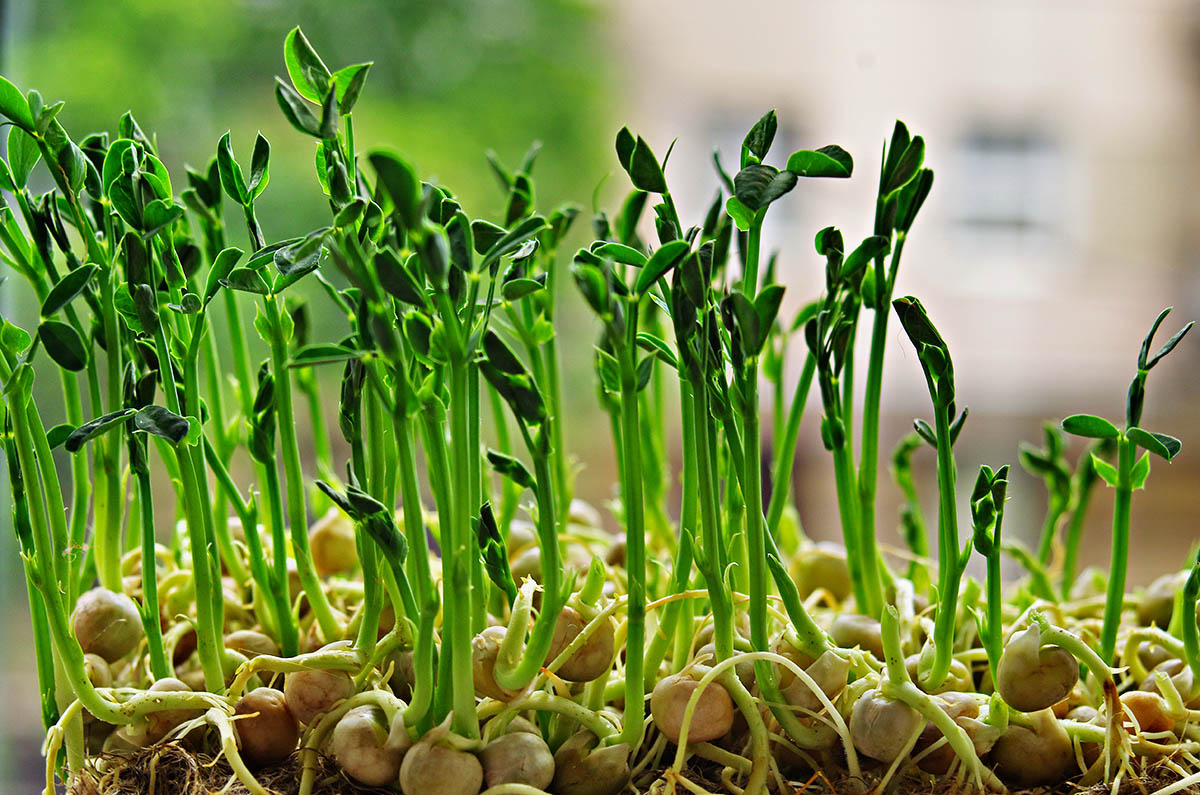
- Be patient and observe the progress of your olive pit. In a few weeks, you should start to see signs of germination, such as the emergence of a tiny sprout from the olive pit.
- Once the olive pit has sprouted and developed a strong root system, it’s time to consider transplanting it to a larger container or an outdoor location suitable for olive tree growth.
The advantage of germinating olive pits directly in potting mix is that it eliminates the need for additional transplanting steps. The olive pit experiences minimal disturbance, allowing for uninterrupted growth as it establishes its roots in the potting mix.
Remember to provide proper care for your germinating olive pits, maintaining consistent moisture levels and providing adequate light. Be patient, as germination can take several weeks, and each olive pit may sprout at its own pace.
With the potting mix method, you have a simple and reliable technique to germinate your olive pits and witness their transformation into young olive trees. Now that you’ve explored all three methods, it’s time to move on to the next step: caring for your germinating olive pits.
Caring for Germinating Olive Pits
Once your olive pits have successfully germinated and sprouted, it’s crucial to provide proper care to ensure their continued growth and development into healthy olive trees. Here are some essential care tips for your germinating olive pits:
- Light: Place your germinating olive pits in a location that receives bright, indirect sunlight. Adequate light is vital for photosynthesis and the growth of strong, healthy seedlings. However, be cautious not to expose them to intense sunlight, as it can scorch the delicate leaves.
- Temperature: Olive trees prefer moderate temperatures, so keep your germinating olive pits in a warm environment. Aim for temperatures between 65°F (18°C) and 75°F (24°C). Avoid exposing the seedlings to extreme temperature fluctuations or cold drafts.
- Watering: Maintain consistent moisture in the potting mix or growing medium. Avoid overwatering, as it can lead to root rot, while allowing the soil to dry out completely can stress the olive pit. Water the seedlings when the top inch of soil feels dry, ensuring thorough watering without waterlogging the soil.
- Humidity: Olive trees prefer a moderate level of humidity. If the air in your home or growing area is dry, you can increase humidity by placing a tray of water near the olive pits or using a humidifier. This helps prevent excessive moisture loss from the seedlings’ leaves.
- Fertilization: Initially, the nutrients from the endosperm within the olive pit will sustain the seedling. As it grows, you can introduce a diluted liquid fertilizer specifically formulated for young seedlings. Follow the manufacturer’s instructions for application and avoid over-fertilizing, as it can harm the delicate roots.
- Support: As the olive seedlings grow, they may need support to prevent them from bending or toppling over. Use small stakes or bamboo sticks to gently support the stem, ensuring not to damage the roots.
- Weeding and Pest Control: Keep an eye out for any weeds or pest infestations that can compete with the seedlings for nutrients or harm them. Remove any weeds promptly and address any pest-related issues with suitable organic pest control methods.
Regular observation and monitoring are key when caring for germinating olive pits. Watch for signs of healthy growth, such as the development of new leaves and roots. At the same time, be vigilant for any signs of stress or disease, such as wilting leaves or discoloration, and take appropriate steps to address the issue.
Remember that olive trees are slow-growing, and it will take time for your germinating olive pits to develop into mature trees. Be patient and enjoy the journey of nurturing these remarkable plants.
Now that you have a solid understanding of how to care for your germinating olive pits, it’s time to explore the next step: transplanting the germinated olive pits into their permanent home.
Transplanting Germinated Olive Pits
Transplanting your germinated olive pits is an exciting milestone in their journey towards becoming fully grown olive trees. When the seedlings have developed strong roots and a healthy leafy growth, it’s time to carefully move them into their permanent home. Follow these steps for successful transplantation:
- Selecting a Location: Choose a suitable spot in your garden or outdoor area for transplanting the olive seedlings. It should offer full sun exposure, well-draining soil, and enough space for the trees to reach their mature size.
- Preparing the Planting Hole: Dig a hole that is wide and deep enough to accommodate the root ball of the olive seedling. Loosen the soil at the bottom of the hole and remove any weeds or rocks.
- Removing the Seedling from the Container: Carefully remove the olive seedling from its current container, taking care not to damage the fragile roots. Gently loosen any compacted roots at the bottom of the root ball.
- Placing the Seedling in the Hole: Lower the root ball of the olive seedling into the planting hole, ensuring that the top of the root ball is level with or slightly above the surrounding soil. Adjust the depth as needed.
- Backfilling and Tamping: Fill the hole with the excavated soil, firming it gently around the root ball to eliminate any air pockets. Avoid packing the soil too tightly, as this can restrict root growth.
- Watering: After transplanting, immediately water the olive seedling thoroughly to help settle the soil and provide moisture to the roots. Continue to water regularly, keeping the soil consistently moist but not waterlogged.
- Mulching: Apply a layer of organic mulch, such as wood chips or straw, around the base of the olive seedling. This helps retain soil moisture, suppresses weed growth, and provides insulation to the roots.
- Staking (if necessary): Depending on the size and stability of the olive seedling, you may need to provide temporary support with stakes. Gently tie the seedling to the stakes, ensuring not to cause damage to the stem.
After transplantation, continue to monitor your olive trees for signs of growth and well-being. Provide regular watering, especially during dry periods, and maintain a weed-free zone around the base of the trees. As the olive trees mature, they will require less frequent watering but may still benefit from occasional fertilization with a balanced fertilizer suitable for olive trees.
It’s important to note that it will take several years for your transplanted olive seedlings to reach maturity and produce fruit. Be patient and allow the trees to establish themselves in their new environment. With proper care and attention, you can enjoy the beauty and bounty of your very own olive trees.
Congratulations on reaching this stage in your olive growing journey! With the transplantation complete, you can now sit back and watch as your olive seedlings grow into magnificent trees, bearing testament to your dedication and green thumb.
As we conclude this article, we hope that it has provided you with valuable insights into germinating and caring for olive pits. May your garden be filled with the beauty and abundance of olive trees for years to come.
Read more: How Do You Light A Fire Pit
Conclusion
Embarking on the journey of germinating olive pits and nurturing them into thriving olive trees is an exciting and rewarding experience for any garden enthusiast. By understanding the olive pit, preparing it properly, and utilizing effective germination methods, you can witness the miracle of new life sprouting from a seemingly ordinary seed.
Through methods like water soaking, the paper towel technique, and germination in potting mix, you can provide the ideal environment for your olive pits to germinate, grow roots, and develop into young seedlings. With the right care, including proper lighting, temperature, watering, and support, you can ensure the healthy growth of your germinating olive pits.
Transplanting the well-established olive seedlings into their permanent outdoor location marks a significant milestone in their journey. Choosing the right spot, preparing the hole, and providing adequate care post-transplantation will set the foundation for your olive trees to flourish and eventually bear delicious olives.
Remember, growing olive trees requires patience and perseverance. It takes time for the seedlings to mature and produce fruit, but the reward of nurturing your own olive trees is well worth the wait. So, enjoy the process, learn from the challenges, and savor the satisfaction of watching your olive trees thrive in your garden or outdoor space.
Now armed with the knowledge of germinating olive pits and caring for the seedlings, you are ready to embark on your own olive-growing adventure. Whether you have a small garden or a large estate, the beauty, history, and delicious fruits provided by olive trees will surely enhance your landscape and bring joy to your life.
We hope this comprehensive guide has inspired and informed you about the art and science of germinating olive pits. Happy gardening, and may your olive trees grow tall and strong, filling your days with beauty and your table with the bountiful harvest of nature’s treasures.
Curious about how long various seeds take to sprout? Our detailed guide on seed germination times will provide all the insights you need to plan your garden effectively. Whether you're looking to nurture herbs, vegetables, or flowers, understanding these timelines can help ensure your planting success. Don't miss out on optimizing your growing season!
Frequently Asked Questions about How Do You Germinate An Olive Pit?
Was this page helpful?
At Storables.com, we guarantee accurate and reliable information. Our content, validated by Expert Board Contributors, is crafted following stringent Editorial Policies. We're committed to providing you with well-researched, expert-backed insights for all your informational needs.


0 thoughts on “How Do You Germinate An Olive Pit?”