Home>Garden Essentials>How Do You Germinate A Peach Pit
Garden Essentials
How Do You Germinate A Peach Pit
Modified: March 15, 2024
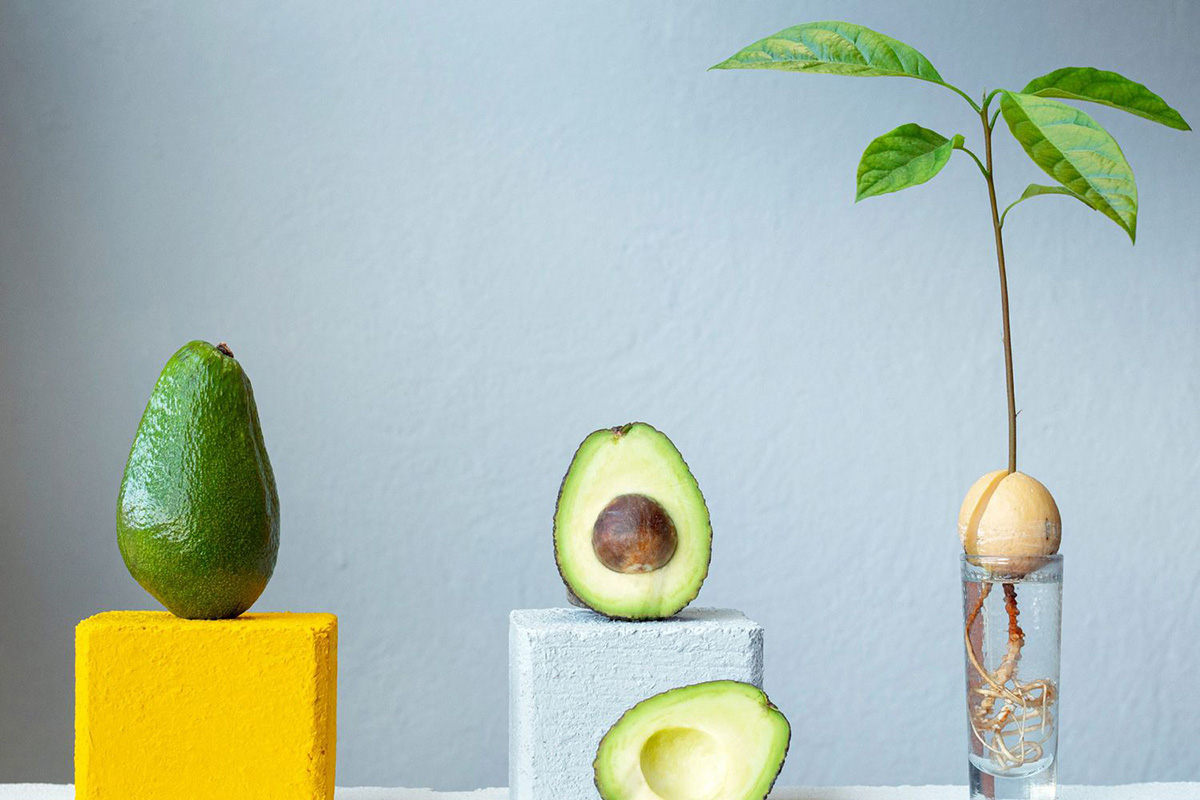
Learn the process of germinating a peach pit in your garden and enjoy fresh, home-grown peaches in no time. Discover expert tips and step-by-step instructions.
(Many of the links in this article redirect to a specific reviewed product. Your purchase of these products through affiliate links helps to generate commission for Storables.com, at no extra cost. Learn more)
Introduction
Welcome to the wonderful world of gardening, where the magic of nature unfolds right before your eyes. If you’ve ever bitten into a juicy, delicious peach, you may have wondered how you could grow your own peach tree and enjoy the sweet and fragrant fruits straight from your backyard. Well, look no further – germinating a peach pit is the perfect place to start!
Understanding how to germinate a peach pit is not only a fun and rewarding gardening project, but it also allows you to witness the incredible process of plant propagation firsthand. Plus, imagine the sense of accomplishment when you successfully grow your very own peach tree from a simple pit!
In this article, we will guide you through the step-by-step process of germinating a peach pit. We’ll cover everything from understanding the anatomy of a peach pit to various germination methods and caring for your seedlings. So, let’s dive right in and discover the secrets of turning a peach pit into a thriving peach tree!
Key Takeaways:
- 1. Peach pits can be germinated using methods like the refrigerator, stratification, or baggie method. Each method mimics nature’s processes to help the pit sprout and grow into a peach tree.
- 2. Once the peach pit sprouts, caring for the seedling involves watering, providing sunlight, and transplanting it into a suitable location. With patience and observation, the seedling can grow into a fruitful peach tree.
Read more: How Do You Germinate An Olive Pit?
Understanding Peach Pits
Before we delve into the process of germinating peach pits, it’s essential to understand what exactly a peach pit is and how it plays a crucial role in the plant’s life cycle.
A peach pit, also known as a seed or stone, is the woody shell that encases the seed of a peach. It is usually oval-shaped and has a hard, protective outer layer. Inside the pit, you’ll find the actual seed, which has the potential to grow into a peach tree.
The pit of a peach is designed by nature to protect the seed and ensure its survival and dispersal. It contains everything the seed needs to germinate and grow, including stored nutrients and a protective coating.
One fascinating fact about peach pits is that they contain a compound called amygdalin. When broken down, amygdalin produces hydrogen cyanide – a toxic substance. While this might sound alarming, there’s no need to worry. As long as you handle peach pits with caution and avoid consuming them, you’ll be completely safe.
It’s also worth noting that not all peach pits are the same. There can be variations in size, shape, and color depending on the peach variety. However, the basic anatomy remains relatively consistent across all varieties.
Now that we have a better understanding of peach pits, let’s move on to the exciting part – preparing the peach pit for germination!
Preparing the Peach Pit
Before you can begin the process of germinating a peach pit, it’s important to prepare the pit properly to ensure optimal conditions for successful germination. Here’s a step-by-step guide to preparing your peach pit:
Step 1: Collecting and Cleaning: Start by collecting fresh, ripe peaches from which you will extract the pits. Look for fully mature, healthy peaches with no signs of disease or damage. Gently wash the peaches to remove any dirt or debris.
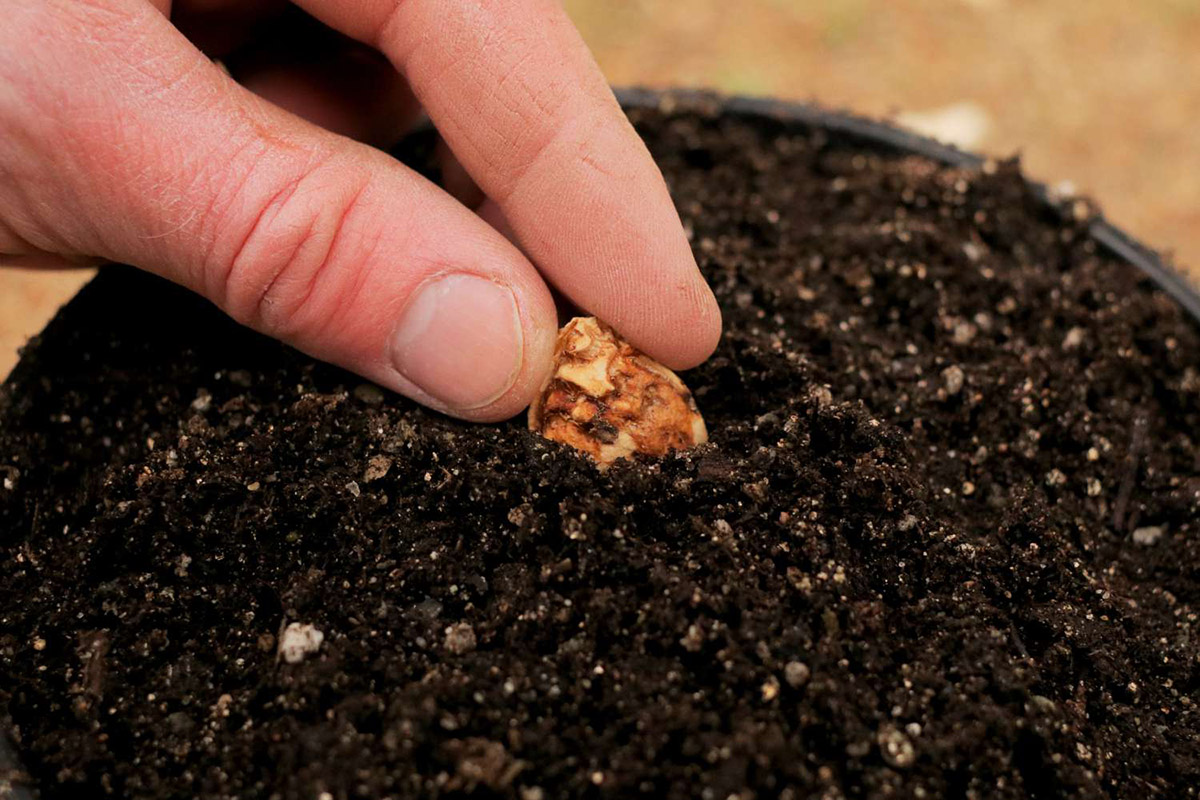
Step 2: Extracting the Pit: Carefully split the peach open, either using your hands or a knife. Inside, you’ll find the pit nestled in the center. Gently remove the pit, taking care not to damage it.
Step 3: Removing the Outer Coating: The outer layer of the peach pit, also known as the husk, can inhibit water absorption and germination. To remove it, gently scrub the pit using a soft brush or toothbrush under running water. Be careful not to scrub too vigorously, as you don’t want to damage the pit.
Step 4: Drying: Once the peach pit is clean, place it on a clean, dry paper towel or a wire rack to air dry. Allow it to dry for about 24 to 48 hours, or until it feels completely dry to the touch. Drying the pit helps to prevent fungal or bacterial growth during germination.
Step 5: Cracking the Seed: This step is optional but can help speed up the germination process. Take a pair of pliers or nutcracker and gently crack the hard shell of the pit, being careful not to damage the seed inside. This allows moisture to penetrate the seed more easily and promotes germination.
Once you’ve completed these steps, your peach pit is now ready for germination! The next section will guide you through various germination methods to choose from.
Germination Methods
When it comes to germinating peach pits, there are several methods you can choose from. Each method utilizes different techniques to mimic the ideal conditions for seed germination. Let’s explore these methods:
Method 1: The Refrigerator Method: This method simulates the winter dormancy and subsequent spring awakening that peach seeds experience in their natural environment. Start by placing your prepared peach pit in a sealable plastic bag with a slightly moistened paper towel. Seal the bag and store it in the refrigerator for about 8-12 weeks. The cold temperature will break the seed dormancy. After the recommended cold stratification period, the pit is ready for planting.
Method 2: The Stratification Method: Similar to the refrigerator method, stratification involves exposing the seed to a period of cold temperatures. However, instead of using the refrigerator, you can also stratify the seeds outdoors. Bury the prepared pit in a well-draining container or garden bed with a layer of moist peat moss or sand. Cover with a layer of mulch or straw to protect it, and let it stay outdoors during the winter. The natural freeze-thaw cycles will facilitate the seed’s dormancy break. Once spring arrives, the pit will be ready for planting.
Method 3: The Baggie Method: This method is a combination of stratification and warm germination. Place your prepared peach pit in a sealable plastic bag with a slightly moistened paper towel. Seal the bag and store it in a warm location, such as a sunny windowsill or a propagator set at around 70-80°F (21-27°C). Check the bag regularly to ensure the paper towel remains moist. After a few weeks, the pit should begin to show signs of germination.
These germination methods provide different approaches to breaking the seed dormancy and kickstarting the process of germination. Whichever method you choose, be patient and monitor the progress of your peach pit regularly. Once you see signs of sprouting, it’s time to move on to the next steps in caring for your germinating peach pit.
Method 1: The Refrigerator Method
The refrigerator method is a popular and effective way to stratify peach pits, giving them the cold treatment they need to break dormancy and prepare for germination. Here’s a step-by-step guide to using the refrigerator method:
Step 1: Prepare the Pit: Start by cleaning and drying the peach pit, as mentioned in the previous section. Make sure it’s free from any outer coating and cracks.
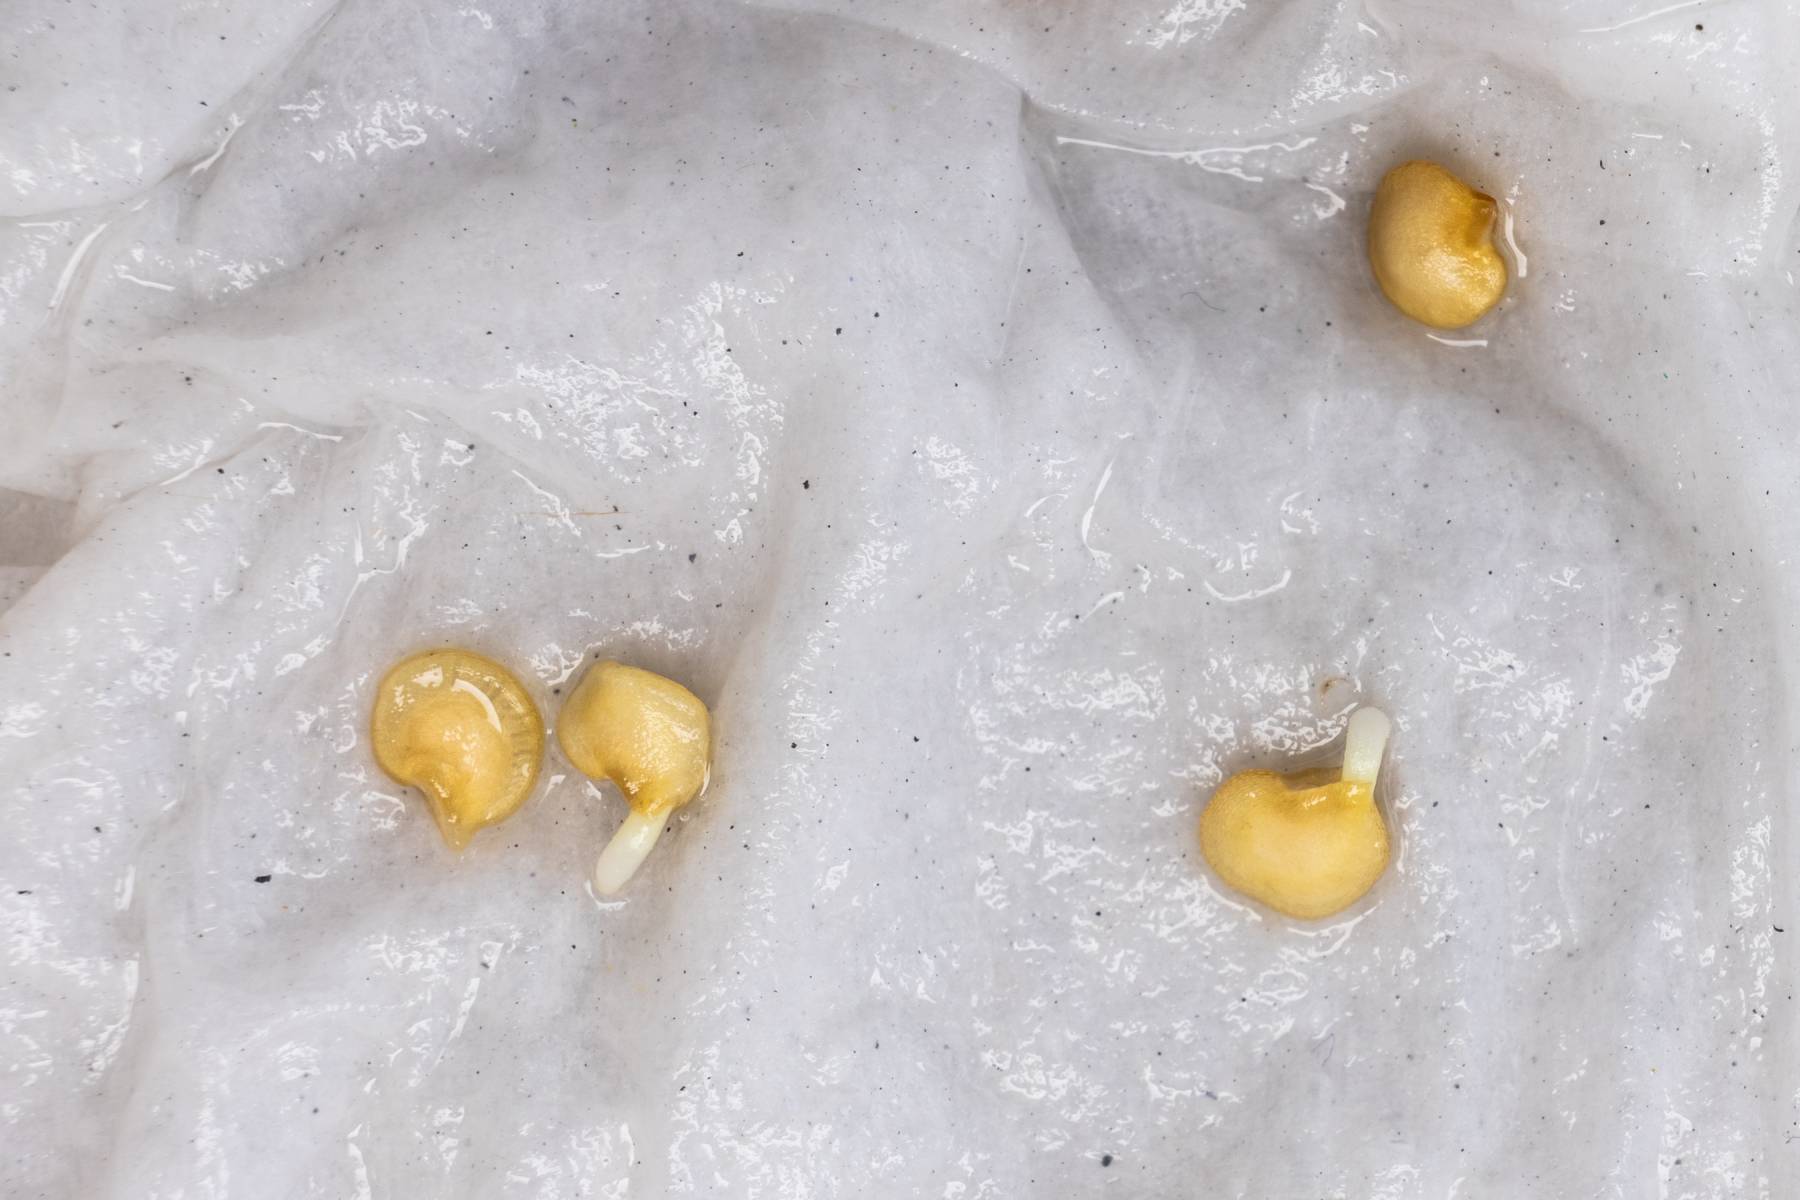
Step 2: Moisture-Filled Paper Towel: Take a paper towel and dampen it slightly with water. It should be moist, but not dripping wet. Lay the peach pit on the damp paper towel.
Step 3: Sealable Plastic Bag: Place the moistened paper towel with the pit inside a sealable plastic bag. Make sure to leave some air space in the bag to prevent mold growth. Seal the bag tightly.
Step 4: Refrigerate: Put the sealed plastic bag in the refrigerator, preferably in the vegetable drawer where the temperature is more stable. The ideal temperature range for stratification is between 35-45°F (2-7°C). Keep the bag in the refrigerator for a period of 8-12 weeks. This cold treatment will simulate winter dormancy.
Step 5: Regular Monitoring: Check the bag periodically to ensure the paper towel remains slightly moist. If it becomes dry, lightly mist the paper towel with water to maintain moisture levels.
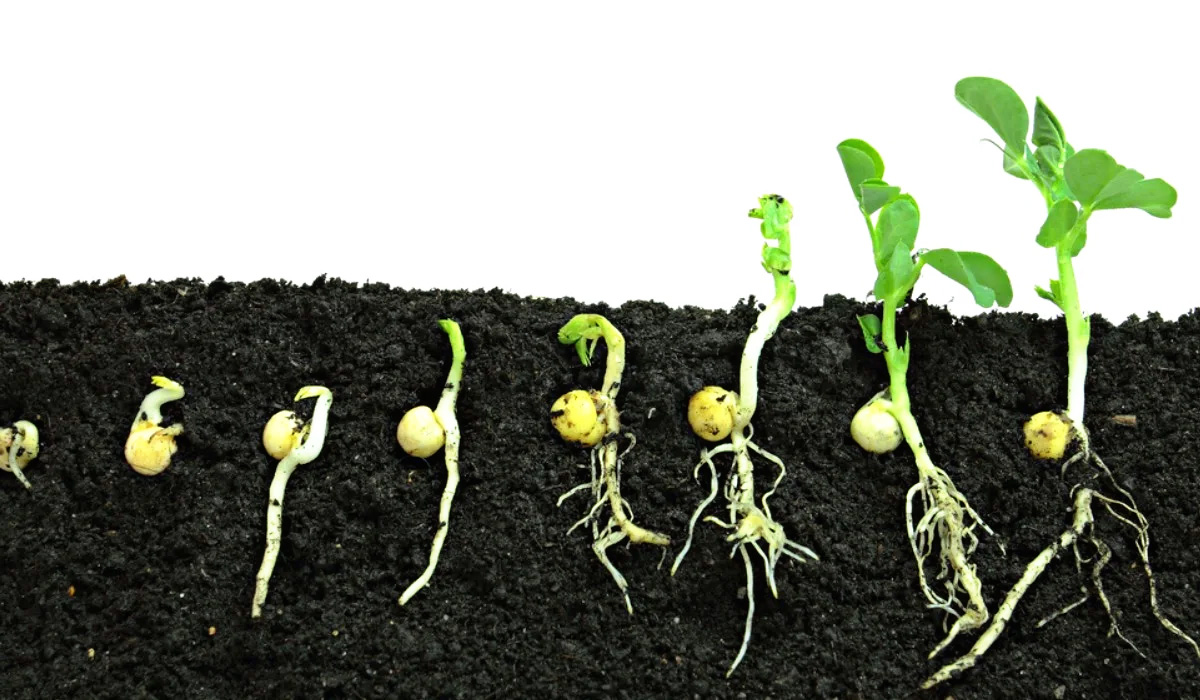
Step 6: Germination: After the recommended stratification period, check the peach pit for signs of germination. You may notice a small root emerging from the pit. Once this occurs, your peach pit is ready for planting.
Remember to handle the germinating peach pit with care, as the root can be fragile. The refrigerator method provides the cold treatment necessary to break dormancy and initiate germination, mimicking nature’s own cycle. Enjoy the process of watching your peach pit come to life during this fascinating stage!
To germinate a peach pit, first clean off any remaining fruit. Then place the pit in a plastic bag with damp paper towels and store in the refrigerator for 8-10 weeks. After this cold stratification period, plant the pit in well-draining soil and keep it moist. It may take several weeks for the pit to sprout.
Read more: How To Germinate Peach Seed
Method 2: The Stratification Method
The stratification method is another effective way to break seed dormancy and promote germination in peach pits. This method utilizes the natural freeze-thaw cycles of winter to prepare the pit for planting. Here’s a step-by-step guide to using the stratification method:
Step 1: Prepare the Pit: Start by cleaning and drying the peach pit, similar to the preparation steps mentioned earlier. Ensure the pit is free from any outer coating and cracks.
Step 2: Choose the Planting Location: Select a well-draining container or garden bed where you plan to grow your peach tree. Make sure the location receives adequate sunlight, as peaches thrive in full sun.
Step 3: Create a Moist Bed: Prepare a moist bed for the peach pit to simulate the natural outdoor conditions. Layer the bottom of the container or garden bed with a mixture of moist peat moss or sand. This will provide the necessary moisture retention for stratification.
Step 4: Plant the Peach Pit: Place the prepared peach pit on top of the moist bed in the container or garden bed. Gently press it down, ensuring it is slightly submerged in the peat moss or sand. Avoid burying it too deeply.
Step 5: Protection: Cover the peach pit with a thin layer of mulch or straw. This will protect the pit from extreme temperatures and help maintain moisture levels during the winter months.
Step 6: Outdoor Stratification: In regions with cold winters, place the container or garden bed outdoors in a sheltered area. The natural freeze-thaw cycles of winter will facilitate the breaking of dormancy. Ensure the pit remains undisturbed during this period.
Step 7: Regular Monitoring: Check the moisture levels of the peat moss or sand regularly. You want to ensure it remains slightly moist but not overly saturated. Adjust the moisture levels as necessary to prevent drying out or excessive moisture accumulation.
Step 8: Spring Awakening: As spring arrives, monitor the container or garden bed for signs of germination. You may notice the emergence of a root or sprout from the peach pit. Once this occurs, your pit is ready for planting in its permanent location.
The stratification method harnesses nature’s own cycles to break seed dormancy and prepare the peach pit for germination. Embrace the beauty of the changing seasons as you wait for your peach pit to emerge from its winter slumber and embark on a journey of growth and abundance.
Method 3: The Baggie Method
The baggie method is a simple and convenient way to germinate peach pits by combining elements of stratification and warm germination. This method provides the seeds with the right amount of moisture, warmth, and a controlled environment to encourage successful germination. Here’s a step-by-step guide to using the baggie method:
Step 1: Prepare the Pit: Clean and dry the peach pit, ensuring it is free from any outer coating and cracks. A clean and intact pit increases the chance of successful germination.
Step 2: Damp Paper Towel: Take a paper towel and dampen it with water, making sure it is moist but not soaking wet. Lay the peach pit on the damp paper towel.
Step 3: Sealable Plastic Bag: Place the moistened paper towel with the pit into a sealable plastic bag. Seal the bag tightly to create a mini greenhouse effect, trapping moisture and warmth inside.
Step 4: Warm Location: Choose a warm location for the baggie, such as a sunny windowsill or a heated propagator set at approximately 70-80°F (21-27°C). The warmth will stimulate germination.
Step 5: Regular Monitoring: Check the baggie regularly to ensure the paper towel remains slightly moist. If it starts to dry out, lightly mist it with water. Avoid over-saturating the paper towel, as excess moisture can lead to mold or rot.
Step 6: Germination: After a few weeks, you should start to see signs of germination. The peach pit may crack open, revealing a small root or sprout emerging from within. This indicates that the pit is ready for the next stage of growth.
Step 7: Transplanting: Once the peach pit has successfully sprouted, it’s time to transplant it into a suitable growing medium, such as a pot filled with well-draining soil. Ensure the root is gently buried in the soil, with the sprout above the surface.
The baggie method provides an optimal environment for germinating peach pits, combining warmth and moisture to promote successful sprouting. Embrace the excitement of watching your peach pit come to life as it breaks dormancy and begins its journey towards becoming a fruitful peach tree.
Caring for Germinating Peach Pits
Once your peach pit has successfully germinated and you’ve transplanted it into a suitable growing medium, it’s important to provide proper care to ensure its healthy growth. Here are some essential tips for caring for germinating peach pits:
1. Watering: Keep the soil consistently moist but not waterlogged. Overwatering can cause root rot, while underwatering can hinder growth. Water your seedling regularly, allowing the top inch of soil to dry out slightly between watering sessions.
2. Sunlight: Place your germinating peach pit in a sunny location where it can receive at least 6-8 hours of direct sunlight each day. Adequate sunlight is essential for photosynthesis and the overall health and vigor of the plant.
3. Temperature: Peach trees thrive in moderate temperatures. Ideally, keep the seedling in an environment with temperatures between 60-75°F (15-24°C). Avoid exposing it to extreme cold or heat, as this can stress the plant.
4. Fertilization: Once your seedling develops a few true leaves, you can begin fertilizing it. Use a balanced, water-soluble fertilizer diluted according to the package instructions. Apply the fertilizer every 4-6 weeks during the growing season to provide the necessary nutrients for healthy growth.
5. Pruning: As your seedling grows, you may need to prune it to shape its growth and encourage stronger branching. Trim any damaged or crossing branches, and promote an open and balanced canopy. However, extensive pruning in the early stages may strain the young plant, so be cautious and only prune as needed.
6. Pest and Disease Control: Monitor your peach seedling for any signs of pests or diseases. Common peach tree pests include aphids, peach tree borers, and scale insects. If you notice any issues, consult with a local garden center or extension office for appropriate pest control measures.
7. Patience and Observation: Growing a peach tree from a pit requires patience as it takes time for the seedling to mature into a fruit-bearing tree. Observe your plant closely, take note of any changes or issues, and adjust your care accordingly.
By providing the right care and attention, you’ll give your germinating peach pit the best chance for successful growth and development into a thriving peach tree.
Transplanting Peach Seedlings
Transplanting peach seedlings is an important step in their growth journey, allowing them to establish their roots in a more permanent location. Here’s a step-by-step guide to transplanting your peach seedlings:
1. Timing: Choose the appropriate time to transplant your peach seedling, which is typically when it has developed a few sets of true leaves and has a well-established root system. Avoid transplanting during extreme weather conditions, such as hot summer days or freezing winter temperatures.
2. Site Selection: Select a suitable location for your peach tree that receives full sun and has well-draining soil. Peach trees thrive in fertile soil with a pH level between 6.0 and 7.0. Ensure there is enough space for the tree to grow and spread its branches without being overshadowed by other plants or structures.
3. Digging the Hole: Dig a hole that is wide and deep enough to accommodate the root system of your seedling. The hole should be slightly wider than the root ball and deep enough so that the top of the root ball is level with or slightly above the soil surface.
4. Planting: Gently remove the seedling from its current container, taking care not to disturb the fragile roots. Place the seedling in the center of the hole, ensuring it is positioned upright. Backfill the hole with soil, gently firming it around the roots to eliminate any air pockets.
5. Watering: After transplanting, thoroughly water the newly planted seedling to help settle the soil and ensure good root-to-soil contact. Continue to water regularly, keeping the soil moist but not waterlogged. Water deeply at the base of the tree, rather than sprinkling water on the foliage, to encourage deep root growth.
6. Mulching: Apply a layer of organic mulch, such as wood chips or straw, around the base of the peach tree. This helps conserve moisture, regulate soil temperature, suppress weeds, and provide a barrier against lawn care equipment that could damage the trunk.
7. Staking (if necessary): If your peach seedling is tall or has weak branches, it may benefit from staking for support. Place a stake in the ground near the seedling and use soft plant ties to loosely secure the tree to the stake, allowing for some movement while providing necessary support.
8. Care and Maintenance: With the seedling successfully transplanted, continue to provide proper care, including regular watering, fertilization, and pest control. Monitor the tree for any signs of stress, such as wilting or leaf discoloration, and take appropriate action to address any issues that arise.
Remember, transplanting can be a stressful process for seedlings, so be patient and give them time to adjust to their new environment. With proper care and attention, your transplanted peach seedling will have the opportunity to grow into a beautiful and fruitful tree.
Read more: How To Store Peach Pits For Planting
Conclusion
Congratulations on embarking on the journey of growing your own peach tree from a simple pit! Germinating peach pits is not only a fascinating process but also a satisfying way to connect with nature and cultivate your own delicious fruits. By understanding the anatomy of peach pits, preparing them properly, and utilizing effective germination methods, you can successfully bring these pits to life and watch them transform into thriving peach trees.
Whether you choose the refrigerator method, the stratification method, or the baggie method, each approach provides a unique way to break seed dormancy and initiate germination. By following the step-by-step instructions, providing the right care, and being patient, you can witness the magic of nature as your peach pit unfolds into a young seedling.
Transplanting your seedling into its permanent location marks an important milestone in its growth journey. Select a sunny spot with well-draining soil, give the seedling enough space to flourish, and provide proper care, including watering, fertilization, and pest control. With time, patience, and observation, your young peach tree will develop into a strong and fruitful addition to your garden.
Remember, gardening is a continuous learning experience. Be open to adapting your techniques, seeking advice from local experts, and embracing the joy and challenges that come with growing your own plants. Your efforts will be rewarded with beautiful peach blossoms and luscious fruits that you can enjoy right from your backyard.
So go ahead, take that peach pit, nurture it with care, and witness the miracle of nature unfold before your very eyes. Happy peach growing!
Frequently Asked Questions about How Do You Germinate A Peach Pit
Was this page helpful?
At Storables.com, we guarantee accurate and reliable information. Our content, validated by Expert Board Contributors, is crafted following stringent Editorial Policies. We're committed to providing you with well-researched, expert-backed insights for all your informational needs.


0 thoughts on “How Do You Germinate A Peach Pit”