Home>Garden Essentials>How Long For Crimson Clover To Germinate
Garden Essentials
How Long For Crimson Clover To Germinate
Modified: March 16, 2024
Looking to grow crimson clover in your garden? Find out how long it takes for crimson clover seeds to germinate and get your garden blooming in no time.
(Many of the links in this article redirect to a specific reviewed product. Your purchase of these products through affiliate links helps to generate commission for Storables.com, at no extra cost. Learn more)
Introduction
Gardening enthusiasts and farmers are always on the lookout for ways to enhance their garden’s productivity and improve the overall health of their soil. One way to achieve these goals is by incorporating cover crops into their planting strategies. Among the various cover crops available, crimson clover (Trifolium incarnatum) stands out as a popular choice due to its numerous benefits. However, to harness the full potential of crimson clover, it is crucial to understand the germination process and the factors that influence it.
Crimson clover is a legume cover crop that is widely recognized for its nitrogen-fixing capabilities, which means it can convert atmospheric nitrogen into a usable form for plants. This enriches the soil with this essential nutrient, promoting healthier plant growth and increasing crop yields. Additionally, crimson clover can act as a weed suppressor, preventing the growth of undesirable plants and reducing the need for herbicides.
Germination is a crucial stage in the life cycle of any plant, including crimson clover. It is the process by which a seed sprouts and develops into a young seedling. Proper germination ensures that the seedling establishes a strong root system and can effectively absorb nutrients and water from the soil. Understanding the germination timeframe and the factors that affect it can help gardeners and farmers plan their planting schedules more effectively and maximize the benefits of crimson clover.
Several factors can impact the germination time of crimson clover. These factors include temperature, moisture, soil conditions, and seed quality. Providing optimal conditions for germination is essential to promote faster and more successful establishment of the seedlings. In this article, we will explore these factors and provide tips on how to foster quicker and more efficient germination of crimson clover.
Key Takeaways:
- Crimson clover seeds typically take 7 to 10 days to germinate under optimal conditions. Factors like temperature, moisture, and seed quality influence the process. Providing proper care and monitoring can lead to successful seedling emergence.
- To promote faster germination, pre-soak or scarify the seeds, maintain optimal temperature and moisture, and troubleshoot issues like poor germination rate or seedling damping-off. These techniques can help establish healthy crimson clover seedlings.
Read more: How Long For Mini Clover To Germinate
What is Crimson Clover?
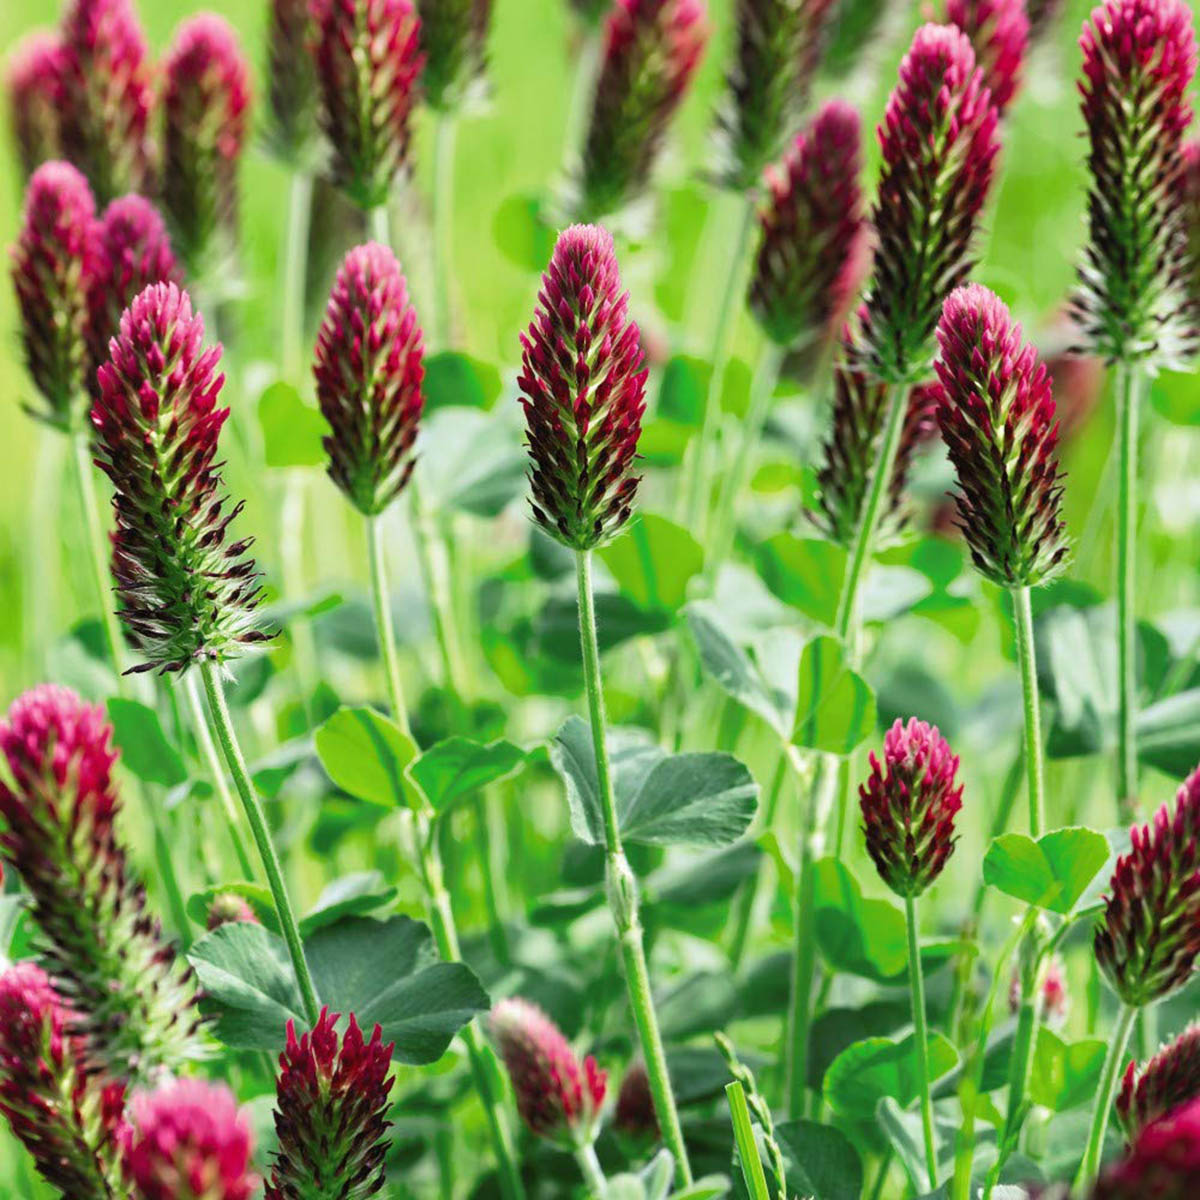
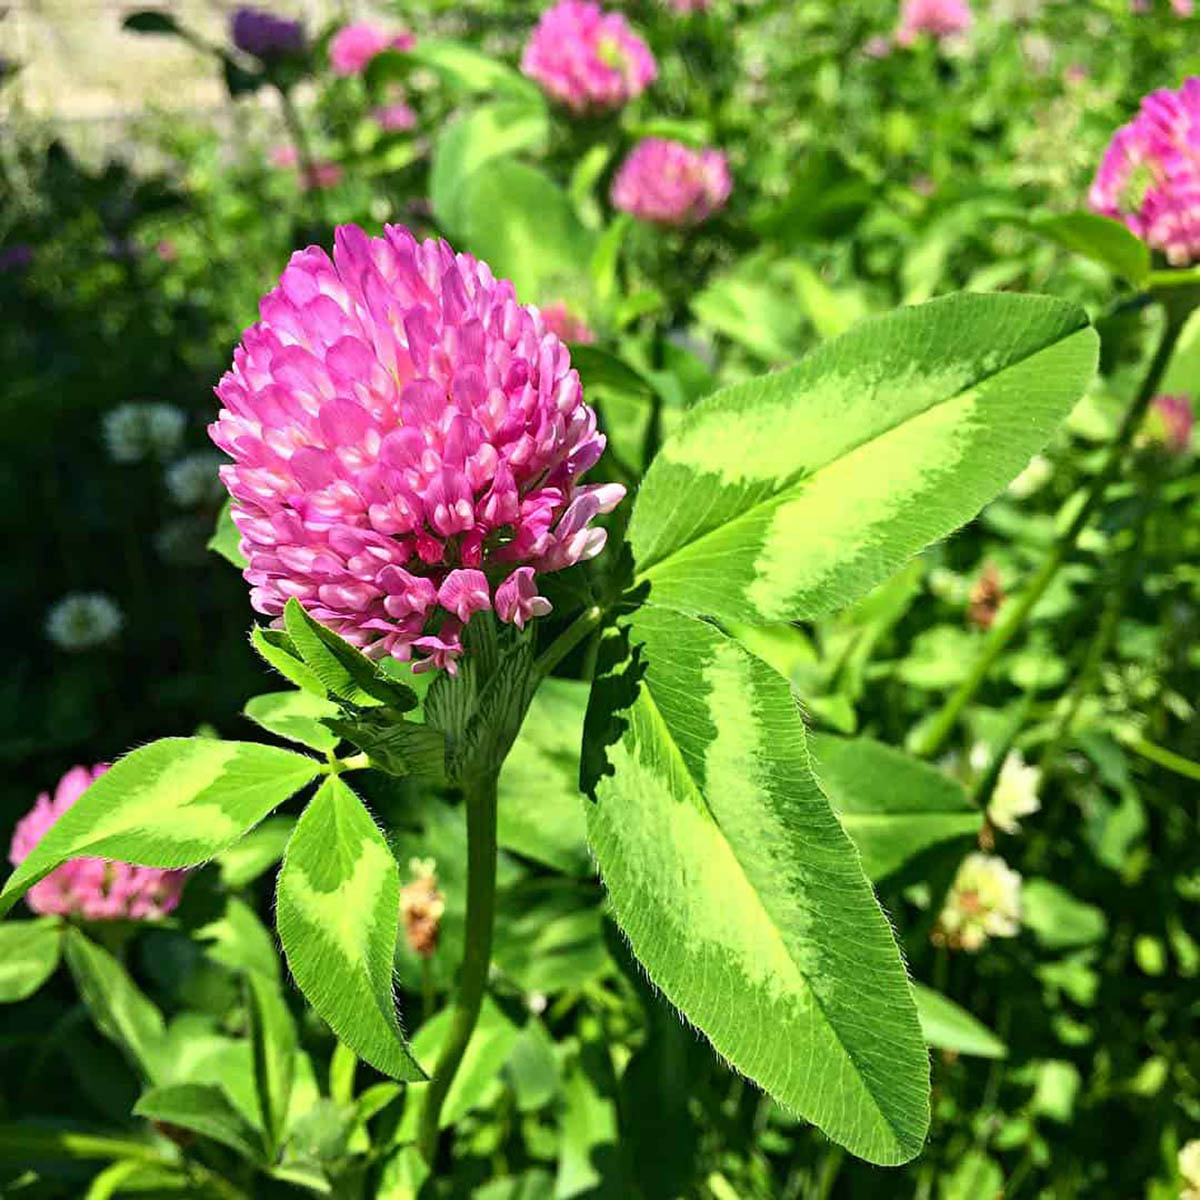
Crimson clover, scientifically known as Trifolium incarnatum, is a flowering legume that belongs to the Fabaceae family. It is native to the Mediterranean region but has been widely cultivated around the world for its benefits as a cover crop and forage plant. The name “crimson clover” refers to its vibrant red flowers, which are highly attractive to pollinators such as bees and butterflies.
As a cover crop, crimson clover offers numerous advantages to the garden or farm. One of its most significant benefits is its ability to fix atmospheric nitrogen into the soil through a symbiotic relationship with bacteria called Rhizobia. These bacteria colonize the roots of crimson clover and convert nitrogen gas in the air into a form that plants can utilize. This process increases the nitrogen content in the soil, providing an organic source of this essential nutrient for subsequent crops.
Aside from its nitrogen-fixing properties, crimson clover also acts as a natural mulch and weed suppressor. Once established, its dense foliage shades the soil, preventing weed growth by blocking sunlight and reducing weed seed germination. It also helps to conserve soil moisture by reducing evaporation, which is particularly beneficial during dry periods.
Crimson clover is an annual plant, which means it completes its life cycle within a single growing season. It typically reaches a mature height of about 1 to 2 feet (30 to 60 cm) and produces vibrant red flowerheads that are rich in nectar. These flowers not only add beauty to the landscape but also attract beneficial insects that help with pollination and pest control.
As a forage plant, crimson clover is highly nutritious for livestock and can be grazed upon or harvested as hay. Its high protein content makes it a valuable feed option, particularly for ruminant animals like sheep and cattle. Additionally, its deep taproot helps to improve soil structure and drainage, enhancing overall soil health.
Overall, crimson clover is a versatile and beneficial plant that offers multiple advantages to gardeners and farmers alike. Whether used as a cover crop to enrich the soil or as a forage option for livestock, its deep red flowers and nitrogen-fixing abilities make it a valuable addition to any garden or farm.
Importance of Germination
Germination plays a vital role in the life cycle of plants, including crimson clover. It is the process by which a seed transforms into a seedling, establishing a strong foundation for growth and development. Understanding the importance of germination can help gardeners and farmers appreciate the significance of providing optimal conditions for this critical stage of a plant’s life.
1. Establishing Strong Root System: During germination, the seed absorbs water and swells, triggering metabolic processes that result in root and shoot growth. The development of a robust root system is especially crucial as it enables the seedling to anchor itself in the soil, absorb water and nutrients, and establish a strong foundation for future growth.
2. Efficient Nutrient and Water Uptake: A healthy germination process ensures that the young seedling has access to adequate nutrients and water. As the root system develops, it begins to absorb essential macronutrients like nitrogen, phosphorus, and potassium from the soil. These nutrients are crucial for overall plant development, including leaf growth, flowering, and fruit production. Similarly, a well-established root system allows the seedling to efficiently take up water from the soil, preventing water stress and dehydration.
3. Resistance to Environmental Stressors: A properly germinated seedling is better equipped to handle environmental stressors such as drought, temperature fluctuations, and pest attacks. The seedling’s ability to develop a strong root system, along with its physiological processes activated during germination, enhances its resilience and ability to withstand adverse conditions.
4. Development of Vigorous Plant: The quality of germination directly impacts the overall vigor and productivity of the plant. A successful germination process creates a healthier and more productive plant, capable of producing more abundant flowers, fruits, or seeds. This is particularly crucial for cover crops like crimson clover, as their primary purpose is to enrich the soil, suppress weeds, and enhance the overall sustainability of the garden or farm.
5. Timing and Synchronization: Understanding the germination timeframe of crimson clover is essential for planning planting schedules, rotational cropping, and managing cover crops. Properly timed germination ensures that the seedlings emerge when environmental conditions are most favorable, maximizin
Factors Affecting Germination Time
The germination time of crimson clover can vary depending on several factors. Understanding these factors can help gardeners and farmers optimize conditions to promote faster and more efficient germination. Here are the key factors that influence the germination time of crimson clover:
- Temperature: Temperature plays a crucial role in seed germination. Crimson clover seeds germinate best in temperatures ranging from 60 to 75 degrees Fahrenheit (15 to 24 degrees Celsius). Cooler temperatures can slow down germination, while excessively high temperatures can inhibit or even prevent germination.
- Moisture: Adequate moisture is essential for seed germination. The seeds need to be in contact with moisture to initiate the germination process. However, excessive moisture can lead to rotting or fungal diseases. Maintaining a consistent and balanced level of moisture in the soil is crucial for successful germination.
- Soil Conditions: The composition and structure of the soil can impact germination. Crimson clover prefers well-drained soils with good moisture-holding capacity. Compacted soil or soil with high clay content can hinder seedling emergence and root development. Proper soil preparation, such as loosening the soil and removing any debris or rocks, can create an ideal environment for germination.
- Light: Some seeds, including crimson clover, do not require exposure to light for germination. In fact, darkness may even promote better germination. Therefore, it is not necessary to provide direct light during the germination process. However, after germination, adequate light is crucial for the seedlings’ growth and development.
- Seeding Depth: The depth at which crimson clover seeds are planted can affect germination. As a general rule of thumb, the seeds should be planted at a depth of 1/4 to 1/2 inch (6 to 12 mm). Planting too shallowly can expose the seeds to drying out, while planting too deeply may hinder seedling emergence. Ensuring proper seed placement is essential for successful germination.
- Seed Quality: The quality of the seeds can also impact germination time. Using fresh, high-quality seeds that are free from disease or damage increases the chances of successful and timely germination. It is advisable to source seeds from reputable suppliers to ensure their viability.
By taking these factors into consideration and providing optimum conditions for germination, gardeners and farmers can enhance the germination time of crimson clover and maximize its benefits as a cover crop. Creating a favorable environment that aligns with the seeds’ requirements can lead to successful and healthy seedling emergence.
Optimal Conditions for Germination
Creating the ideal conditions for germination is crucial to ensure successful seedling emergence and promote efficient growth of crimson clover. By optimizing certain factors, gardeners and farmers can enhance the germination process and maximize the benefits of this valuable cover crop. Here are the optimal conditions for germinating crimson clover seeds:
- Temperature: Crimson clover seeds germinate best in temperatures ranging from 60 to 75 degrees Fahrenheit (15 to 24 degrees Celsius). Maintaining a consistent temperature within this range encourages faster and more efficient germination. Using a thermometer to monitor soil temperature can help ensure the seeds are planted at the right time.
- Moisture: Adequate moisture is essential for seed germination. Keep the soil consistently moist but not saturated. Overwatering can lead to seed rotting, while underwatering can inhibit germination. Regularly check the soil moisture and adjust irrigation or watering accordingly to maintain optimal moisture levels throughout the germination period.
- Light: Crimson clover seeds do not require exposure to light to germinate. In fact, darkness may even promote better germination. Therefore, it is not necessary to provide direct light during the germination process. However, after germination, adequate light is crucial for the seedlings’ growth and development. Place the seed trays or pots in a well-lit area or provide supplemental artificial light if needed.
- Soil Conditions: Create a favorable soil environment for germination by preparing the soil properly. Crimson clover prefers well-drained soils with good moisture-holding capacity. Before sowing the seeds, loosen the soil and remove any debris or rocks. Adding organic matter such as compost can help improve soil structure and nutrient content, creating an optimal environment for germination.
- Seeding Depth: Plant crimson clover seeds at a depth of 1/4 to 1/2 inch (6 to 12 mm) for optimal germination. This depth provides the seeds with sufficient soil contact while still allowing them to emerge easily. Planting too shallowly can expose the seeds to drying out, while planting too deeply may hinder seedling emergence.
- Seeding Density: When sowing crimson clover seeds, consider the desired coverage and purpose of planting. For ground cover and weed suppression, higher seeding density may be necessary. Follow the recommended seeding rate for crimson clover to ensure adequate seedling density and desirable results.
By providing these optimal conditions during the germination process, gardeners and farmers can increase the chances of successful crimson clover seedling emergence. Monitoring and adjusting temperature, moisture, light exposure, and soil conditions can help create an ideal germination environment. Remember to refer to specific guidelines provided by seed suppliers and adapt these conditions based on local climate and environmental factors for the best possible results. With proper care and attention, crimson clover can germinate effectively and contribute to a healthier and more productive garden or farm.
Crimson clover typically germinates within 7-14 days when soil temperature is around 60-70°F. Keep the soil consistently moist to promote germination.
Read more: How Long For White Clover To Germinate
Steps to Germinate Crimson Clover
Germinating crimson clover seeds can be a straightforward process when following the proper steps. By following these steps, gardeners and farmers can maximize the chances of successful germination and establishment of crimson clover seedlings:
- Prepare the soil: Start by preparing the soil where you plan to sow the crimson clover seeds. Loosen the soil to a depth of about 4-6 inches (10-15 cm) using a garden fork or tiller. Remove any weeds, rocks, or debris from the area to provide a clean and suitable environment for germination.
- Sow the seeds: Spread the crimson clover seeds evenly over the prepared soil. The recommended seeding rate may vary depending on the purpose and coverage desired, so refer to the specific guidelines provided by the seed supplier. Aim for a depth of 1/4 to 1/2 inch (6 to 12 mm) when planting the seeds by lightly raking or tamping them into the soil.
- Water the seeds: After sowing the seeds, gently water the area to ensure adequate moisture. Use a fine mist or a sprinkler to avoid disturbing the seeds. Keep the soil consistently moist throughout the germination period but avoid overwatering, as excessive moisture can lead to rotting or fungal diseases.
- Provide optimal temperature: Place the seeded area in a location that maintains a temperature range of 60 to 75 degrees Fahrenheit (15 to 24 degrees Celsius), which is ideal for crimson clover germination. If necessary, use row covers or protect the area from extreme temperature fluctuations to create a more stable environment.
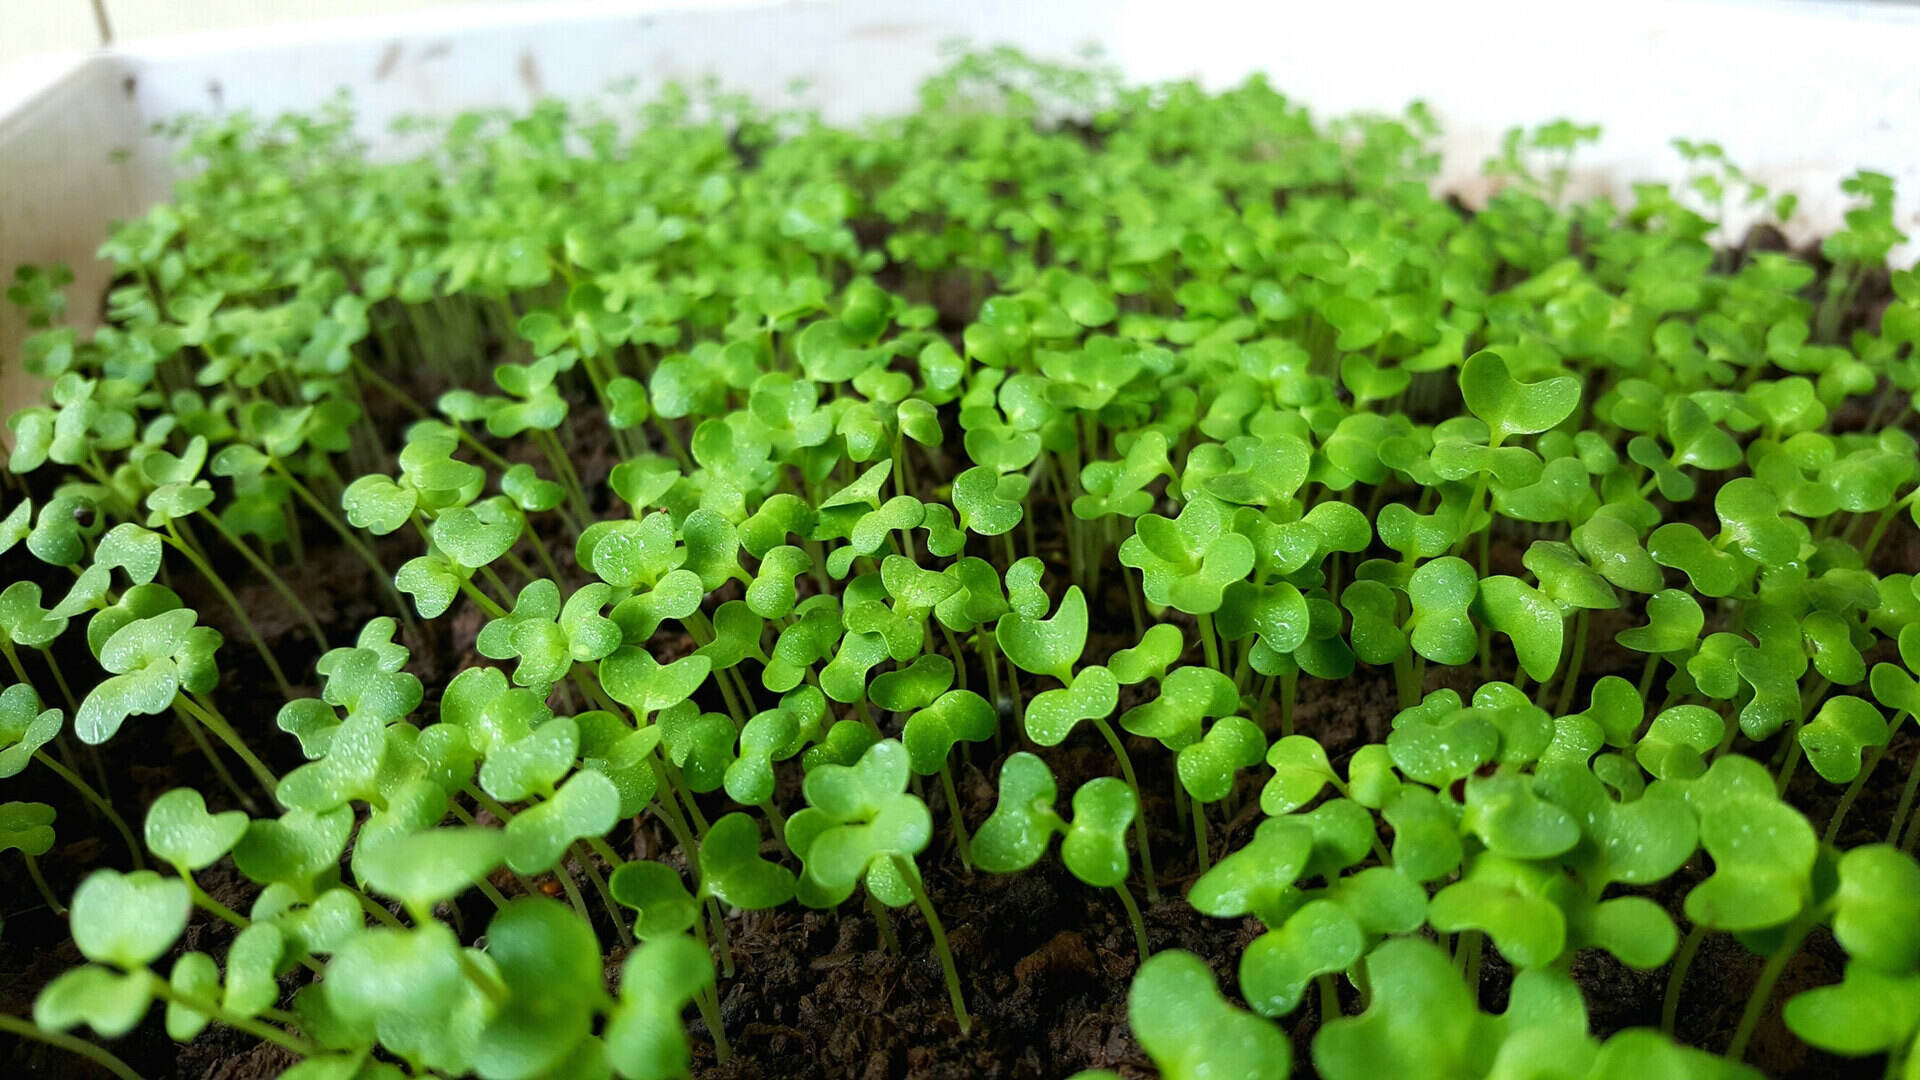
- Monitor germination: Regularly monitor the seeded area for signs of germination. Crimson clover seeds typically germinate within 7 to 10 days, but it may take longer depending on environmental conditions. Watch for the emergence of small seedlings and the growth of their first true leaves.
- Maintain proper care: Once the crimson clover seedlings have emerged, provide them with adequate light and continue to monitor soil moisture. Gradually reduce watering frequency as the seedlings establish, but ensure that the soil remains moist to support their growth. Avoid any disturbances that may damage the delicate seedlings.
- Thin or transplant if needed: If the crimson clover seedlings are too crowded or if you want to transplant them to another location, thin them out by gently pulling or cutting some of the seedlings. Alternatively, carefully lift the seedlings with their root systems intact and transplant them to desired areas, providing adequate spacing for proper growth.
- Continue care and maintenance: As the crimson clover seedlings continue to grow, provide them with proper care and maintenance. This includes regular watering, managing weeds, and monitoring for any pests or diseases. Follow the recommended guidelines for nurturing crimson clover throughout its growth cycle.
By following these steps and providing the necessary care, gardeners and farmers can successfully germinate crimson clover seeds. Remember to adjust these steps based on specific environmental conditions, location, and guidance from seed suppliers. With patience and proper nurturing, crimson clover can thrive and provide numerous benefits as a cover crop or forage plant.
Germination Timeframe for Crimson Clover
The germination timeframe for crimson clover can vary depending on several factors, including environmental conditions and seed quality. Understanding the typical germination time will help gardeners and farmers plan their planting schedules and manage their crops effectively.
On average, crimson clover seeds take around 7 to 10 days to germinate under optimal conditions. However, it is important to note that germination can be influenced by factors such as temperature, moisture, and seed quality. Cooler temperatures can slow down the germination process, while warmer temperatures within the recommended range of 60 to 75 degrees Fahrenheit (15 to 24 degrees Celsius) can promote faster germination.
Moisture is also a crucial factor in germination. Keeping the soil consistently moist, but not overly saturated, is essential for successful germination. Adequate moisture triggers the metabolic processes in the seed, leading to the emergence of the seedling. However, excessive moisture can lead to rotting or fungal diseases, so finding the right balance is key.
The quality of the crimson clover seeds can also impact the germination timeframe. Using fresh, high-quality seeds that are free from disease or damage increases the chances of faster and more successful germination. It is advisable to source seeds from reputable suppliers and check the seed packet for any specific information regarding expected germination times or recommendations.
While the average germination timeframe for crimson clover is around 7 to 10 days, it is important to keep in mind that individual seeds may germinate at slightly different rates. Some seeds may germinate earlier, while others may take a bit longer. Patience is key during this stage, as seed germination can be a gradual process.
Monitoring the seeded area and regularly checking for signs of seedling emergence can give gardeners and farmers an idea of the progress. Once the seedlings have emerged, it is important to continue providing them with proper care and maintenance to ensure their healthy growth and establishment.
By understanding the typical germination timeframe for crimson clover and considering the various factors that influence it, gardeners and farmers can effectively plan their planting schedules and manage their crops accordingly. This knowledge allows for better timing and ensures that the benefits of crimson clover as a cover crop or forage plant can be optimized.
Tips for Faster Germination
When it comes to germinating crimson clover seeds, there are several tips and techniques you can employ to promote faster and more efficient germination. These tips will help you optimize the germination process and accelerate the establishment of healthy crimson clover seedlings:
- Pre-soak the seeds: To speed up germination, you can pre-soak the crimson clover seeds before planting. Place the seeds in a container of room temperature water and let them soak for 12 to 24 hours. This can help soften the seed coat and jumpstart the germination process.
- Scarify the seeds: Crimson clover seeds have a hard outer seed coat that can sometimes inhibit water absorption and slow down germination. By scarifying the seeds, you can manually break through the seed coat, allowing water to penetrate more easily. You can scarify the seeds by gently rubbing them between two sheets of sandpaper or using a small file to create small scratches on the surface of the seed.
- Stratify the seeds: Stratification is a technique that exposes the seeds to cold temperatures to simulate natural winter conditions. This process can help break seed dormancy and promote more synchronized and faster germination. Place the seeds in a plastic bag with a moist paper towel and refrigerate them for 2 to 4 weeks before planting.
- Provide optimal temperature: Maintaining an optimal temperature within the recommended range of 60 to 75 degrees Fahrenheit (15 to 24 degrees Celsius) can help accelerate germination. Use row covers or protective structures to create a more controlled and stable microclimate for the seeds.
- Use a germination mat: A germination mat or seedling heat mat can provide bottom heat to the seeds, creating an ideal germination environment. These mats regulate the soil temperature and can significantly speed up the germination process.
- Implement proper watering techniques: Consistent moisture is crucial for successful germination. Use a fine mist or a gentle watering technique to keep the soil consistently moist, but avoid overwatering, which can lead to rotting or fungal diseases. Consider using a soaker hose or drip irrigation system to provide a slower and more even distribution of water.
- Provide adequate light after germination: Once the crimson clover seedlings have emerged, make sure they receive adequate light for healthy growth. Place them in a well-lit area or use supplemental artificial lighting if natural light is insufficient. Proper lighting ensures proper photosynthesis and helps prevent leggy or weak seedlings.
- Monitor and adjust soil moisture: Regularly monitor the soil moisture and make adjustments as needed. Avoid allowing the soil to dry out completely, but also be cautious not to overwater. The consistent and balanced moisture level will support faster and more efficient germination.
By applying these tips, you can promote faster germination of crimson clover seeds. Experiment with different techniques and find what works best for your specific growing conditions. Remember to closely monitor the seeds and seedlings throughout the germination process, providing them with the necessary care and attention for healthy growth. With these strategies, you can accelerate the germination process and establish vibrant crimson clover plants in your garden or farm.
Troubleshooting Germination Issues
Germinating crimson clover seeds can sometimes encounter challenges and issues that can hinder the successful establishment of seedlings. By knowing how to troubleshoot these germination issues, gardeners and farmers can identify and address problems to improve the overall success rate. Here are some common germination issues and possible solutions:
- Poor germination rate: If you notice a low germination rate, it could be due to factors such as old or low-quality seeds. To resolve this issue, make sure to source fresh and high-quality crimson clover seeds from reputable suppliers. Additionally, ensure that the storage conditions for your seeds are appropriate to maintain their viability.
- Uneven germination: Uneven germination can occur due to inconsistent moisture levels or poor soil conditions. Ensure that the soil is properly prepared and uniformly moist. Adequate watering techniques, such as using a fine mist or drip irrigation, can help distribute moisture evenly. Consider lightly covering the seeds with a thin layer of mulch to help retain moisture and promote more consistent germination.
- Seedling damping-off: Damping-off is a fungal disease that can affect seedlings, causing them to wilt, collapse, and eventually die. It is usually caused by overly moist and poorly drained soil. To prevent damping-off, make sure to provide proper drainage for the soil and avoid overwatering. Use sterilized soil or seed-starting mix to minimize the risk of fungal diseases.
- Seed rot or fungal diseases: Excessive moisture or poor air circulation can contribute to seed rot and fungal diseases. To prevent these issues, ensure good airflow around the seeded area and avoid overwatering. Water in the morning to allow the soil surface to dry out during the day. If necessary, treat the seeds with a fungicide before planting to reduce the risk of fungal infections.
- Poor seed-to-soil contact: Insufficient seed-to-soil contact can impede germination. Ensure that the seeds are planted at the recommended depth and lightly press them into the soil to promote good contact. Avoid planting the seeds too shallowly or too deeply. Gentle raking or tamping can help achieve proper soil-seed contact.
- Pest damage: Pests, such as birds or insects, can damage seeds or seedlings, affecting germination. Protect the seeded area by using bird netting, row covers, or other protective barriers. Regularly inspect the area for signs of pests and take appropriate measures to control them.
- Environmental extremes: Extreme temperatures or weather conditions can adversely affect germination. Provide protection against excessive heat or cold by using row covers, cloches, or shade cloth as needed. Monitor weather forecasts and adjust your planting and germination schedule accordingly.
By troubleshooting these germination issues promptly and implementing appropriate solutions, you can increase the chances of successful germination and establish healthy crimson clover seedlings. Remember to regularly monitor the germinating seeds and seedlings, provide the necessary care, and make adjustments based on specific conditions. Through careful observation and problem-solving, you can overcome germination challenges and enjoy the benefits of vibrant crimson clover in your garden or farm.
Read more: When To Plant Crimson Clover Seed
Conclusion
Germinating crimson clover seeds is a crucial step in harnessing the numerous benefits of this versatile cover crop. By understanding the factors that influence germination and implementing proper techniques, gardeners and farmers can optimize the germination process and promote the successful establishment of crimson clover seedlings.
We have discussed the importance of germination, highlighting how it establishes a strong root system, enables efficient nutrient and water uptake, enhances resistance to environmental stressors, and ultimately results in a vigorous plant. Recognizing the factors that affect germination, such as temperature, moisture, soil conditions, light, seeding depth, and seed quality, allows for better planning and management during the germination stage.
In order to achieve faster germination, we have provided a range of tips and techniques. Pre-soaking or scarifying the seeds, stratifying them, providing optimal temperature and lighting, and maintaining proper moisture levels are all effective methods to accelerate the germination process. These strategies enable gardeners and farmers to enhance the germination rate and overall success of crimson clover seedlings.
However, it is important to troubleshoot any potential issues that may arise during germination. Poor germination rate, uneven germination, damping-off, seed rot, poor seed-to-soil contact, pest damage, and environmental extremes are all factors that can impact the germination process. By promptly addressing these issues with appropriate solutions, such as using high-quality seeds, ensuring proper soil conditions, controlling pests, and preventing excessive moisture or extreme temperatures, the chances of successful germination can be significantly improved.
In conclusion, the germination of crimson clover seeds is a critical stage in harnessing the benefits of this valuable cover crop. By following the steps to germinate crimson clover, providing optimal conditions, implementing tips for faster germination, and troubleshooting any issues that may arise, gardeners and farmers can establish healthy and vibrant crimson clover seedlings. This facilitates the enrichment of the soil, weed suppression, increased nitrogen availability, and other benefits that crimson clover offers, ultimately contributing to a more productive and sustainable garden or farm.
With proper care and attention, crimson clover can thrive and play an important role in enhancing the health and productivity of your garden or farm, all while beautifying the landscape and providing a habitat for beneficial pollinators. So, get ready to witness the transformation as you germinate and nurture crimson clover for a successful and rewarding growing season!
Frequently Asked Questions about How Long For Crimson Clover To Germinate
Was this page helpful?
At Storables.com, we guarantee accurate and reliable information. Our content, validated by Expert Board Contributors, is crafted following stringent Editorial Policies. We're committed to providing you with well-researched, expert-backed insights for all your informational needs.
0 thoughts on “How Long For Crimson Clover To Germinate”