Home>Garden Essentials>How To Clear A Yard For Landscaping
Garden Essentials
How To Clear A Yard For Landscaping
Modified: October 20, 2024
Learn how to clear your yard for landscaping and create the perfect garden. Find step-by-step instructions and practical tips for clearing and preparing your yard.
(Many of the links in this article redirect to a specific reviewed product. Your purchase of these products through affiliate links helps to generate commission for Storables.com, at no extra cost. Learn more)
Introduction
Welcome to our comprehensive guide on how to clear a yard for landscaping! If you’ve recently acquired a new property or simply want to transform your existing yard into a stunning outdoor space, getting rid of debris and overgrown vegetation is the first step towards creating your dream landscape.
Clearing a yard may seem like a daunting task, but with careful planning, the right tools, and some elbow grease, you can create a clean and blank canvas for your landscaping project. Whether you’re a seasoned gardener or a novice, this guide will provide you with step-by-step instructions on how to effectively clear your yard and prepare it for a beautiful landscape design.
Before diving into the physical work, it’s important to assess your yard and determine the scope of the project. Take a walk around your property and identify any large debris, overgrown vegetation, weeds, unwanted trees, and shrubs that need to be removed. This initial evaluation will help you plan your approach and gather the necessary tools for the job.
Speaking of tools, having the right equipment is essential for efficient yard clearing. From pruning shears and loppers to chainsaws and stump grinders, make sure you have the required tools to tackle different aspects of the project. Renting or borrowing equipment is an option if you don’t have everything you need.
Once you have your tools ready, the first step is to remove any large debris from the yard. This includes fallen branches, broken fences, old furniture, and any other items that may have accumulated over time. Clearing this unwanted clutter will provide you with a safer and more organized space to work in.
Next, it’s time to tackle the overgrown vegetation. This includes trimming back or removing any bushes, hedges, or vines that have become unruly. Use your pruning shears or loppers to cut back the excess growth, allowing for better access and visibility throughout the yard.
Weeds can quickly take over a yard, so it’s important to dedicate time to get rid of them. Use a garden hoe or trowel to dig up the weeds from the roots, ensuring they won’t grow back. Applying mulch or a weed barrier can also help prevent weed growth in the future.
Unwanted trees and shrubs can be a challenge to remove, especially if they have deep roots. Consider using a chainsaw or hand saw to safely cut down larger trees, making sure to take the necessary precautions. Removing the stumps can be done with a stump grinder or by hiring a professional tree removal service.
After clearing away the debris and vegetation, you may need to level the ground to create a smooth surface for your future landscaping projects. Use a shovel and rake to redistribute soil and fill in any uneven areas. This step is crucial for ensuring proper drainage and a stable foundation for your plants.
With the bulk of the yard cleared, it’s time to focus on removing small debris like twigs, leaves, and rocks. Rake the entire yard to gather these smaller items into piles for easy removal. Large trash bags or a wheelbarrow can be used to transport the debris to the appropriate disposal area.
Speaking of disposal, it’s important to know the regulations and guidelines in your area for yard waste. Check with your local municipality to determine the proper disposal methods, whether that’s through curbside pickup, a community composting facility, or a designated landfill. Proper disposal ensures you are being environmentally responsible.
Finally, before wrapping up your yard clearing project, take some time to reflect on the overall result. Step back and admire the clean and spacious yard you’ve created. Make note of any additional landscaping ideas or future projects you may want to undertake.
Now that you have a clear and prepped yard, you’re ready to dive into the exciting world of landscaping. Whether you plan on creating a beautiful flower garden, installing a patio, or designing a functional outdoor space, your efforts in clearing your yard will be the foundation for a successful project. Get ready to unleash your creativity and watch your outdoor oasis come to life!
Key Takeaways:
- Clearing a yard for landscaping involves assessing, gathering tools, removing debris, leveling the ground, and disposing of waste. It’s a crucial first step in creating a beautiful outdoor space.
- Prioritize safety, plan and prepare, work in sections, reuse and recycle, respect regulations, document progress, consider professional help, take breaks, and be mindful of the environment throughout the yard-clearing process.
Read more: How To Landscape Yard Without Grass
Assessing the Yard
Before you begin clearing your yard for landscaping, it’s essential to assess the current state of your property. Taking the time to evaluate the yard will help you plan your approach and determine the specific needs of the space.
Start by taking a walk around the entire yard, observing the existing landscape and noting any areas that require attention. Look for any large debris, such as fallen branches, old furniture, or broken fencing. These items can obstruct your ability to move freely and safely in the yard and should be cleared first.
Next, pay attention to the vegetation in your yard. Determine if there are any overgrown bushes, hedges, or vines that need to be trimmed back or removed entirely. Look for any signs of pest infestations or disease on trees and shrubs, as these may need special attention or professional treatment.
Identify any areas of the yard that are prone to flooding or poor drainage. These areas may need additional grading or the installation of drainage solutions to prevent water accumulation and potential damage to your landscaping projects in the future.
Take note of any existing trees and shrubs that you want to keep as part of your future landscape design. Consider their size, condition, and location in relation to other elements in the yard. These existing features can serve as focal points in your new landscape or provide shade and privacy.
Assess the soil quality by examining its texture and composition. Sandy soil may require amendments to improve its ability to retain water and nutrients, while clay soil may need to be loosened and enriched for optimal plant growth. Consider conducting a soil test to determine its pH level and specific nutrient deficiencies.
Lastly, evaluate the amount of sunlight your yard receives throughout the day. Take note of the areas that are in full sun, partial shade, or full shade. This information will guide your plant selection and help ensure that the right plants are placed in the appropriate areas to thrive.
By thoroughly assessing your yard, you will gain valuable insights into its current condition and potential challenges that may arise during the clearing and landscaping process. This information will enable you to develop a suitable plan and make informed decisions to create the yard of your dreams.
Gathering the Necessary Tools and Equipment
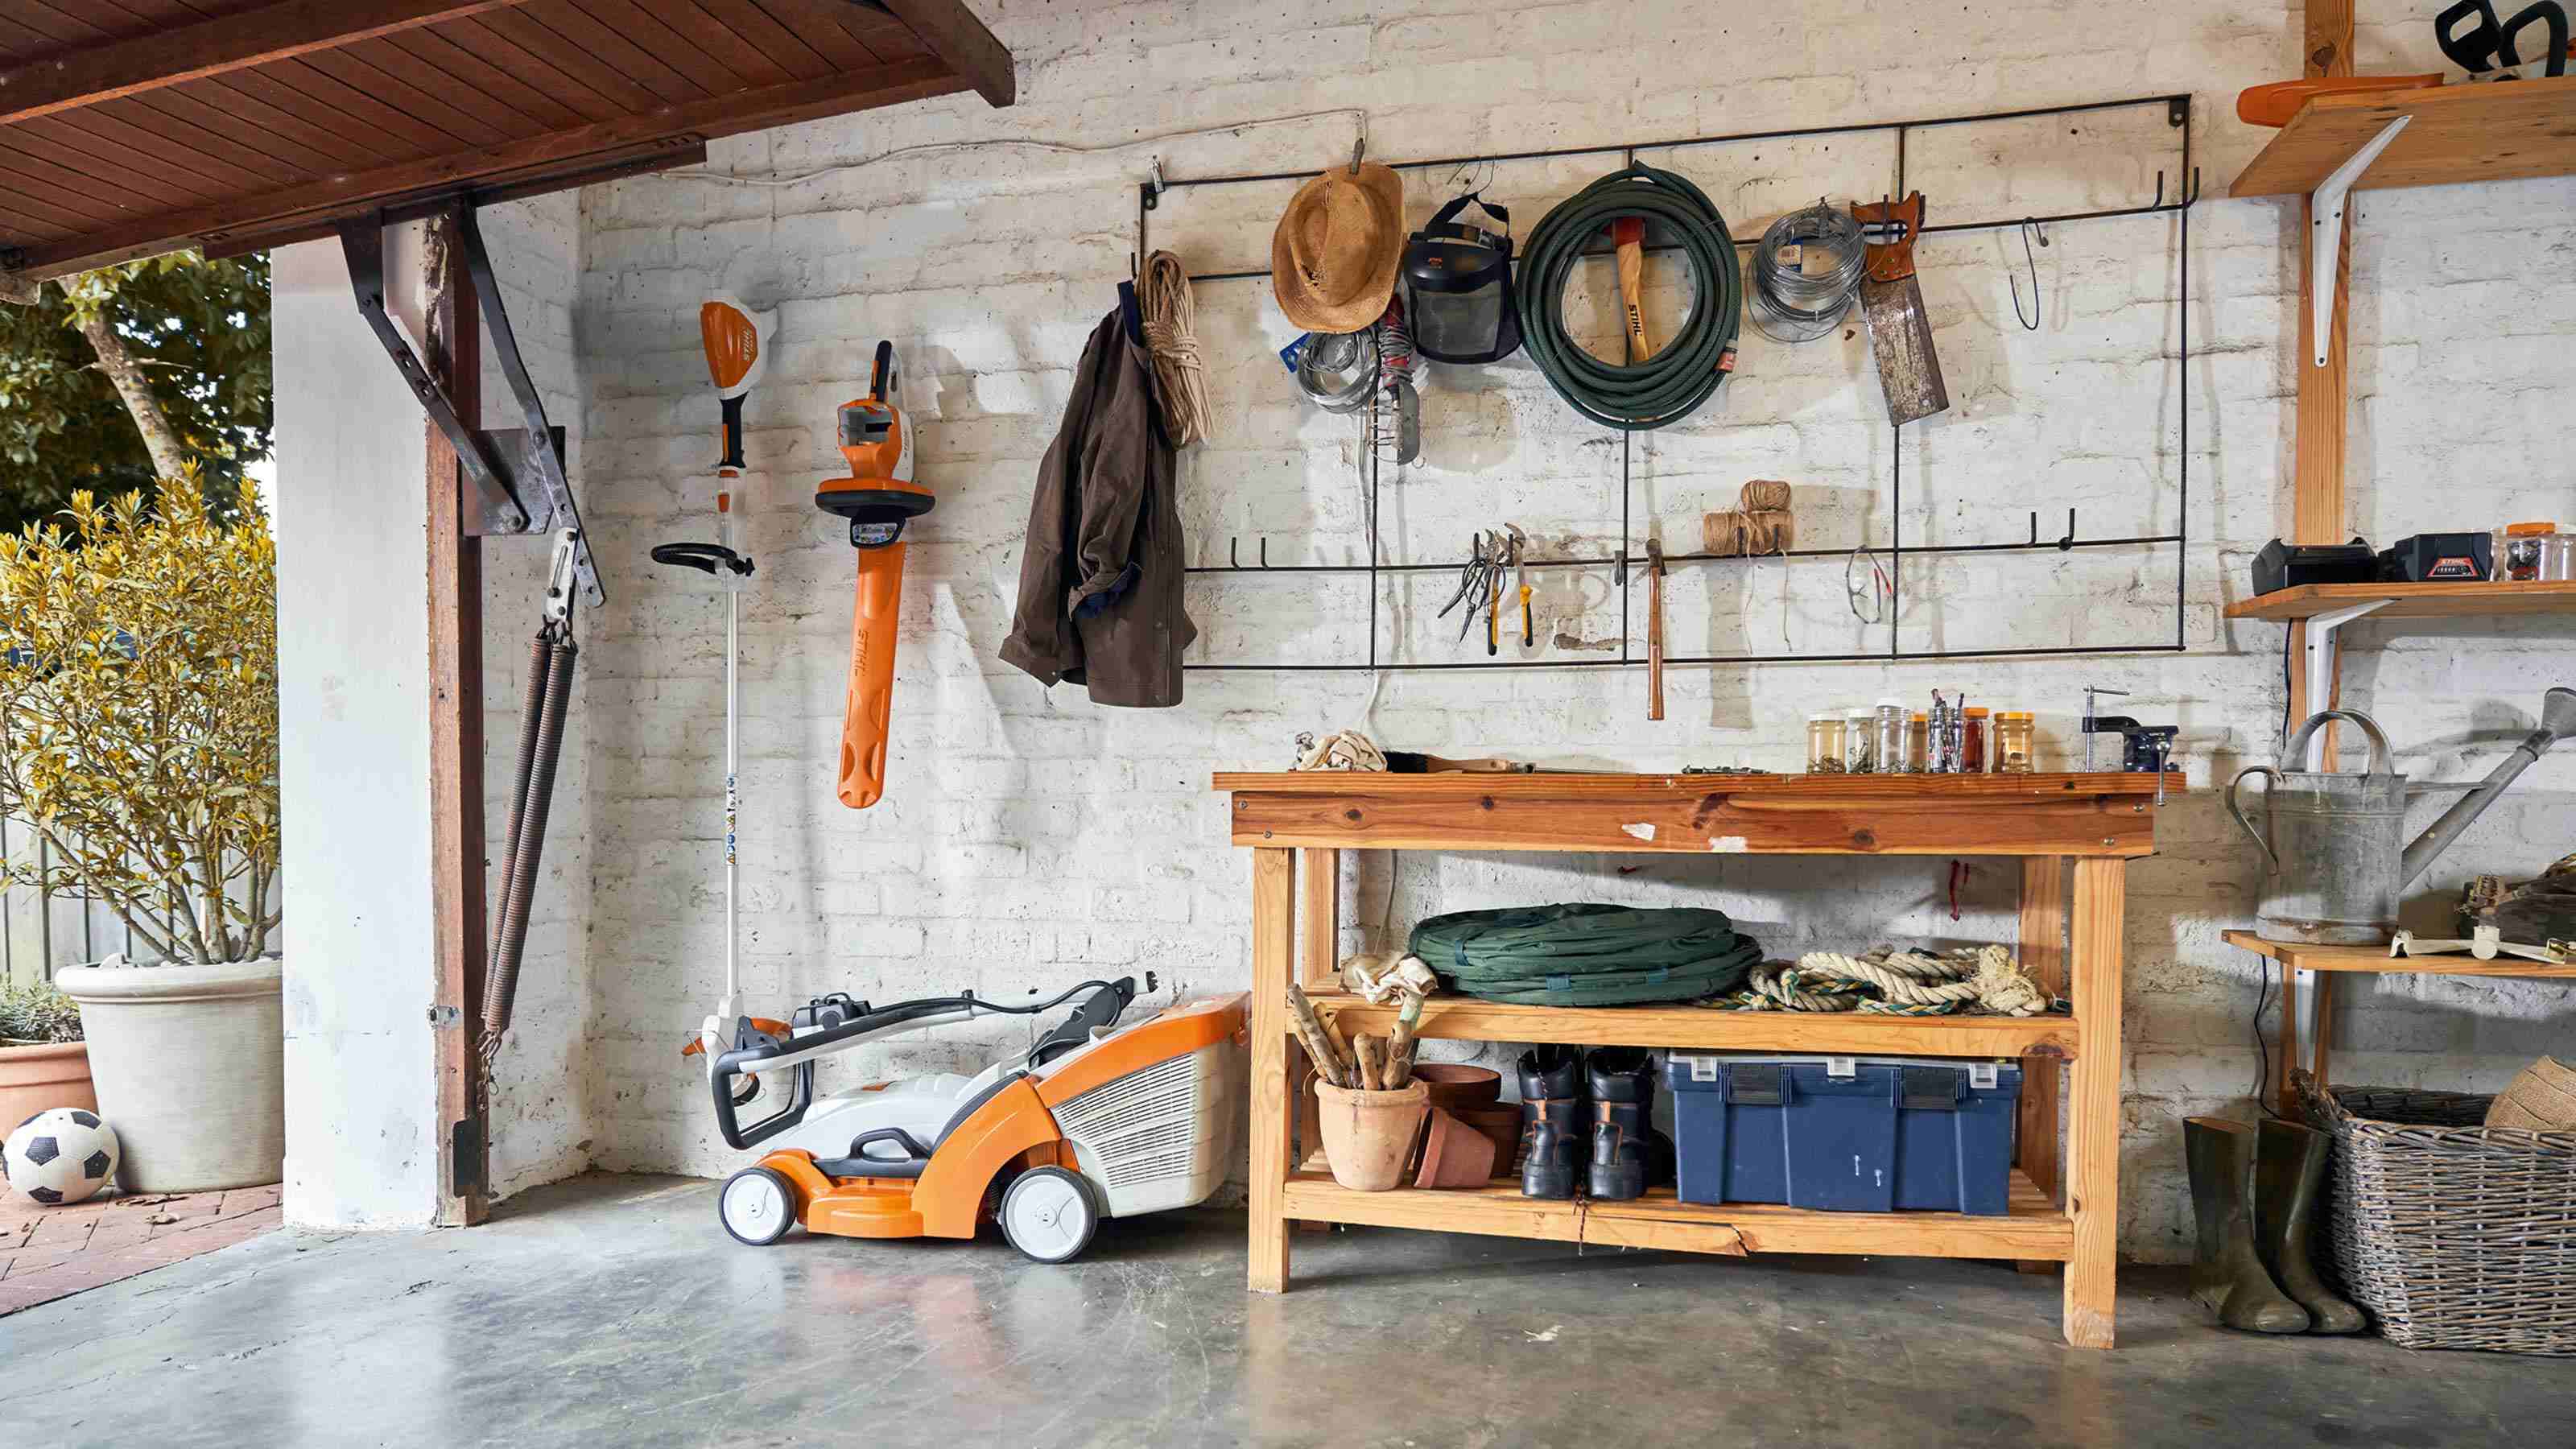
Once you have assessed your yard and identified the areas that need clearing, it’s time to gather the necessary tools and equipment. Having the right tools will make the process more efficient and ensure that you can tackle various aspects of the project effectively. Here are some essential tools and equipment you’ll need:
- Gloves: Invest in a good pair of gloves to protect your hands from scratches, blisters, and thorns. Choose gloves that are durable, comfortable, and provide adequate grip.
- Pruning Shears: These are essential for cutting back smaller branches, removing dead foliage, and shaping shrubs. Look for pruning shears with sharp blades and ergonomic handles for ease of use.
- Loppers: For thicker branches or harder-to-reach areas, loppers come in handy. Choose loppers with long handles and sharp blades to make pruning tasks more manageable.
- Chainsaw: If you have large trees that need to be cut down, a chainsaw is a must-have tool. Ensure you have the necessary safety gear, such as protective goggles and a hard hat, when operating a chainsaw.
- Hedge Trimmer: If you have hedges or bushes that require trimming, a hedge trimmer can make the job much faster and more precise. Opt for a model that is lightweight and easy to maneuver.
- Shovel: A sturdy shovel is essential for removing larger debris, digging up plants, and leveling the ground. Look for a shovel with a comfortable grip and a strong steel blade.
- Rake: A rake is perfect for gathering leaves, twigs, and other small debris. Choose a rake with flexible tines that won’t damage the lawn or soil.
- Wheelbarrow: Having a wheelbarrow or a garden cart will significantly ease the process of transporting heavy debris, soil, or plants. Look for a sturdy model with good weight-bearing capacity.
- Stump Grinder: If you plan on removing tree stumps, renting or purchasing a stump grinder can save you time and effort. Stump grinders are powerful machines that can efficiently grind stumps below ground level.
- Safety Gear: Don’t forget to prioritize your safety. Wear appropriate protective gear, such as safety goggles, gloves, sturdy shoes, and ear protection when using power tools.
Depending on the size of your yard and the specific tasks required, you may need additional tools such as a leaf blower, weed trimmer, or a garden tractor for larger properties. Assess the needs of your yard and gather the necessary tools and equipment before you start clearing. If you don’t own all the tools, consider borrowing, renting, or purchasing them from a local garden center or hardware store.
By having the right tools at your disposal, you’ll be well-equipped to handle the yard-clearing process efficiently and effectively, setting the stage for the next steps in creating your perfect landscaping project.
Removing Large Debris
One of the first tasks in clearing a yard for landscaping is removing large debris. This includes fallen branches, broken fences, old furniture, and any other items that may be cluttering your yard. Clearing away these larger items will not only provide a safer and more organized space to work in but also lay the groundwork for the next steps in your landscaping project.
Here’s a step-by-step process to help you effectively remove large debris:
- Start by assessing the size and weight of the debris to determine if you can move it by yourself or if you need assistance. Some larger items may require help from a friend or family member.
- Create a designated area in your yard or on the driveway where you can temporarily store the debris before deciding on its final disposal method.
- Clear a path to the debris by removing any smaller items in its way.
- If the debris is too heavy to lift on your own, consider using a dolly or a hand truck to transport it more easily. These tools can help you maneuver heavy items across the yard with less strain on your back.
- If you’re dealing with large branches or tree limbs, cut them into more manageable sizes using a chainsaw or hand saw. Always follow proper safety precautions and wear protective gear when operating power tools.
- If necessary, disassemble any broken furniture or fencing to make it easier to move and dispose of. Keep in mind that some materials may need to be recycled or disposed of according to local regulations.
- Once the debris is cleared from the yard, assess whether it is salvageable or can be repurposed. Some items may be suitable for donation, recycling, or upcycling.
- Dispose of the unwanted debris responsibly. Check with your local municipality for guidelines on proper disposal methods in your area. This may include arranging for bulk pickup, taking items to a recycling center, or disposing of them at a designated landfill.
Remember to prioritize safety throughout the debris removal process. Wear sturdy gloves to protect your hands from sharp edges and use caution when lifting heavy items to prevent injuries.
By removing large debris from your yard, you’ll create a clean and spacious area to continue clearing and landscaping. It’s a crucial step in transforming your yard into the outdoor oasis you envision.
Clearing Overgrown Vegetation
Overgrown vegetation can quickly turn a once beautiful yard into a tangled mess. To create a clean and organized space for your landscaping project, it’s essential to tackle the overgrown plants and vegetation. Here’s a step-by-step guide on how to clear overgrown vegetation effectively:
- Start by identifying the areas of your yard that have become overgrown. This may include shrubs, bushes, vines, or other plants that have spread out of control.
- Inspect the plants to determine the best approach for pruning or removal. Some plants may require trimming to control their growth, while others may need to be completely removed.
- Equip yourself with the necessary tools such as pruning shears, loppers, and a hedge trimmer, depending on the type and size of the vegetation you are working with.
- Before you begin cutting, make sure to wear protective gloves and eye protection to guard against thorns, prickly leaves, or debris.
- Start by removing any dead or diseased branches from the plants. This will improve their overall health and appearance.
- Next, focus on trimming back the overgrown branches and foliage. Use pruning shears or loppers to cut back the excess growth, giving the plants a more controlled and tidy shape.
- If there are vines or creepers entangled around other plants or structures, carefully cut and remove them to prevent further overgrowth.
- For larger shrubs or hedges, consider using a hedge trimmer to achieve a more even and uniform shape. Take your time and step back periodically to assess the progress and make adjustments as needed.
- Once you have pruned and trimmed the vegetation, gather the cuttings and debris into piles for easy removal.
- Dispose of the debris according to the guidelines set by your local municipality. This may involve composting, arranging for green waste pickup, or taking the cuttings to a designated disposal site.
While clearing overgrown vegetation can be a challenging task, it’s important to approach it with patience and care. Take breaks if needed and don’t rush the process, as it requires precision to avoid damaging desired plants or structures.
Keep in mind that some plants may have deep roots or stubborn growth habits, making complete removal necessary. In such cases, consider contacting a professional tree removal service to assist you with more difficult or hazardous vegetation.
By effectively clearing overgrown vegetation, you will not only improve the appearance of your yard but also lay the foundation for a more cohesive and organized landscape design.
Read more: How To Plan Landscaping For Your Yard
Getting Rid of Weeds
Weeds can quickly take over a yard and compete with desired plants for nutrients, water, and sunlight. Tackling weeds is an essential step in clearing your yard for landscaping. Here’s a step-by-step guide on how to effectively get rid of weeds:
- Identify the types of weeds present in your yard. Different weeds may require different approaches for effective removal.
- Equip yourself with the necessary tools such as a garden hoe or trowel for digging up weeds, a weed trimmer for cutting down larger patches of weeds, and a weed barrier or mulch for weed prevention.
- Begin by manually pulling visible weeds by hand or using a garden hoe or trowel to dig them out from the root. It’s important to remove the entire plant, including the root, to prevent regrowth.
- For larger areas with dense weed growth, consider using a weed trimmer to cut down the weeds to ground level. This will make it easier to remove them from the root later.
- Dispose of the pulled or cut weeds properly to prevent them from reseeding or spreading. Place them in a compost bin if they are free from seed heads, or bag them for disposal.
- Apply a weed barrier or mulch to areas prone to weed growth. This will help suppress weed growth by blocking sunlight and preventing weed seeds from germinating.
- If necessary, use a weed killer or herbicide as a last resort. Be sure to follow the manufacturer’s instructions carefully, and choose a product that is safe for your desired plants and the environment.
- Regularly inspect your yard for new weed growth and continue to remove them promptly. This will prevent the weeds from establishing a strong presence in your landscape.
Prevention is key when it comes to weeds. To minimize future weed growth, consider implementing these practices:
- Maintain healthy and dense turf grass through proper mowing, watering, and fertilizing. A well-established lawn will naturally suppress weed growth.
- Regularly inspect and remove weeds before they have a chance to spread and proliferate.
- Use a pre-emergent herbicide in early spring to prevent weed seeds from germinating.
- Frequently mulch your garden beds to deter weed growth and maintain moisture in the soil.
- Consider planting ground covers or perennial plants to create a dense canopy that inhibits weed growth.
By diligently removing weeds and implementing preventive measures, you can maintain a weed-free yard and ensure that your desired plants thrive in your new landscaping project.
Before clearing a yard for landscaping, make sure to remove any debris, such as rocks, branches, and old plant material. This will create a clean slate for your new landscaping project.
Removing Unwanted Trees and Shrubs
Removing unwanted trees and shrubs is an important step in clearing your yard for landscaping. Whether they are diseased, overcrowded, or simply don’t fit with your desired landscape design, getting rid of these unwanted plants will create more space and allow you to start fresh. Here’s a step-by-step guide on how to effectively remove unwanted trees and shrubs:
- Determine which trees and shrubs you want to remove. Consider their health, size, location, and relevance to your landscape design goals.
- Check with local regulations or homeowners’ association guidelines to ensure you comply with any restrictions or permissions required for tree removal.
- Assess the size and complexity of the removal task. Smaller plants can often be removed manually, while larger trees may require professional help or specialized equipment.
- If the tree or shrub is small enough, you can remove it manually using a shovel, pruning shears, and a root saw. Dig around the base of the plant to expose the root system, then carefully cut and remove the roots.
- For larger trees or shrubs, it’s recommended to hire a professional tree removal service. They have the expertise, equipment, and safety measures to handle the task safely and efficiently.
- If you choose to remove the plant yourself, consider hiring a stump grinder to remove the stump after cutting down the tree or shrub. This will prevent regrowth and allow for a smoother surface.
- Prioritize safety during the removal process. Wear appropriate protective gear, such as gloves, goggles, and a hard hat, and follow proper techniques to avoid accidents or injuries.
- Dispose of the removed trees and shrubs responsibly. Some options include composting the organic matter, using it as mulch, or arranging for green waste pickup or disposal at a designated facility.
It’s important to note that removing large trees or shrubs can be dangerous and should be approached with caution. If you are unsure or uncomfortable with the process, it’s best to consult a professional tree removal service.
After removing unwanted trees and shrubs, take the opportunity to fill the empty spaces with new, desired plants that align with your landscaping goals. This blank canvas will allow you to create a well-planned and cohesive landscape design.
Remember, removing unwanted trees and shrubs is a significant task that requires proper planning and execution. By following the steps outlined above, you can efficiently remove these plants and create a fresh start for your landscaping project.
Leveling the Ground
Leveling the ground is an essential step in preparing a yard for landscaping. A level surface provides stability, proper drainage, and a solid foundation for various landscaping features such as patios, walkways, and gardens. Here’s a step-by-step guide on how to effectively level the ground:
- Start by clearing the area of any debris, rocks, or plants. This will give you a clean slate to work with and ensure accurate leveling.
- Assess the current state of the ground. Look for any uneven areas, low spots that collect water, or high spots that may need to be leveled down.
- Using a shovel or a garden rake, remove any excess soil or turf from high spots and distribute it to fill in low spots. This process is known as cut and fill, and it helps create a more even surface.
- Continue to rake and smooth the soil until you achieve a roughly level surface. Pay attention to the entire area, ensuring there are no noticeable bumps or depressions.
- For more precise leveling, use a long piece of wood or a level tool to check the ground’s evenness. Lay the level across the ground in different directions, adjusting the soil as needed to achieve a truly level surface.
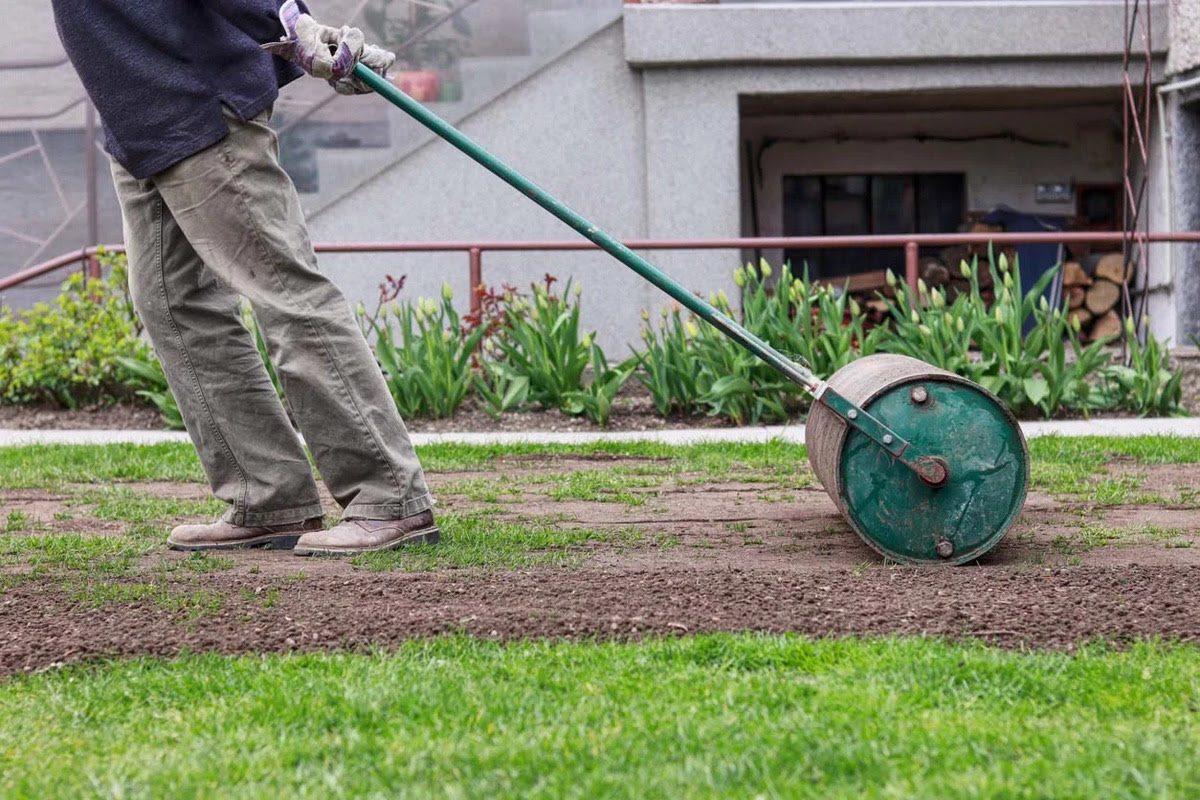
- If necessary, consider renting a plate compactor or a roller to compact the soil and ensure a solid and stable base.
- After leveling, water the area lightly and allow it to settle for a few days. This will help identify any areas that may have shifted or settled further, allowing you to make final adjustments before proceeding with your landscaping plans.
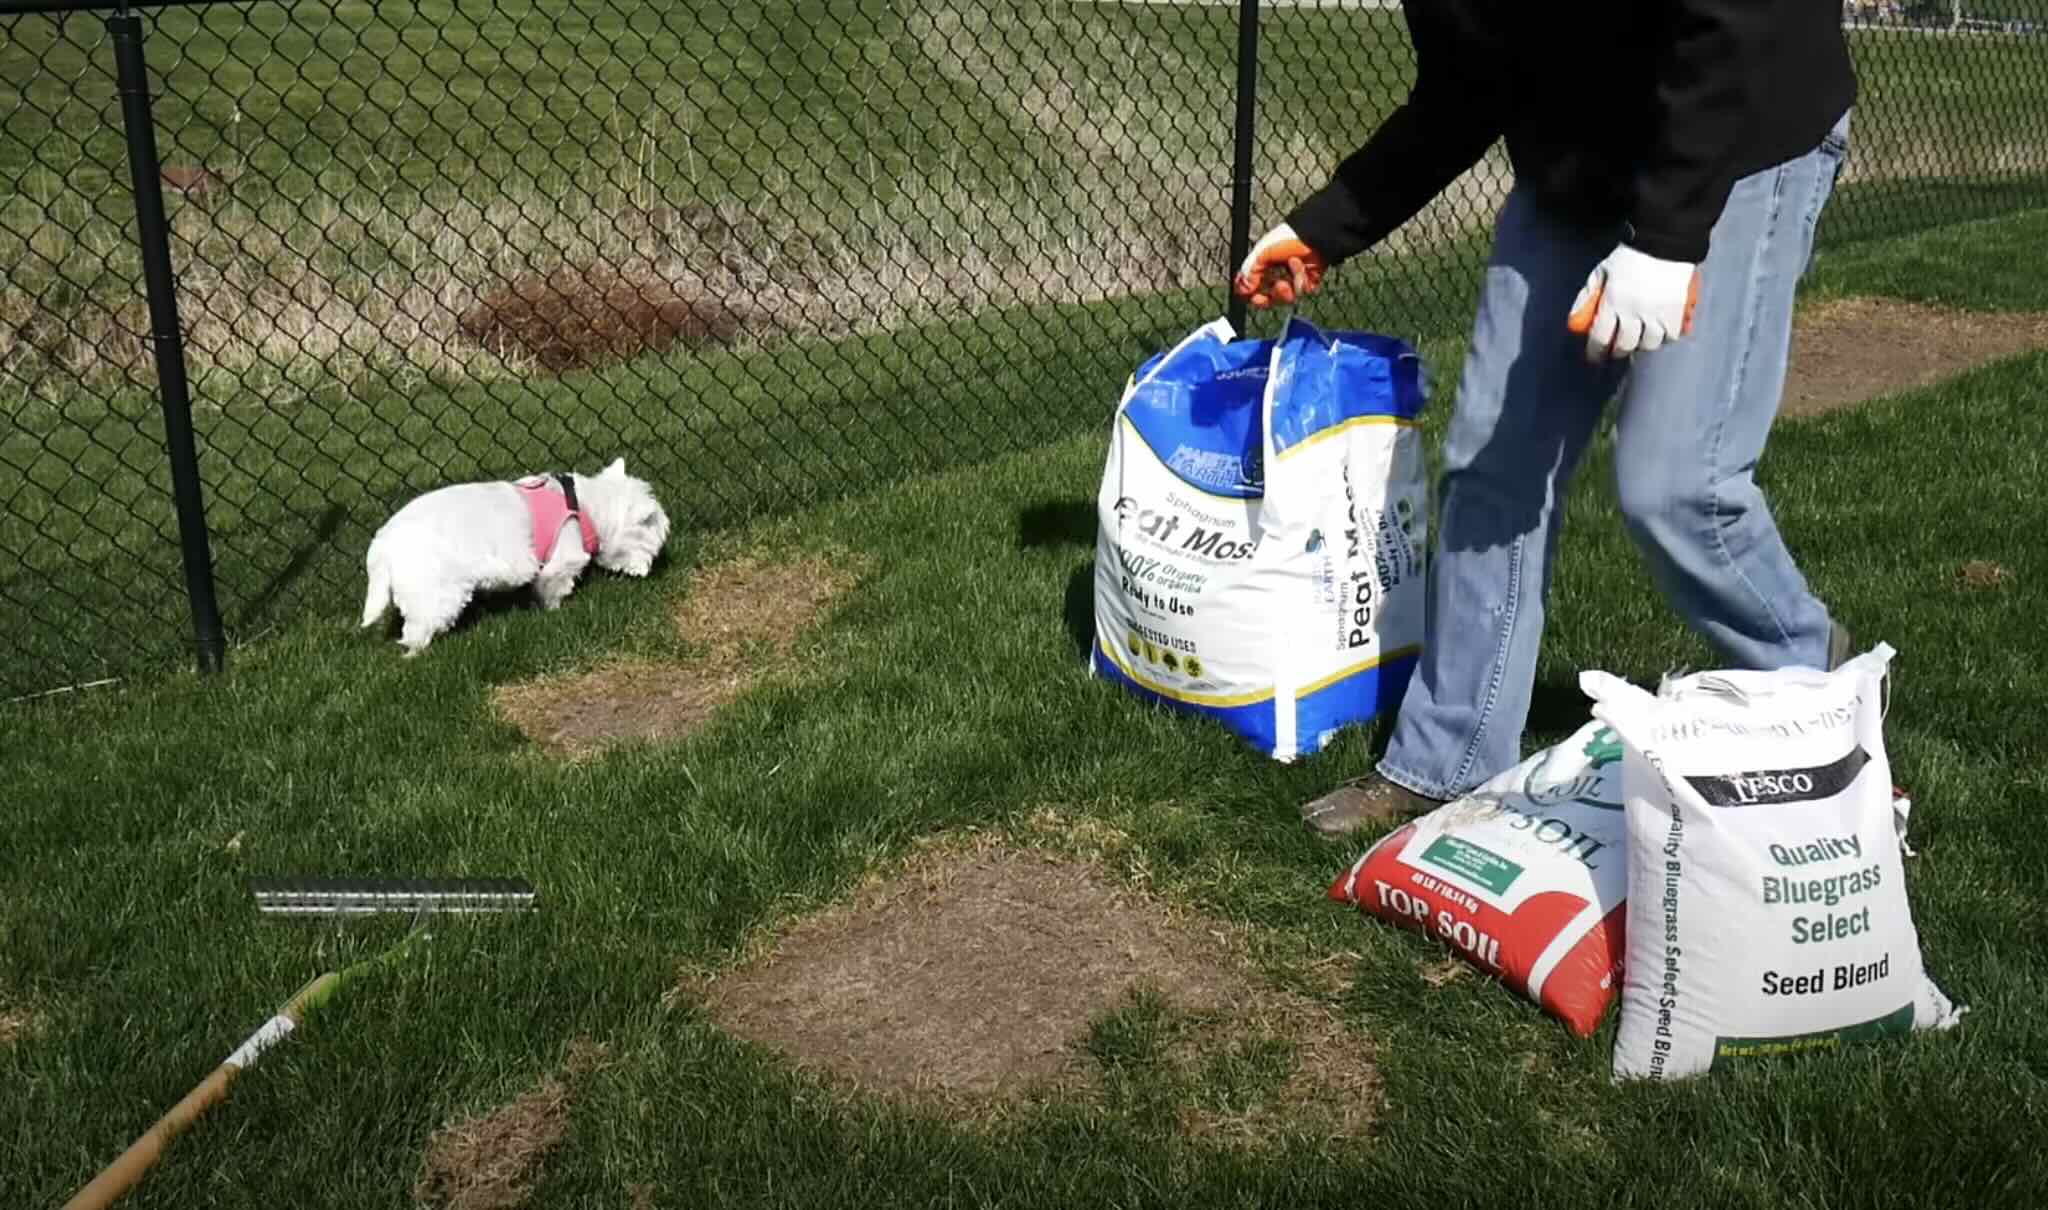
Keep in mind that leveling the ground may involve removing or adding soil in certain areas. If you need to add soil, choose a quality topsoil and distribute it evenly to achieve the desired level.
It’s worth noting that major grading or leveling projects may require expert assistance to ensure proper drainage and prevent future issues. If you’re dealing with a large area or complex terrain, consider consulting a professional landscape contractor or grading specialist.
Leveling the ground is an important step in creating a smooth and functional landscape. By taking the time to level your yard, you’ll set the stage for successful landscaping projects and ensure the long-term stability and aesthetics of your outdoor space.
Clearing Away Small Debris
Clearing away small debris is a crucial step in the yard-clearing process, as it helps create a clean and tidy space for your landscaping project. Small debris such as twigs, leaves, and rocks can clutter the yard and hinder the progress of your landscaping efforts. Here’s a step-by-step guide on how to effectively clear away small debris:
- Start by equipping yourself with the necessary tools. A rake and a garden broom are ideal for collecting and gathering the small debris in your yard.
- Choose a starting point in your yard and systematically work your way across the area, focusing on one section at a time.
- Rake the debris, including leaves, twigs, and small rocks, into piles. Use a side-to-side motion to gather the debris into a centralized location.
- Once you have created piles of debris, use a garden broom or a shovel to collect and transfer the debris into a large trash bag or a wheelbarrow for easy disposal.
- Continue this process, moving from one section to another until the entire yard is free from small debris.
- If necessary, use a leaf blower on a low setting to blow away any remaining small debris from hard-to-reach areas, such as cracks in patios or between plants.
- Inspect the yard thoroughly to ensure that no small debris has been missed. Pay special attention to corners, edges, and areas under shrubs or trees.
- Dispose of the collected debris in accordance with local regulations. Check with your municipality for guidelines on green waste disposal, recycling, or composting.
Keep in mind that the process of clearing away small debris may vary depending on the size of your yard and the amount of debris present. If you have a large yard or a significant accumulation of debris, consider enlisting the help of family members, friends, or hiring professionals to assist you.
Regular maintenance is key to keeping your yard free from small debris. Implementing regular cleaning routines, such as weekly sweeping or leaf blowing, will help prevent excessive accumulation of debris and make future cleanups more manageable.
By effectively clearing away small debris, you’ll create a clean and organized space for your landscaping endeavors. It sets the foundation for the next steps in transforming your yard into a beautiful and enjoyable outdoor area.
Read more: How To Do Front Yard Landscaping
Disposing of Yard Waste
Proper disposal of yard waste is crucial for maintaining a clean and environmentally-friendly landscape. Whether you’re clearing debris, pruning plants, or removing unwanted vegetation, knowing how to dispose of yard waste responsibly is essential. Here’s a step-by-step guide on how to effectively dispose of yard waste:
- Separate the yard waste into different categories. Typically, yard waste can be divided into two main categories: green waste and woody waste.
- Green waste: This category includes grass clippings, leaves, weeds, small branches, and plant trimmings. Green waste can be composted or recycled to create nutrient-rich compost that can be used in your garden.
- Woody waste: This category encompasses larger branches, tree trunks, and stumps. Woody waste requires different disposal methods, as it cannot be easily composted. Consider the following options:
- Curbside pickup: Check with your local waste management or municipality to see if they have specific guidelines for collecting woody waste. They may require you to bundle or cut the waste into manageable sizes for pickup.
- Green waste facilities: Many communities have designated facilities where you can drop off your woody waste. These facilities often have chippers or grinders that can process the waste for recycling or composting purposes.
- Hire a professional service: If you have a significant amount of woody waste or large tree stumps to dispose of, consider hiring a professional tree removal or waste disposal service. They will have the proper equipment and expertise to handle the materials safely and responsibly.
- If you decide to compost your green waste, create a separate compost pile or use a compost bin specifically for organic materials. Ensure a proper balance of carbon-rich materials (such as dried leaves or newspaper) and nitrogen-rich materials (such as grass clippings or kitchen scraps) for optimal composting conditions.
- Take advantage of municipal or community composting programs if they are available in your area. These programs often collect yard waste and create compost on a larger scale, which can then be used for community projects or made available for residents.
It’s important to dispose of yard waste in accordance with local regulations to prevent negative impacts on the environment. Illegal dumping or improper disposal can lead to pollution, spread of invasive species, or fines from local authorities.
By responsibly disposing of yard waste, you contribute to a cleaner environment and can even benefit by creating your own nutrient-rich compost for future garden projects. Follow these guidelines to ensure that your yard waste is properly managed and repurposed in an eco-friendly manner.
Final Tips and Considerations
As you embark on clearing your yard for landscaping, it’s important to keep in mind some final tips and considerations to ensure a successful and rewarding process. Here are some key points to remember:
- Safety First: Prioritize your safety throughout the yard-clearing process. Wear appropriate protective gear, such as gloves, goggles, and sturdy footwear, and follow proper techniques when using tools or equipment.
- Plan and Prepare: Develop a clear plan for the yard-clearing project, taking into account the scope of work, the time required, and the necessary resources. This will help you stay organized and focused.
- Work in Sections: Divide your yard into manageable sections and tackle one area at a time. This will prevent overwhelm and allow you to see progress as you move forward.
- Reuse and Recycle: Whenever possible, consider reusing or recycling materials from the yard-clearing process. This includes repurposing rocks, salvaging usable items, or composting organic waste.
- Respect Local Regulations: Familiarize yourself with local regulations regarding waste disposal, tree removal permits, and any guidelines specific to your area. Adhering to these rules will prevent any legal issues or fines.
- Document and Evaluate: Take before and after photos to document the transformation of your yard. It will serve as a reminder of your hard work and can also help you evaluate your progress and plan for future landscaping projects.
- Consider Professional Help: If you encounter significant challenges or feel overwhelmed, don’t hesitate to seek professional assistance. Arborists, landscapers, or waste removal services can offer expertise and support to ensure a smooth and successful yard-clearing process.
- Take Breaks and Stay Hydrated: Clearing a yard can be physically demanding, so remember to take regular breaks, stay hydrated, and listen to your body. Pace yourself and avoid overexertion.
- Be Mindful of the Environment: Throughout the process, be mindful of the ecological impact of your actions. Consider using environmentally-friendly products, planting native species, and implementing sustainable practices in your landscaping plans.
Remember that clearing your yard is just the first step towards creating a stunning landscape. Take your time to plan and design your ideal outdoor space, considering factors such as sun exposure, soil conditions, and personal preferences.
With patience, perseverance, and attention to detail, you’ll soon transform your yard into a beautiful and inviting space that you can enjoy for years to come.
Conclusion
Congratulations on completing the yard-clearing process for your landscaping project! Clearing a yard may initially seem like a daunting task, but with careful planning, the right tools, and a little bit of sweat equity, you have successfully created a blank canvas to bring your dream outdoor space to life.
Throughout this comprehensive guide, we discussed the importance of assessing the yard, gathering the necessary tools and equipment, removing large debris, clearing overgrown vegetation, getting rid of weeds, removing unwanted trees and shrubs, leveling the ground, clearing away small debris, and properly disposing of yard waste. These steps are vital to creating a clean, organized, and well-prepared space for your landscaping endeavors.
While the yard-clearing process has come to an end, your landscaping journey is just beginning. Take the time to plan your desired landscape design, considering factors such as your climate, soil type, and personal preferences. Incorporate your favorite plants, design elements, and functional areas to create an outdoor oasis that reflects your style and meets your needs.
As you move forward with your landscaping project, remember to prioritize safety, conduct regular maintenance, and be mindful of sustainable and eco-friendly practices. Respect local regulations and guidelines regarding waste disposal, tree removal, and any other relevant regulations specific to your area.
Enjoy the process of transforming your yard into a beautiful and inviting space. Take pride in your accomplishments, and don’t hesitate to seek professional help or inspiration when needed. Remember, creating a stunning landscape requires ongoing care, attention, and creativity.
Now, go ahead and unleash your creativity, implement your landscaping ideas, and watch your outdoor space flourish. Embrace the beauty and serenity of your newly cleared yard. Happy landscaping!
Frequently Asked Questions about How To Clear A Yard For Landscaping
Was this page helpful?
At Storables.com, we guarantee accurate and reliable information. Our content, validated by Expert Board Contributors, is crafted following stringent Editorial Policies. We're committed to providing you with well-researched, expert-backed insights for all your informational needs.


0 thoughts on “How To Clear A Yard For Landscaping”